


We may receive a commission when you use our affiliate links. However, this does not impact our recommendations.
I have a new-found eye for Arts & Crafts furniture. I’m also enjoying my router these days. Since one of the main things holding me back from actually working in the Arts & Crafts style is the thousands of mortise and tenon joints involved, I decided to dig into our techniques archive and find some router methods. I discovered a great one from Glen Huey.
Something to think about before you start the process: routers cut round profiles at the ends of your mortises. Glen says this is not a structural problem, and with the exception of through-tenons, it’s not a visual problem either. As long as you are working with the basic version, don’t worry about squaring the cut. If you get into doing through-tenons, you can square the mortises with a small chisel.
 1. Lay out the mortise. This is pretty self-explanatory. Use the board that will be your tenon piece to establish the outer margins on the mortise piece. Then pencil in the mortise cut.
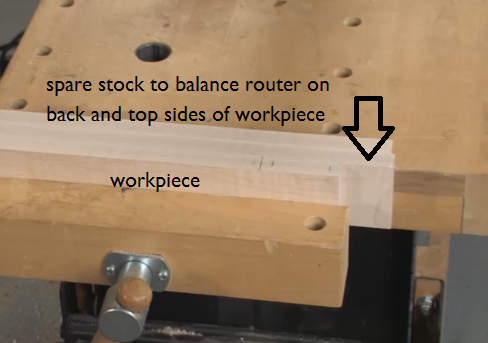 2. Set up the mortise cut. Use spare boards in the vise to compensate for the router’s tendency to fall away from the back and top edges. Grab your fenced plunge router with the appropriate bit, and set it at the depth you want for your joint.
 3. Cut the mortise with a series of plunges and a few straight passes to smooth the sides.
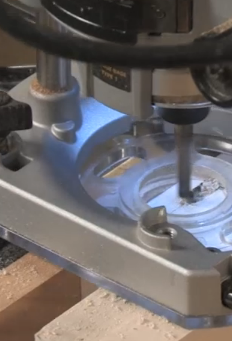
 4. Time for the tenon. Glen recommends using his patented square platform jig and a pattern bit. Set up the cut as seen in the picture at left.
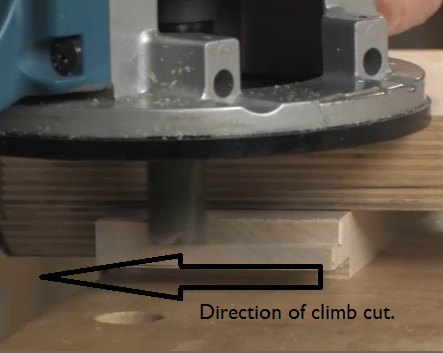 5. Cut the tenon with a couple climb cuts and a single forward pass. Repeat on the other side. Finally, cut the smaller shoulders with a backsaw.
I’m looking forward to getting more into Arts & Crafts furniture with this mortise and tenon technique. I have the advance copy of Michael Crow’s new book of project plans, which I’ll put to use. The nice thing about this book is that it is not technique-heavy. You get a little history and then a lot of plan drawings, so you can get straight into building things. Enjoy!
–Dan Farnbach
Here are some supplies and tools we find essential in our everyday work around the shop. We may receive a commission from sales referred by our links; however, we have carefully selected these products for their usefulness and quality.


Are the climb cuts done free-hand without riding against the fence? Thanks for the tips and practical techniques.