We may receive a commission when you use our affiliate links. However, this does not impact our recommendations.
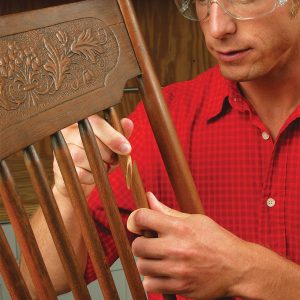
Whenever I teach a class, at least one student will say to me “you really don’t like measuring, do you?” I don’t dislike measuring, but I try to avoid it whenever I can. When I’m trying to get one part to fit another, the numbers become irrelevant and measuring often becomes an opportunity to make an error. As a perfectionist I recognize that I’m not perfect, but there are some things that I, and most humans do pretty well. One of these things is dividing a space in half visually, and I stumbled across a way to take advantage of that while working on my Morris Chair. The goal here is to cut a tenon on the end of this board that will fit nicely into this mortise.

I held one face of the board against the edge of the mortise, and made a pencil mark on the other edge. This defines the size of the finished tenon. Because I’m marking directly, I have precision without involving numbers, but I’m in the wrong place; the tenon should be centered in the board. I could measure, in fact I did with a pair of calipers. The mortise is 5/8″ wide, and the board is 7/8″ thick. Logic tells me I should just mark in 1/8″ from each edge and start cutting. Experience tells me I would need to perfectly measure and perfectly mark four times to get it right, and if my reading or marking is off a little, I’ll need to make one or more corrections. I can do that, but it will take a while.

I decided instead to take my marking gauge and set it by eye halfway in between my pencil mark and the edge of the board that gets the tenon. I’m not sure if it’s because of our physical make up (two eyes, two arms, and two halves of a brain), or through human experience (my brother Jim just got the bigger half of the sandwich) but most people can accurately mark a point halfway between two other points. The shorter the distance between the points, the more precise you can be. I can barely see the 1/64″ marks on my Starrett ruler, but I can easily see a point halfway between the 1/32″ marks. Try this yourself and see how you do.

The proof, as my grandmother used to say, is in the pudding. I darkened the gauge lines with a pencil to make them easier to see. Here is the ready-to-cut tenon sitting on the mortise. Good layout is essential to good joinery, but it’s easy to get bogged down with methods that take forever. Look for tricks to speed the process and the quality of your work will go up as your stress level goes down.
Before you can do good layout, you need to have a practical plan. This trick does you no good whatsoever if the proportions of the joints are wrong. I taught a workshop on mortise and tenon design at this year’s Woodworking in America conference, and we expanded my presentation into a narrated slide show available as part of our “Shop Class” series. You can see the slides I used at the conference (click here for a sample)(74.01 KB) as you listen to me talk about what works with mortise and tenon joinery and what doesn’t. Here is a sample of what’s on the disc: