


We may receive a commission when you use our affiliate links. However, this does not impact our recommendations.
An expert woodworker talks about what really gets him excited.
One of my first trips to see firsthand the furniture of Charles and Henry Greene, two early 20th century architects from Pasadena, California, was innocent enough: I took a sightseer’s tour of the house they built in 1908 for David Gamble. I came away a changed man. And as a furnituremaker, I was hooked for life.
Few furniture styles are as rich in detail as Greene and Greene. Details large and small await in every nook and cranny of the many homes they built. Something lures you back for a second look–most often one of the many small things you overlooked at first glance. “Wow! I didn’t see that! Man! Is that not the neatest little detail? Look how it blends seamlessly with the overall design!” I’ve been known to get pretty worked up about these things.
Details that work together
The Greenes’ designs were never mass produced. Each piece of furniture was made for a specific setting, usually a private house, and each setting had its own unique set of details. While some details were common to the larger style as a whole, most were specific to one piece of furniture or an individual room.
I’ve always thought that some elements in a good design shouldn’t be apparent at first glance. That’s certainly true of Greene and Greene furniture. Many of the details are very small indeed and do not reveal themselves readily; they require effort to be seen.
Many commercial millwork shops have a “three foot” standard to judge whether a piece is ready to go out the door. If a defect isn’t visible from three feet away, the piece passes. This rule applies in reverse to Greene and Greene. If you stand three feet away, you’ll miss much of the design! I’ve been back to the Gamble House many times, and on each visit, I’ve made a new, close-up discovery.
While much of the magic of the Greene and Greene style lies in its details, those details, independent of each other, have little magic. Simply adding a spattering of great details to a piece does not by itself make for a good design. They must be used judiciously, in context, and work with one another to create a unified vision.
Charles Greene was a true master of this. It was his vision and artistic ability, for the most part, that brought together so many details to speak a in a common language. The mature work of Greene and Greene always conveyed a strong, organic sense of unity. Borrowing terms from biology, their overall style would be an Order; each house, a Family; each room, a Genus; and each piece, a different Species.
There are far too many Greene and Greene details to cover here. I’ll highlight the most common and better known ones, and add a few I’ve been drawn to that are not well known.
The spell of Japan
Japanese and Asian motifs played an important role in the Greenes’ designs. C. R. Ashbee, a leader in the English Arts & Crafts Movement, visited Charles Greene in Pasadena. Ashbee later said, “Like Lloyd Wright, the spell of Japan is upon him.”
The cloud lift
1. These cloud lifts are large and bold. The ebony plugs look like structural components, but they’re just decorative. Gamble House living room rocker
The cloud lift was one of the more common details employed by the Greenes. It’s essentially a rise in a horizontal line that’s formed by two connecting arcs. Stylized clouds were often depicted this way in Chinese art, and cloud lifts were occasionally used in Asian furniture. Not all of the Greenes’ cloud lifts are alike, though. They could be large and bold or very small and delicate (Photos 1 & 2). Most often, they were somewhere in between.
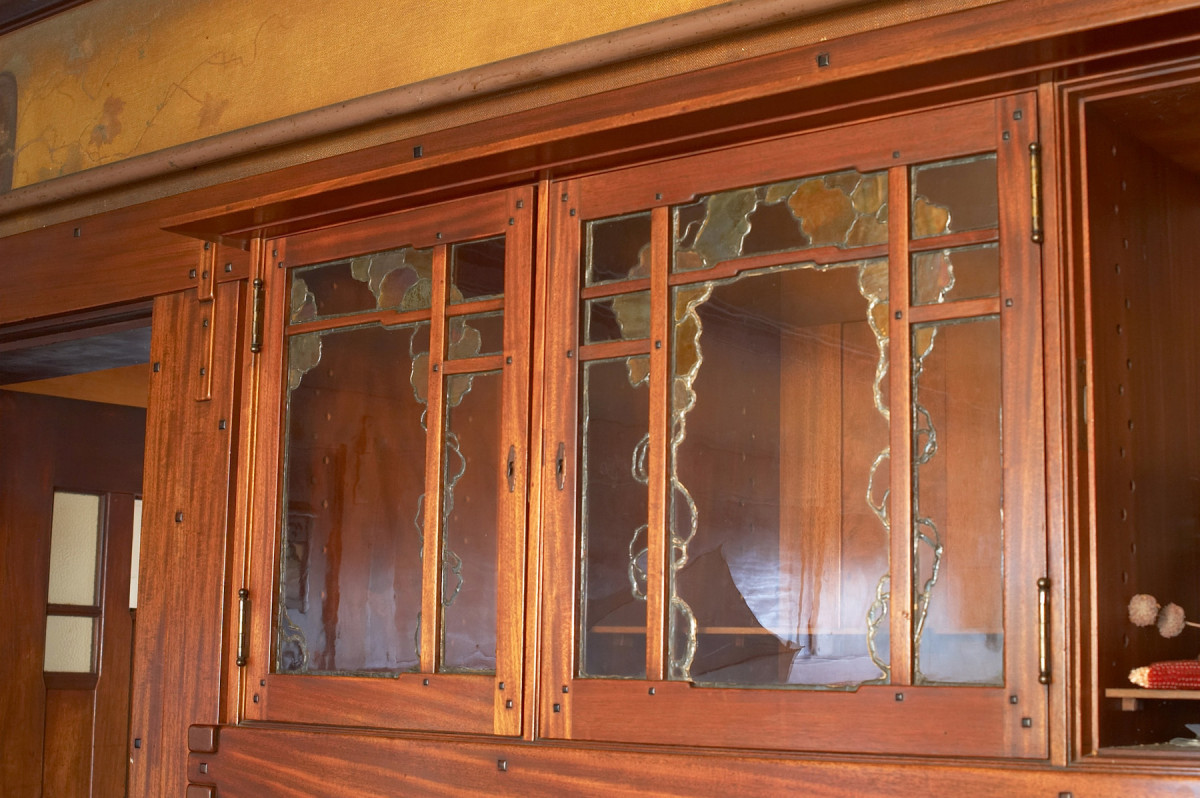
2. The cloud lifts on this built-in cupboard are smaller and more delicate than those on the rocker. Thorsen House
Many Greene and Greene-inspired woodworkers have searched for an equation or a set of rules for drawing cloud lifts, but I don’t think there’s any magic formula. Changing one or both of the arcs can dramatically alter this detail’s character. I work in CAD, and often stretch or compress a cloud lift, looking for the right shape. My advice for drawing a cloud lift is to simply draw and re-draw it until it looks right for the piece you’re building. Context is everything.
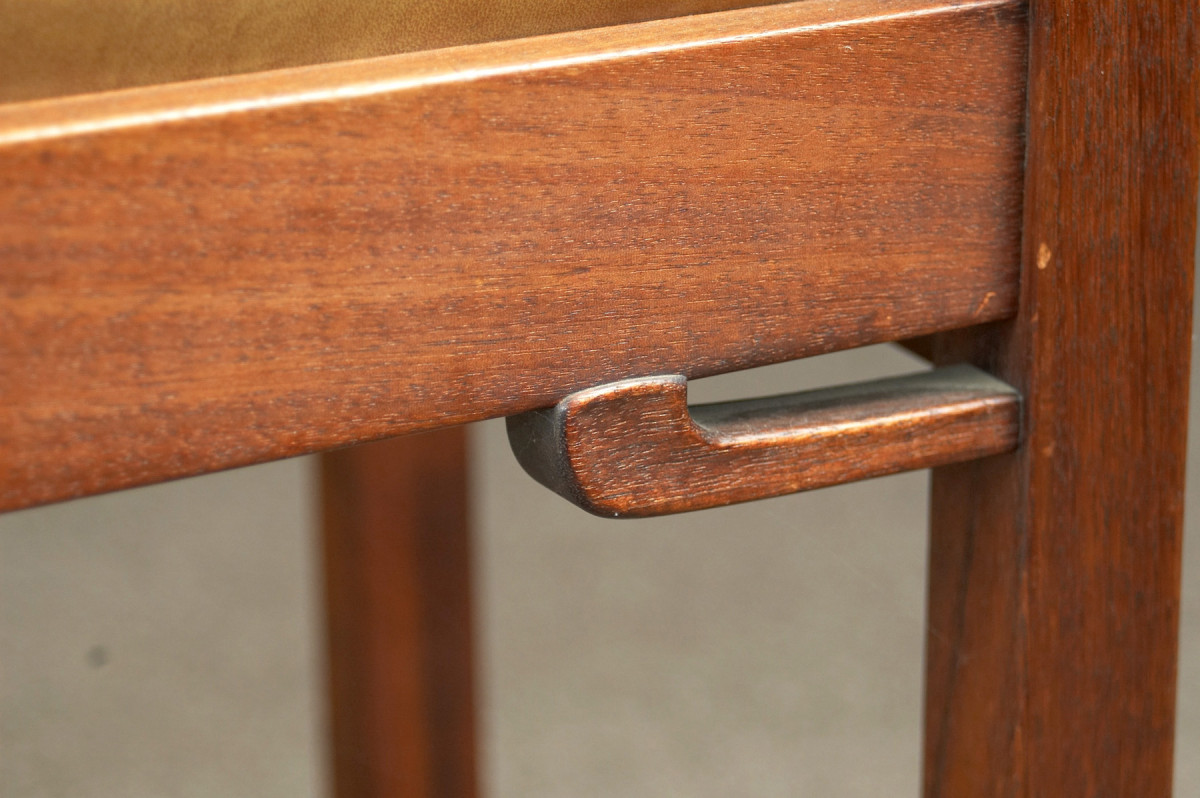
Brackets
3. This is an early example of the Greenes’ bracket detail. Chair from the Tichenor House, 1904
Scholars believe the Greenes’ brackets were inspired by the low, swooping rafters used in Japanese temples. This detail is often repeated by contemporary woodworkers, but the Greenes employed them on only three furniture projects, using a different design each time. The earliest example of this detail used on furniture is in the Adelaide Tichenor house of 1904 (Photo 3), where they employed a single puffy loop. By 1906, in the Robinson House (Photo 4), the bracket gains a bit of sophistication, displaying a concave surface.
4. A later single bracket is slightly concave. Robinson house dining room chair, 1906
The brackets reached their maturity in 1907 in the Blacker House living room furniture (Photo 5). These brackets are the most successful in conveying a visual sense of strength to the joint between leg and rail. The smaller loop appears to be adding support to the larger loop.
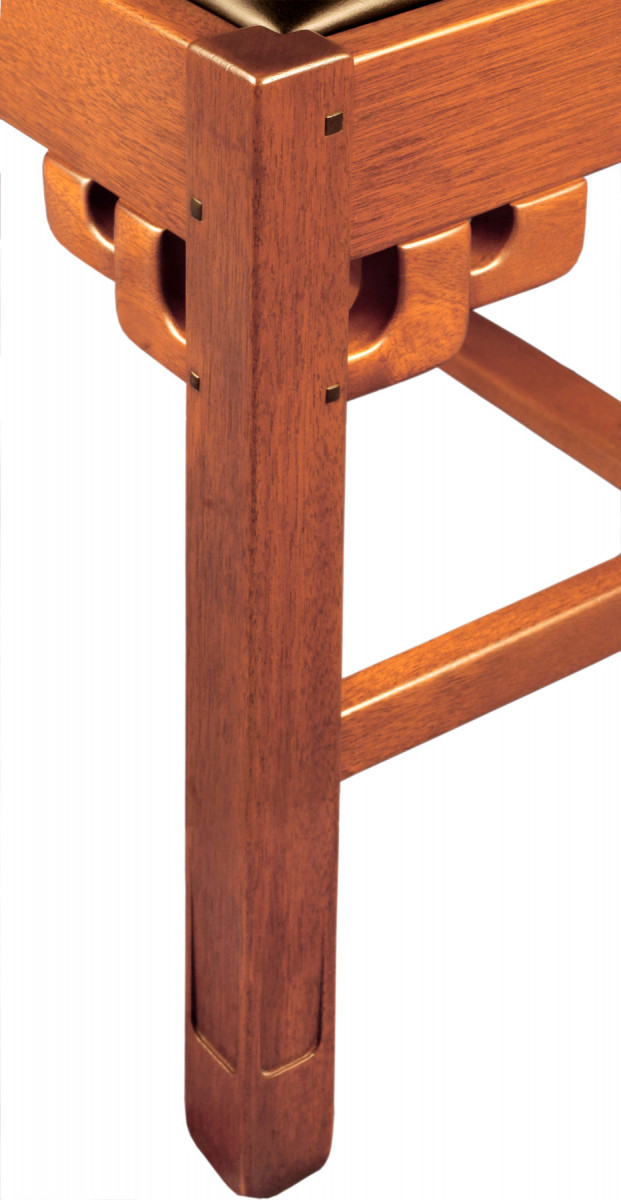
5. A double bracket helps convey a sense of strength to the joint between leg and rail. Blacker House chair; reproduction by Darrell Peart.
On all three variations, the bracket is let into the rail and leg ever so slightly. This small feature enhances the design in a very subtle way–one you can’t see from three feet away.
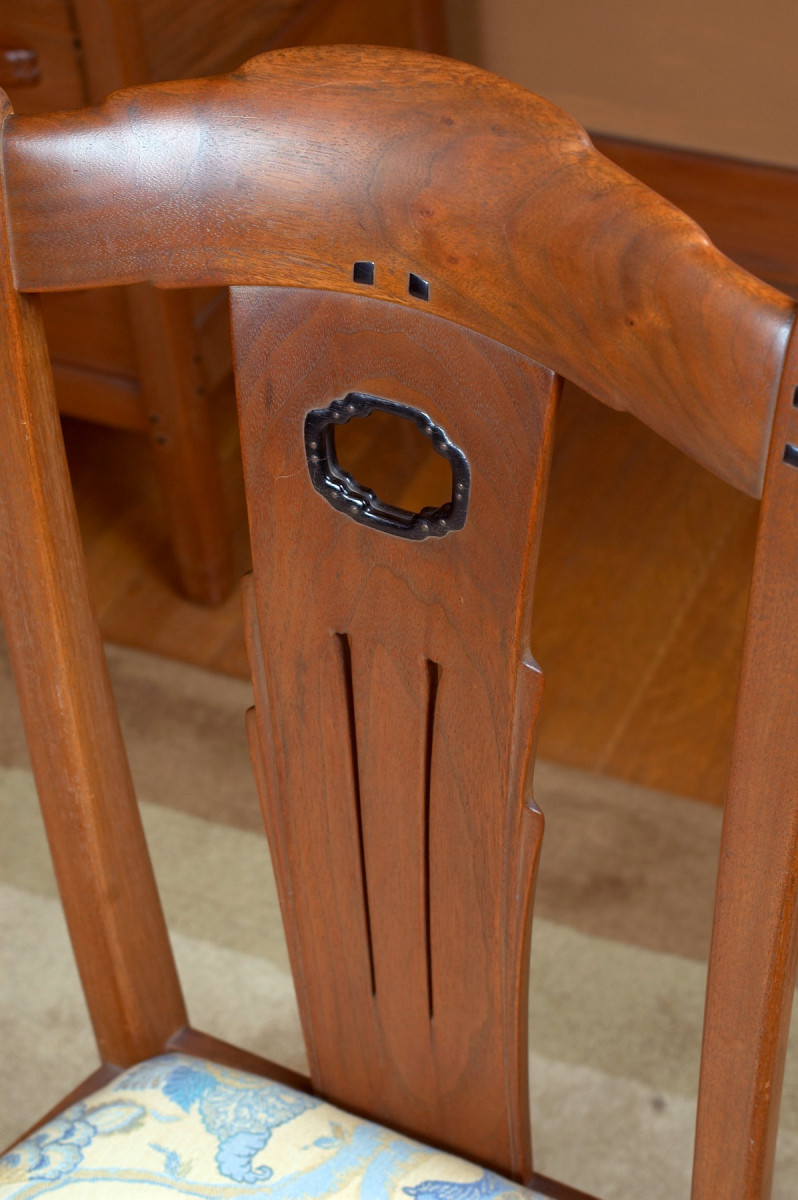
The tsuba
A tsuba is a Japanese sword guard, separating the blade from the handle. Often found in museums, tsubas are genuine works of art and come in a variety of shapes. Charles Greene collected them and often employed a double ovoid tsuba shape as a design element.
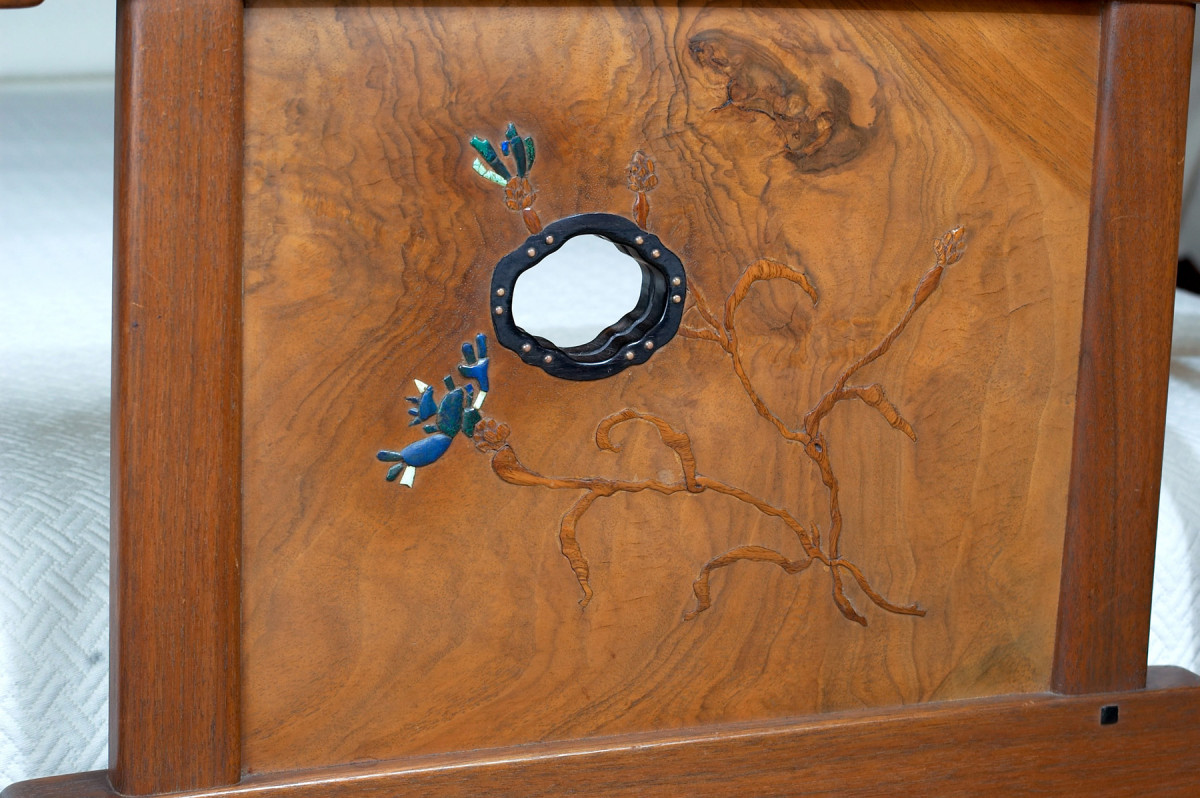
6. This detail of a footboard shows a pierced tsuba (a stylized Japanese sword guard) and raised inlay. Gamble House master bedroom
Walking through the Gamble House, you’ll see tsubas in a number of places, from the outline of the dining room table top, to a chair back detail, electrical plates, doorbell plates, lamp base and more (Photo 6).
Elements of structure as adornment
The furniture of the American Arts & Crafts Movement celebrated joinery by exposing it to view. Elements of structure, such as through tenons and the pins that hold mortise and tenon joints together, became part of a piece’s design. Greene and Greene took this idea a half step further. They saw those elements as opportunities for creating new design details that were not functional, but purely ornamental.
Knowing that much of the Greenes’ visible joinery served no other purpose than decoration, you might doubt the soundness of the real joints. Some of their early work wasn’t constructed to the highest standards, but by 1906 the stage was set for what would become a remarkable collaboration with another set of brothers, John and Peter Hall. The Hall brothers were highly skilled Swedish immigrants believed to have been trained in the home Sloyd method.
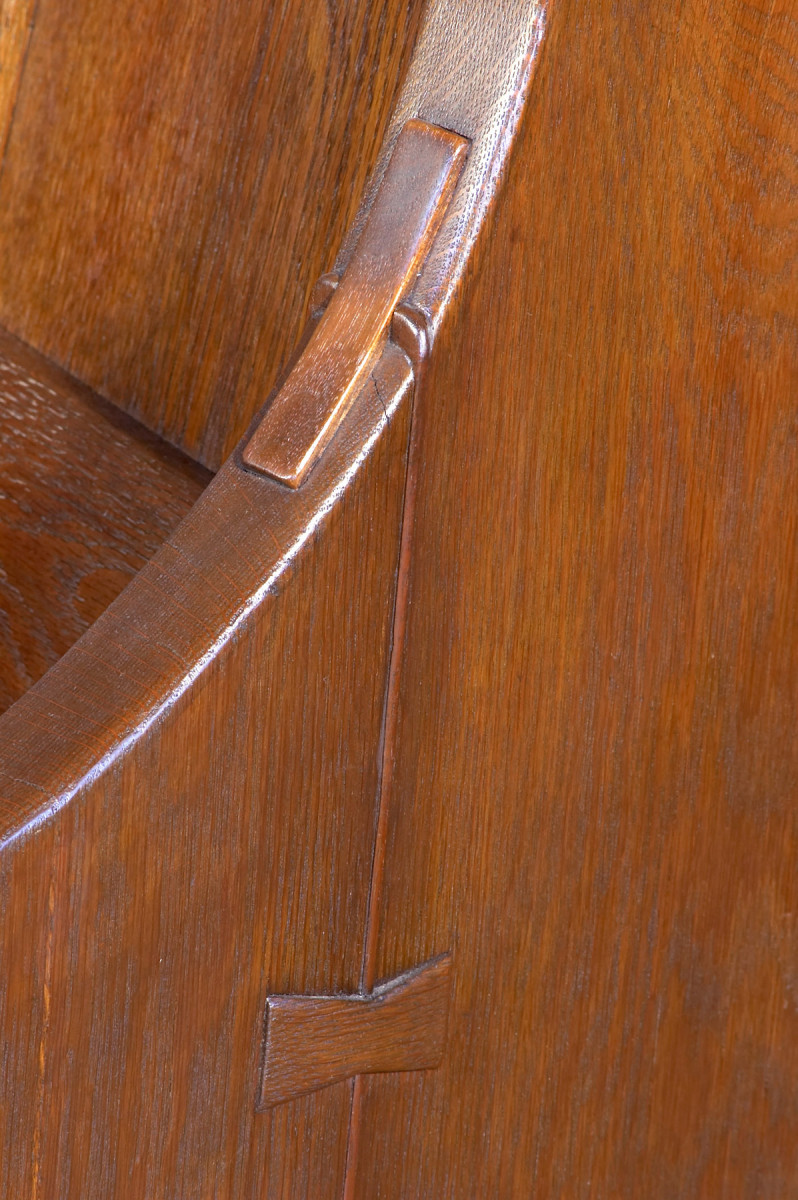
7. These spline and butterfly details are an early example of stylized joinery. Robinson House, 1906
The majority of Greene and Greene furniture, including all the mature work, was built by the Halls. The underlying joinery is quite sound. One hundred years later, most pieces are in excellent shape (Photo 7).
Ebony plugs
8. The top edges of these ebony plugs follow the upward arc of the crest rail, a detail that’s easy to miss. Gamble House master bedroom
You might think that the ebony plugs used by the Greenes are an essential part of the joinery, but most of them aren’t functional. Some of the plugs do cover screws, particularly on breadboard ends, but most plugs are just set in their own little mortises. Plugs were placed strategically, usually with the implication of pinning a tenon, but occasionally the relationship to joinery was disregarded and their placement was based on aesthetics alone.
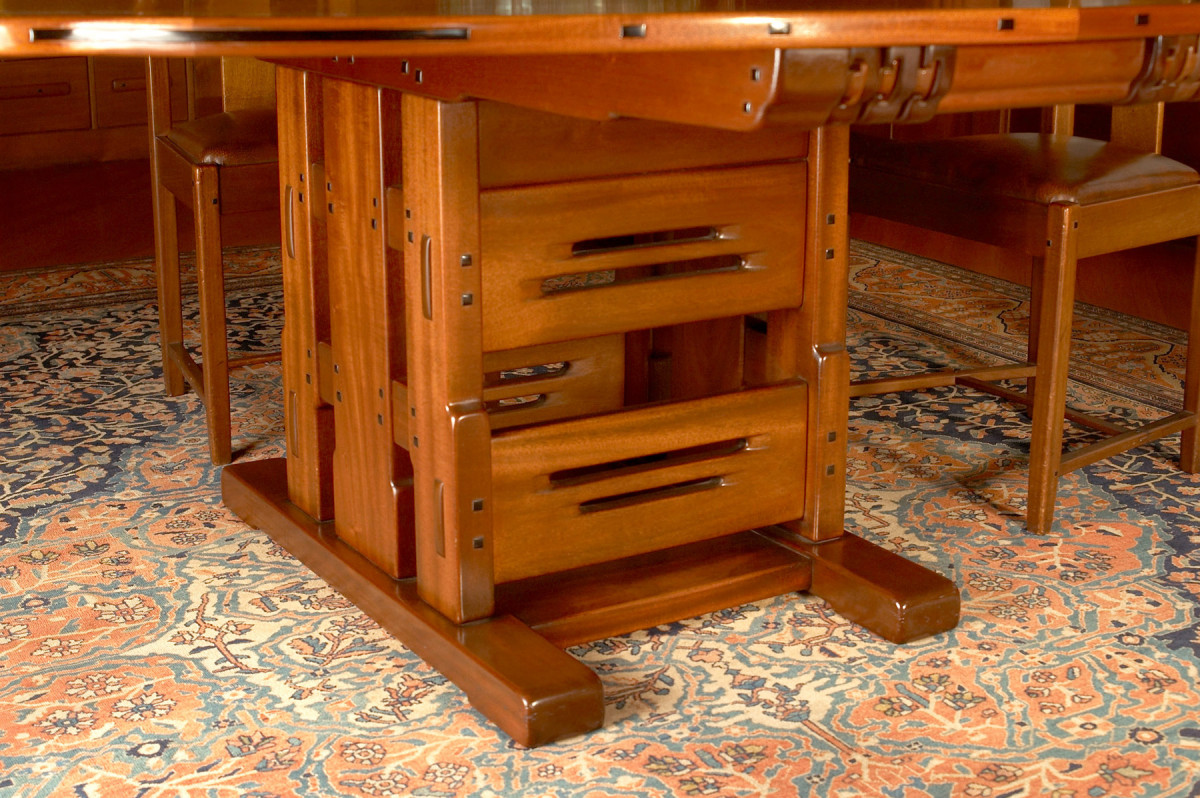
10. These ebony plugs appear to cover pins that go through the tenons, but they’re just decorative. Gamble House dining room table base
Plugs were made in an infinite variety of sizes and shapes. When used on furniture, the plugs were slightly pillowed and proud, but in low profile. On built-ins, the treatment of the plugs varied widely. Some have surfaces that are almost flat, while others have a much more pronounced domed face (Photos 8 & 10).
Exposed ebony spline

9. This classic Greene and Greene breadboard end has exposed ebony spline. Thorsen house sideboard
The breadboard end is a classic woodworking technique used to prevent a flat panel from warping. Traditionally, breadboard ends were flush with the panel, but Greene and Greene made their breadboard ends proud, both on the top and sides (Photo 9). They also added a long ebony spline to the sides of the joint. The breadboard was functional, but the ebony spline was for decoration only–the actual working spline remained hidden inside.
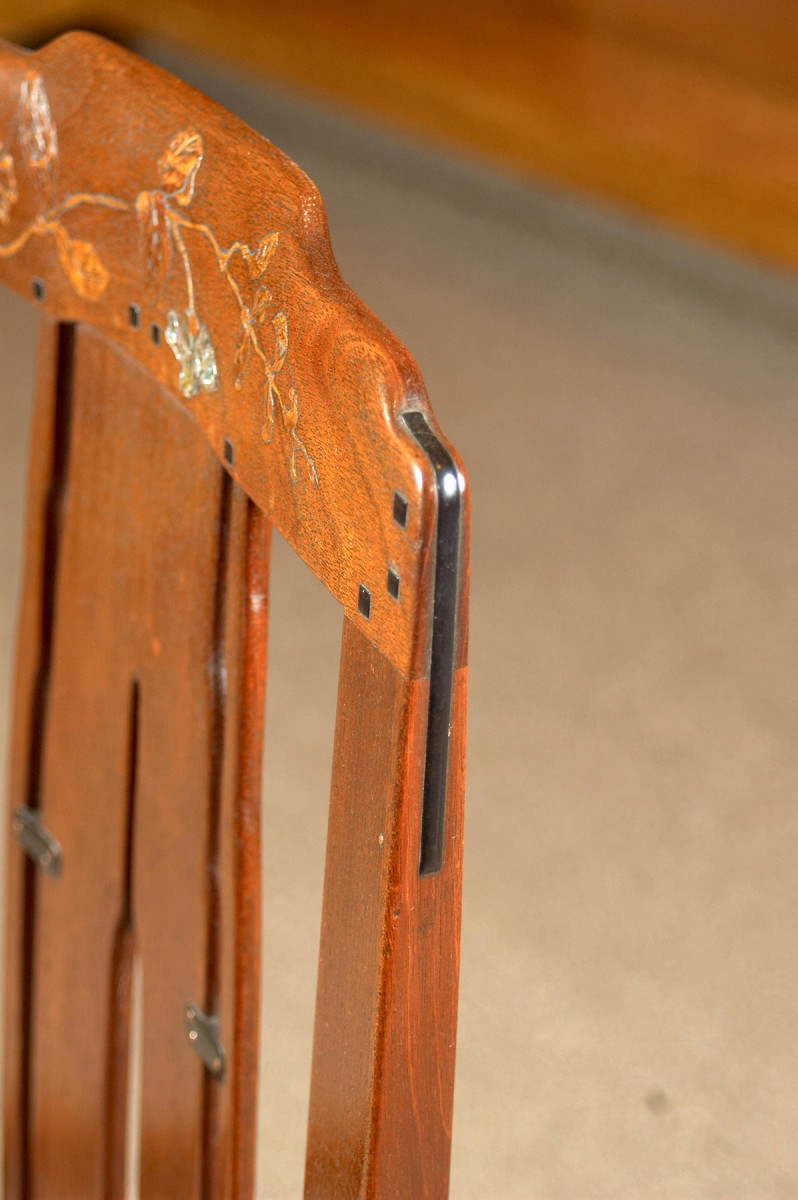
11. This chair’s crest rail also has an exposed ebony spline. Thorsen House dining room chair
Faux ebony splines were also used where the back leg of a chair meets the crest rail (Photo 11). There’s a real mortise and tenon joint inside, but the spline is not a functional part of the joint. Perhaps one of the most notable and successful uses of a faux ebony spline was on the Blacker living room armchair. The spline is quite prominent at the point where the arm joins the front leg.
Exposed finger joints
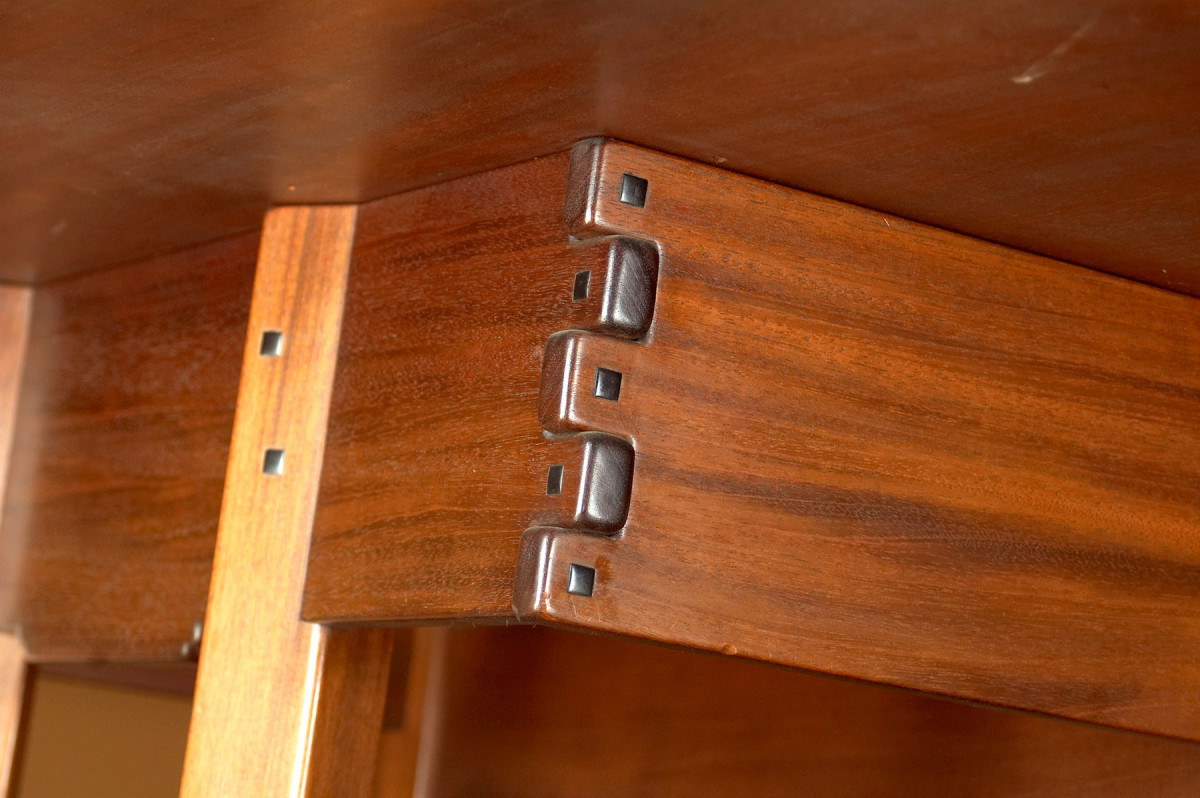
12. In this detail from the underside of a table, a box joint has proud and pillowed fingers that are “pinned” by ebony plugs. Thorsen House dining table
Greene and Greene employed proud, exposed finger joints in a number of instances, (Photo 12), but they were most notably used for drawer fronts. Drawer fingers were usually in lower profile than fingers on casework. On all joints, the fingers were usually “pinned” with an ebony plug, but I don’t know whether there are screws or dowels beneath most of the plugs.
Waterfall shelves
A really good designer can transform an apparent problem into a positive design feature. As most woodworkers know, bookshelves that must carry a lot of weight have to be made extra-thick, or be supported underneath. From an aesthetic point of view, both of these choices are undesirable. The Greenes solved this problem in a beautiful way.
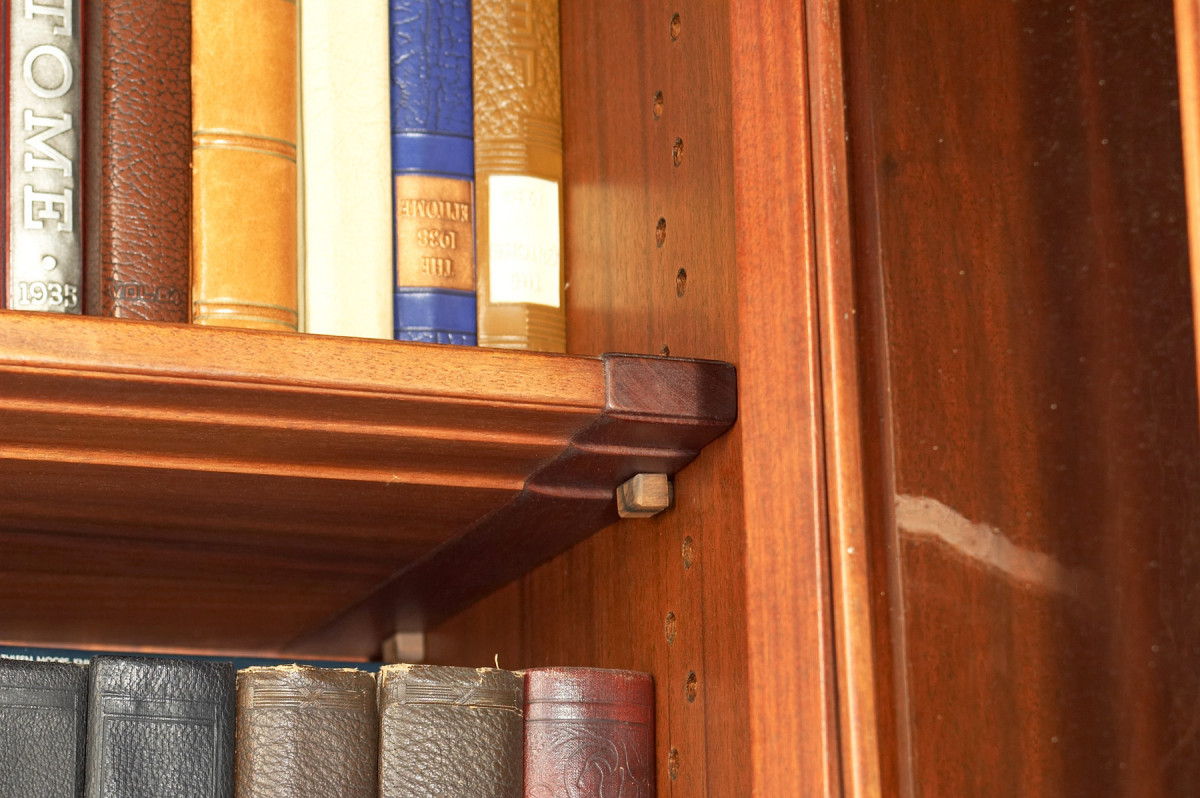
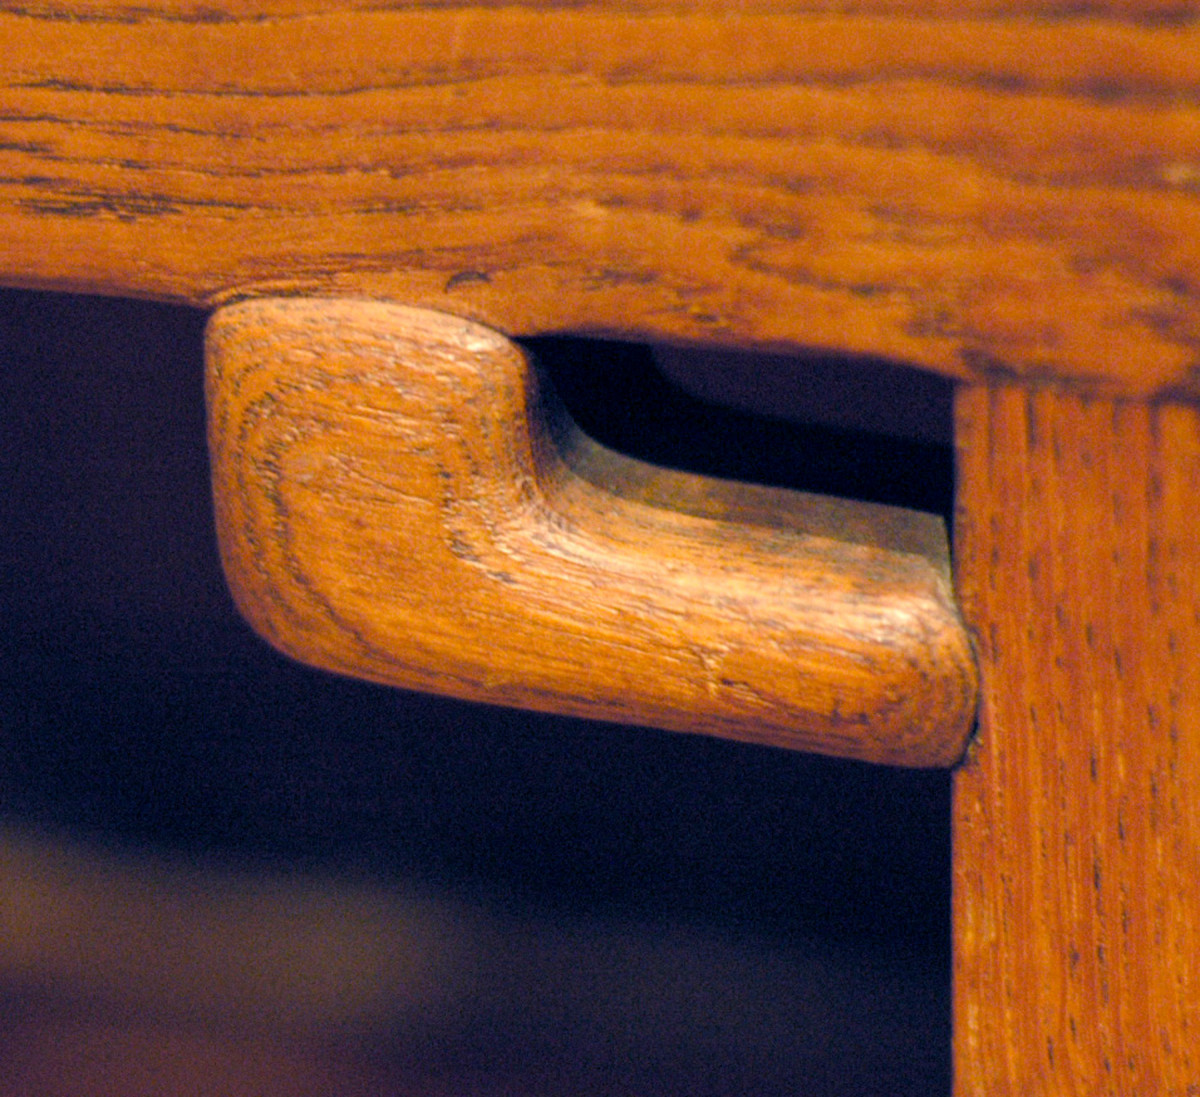
13. The waterfall shelf detail is an ingenious and beautiful solution for adding strength. Thorsen House living room bookshelves
Seen from the front, the built-in bookshelves in the Thorsen House living room are relatively thin and pleasing to the eye (Photo 13). A closer inspection reveals yet another delightful Greene and Greene detail: a sort of waterfall effect on the underside. The waterfall detail is in reality a clever method to add thickness and strength to the shelf, but it also enhances the beauty of the piece.
Back splat connectors
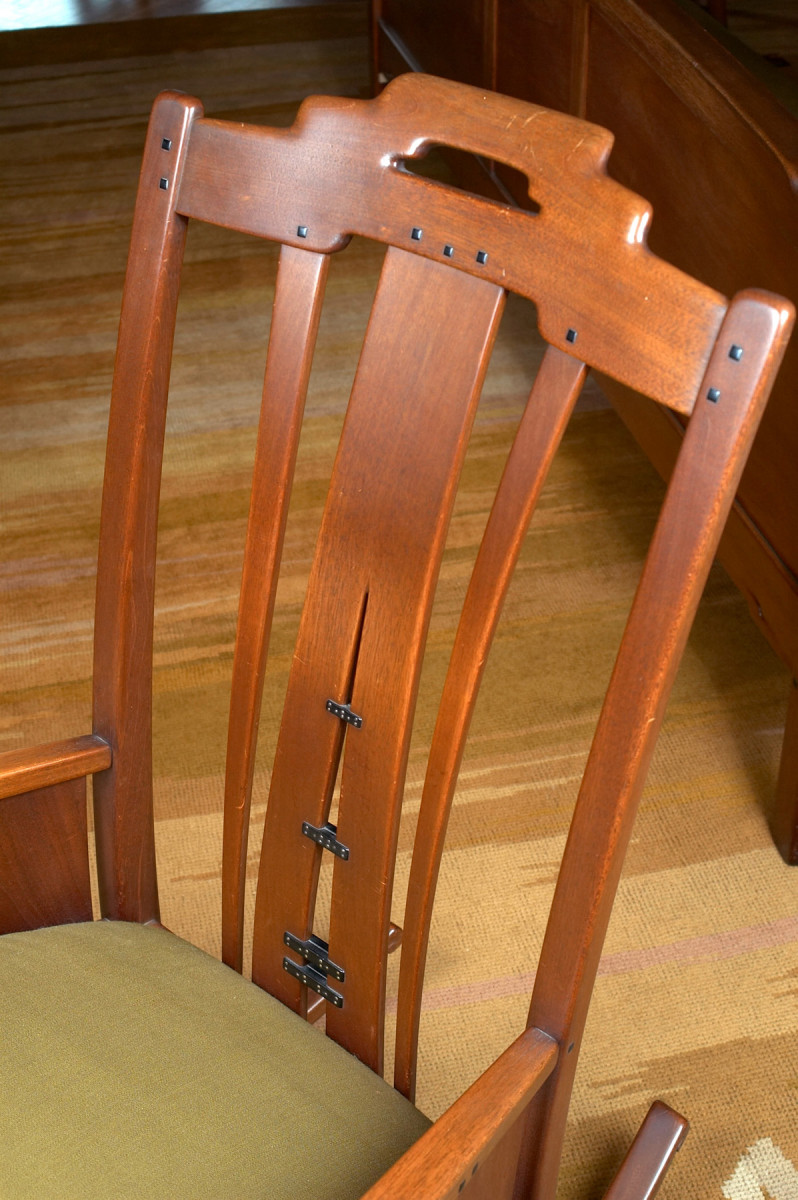
14. This chair’s center splat appears to be pulling apart, but the ebony connectors secure the two halves in place. Gamble House living room rocker
The backs of several Greene and Greene chairs have small decorative connectors joining the splats (Photo 14). While their usefulness may be debatable, the connectors’ value as a design feature is not. On the Gamble House living room chairs, the splats appear to be pulling apart, while the connectors exert an opposite force, giving the impression of holding the splats in check.
Relief detail

15. The Greenes were masters of relief. Every structural element exists in its own plane and is rounded over before stepping down to the next level. Drawer from the Thorsen house
The relief detail has a profound effect on the overall design, but it’s a very simple concept: every element exists in its own plane. No two surfaces are allowed to meet at the same level. Every level is rounded over before dropping down to the next level. Relief adds depth and shadow, highlighting each and every structural component of the design (Photo 15). Even when the Greenes used inlay, it was in relief, proud of its surrounding surfaces.
Leg details
Charles Greene apparently did not like simply pulling a classic design detail off the shelf and borrowing it. He had to give it a distinctive Greene and Greene twist. Such is the case with a couple of leg bottom details.
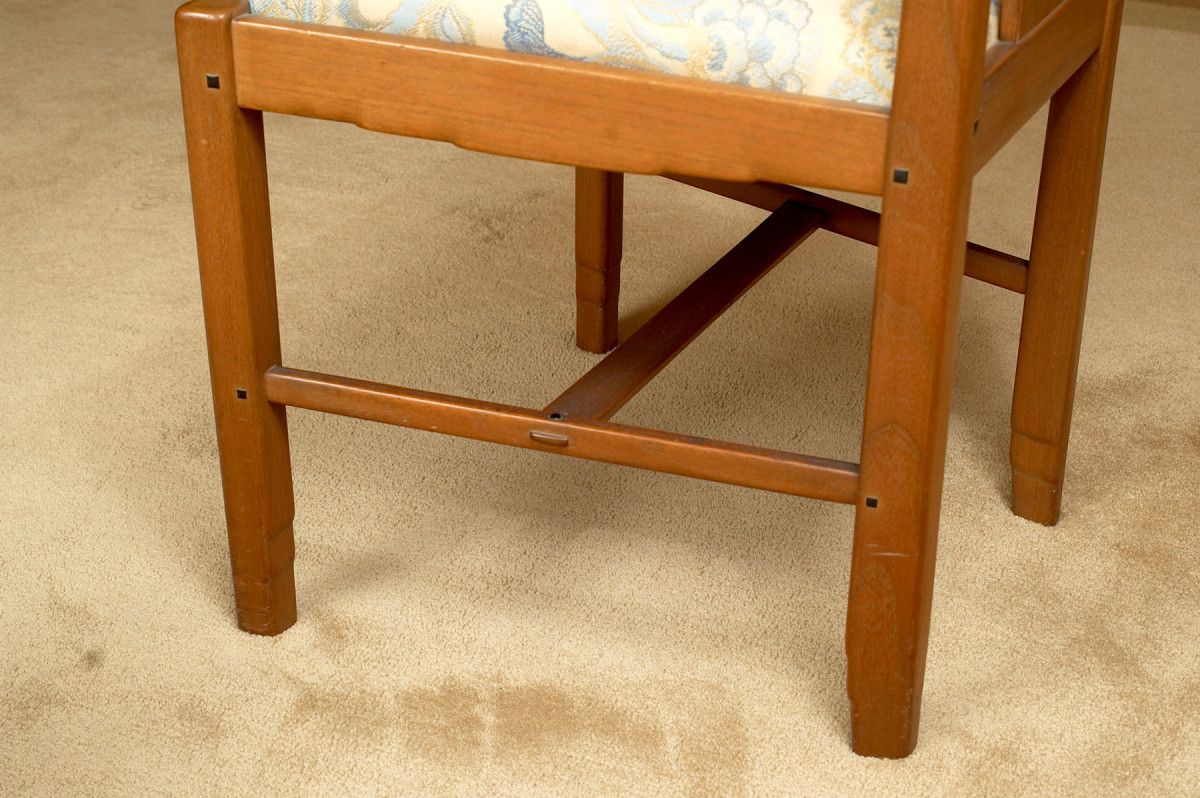
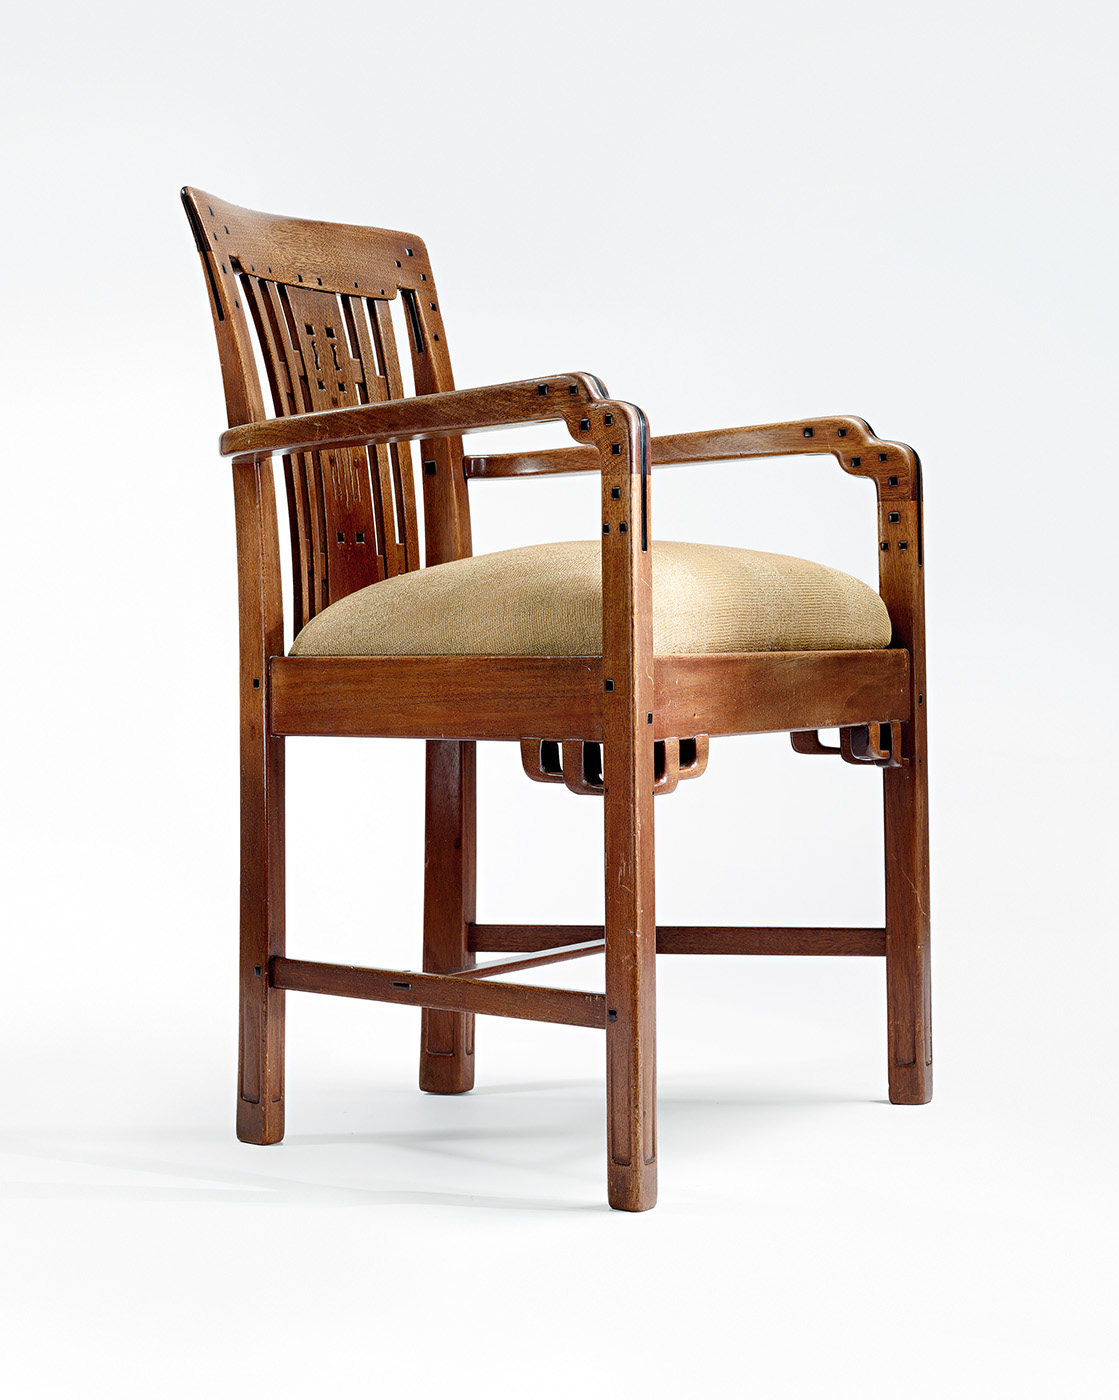
16. The waterfall leg is a new take on a classic tapered leg. Chair from the Gamble House master bedroom
The waterfall leg is a take on the classic detail of tapering the two inside faces of a leg, making the leg increasingly narrow as it reaches the floor. The waterfall leg tapers in a series of three short steps that are shaped as vertical cloud lifts (Photo 16).
The Blacker House armchair’s leg-indent detail anchors the design to the ground, like a classic claw and ball foot. The indent pushes down and transfers the weight of the piece to the very bottom of the leg.
See it up close
I hope this article whets your appetite for more Greene and Greene design. May you someday make the pilgrimage to Pasadena and see their work as it should be experienced–in person. Soak it in, and make your own little discoveries. But beware–Greene and Greene may become habit-forming.
To see a fully restored Greene and Greene masterpiece, and for the ultimate thrill, visit The Gamble House at www.gamblehouse.org


