


We may receive a commission when you use our affiliate links. However, this does not impact our recommendations.
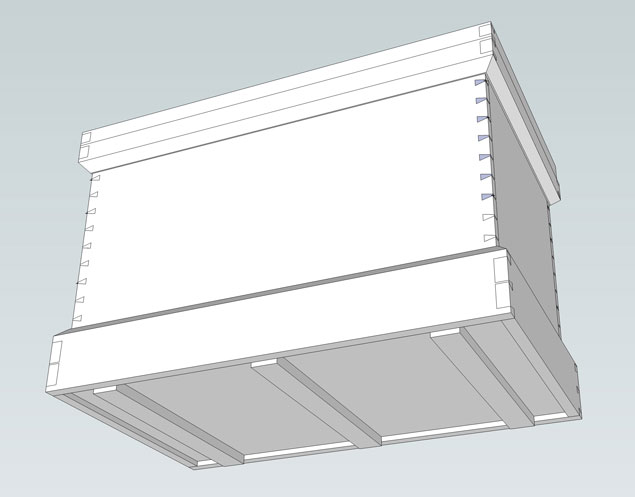
One of the important features on tool chests are what I call “rotting strips” – pieces of wood between the chest and floor that protect the bottom of the chest from water. And, if the chest does get wet, these strips rot before the bottom of the chest.
I’m in the middle of building a couple of tool chests for customers. And one of the customers wanted to add casters to the chest, but we couldn’t find any that he liked. So he suggested adding Ultra High Molecular Weight (UHMW) plastic to the rotting strips instead. The plastic would allow the chest to slide on a floor and be water-resistant.
I was intrigued by his idea and decided to give it a try.
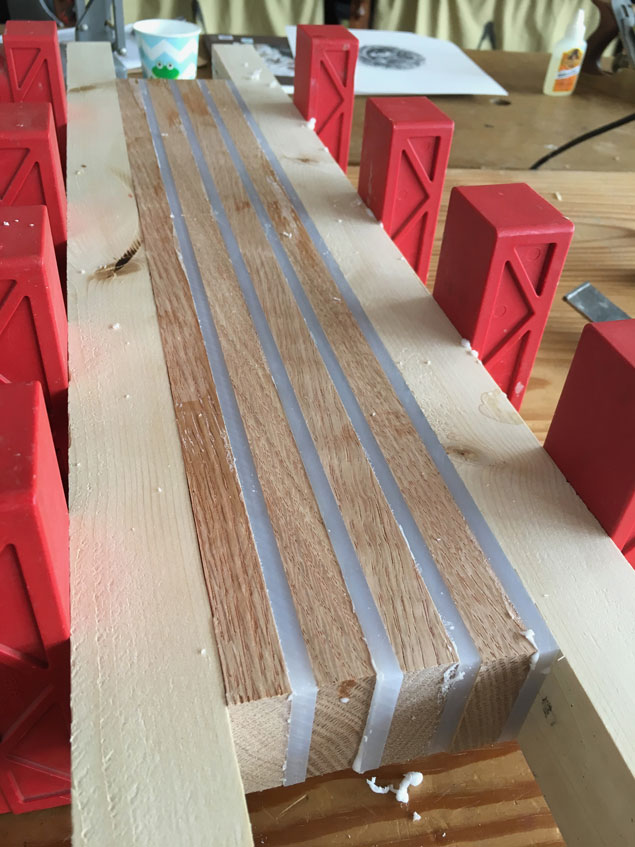
UHWM plastic can be expensive, so I decided to laminate 1/4”-thick strips of it to 5/8”-thick strips of oak. The plastic stuff cuts like dense wood and can be worked with normal woodworking tools – you can saw, drill and plane it with no problems.
Gluing it, however, is another matter. I’ve used epoxy and polyurethane glue in the past with success. I was out of epoxy this week, so I used the poly glue. (Side note: I use hide glue for most operations in my shop, but when it comes to gluing plastics, sometimes modern technology is the easier way to go.)
Spread a tiny film of poly glue on the wood and place the UHMW plastic strips on top. I stacked up four layers of wood and plastic and then clamped them using pine cauls to help distribute the clamping pressure evenly.
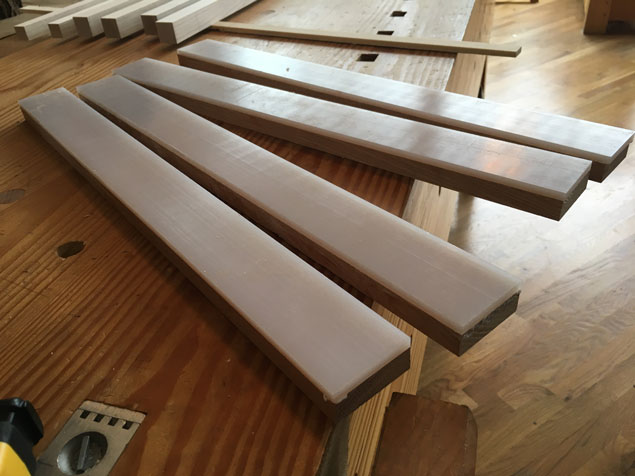
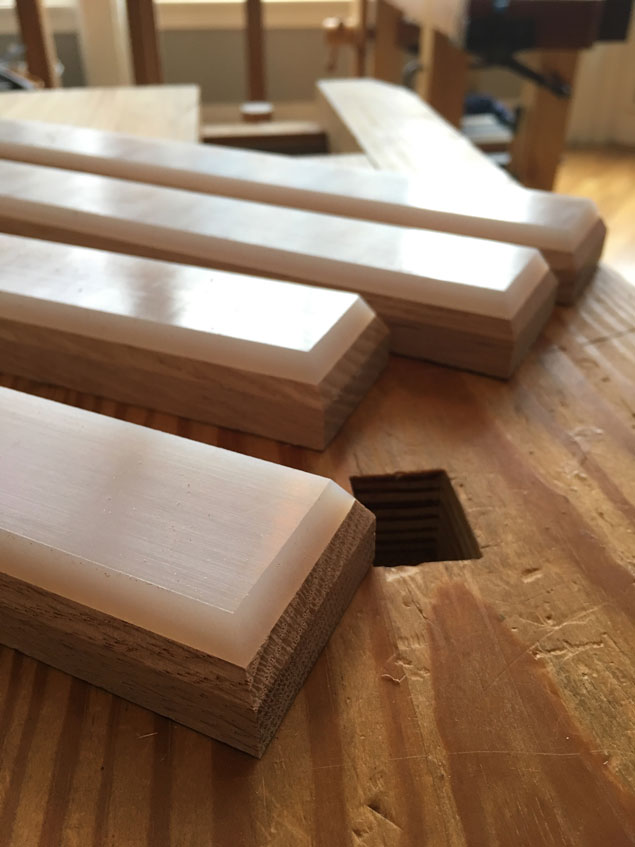
After an hour in the clamps, I scraped off the excess foamy squeeze-out and trimmed the wood and plastic flush all around. Then I sawed a 30° bevel on the corners of the rotting strips to make them ride over bumps in the floor a little easier.
Today I will screw them to the underside of the chest and give them a try. I’m hoping the glue and screws will hold everything together for years to come. If they fail, I can take comfort that these parts of the tool chest are designed to fail.
— Christopher Schwarz
P.S. If you would like to build a tool chest such as this, check out my video in ShopWoodworking.com: “Make a Traditional English Tool Chest.” It features 220 minutes of instruction on every aspect of the project, from the dovetailing to the finish.
Here are some supplies and tools we find essential in our everyday work around the shop. We may receive a commission from sales referred by our links; however, we have carefully selected these products for their usefulness and quality.


Slick solution. (Pun intended)
Considering the chest may be slid across the floor, I’d have countersunk some mechanical fasteners too and not just relied on the glue bond.
Great idea, even if the jury is still out. Where did you purchase the UHMW strips?
I actually debated using 3/4 pvc trim board on my traveling chest but chickened out. I had some left over from a fence repair but I was just a little short of what I would have needed for the rot strips. It’s fairly inexpensive stuff.
Chris,
I’m a little surprised that you didn’t sandwich the UHMW between to pieces of oak (with liberal use of rabbets). That way you’d be gluing oak to oak. Sure, a bunch more work but stronger mechanically without question.
Joe
The fabulous Lou Sauzedde (Tips from a Shipwright – search for his website and YouTube channel) describes using plastic for frames on a boat.
And you thought the molding profile would date the chest! Really like this solution and hope it works out.
Flame treating the PE can really improve the adhesion. Just run a torch across the aide that you’re planning to bond to.