We may receive a commission when you use our affiliate links. However, this does not impact our recommendations.
 A rotary tool, hammer and a few shop-made tools are all it takes.
I recently had the opportunity to explore a concept that has been rattling around the dark recesses of my cranium for almost three decades. It was inspired first by a spectacular pair of curly juniper boards (also known as aromatic red cedar) I bought way back when “just because” that were still awaiting their final purpose, and a cheesy Anglo-Indian carved teak box I use to hold my favorite “fussy” tools used for inlaying, engraving and marquetry.
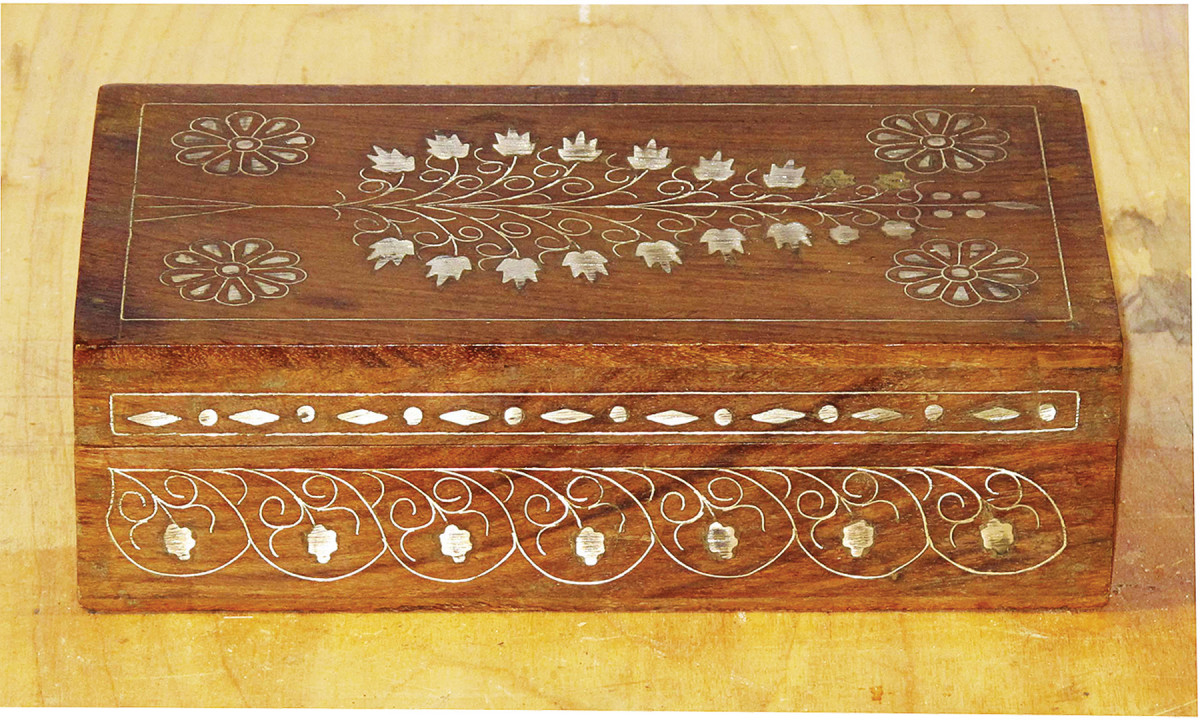
Ideas everywhere. Inspiration comes sometimes from humble and mundane sources. This $2 teak and brass box from a thrift store was a seed for this technique.
The idea? Inlay wire into the presentation surface to enhance the already eye-catching beauty of the swirling grain pattern. The beauty of the technique is that it can be used for just about any kind of metal wire that fits the project – copper, brass, silver, pewter, aluminum, steel and even gold – and employed for any type of artistic expression, whether linear accents, scrollwork or free-form.
The use of inlaid wire has long historical precedence, perhaps nowhere more noteworthy than in the filigree inlays of exquisite antique firearms such as elegant dueling pistols and hunting long guns from centuries past. While the delicate accents of these artifacts were achieved through a skill developed during a long period of trial and error, by following the steps here, you can be up and running quickly because the scale and materials are more suited to both the modern shop and the task of furniture making.
The Substrate
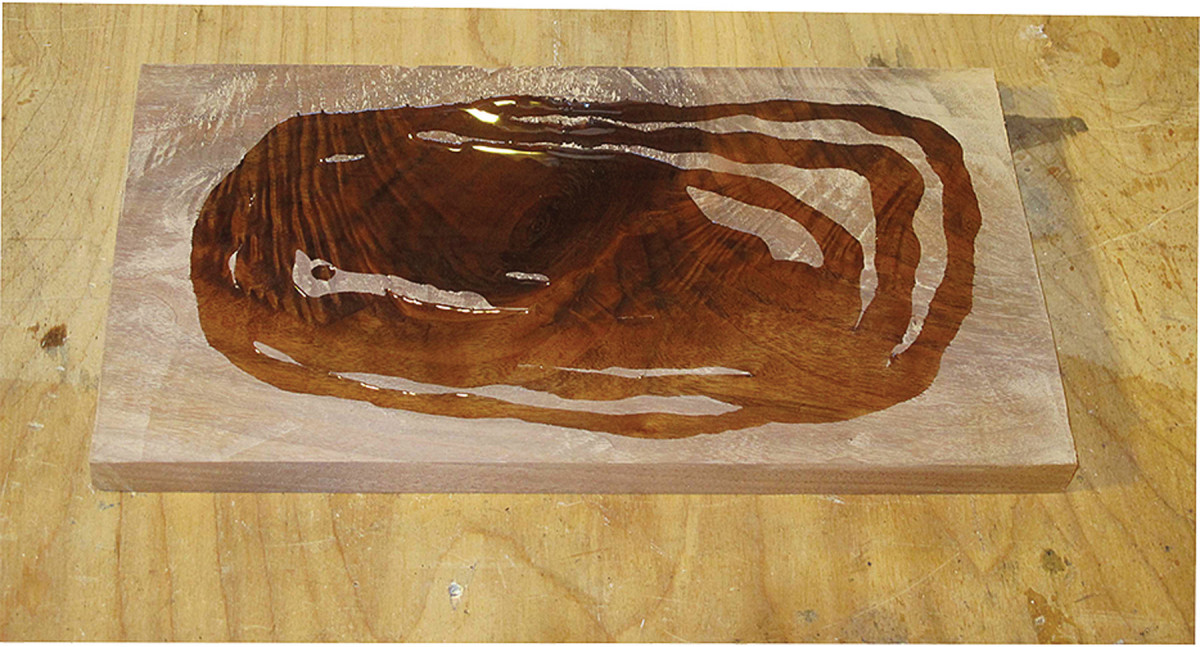
Deep finish. The background material must be impregnated so that it will cut cleanly with the rotating tool cutter. Make sure to apply enough penetrating oil finish that it soaks in deep. The more exuberant the grain, the more finish will soak in.
While I chose to emphasize burls and “curly” wood for my own pursuits, any wood ground, solid stock or veneer can suffice for the endeavor. Whether you are using solid lumber or veneer, the first step is to get the surface well-prepared for the processes to follow, by whatever process you feel most comfortable with (planing, scraping, burnishing, sanding etc.).
Once the surface is smooth and flat, apply a penetrating finish to harden the wood to a depth of about 3⁄32“.
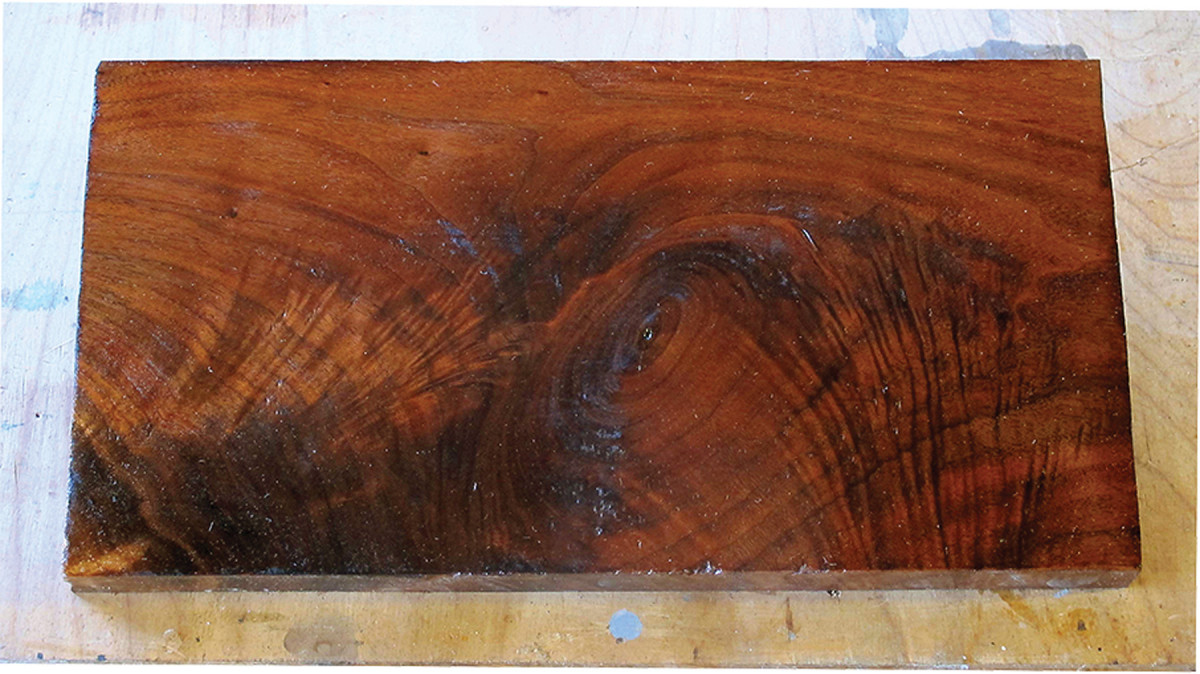
Enhanced wood. This walnut panel has been thoroughly saturated, enhancing its lively grain pattern both visually and structurally.
When using veneer, this can be accomplished fairly easily by hammer veneering with hot hide glue. When done correctly, it not only sets down the veneer but fully saturates it with glue that hardens in place. For solid lumber, I tend to select a reactive oil coating, such as a polymerized tung oil or something similar, first thinned 1:1 with mineral spirits.
Alternate materials include an alkyd resin/linseed oil varnish (Pratt and Lambert 38), gunstock varnish (Birchwood Casey Tru Oil) or a phenolic resin/tung oil varnish (Waterlox Original) or any other comparable analog, all thinned 1:1 with mineral spirits.
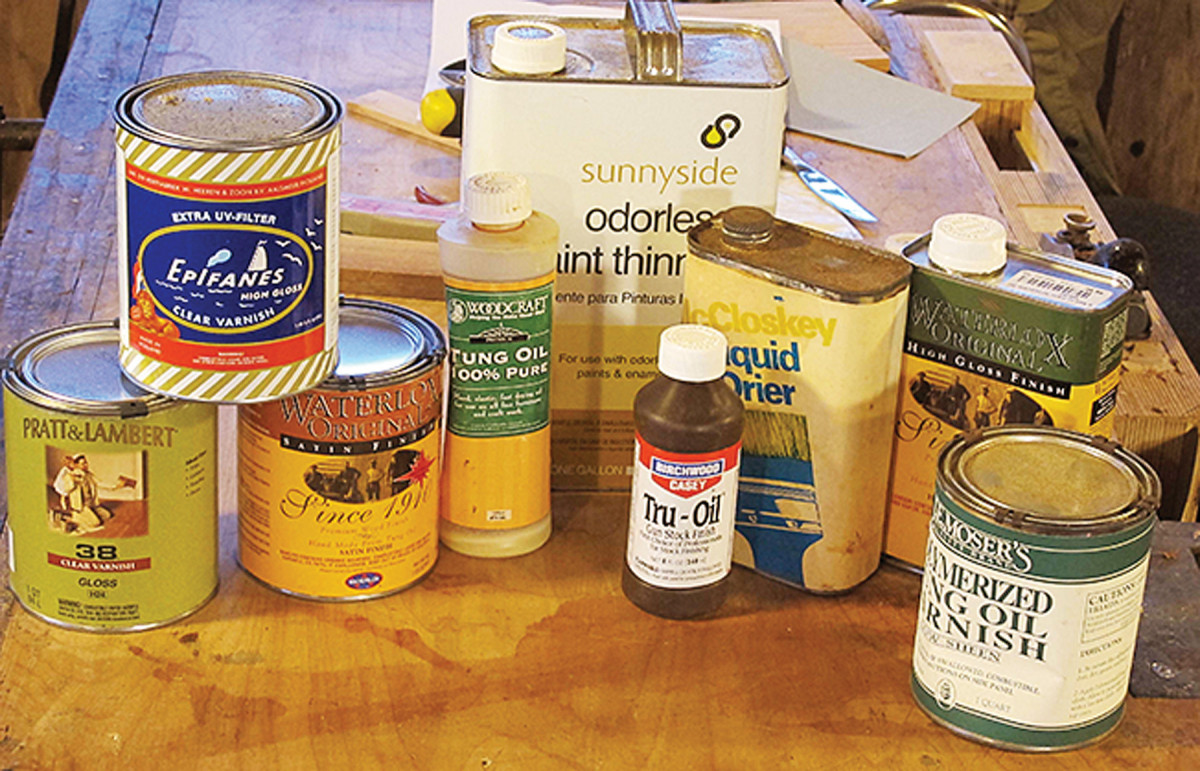
Below the surface. This selection of suitable penetrating coatings for consolidating the surface is just what I had on hand. It is by no means an exhaustive representation of appropriate products.
Slather on the impregnating concoction, and using a coarse-weave lint-free cloth, vigorously wipe off any excess when the liquid starts to get tacky.
Allow this application to harden, which could take from a few hours to a few days. If it goes too slowly for you, try using naphtha as the thinner or adding a bit of Japan drier to jump-start the drying reaction. Repeat the application and drying process until the surface is fully impregnated, but not to the point of building a glossy film above the surface.
Cutting Channels for Inlay
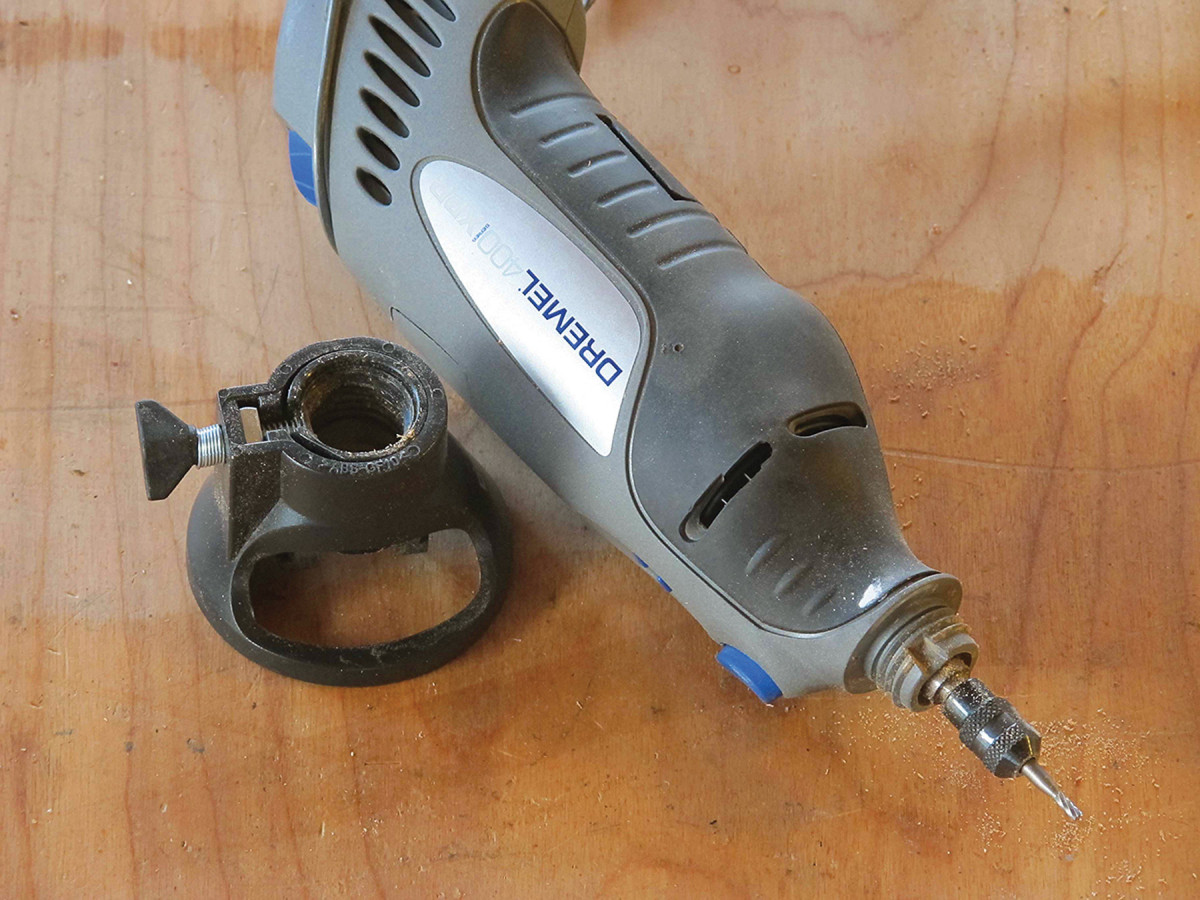
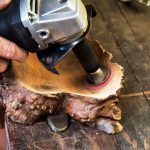
The right tool. It’s important to make sure your rotary tool can accommodate 1) the right size cutter for your project, and 2) a stabilizing collar that can turn the tool into a mini-router, and enable its use as essentially a drawing tool.
Once the working surface is fully impregnated and hardened, it’s time to begin cutting the channels into which you will inlay the wire. My preferred tool for this is a hand-held power rotary tool with a ball or straight burr bit roughly the same size (or slightly smaller) as the wire you will be inletting into the channel. I have mounted on mine a router-type collar I bought for about $10 at a home improvement store.
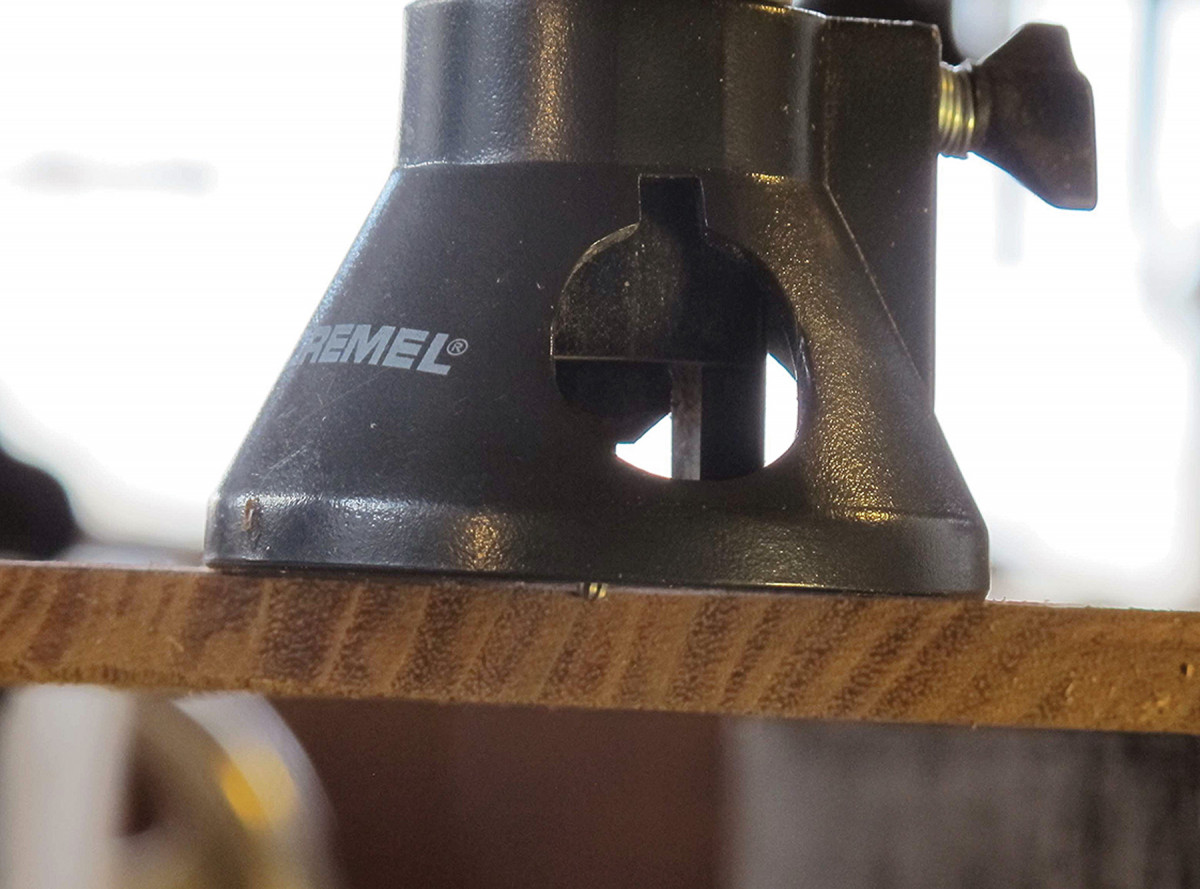
Test first. Setting up the rotary cutter’s burr is probably the fussiest part of the technique. First test it on a scrap to make sure you are using the right cutter and the right depth setting.
This allows me to think about one less thing when I am creating the channels, because it holds everything in a fixed attitude relative to the presentation surface. I set up the cutting tool so that the ball burr is about 75 percent submerged into the surface, creating a rounded tunnel-like cavity for the wire, or, if using a straight burr, that it is cutting a channel slightly narrower and deeper than the wire diameter.

Groove on. As long as you keep the rotary tool’s collar firm against a straightedge, it will cut a straight groove. You can also create a stencil to create patterns for the inlay.
For this project with such a bold grain pattern, I selected a fairly large cutter and wire.
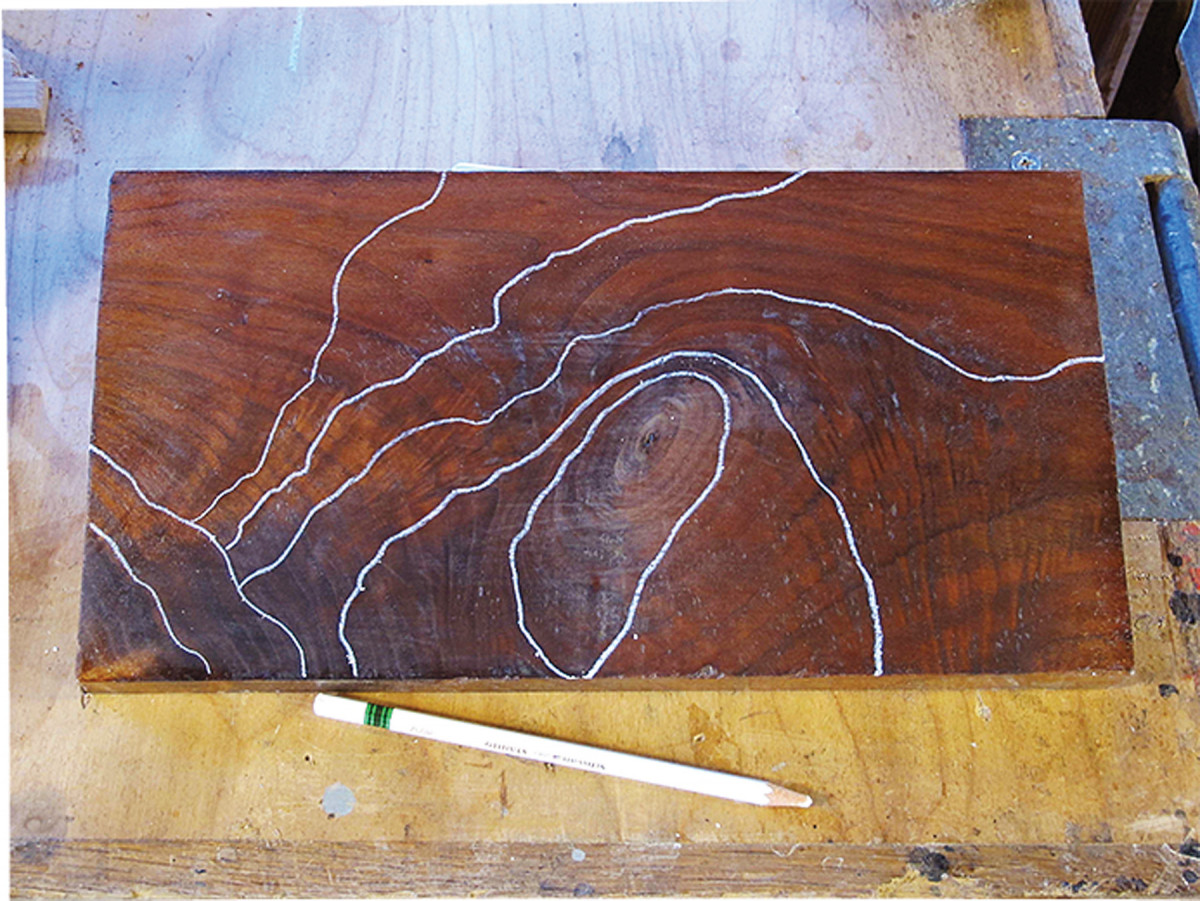
No limits. The true beauty of artistry is that you can take it in any direction you want to go. Here I selected a pattern sympathetic to the grain; I could have just as easily made a design in counterpoint to that same grain pattern.
As to the pattern for the inlay, you can make it whatever you want. For linear inlays, simply allow the cutting tool to follow a straightedge while it is excavating the channel.
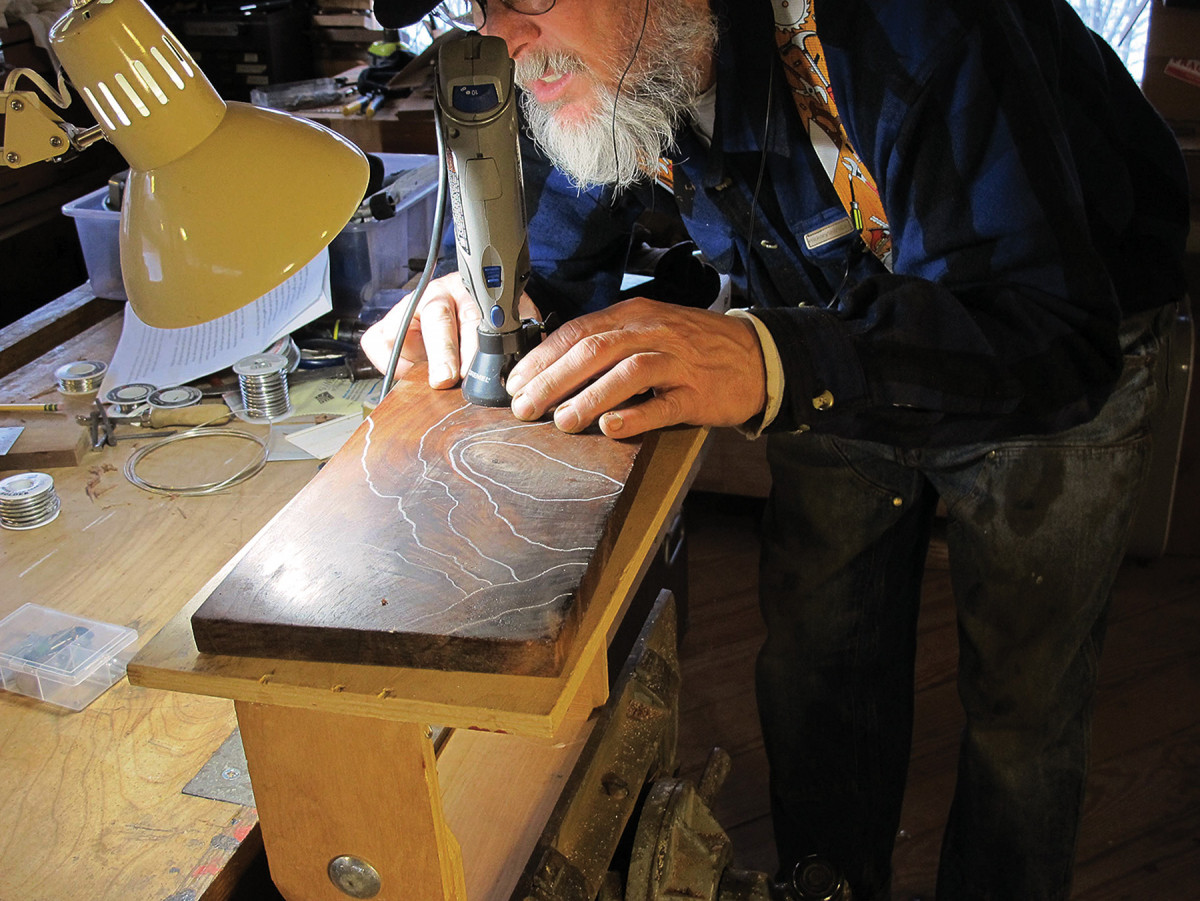
Follow along. If you arrange the window in the collar attachment with the light and your line of sight, following your design isn’t all that difficult if you concentrate.
For more free-form designs, such as the one completed for this project, I first mark the impregnated surface with a pencil indicating the design I am trying to accomplish, then set up the tool, lighting and my eye so that I can carefully follow the pattern I have laid out on the surface.

Clear channel. If the surface is well prepared and you use a steady, gentle touch with the rotary cutter and a burr that is set up correctly, you can achieve and nice clean channel for the inlay.
Truth be told, this is the most stressful moment of the whole project, because if I lose track of the line or allow the high-speed rotating cutting tool to get away from me, I have wasted all the work to this point and either have to start over again or change the design. Or, you can just take the attitude of architects and software designers and call it a “feature” rather than a mistake.
Choosing, Preparing & Shaping the Wire
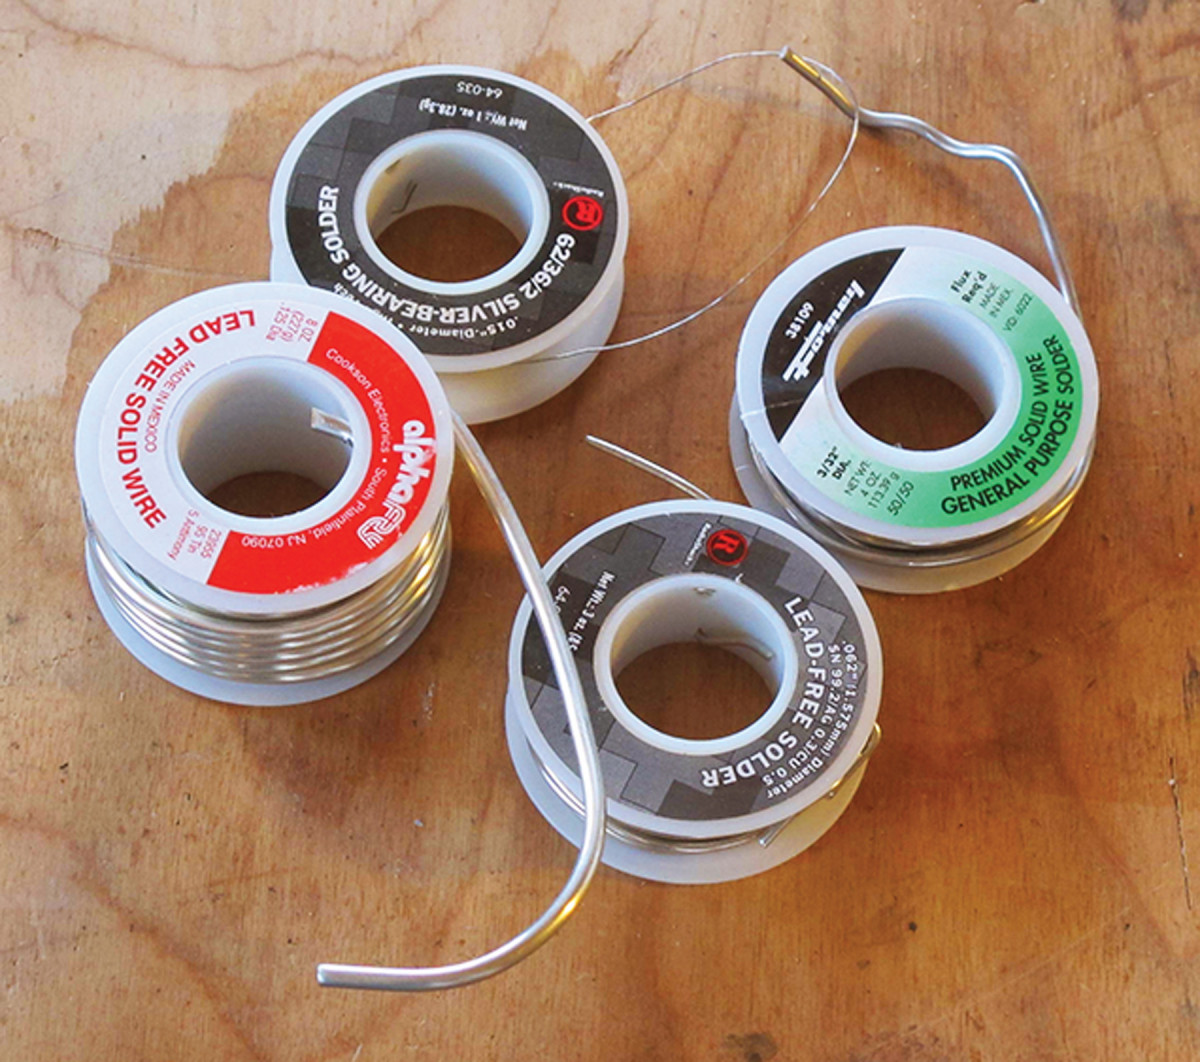
Ready to use. Most “plumber’s” solder is soft enough to use right off of the spool.
Some of the wire you might select for inlay, most notably pewter (also known as lead-free solder), is ready to start working straight off the shelf.
Aim for dull. These before-and-after photos provide the visual clues to annealing brass wire. When it is new and fairly hardened from rolling or drawing during manufacture, brass has a bright gold appearance.
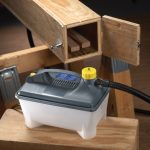
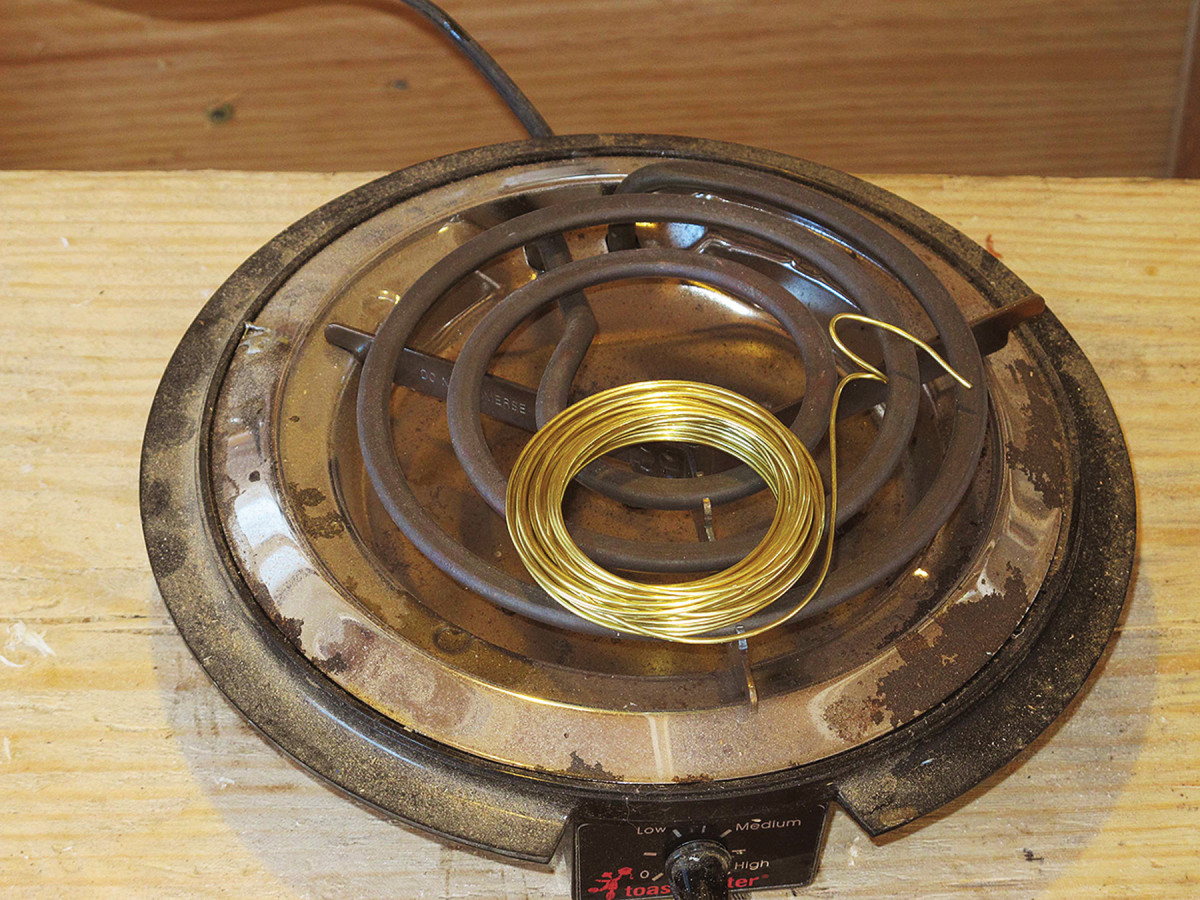
Others, such as brass and silver, need to be first annealed, or relaxed, to reduce their stiffness and make them easier to pound and bend as needed. I anneal metals by either placing them directly on an electric hot plate on “High” and letting them cook until they have changed color thoroughly (which indicates they are done), or by reaching the same color by hitting them with the flame from a propane torch while the spool of wire is sitting on a bed of firebricks.
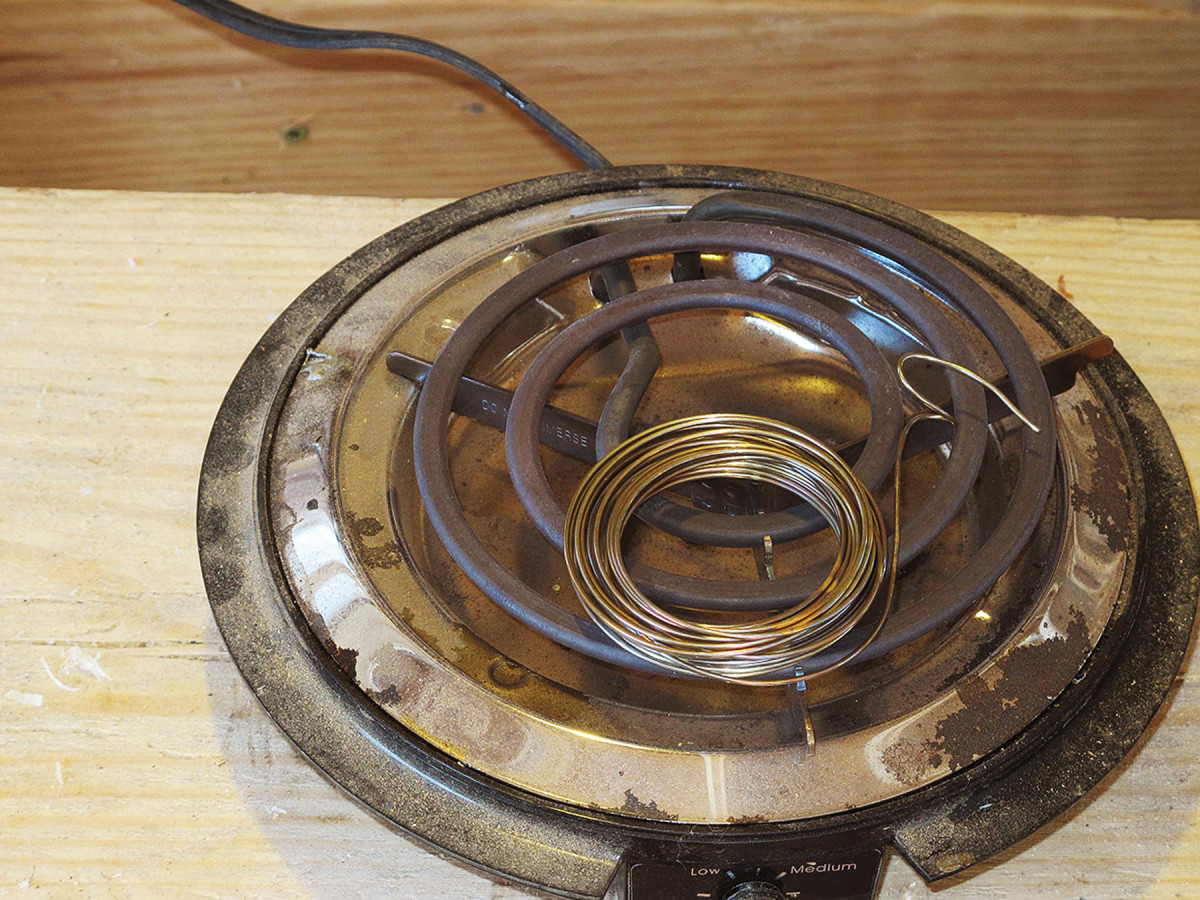
After annealing on a hot plate, it adopts a muted bluish/brown tone.
The wire then needs to be both flattened slightly with a hammer and anvil (in order to fit edge-wise through the narrowed opening of the ditch-like cavity into which it will be inset) and, if the design is circuitous, bent to mimic precisely the channels that have been excavated for them.
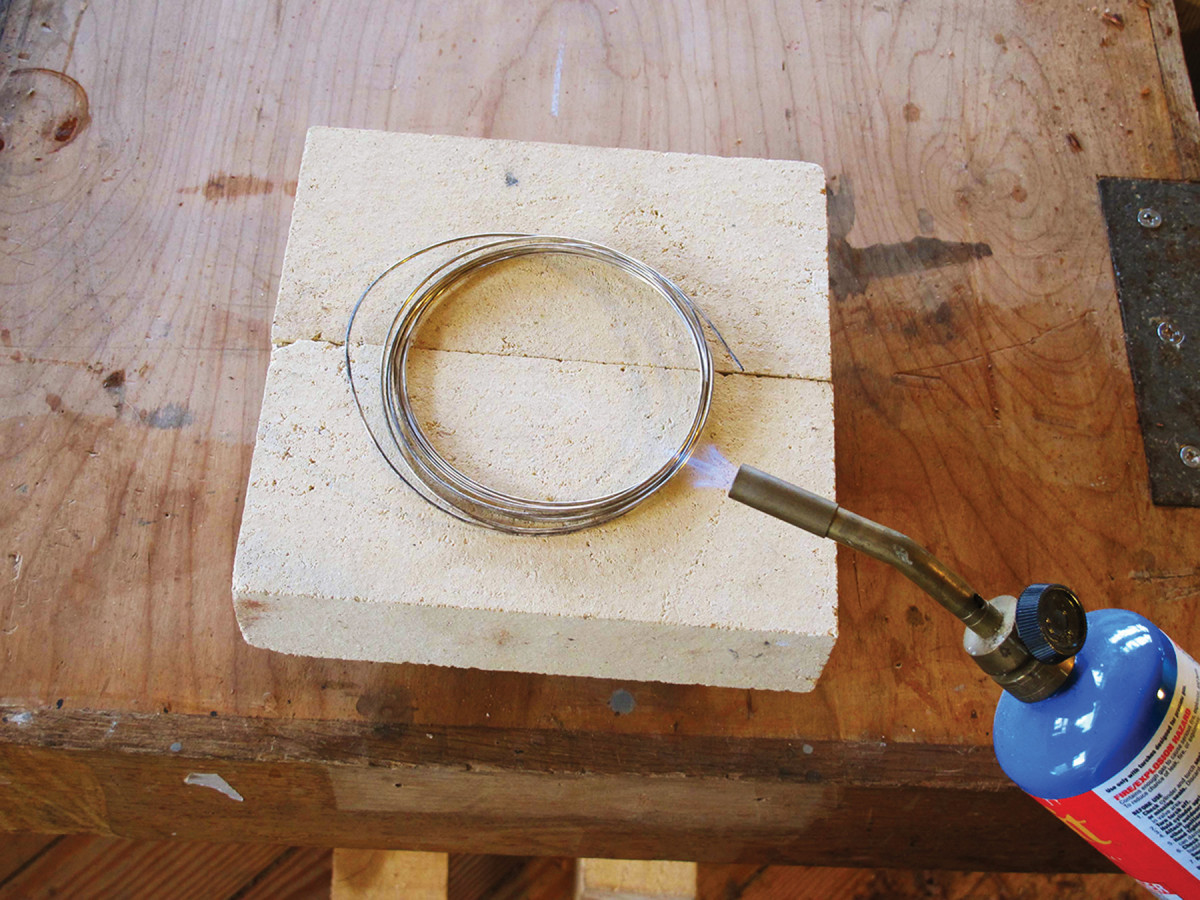
Base rotation. I use a rotating brazing stand with firebricks when doing torch work, so I mostly rotate the workpiece, not move the torch.
For flattening the wire slightly, I simply pound it lightly against an anvil using a hammer with a polished flat face. You will know almost immediately at this point if the wire has been made soft enough for working. When you are sure that it is, polish the wire to remove any accretions or fire scale left by the annealing. I use an abrasive pad followed by a pumice cloth, then wipe it down with acetone to remove any surface contaminants.
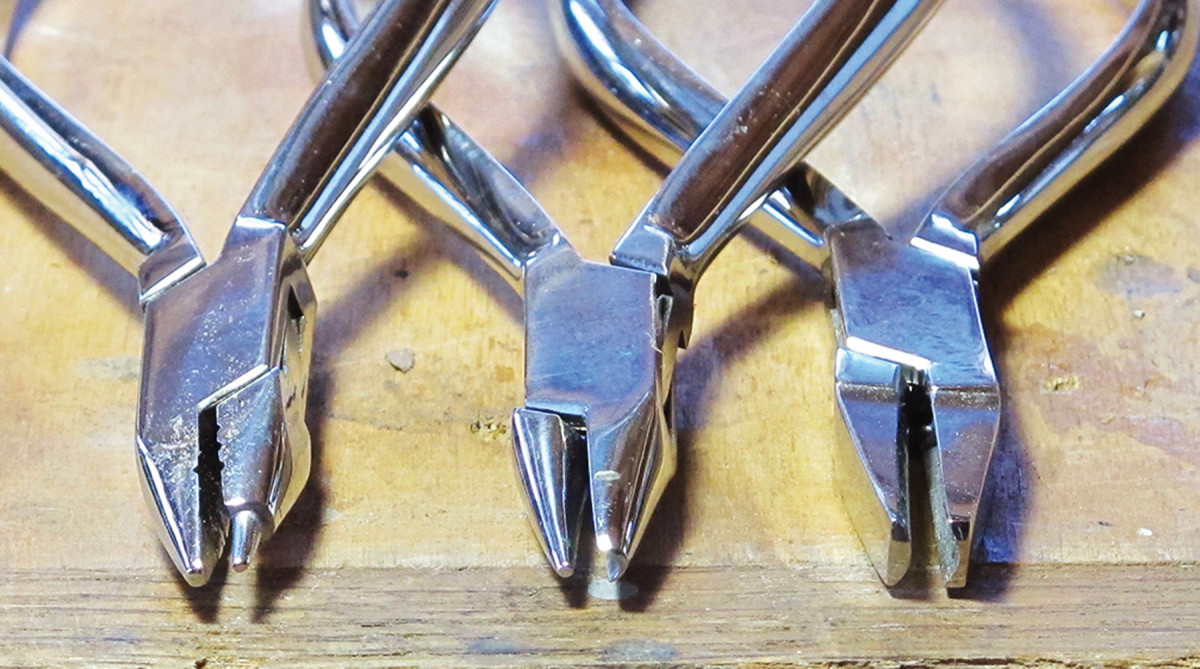
Once the wire has been flattened, it must be bent to the shape of the channel, for which I use jeweler’s filigree pliers.
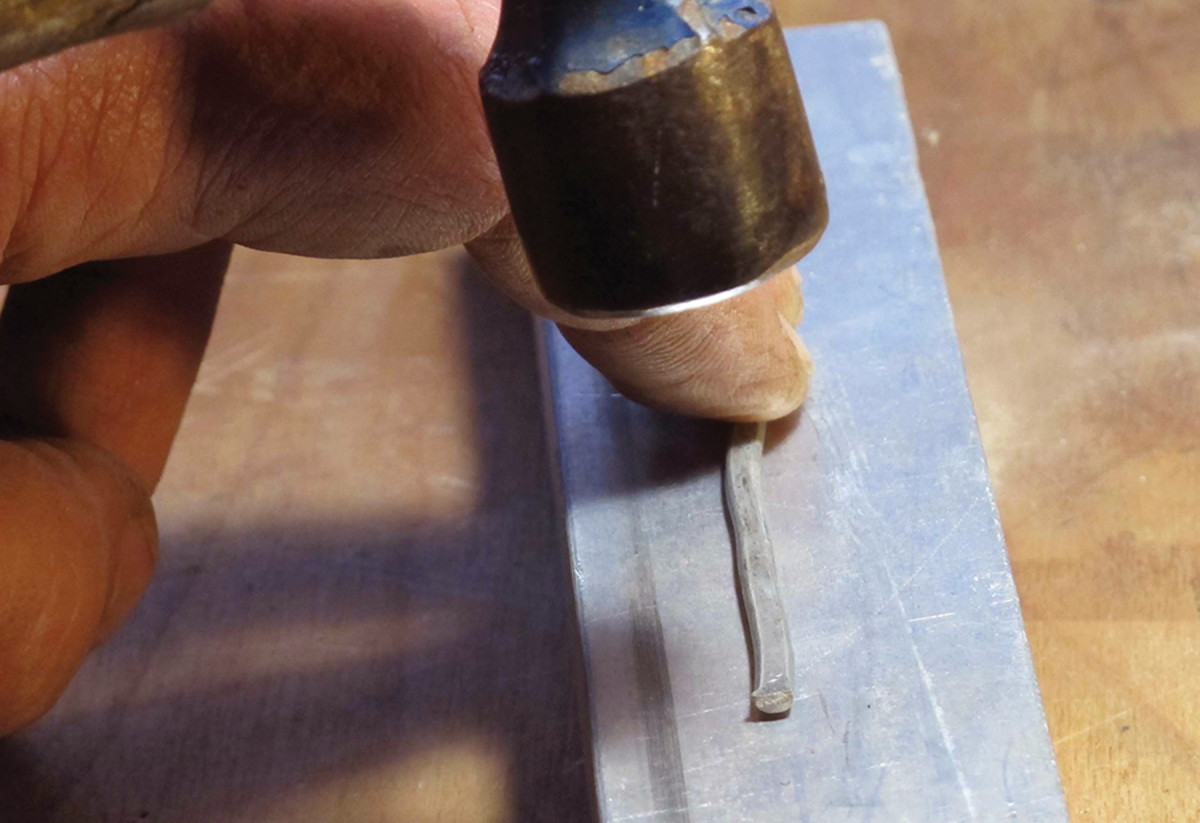
Strike zone. This is soft wire, so a strike or two will flatten the area of the hammer face.
You can just as easily use an extra pair of needle-nosed pliers, making sure to first remove any texture from the face of the jaws, then rounding the inside shoulders of the jaws with a diamond stone. (A boxwood tool, with a slot the exact dimension of the wire being bent, suffices equally well here.) With the pliers, gently bend the wire to fit exactly the opening into which it will eventually reside.
Make a Chasing Tool
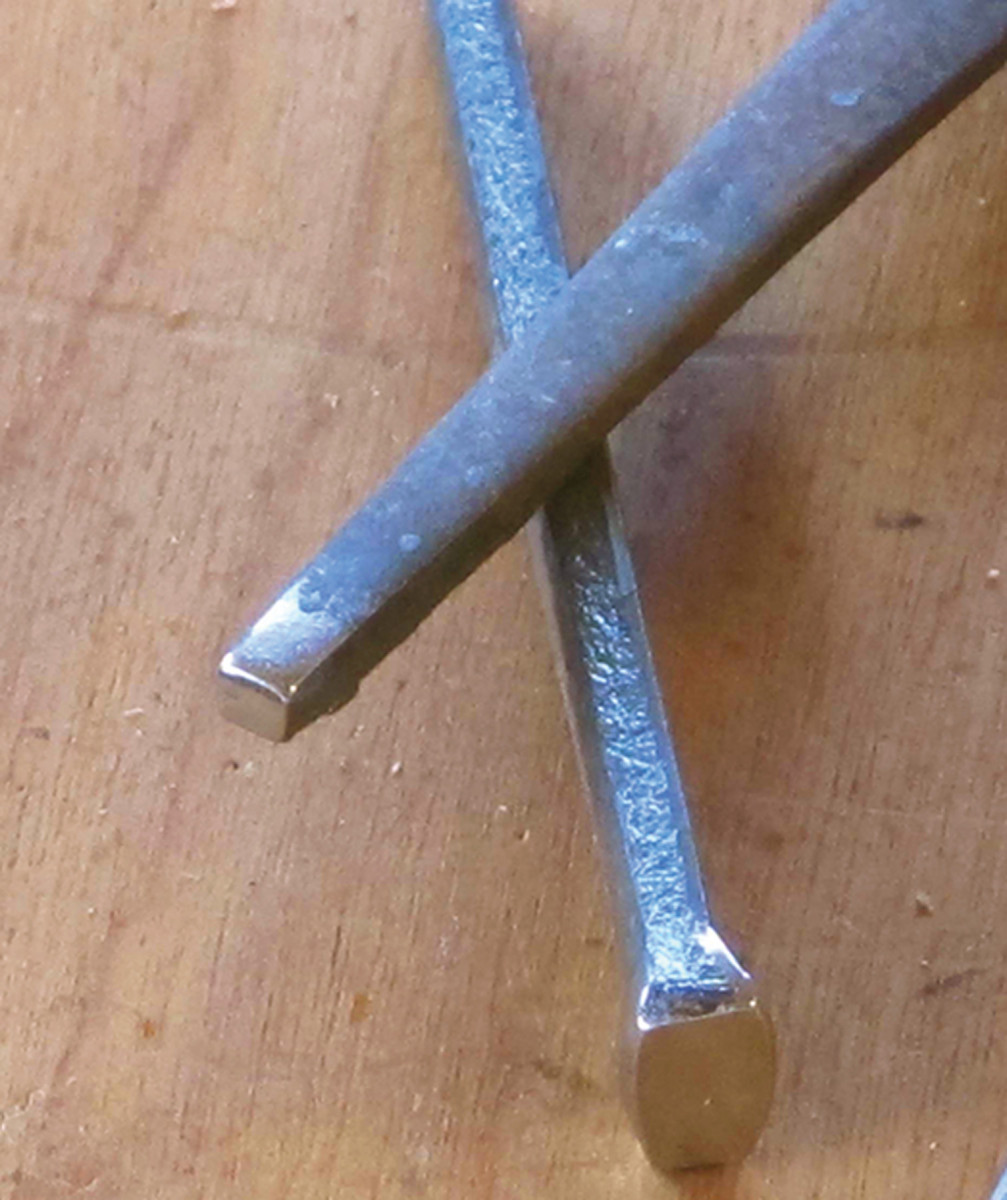
Very often in my work as a decorative arts conservator or creative artisan who works in a variety of materials – wood, steel, aluminum, brass, pewter, silver, ivory, mother-of-pearl, paper, leather, glass, plastic and composites, to name a few – I have needed one special tool to complete the task. Whether that tool was a special-shaped or precisely sized punch, a chasing tool (“chasing” is the process whereby you hammer the surface of a metal object using a punch-like tool and a hammer to create a desired surface texture), metal carving/engraving chisels, or a burnisher, many years ago I discovered a near-perfect source of the high-quality raw material from which I could make fine tools – concrete nails. I especially like them because they are easily available and ultra-cheap, yet perform and work nearly as well as expensive tool-steel stock.
I start with a nail of the preferred size and gently work the tip on a coarse water wheel to shape it. Generally, I use a Makita flat-wheel sharpener with an #80-grit wheel. The water wheel keeps the workpiece cool and allows the temper to remain intact for these exceedingly hard but sometimes brittle fasteners. (On rare occasion I will de-temper a nail before working it, such as when I need to bend the tool shank, then re-harden it when all finished.)
Once the rough shape is accomplished on the water wheel, I move to a diamond stone to finish off the shape, then buff the tip to a mirror surface on a buffing wheel. For chasing tools with a specific shape, I will impart that with a set of diamond files or slipstones before buffing. For metal-carving chisels I sharpen them like any other carving tool.
Both tapered case-hardened and round fluted concrete nails work fine, and each has their advantages. Both come in a variety of sizes. Flat-cut nails have one small end and one large end, and sometimes one or the other is preferable. Fluted nails come essentially round in cross-section, so when I need to make a precise pin punch, that is where I start.
The best part for me is that because the concrete nails are so common and inexpensive, I don’t feel the need to treat them as precious objects. Yes they are high-performance tools, but they are cheap high-performance tools and I can make another one any time I need to.
— DW
Inletting & Finishing Inlay
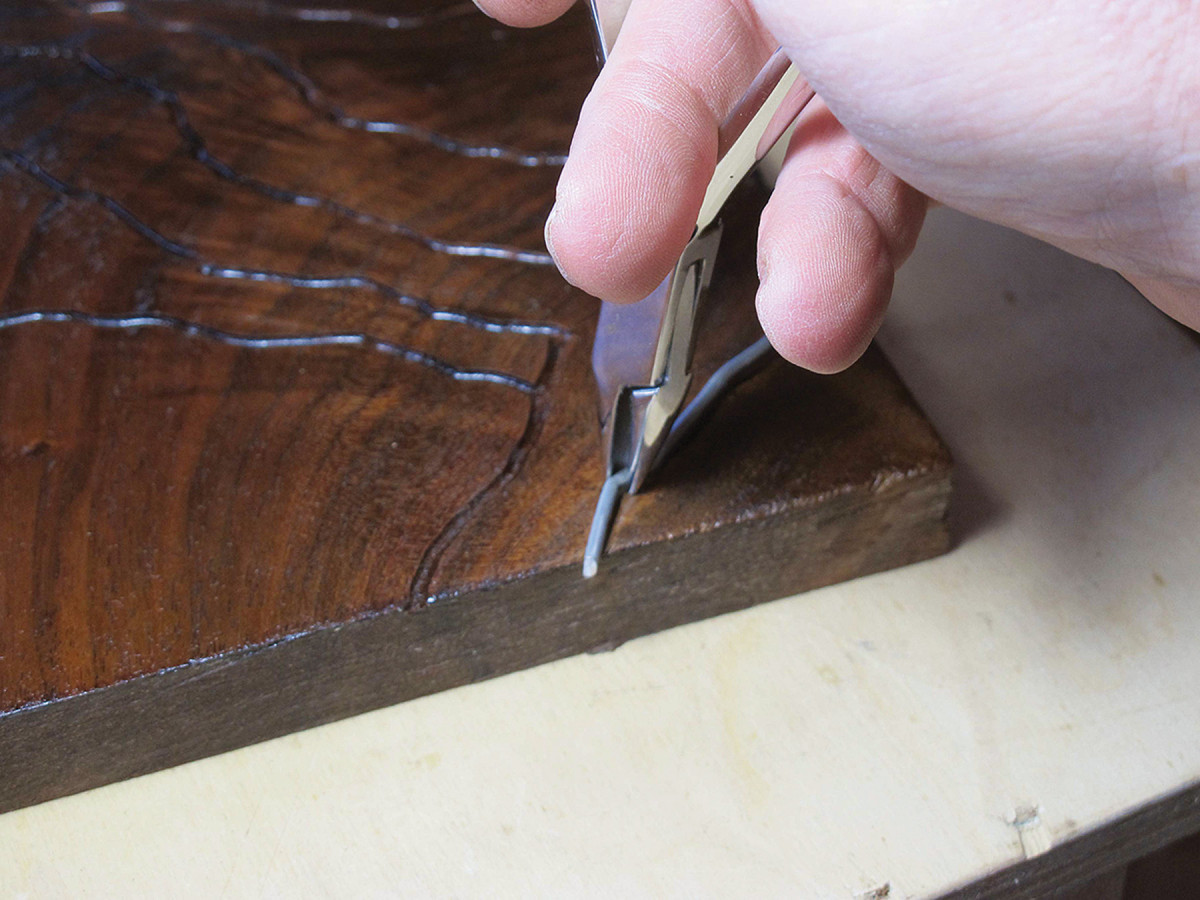
Go digital. While jeweler’s filigree pliers are valued for bending brass or silver wire, for smaller-gauge soft pewter solder, fingers will suffice.
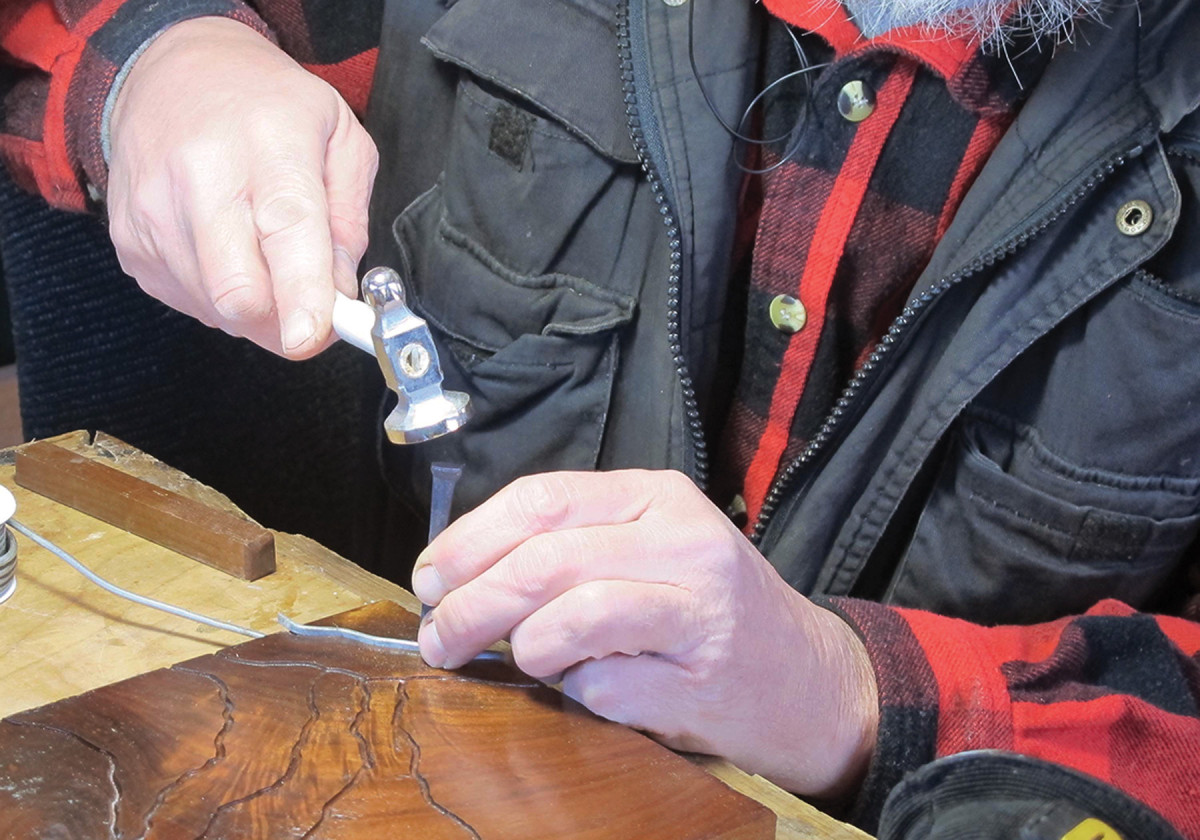
Once the wire has been conformed to its channel, gently press it down into place. For this step I use a type of a punch often called a “chasing tool” that I make myself out of case-hardened concrete nails.
No regrets. Take the time to get the fit perfect. Otherwise you will regret the unsatisfying result.
With a small hammer and a light touch, I gently drive the wire down until it is fully set against the bottom of the channel, then continue working with my hammer and chasing tool to mushroom the slightly flattened wire to fill completely the channel.
 Once the wire is fully housed in the channel, I then decide whether it needs any adhesive to secure it in place. Usually any looseness will be overcome by subsequent applications of finish, but in cases where I am less confident, I will prepare some epoxy and either place a bead at the bottom of the channel, or thin it with a little acetone, then wick it in around the inlay, making sure to wipe up the excess immediately. Leave the wire alone until any adhesive has set up completely.
Go lightly. If you first bend the wire carefully, chasing it down into the channel is an easy task. Simply work your way down the length of the wire and tap it into place. Caution: Don’t beat on the wire too hard; that will distort it upward and cause it to not fit cleanly.
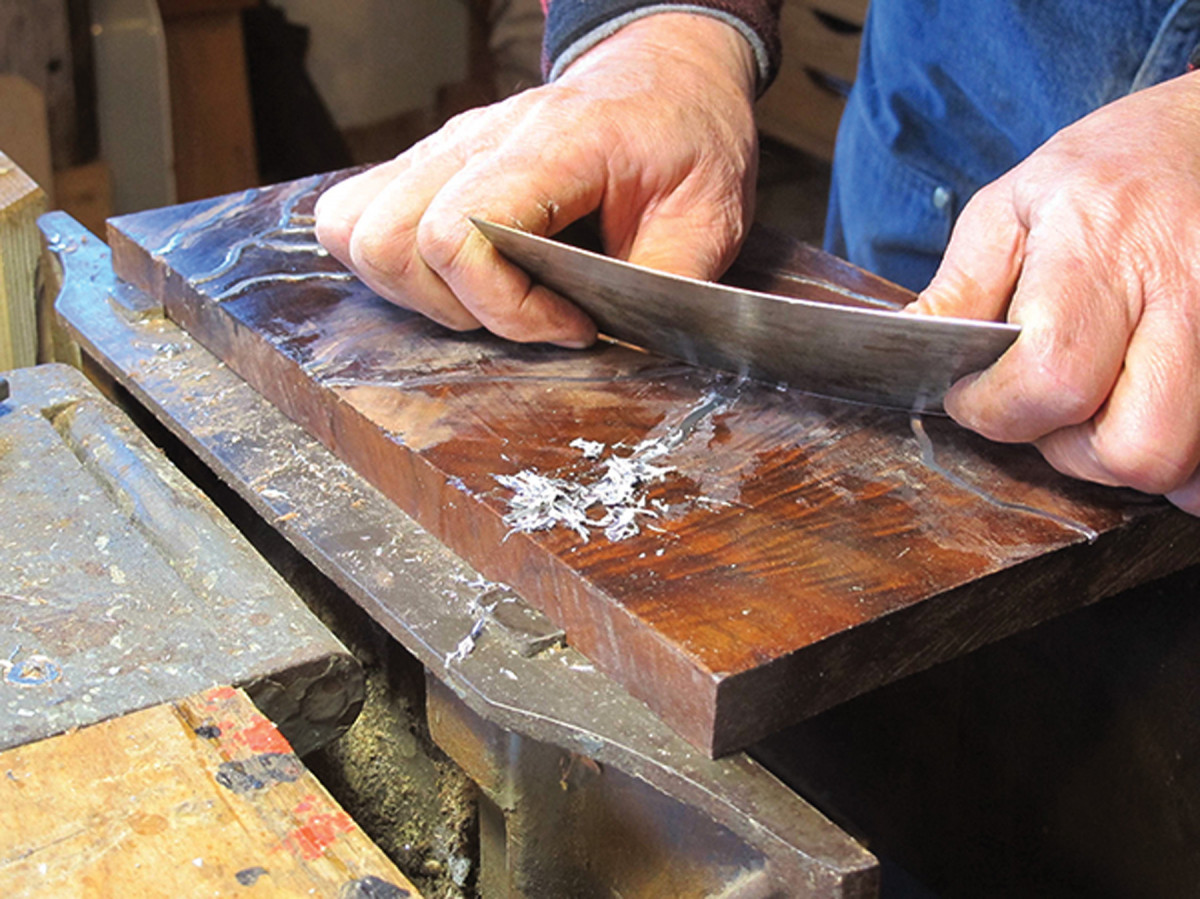
Not a tough scrape. Scraping the wire inlay flat is simple because the wire is much softer than a card scraper. Just make sure to work along the length of the inlay so you don’t snag and risk dislodging it.
With the wire fixed in place, you can proceed with whatever finishing scheme you want to employ. This can be as simple as scraping the surface totally flat with a card scraper.
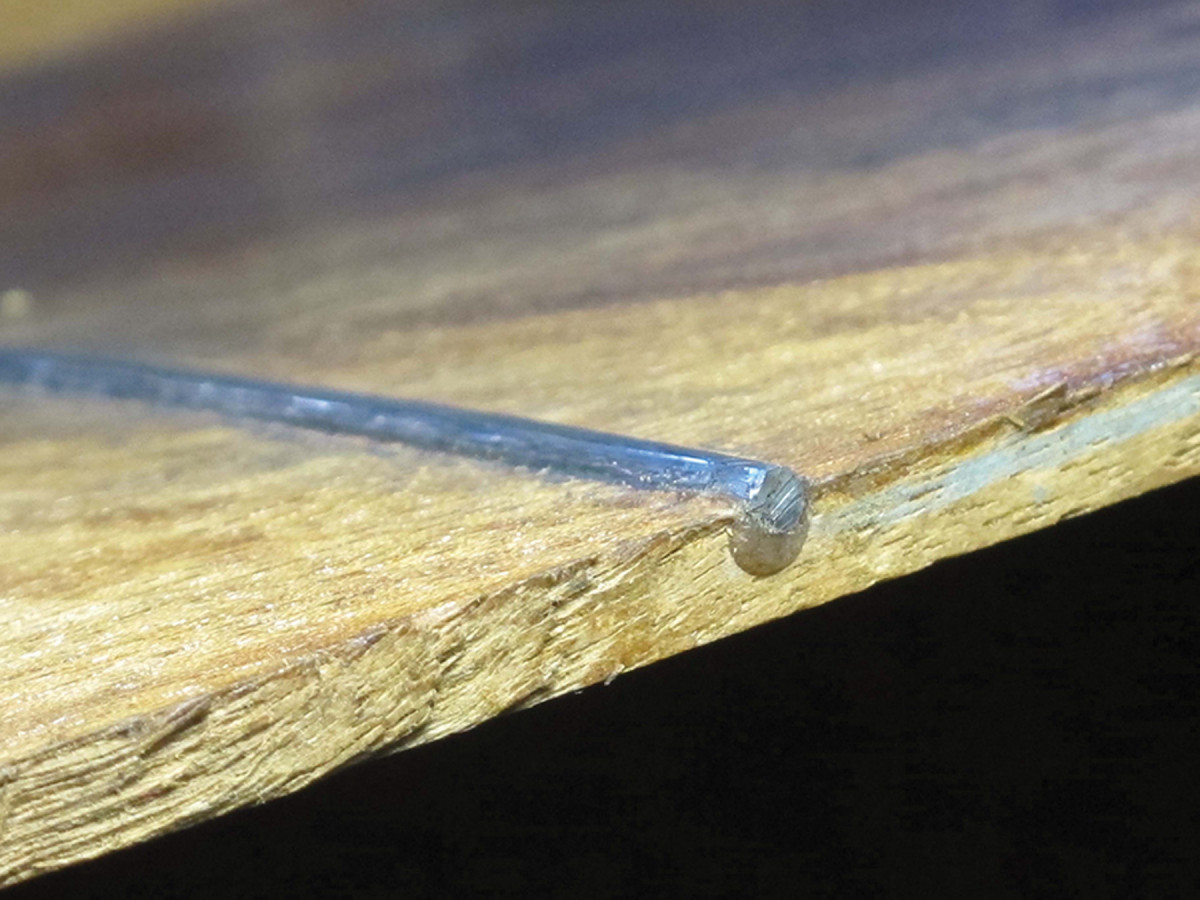
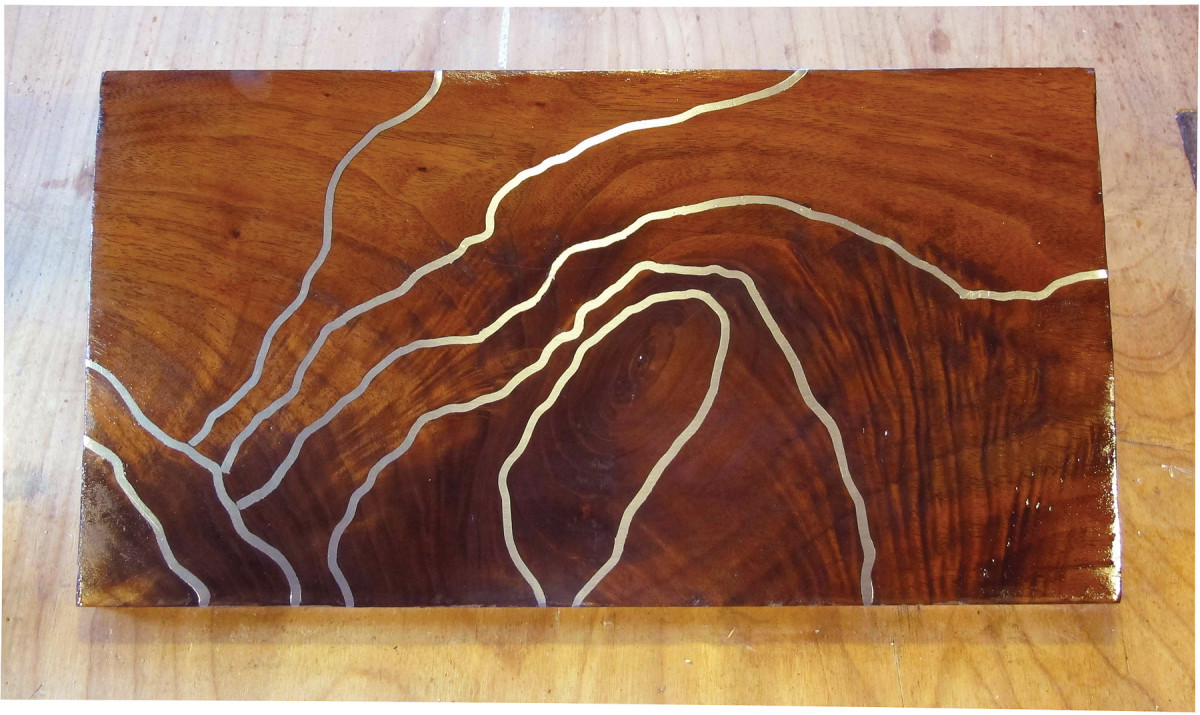
Popped. Leaving the inlay proud of the surface is an eye-popping detail.
Another option is to leave the wire proud of the surface and burnish it with another homemade “nail tool,” then move on to whatever applications of finish you want so that it is a glistening design element much like that used by Greene & Greene in some of their work.
Visit the author’s website at donsbarn.com.
Here are some supplies and tools we find essential in our everyday work around the shop. We may receive a commission from sales referred by our links; however, we have carefully selected these products for their usefulness and quality.