


We may receive a commission when you use our affiliate links. However, this does not impact our recommendations.
A slick technique makes the divided-light door a snap.
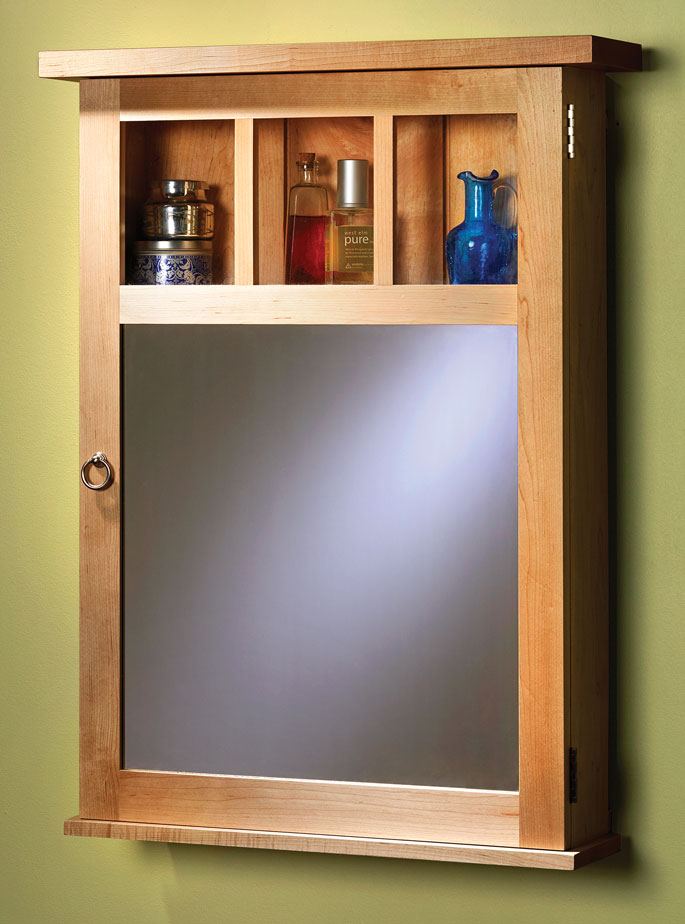
In 2008, I built a contemporary maple chimney cupboard to hold towels in my bathroom. Eight years on, I decided it was time for a matching medicine cabinet – in large part because the house I recently bought has solid masonry walls, so I needed a nice-looking mirrored cabinet that can hang on the wall rather than be recessed.
So, using that 2008 piece as a starting point, along with a similar piece that hangs in a friend’s bathroom, here’s what I came up with: a simple-to-make maple medicine cabinet that takes its cues from Arts & Crafts, but with joinery and style details that give it contemporary appeal.
Case Construction
When I initially modeled this cabinet in SketchUp, I used dovetails to join the carcase. But when it came time to build, I decided to use loose tenons instead. The resulting clean lines on the sides (no end grain) seem more in tune with an updated look, and loose tenons are plenty strong enough for this application.
But there is, of course, no reason you couldn’t use dovetails (tails on the sides), or even dowel joints.
The Festool Domino, however, plus a trick for the divided-light glass door I picked up from David T. Smith (more on that later), allowed me to make this piece in about 12 hours of shop time.
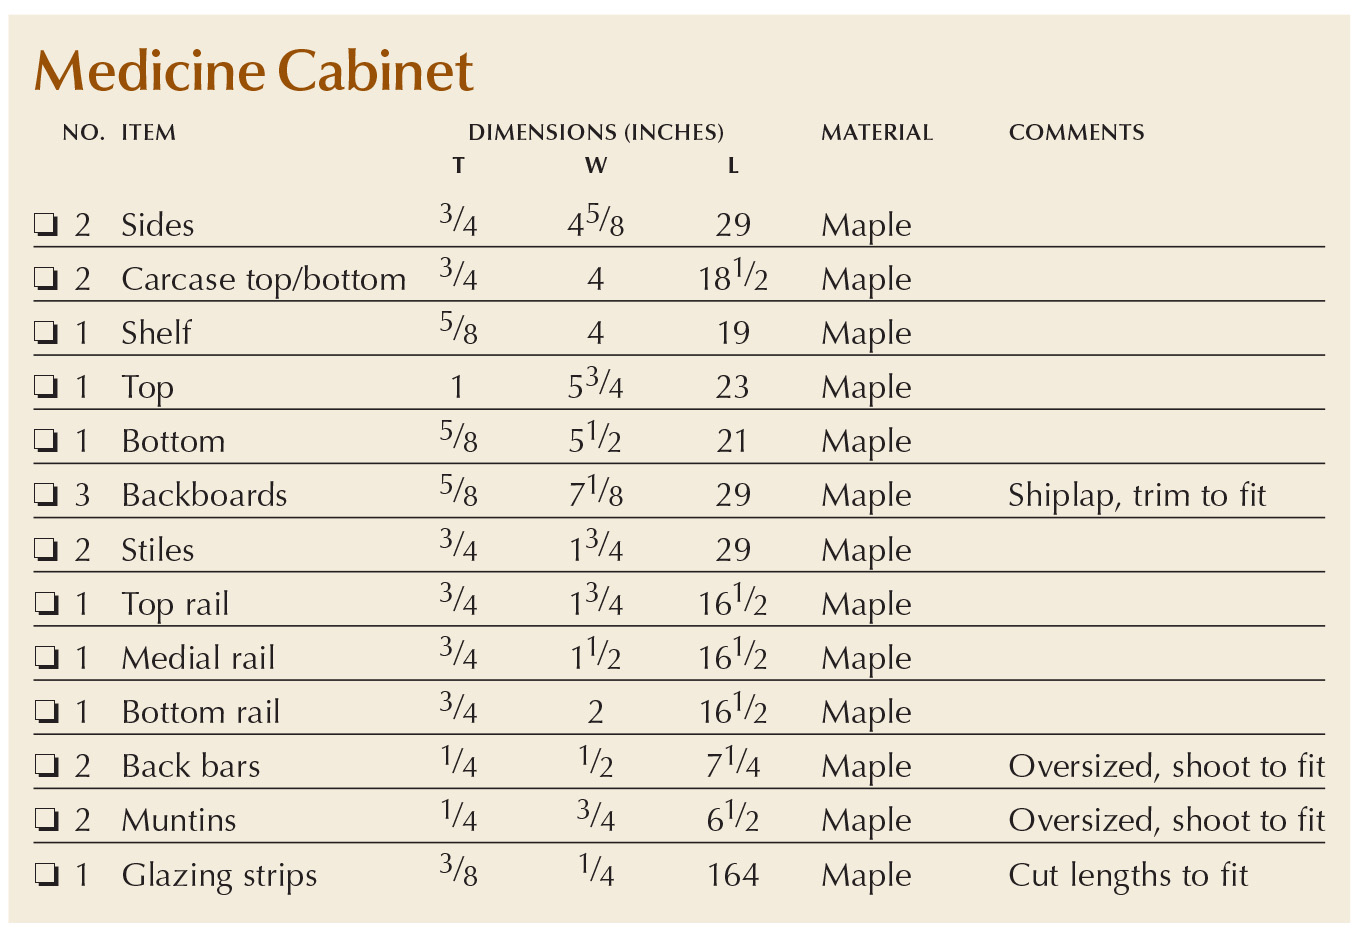
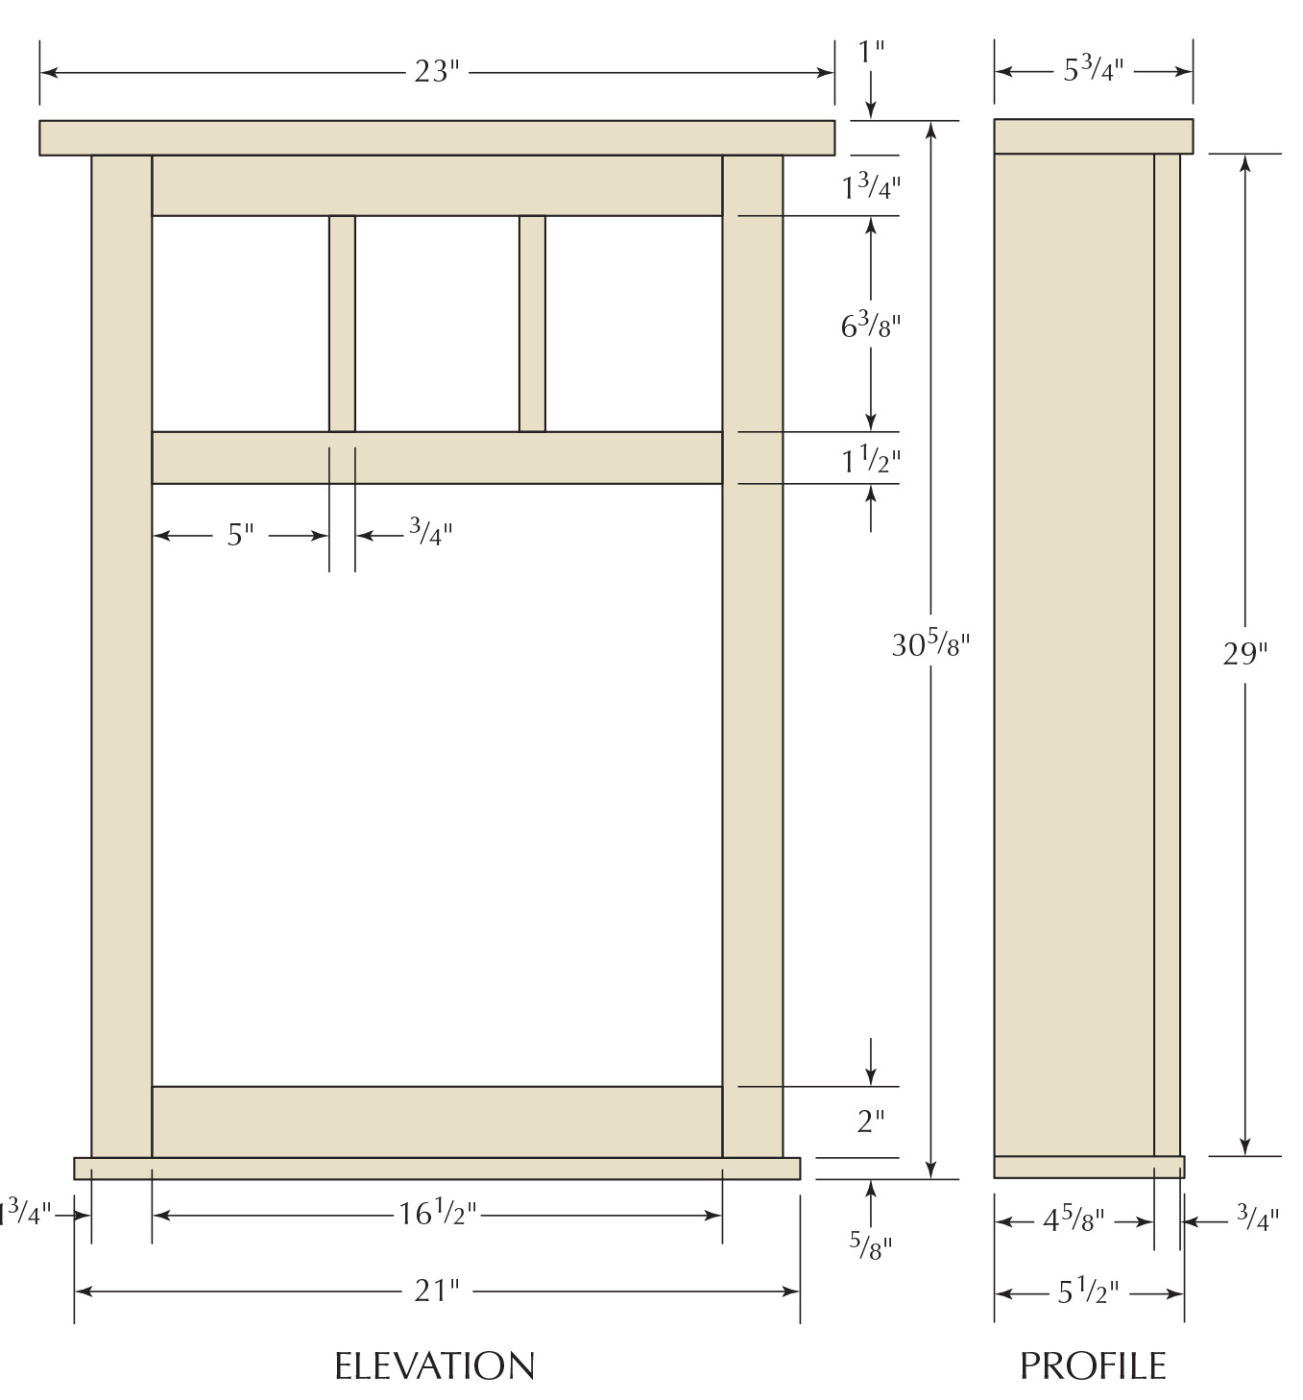
After surfacing and cutting my four case pieces to size (note that the top and bottom are 5⁄8” narrower than the sides), I set up a dado stack on the table saw to cut 5⁄8“-deep x 1⁄2“-wide rabbets on the case sides to house the backboards.
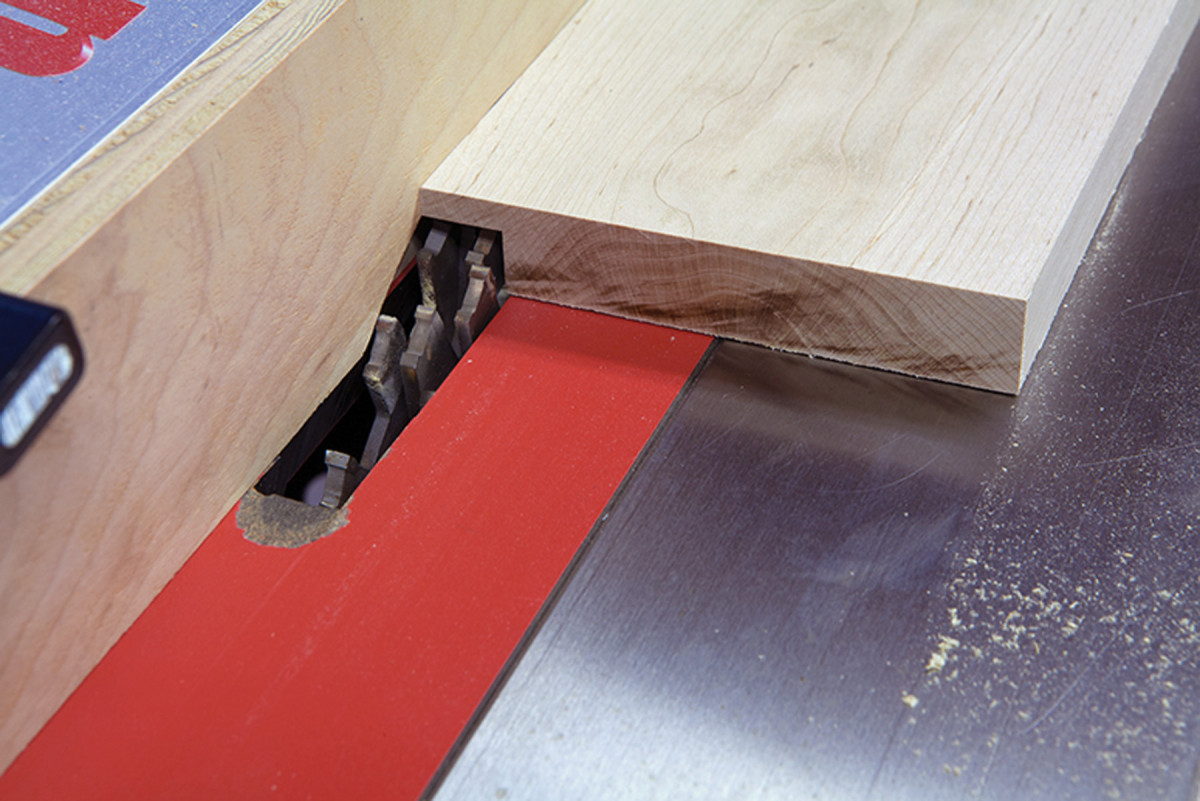
Efficient setup. I decided on 5⁄8″-thick backboards and a 5⁄8″-thick fixed shelf. That allowed me cut both the rabbet for the backboard (above) and the dado for the shelf (below) with one dado stack setup at the table saw. (I used a similar setup later to cut shiplap joints in the backboards.)
 I then laid out the shelf location on both side pieces so the shelf will be hidden behind the medial rail of the door, and lowered the blades to cut 5⁄8“-wide x 1⁄4“-deep dados.
After checking to ensure the shelf dados lined up across the two side pieces, I laid out the locations of the Dominos.
To do this, butt the matching corners of the sides and top/bottom pieces together, make sure they’re perfectly aligned on the front edges, then mark across the end grain of both pieces wherever you want a loose tenon (I decided on three at each corner – overkill, really). Separate the pieces, then carefully carry the lines around to the mating surfaces.
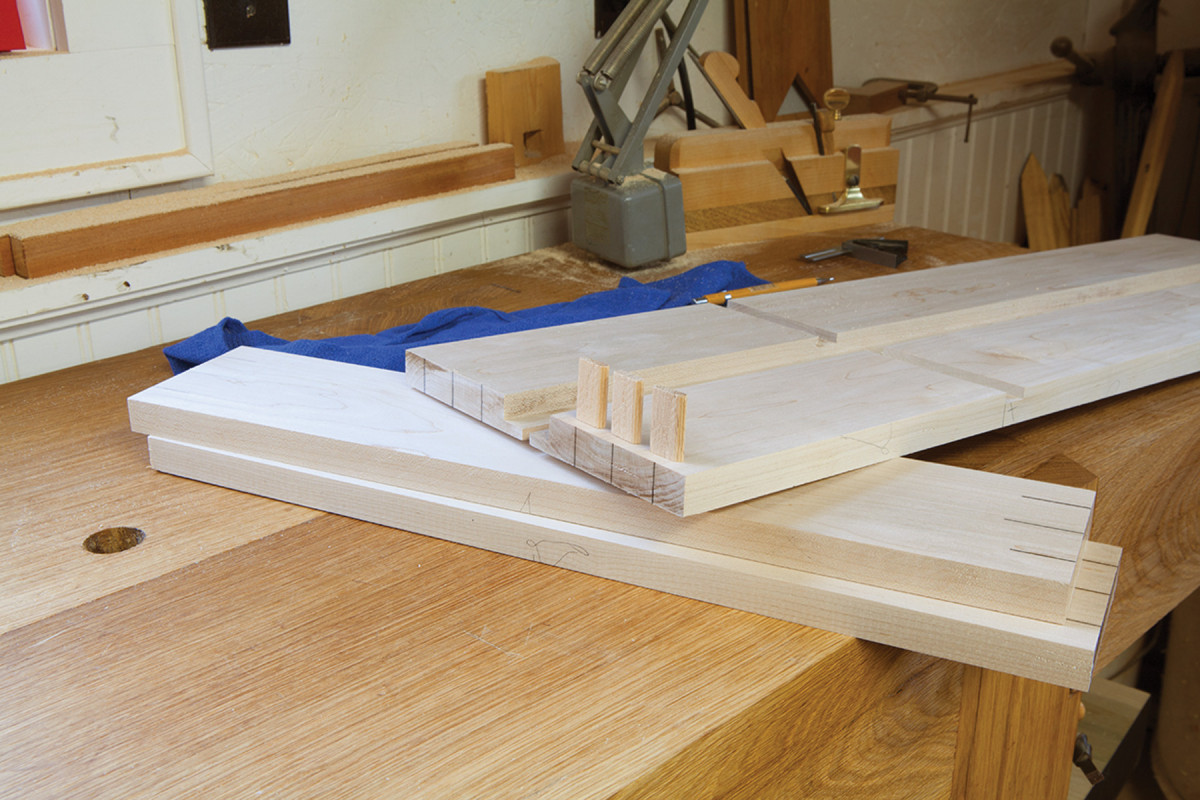
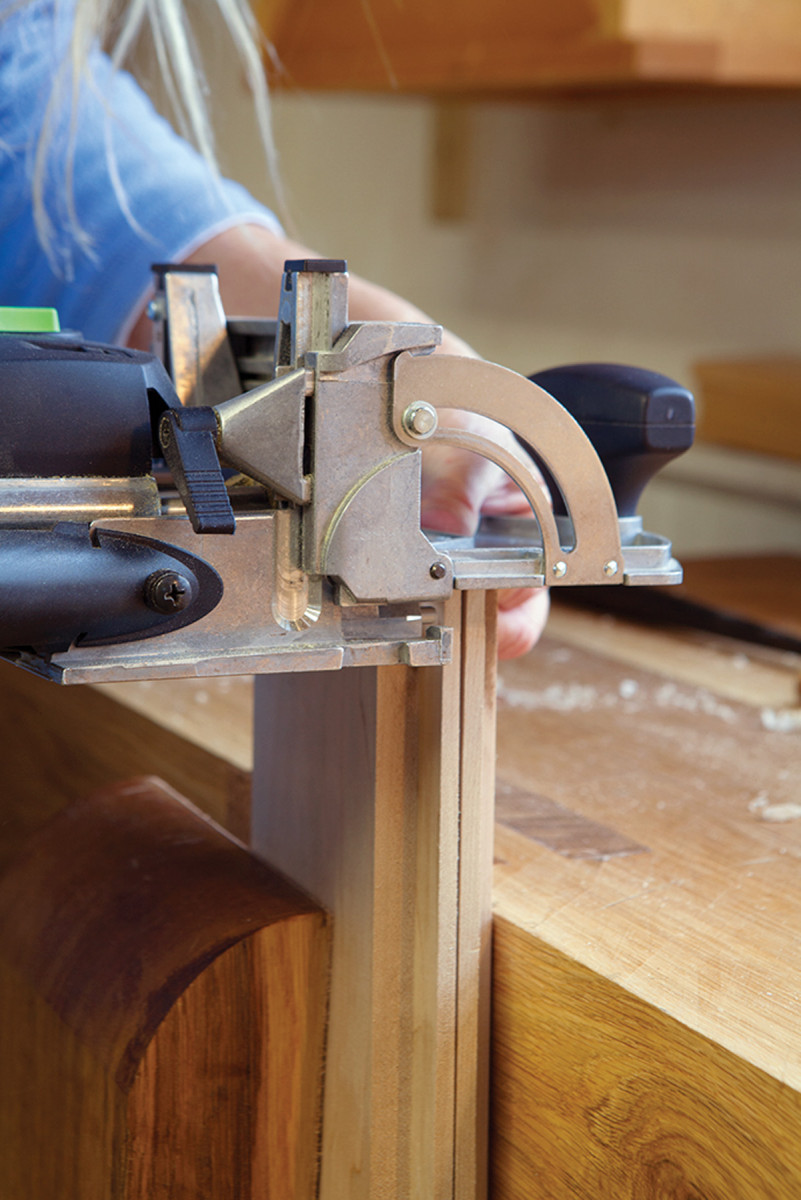
Domino layout. Make sure your lines match up and you can see them – layout (and good cuts) are key to a smooth glue-up.
The Festool Domino, which is sort of a combination plunge-cut drill and biscuit joiner, can be adjusted for a tight mortise, a slightly less-tight mortise and a loose mortise. At the front edge of every corner, I set the cutter for a tight mortise; for the other two, I changed to the medium mortise (which is but a millimeter or two wider). This ensures that at glue-up, the front edges are perfectly aligned but there’s just enough play in the middle and back mortises to get everything together easily.
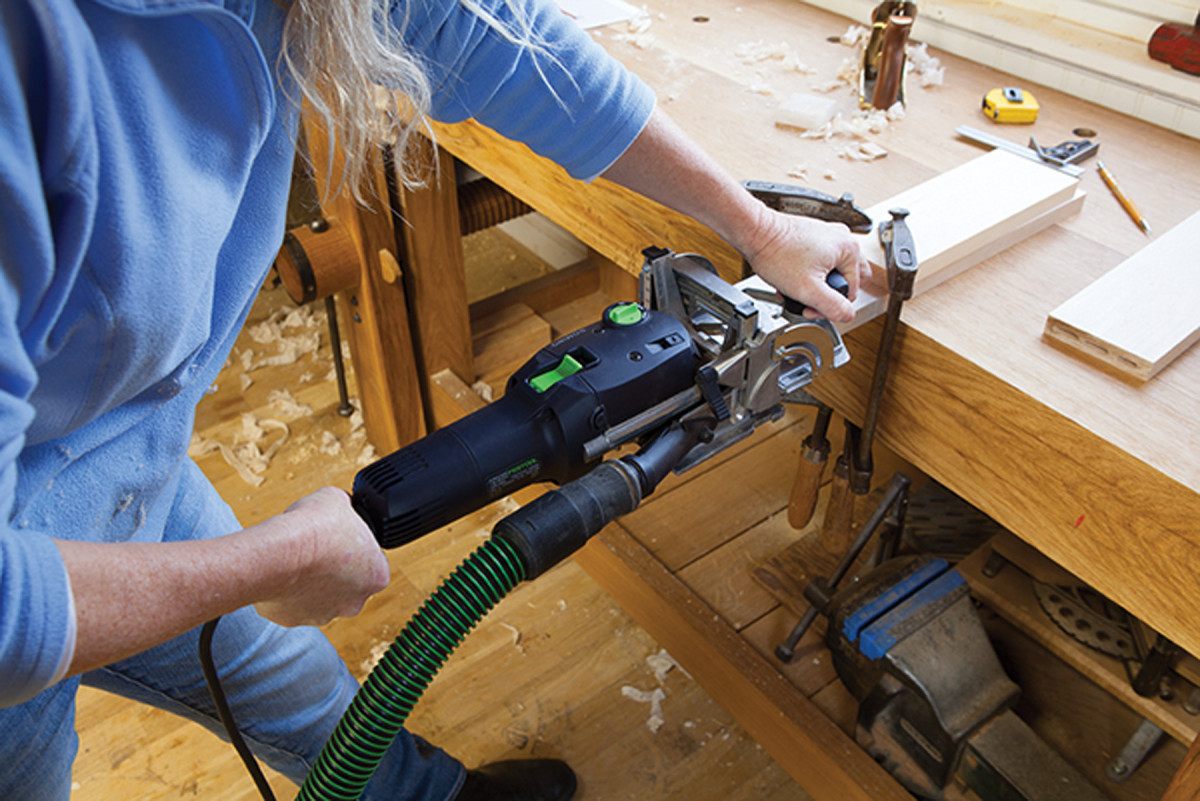
Get a grip. Ignore that thing that looks like a handle at the back of the Festool Domino. If you grip there while plunging the tool, you’re more likely to tip off horizontal. Concentrate on keeping the fence registered flat to the workpiece with your off hand; grip loosely at the base of the cord connection with your dominant hand and push forward.
Now cut the shelf to size and fit it to its dados. I like to plane underneath just at the ends if things are too tight. You’re (hopefully) removing such a small amount of material that it’s not noticeable to the naked eye.
Pinch. While cutting the mortises on the inside face of the sides, it’s a bit more difficult to register the fence flat. Extend the support surface for the fence by butting the two sides together (which in this case provides and extra 3⁄4″ of bearing surface), and pinch the fence to the work with your off hand.
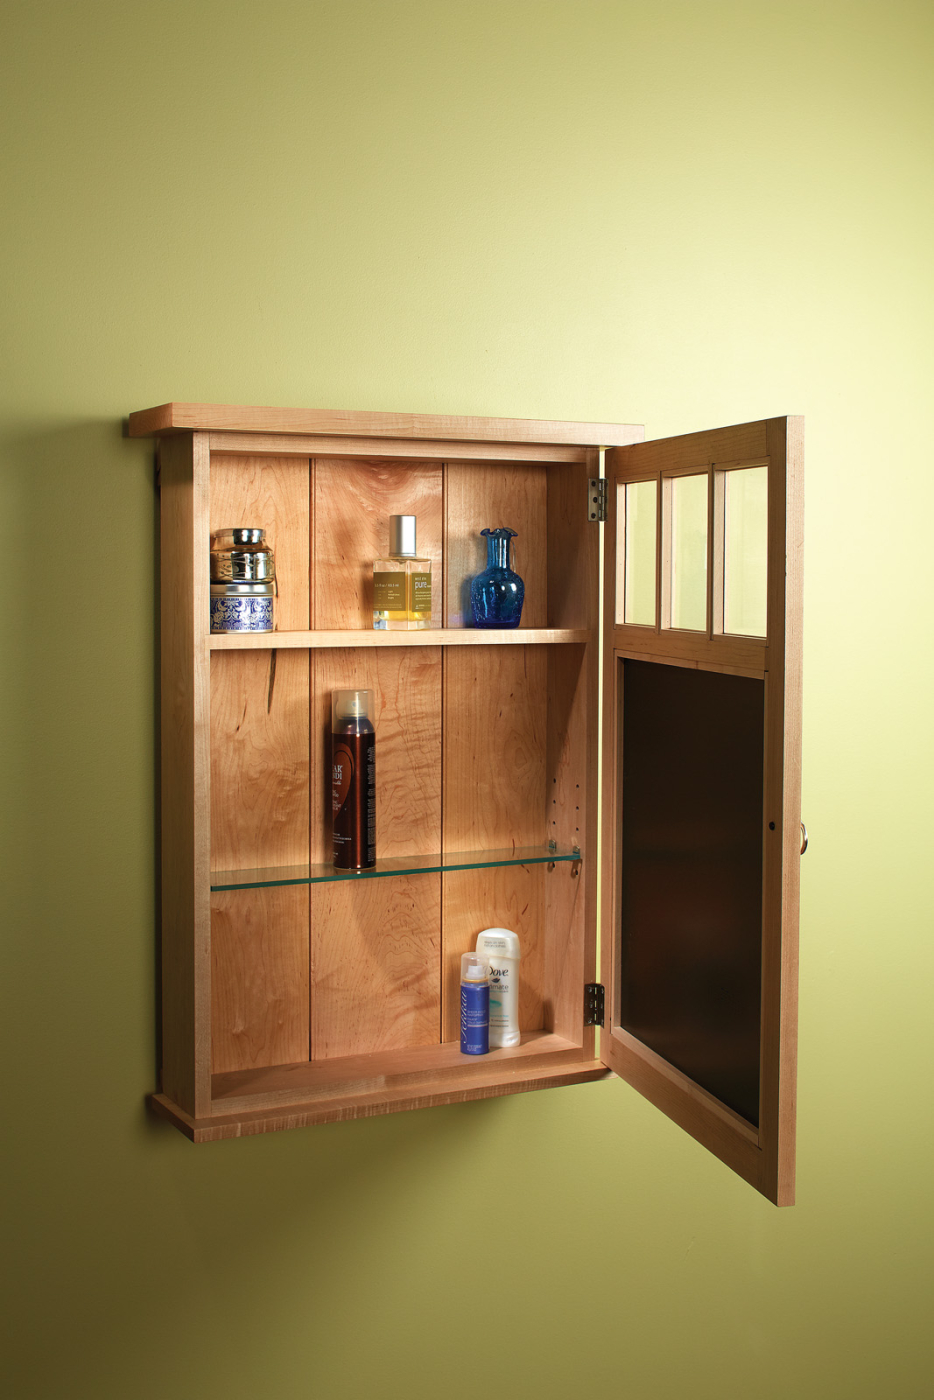
The last task before gluing up the carcase is to lay out and drill shelf-pin holes for an adjustable shelf. I used a pair of dividers to walk off the hole locations about 5⁄8” off the front and rabbeted edges; the holes are spaced 1″ on center. I decided (based on the size of some of my toiletries) on five possible shelf locations in the bottom section of the carcase. Your needs may vary.
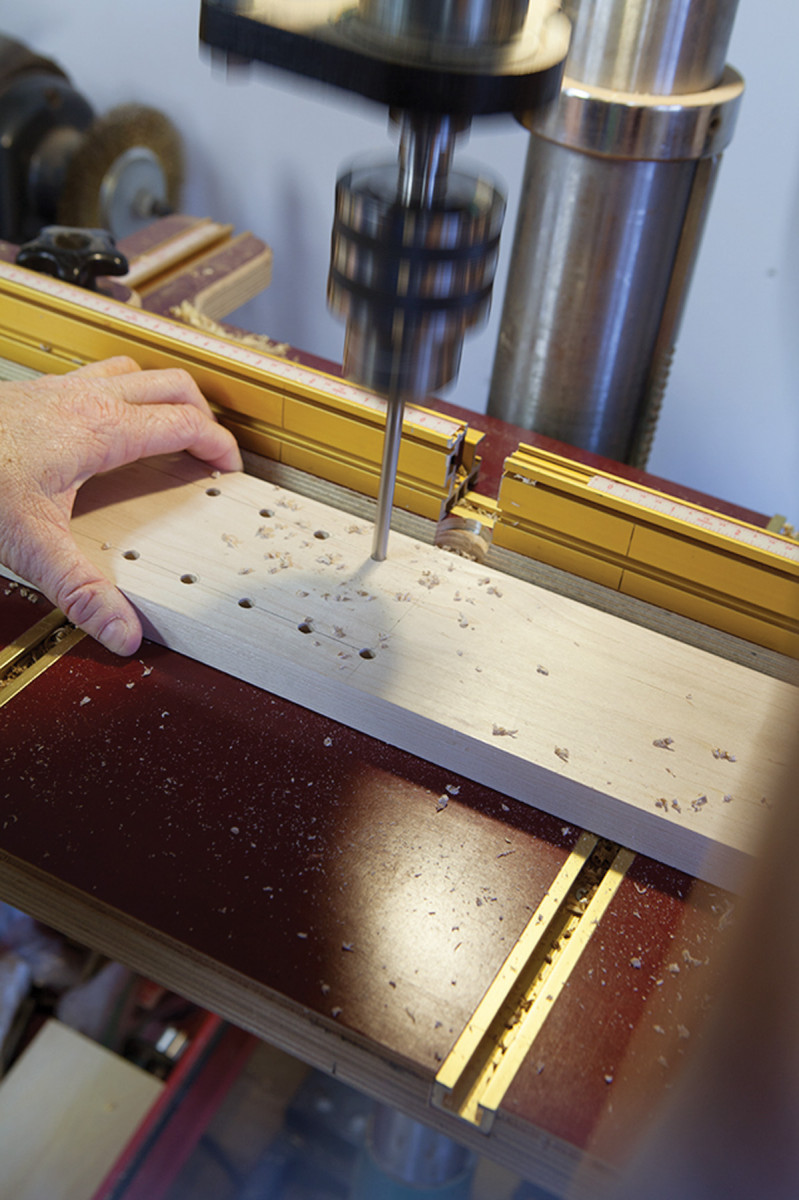
Level. A drill press makes quick and perfect vertical work of drilling the shelf-pin holes. But if you don’t have a drill press, these can easily be drilled by hand – and there are dedicated shelf-pin bits that limit the depth and center the hole, available at any woodworking store.
I then used a drill press to drill 1⁄4“-diameter x 3⁄8” deep holes.
Clean up the interior surfaces of the case, and the top and bottom of the shelf. I used a smoothing plane, though a random-orbit sander works perfectly well, too.
Start the glue-up by painting glue on the loose tenons and inserting them into one of the side pieces (the tight-fitting tenons at the front edges will require some gentle persuasion), then attach the top and bottom. Add glue in the shelf dado and put the shelf in place, then glue the other side piece in place on the Dominos, and clamp across the width at the shelf, top and bottom.
Note: Hide glue is more slippery than PVA – I find it makes glue-ups (and cleanup) easier.
Medicine Cabinet Cut List
 Beaded Backboards
Set the carcase aside for the glue to dry, and move on to the backboards.
Typically, I like painted backboards, but to my eye, that didn’t work with this aesthetic. So I used the last of the maple I had in my stash (one of which was a cantankerous piece indeed) to cut a three-piece back with shiplapped joints. And because the table saw was still set up with a 5⁄8“-wide dado stack, the shiplaps are 5⁄8” wide. This build is all about efficiency.
But that doesn’t mean I was willing to eschew a traditional bead on the edges – I’ll be looking at the interior at least twice every day – might as well enjoy the view.
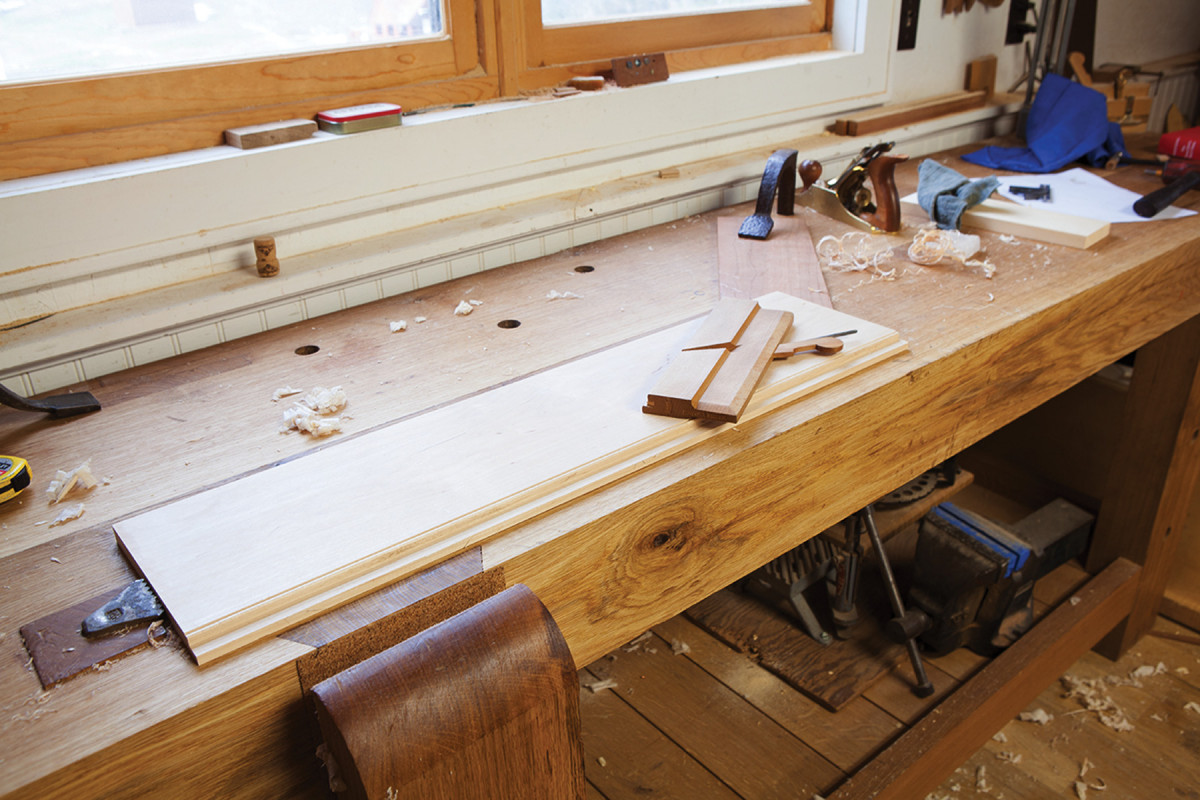
Beaded. After planing the face of the backboards smooth, I cut a 3⁄16″ bead where the shiplap joints meet. Note that the bead is cut on the full 5⁄8″ thickness, not on the rabbeted surface of the mating piece.
As I noted earlier, the top and bottom of the carcase are narrower than the sides by the width of the backboard rabbet – that’s to allow the backboards to run from top to bottom, so they can be secured to the back edges of the top and bottom.
I drilled countersinks and pilot holes – two at each corner of each of the three backboards, top and bottom, and used 1″ x #8 screws (#6 would do, but I didn’t have any at hand) to secure the backboards in place. I reamed slightly all but the four corner holes to allow the backboards to expand and contract with seasonal movement (not to mention the constantly fluctuating humidity of a bathroom).
Screwed. A screw at each corner (reamed slightly to allow for movement) will keep the back in place. Note the tearout…that would be the cantankerous board I mentioned. The front is smooth; that’ll do.
I also used four screws on each of the two outside edges – be careful there; it’s all too easy to poke through the side when drilling into the rabbet.
Divided Door
The door is joined with one Domino at each corner, and one at each end of the medial rail. Again, take the time to get the layout right and register properly on your marks before making the cuts.
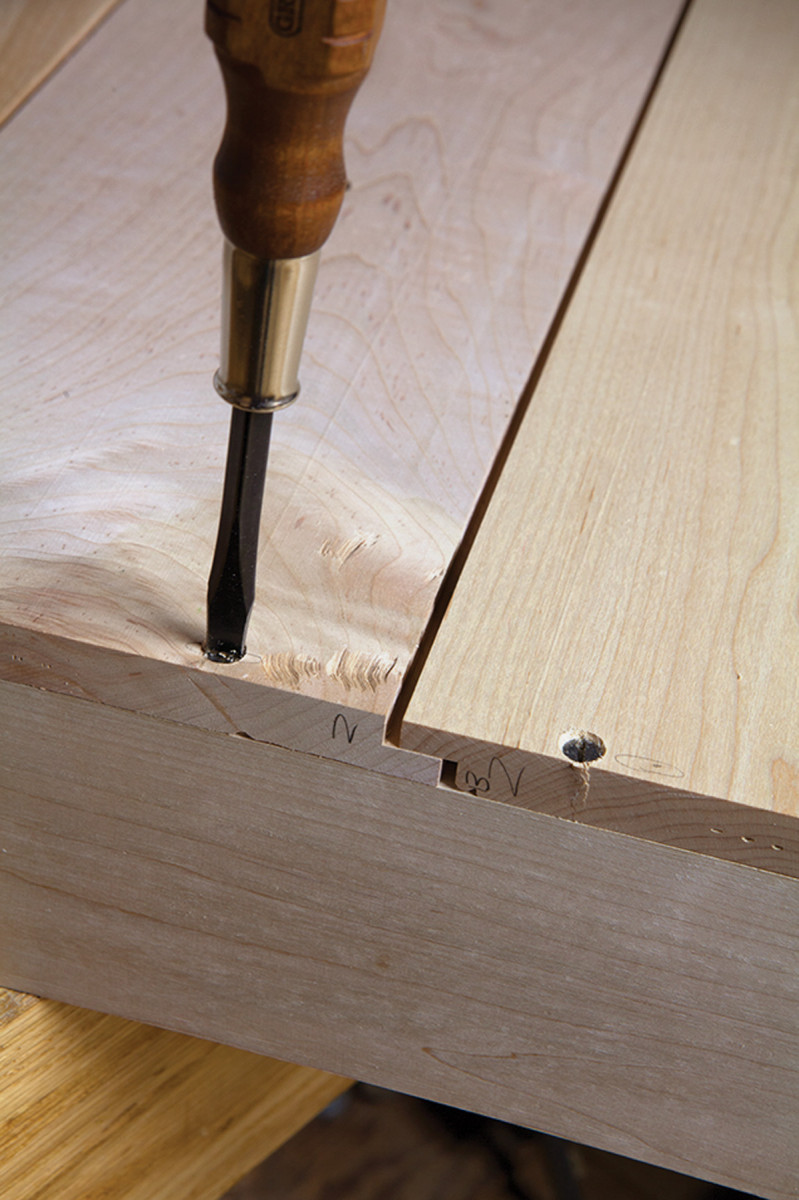
After the glue dries, rout a 1⁄2“-deep x 3⁄8“-wide rabbet on all four edges of each opening, and square the corners with a chisel.
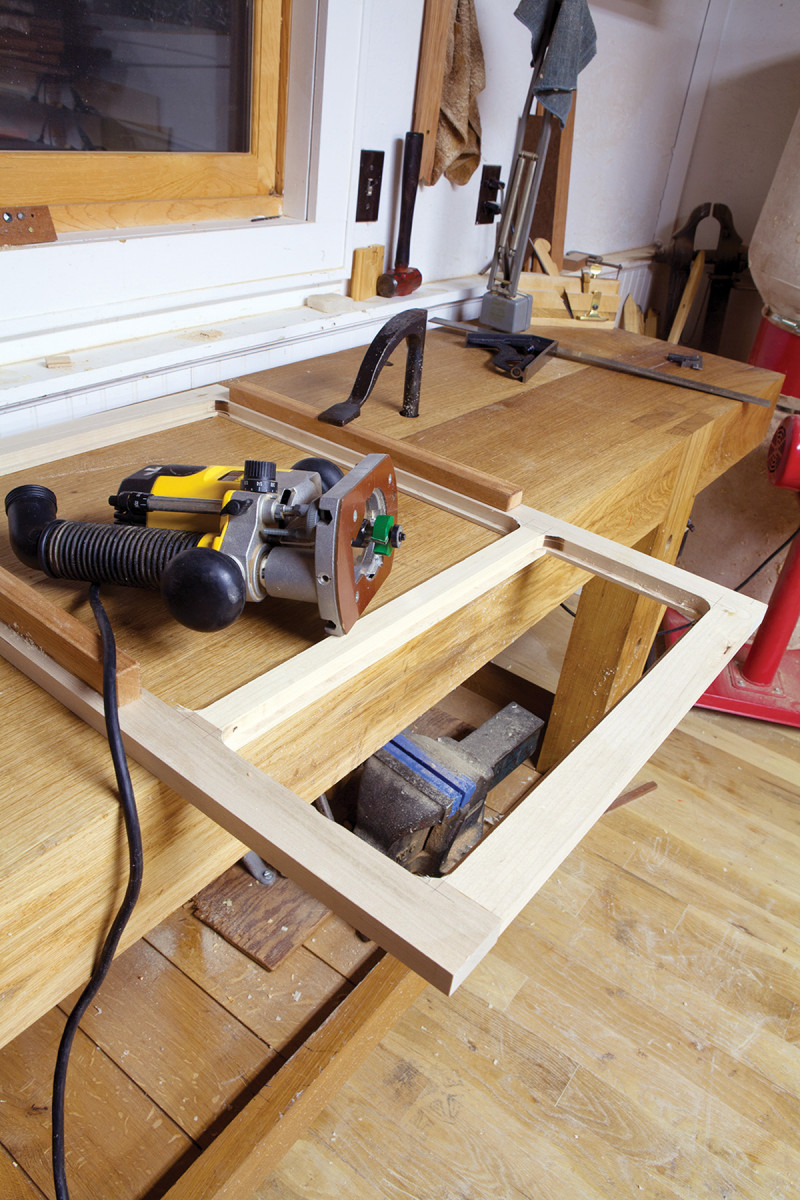
Rout it out. A rabbeting bit and router makes quick (if messy and loud) work of cutting rabbets, but you do have to square the corners with a chisel…or cut your glass with round corners.
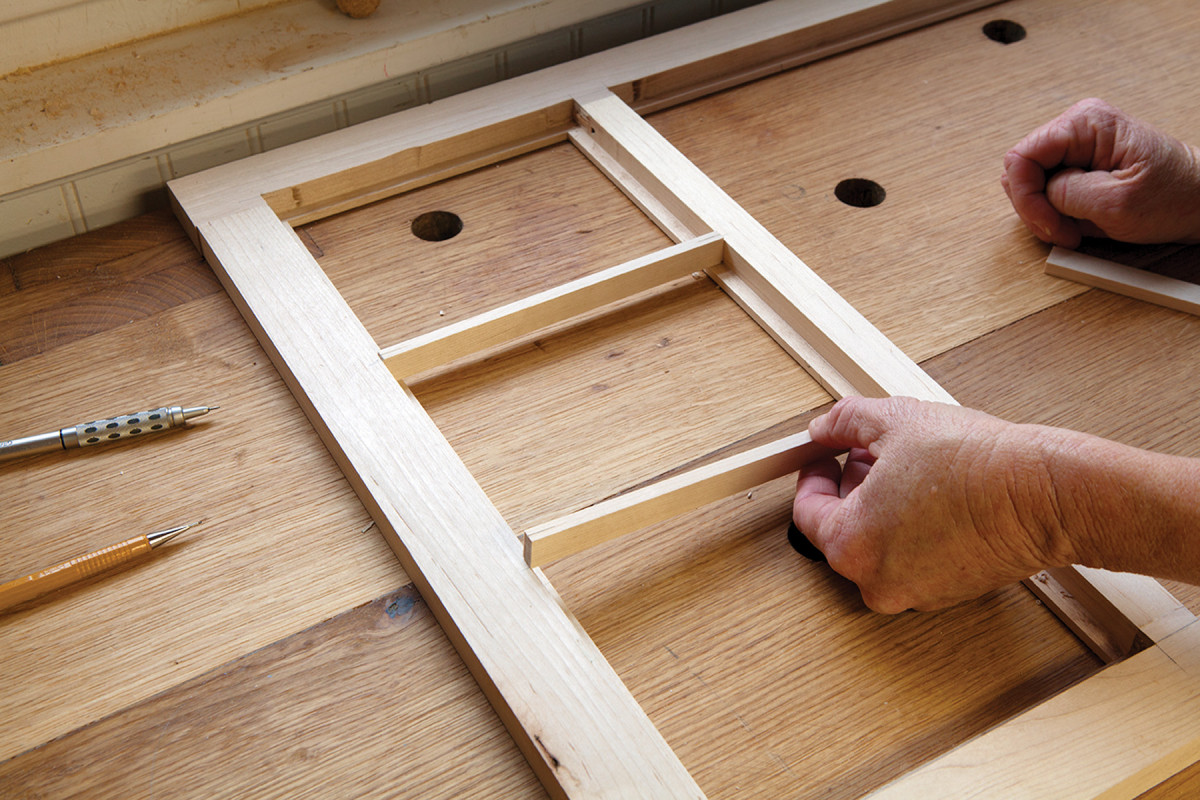
Now comes the fun part – Smith’s quick and clever method for dividing a door – it’s most effective for flat muntins, which don’t require coping. Each divider is simply two pieces of wood – a front piece, which I’m calling the muntin, and a back bar (or retainer strip) that sits in the rabbet.
First, use dividers to lay out the approximate locations of the two muntins in the rabbet, top and bottom (it’s approximate because the final locations will shift a tad in relation to the width of your muntin stock).
Now prepare enough 1⁄4“-thick stock for the two back bars, plus a piece or two extra, just in case. The width should match (or be just a little proud) of the depth of the rabbet – so in this case, 1⁄2“.
Press fit. You want the back bars (or retainer strips) to fit tightly top to bottom in the rabbet. A shooting plane will help you sneak up on the perfect fit.
Cut two pieces just a hair overlong, then shoot the length for a perfect fit, and mark a centerline at the top and bottom of each piece.
With the back bars dry-fit, cut the 1⁄4“-thick stock for the muntins (those need to match the thickness of the frame in front of the rabbets).
Again you’re going for a perfect fit – any gaps will be noticeable.
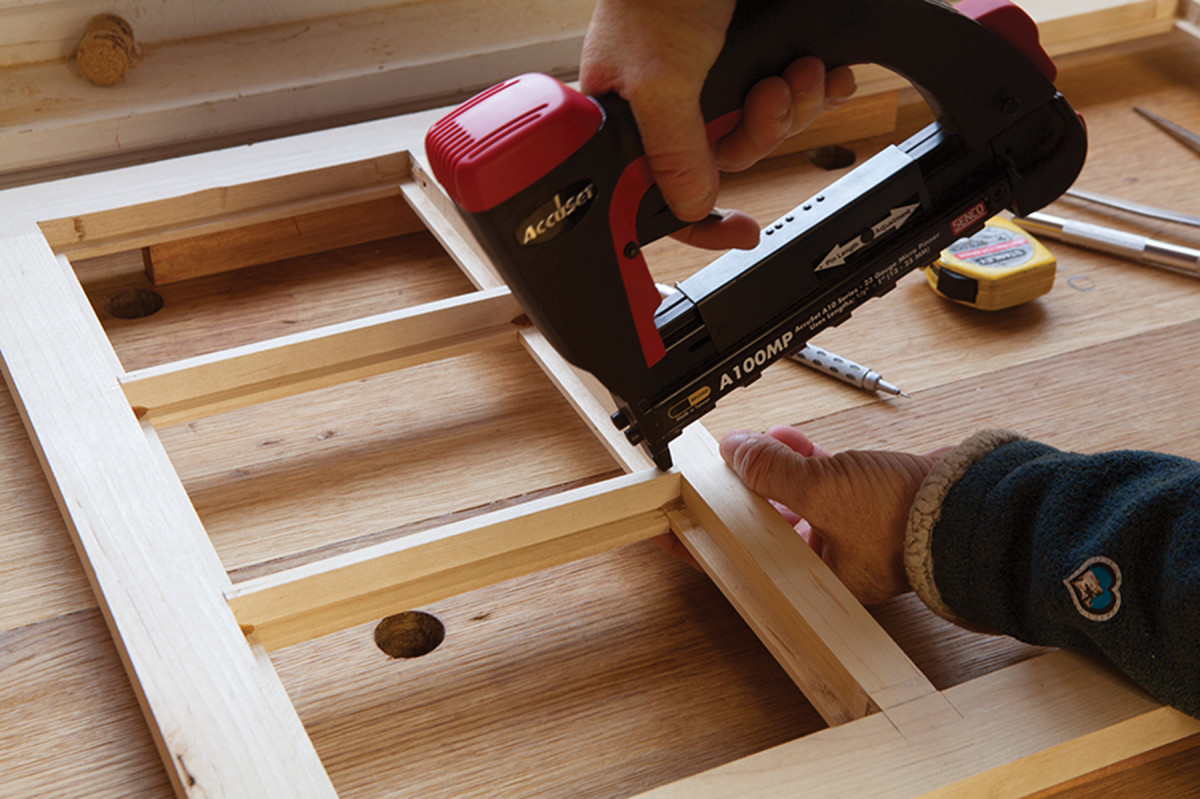
Pin it. Put a dab of glue in the rabbet, then pin the strips in place. Note: I’m merely holding the muntin in place here with my fingers.
Now dry-fit the muntins behind the back bars and shift things as needed to get three equal-sized openings. Mark that location on the top and bottom of the opening so you can easily line up the centerline on the back bars.
Put a dab of glue in the rabbet, then pin the back bars in place.
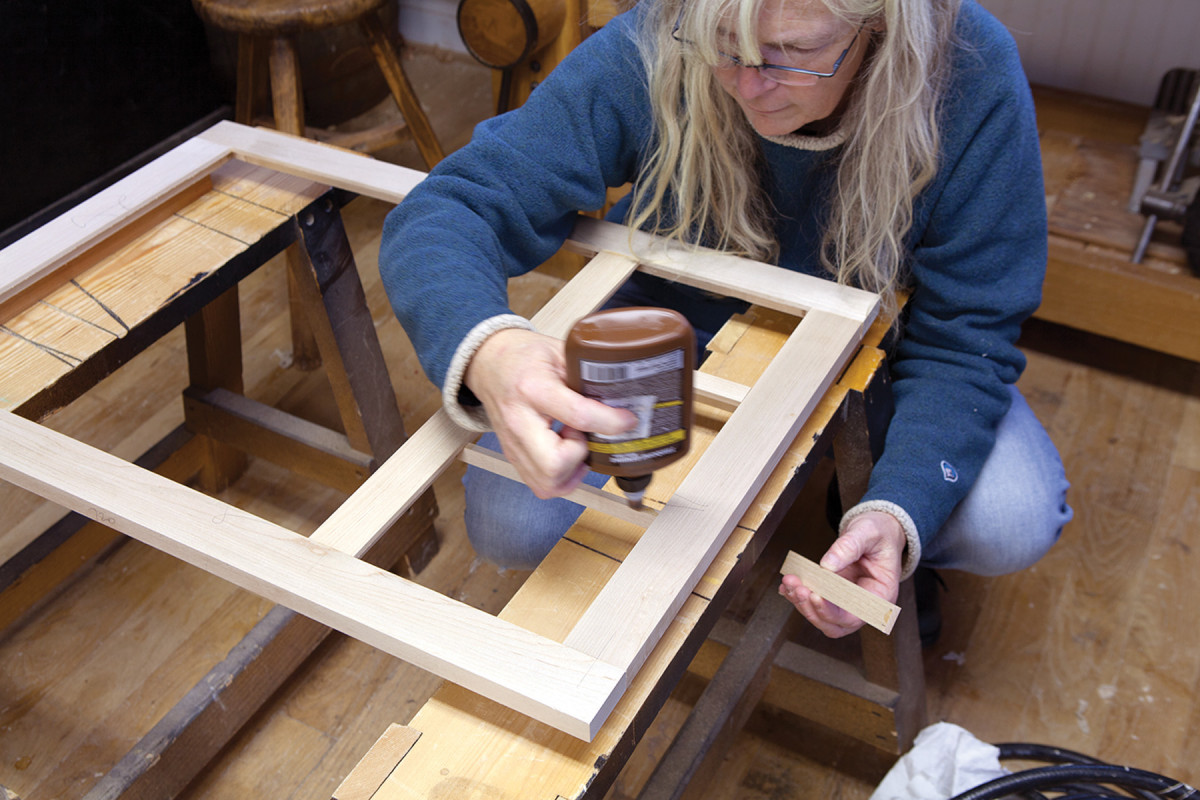
Glue it. Glue each muntin to its retainer strip, then secure spring clamps at the top and bottom of each muntin to hold them in place until the glue sets.
Flip the door, put a thin bead of glue on the front of the back bar, and center the muntin on it. This long-grain to long-grain glue-up will be plenty strong enough to hold the glass in place.
Top & Bottom
My original design had a coved top to match my chimney cupboard; that shifted in my head to a bevel on the underside as I put together the carcase.
So, I cut the top the top to size, then placed it on top of the carcase to determine where the bevel should terminate. But then I stepped back to have a better overall look at the thing, and realized I liked how the square edges pick up the lines of the flat muntins.
So square edges it is for me – but don’t hesitate to add a bevel or moulded edge if you like; that would lighten the cabinet both in looks and actual weight (and a cove would give it a more traditional look).
I finish-planed the top and bottom, then simply glued them in place and clamped them to dry. There’s a lot of glue surface; they aren’t going anywhere.
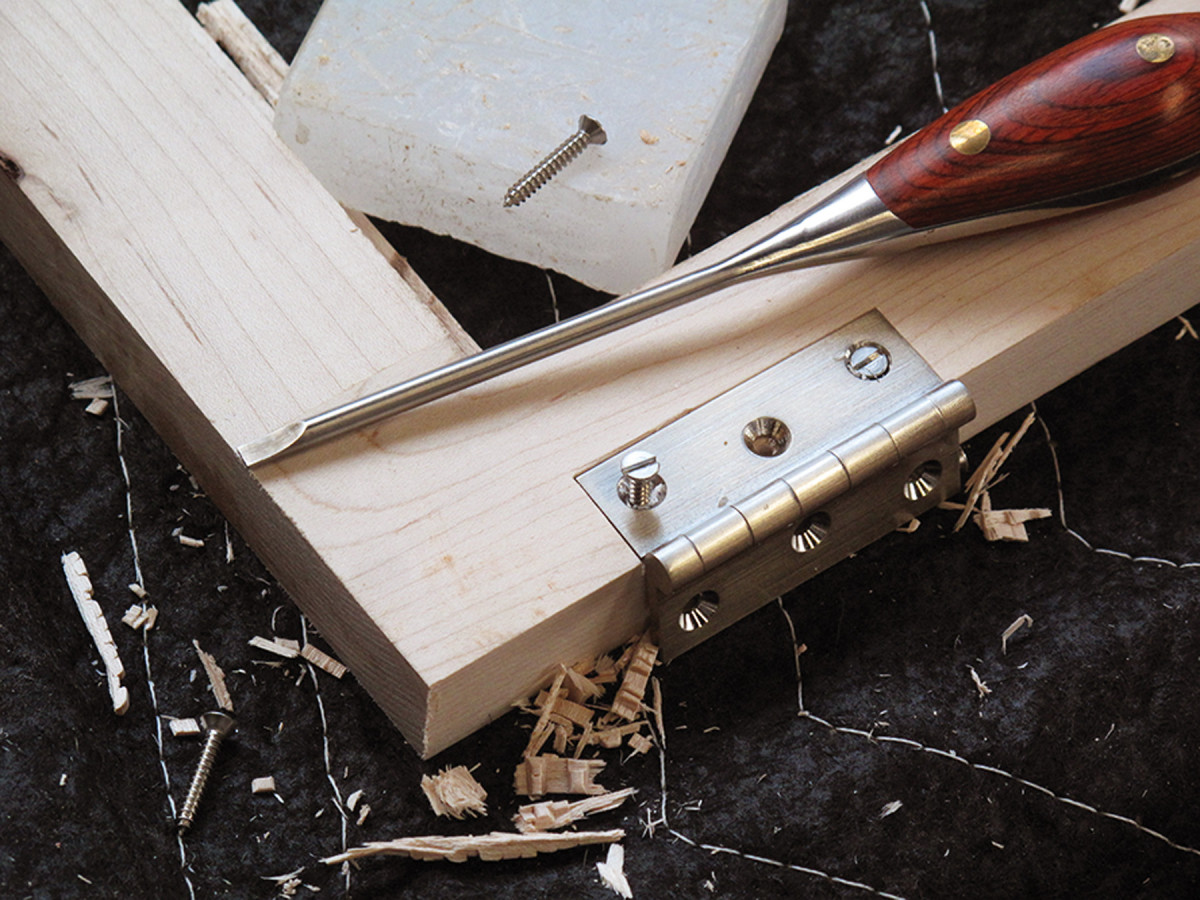
I then fit the door with a reveal of about 1⁄16” at the top and bottom, and installed the pull and butt hinges. I prefer silver over gold tones, so I opted for a satin nickel finish on my hinges and pull; I think dark antique, or even black iron, would also look nice.
Remove the hardware for finishing.
Butt Hinge Installation
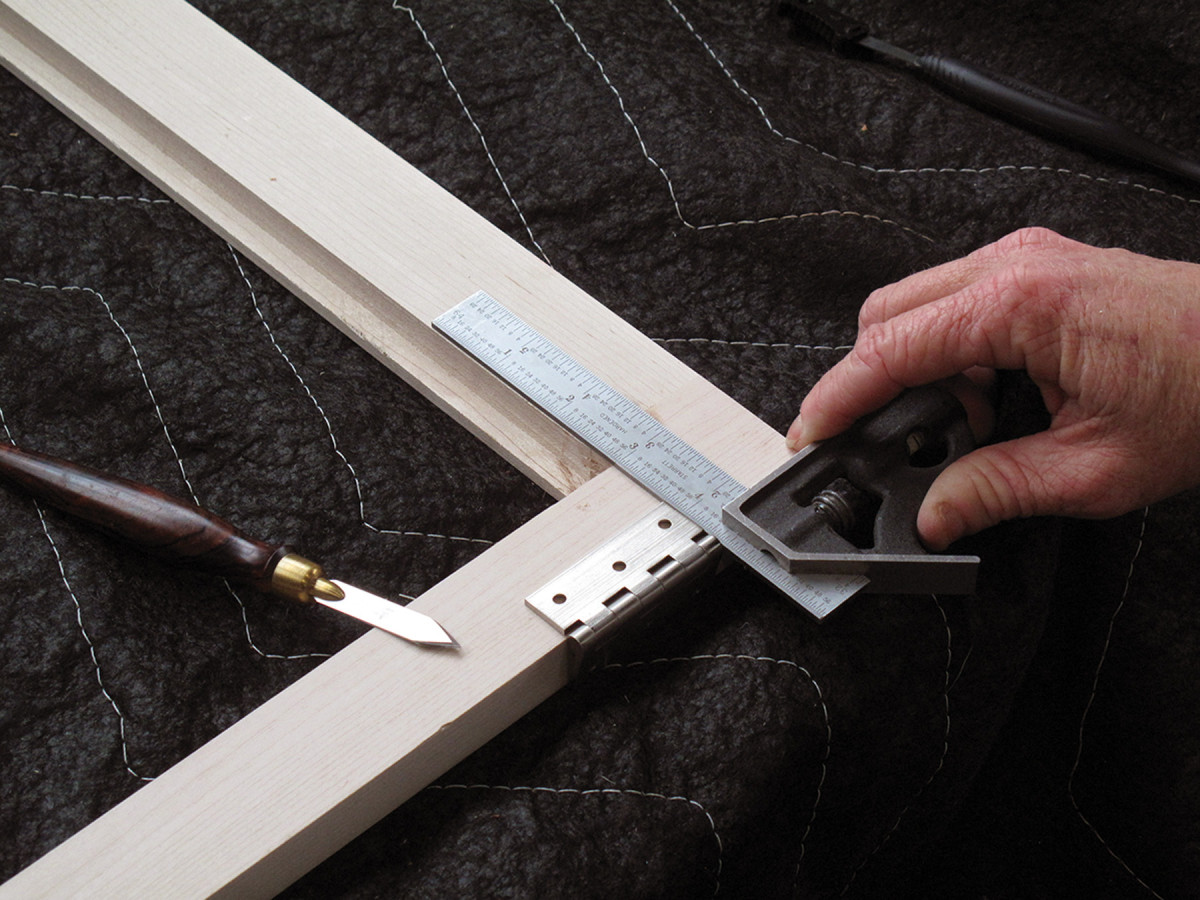
1. Locate. Hinges are typically installed in this type of build with the leaves registering off the door rails. So I use a combination square to line things up. I always start with the door, not the case.
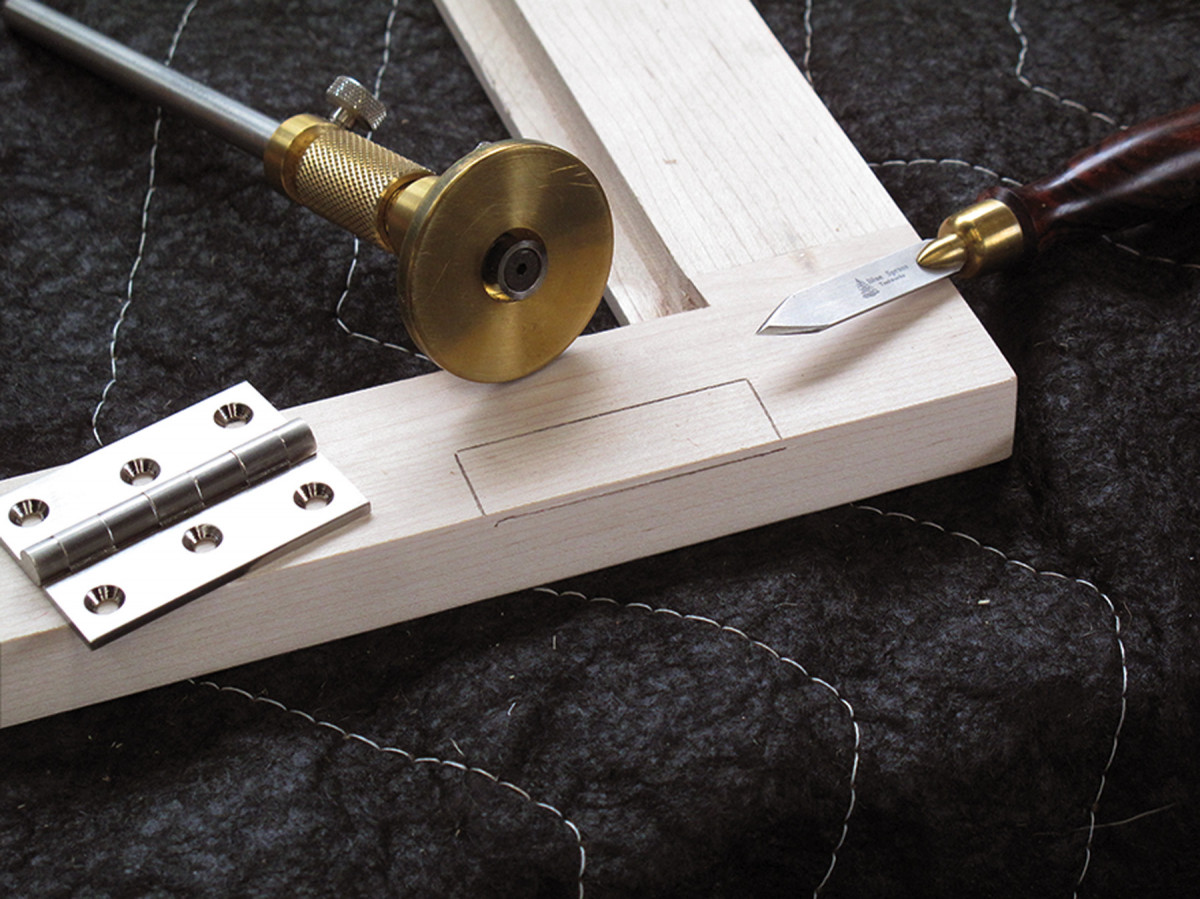
2. Mark. Hold the hinge firmly in place with your off hand, and use a marking knife to score around the edges. A series of light cuts will be more effective than one deep cut. Now set a cutting gauge to the exact thickness of the leaf and mark the mortise depth. (I’ve penciled in the lines here for ease of viewing.)
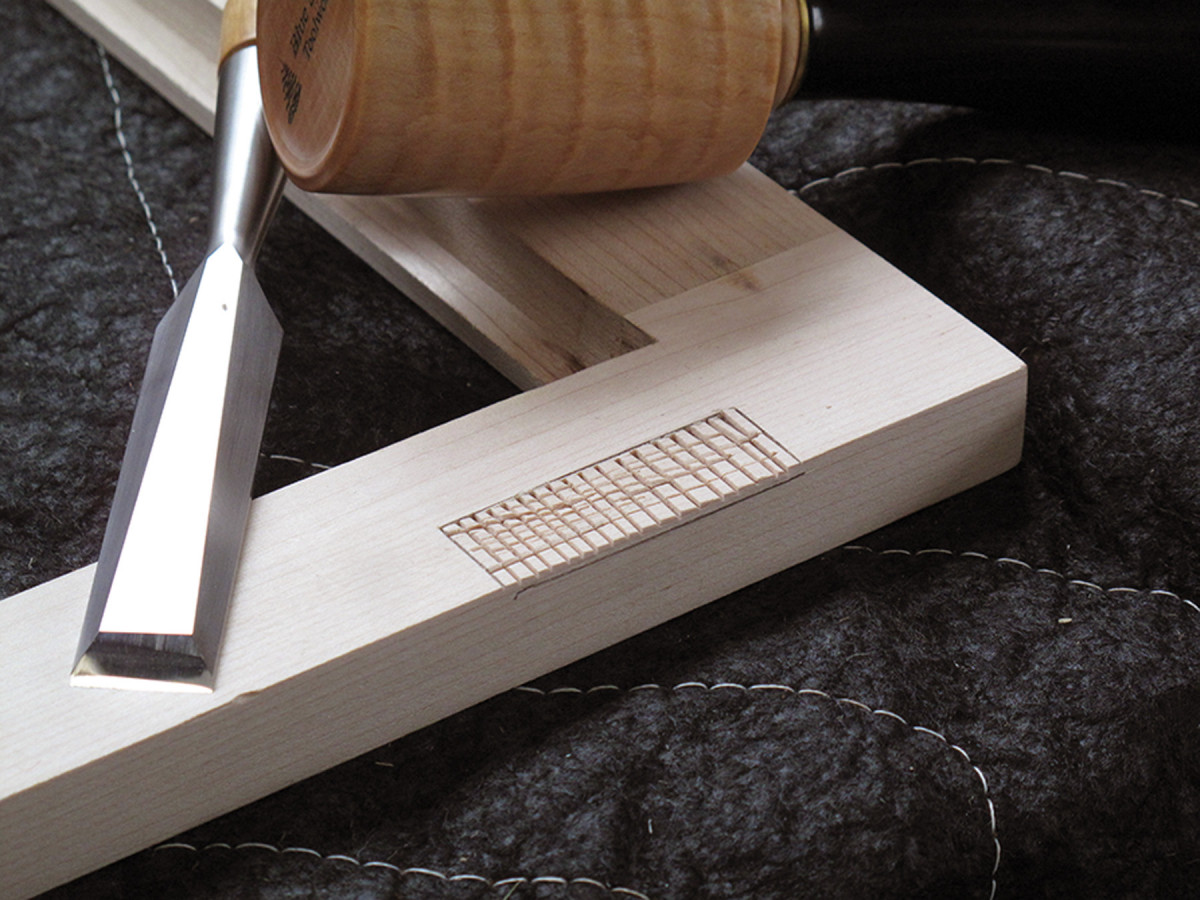
3. Chop. Make a series of cuts in the waste with a chisel, and use the tool to deepen the edges you marked with your knife (bevel facing into the waste, of course).
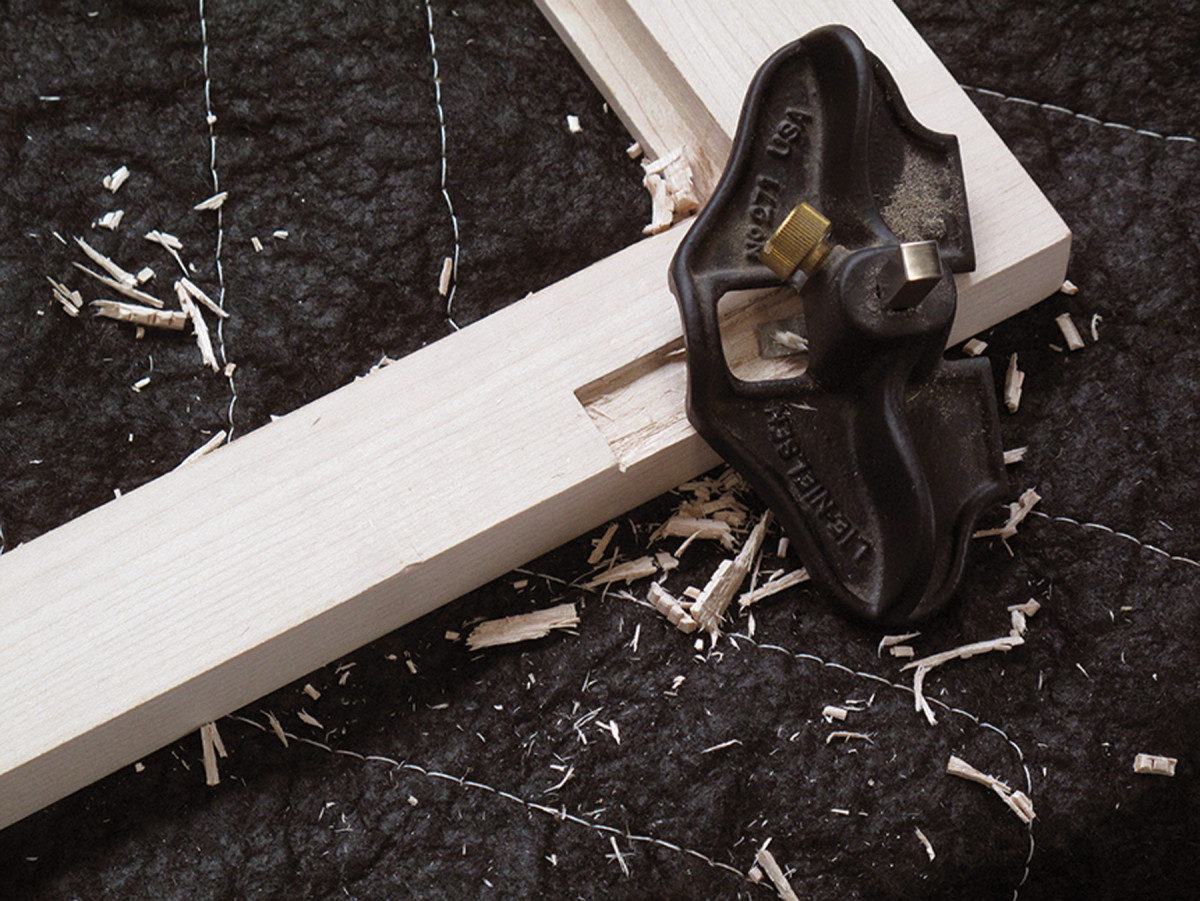
4. Clean. Drop the router plane blade in the baseline then tighten it. A few passes with the plane will lift out the waste and smooth the bottom of the mortise. (You can also set the router plane to the thickness of the hinge leaf, and use the plane to mark the bottom of the mortise, instead of a cutting gauge.)
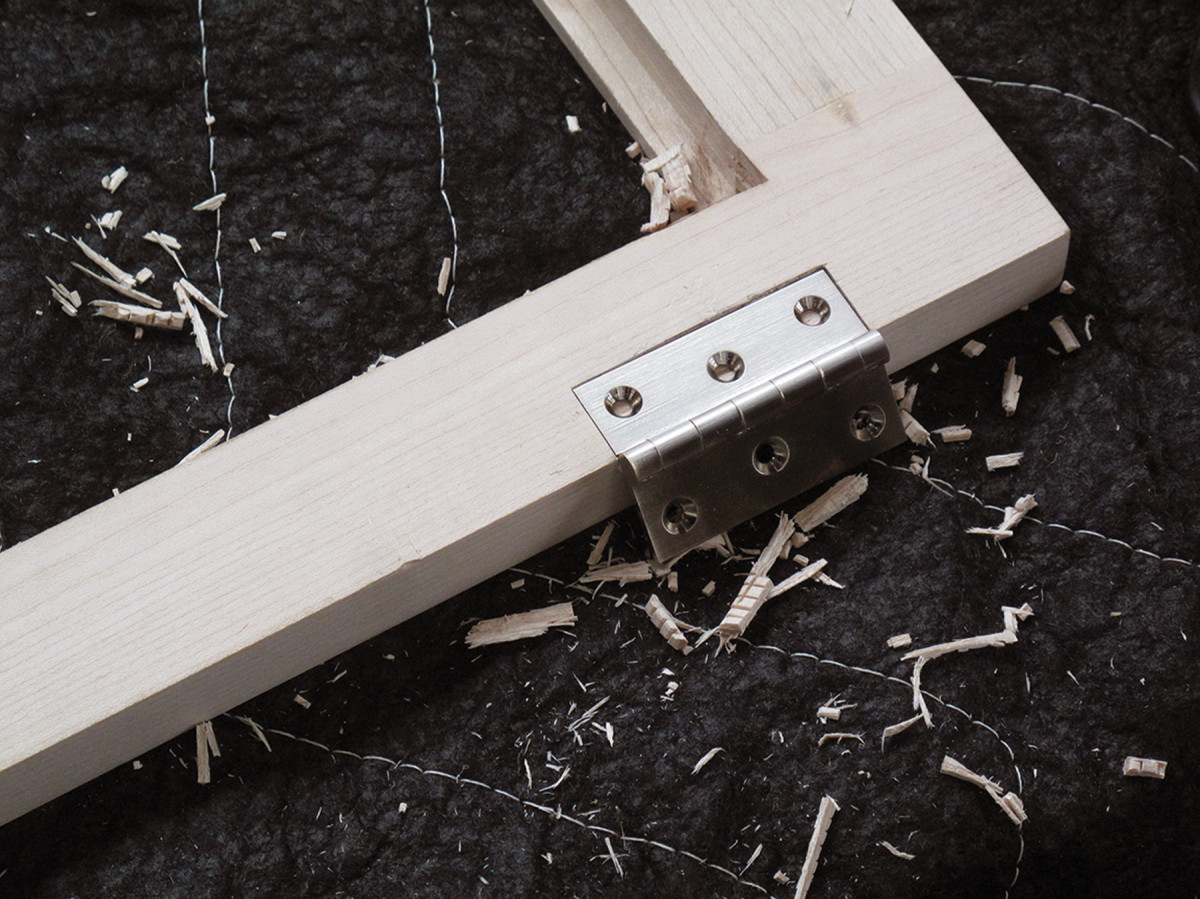
5. Screw holes. Drop the hinge in its mortise and mark the screw-hole locations, then drill. Be careful to not drill through the stile.
6. Screws. Screw the hinges in place; a little wax on the threads will make it easier. (I typically install only the top and bottom screws at this time; it saves time when removing the hardware before applying a finish.)
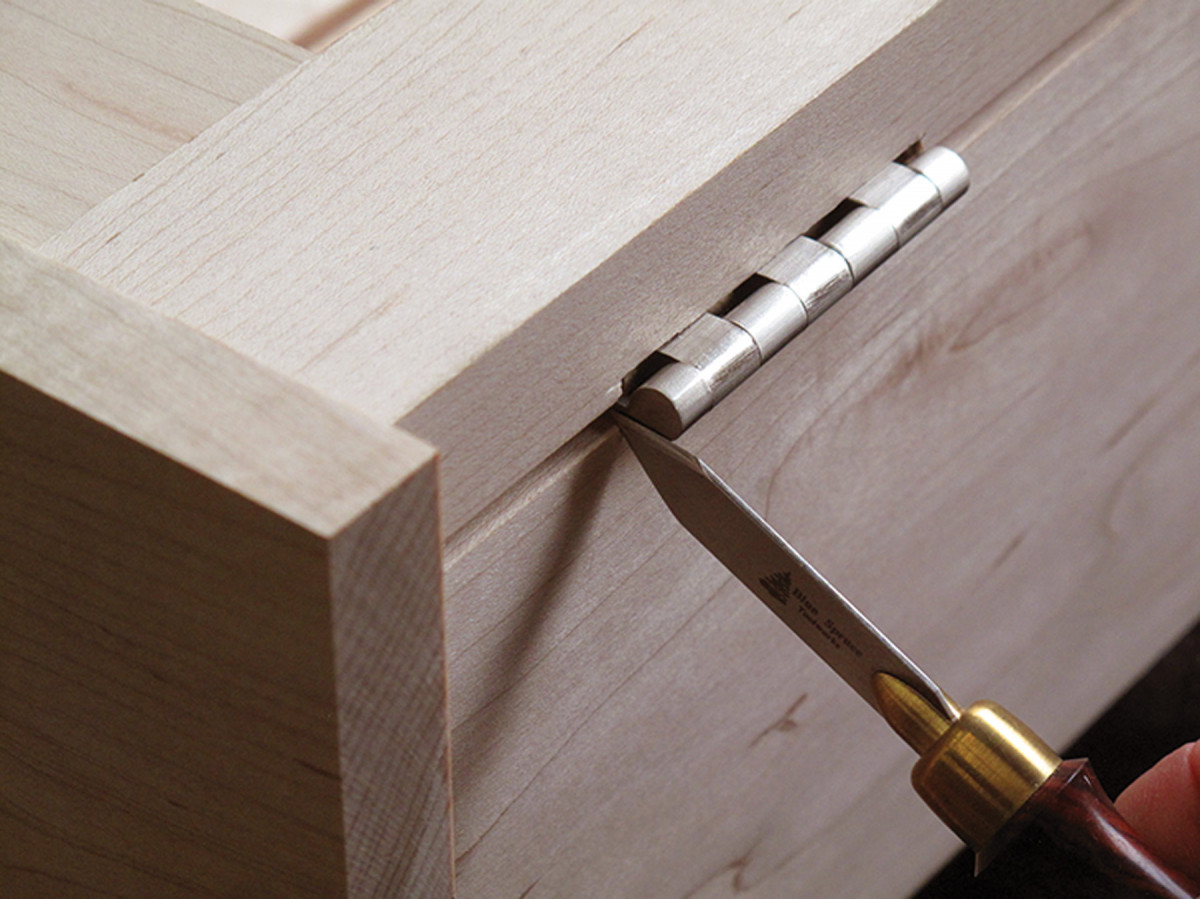
7. Mark the carcase. Now fit the door to its opening, with the desired reveal shimmed at the top and bottom. Hold the door firmly in place. Register the flat of the marking knife off the barrel of the hinge and make a nick. Do the same for the other hinge(s). I always mark the bottom of the leaf. It’s a habit that keeps me from cutting the mortise on the wrong side of my mark (that’s more of a fear for me when there’s also a middle hinge).
8. Narrow material. The process for the hinge mortises on the sides is the same as for the door – except that, if you want to retain the small amount of wood behind the hinge mortise, clamp a piece behind it for support as you’re chopping. If you don’t, it will certainly tear out. There is, however, no shame in simply cutting the mortise across the full thickness of the side.
Finish Details
Ideally, I’d have finish-planed the door pieces before assembly…but I got overeager to move forward on the build and forgot. So that meant sanding. I started with #80 grit and worked up to #180 grit.
With all visible-to-my-naked-eyes scratches removed, I used a rag dampened with alcohol both to remove the dust, and so I could more easily see if there were any machine marks or plane tracks that I missed. (There is little more disheartening in woodworking than putting on a coat of finish only to have it call attention to a faulty surface.)
The finish is simply three sprayed coats of pre-catalyzed lacquer (which I’ll keep a close eye on and recoat if necessary – polyurethane would be better for a bathroom, but I don’t like the look). After the final coat dried, I rubbed down all the surfaces (OK – maybe I skipped the back of the backboards) with a grey Scotch-Brite pad to remove dust nibs and to make the surface feel silky-smooth.
But wait – you still have to install the glass.
Both the mirror and the three clear glass panels are 1⁄8” thick (I had them cut at a local glass and paint store), and are housed in 1⁄2“-deep x 3⁄8“-wide rabbets. So that means you’ll need glazing strips no more than 3⁄8” x 3⁄8“. And while it doesn’t matter a great deal on the mirrored glass because they won’t show through, for the clear glass you’ll want to make sure no strip peeks into the opening – so check that before you pin them in place.
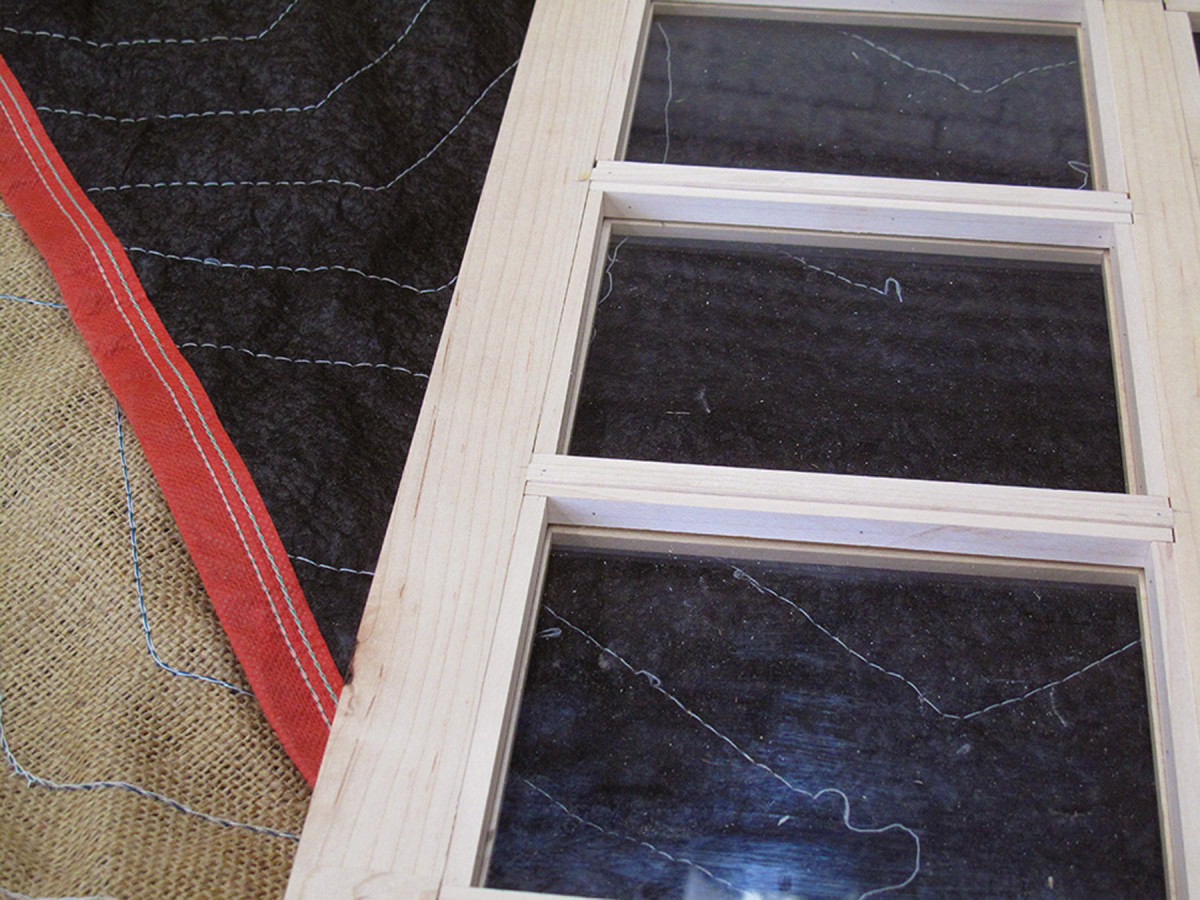
Glazed. Thin strips of maple hold the glass in place and provide a clean look on the interior.
The strips are simply butt-jointed and secured with 23-gauge pins. You could use glazing points or silicone to hold the glass in place, but I prefer the clean look of the strips, and it doesn’t take much extra time to make and install them.
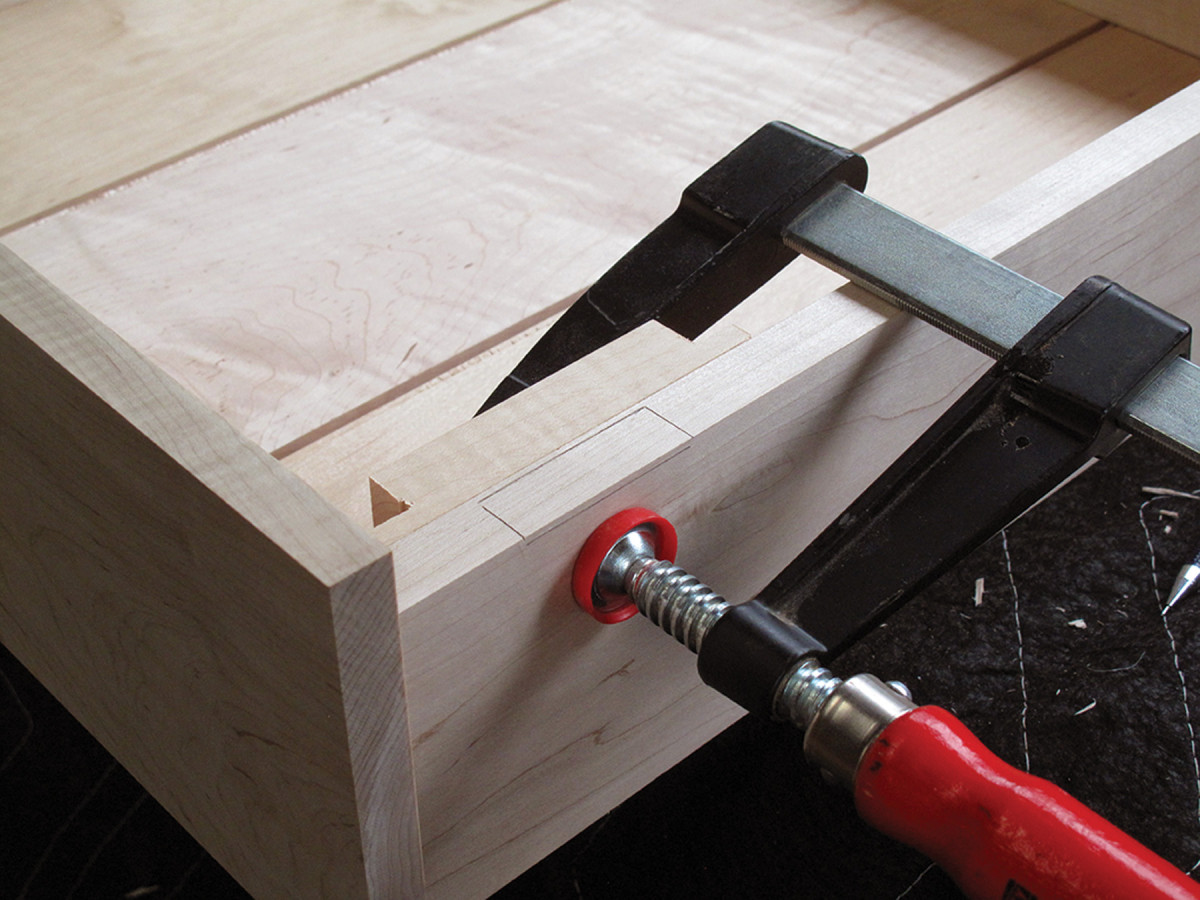
Before reinstalling the door, screw a French cleat to the top of the carcase (secured at both long edges and in a slightly elongated hole in the middle) and a strip of equal thickness at the bottom of the case; that will keep it at 90° to the wall when you hang it.
Put the hinges back in, hang the door and reinstall the pull.
The door on mine hangs closed, so I didn’t add a latch of any kind. If in the future I decide one is needed, I’ll simply inset a small rare-earth magnet at the front edge of the side’s interior face, right where the screw for the ring pull hits the case.
Now you’re ready to hang the piece (secure the other half of the cleat to two studs), step back and admire your work – and yourself in the mirror.
Plan: Download a free SketchUp model of this project from our SketchUp Warehouse.
Here are some supplies and tools we find essential in our everyday work around the shop. We may receive a commission from sales referred by our links; however, we have carefully selected these products for their usefulness and quality.


