We may receive a commission when you use our affiliate links. However, this does not impact our recommendations.
Four short (but crucial) finishing subjects.
What follows are four concise – but important – finishing topics about which you’ve likely wondered.
1 – Metamerism
Most of us have experienced a situation where we finish a project in our shop or garage to the exact color we want, only to discover that the color isn’t right when we move the project into the house (or to a client’s location). The explanation is the phenomenon of “metamerism.” The lighting is different in the two locations.
The light source makes a big difference. It’s important to be aware of this even though it can be difficult to do anything about it.
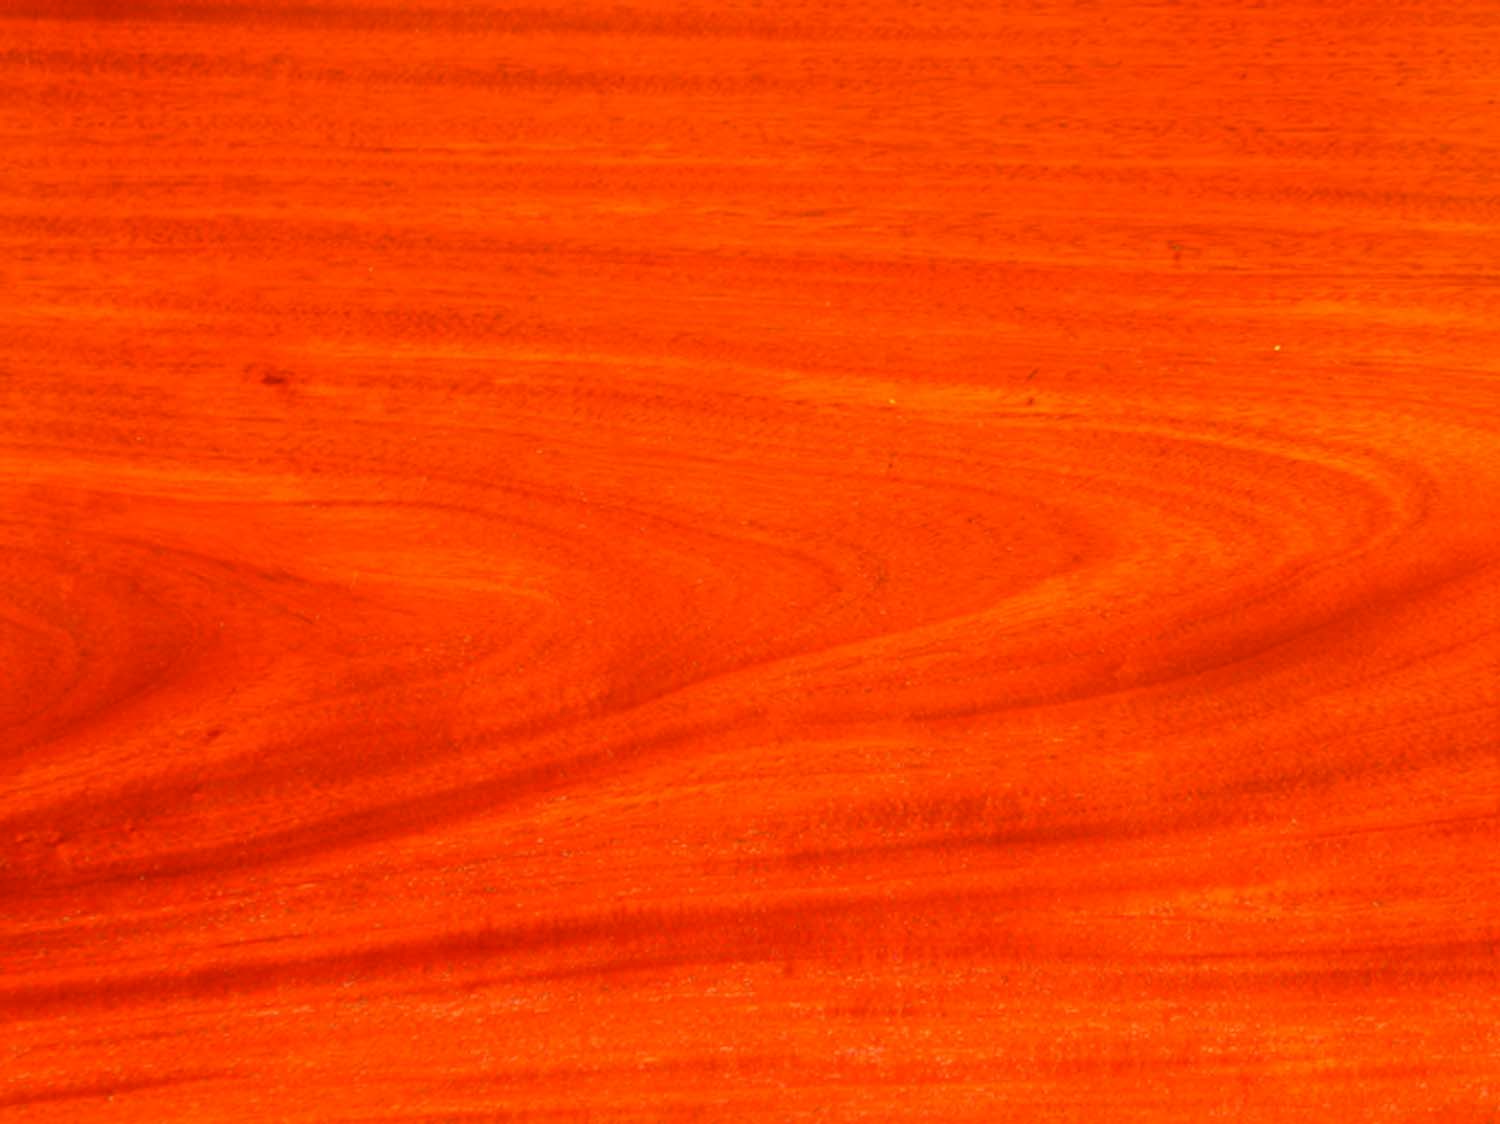
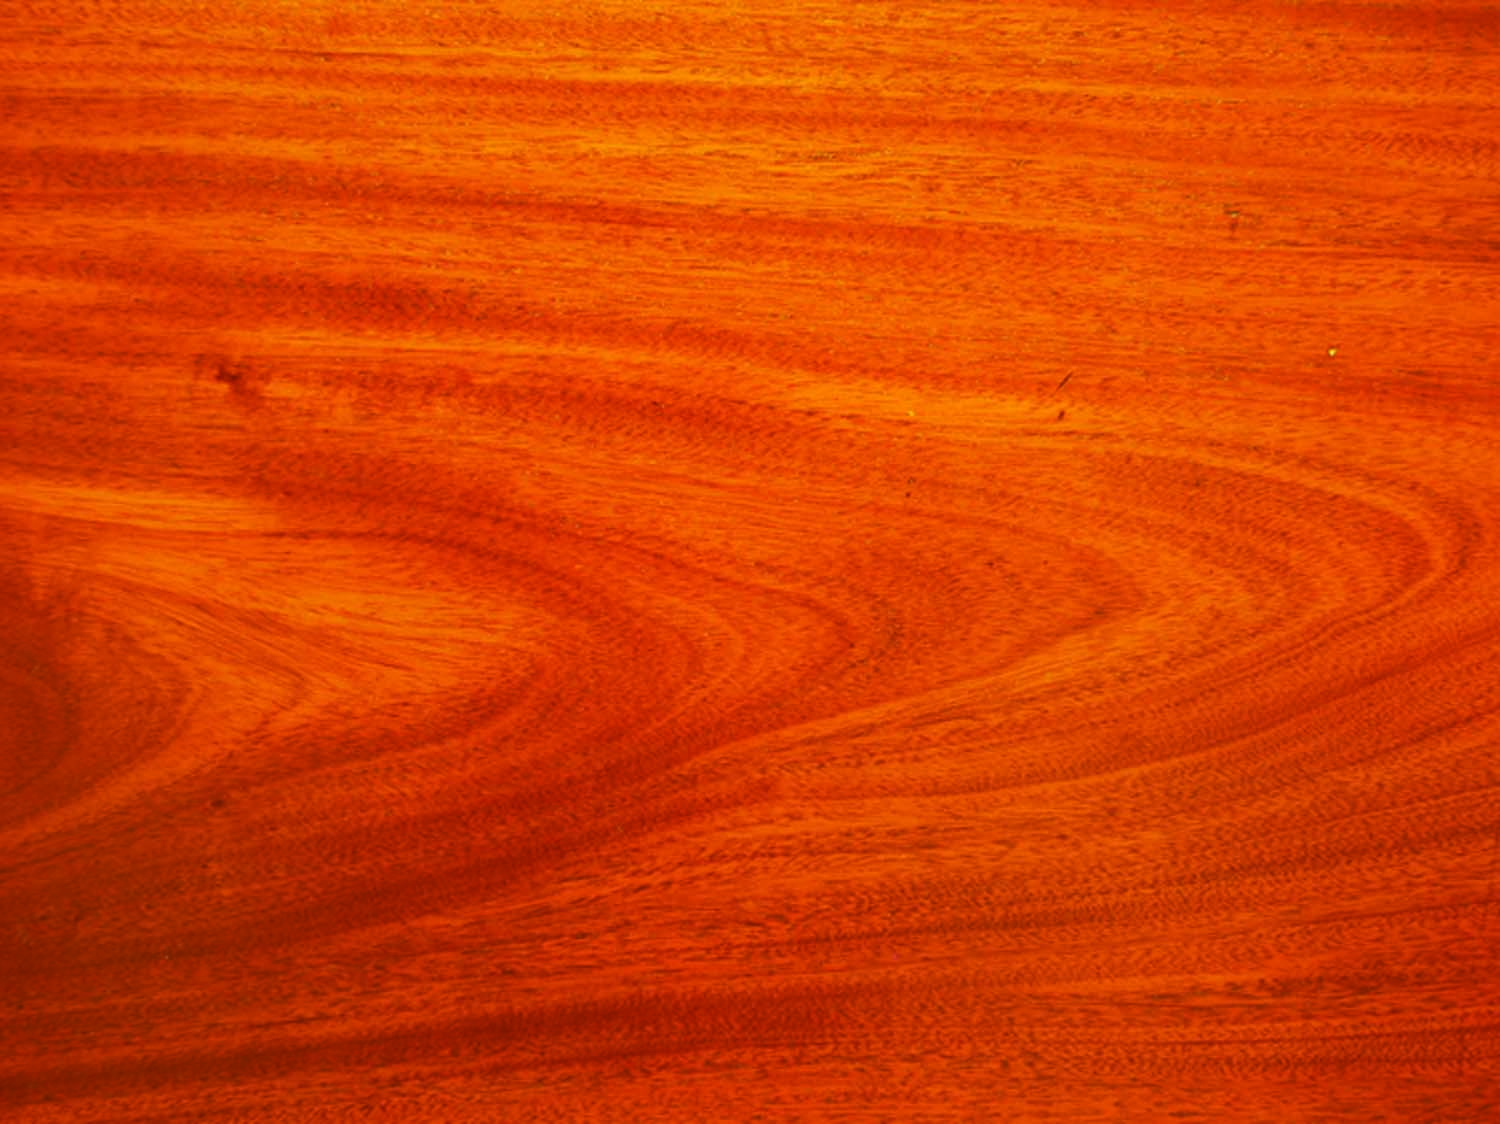
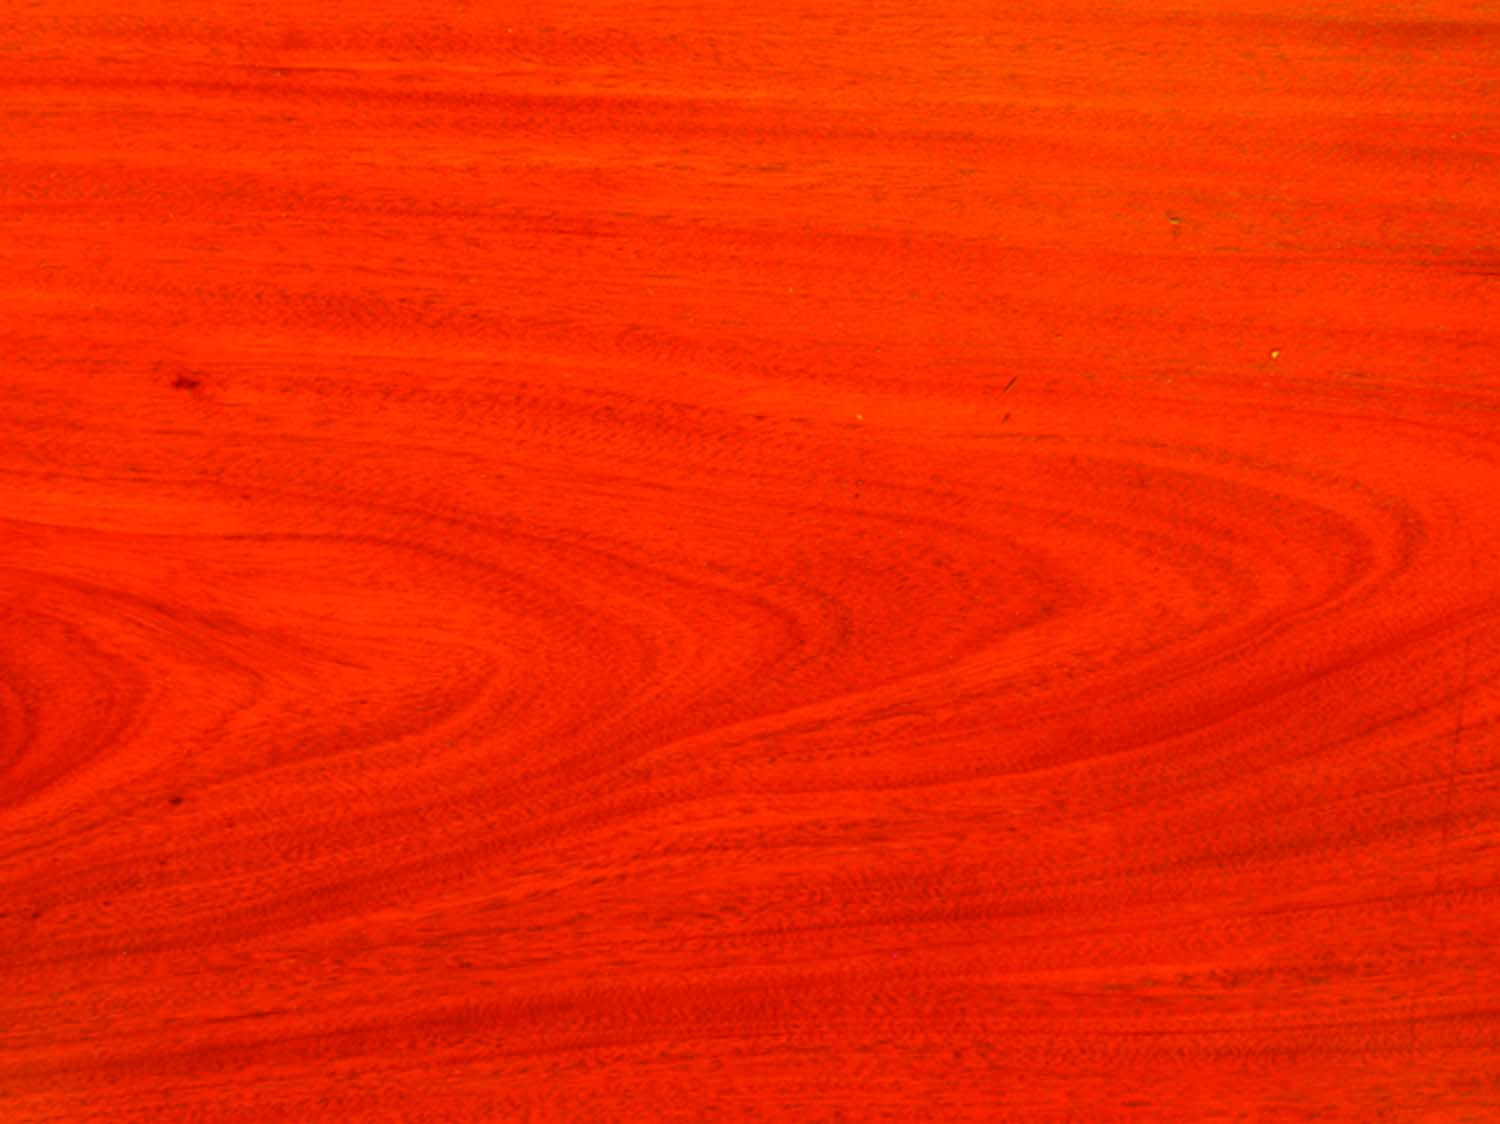
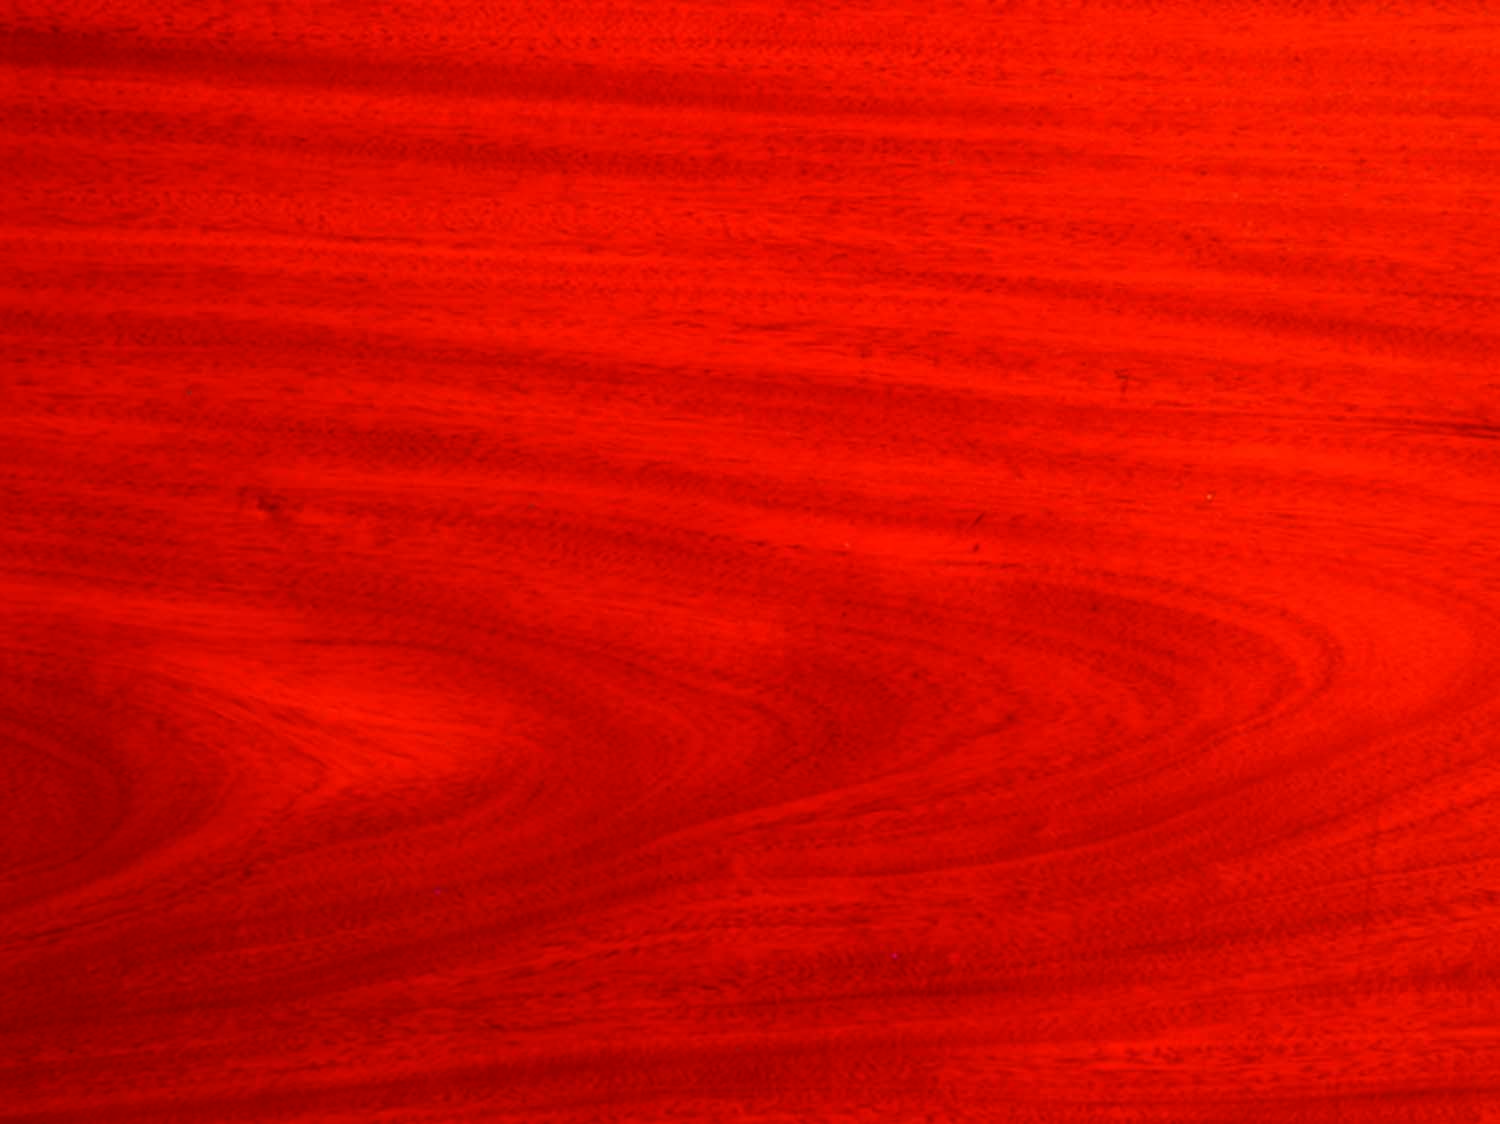
#1 Metamerism. The light source makes a big difference in the way color is seen. Photo #1 of a stained mahogany panel is the control, taken in daylight. Photo #2 shows the increased green revealed under cool-white fluorescent light. Photo #3 shows how the panel looks in full-spectrum light. Photo #4 shows the enhanced red seen in incandescent light.
#2
#3
#4
Digital cameras have made it easy for me to illustrate the phenomenon. To establish a control, I set the white balance on my camera to daylight and took photo #1 of a stained mahogany panel outdoors in the shade.
Then, without changing the white balance, I took additional pictures indoors under the cool-white fluorescent lighting I use in my shop (photo #2), the full-spectrum fluorescent lighting I use in my finishing area (photo #3), and finally in the incandescent lighting in my house (photo #4).
Notice how the cool-white lighting brings out more green in the stained wood, the full-spectrum lighting produces a color that is closest to natural daylight, and the incandescent lighting brings out more red tones. This is what you should expect when you move a project from one light source to another.
Because it’s rarely possible to create the same type of lighting in both your shop and eventual location of a piece, and because the lighting in any area can change between daytime and nighttime, the best way to handle the situation, if you are matching a color, is to have a sample of the color in the same light while you’re doing the matching.
Alternatively, install full-spectrum fluorescent lights in your finishing area. These lights bring out the wide spectrum of colors, so they make possible the closest matches for all situations.
2 – Polyurethane is polyurethane
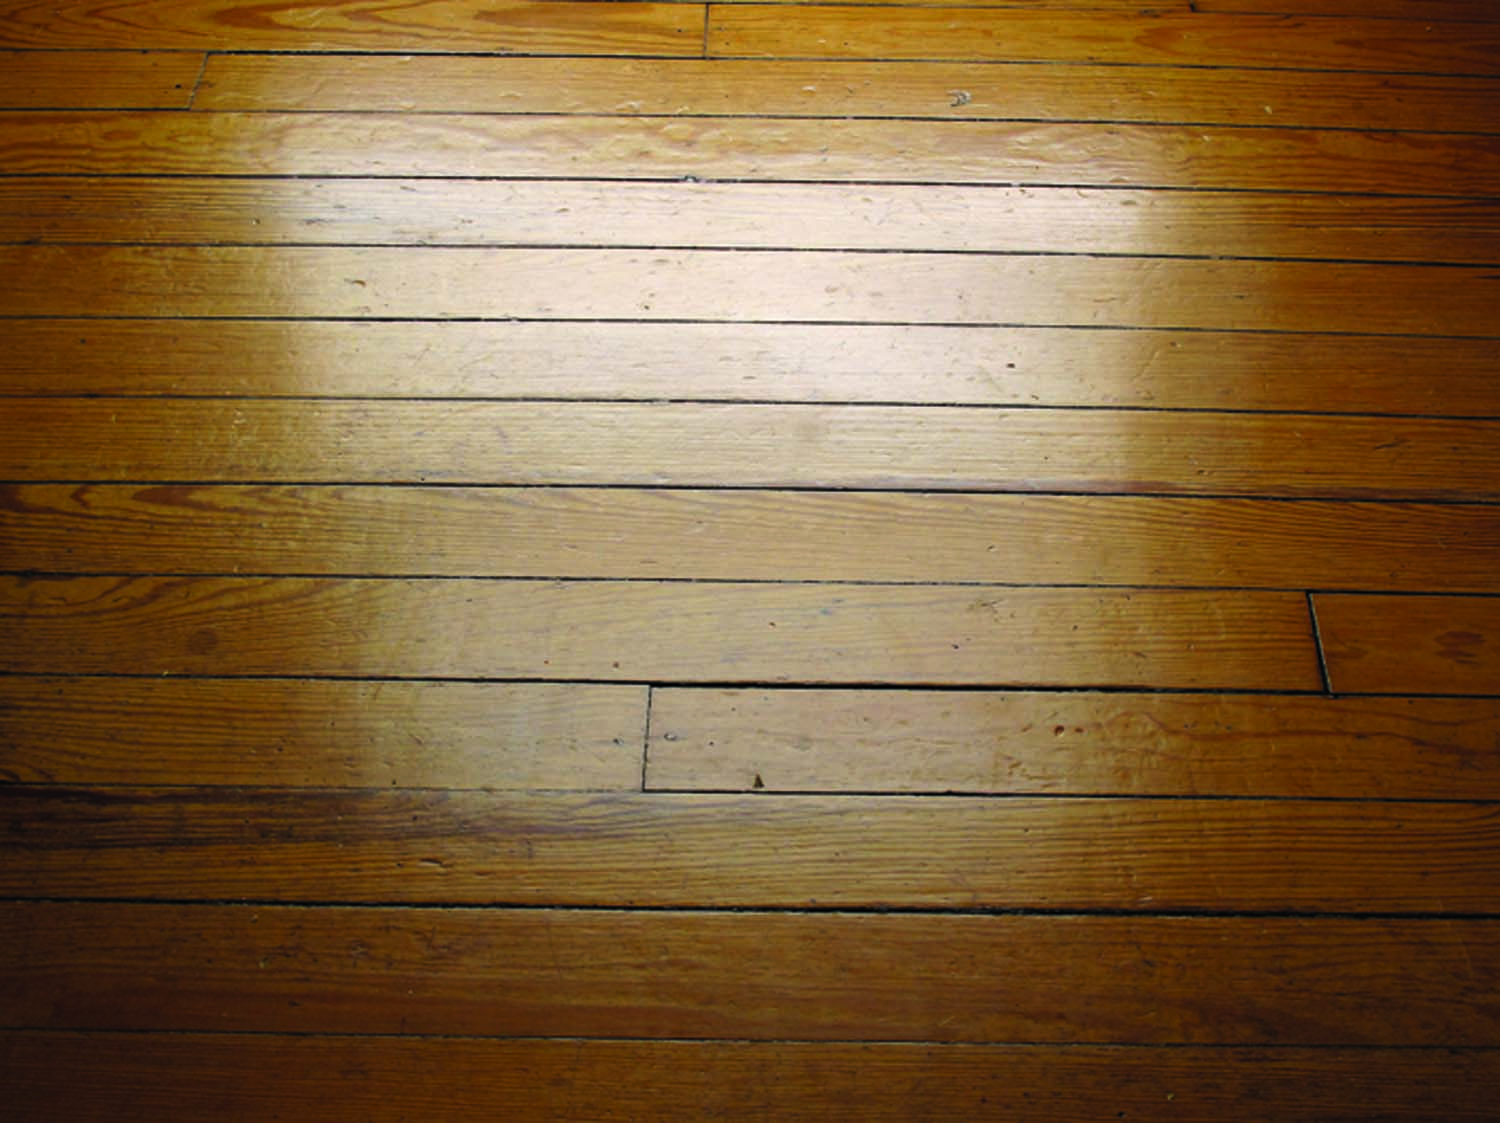
Polyurethane. Among consumer finishes, oil-based polyurethane, shown here on a pine floor, wears best of all finishes.
This is not true. Among consumer products, oil-based polyurethane is much more durable (meaning scratch, heat and solvent resistant) than water-based polyurethane, and, if you include high-performance spray finishes, two-part polyurethane, which is not a consumer product, is more durable still.
It’s not the “polyurethane” that’s different. It’s the way the finish cures. Oil-based polyurethane cures by oxidation – crosslinking in contact with air. Water-based polyurethane cures first by the evaporation of water and solvent, then by coalescing (the tiny finish particles stick together). Two-part polyurethane cures by crosslinking between the two parts, similar to the way epoxy adhesives cure.
Oil-based polyurethane wears better on floors than water-based polyurethane. Two-part polyurethane, which dries much faster than oil- or water-based polyurethane, is better to use in a production shop where objects requiring a very durable finish are being sprayed.
On the other hand, water-based polyurethane is still more durable than nitrocellulose lacquer or shellac, and is unique in that it adds no color to the wood. No finish is best for all situations. You may choose to give up a little durability to eliminate the yellowing.
3 – Edges of Cabinet Doors
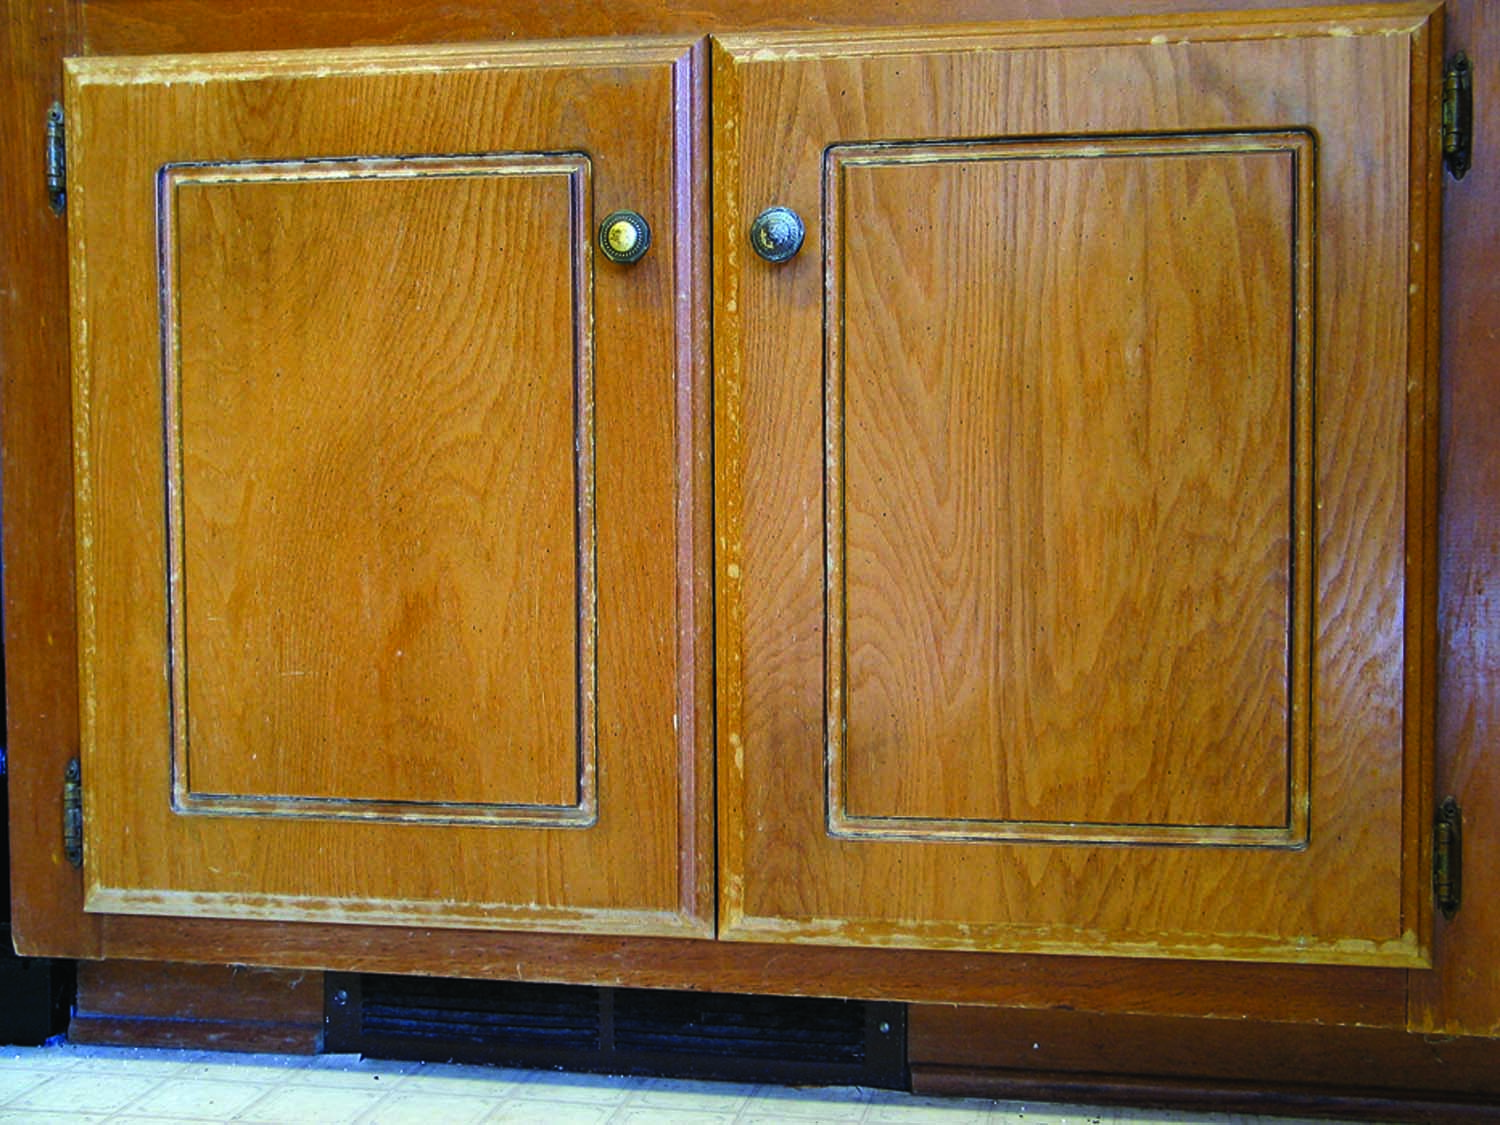
Cabinet door edges. The edges of cabinet doors installed under sinks have to be finished well to avoid damage from water working its way through a too-thin (or deteriorated) coat of finish.
If you’re spraying rather than brushing, you need to be diligent in applying product to the edges of cabinet doors. It’s quite common that these edges don’t receive enough finish to protect them adequately from water splashes under sinks.
Most finishers spray the edges at an angle so the fan pattern strikes the edge and face simultaneously – one angled pass around the door, then overlapping passes on the face.
For most locations, having too little finish on door edges is not a big problem. Edges aren’t as visible as faces, and water doesn’t get on the doors. The exceptions are the edges, especially the top and bottom edges, below a sink. These edges get a lot of water contact and, if the finish is too thin, the water can break through and get into the wood. The water then works its way under the finish and causes it to peel.
Just being conscious of this problem will lead you to be more careful when spraying, but it may also help if you adjust your spraying technique. Begin by narrowing the fan pattern of your spray gun so the fan is only a little wider than the thickness of the door. You may have to adjust the fluid-control knob also, to reduce the volume of material being sprayed.
Then spray the edges straight on, the same number of times you spray the face and back with the wide fan pattern. For profiled edges, it may be wise to also spray at an angle.
One more precaution. Be sure to soften all sharp edges with sandpaper. Finishes pull away from sharp edges leaving the finish too thin to be water-resistant.
4 – Luster in a Finish

Shine up a surface. Paste wax is best for adding shine to a dull surface as long as the finish isn’t badly crazed.
The luster, or shine, in a finish dulls over time, primarily due to exposure to light – especially sunlight and fluorescent light, which are both high in ultraviolet light. Once a finish has dulled, there are three ways to bring back the shine.
If there is no crazing (cracking), the application of a furniture polish or paste wax may be sufficient. Paste wax is far more permanent than liquid furniture polishes, with the limitation being that you can’t then use furniture polish for dusting or you’ll remove the wax.
If there’s mild crazing, you can remove it with very fine sandpaper. Then rub a shine into the finish using fine abrasive compounds, such as rottenstone. The finer the abrasive grit, the higher the shine.
If the condition of the finish is worse but not totally deteriorated, you can sand it level and apply more finish on top. The safest finishes to use are oil (which is not very effective because it can’t be built up) and shellac. Shellac can be applied with a pad (called French polishing), or with a brush or spray gun.
Varnish (including polyurethane varnish), water-based finish and lacquer can also be applied. But the surface should be perfectly clean, especially from the silicone oil contained in many furniture polishes, or the finish will fish eye. Lacquer should be sprayed very lightly at first, or the lacquer thinner may attack and blister the old finish.
Here are some supplies and tools we find essential in our everyday work around the shop. We may receive a commission from sales referred by our links; however, we have carefully selected these products for their usefulness and quality.