We may receive a commission when you use our affiliate links. However, this does not impact our recommendations.
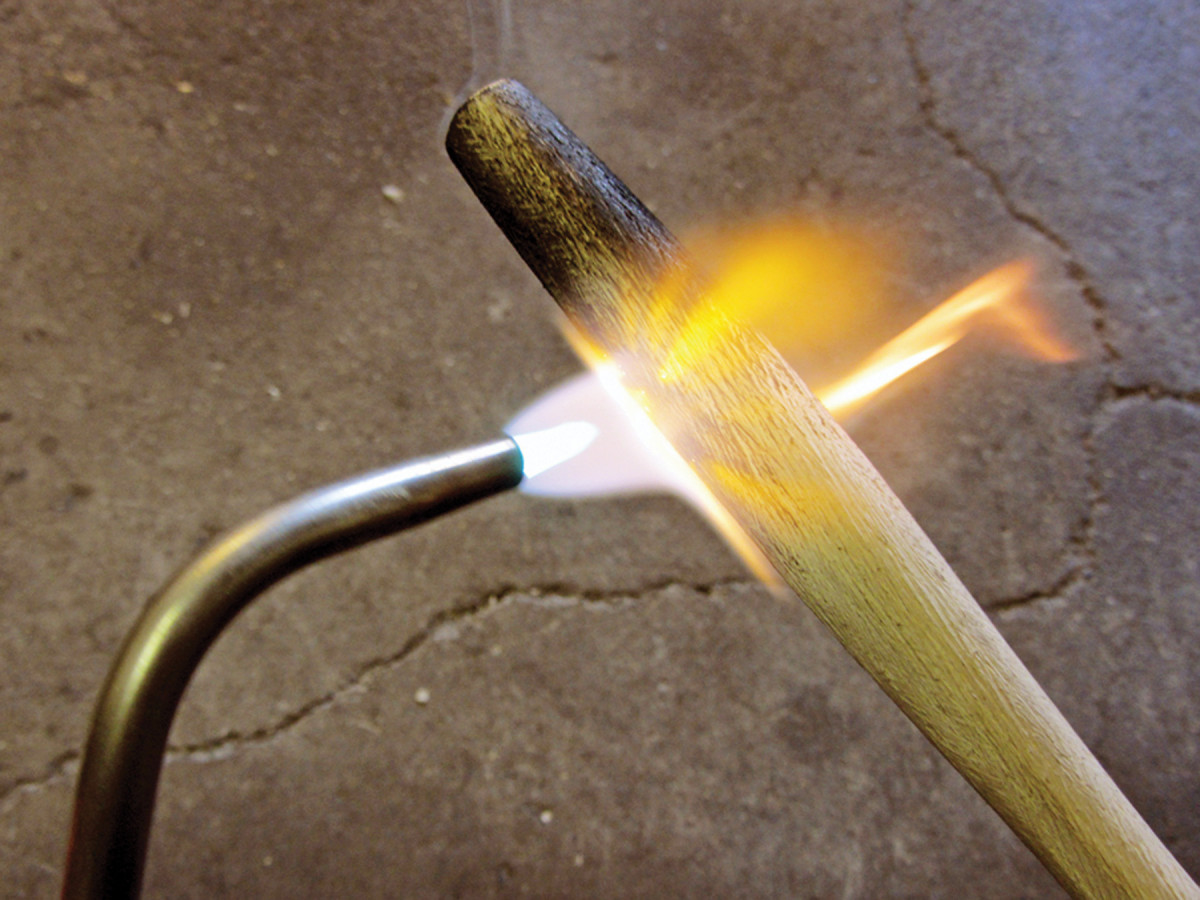
In motion. Use the torch to char the wood evenly, constantly moving so you don’t burn away too much material in one spot.
Fire and wax together produce a rich black surface.
Fire might not be the first finishing technique that most woodworkers gravitate toward; then again, I am not most woodworkers.
As a blacksmith and toolmaker, I am around fire every day, and when I began burning my hammer handles, I found it to be a simple way to obtain an alluring surface that set my work apart. It is unlike any other finish I have seen, and it really stands out on its own.
I don’t claim any ownership over this application, because I am sure at some point I saw another blacksmith’s handle done this way. But by now I have done it enough to feel comfortable sharing this technique.
Beyond the charred oak barrels used in distilling spirits and some use of fire finishing in Japanese architecture, I have been hard-pressed to find mainstream examples of burnt wood used as a finishing technique.
Material Options
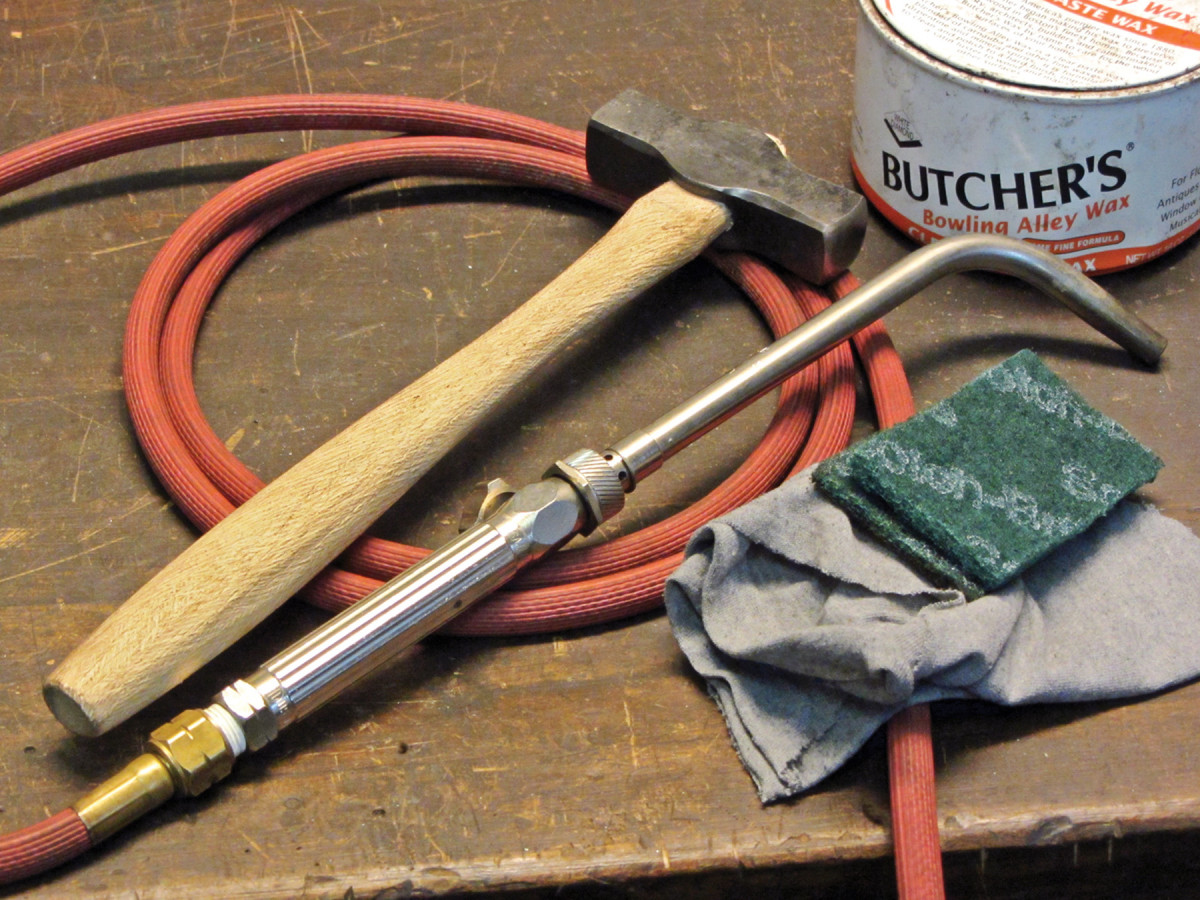
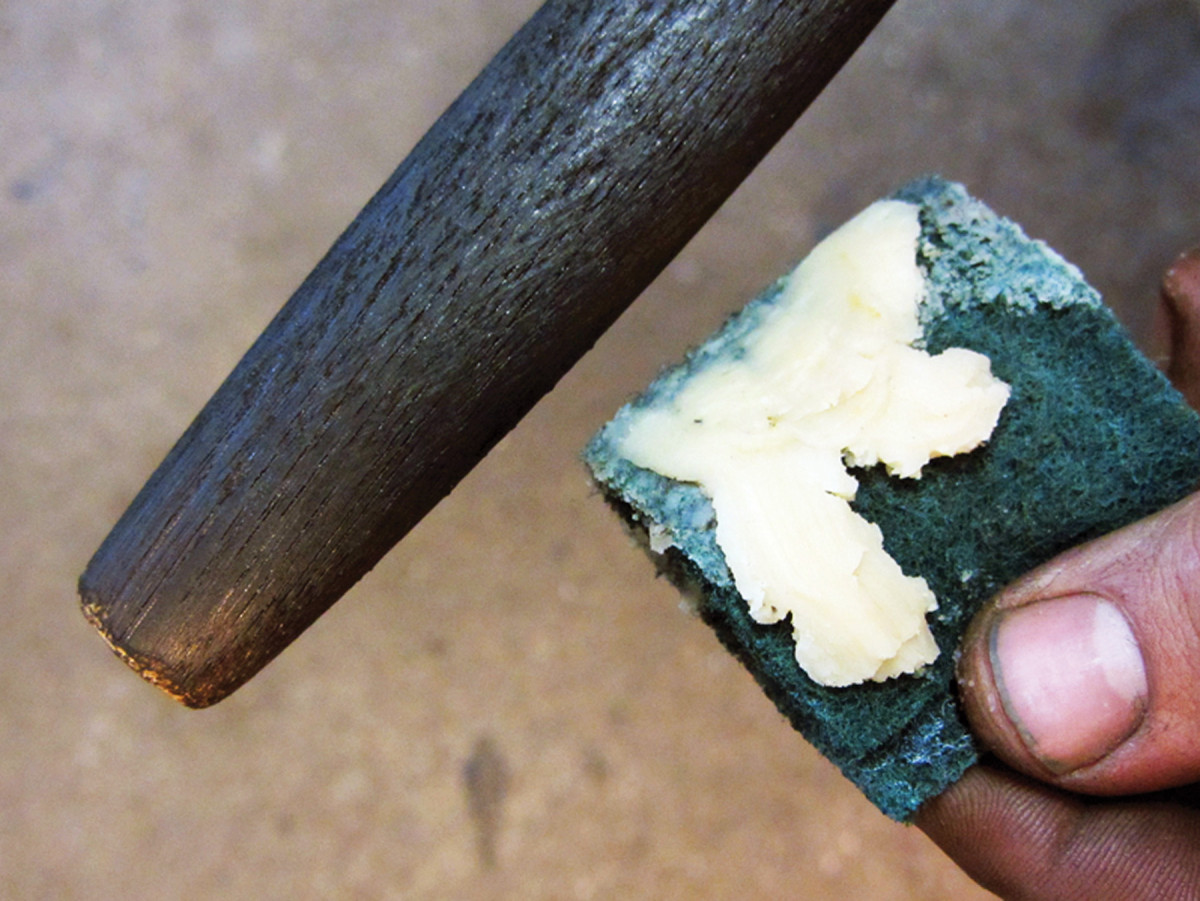
Tools. A torch, some wax and an abrasive pad are all you need to produce a rich black finish.
In my experience, open-grained hardwoods such as hickory, oak, walnut and mahogany produce the best results for this technique. With these, the softer earlywood tends to burn away faster, leaving a varied surface texture that looks and feels great after charring.
Woods with a more closed grain, such as maple and cherry, keep their smoother surface and don’t turn out nearly as compelling. Softer woods such as pine and cypress tend to burn too quickly and have a ragged appearance.
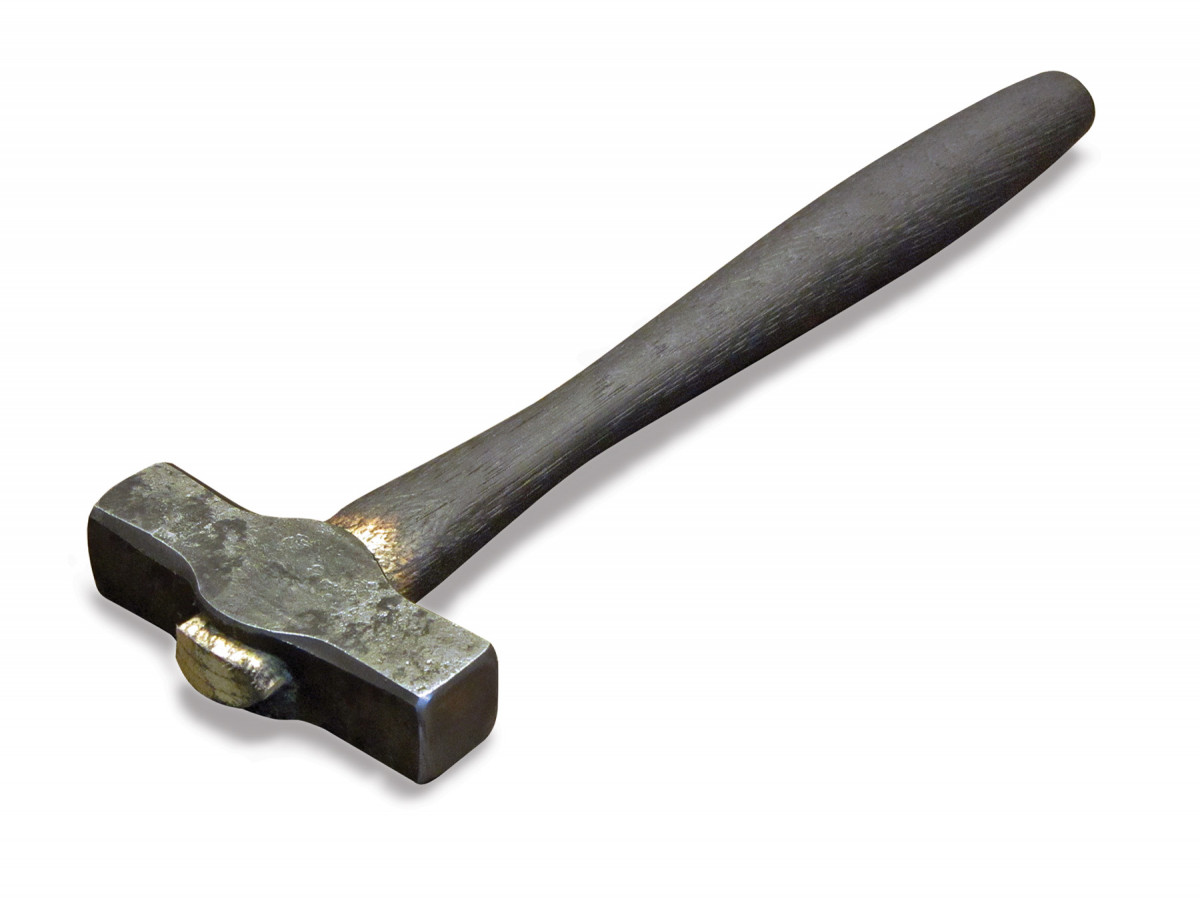
Results. This hammer handle with a charred finish has one coat of wax that was added while the wood was warm and buffed with a rag once it cooled.
Beyond the species, two factors to keep in mind are moisture content and thickness. If the wood is too wet or too thin, it is prone to warping or cracking. Any well-dried wood should be fine, but stay away from anything green.
I tend not to burn wood that is less than 5⁄8” thick. The smaller dimensions are unpredictable and especially prone to bending. One way to combat this is to use straight-grained wood to help prevent unwanted movement.
The Process
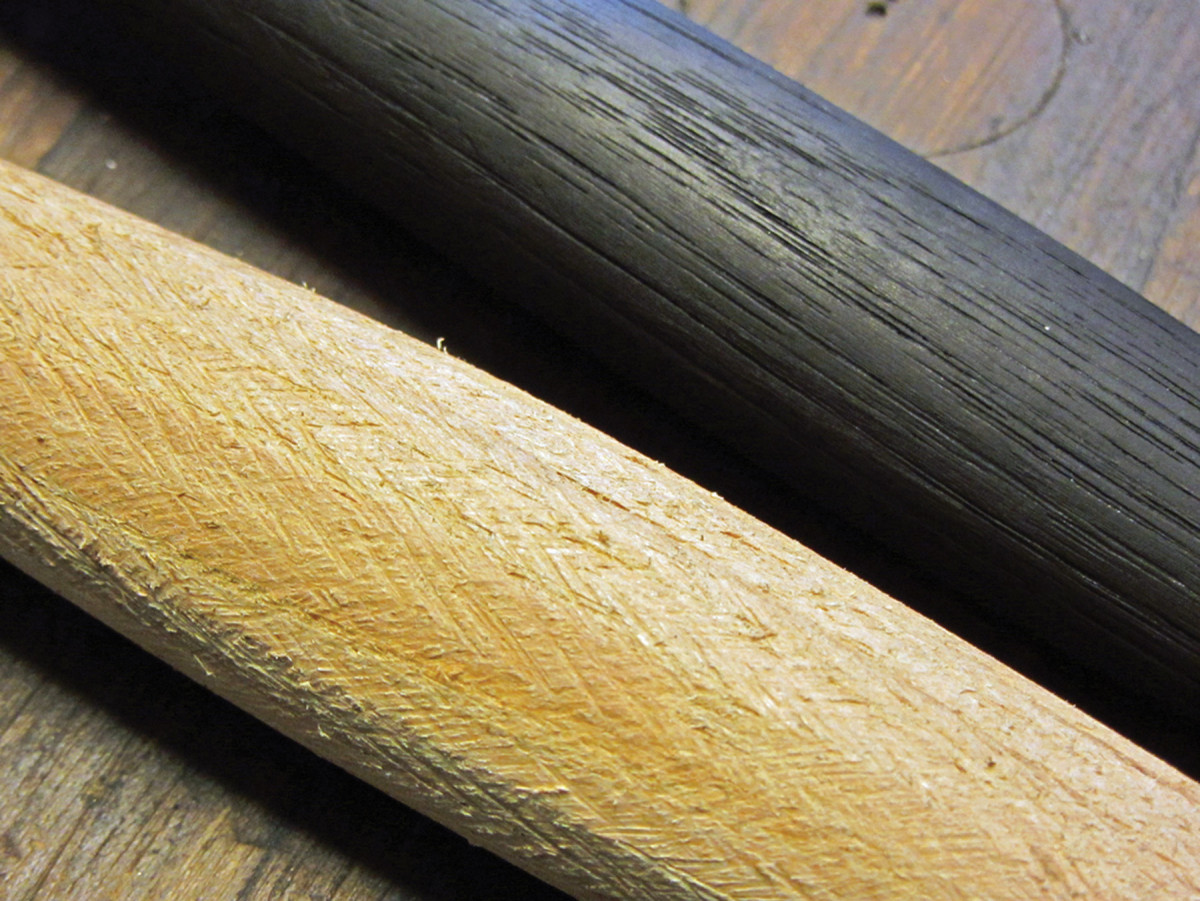
Hot surfaces. This side-by-side comparison shows show how much the charring technique refines the surface of the wood; there’s no need to sand before burning.
For a charred finish, you will need a piece of abrasive cleaning pad (such as Scotch-Brite), paste wax, a rag and some sort of flame. I use my acetylene soldering torch, but an inexpensive propane torch or MAAP torch will work just fine.
The beauty of the technique is that the wood can be surfaced to a rather rough state, and, through the process of burning, the end result is a refined surface. I usually don’t go beyond a fine rasp for my shaping and finishing; the torch takes care of the rest.
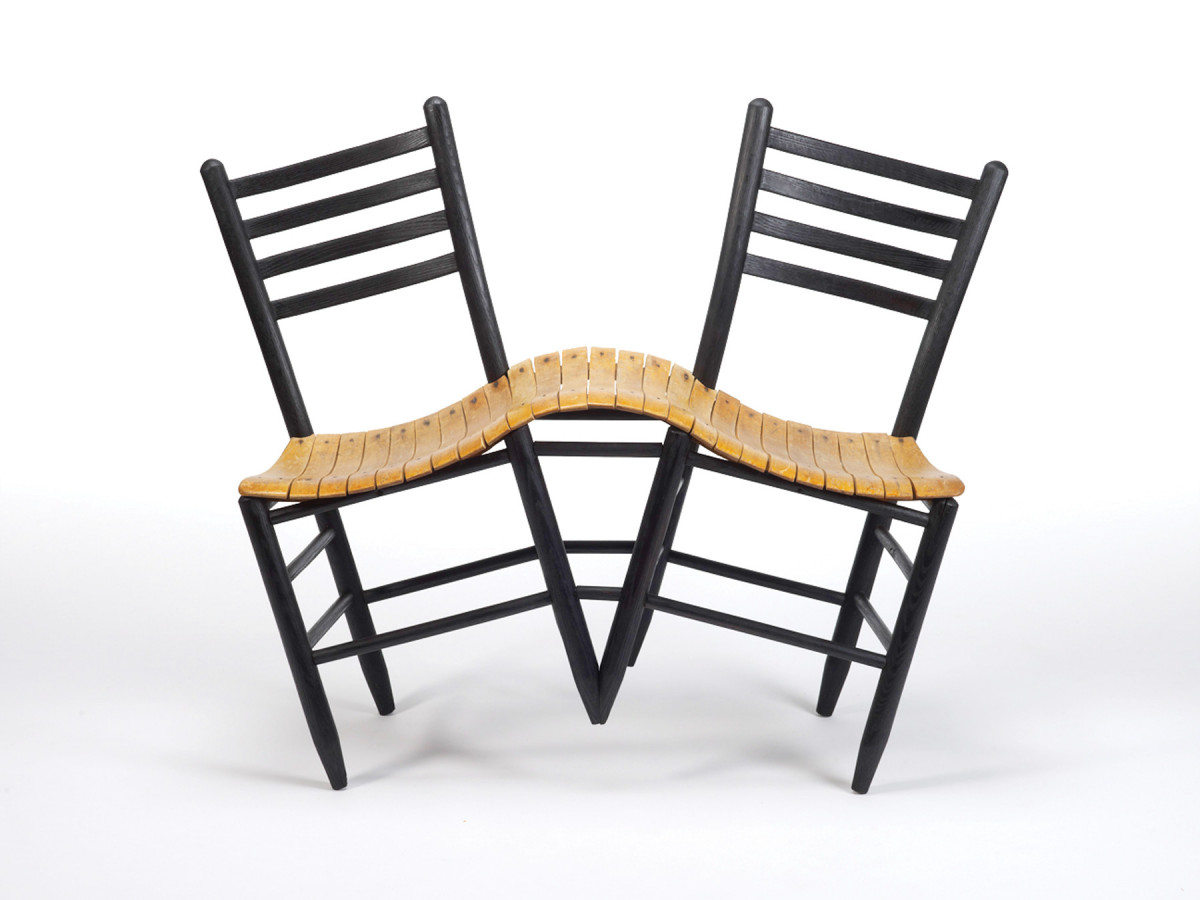
In furniture. Tom Shields, who has work in many museum collections, is a fine example of a contemporary furniture maker who uses the charred finish technique in his work.
When putting the flame to the wood, don’t be too aggressive at first. I approach the wood with the torch and move up and down the material so I am not lingering on any one place with the heat. By constantly moving the flame, the wood will burn evenly and be less prone to bending, warping or cracking. Also, if you stay in one spot, you run the risk of burning away too much material and creating a depression.
If the wood flares up, I simply blow it out and continue burning. I keep going over the piece until I can no longer see the color of the wood and there is an even black char on all the surfaces.
Wax on. Use a liberal amount of wax; the wood really soaks it up once it liquefies.
For some applications, however, partial burning can be an attractive alternative as well. Experiment!
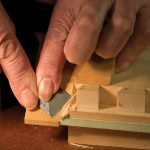
Next, use your Scotch-Brite pad to scoop up some paste wax and aggressively rub it into the wood. This works best while the wood is still warm so the wax melts and spreads around.
As you scrub, the charred particles will be picked up by the liquid wax and help to blend any unevenness. Once you have given the piece a good scouring, wipe off the excess wax and let it cool.
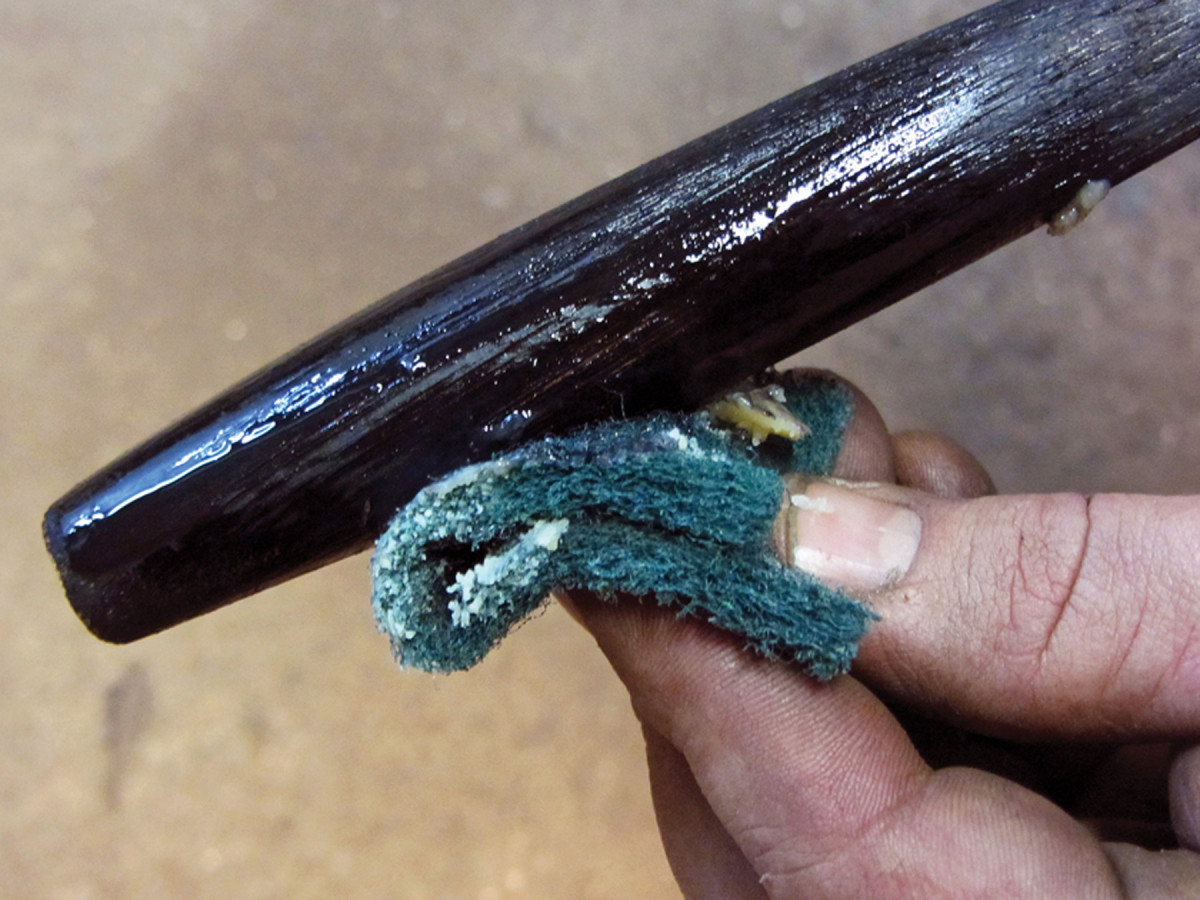
Fast finish. With about 30 seconds of scouring, you can skip an hour of sanding.
At this point, if you see any spots that seem light or uneven, you can go back and burn a little more. This will burn off any wax you have already applied, so you will have to reapply where necessary.
When the piece cools, you can add more wax to build up the finish, but I usually just buff with a rag and call it a day.
For me, this technique is purely aesthetic, so my experimentation has been rather limited. There are many places this finish could be used, though – such as woodworker Tom Shields does on his contemporary work.
Here are some supplies and tools we find essential in our everyday work around the shop. We may receive a commission from sales referred by our links; however, we have carefully selected these products for their usefulness and quality.