We may receive a commission when you use our affiliate links. However, this does not impact our recommendations.

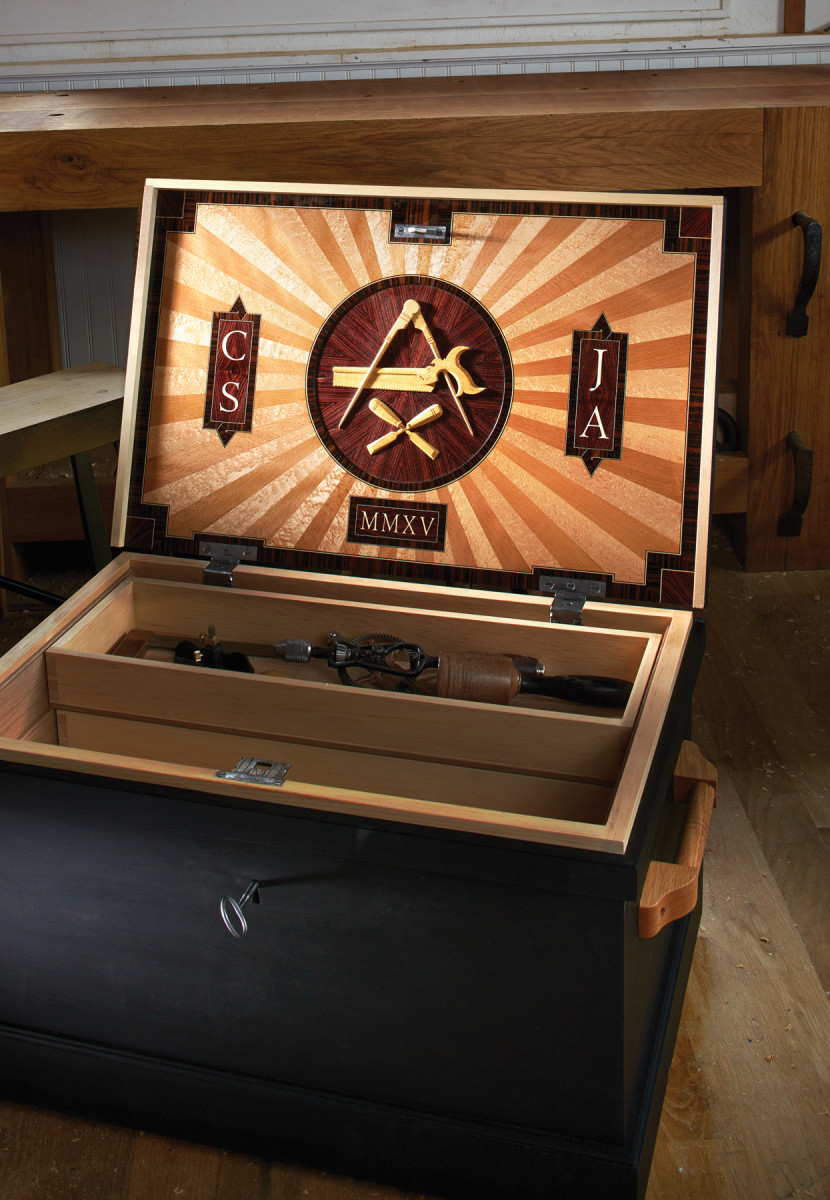
An embellished lid is your woodworking calling card.
Embellished tool chests are perhaps the quintessential calling card of the cabinetmaker. From Benjamin Seaton’s mahogany and tulipwood masterpiece to the unequalled work of Henry Studley, we woodworkers tend to pull out all the stops when we decorate our chests.
Read how the rest of the chest was built here.
I’m convinced that the old timers built as much for their own eyes as their customers’. And because I don’t build furniture for a living, I designed this chest lid for me, with its inlaid dividers, dovetail saw and crossed chisels. A sort of coat of arms for the battle against cheap furniture. With that in mind I ask you, “are you ready for a war?”
The Foundation
High-class ply. Like a good sandwich, the best plywood is homemade. Make sure you alternate each layer at 90°.
Typical chest lids are constructed either of a solid panel framed by a narrow dust seal, or by a smaller panel or two and wider, more substantial frame members to help keep the lid flat and isolate wood movement. I wanted as much real estate as possible for my embellishments, so a solid lid with a narrow dust seal would be ideal.
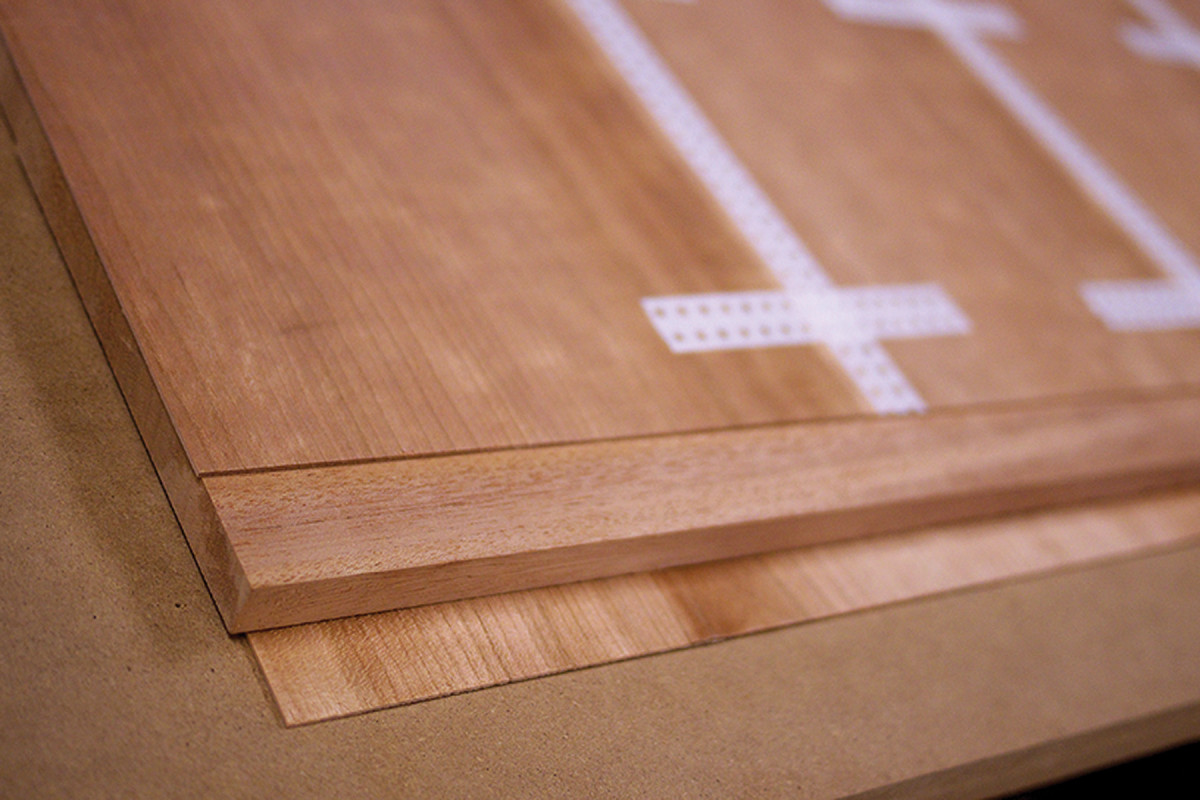
To get the stability needed, there is only one option for quality work: lumber-core plywood. This product has all but vanished from lumberyards, so I made my own with the best materials.
Lumber core has the same basic structure as any plywood: an odd number of layers with grain running perpendicular in each layer. But the core is thicker in a lumber-core panel, so you can work it and attach hardware to it like a solid-wood panel.
For the core I used mahogany, which I glued up from three boards, each about 6″ wide. It’s pretty easy to get quartered mahogany in these widths, but any quartered, mild-grain wood will work.
Onto each face of this core, glue a layer of 1⁄16“-thick veneer or two alternating layers of typical thinner veneer (always glue both sides of the panel at once), orienting the grain at 90° to the layer it’s glued to.
I made the panel about 3⁄4” larger in length and width than the final size. Final thickness is not so critical. My completed lid finished out around 7⁄8“.
The Sunburst
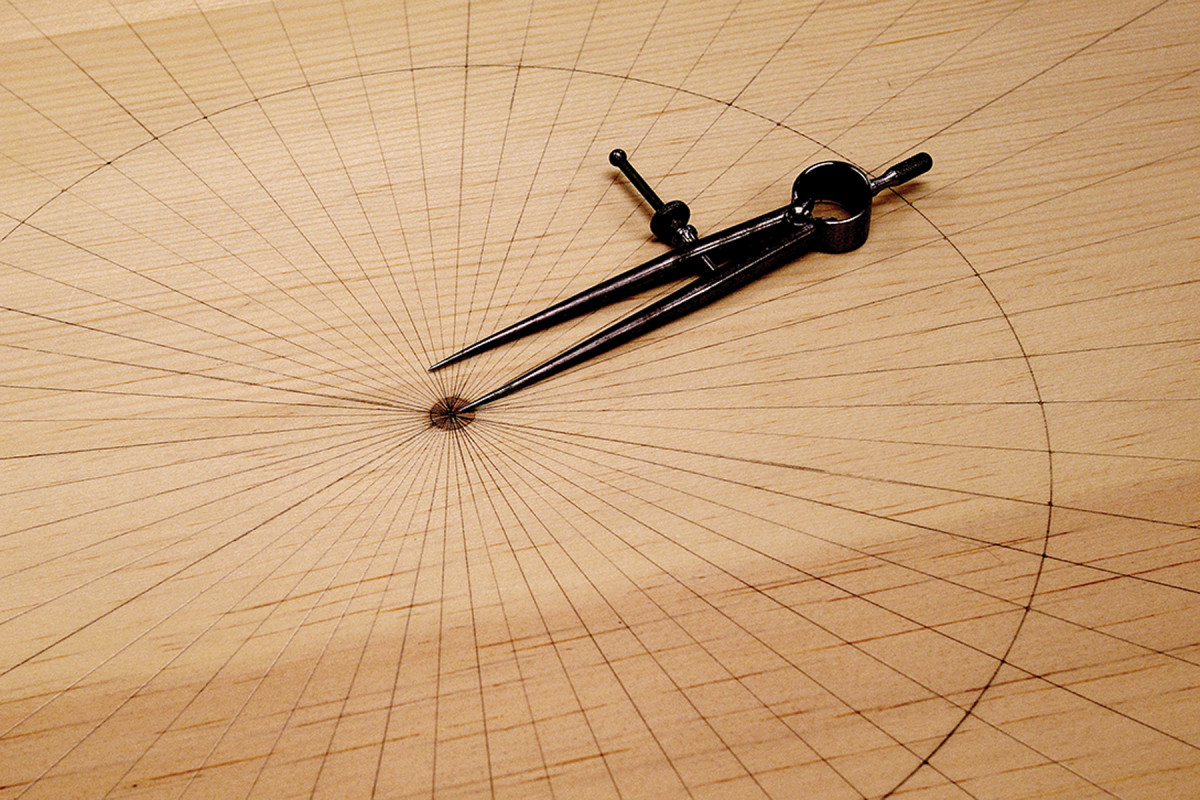
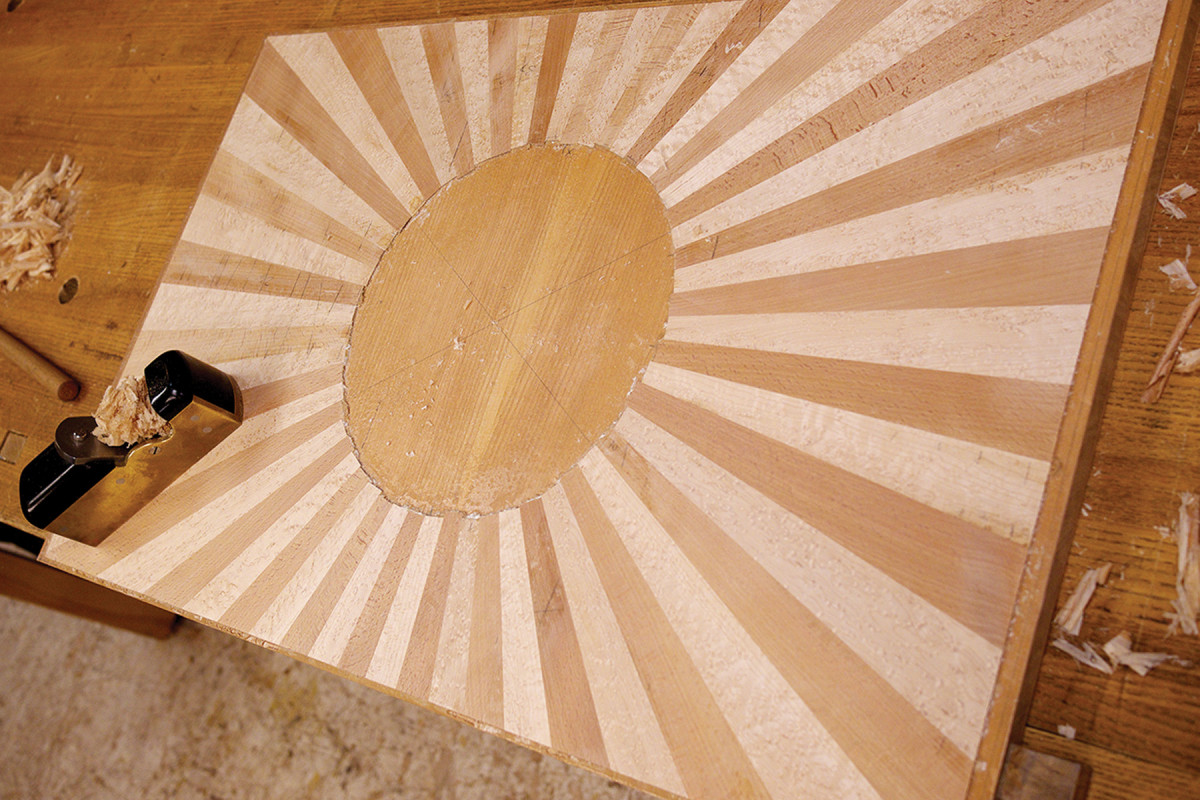
Divide & conquer. One tool is all it takes to lay out the sunburst.
To lay out the sunburst, draw a circle in the middle of the lid, then, using dividers, walk off as many rays as you’d like. Next, strike lines through the center point of the circle to the edge of the lid. Mine has 56 rays. That sounds like a lot, but once they get to the edge of the panel, they end up quite wide.
I didn’t want the rays to jump out too much, so I used woods that were close in value: bird’s-eye maple and quartered beech. I resawed these from one board so the grain matched.
Slice each ray at just over 1⁄16” thick. Cut more material than you think you’ll need, then cut some more. You will ruin some.
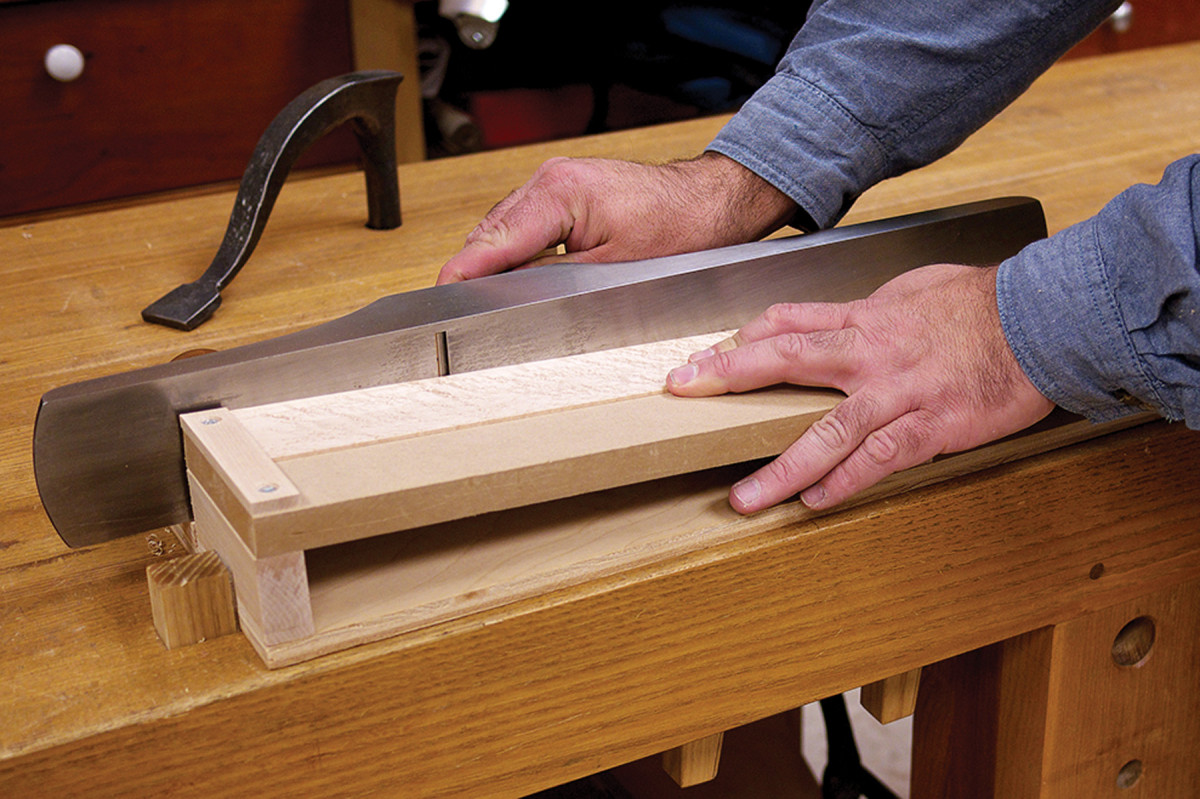
Arrow-straight. A ramped shooting board is used to present the edge of the rays to more of the plane’s iron. This keeps your plane sharper longer by spreading the wear on the blade.
To cut the rays to shape, first shoot one edge straight and square. My shooting board is ramped to use more of the plane’s iron. The board runs uphill so the action of the plane forces the thin ray down onto the board, which is also faced with self-adhesive sandpaper to keep the rays from slipping. A stop at the end keeps the rays from shifting forward. To use the shooting board, extend the edge of the ray over the ramp and plane the edge. The plane’s sole doesn’t ride against the edge of the ramp.
Now lay out the ray’s shape using the lines on the lid, cut close to the line and to length, then plane the tapered edge precisely on the shooting board. Secure the first ray on the lid with push pins, then move onto the next ray, taping each to its mate as you progress.
Fitting the rays one edge at a time allows a bit of wiggle room. If you’re off a tad on one ray, make up for it on the next one. When you get to the last ray, fit each edge precisely, but leave the ray extra long and separate from the others.
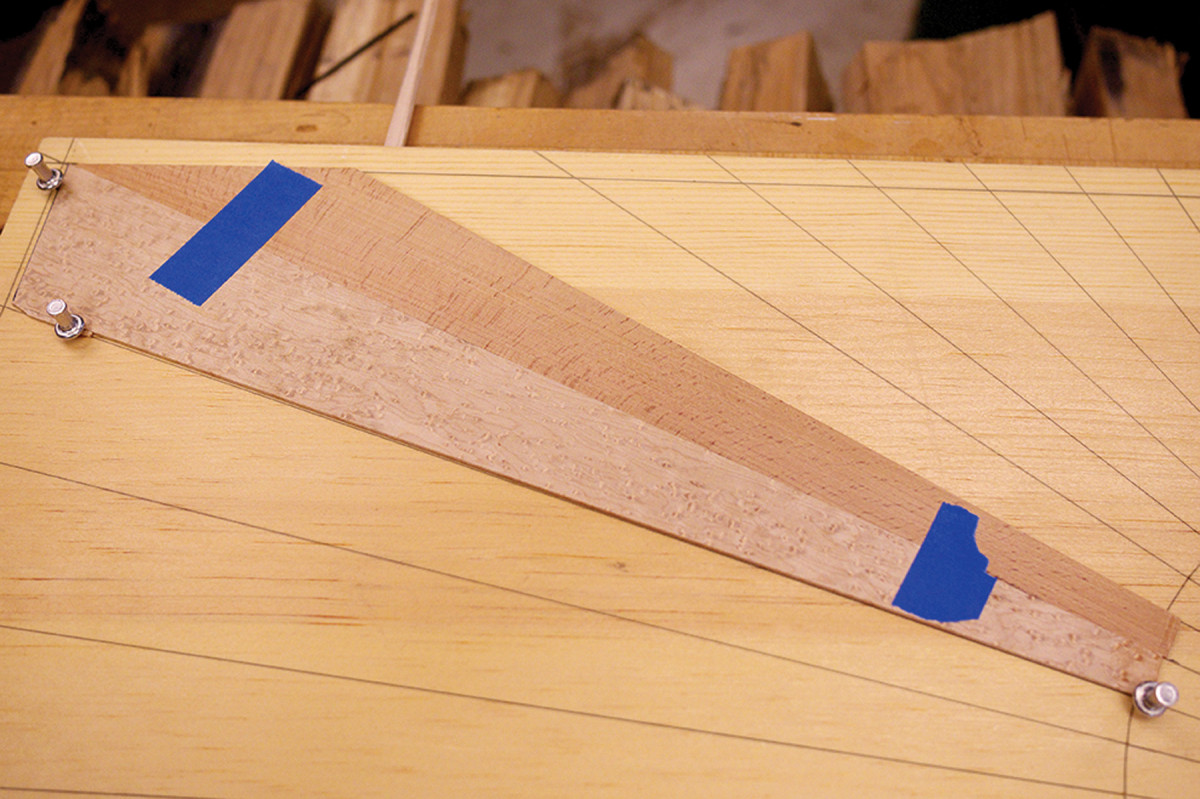
One by one. Fit the rays’ edges precisely, but keep the narrow end long. The wide end gets trimmed later when installing the crossbanding.
The rays are edge-glued before gluing them to the panel. Number the rays in sequence and, using a pencil, draw a light line that crosses each ray all around the sunburst. This will help you align each section during assembly.
Separate the sunburst into sections of about eight rays. Flip over each section and tape the rays together. Now flip it back over and remove the small pieces of tape you used to join each ray. Replace these with veneer tape along each joint. Once the veneer tape is dry, flip the section over again and remove the masking tape.
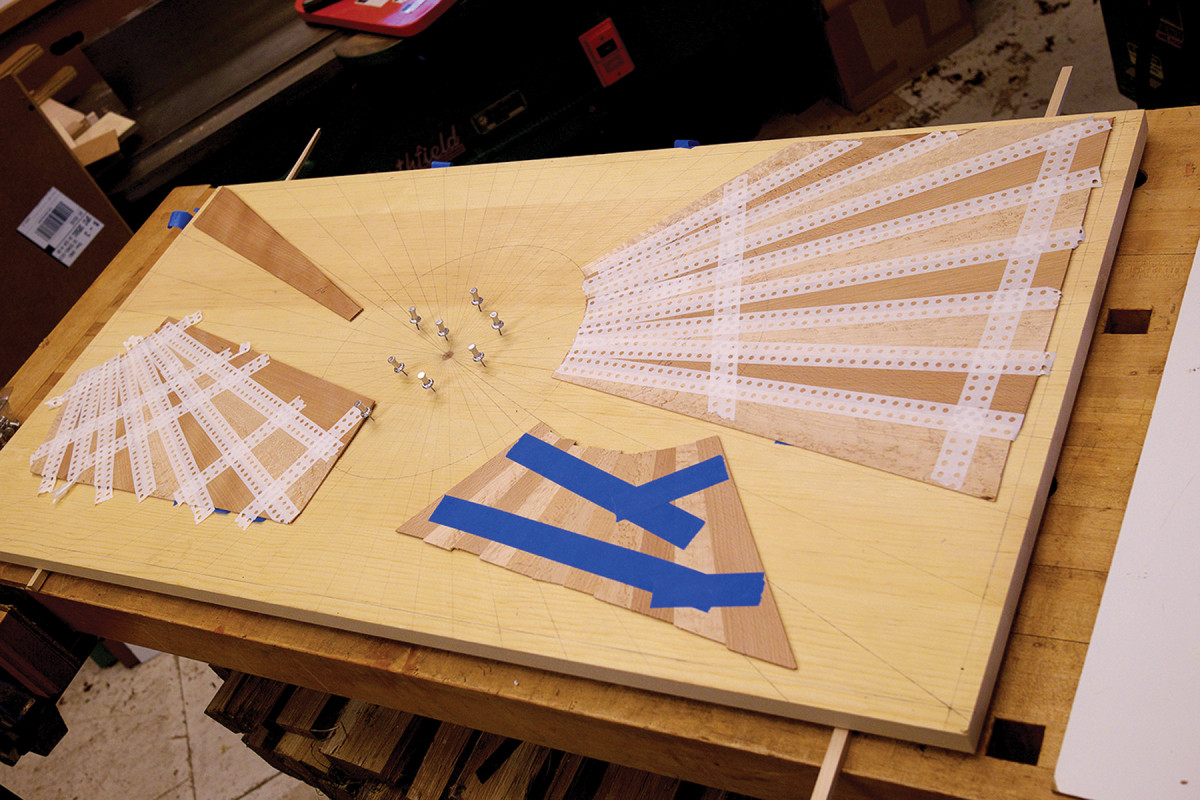
Sectioned off. Assemble a few rays at a time, then assemble each section into the final sunburst. This helps keep you sane.
To glue each section, fold open the rays one by one to expose the joint, run a small bead of glue, then do the next joint. Clean any squeeze-out, then lay the section flat between a couple of pieces of MDF or plywood and put a weight on it. Line the MDF with packing tape or waxed paper so the glue doesn’t stick.
With all the rays glued and cured, glue each section together the same way. Check the fit of all them together before gluing. You can tweak the fit by shooting the edges of the sections.
Here comes the fun. And it’s all right. Smooth-planing the sunburst is the first really satisfying moment of the process.
Finally, the last oversized ray is fit. It will need to be refit because the glue thickness, multiplied over 56 joints, has slightly changed the shape of the sunburst. Once fit, glue both edges and tape it into position. Don’t force it in too tight, or you’ll cause the whole sunburst to buckle like a potato chip. After it cures, scrape off any dried glue, then glue it to the plywood panel, along with the outside veneer (mine is sugar pine). After the glue cures, smooth-plane the sunburst.
Crossbanding & Medallion
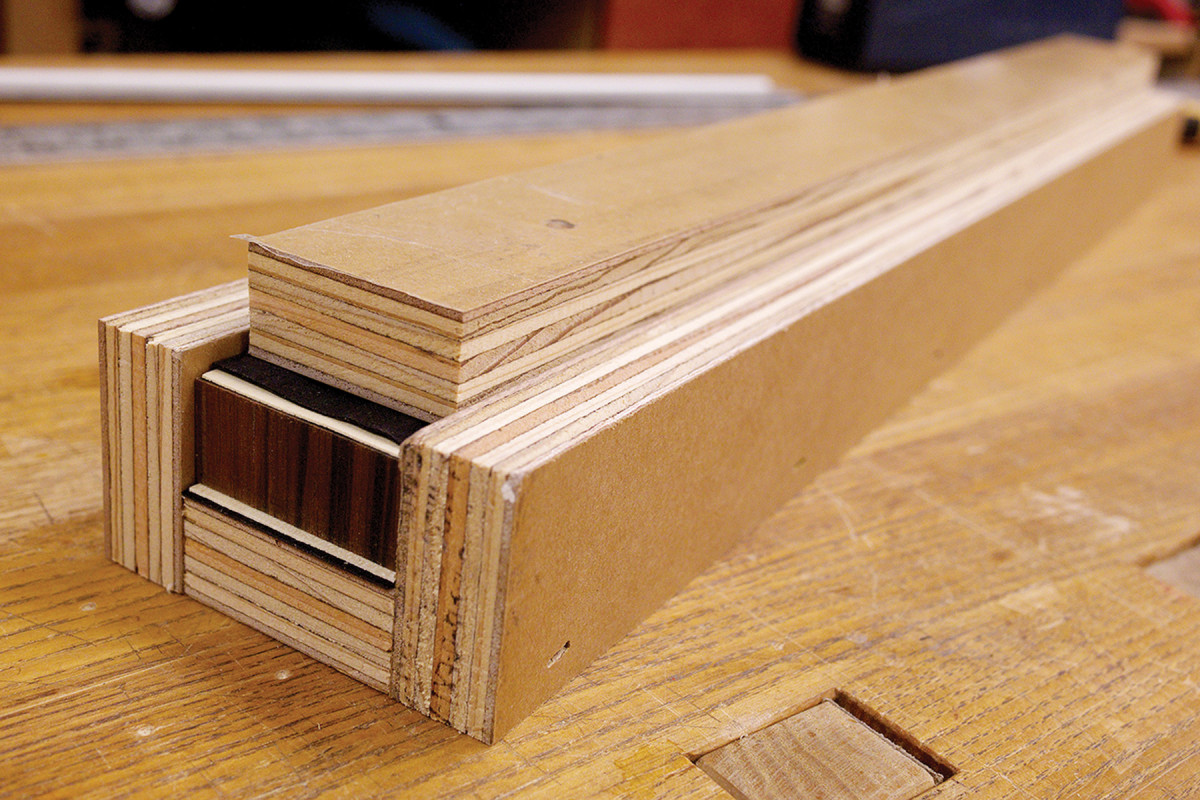
Squeeze this. The press box ensures your banding blank glues up straight and flat. I make these quickly with a pneumatic nailer.
To make the Macassar ebony crossbanding, cut slices from the end of a board about 5⁄8” thick, then sandwich these between double layers of holly and black-dyed veneer. Make sure the blank is longer than the longest run of banding on the lid. Glue them together in a “press box” made from plywood. I line the inside of the press with packing tape so the glue doesn’t stick. Because the ebony glue surface is all end grain, use epoxy. When the glue is cured, saw strips from the edge of the blank just a bit thicker than the sunburst.
To fit the banding, cut a shallow rabbet around the entire perimeter. Use a router with an edge guide to get close to your layout lines, then use a shoulder plane to make it all as perfect as possible. Where the banding wraps around the corner squares, hinges and catch, do the layout with a square and marking knife, then rout and chisel to the gauge line.
Start at any corner and cut a miter on one end of a piece of banding, then mark the other end and cut the miter, then glue it in place with masking tape wrapped over the edge. Fit the next piece to the end of the first piece, miter the opposite end, and glue. This way you’re only fitting and gluing one side of a miter at a time. Only the very last piece requires fitting both miters before gluing.
It’s tricky. Don’t be discouraged if you toast some of the banding. I did. For every goof, you’ve gained twice the experience.
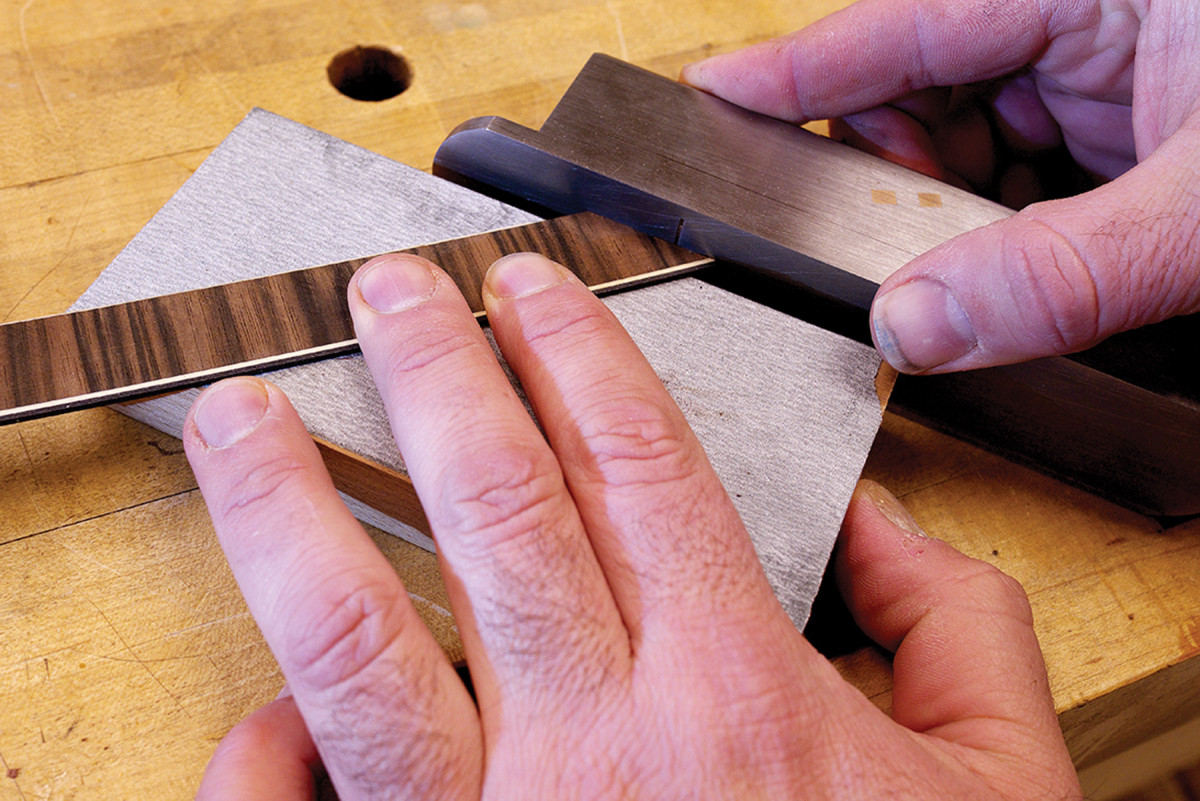
I use a small miter box with a fine dozuki saw and a small plane to tweak the angle. A small piece of scrap plywood with sandpaper glued to both faces acts as a planing support. You’ll need to plane from both directions in some cases to prevent blowout of the stringing or short grain.
Crossbanding is unusual in that the grain runs opposite to a typical miter. This means you can’t always plane with the grain. So use a file or sanding block to tweak the miter.
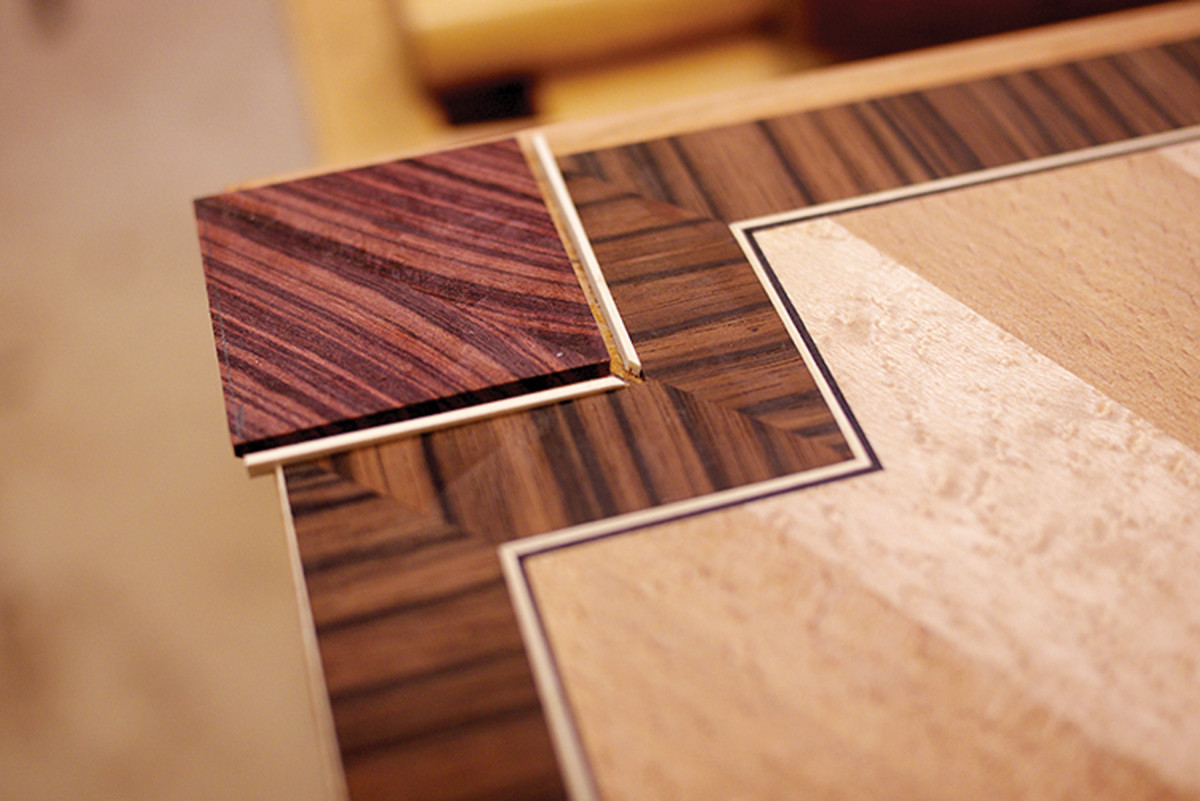
The bookmatched kingwood corner squares and holly stringing are fit and glued next. The crossbanding and corners should be oversized, so when you trim the lid to final size, they will terminate crisply at the very edge. I added a 3⁄16” strip of cherry banding to the short ends of the lid, which will get buried in the lid’s skirt.
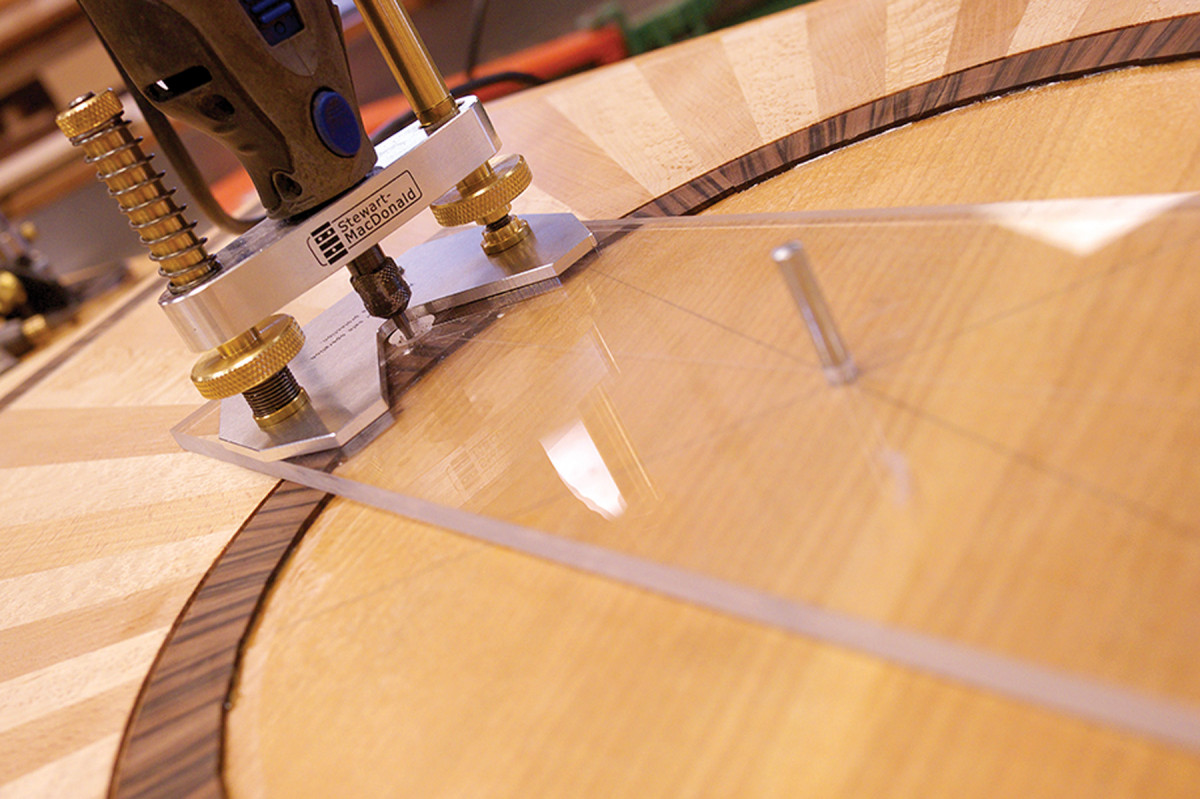
Channel groove. A 3⁄32″ metal-cutting end mill cuts a clean path for the stringing.
The circular crossbanding is easier than you might imagine. First, set up a router for circle cutting and rout a groove around the center of the sunburst.
Now crosscut tiles about 5⁄8” long from a 1⁄8“-thick, 3⁄4“-wide Macassar ebony strip. Plane both long-grain edges of the tile to a taper (you’ll get the angle right with some practice). Glue it down with hide glue as you press it to the outside edge of the groove. Move from tile to tile, fitting each one individually while gluing it to the edge of the previous tile. Don’t worry about the gap at the outer diameter – but don’t let it get too large.
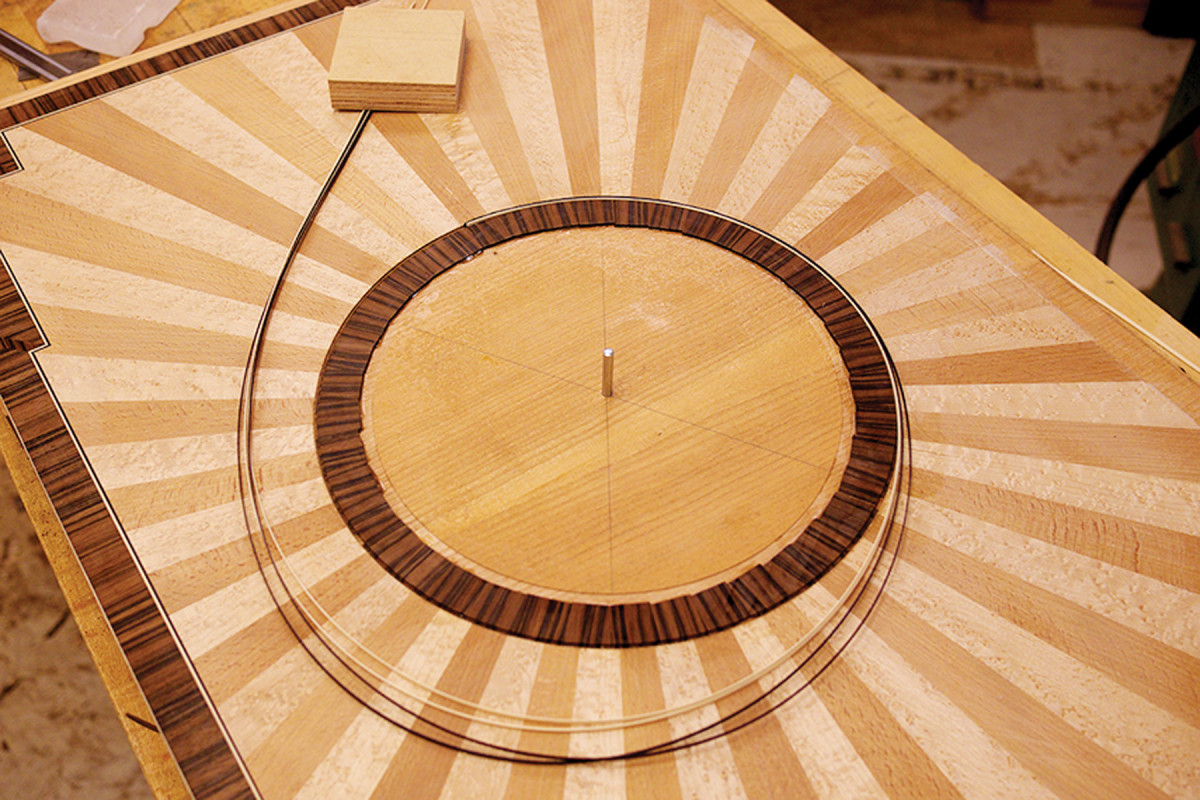
String theory. The block at the top holds the free end of the stringing while you glue a few inches at a time.
After the glue cures, plane the tiles flush with the sunburst. Set up a small router to cut the channel for the stringing between the outside edge of the tiles and the sunburst. I use a 3⁄32” end mill in a Dremel tool with a mini router base.
To glue in the stringing, first glue the veneer lines together for the first inch or so for easy handling, then take a chisel and cut a miter on this end. With a little glue in the groove, begin pressing the stringing into the groove, doing a few inches at a time. They should be snug, but not tight, or they may not fit at all once saturated with glue.
When you reach the beginning, hold the end of the stringing lines up to the miter and cut a matching miter on the free end. If you’re careful, this mini scarf joint will disappear. Let the glue cure, then plane the stringing flush.
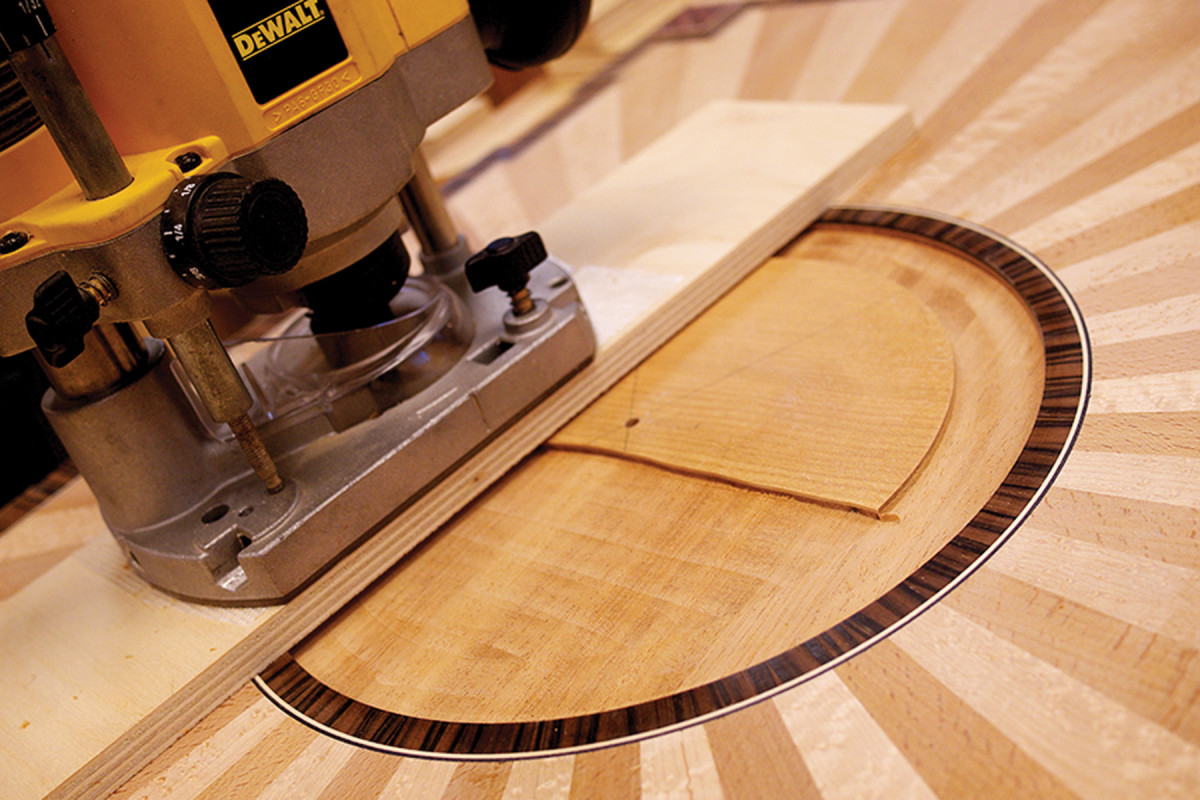
Rout the enemy. Waste away the center of the circle. The extended base keeps the router from taking a dip.
Finally, cut the inside diameter of the tiles with your circle-cutting router then excavate the circle to a uniform depth. You’ll need to attach a larger auxiliary base to your router to span the cavity. The final depth should be about 1⁄16” deeper than your medallion’s thickness.
With your circle-cutting router, cut a piece of MDF or hardboard to act as a template for sizing the medallion. Fit the medallion template to the lid precisely, but not tightly. If you test-fit the medallion later and it’s too tight, it might get stuck. It should fit easily, but not sloppily.

It’s good to be the king. Kingwood, that is. Arrange the sequential slices as pictured, and each ray will be no more than two slices away from its mate.
Make the sunburst medallion the same way as the large one. Bookmatch every other ray, number them and arrange them in order as shown below. By arranging the pieces this way, the grain will match all the way around.
Glue it up the same way as before, but this time assemble each half, then joint the two straight edges to complete the medallion. Attach the circle template to the medallion with double-sided tape and rout with a bearing-guided bit.
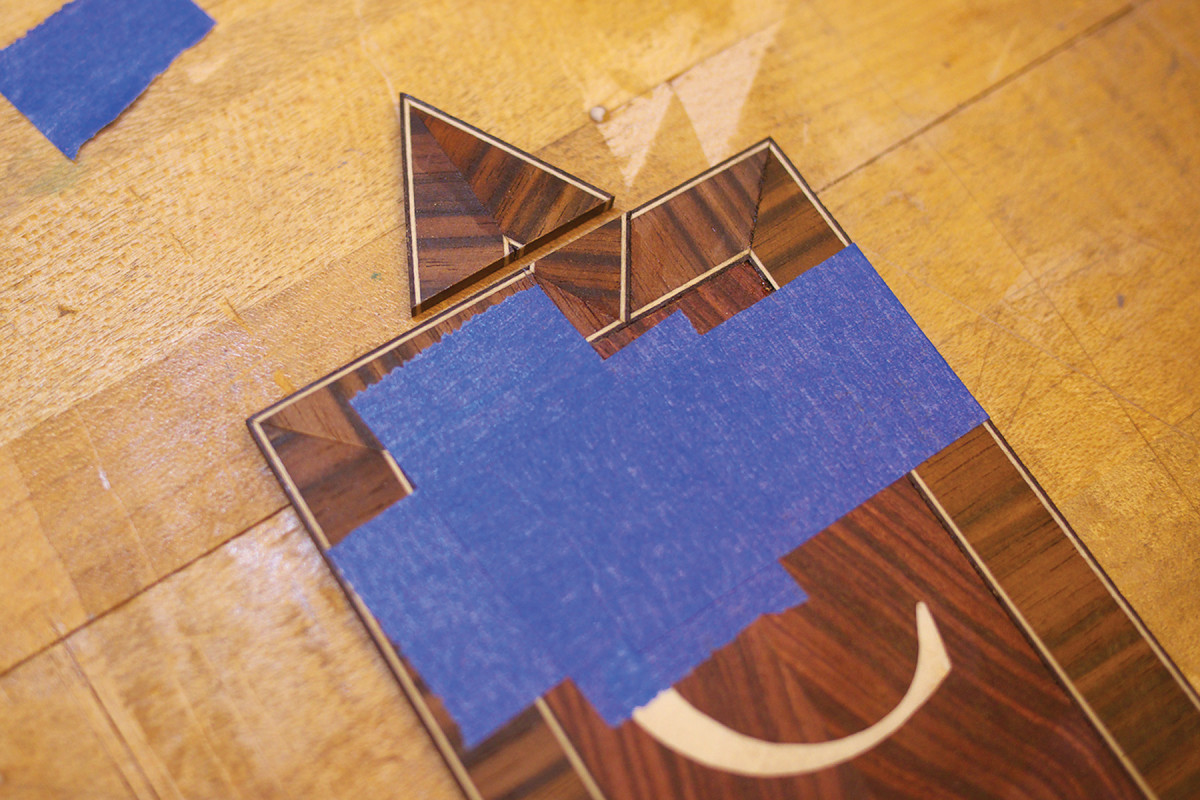
The Monograms
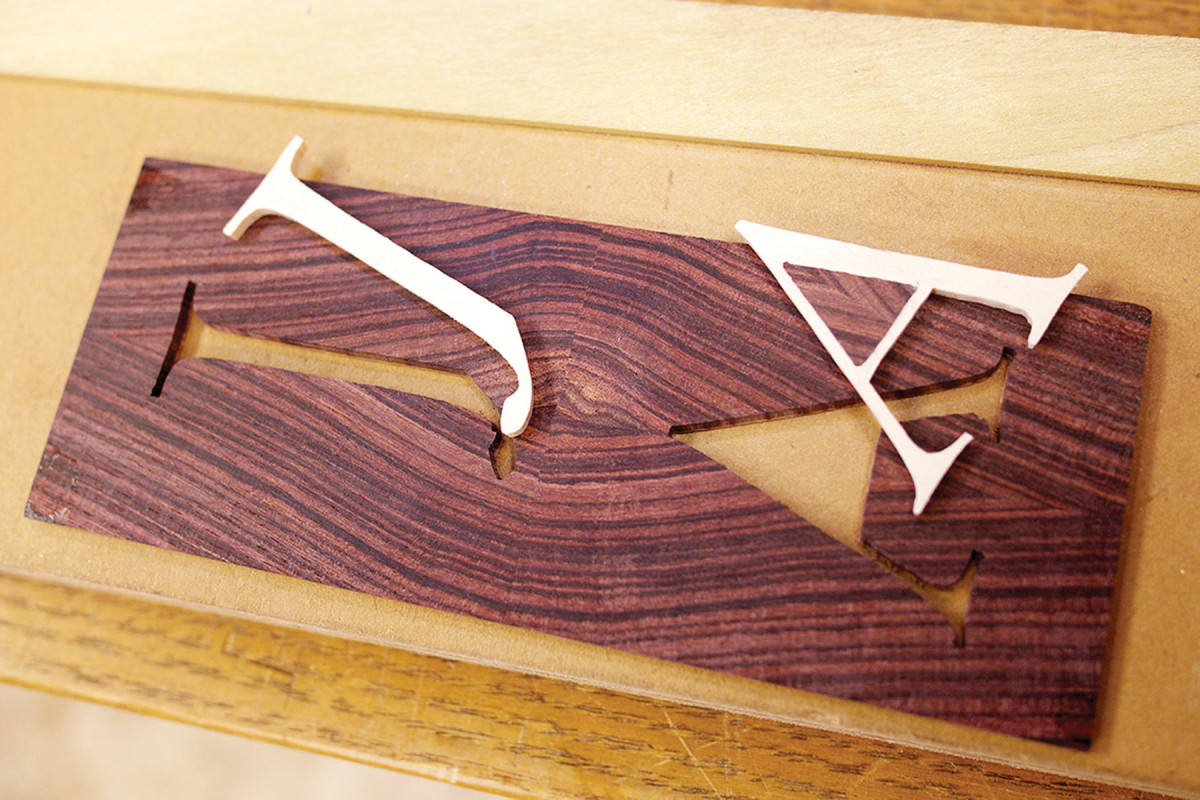
Buy a vowel. When you cut the double-bevel inlay, the letters will fit just perfectly. This is inlay for the lazy, but smart.
To make the monograms, start with the background wood. I used kingwood to match the medallion and corner squares. Using resawn stock allows you to make a four-way bookmatch that looks elegant behind the holly letters. Wrap the background with a smaller version of the ebony banding, mitering the corners. At the top and bottom of each monogram, using 30° and 60° miter cuts, create a “weaved ribbon” design. This adds tons of visual interest and dimension to the monogram. Glue each piece to the background’s edge as you fit each miter.
But before the crossbanding can be fit to the background, the holly letters must be inlayed. Well, that’s not entirely true. The letters and mortises are actually cut out simultaneously on the scrollsaw with the table tilted slightly.
This double-bevel technique (about which I wrote in the August 2013 issue of this magazine, #205) creates a wedge-shaped holly letter that drops into an equally tapered recess for a flawless fit.
Here’s the point. Make the points as an assembly, plane the bottom edge flat, then glue it to the top of the monogram. This is much easier than fitting each point separately.
Tack-glue a piece of holly to the kingwood (they should both be the same thickness), tilt your saw to about 10° to start, then make some test cuts on the edge of the piece. If the piece on top fits perfectly in the bottom and ends up flush, you’ve got it. If it’s too loose or tight, adjust the tilt of the table until it’s just right.
When you test-cut, notice that when moving clockwise or counterclockwise, either the top piece will fit in the bottom layer or vice versa. You’ll need this knowledge when cutting out interior shapes, such as the triangle in the letter A. The Roman numerals are made the same way.
To inlay the completed monograms, tack them in position with a few tiny dots of cyanoacrylate glue, then scribe around them carefully with a hobby knife.
Crisp. If this mortise was cereal, it’d be magically delicious. But you can’t get good results with lucky charms. You need sharp tools, and that’s no blarney.
Pop off the monogram with a thin knife, then rout the mortise to just a little less than the monogram’s thickness and chisel carefully right in the scribe line. Before scribing, you can file the edge of the monogram at a slight angle (just a couple degrees at most), so your scribe line ends up slightly smaller than the inlay, encouraging a perfect fit.
Glue the monograms in using a flat caul, then plane them flush.
At this point, you can scrape the lid flat and smooth, cut the top to final size and apply a finish (leave the outside and edges unfinished for now). Sanding kingwood and holly at the same time is risky business (the kingwood heats up and bleeds red into the holly) so plane and scrape the final surface, sanding very sparingly.
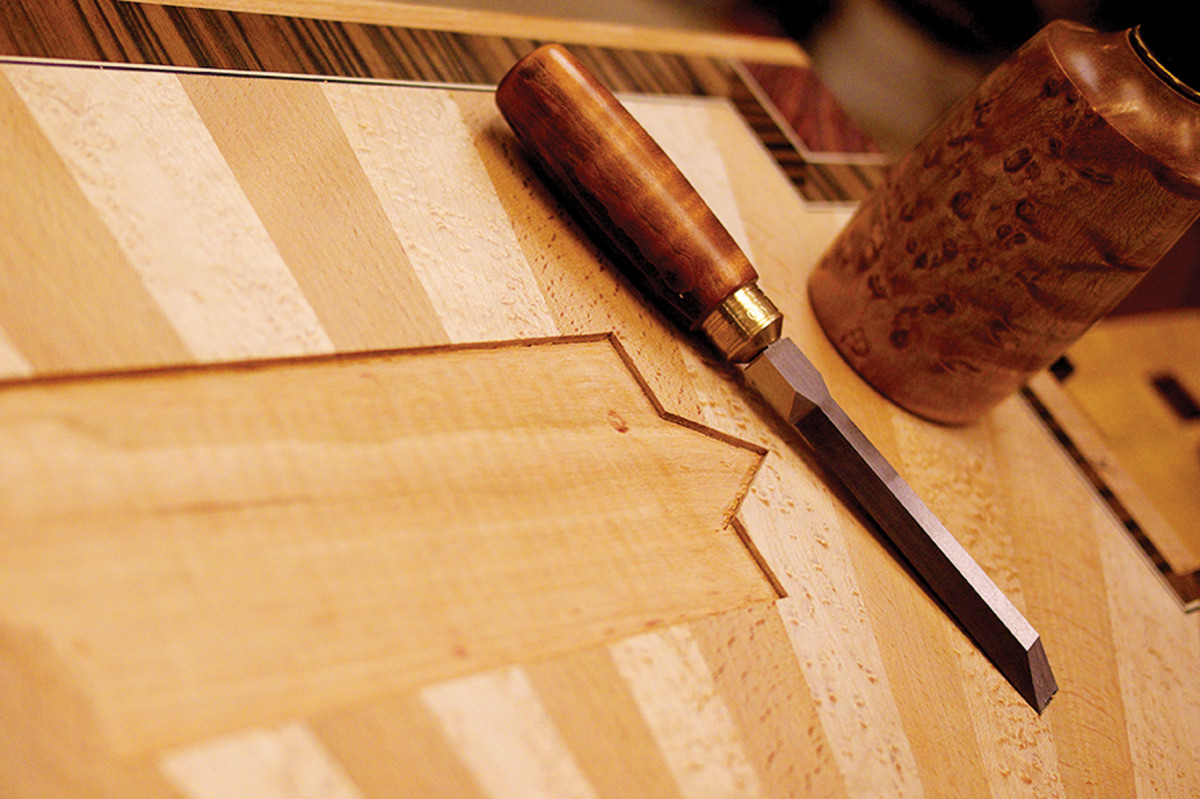
The Montage
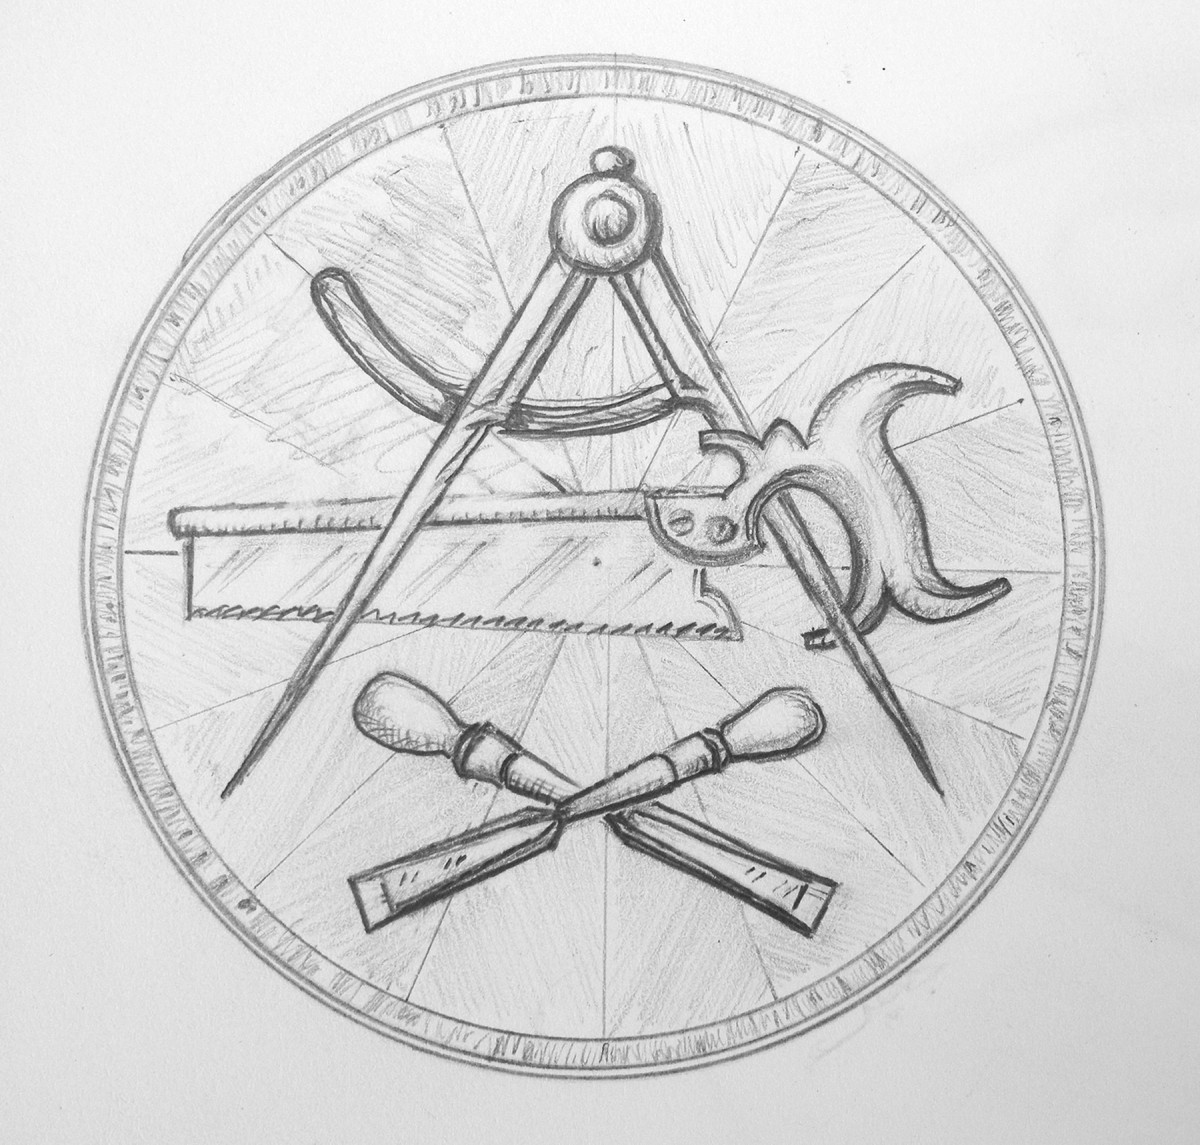
Pencilshop 2.0. Use the meat computer God gave you and render yourself a coat of arms.
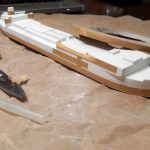
Still with me? Excellent. Because the montage is where you get to break free and have some real fun. To get the right look, first make some pencil sketches of your favorite tools. Don’t worry if they don’t look perfect. Just sketch roughly to let your ideas flow. Once I was happy with my sketch, I then refined everything using drawing software so I could easily manipulate the size and arrangement of the tools.
Print the tool profiles and glue them to blanks of boxwood. Cut them out on the scrollsaw or fret saw and refine their shapes with carving chisels, rasps, scrapers and files. Don’t pay attention to which tools overlap the others, or what parts might get cut away. Just carve the tools as if they will stand on their own.
Once the tools are completely shaped, you can begin the layout process. Set out the tools on your sketch and mark the parts that overlap with each other.
Use a marking knife to accurately scribe your cutlines. I use a fine dozuki to make the cuts, then refine them with planes, files and chisels.
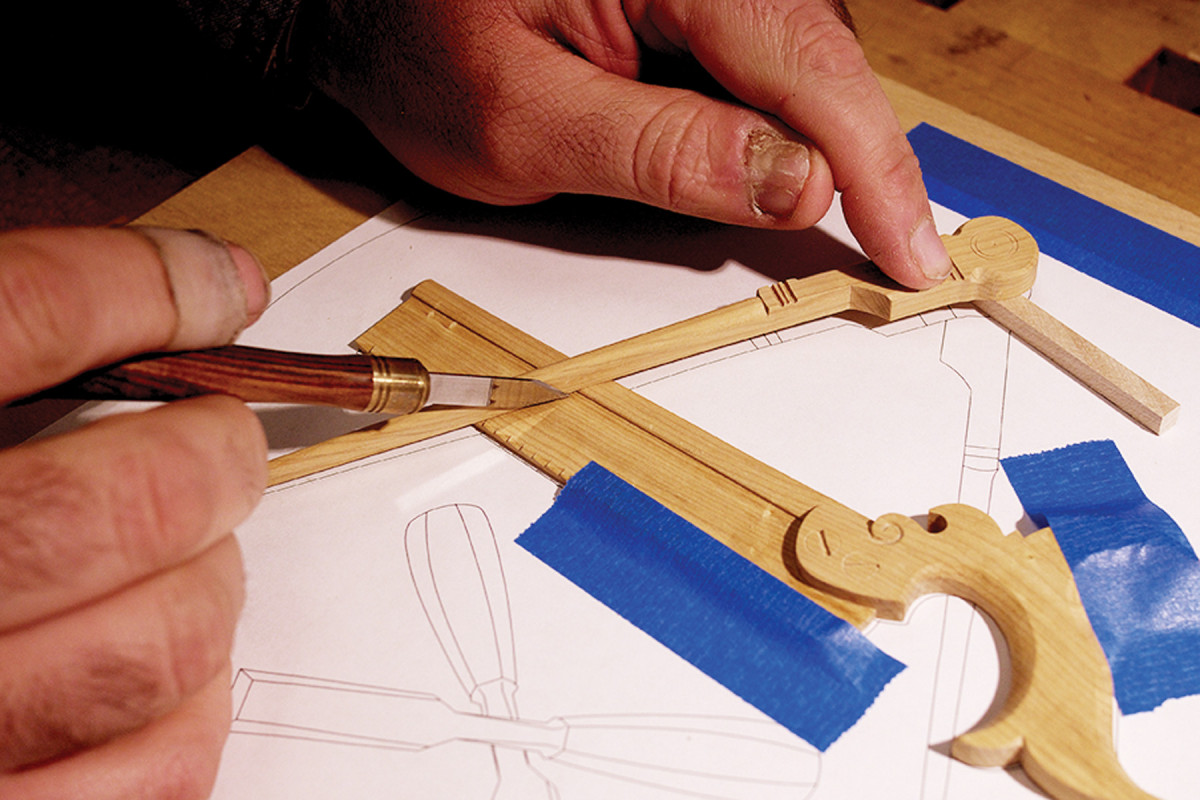
Slice & dice. With the tools precisely made, you can then cut them up into little pieces. It’s a little sad. You have hugged a tree lately, haven’t you?
Make everything fit sweetly, then tack the tools onto the medallion and scribe with a hobby knife. Press the knife tightly to the edge, make a light pass, then go back once or twice to deepen it slightly.
Pop the tools off the medallion, then rub some chalk dust into the scribe line, which will make it highly visible. Rout the inlay mortise, and chisel right in the scribe line on straight sections.
On tight curves, I use the Dremel tool to rout directly up to the scribe line. When you see the chalk disappear, you’ve routed to the line.
Ease the bottom arris of the inlay and test-fit carefully. It should be tight. Be careful as you remove the piece; it could chip out some of the short grain if you’re ham-handed.
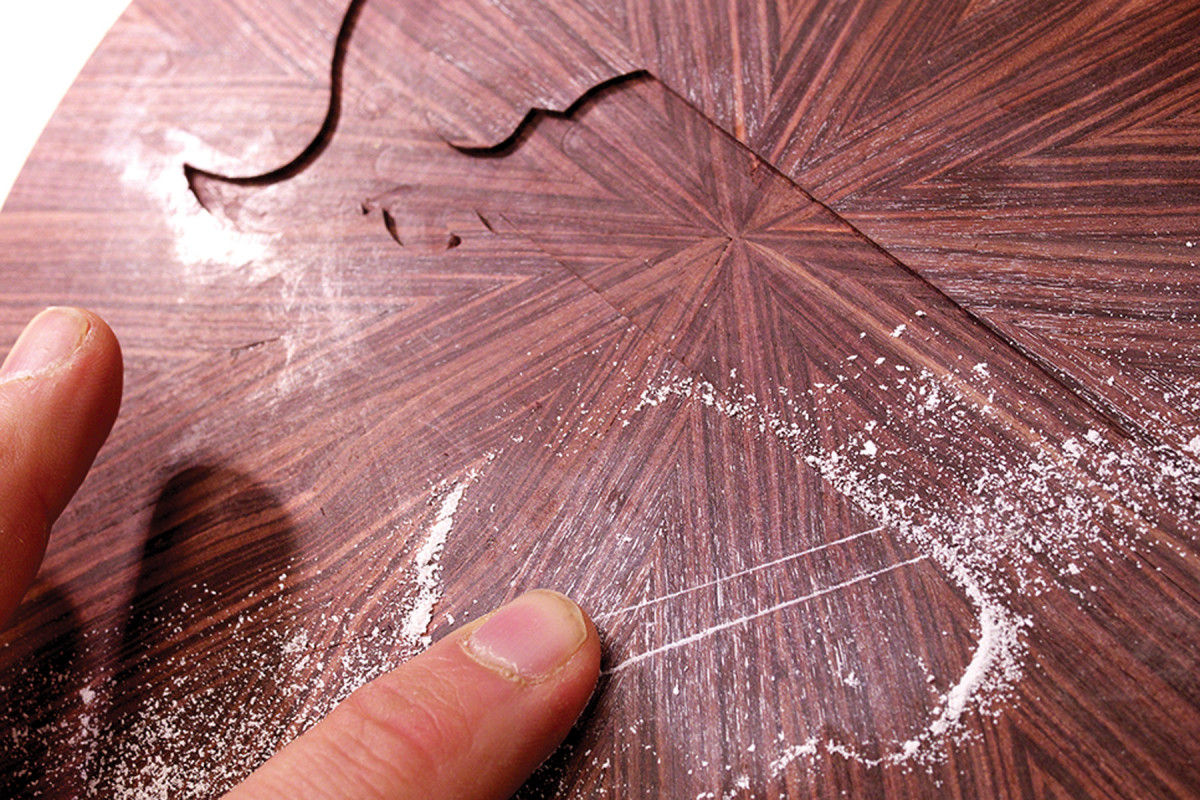
Chalk it up. A bit of white powder in the scribe lines ensures you don’t blow it when routing the mortise.
Once the inlay mortises are cut, finish the medallion, keeping finish out of the mortises – I use an old T-shirt on a cork block. Then glue the medallion into the lid.
While that cures, apply finish to the boxwood tools. Mask the bottom surface so it stays free of finish. Once the finish is dry, glue the tools into the medallion using hide glue. Brush a little into the mortise and press the tools firmly in place (tapping lightly with a block and small hammer if necessary), hold for a few seconds, then do the next piece. Don’t use excessive glue. When it’s dry, you can pop off any little beads of dried glue with the tip of a hobby knife.
If you’re thinking of making an embellished lid for your tool chest (and I think you should) make sure you develop a strategy, sharpen your weapons and above all, emerge from the ashes of battle with your own trophy of victory.
Blog: Read this post from the author with more details, more pictures and a video about the creating of the lid panel.
Here are some supplies and tools we find essential in our everyday work around the shop. We may receive a commission from sales referred by our links; however, we have carefully selected these products for their usefulness and quality.