


We may receive a commission when you use our affiliate links. However, this does not impact our recommendations.

My Uncle Bob was a butcher—not the woodworking kind people joke about, but the real thing. In his off hours, he used to switch blades and put his meat-cutting bandsaw to work as a woodworking tool. You won’t find any of his stuff in the Museum of Modern Art, but you will find one of the side tables he built over 40 years ago perched next to my favorite chair, still going strong.
Uncle Bob built his original version using plywood and basic “glue and screw” joinery. This version kicks things up a notch, but incorporates the same dimensions, simplicity and timelessness as the original. First, let’s talk about wood. Prepare to be surprised!
Red alder is the ticket
Any wood that holds screws reasonably well is OK for this project, but I dug deep into my lumber pile in order to find something special: clear red alder. “Clear” is a special grade of alder that doesn’t have any knots. Most other alder boards have plenty!
Red alder is very easy to work. Planing it by hand is a breeze, and it sands like a dream. I really appreciated those user-friendly qualities when I made the table’s round parts, which are glued up from narrower boards. Evening them up and smoothing their bandsawn edges took very little time and effort.
Clear alder is much less expensive than clear cherry and walnut, but it’s quite easy to finish alder to look like those two premium woods. I used a simple technique that turns alder into cherry—I’ll bet you were fooled! More on that later.
All of the table’s parts are made from 3/4″ thick solid wood, but you could save time by making the subtop from plywood (Part C; see Fig. A). Once the table is assembled, you really can’t see the edge of this piece—no one will know that it’s plywood. If you do use plywood, be sure to fasten the top in the manner shown in Fig. A, which allows the top to expand and contract. If the subtop is solid wood, you don’t have to drill oversize holes or use fender washers, as shown in the drawing.
Build the table
Mill the legs (A) to final thickness and width. Cut them about 1″ extra long, then trim both ends at 3-1/2° (Fig. 02). Note that this angle leans in the same direction on both ends.
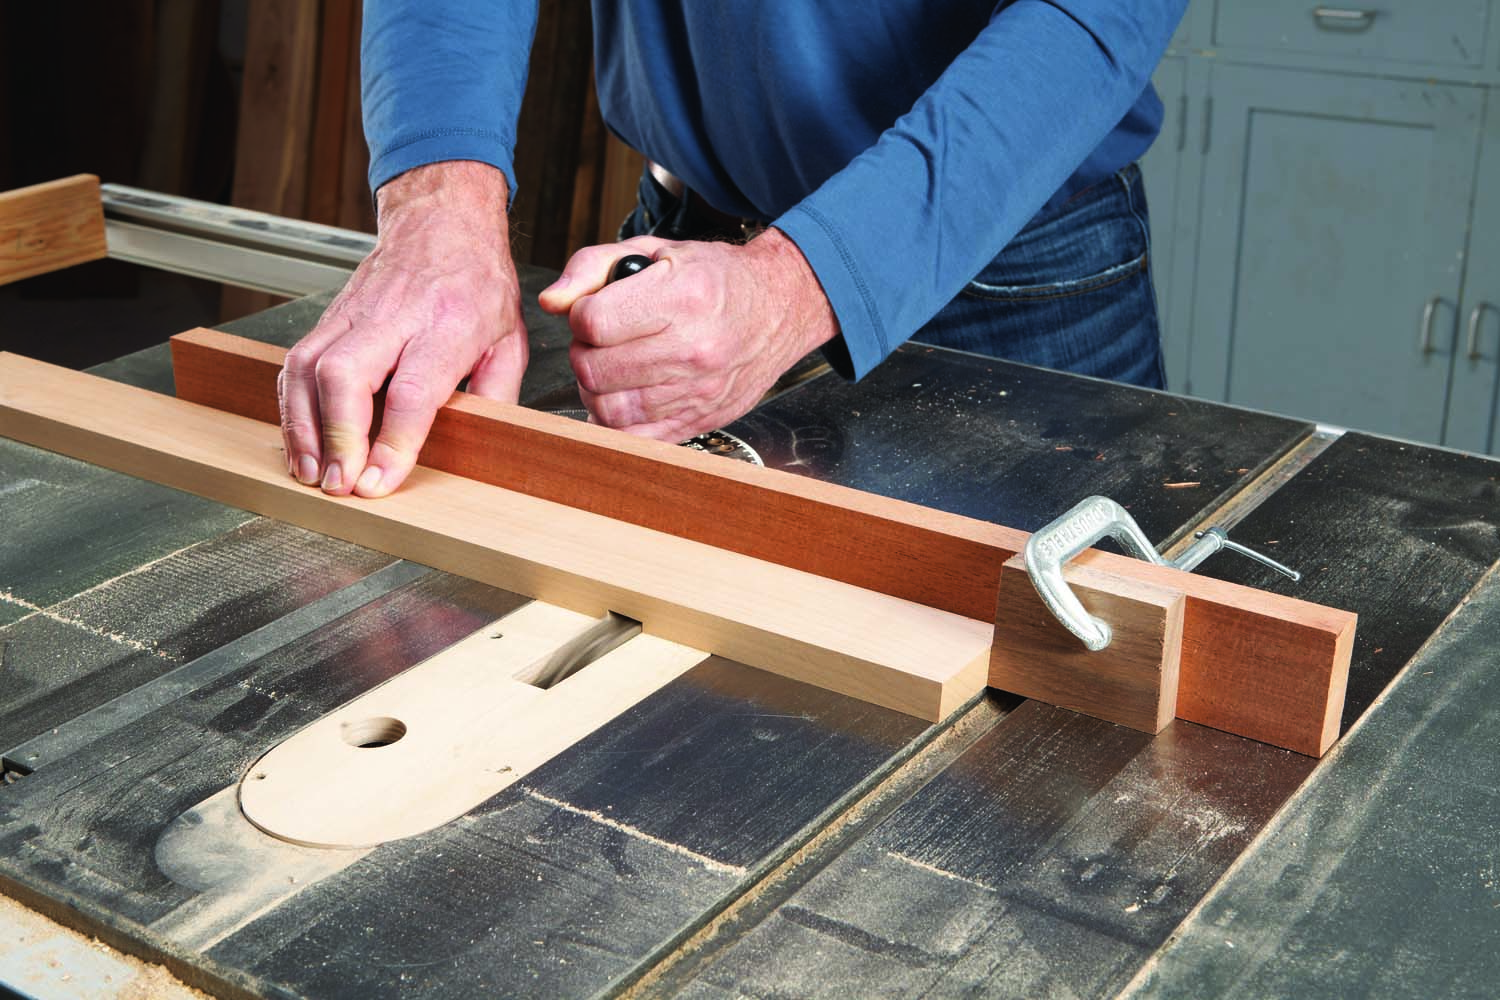
Photo 1. Begin by making the legs. First, cut notches in them using a dado set. These notches will receive the shelf.
Next, make blanks for the shelf (B), subtop (C) and top (D). Trim the shelf to its final square size (Fig. 03), but leave the subtop and top oversize.
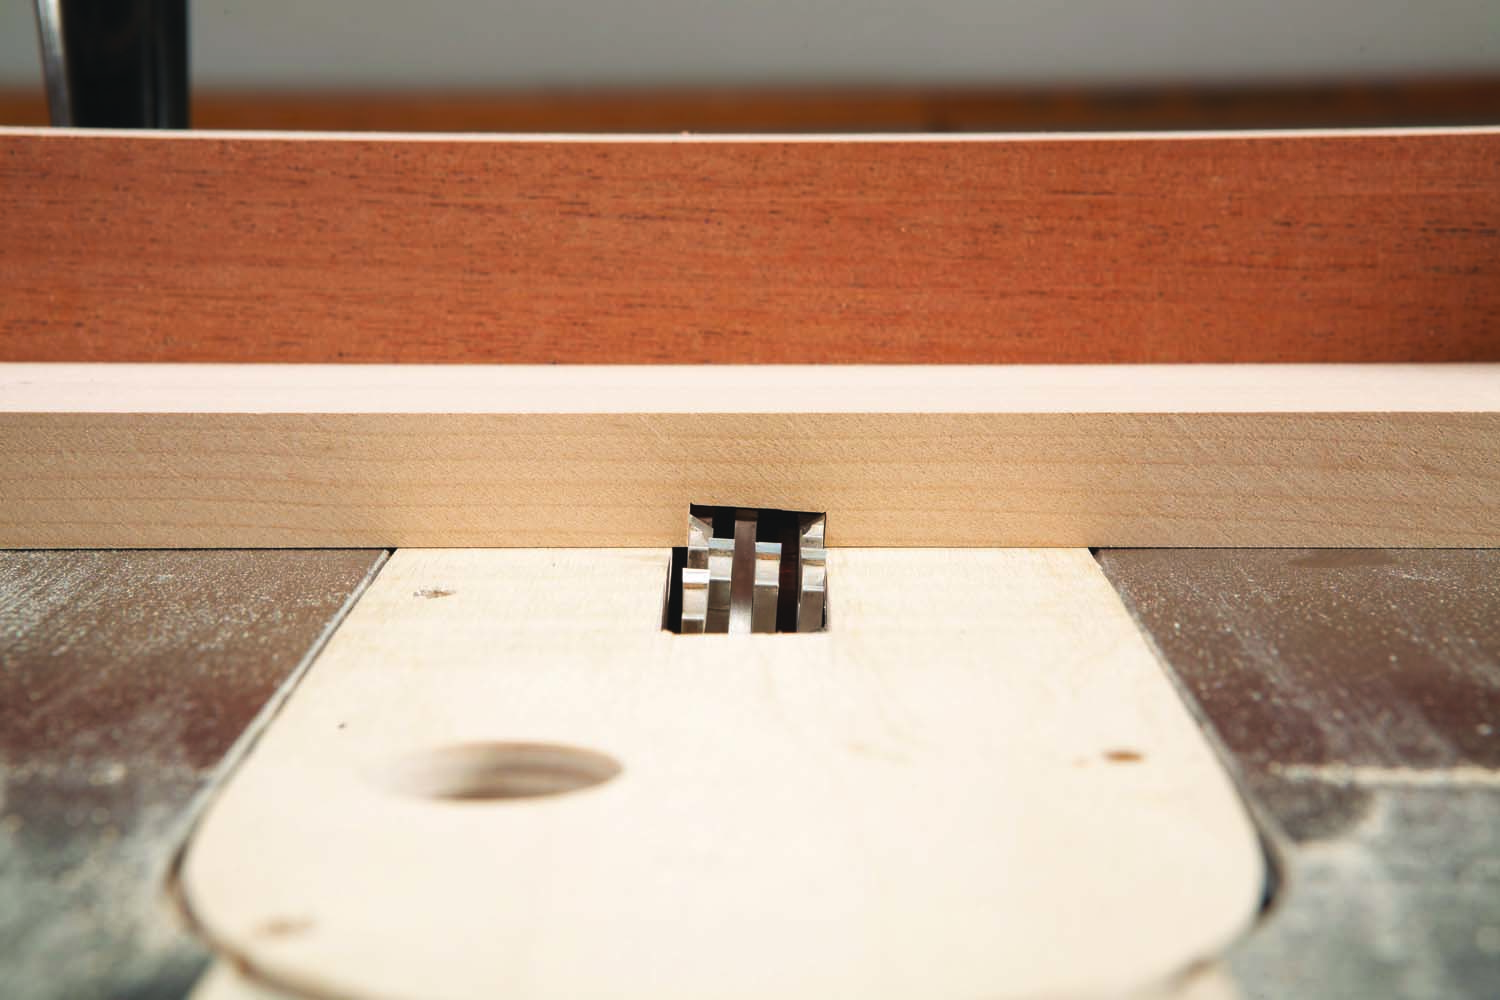
Photo 2. Tilt the dado set 3-1/2° when you cut the notches. Cut similar notches on the upper end of the legs to receive the table’s subtop.
Cut notches in the legs to receive the table’s shelf and subtop (Photos 1 and 2). These notches should fit tightly around the shelf—you may have to add shims to your dado set to achieve this. Tilt the dado set 3-1/2°, then raise it to cut 1/4″ deep. Use a stop block to ensure that all the notches are in the same position.
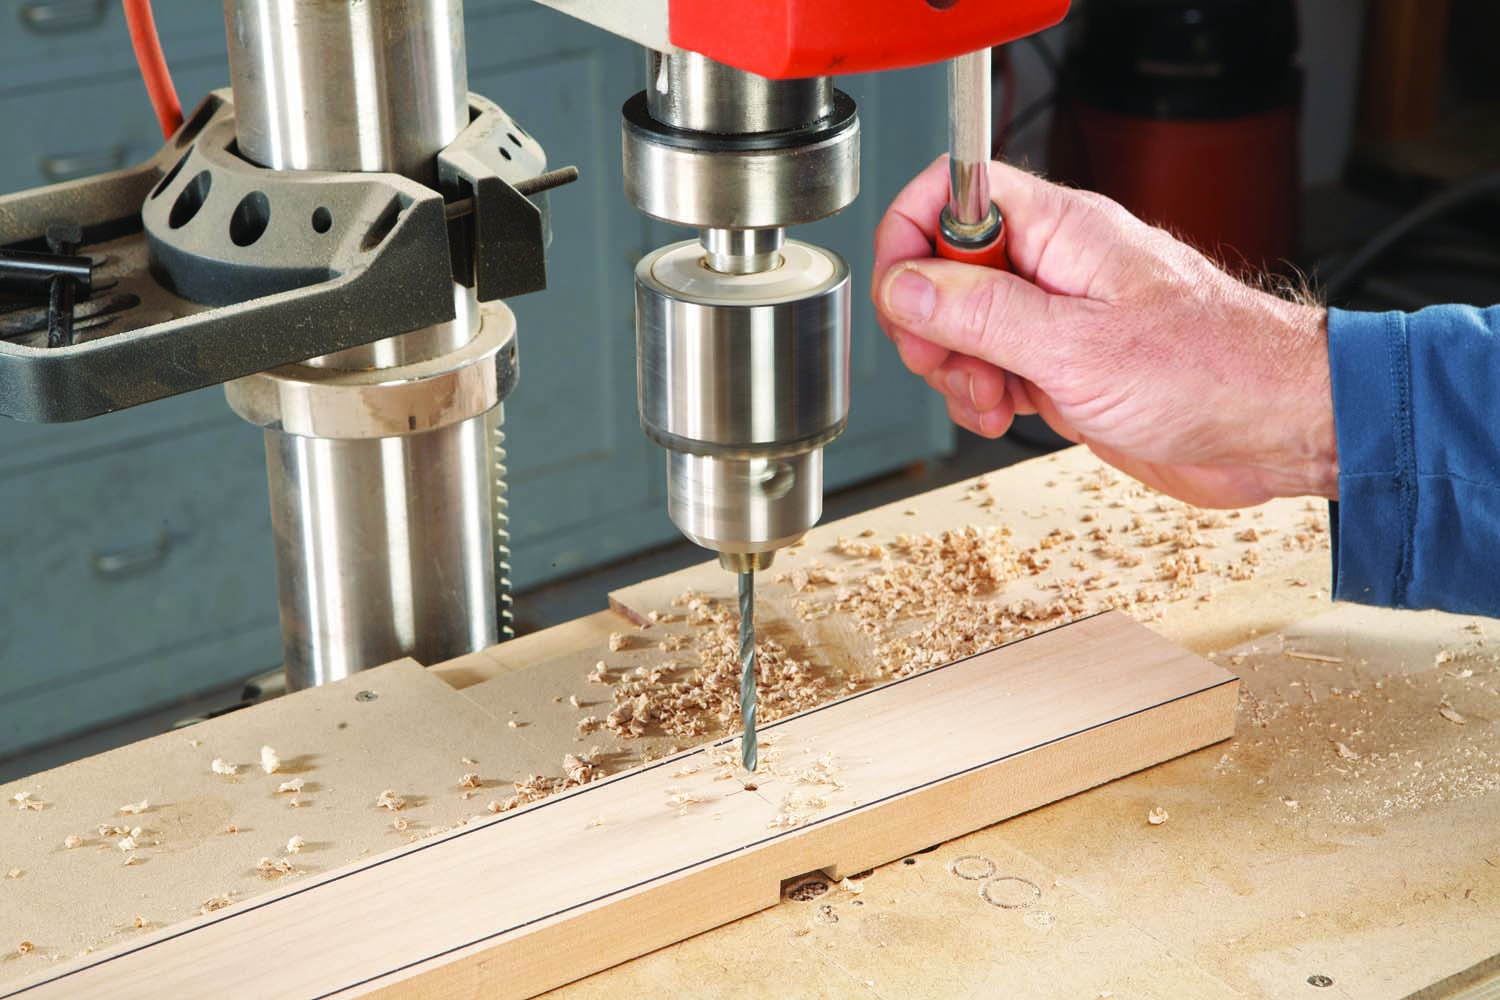
Photo 3. Drill pilot holes through the notches for fastening the legs to the shelf and subtop. Unlike the notches, these holes don’t have to be angled.
Lay out and drill holes for the screws that will fasten the legs to the shelf and subtop (Photo 3; Fig. 02). Taper the legs by cutting them on the bandsaw (Photo 4). I’ve always found it best to start at the thin end of this type of cut, using the back edge of the blade as a fulcrum. If you start at the wide end instead, the blade may pop out as you approach the end of the cut and form a bump that’s a pain to remove later on.
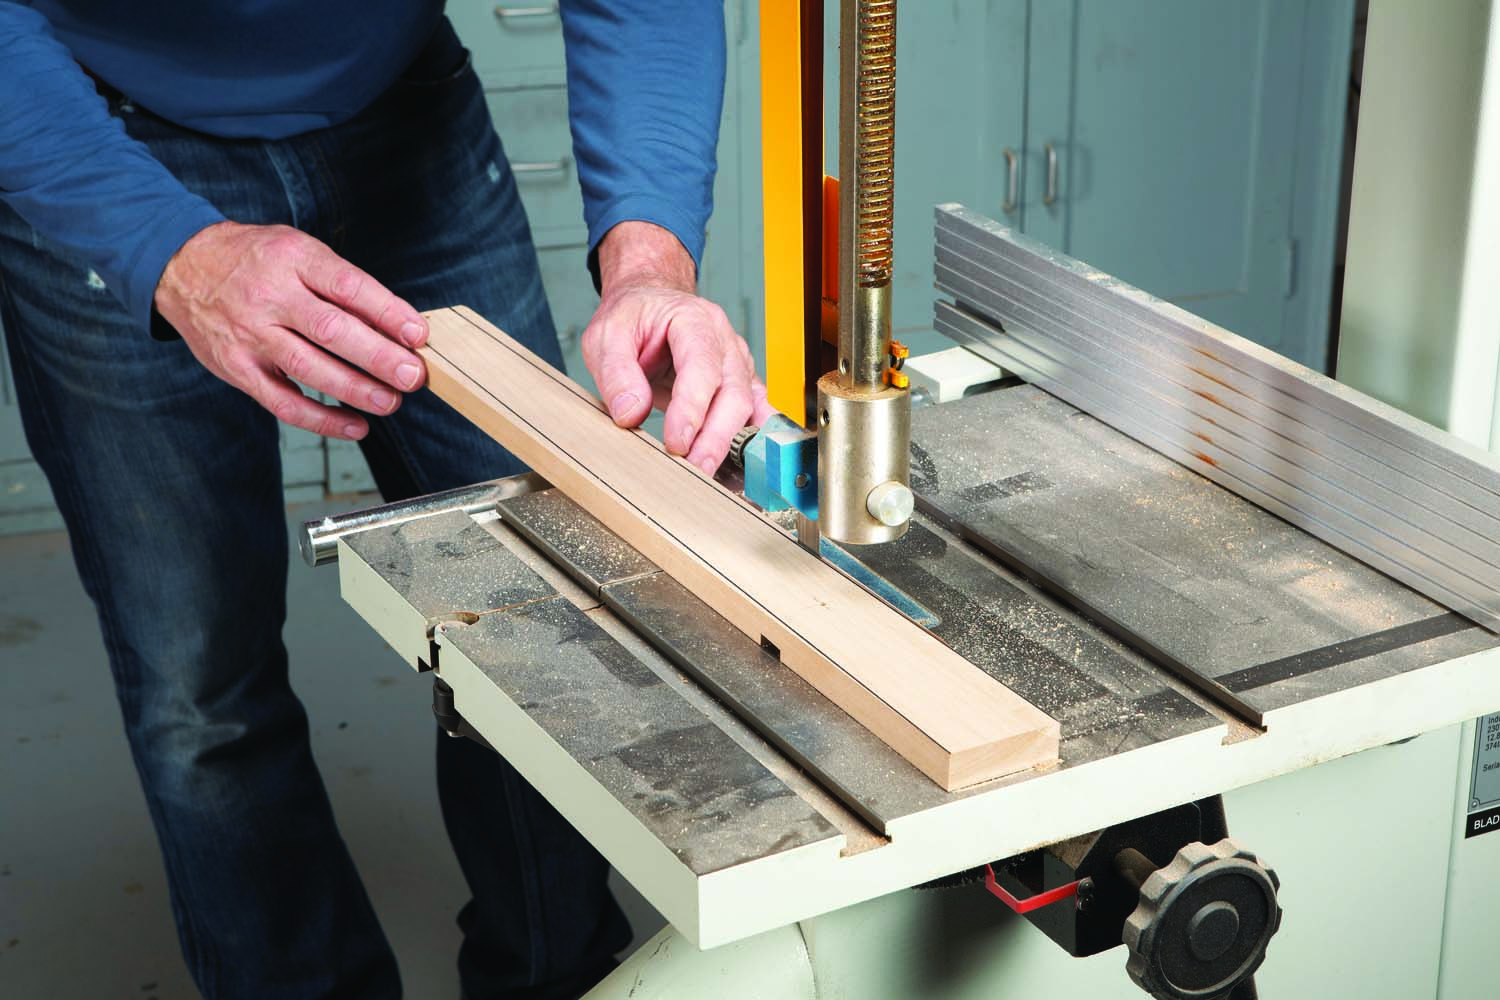
Photo 4. Saw the leg’s tapers freehand, starting at the skinny end of the waste piece. Smooth the sawn surfaces using a jointer or plane them by hand.
Round the bottom ends of the legs (Fig. 02), then use a 1/8″ roundover router bit to soften all the leg’s edges.
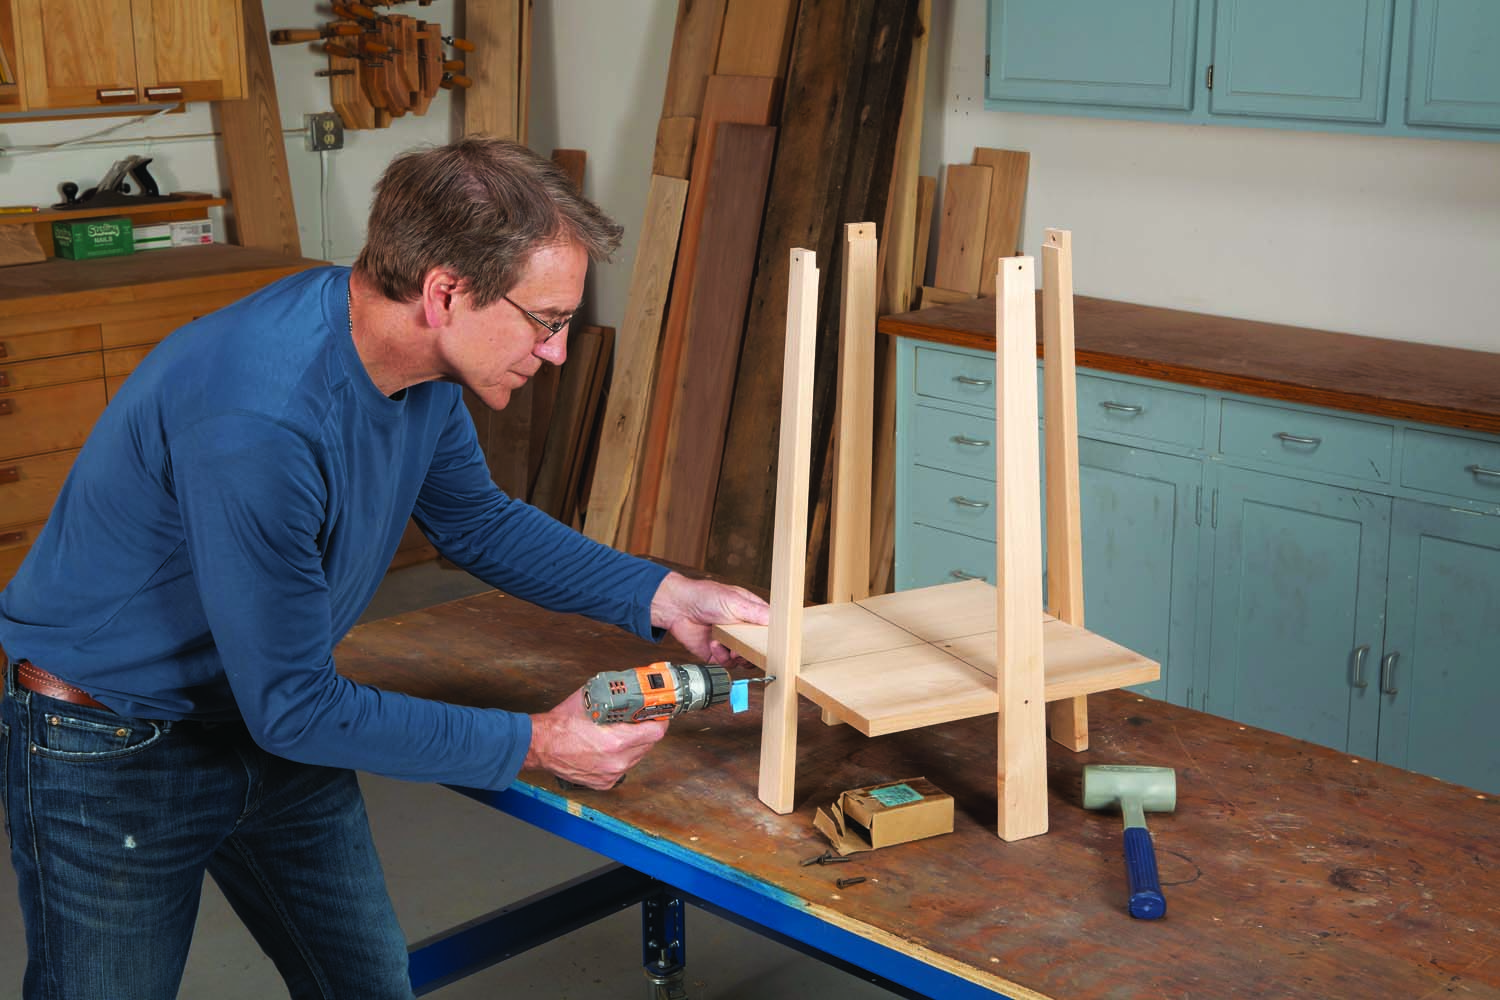
Photo 5. Place the legs on the square piece of wood that will become the shelf. Drill pilot holes into the shelf, then countersink the holes and run in the screws.
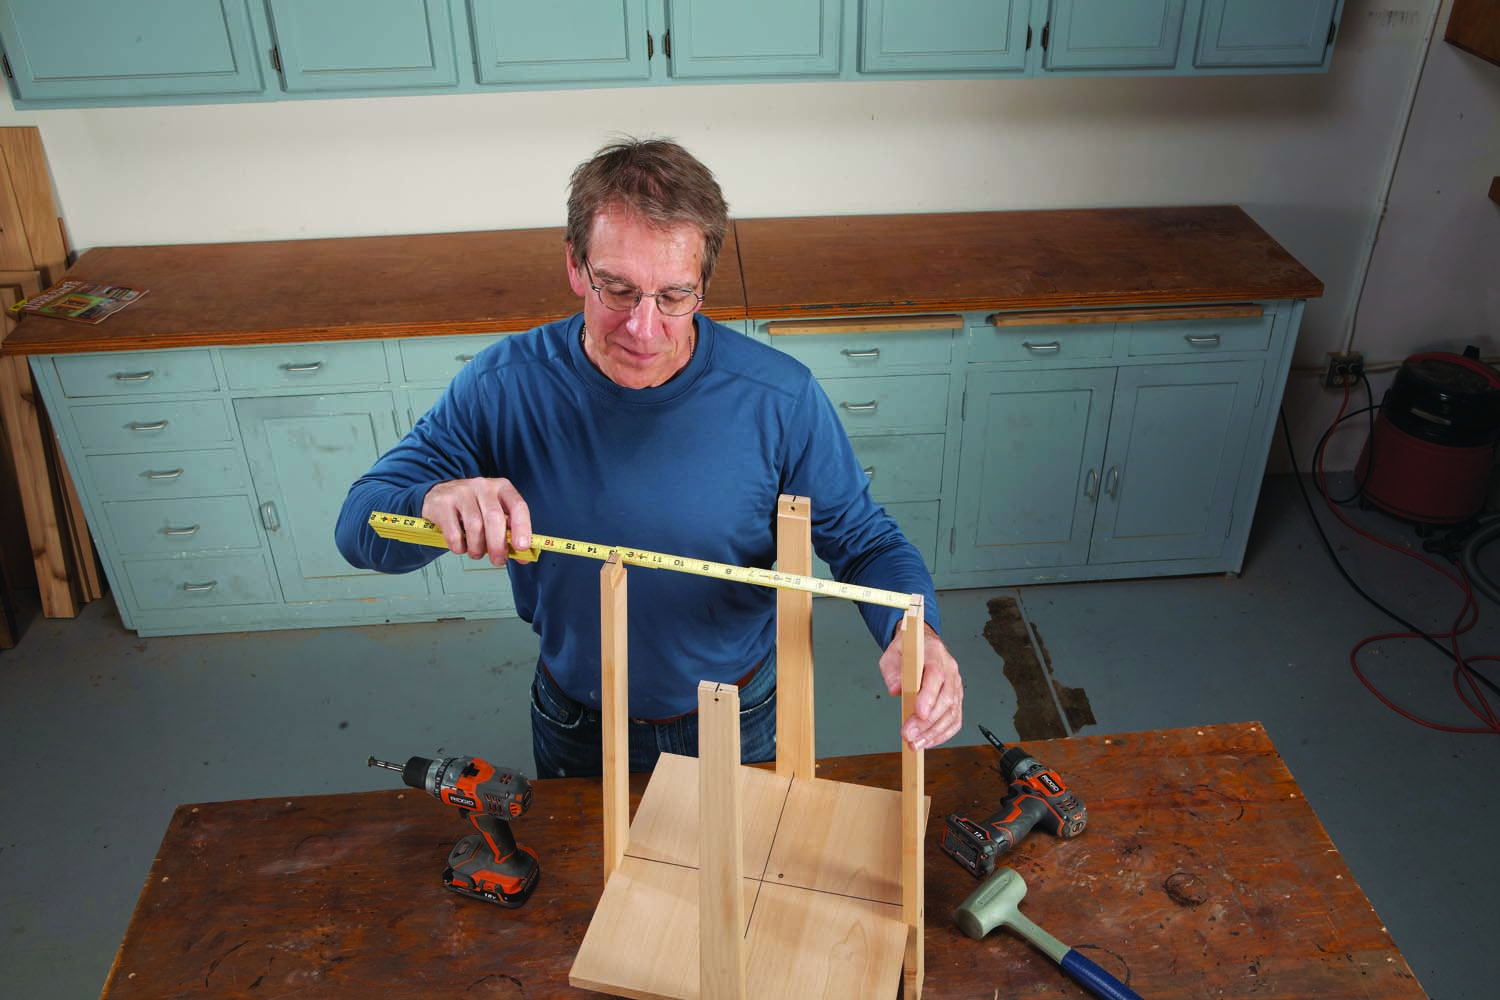
Photo 6. Measure the distance between the upper leg notches. Cut another square piece of wood—the subtop—to fit inside the notches.
Draw centerlines on top of the shelf and above the leg notches. Place the legs on the shelf and align these marks. Temporarily fasten the legs to the shelf (Photo 5). Measure the distance between the notches for the subtop (Photo 6), then trim the subtop to fit.
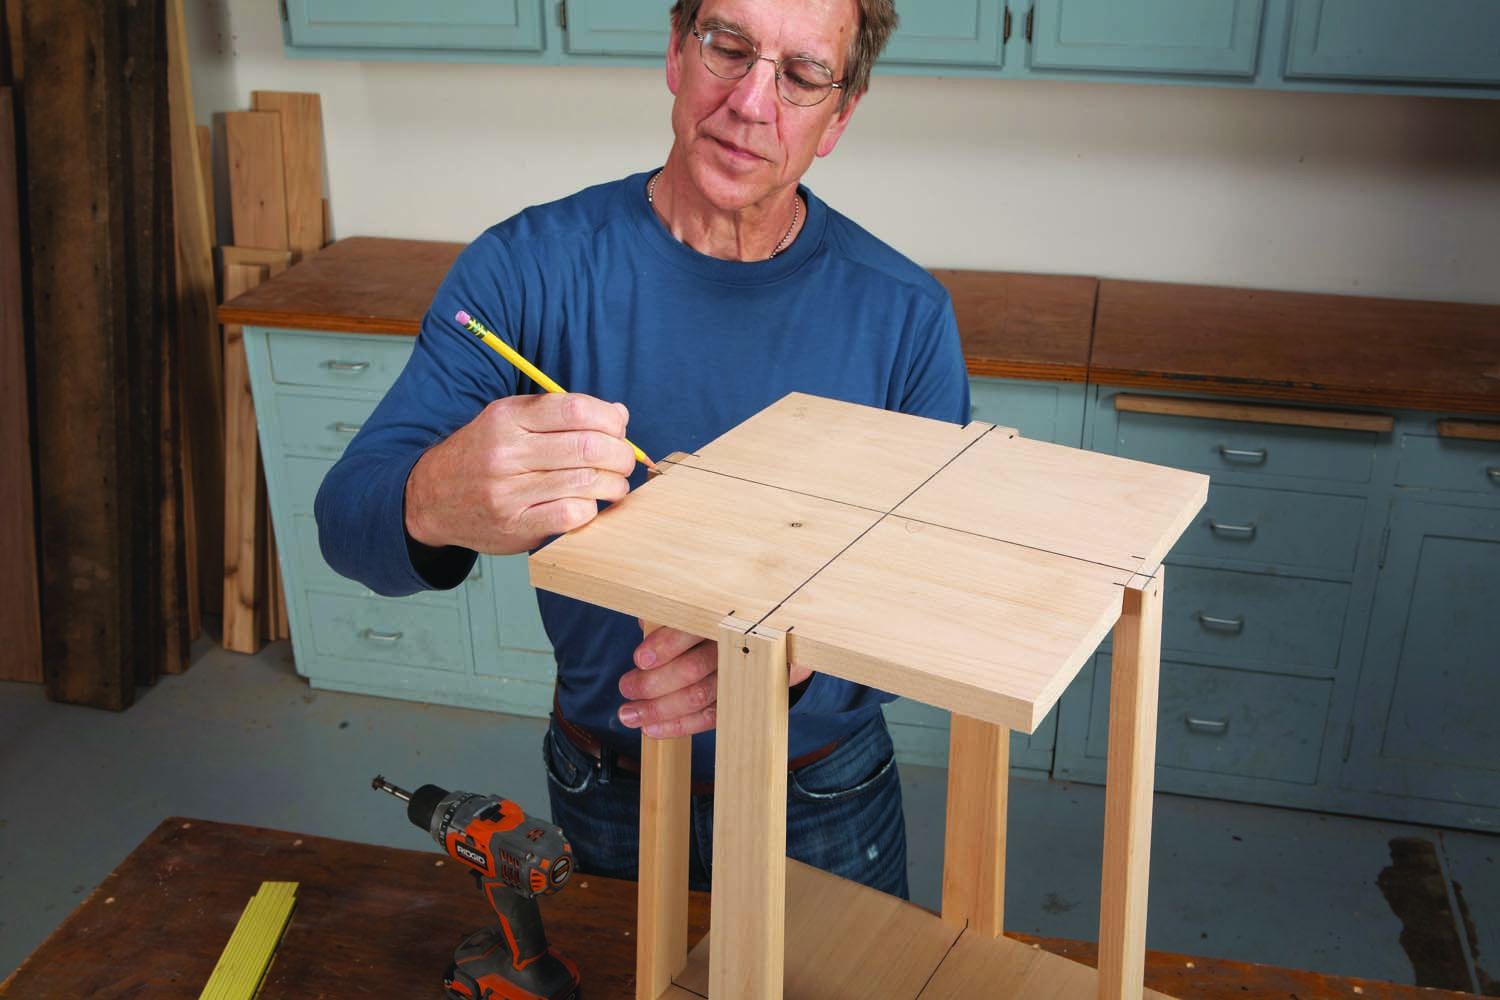
Photo 7. Draw centerlines on the subtop. Align the middle of each leg with these lines. Mark the outer edges of each leg on the subtop and the shelf.
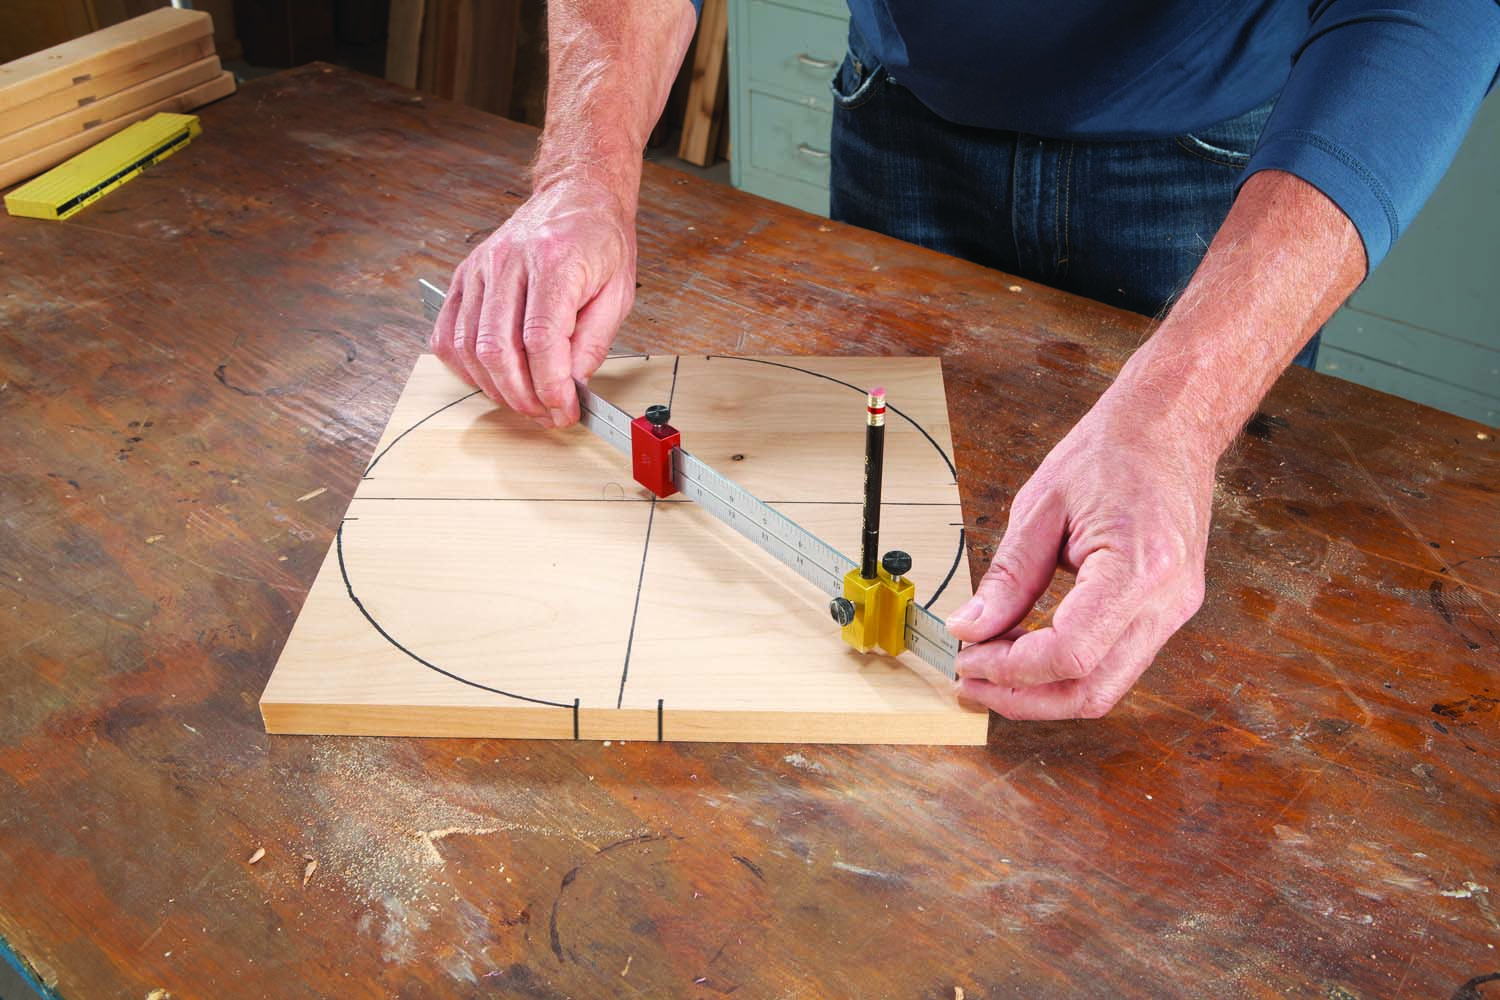
Photo 8. Draw the outlines of the subtop and shelf using a trammel. Note that the circle starts and stops at each leg mark, leaving flat areas opposite the leg notches.
Draw centerlines on the subtop and upper ends of the legs (Photo 7). Align these marks, then draw additional marks on the subtop opposite the edges of each leg. These marks indicate the leg’s width. Mark the width of the legs on the shelf, too. Drill pilot holes into the subtop, then disassemble the table. Use a trammel to lay out the circular shapes of the shelf and subtop (Photo 8), then cut them on the bandsaw (Photo 9). Smooth the sides of these pieces, then soften the edges with the roundover bit. You don’t have to start and stop the roundovers at the flat areas by the legs—it’s OK to go right through.

Photo 9. Saw the subtop and shelf. Sand all the table’s parts and cover the flat areas and notches with tape. Apply finish to each part, then remove the tape.
Make the table’s top. I routed a large radius along its bottom edge to make the top appear thinner (Fig. 04). Drill holes in the subtop and top for fastening them together.
Sand every part of the table, then put tape over the surfaces that will be glued together (the flat areas on the edges of the top and subtop, and inside all the notches).
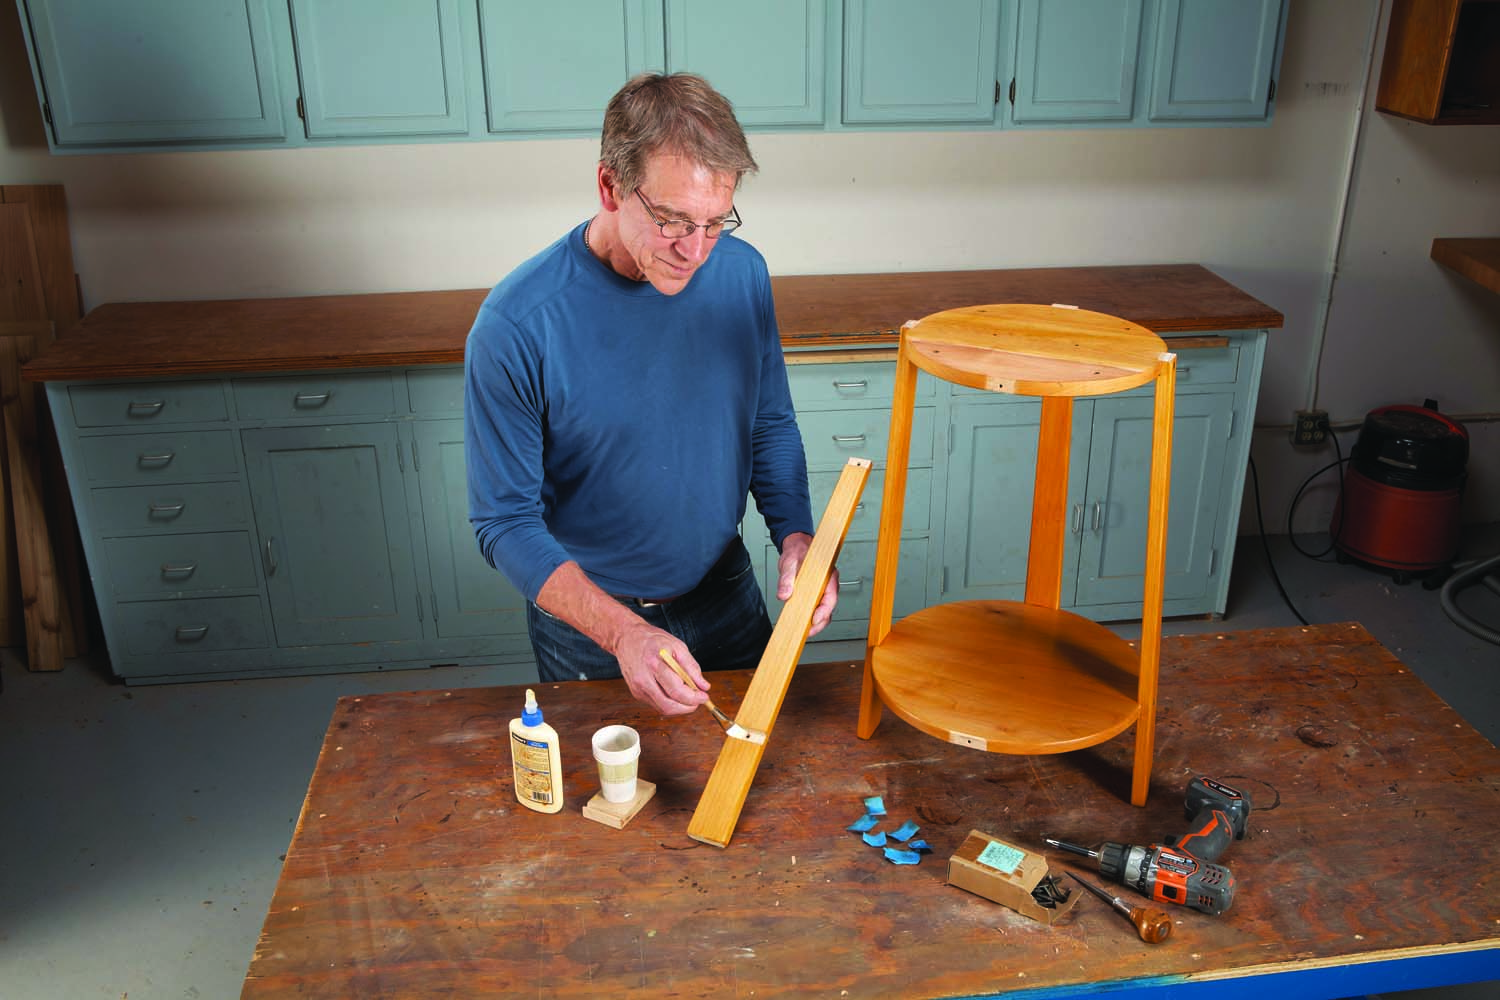
Photo 10. Glue and screw the table together, adding one leg at a time.
Finish all the parts. To imitate the color of cherry, I first applied a coat of clear shellac, thinned 1:1 with denatured alcohol. I then applied two coats of amber shellac, also thinned 1:1. I followed up with three coats of water-based poly. Once the table is finished, remove the tape and glue and screw it together (Photo 10).

Fig. A. Exploded View
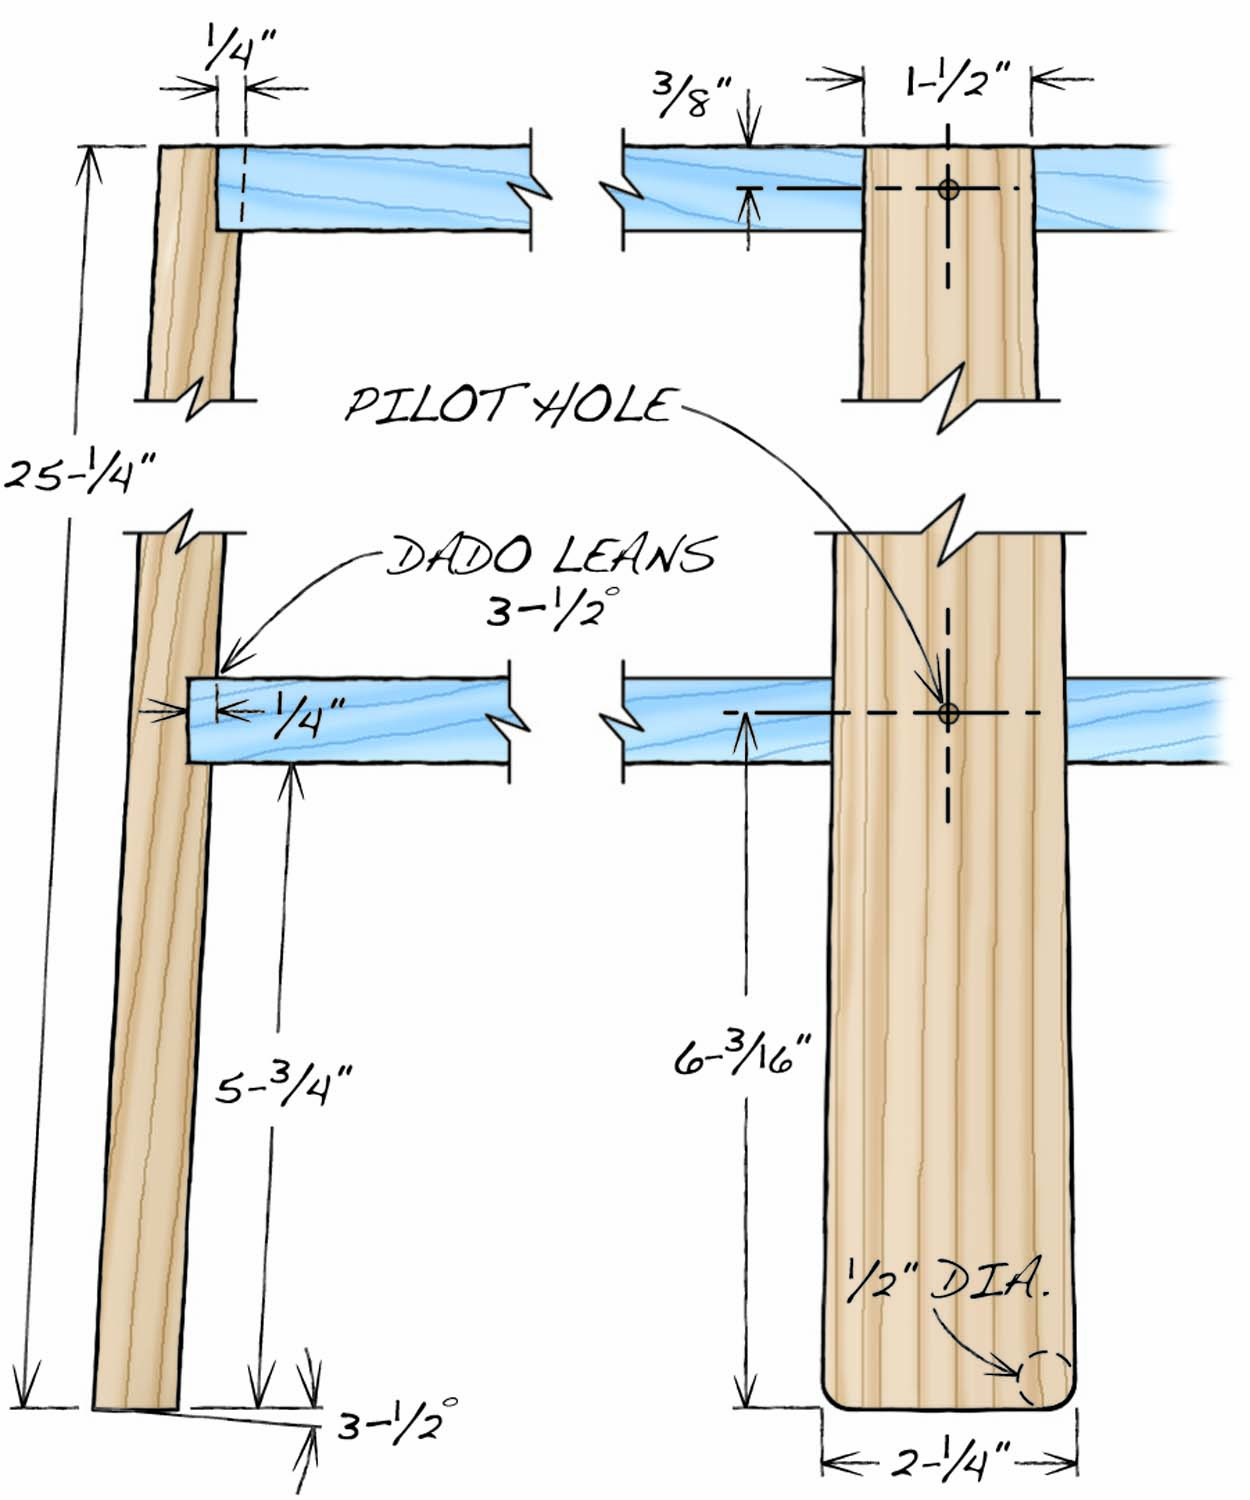
Fig. B. Leg Details
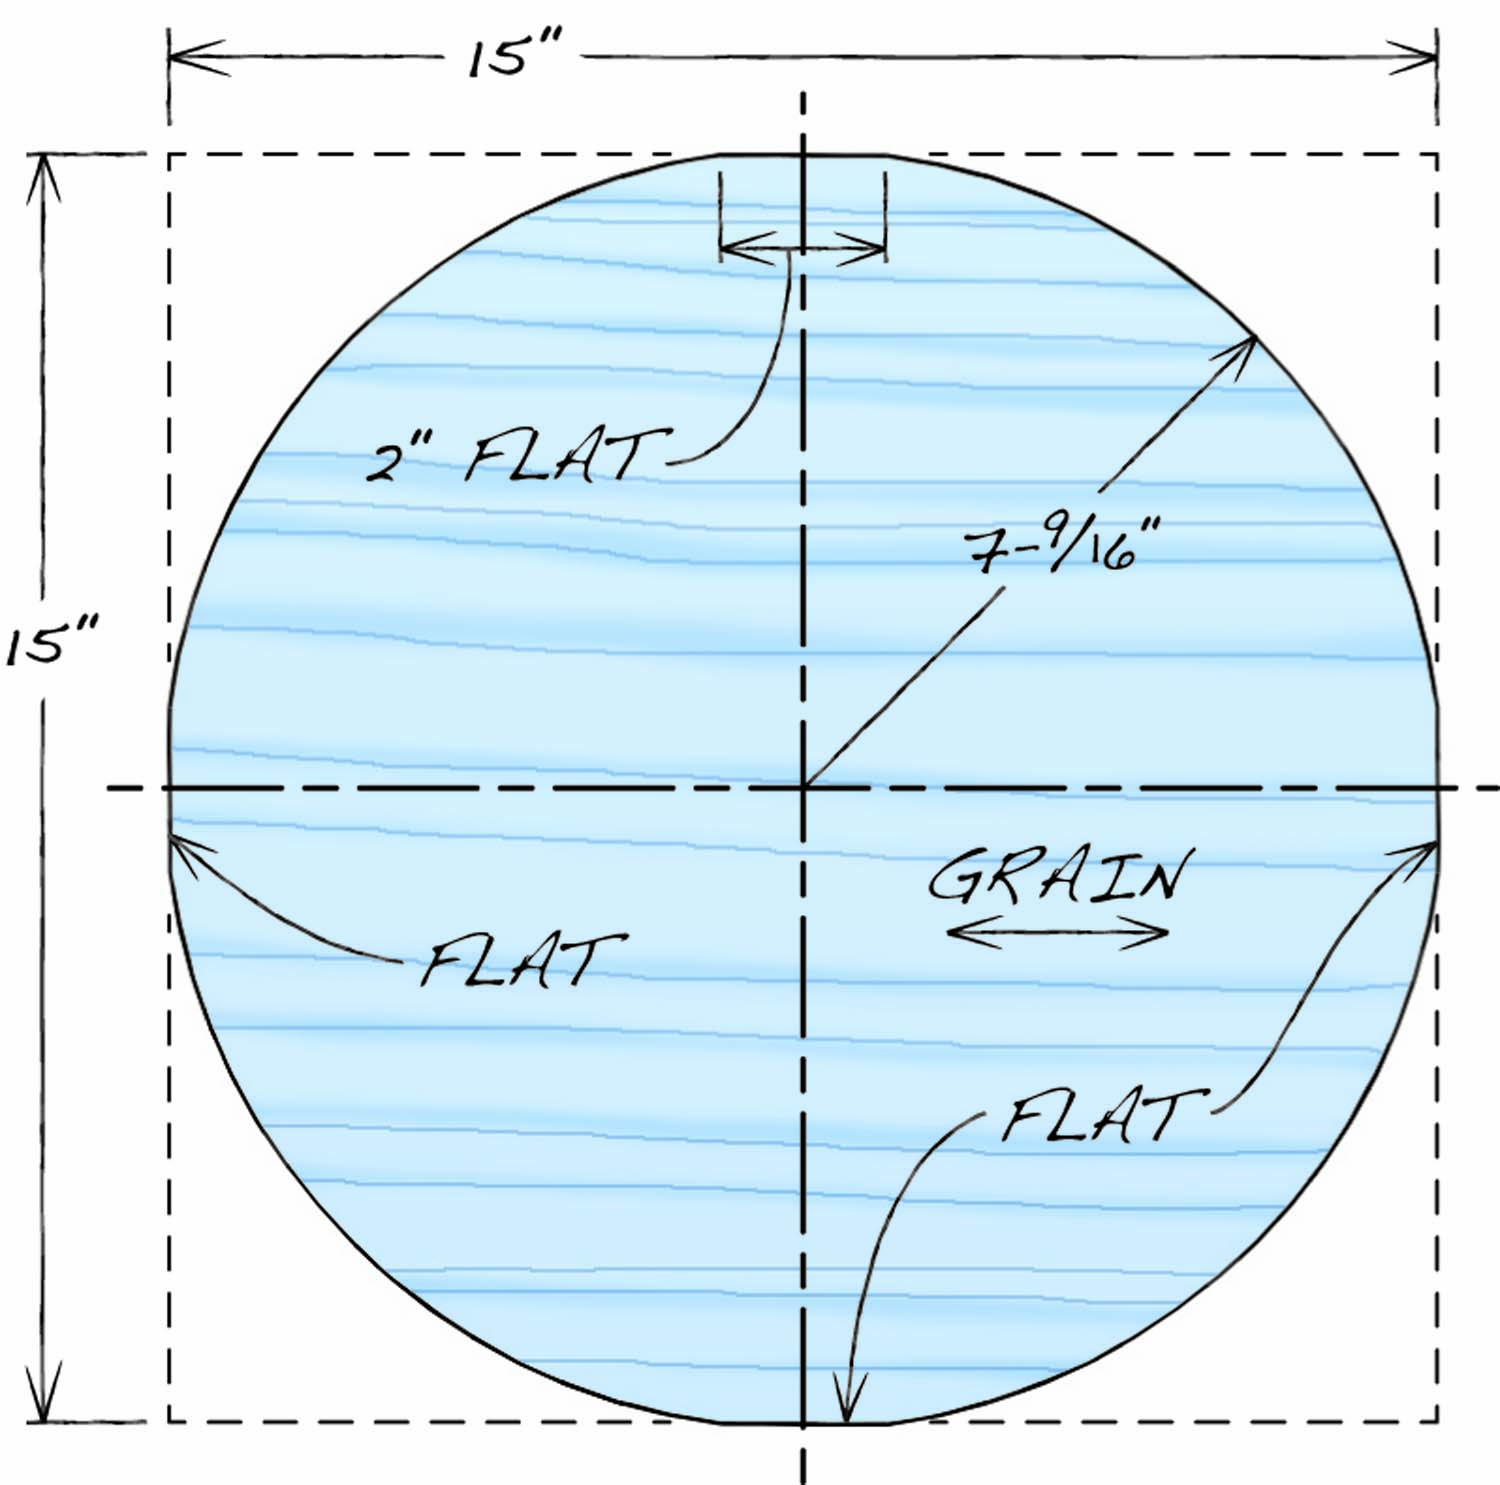
Fig. C. Plan View of Shelf
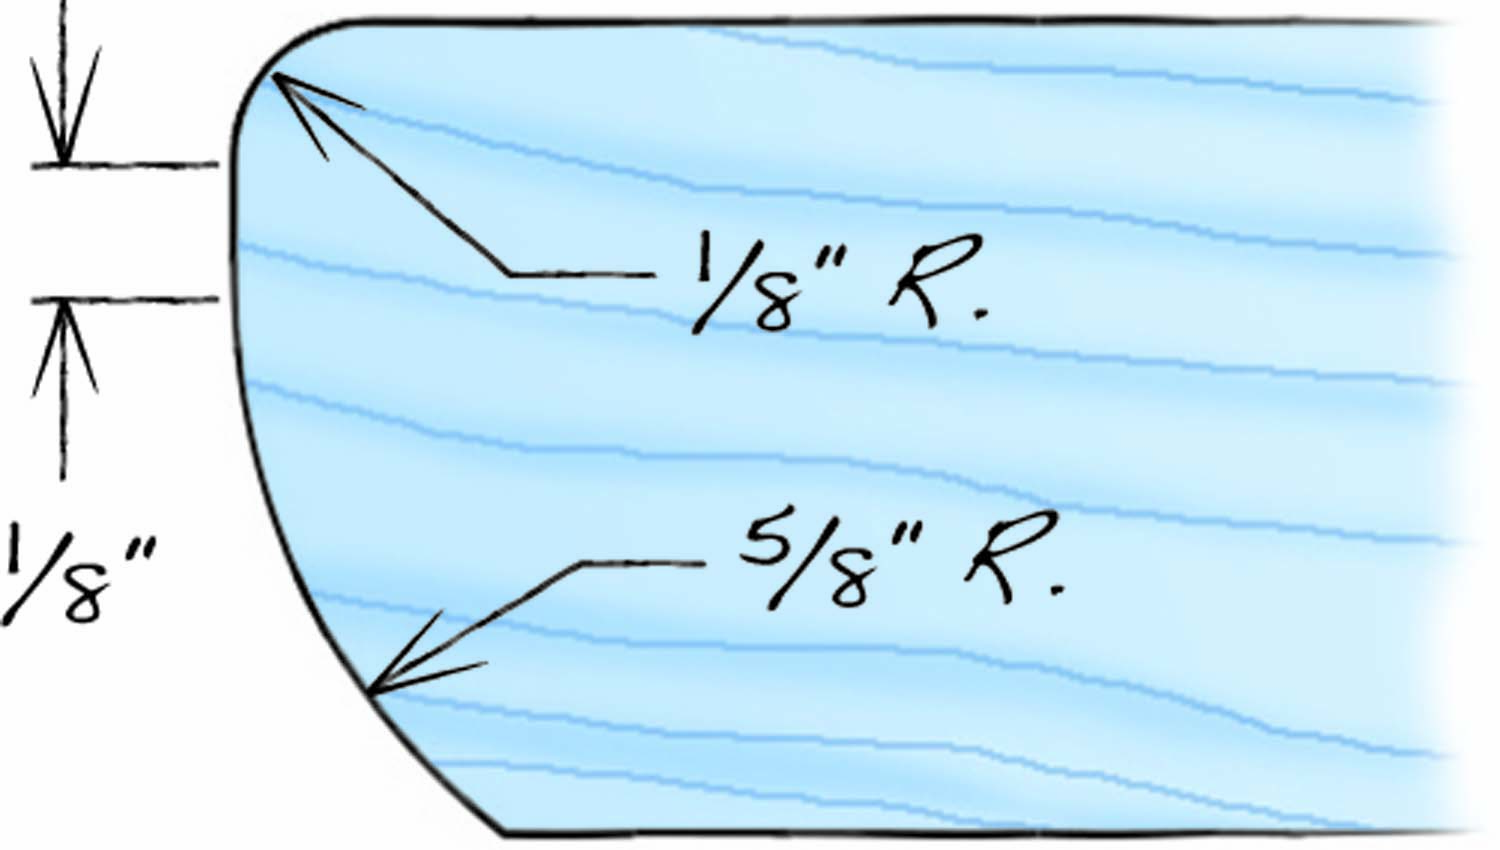
Fig. D. Profile of Top
Cutting List
|
Bob’s Table |
|||
|
Overall dimensions: 26″ H x 20″ Dia. |
|||
|
Part |
Name |
Qty. |
Th x W x L |
|
A |
Leg |
4 |
3/4″ x 2-1/4″ x 25-1/4″ (a) |
|
B |
Shelf |
1 |
3/4″ x 15″ x 15″ |
|
C |
Subtop |
1 |
3/4″ x 13″ x 13″ (b) |
|
D |
Top |
1 |
3/4″ x 20″ Dia. |
|
Notes: a) See Fig. 02 to see how length is measured. b) Approximate size. Cut to fit. |
|||

Here are some supplies and tools we find essential in our everyday work around the shop. We may receive a commission from sales referred by our links; however, we have carefully selected these products for their usefulness and quality.


