We may receive a commission when you use our affiliate links. However, this does not impact our recommendations.
This kitchen workhorse presents a surprising and rewarding challenge.
This article originally appeared in the June 2014 issue of Popular Woodworking Magazine.
A wooden spoon – you can get one for a dollar in many places. It’s just a stick with a hollow shaped at one end. Why go to any bother over such a thing? Use them to stir sauces, dole out rice and beans, then forget about them. But like much in woodworking, the hand-carved spoon is in another sphere than its mass-produced substitute.
I have worked wood for more than 30 years, and made several households’ worth of furniture both simple and complex. The spoon remains a greater challenge than my most ambitious court cupboard or joined and carved chest. This aspect of woodworking is about tradition, design, shapes, forms and function. In spoon carving, you learn about edge tools, green wood and body mechanics – all while sampling a variety of local woods that might otherwise never make it to your workbench.
The spoon carving I learned from Jögge Sundqvist, his father, Wille Sundqvist, and Drew Langsner is part of a Swedish tradition, the revival of which was really spearheaded by Wille. My first attempts were thick and clunky. One nice thing about spoons is that you get another chance to get it right in just a couple of hours or less. Another nice thing is that you can do most of it – other than the hatchet work – anywhere; you don’t really need a dedicated shop space.
Ideally, spoon carving is a green woodworking craft. You can experiment with a great range of local woods, usually free. I’ve used apple, pear, cherry, rhododendron, birch, lilac, olive, mulberry, beech, maple and others. Fruitwoods are the nicest; among them, apple is my favorite.
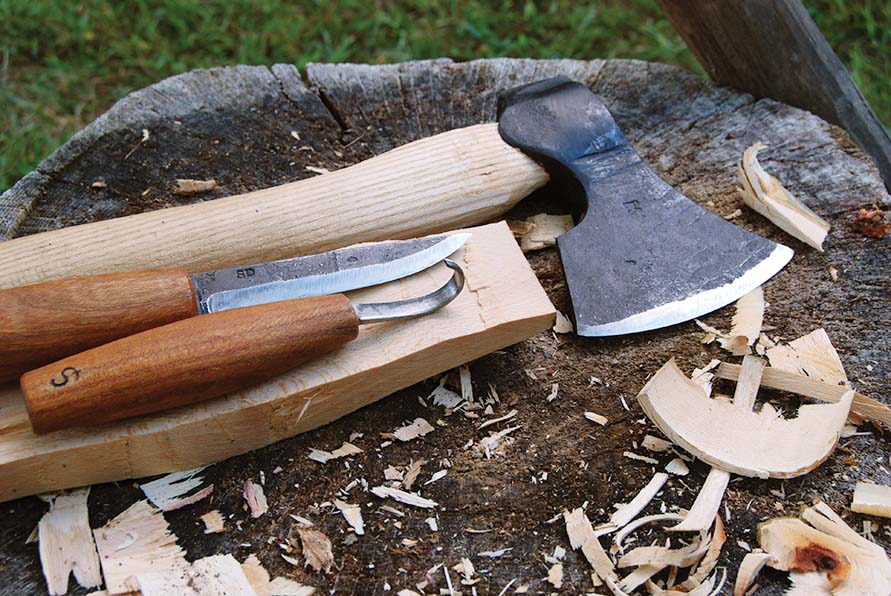
Tool kit. It takes only a few tools to shape your own spoons; I use a hatchet and two – sometimes three – knives.
The tool kit is small; I do most of the work with a hatchet and a few knives. Add some splitting tools and a rough saw for crosscutting the blank. The hatchet is a small, double-bevel affair, not like the large single-bevel tool I prefer for joinery work. We’re cutting shapes here, not flat surfaces, so the double-bevel tool allows you to work both convex and concave areas.
The bulk of the shaping is done with a long-bladed carving knife, often marketed under the description “sloyd knife,” which refers to the Swedish term relating to handicrafts.
To hollow the spoon’s bowl, I use hook knives specifically made for carving spoons, but you can hollow your spoon with a carving gouge.

Crooked blank. From a crook comes a thin but strong spoon.
Some spoons are made from “crooks,” sections of bent limb-wood, or places where a limb meets the trunk or a larger limb. These are some of the most challenging spoons, but can be the most successful. In them, the spoon’s bowl flows below the stem and handle while following the tree’s fibers, resulting in thin, but strong spoons. When you work with straight-grained blanks, you have to compromise some to create the flowing shape of a graceful spoon. At some point, you’re cutting across the wood fibers. But it can work either way.
I’ll begin with a serving spoon from a fairly straight blank. Start with a clear piece of fresh wood, the diameter a little greater than the intended spoon’s width. Split the piece down its length with a froe or hatchet. (Strike the froe with a wooden club, never metal.) Hew away the inner flat face, removing the tree’s pith (the central section); leaving this bit in results in radial cracks or splits, ruining the spoon. Next I hew away the bark side so I can see where I’m going.
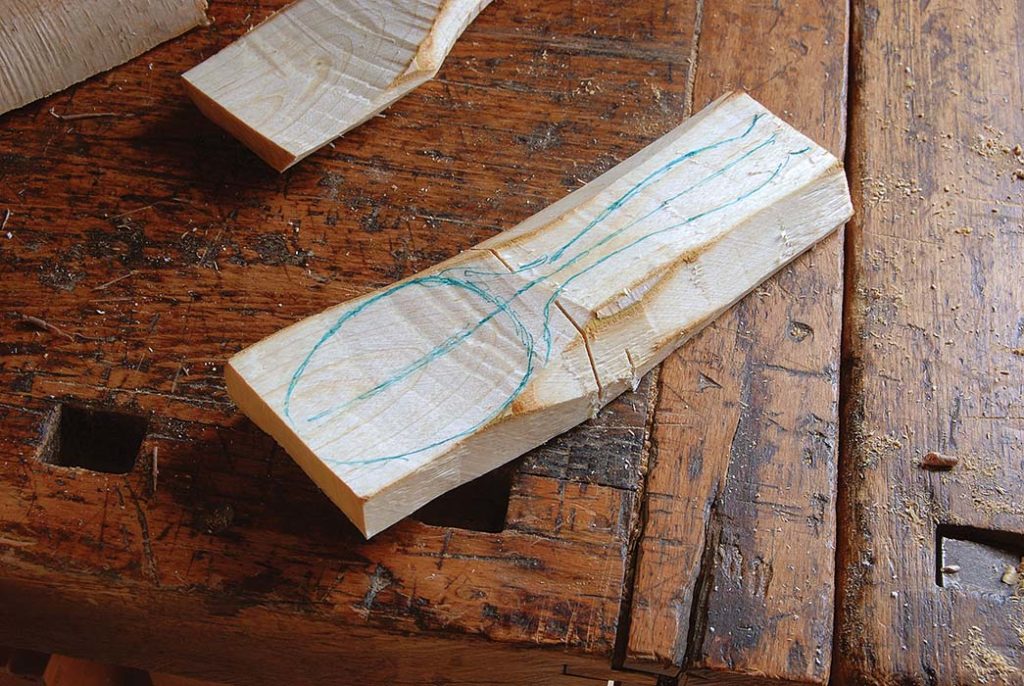
Pencil it in. After sketching the outline of the spoon on top of the blank, make relief cuts with a saw or hatchet to where the bowl meets the handle.
One big departure for me from joinery work is the pencil; I use one on spoons, never on furniture. I sketch the top view on the bark side, then make relief cuts where the handle meets the spoon’s bowl. These are either sawn or chopped with my hatchet. Now I can chop down the handle’s outline without risk of hitting the end grain of the bowl and splitting it.
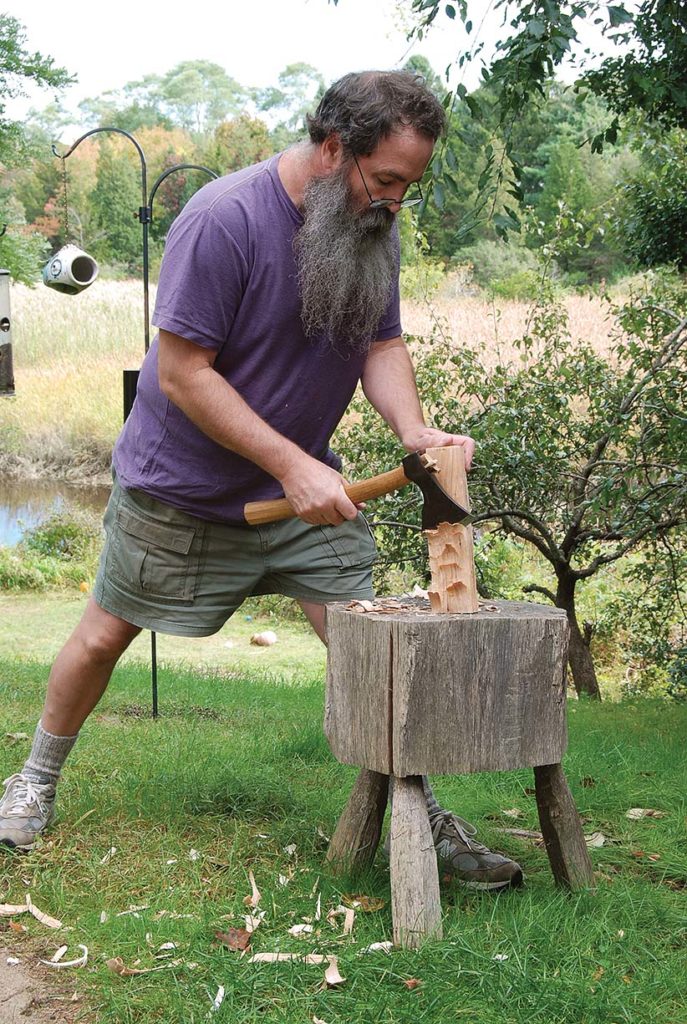
Safety stance. To keep your hands out of harm’s way, work at the proper height with the cut angled away from your body and into the chopping block.
When using the hatchet, grip and posture are critical. I set the spoon on a clean stump (sometimes called a chopping block) that’s between knee and waist high. Hold the spoon on the far side of the stump and start chopping near the bottom of the spoon’s handle. Make light relief cuts, breaking the fibers toward your outline. Work your way up the spoon’s handle, but stop a good ways from your off-hand that’s gripping the wood. I’m right-handed and keep my feet spread apart with my right leg dropped down behind me. That way an errant blow from the hatchet doesn’t glance off the stump into my leg. Having the proper stance also brings you better balance and more power in your hatchet strokes.
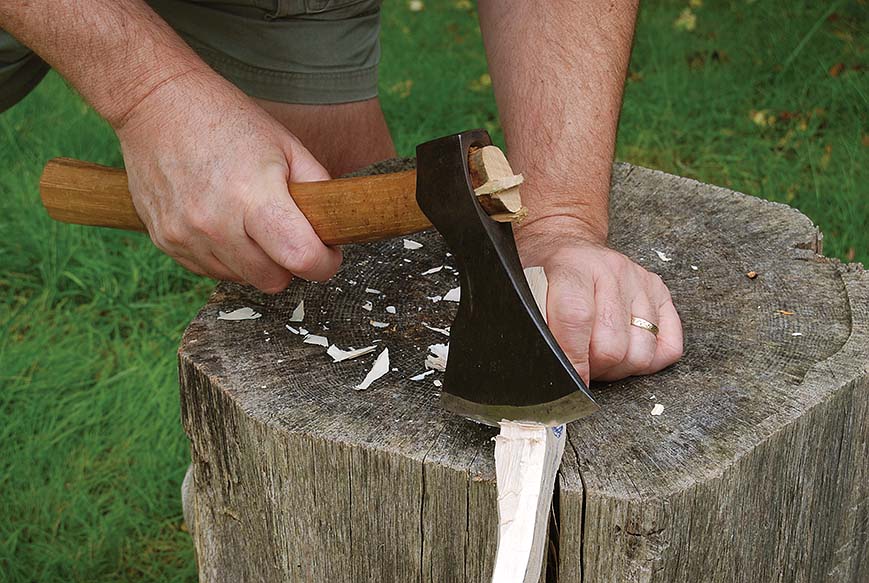
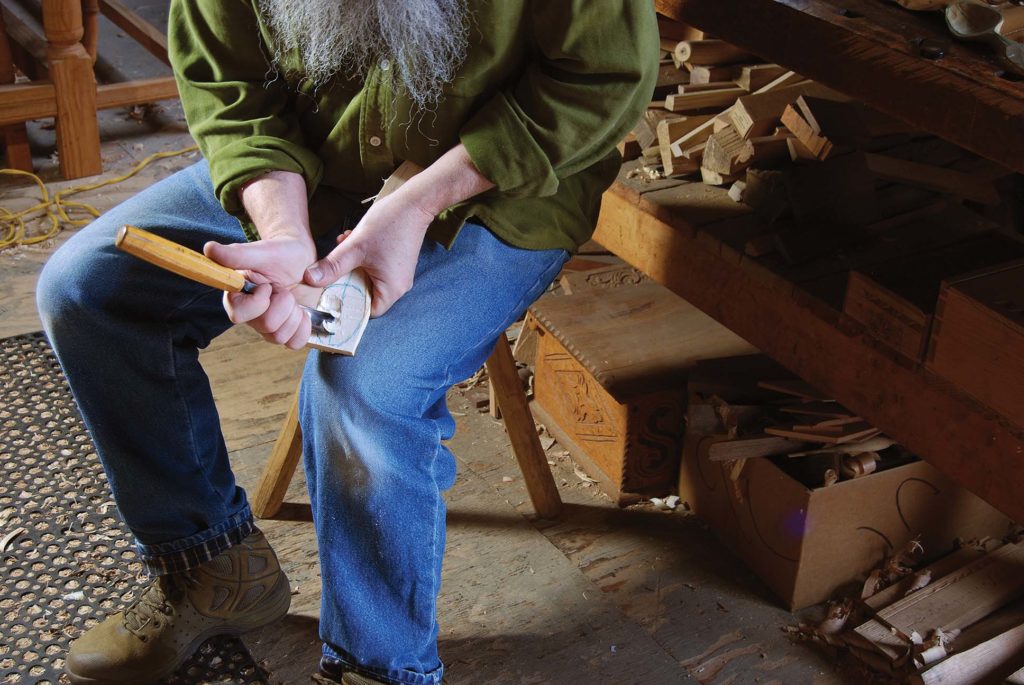
Built-in stop. A notch in your block gives you more control over detail chopping work.
To shape the outside of the bowl, it’s best to support the spoon on the edge of the chopping block. Jögge showed me how he creates a notch in the edge of the block to nest the spoon into while hewing this shape. The notch allows you to hew accurately, and it makes a stop for the hatchet. The tool’s edge bottoms out on the block before cutting too far on the spoon.
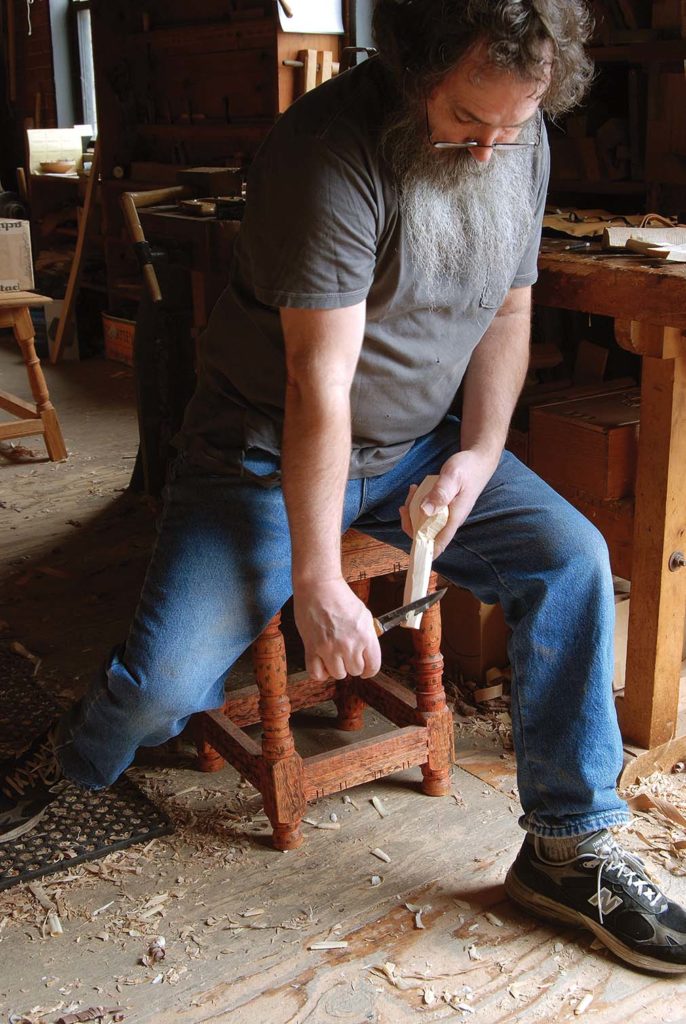
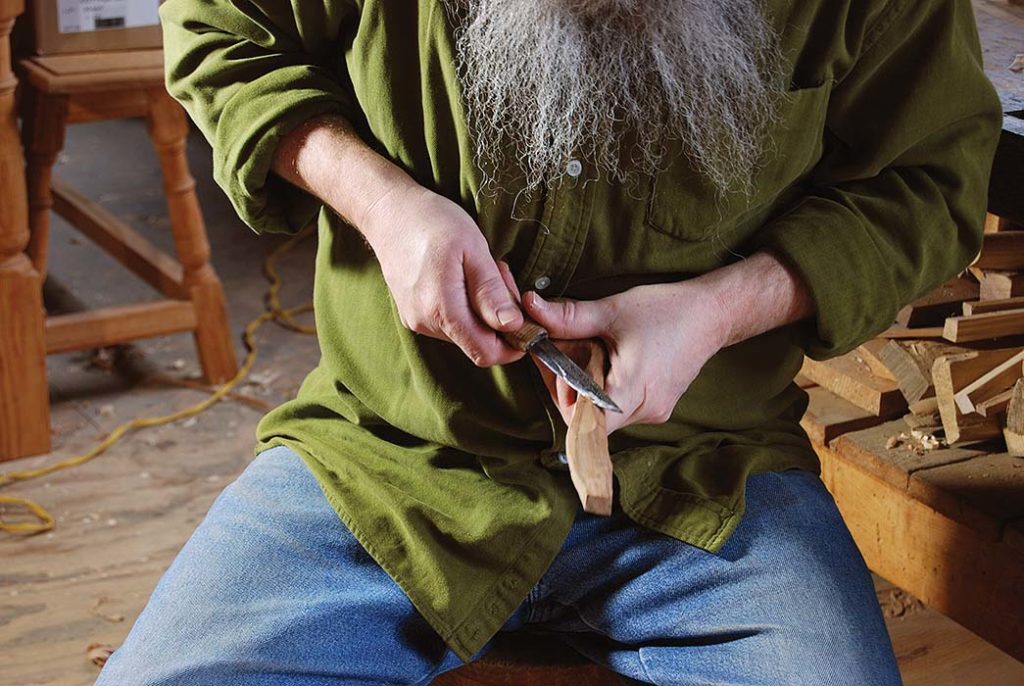
First grasp. Wrist and elbow are locked for the powerful first strokes with the knife. The motion comes from the shoulder. Note how the work is pointing away from all body parts.
Knife work is where all the refinement of shapes comes into play. There are numerous “grasps,” as Wille and Jögge termed them, that allow great power in the knife work. These are designed and practiced so that the knife is slicing the wood with tremendous accuracy and power, but the grips, postures and movements also feature a “stop” for the knife, so that it only cuts what you want to cut – the spoon, not you.
Handle First
The first knife stroke for the handle is a powerful one, used to slice long and generous shavings off the spoon. Hold the knife with your wrist and elbow straight and locked. The movement comes from your upper body and shoulder. Raise your shoulder up as high as it goes, and with the knife engaging the wood at the butt, make a downward thrust while slicing toward the knife’s tip. This stroke has no stop, so you need to position yourself and the wood in such a way that the knife travels down beside or between your legs. Make sure there is nothing in the knife’s path.
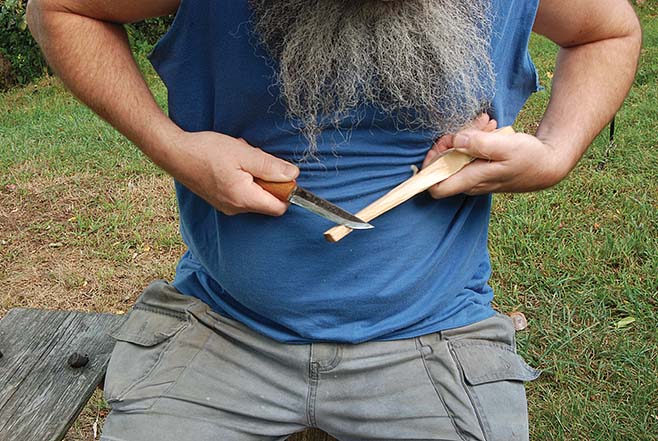
‘Chest lever grip.’ This shows another way to make the first cuts; again, the action comes from the chest and back, not the arms.
Another useful grasp is the one Wille calls the “chest lever grip.” I’m right-handed, so I hold the knife in my right hand, blade pointed out. The spoon in my left hand mirrors the position of the knife. To start the cut, the knuckles on each hand are against my chest and my forefingers bump up against each other. The knife slices as I pull my hands apart, with the action coming from my upper chest and back. The cut ends with my elbows sticking straight out and the knife and spoon have both moved out and away from each other.
Both of the above cuts end in space; there is no stop for the knife. Other cuts have a built-in stop to keep things safe. One of my most-used cuts draws the knife toward my chest, with the spoon held against my sternum. I begin the cut with my forearms held close to my body; the movement is fairly short. The knife cuts from butt to tip as I draw it toward me. The stop is when my right hand bumps up against my chest. As before, it’s a slicing motion.
Sometimes my off-hand applies pressure on the knife’s spine, helping to guide and drive the tool’s edge in cutting. In one version of this grasp, I press the spoon against my chest with my left thumb and forefinger, while the other fingers push against my right hand to help slide the knife along its travel. Both forearms are braced against my body. The length of this cut is not great, but it is excellent for defining shapes of both the handle and the bowl.
Thumb guide. This cut slices at an angle across the work, stopping when the hilt hits the work.
A related grip I frequently use has the knife pointed away from me and my left thumb helps guide the tool. At the beginning of the cut, my left thumb is extended almost as far as it can be and is pushing on the knife handle right above the blade. The cut begins at the tip, and moves toward the hilt/butt as the knife slices into the cut. The stop is when the knife handle bumps into the spoon.
A Philosophical Stem
The spoon’s design employs the wood’s strength to great advantage. Think of it as having three parts: the bowl, the handle and the stem that joins the two. The deepest part of the bowl is also the widest in most examples. The stem is narrow where it meets the bowl, therefore it is deep to give it the strength it needs. It can be carved in the shape of a rib that hugs the bottom of the spoon’s bowl.
As the stem flows into the handle, it thins out to fit your fingers better. So then you make it wider, both for comfort and for appearance. Just as the handle reaches its end, it can gain a bit of thickness. Carved finials are a pleasing touch at the end.
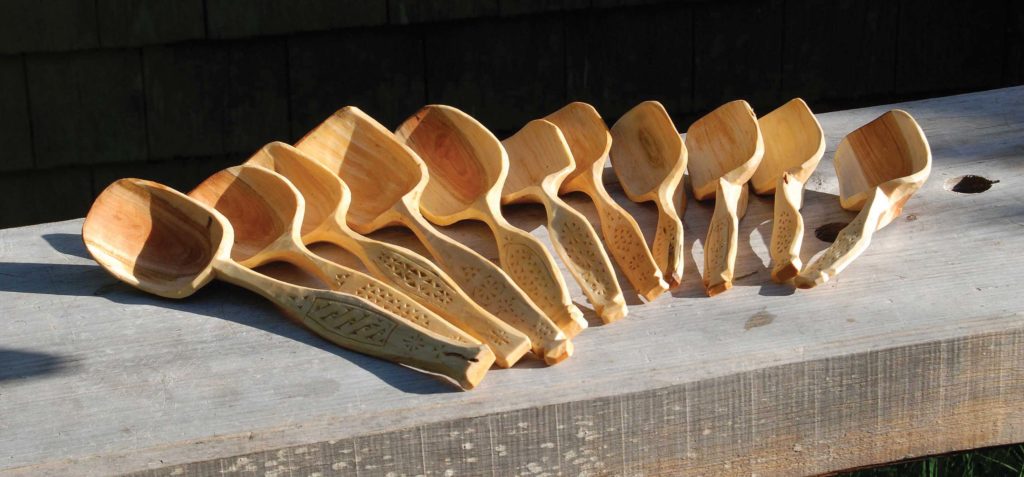
As I work the spoons, I think of the shapes as a series of bevels flowing one into another. I also try to focus on curves, some slight, some more pronounced (see the opening photo and the photo above for a variety of shapes). A spoon that has too many flat places in it looks and feels lifeless. Because you hold it as you carve, it is easy to shift the spoon around for a different view. This is critical because the design has to work from all angles and from the hand as well as the eye. Cut a little, look a lot.
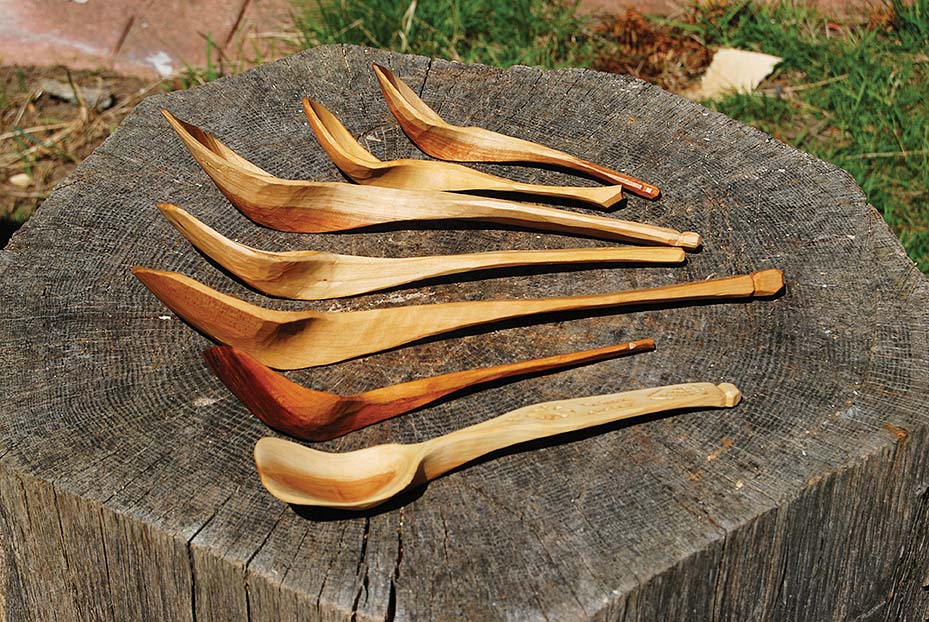
A subtle ‘S.’ Each spoon is a slightly different shape, but I usually aim for a gentle curve.
I try to make the side view with something of an S-shape to it. Sometimes the wood helps guide you, other times you have to make it happen. I aim for a bit of a lift right at the front end of the bowl, then a curve under the deepest part that then sweeps up toward the handle. The end of the handle can either sweep back down a bit, or take one last lift upwards again. You get to try lots of variations.
Now the Bowl
To shape the inside of the spoon’s bowl, you can use a hook knife or the gouge. For my first spoons, I hollowed the bowl with a gouge (mine has a No. 8 sweep in the Swiss-made numbering system). Just as with the straight knife, you want to use your body and hands in such a way that you can cut efficiently, without having the tool’s edge land in your flesh.
Gouge. A gouge works and is a great way to start. But if you get hooked on spoon carving, consider getting a hooked knife.
With the spoon in my left hand, I hold the gouge in my right, way down on the tool’s shank. The heel of my right hand presses against the edge of the spoon blank; my left thumb reaches across the spoon to brace my right hand. The action is a pivoting motion from the heel of my right hand. The gouge travels a very short distance. The cutting is across the bowl’s face.
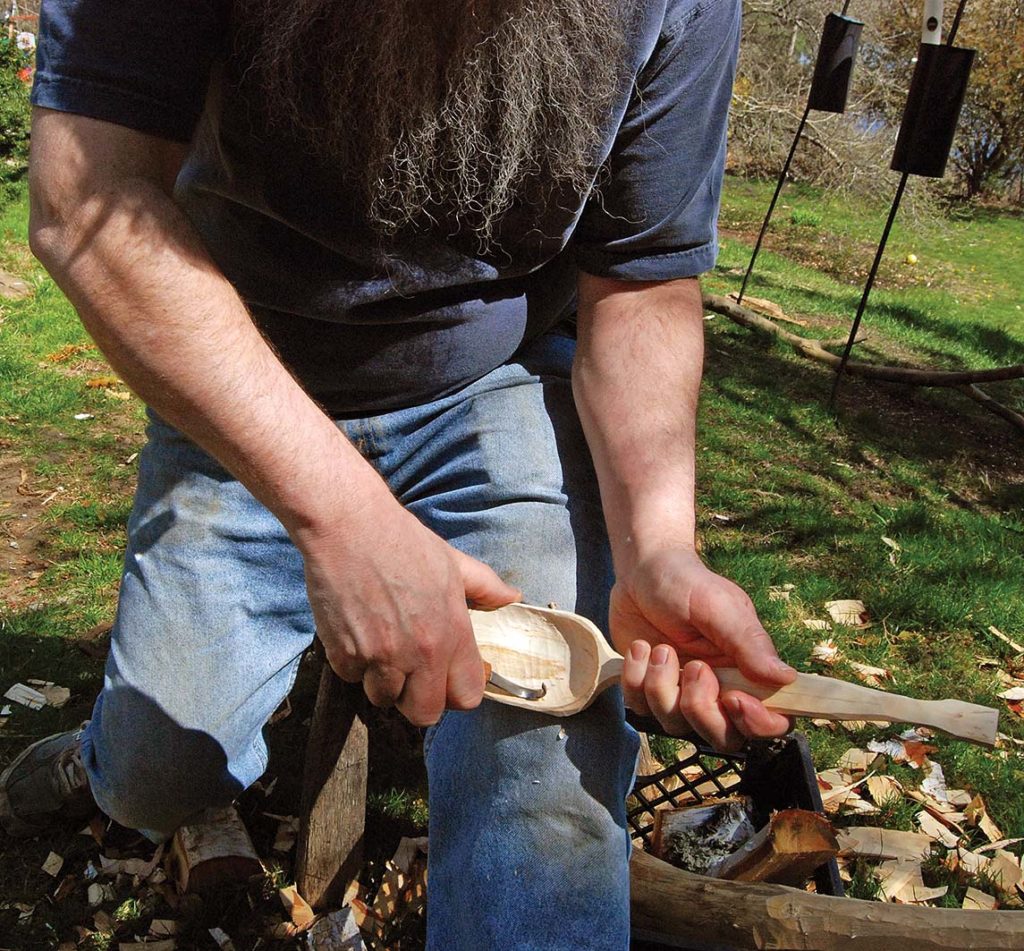
Across the bowl. A hooked knife gives you precise control as you shape the bowl.
Then along came the hook knife; it makes life so much easier than hollowing with a gouge. These tools come in many shapes; some are more rounded, others shallower. Hold it with your fingers. Tuck it against your palm, and your thumb provides the leverage to pull the tool into the cut. The knife slices across the bowl most often, except when you are refining some shapes. These tools come in left- and right-handed versions. I mostly use the righty, but there are places and times when the left-handed version is helpful.
I try to do most of the general shaping when the wood is still very green – so at this stage the cuts leave a bit of a fuzzy surface. Next, let the spoon dry then take your final strokes with extremely sharp knives to give the work a fine-finished texture. Some carvers aim for a tooled finish while others use sandpaper, especially on the inside of the spoon’s bowl. When you’re done, apply a finish. I use food-grade flax oil. I soak my spoons in it for a few days, wipe off the excess then bring my hand-carved utensils to the table.
Spoon-fed Revolution
To me, spoon carving is a revolutionary act. It helps cut through the mass-produced cheap culture that we have absorbed like zombies. It’s such a simple household implement, taken to extraordinary heights. Why shouldn’t our most basic kitchen stuff be beautiful? Out with plastic! I always think of Bill Coperthwaite’s line from A Handmade Life: Search for Simplicity:
“I want to live in a world where people are intoxicated with the joy of making things.” Me, too.
Full article: Spoon Carving PDF
Peter is the joiner at Plimoth Plantation and co-author of “Make a Joint Stool from a Tree” (Lost Art Press).

The Art of Spoon Carving DVD
By Jarrod Stone Dahl
In this woodworking video you’ll learn:
- What to look for in a standing tree that will make a fine wooden spoon
- About the few tools required, and the basic “grips” to get the best use from each
- How to judge the ergonomics of a spoon (how it feels in your hand and mouth)
- How to add simple carved details that will personalize your spoons and set them apart
Here are some supplies and tools we find essential in our everyday work around the shop. We may receive a commission from sales referred by our links; however, we have carefully selected these products for their usefulness and quality.