We may receive a commission when you use our affiliate links. However, this does not impact our recommendations.
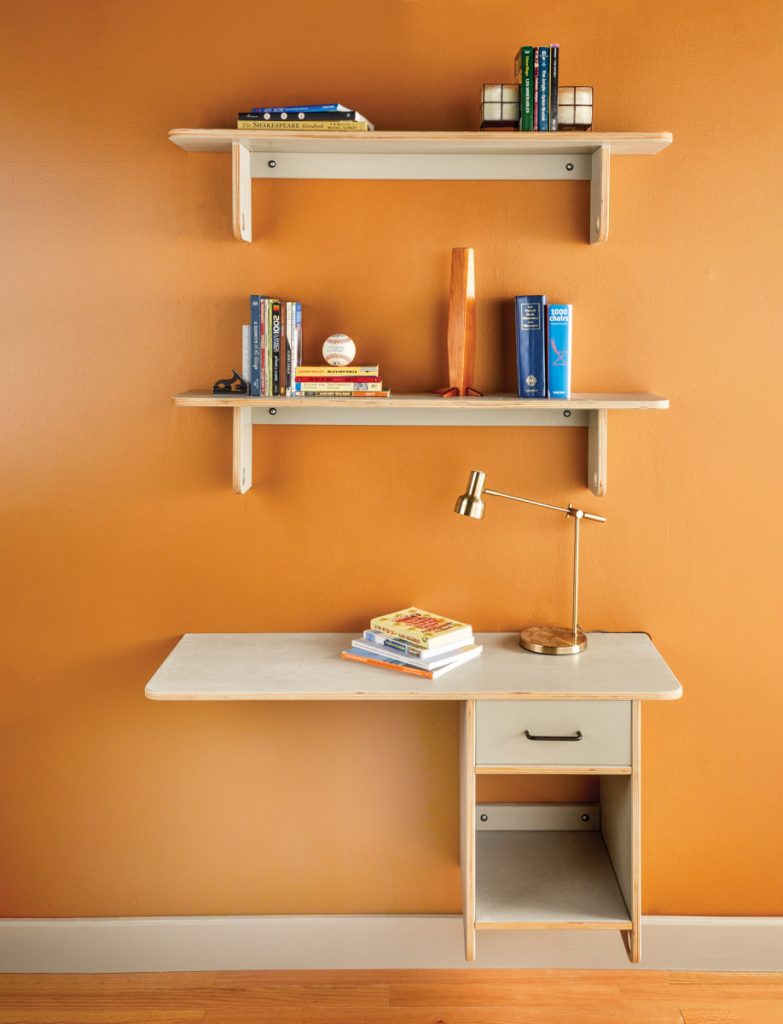
 Build a modern workspace with just a single sheet of plywood.
 Build a modern workspace with just a single sheet of plywood.
Project #2012 • Skill Level: Beginner • Time: 1 day • Cost: $150
Creating your own space seems to be a rite of passage for most first-time homebuyers. Albeit, its often easy to become disillusioned, overzealous and even unrealistic about the amount of work it takes to transform your entire space. Coming from someone who is constantly trying to decipher a barrage of concepts and new project ideas, finding a starting point is always the most difficult facet.
After occupying my new home for the better part of 6 months I figured it was finally time to tackle one of my many planned projects. For me, when starting a project, it is imperative to do some pre-planning to help avoid your space from becoming one of those abandoned projects that is indefinitely incomplete. They are the project(s)/room(s) in homes that become closets for the unwanted and just another space to ultimately avoid.
After much deliberation, deciding on the room I am declaring as my office seemed like an obvious candidate. The room needed to be a space I could spend extended periods of time in, and ultimately one that could be used as a creativity incubator (but also a place to just sit and be). The room is modest, approximately 160 square feet and equipped with two windows. Considering the size of the space (or lack thereof), it’s important to address not only the challenge of what to place within it, but where/how you place it. This left me with conclusion that the first sensible pieces of furniture an office needs are a proper work surface with an ample amount of storage. Let’s get started.
Cutting Your Pieces
Start by cutting all your plywood pieces to size. All that is required for this project is one 4’x8′ sheet of Baltic birch plywood. I like to start by cutting my largest lengths/widths first. This approach allows your sheet of plywood to become more manageable in size at a much quicker rate. If you do not have access to a table saw, using a circular saw with a straight edge and a few supports will suffice.
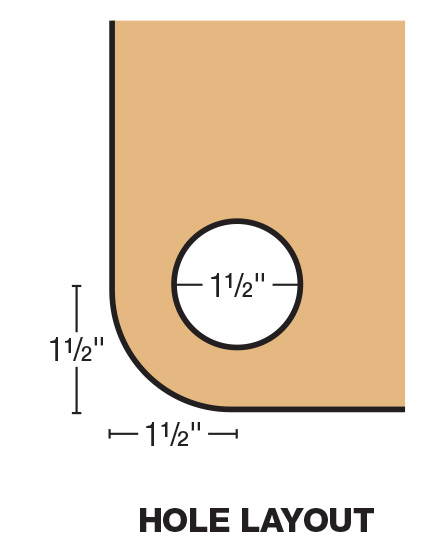
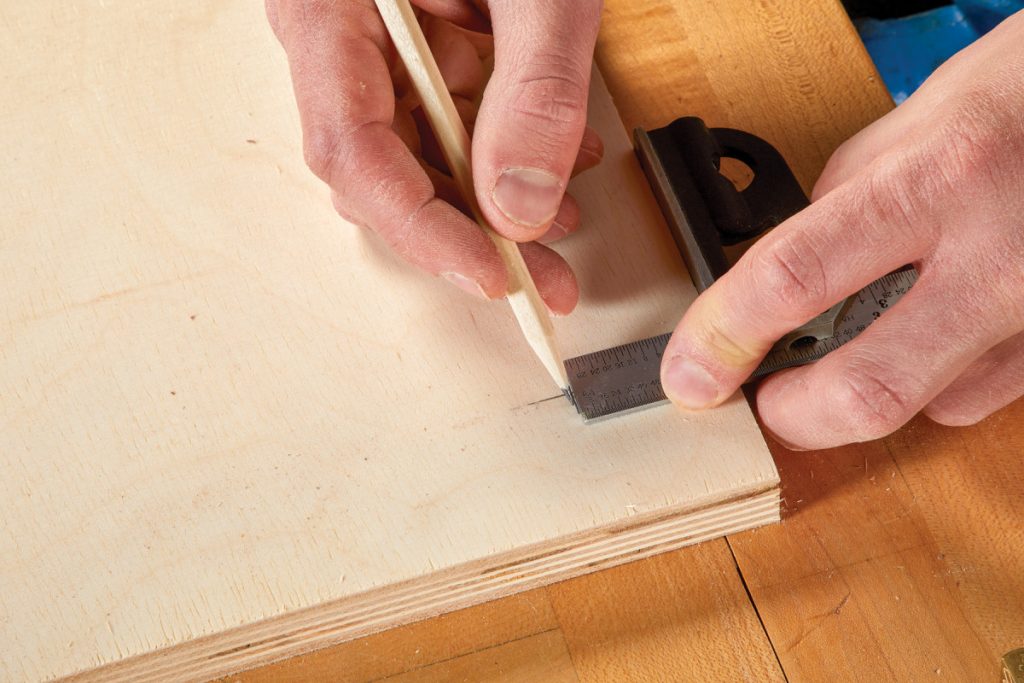
With your parts cut to size, focus on the details to turn a series of boxes into something more refined. I settled on rounded corners as a defining feature. Measure in 1 1/2″ from each side to find the center of your arc.
Use a compass set to 1 1/2″ to lay out the curve. Use the 1 1/2″ center point as the center.
When laying out your cut list, it’s important to consider the sequence in which you cut your individual pieces. For example; the shelf lengths are equal to the length of the desk so it’s wise to crosscut your sheet to the 42″ measurement, then proceed to cut the individual pieces down to their respected widths. This methodology and system of cutting ensures the overall accuracy of your pieces while simultaneously cutting down on the amount of times you need to adjust your fence.
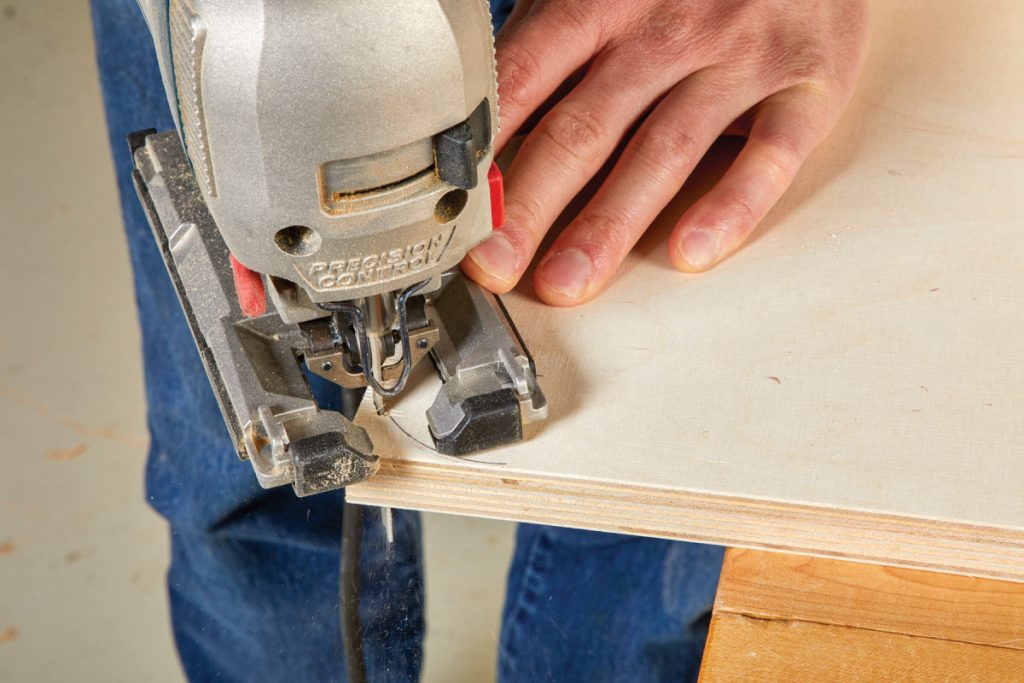
Cut close to the curve with a jig saw, make sure to stay in the waste side of the line.
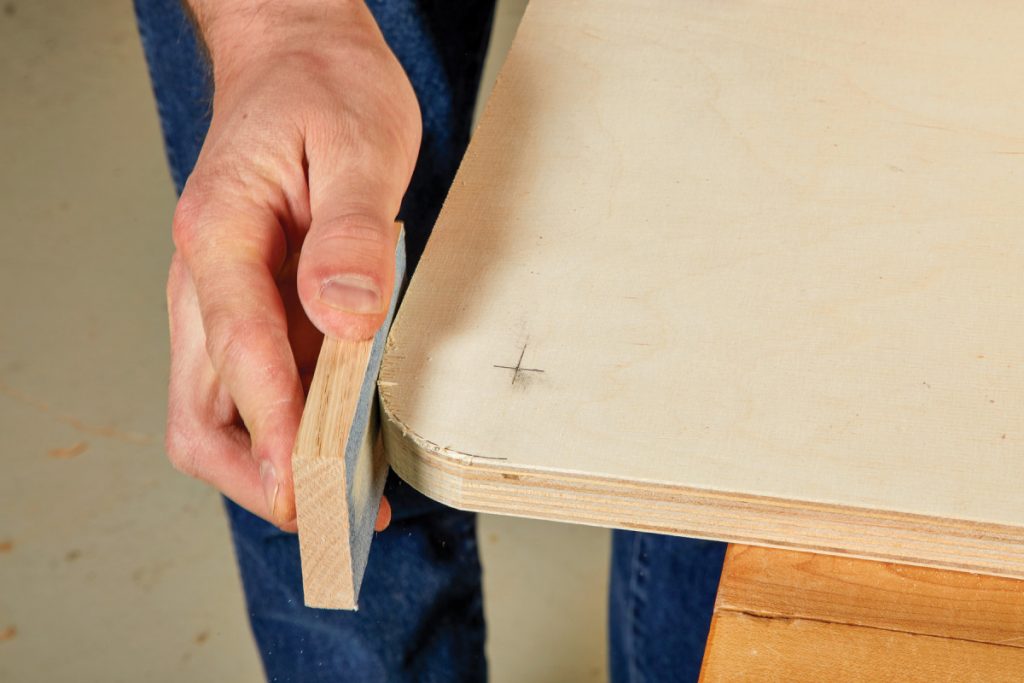
Finally, refine the edge with a sanding block.
Once the tops are cut, I move onto the desk sides, dividers and shelf brackets. With the remaining material leftover from the 42″ cut for the desk/shelf tops, I cut the ledger/mounting boards for both shelfs as well as desk. There is an optional drawer that can be constructed from the leftover 3/4″ material, however, I used scrap 1/2″ plywood that was laying around to maximize drawer space. Now that your pieces are cut, it’s time to move on to the joinery.
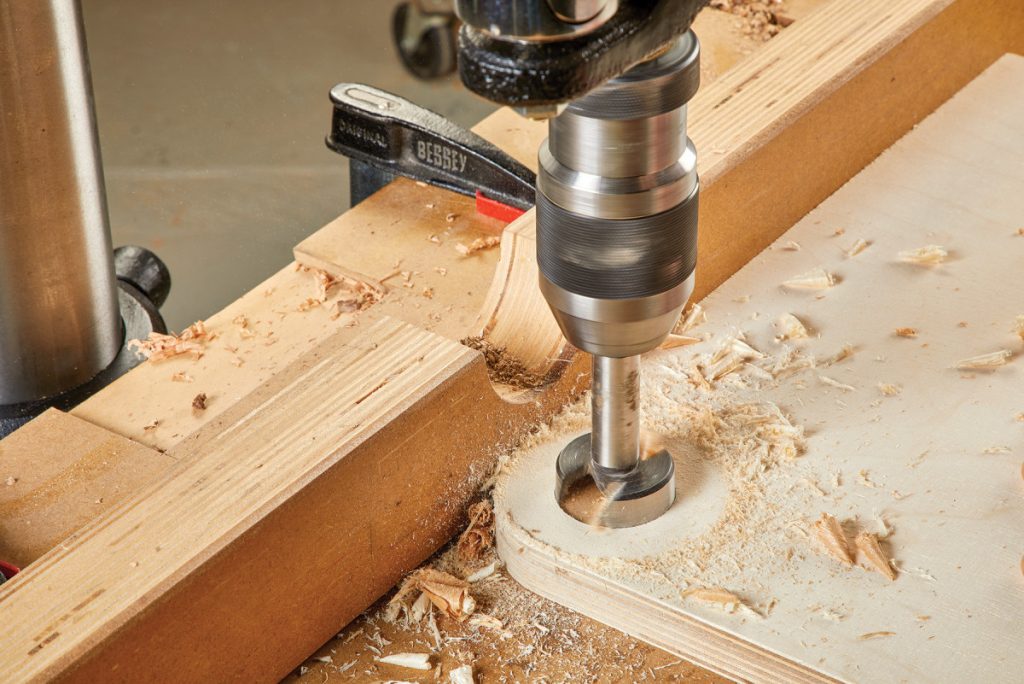
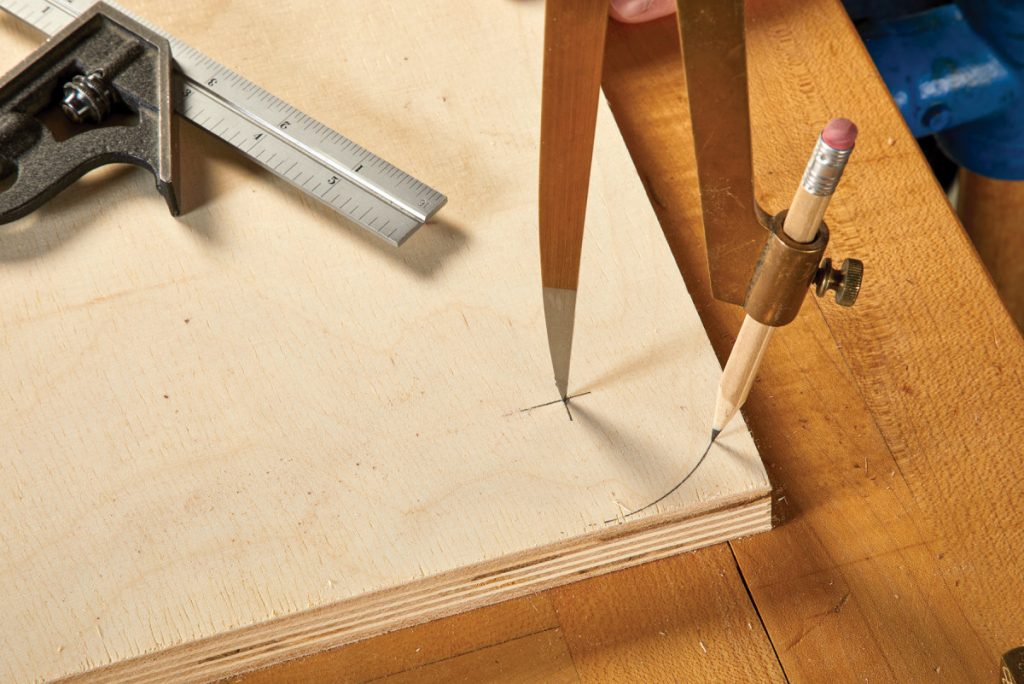
Next, I add 1 1/2″ holes in the center of each arc. Use the center you marked previously and a 1 1/2″ Forstner bit in a drill press.

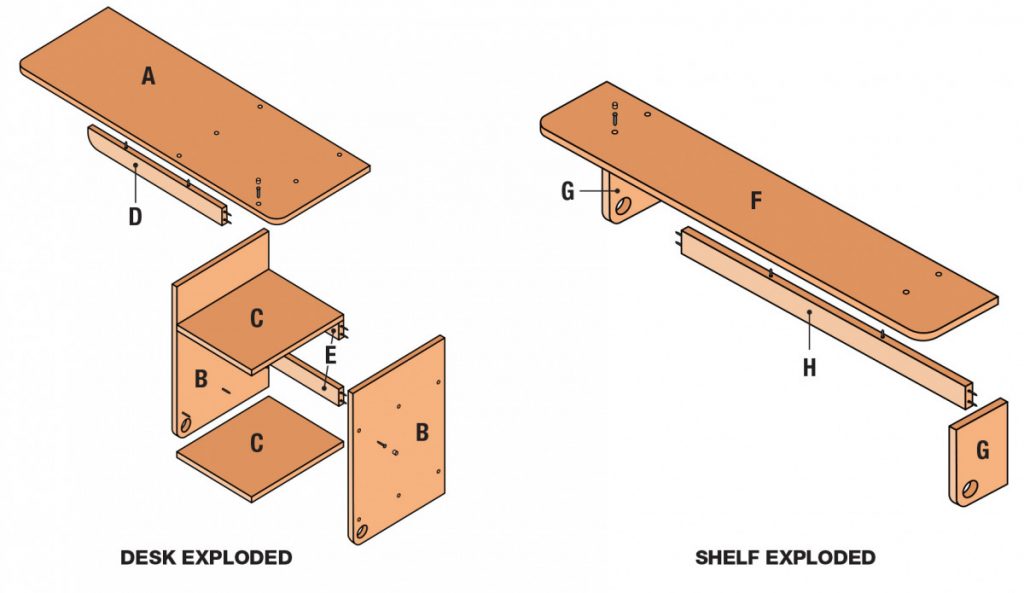 Cut List
No.Item Dimensions (in.)T W L
DESK
1 A Top 3/4 x 15 x 42
2 B Sides 3/4 x 14 3/4 x 20 1/2
2 C Shelves 3/4 x 12 x 14 3/4
1 D Ledger board 3/4 x 2 1/4 x 21 1/2
2 E Short ledger boards 3/4 x 2 1/4 x 12
SHELVES
2 F Top panel 3/4 x 8 x 42
4 G Sides 3/4 x 5 1/2 x 8
2 H Ledger board 3/4 x 2 1/4 x 30 1/2
Simple Joinery
The joinery used for this project is as simple as counterboring holes, and then proceeding to use screws followed by 3/8″ wooden plugs. I know this is a far cry from the perfect marriage of two exceptionally cut joints. However, the objective of this project should be reflected in both the accessibility of its construction as well as its design. There is no finite equation for the layout of the screws just so long as they are spaced evenly enough to ensure sufficient lateral tension. For the desk, I found center on the width of the board, and then proceeded to measure 1″ in from either side. This gave me three points of contact for every perpendicular intersection on the desk.
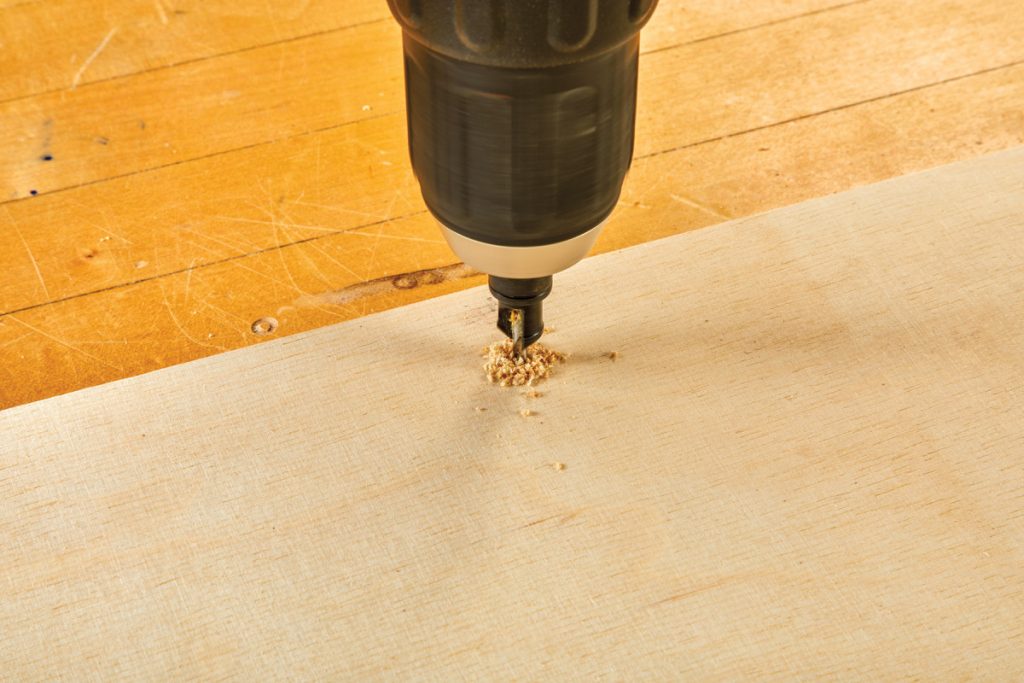
Pre-drill and countersink screw holes for all your joints. You’ll be filling these holes with 3/8″ plugs, so make sure they’re deep enough.
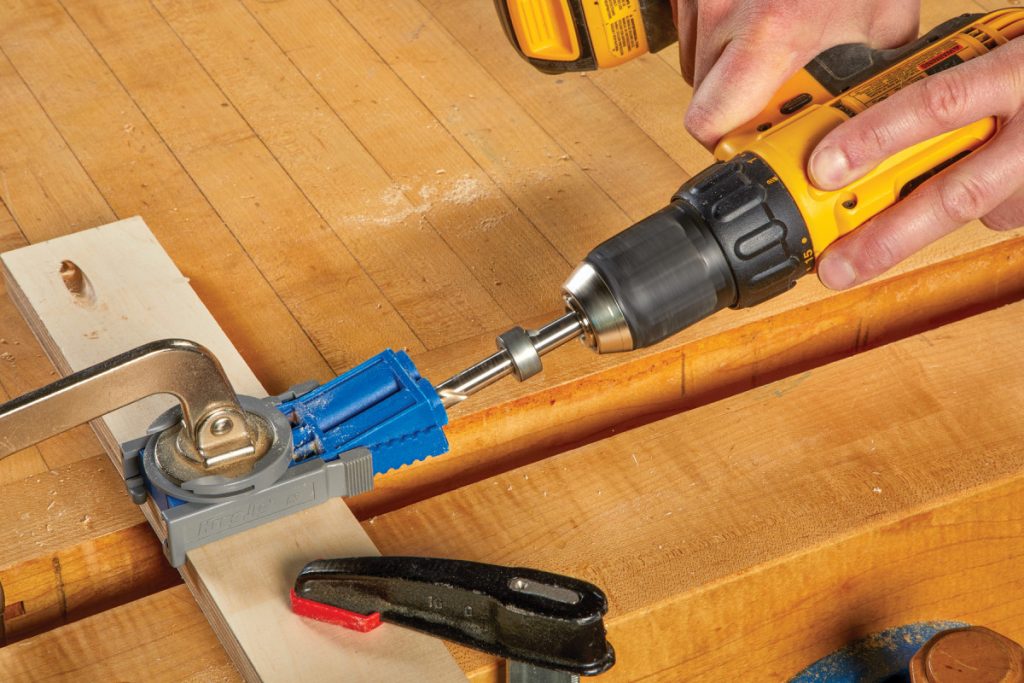
I use pocket hole screws for the back ledger boards to keep things looking clean on the front.
When it came to the layout of the screws on the shelf, I followed my previous method by measuring 1″ in from the sides. The only difference here is that the measurement began where the contact point of the bracket met the top. This is a result of the bracket being shorter in width than the shelf top. Since the shelves are much shallower than the desktop, two screw locations were exchanged for the three. Now that all your contact points are laid out and drilled, it’s time to switch our attention to the ledger boards. These were installed last in the construction using pocket screws. By substituting pocket screws, this allowed for maximum surface contact without the need for the screws having to be concealed.
All in the Details
Now that all our pieces are cut and have been laid out and drilled for all our joinery, it’s time to give the plywood a personality. Even though Baltic birch plywood is lauded for its many refining qualities, it often times still requires a degree of manipulation to set it above the rest. Inspired by Waterfall furniture of the 1930s and 40s, distinctive rounded drops were added to all the edges of horizontal surfaces. This feature not only drastically softens the edge, but also allows the surfaces to act as an organic ‘extension’ of which they are mounted.

Add a small 1/8″ roundover to all exposed edges. This will take a little planning ahead, but it’s easier to do this to your parts while everything is disassembled.
Another defining design element that was added is the use of circular cutouts that contour the exaggerated radii of the panel’s edges. These cutouts offset the flat opaqueness of the material and give the piece a sense of visual continuity. Once these two design elements were addressed it was time to dress/profile the edges. Since plywood is prone to splintering, I like to give the hard edges either a 1/8″ chamfer or round over profile. This not only saves your fingers and the piece, it visually complements all the other design elements included in this project.
Assembly/Finishing
One of the great benefits of using screws as joinery is the ability to work with partial constructions when applying your stain/finishes. Since there are a couple of tight spaces within the desk’s storage, this accessibility was paramount. For the paint application I went with a ‘furniture grade’ latex paint which is great due to its low VOC count as well as cure density.
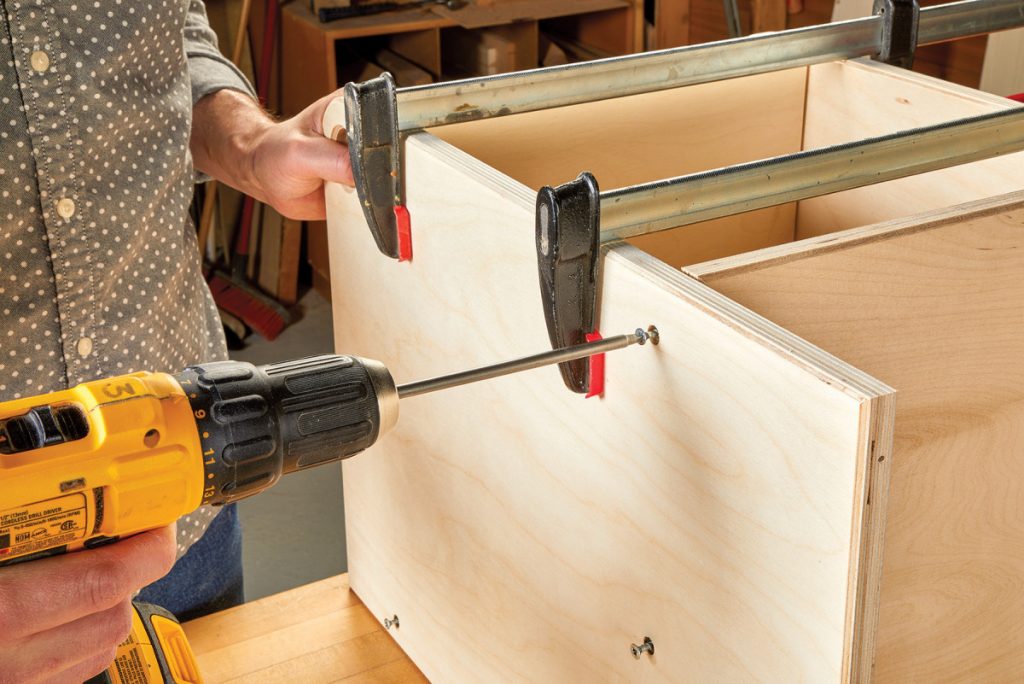
With all the prep work done, it’s time for assembly. The desk and shelves are just screwed together (no glue). Assemble the understructure of the desk first.
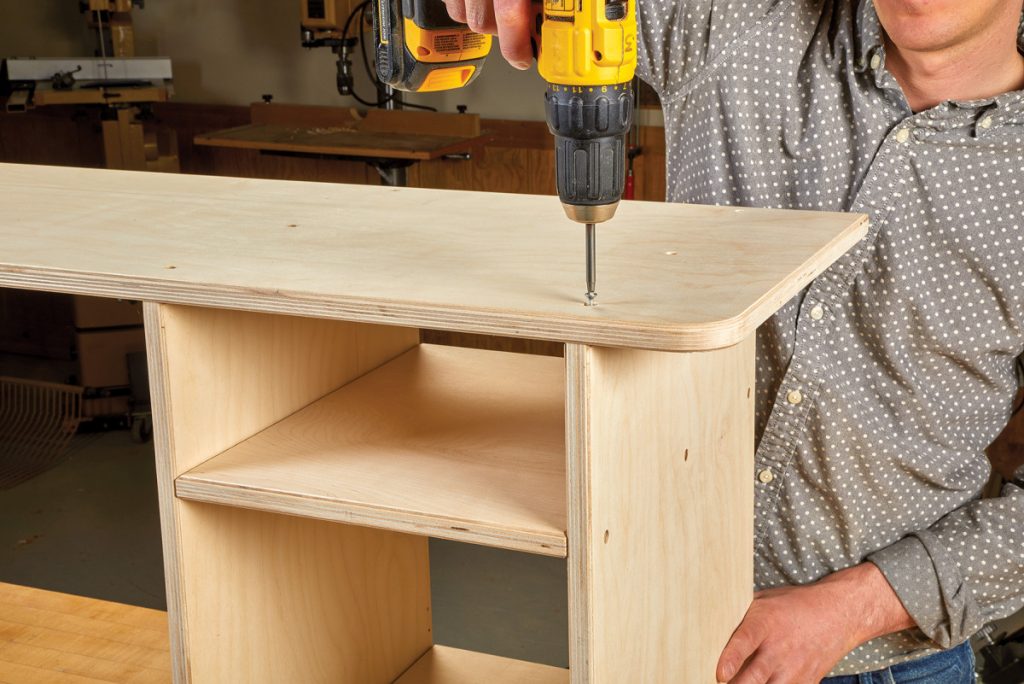
Attach the top to the desk.
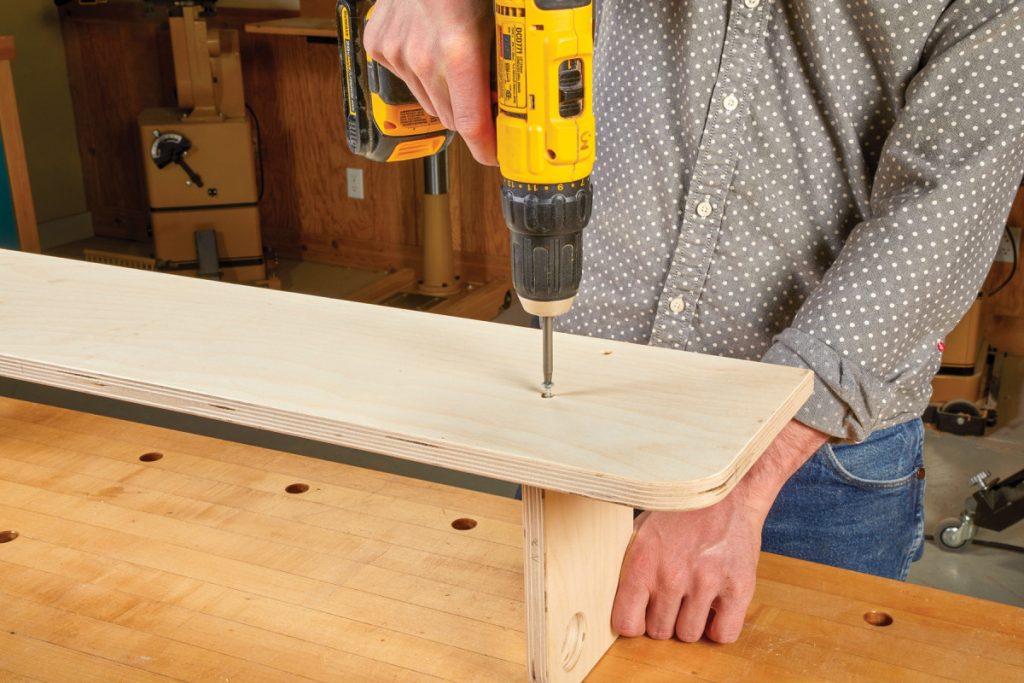
With the shelves, attach the tops to the supports.
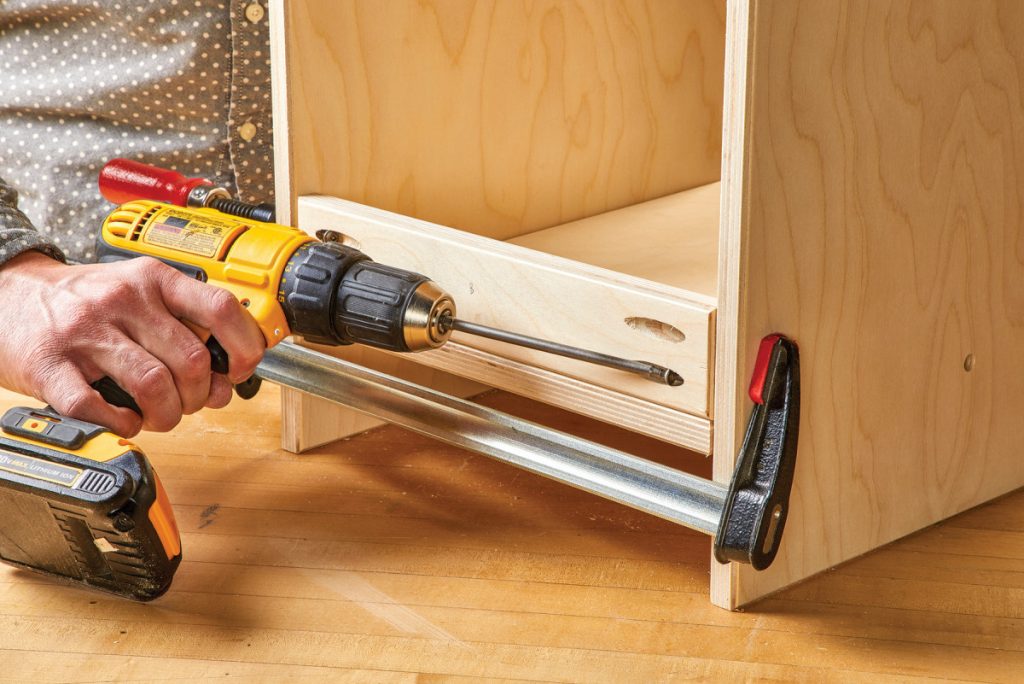
Then, attach the ledger boards to the desk and shelf assemblies.
I first started by attaching both cabinet sides to the top, along with all three ledger boards. This allowed for better access to the interior when applying the paint. After the paint was applied to the interior, I proceeded to attach the two horizontal dividers that make up the desk’s storage. After these were in place, and the two shelves were assembled, I could continue with the application process. Once the paint had cured, there was one more liberty that needed to be taken; something didn’t feel right.
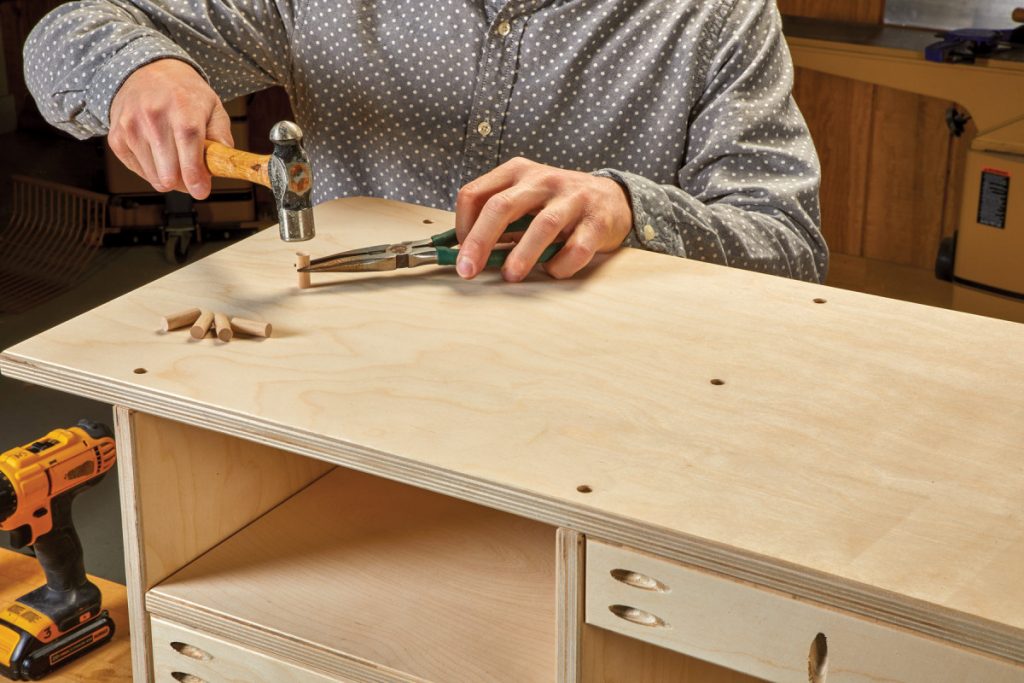
Once you have everything assembled, add the wood plugs to cover exposed screws. Add a dab of glue, and hammer a 3/8″ dowel in. Pay attention to grain orientation to help them blend in as much as possible.
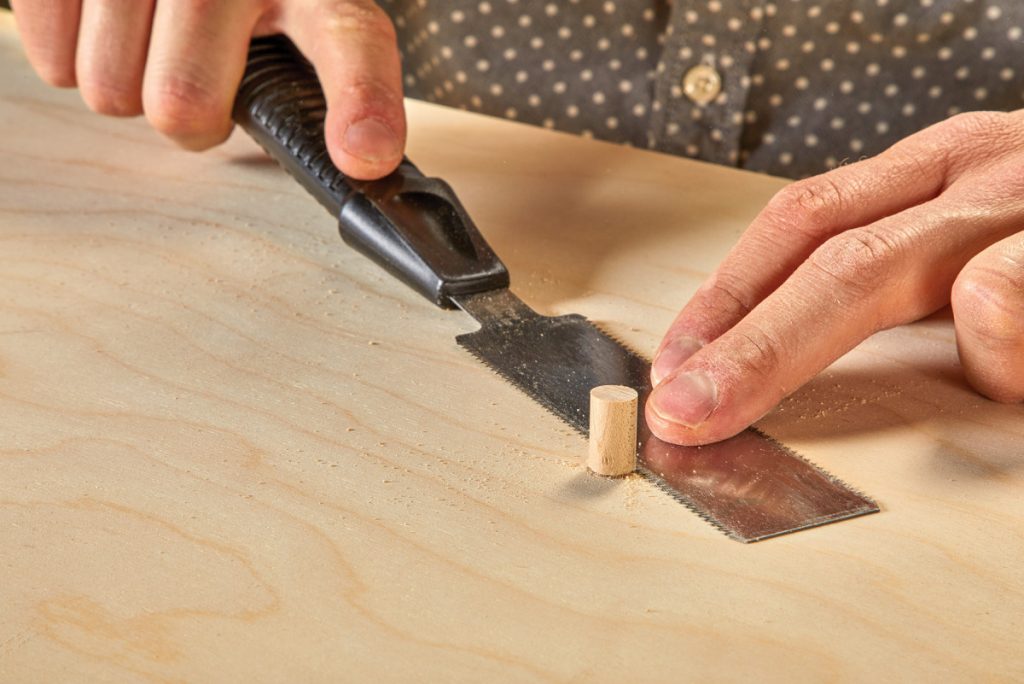
I wait for the glue to set up for about 30 minutes, then come back and use a flush trim saw to cut the dowel flush.
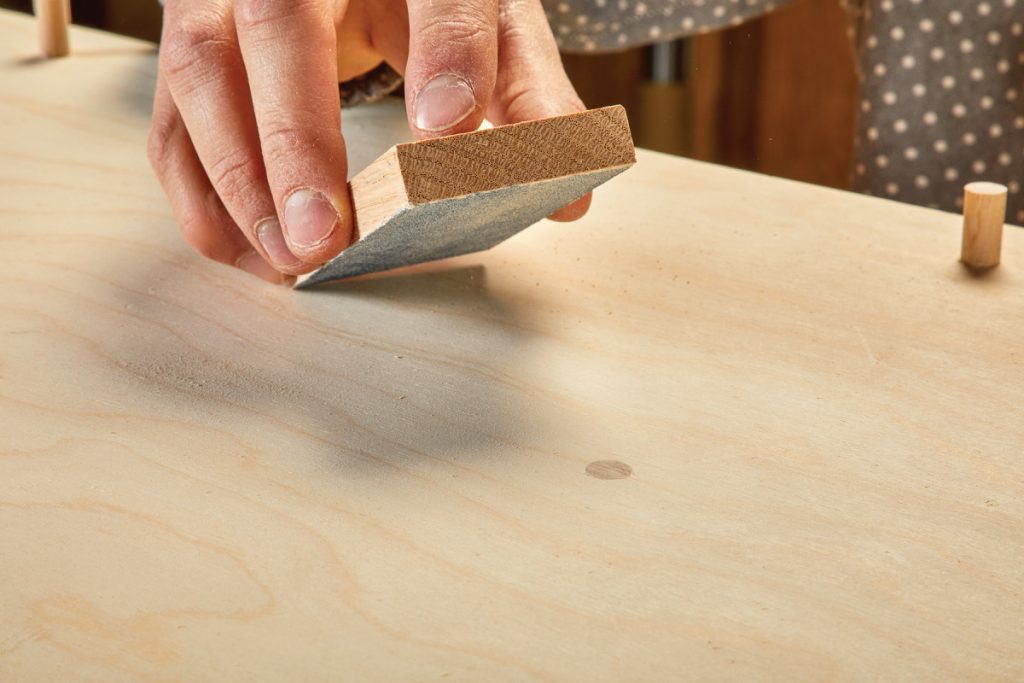
A quick hit with the sanding block and the surface is ready for paint.
After concealing all the layers of finely laminated birch in paint, the need to sand to it back felt imminent. Due to its core being free of voids, exposing the edges of the plywood not only highlights the material’s construction, but also makes for a great way to add visual contrast to the piece.
Now that the piece is complete, its ready to mount in its new home. The anchoring system you choose will be contingent on the substrate to which it is applied. My home is filled with its original lath and plaster walls, so toggle bolts were my fail-safe to ensure a firm connection between the piece(s) and the backside of the lath.
Here are some supplies and tools we find essential in our everyday work around the shop. We may receive a commission from sales referred by our links; however, we have carefully selected these products for their usefulness and quality.