


We may receive a commission when you use our affiliate links. However, this does not impact our recommendations.
David Fleming, a former English teacher turned chairmaker, teaches the craft of building chairs on the edge of the Canadian wilderness.
Editor’s note: This article originally appeared in the November 2004 issue of Popular Woodworking Magazine.
After eight hours of a complete physical and mental workout, the seat of my Welsh stick chair is finally taking shape. What had started as a rough plank of gnarly elm that morning now looks like a perfectly shaped cradle for my now-aching behind.
I’d hacked out most of the depression in the seat using a primitive but powerful tool called an adze. Other traditional chairmaking devices – a scorp, travisher, scrapers and deltoids – smoothed out the furred and jagged elm seat into something that resembled a well-worn leather saddle.
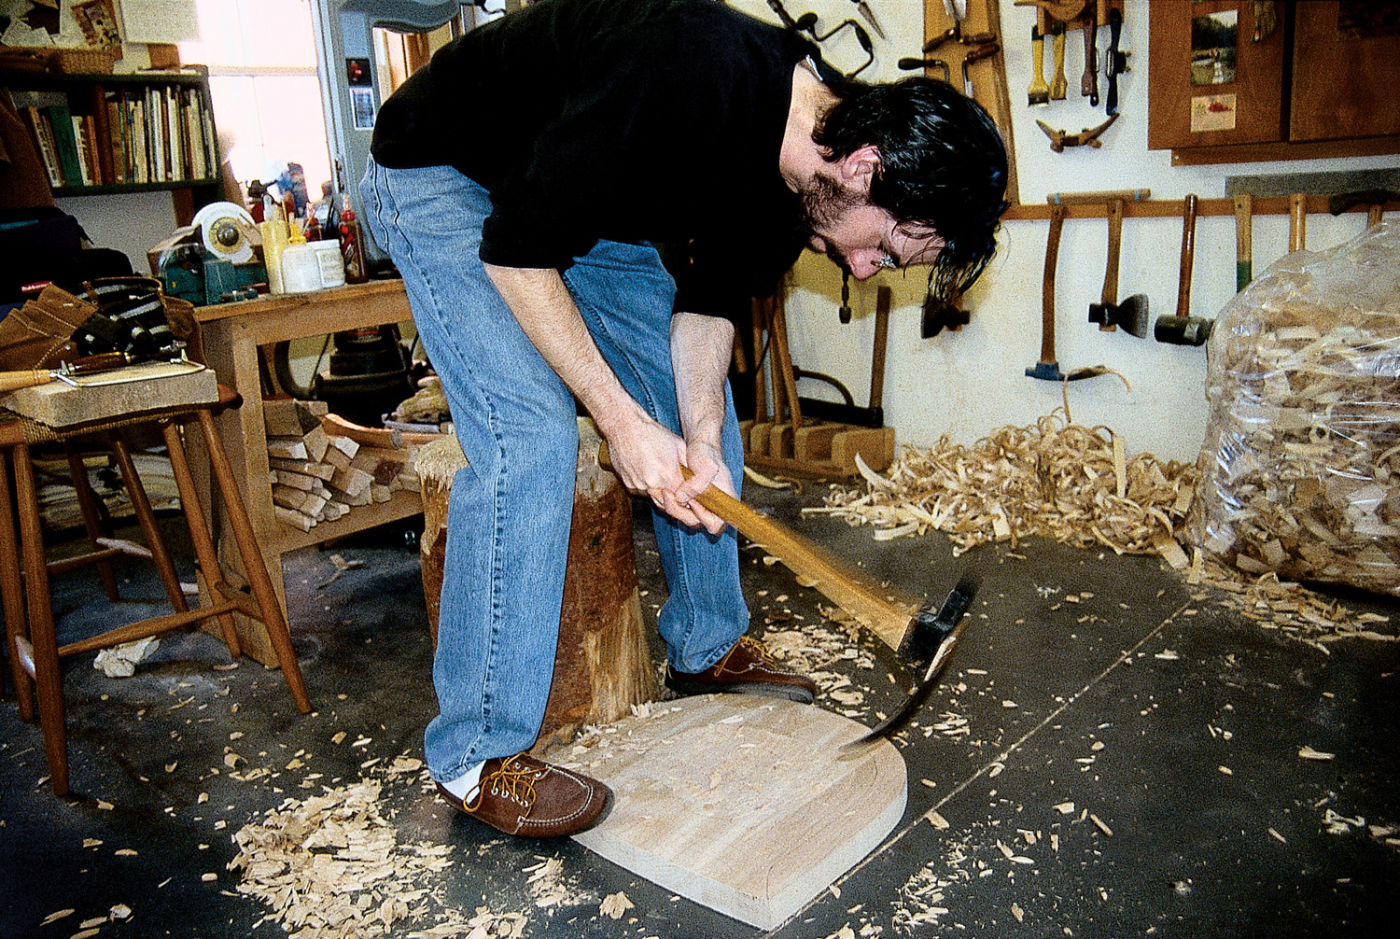
The adze is a tricky tool to master. Finding the right angle takes practice. Removing material quickly takes a bit of strength.
As I reach for my spokeshave with one hand, I turn the workbench’s vise screw with the other to secure the seat. Time for the easy part: chamfering the edges. As the bench dogs tighten their grip, a sickening sound seeps from my seat.
The whole thing – all eight hours of it – splits before my eyes.
Before my blood pressure can even shoot up a few points, the instructor of the chairmaking class, David Fleming, steps to the bench when he sees me deflate. To my eye the seat is wrecked, and I begin uttering a long string of self-loathing curse words. Fleming, however, is completely unfazed.
He removes a thin-kerf handsaw from the wall of the shop and shows me how he will fix the problem. He’s going to rip the whole thing directly down the split, clean up the joint with a try plane and glue it back together. The tone of his voice is so calm, his manner so confident, that I almost believe what he suggests is possible.
When class starts again the next morning, my seat is on the bench in one piece and as good as new. (Even to this day I cannot find the repair.) I’m amazed, but Fleming merely shrugs, smiles and resumes whistling a song as he keeps time on his foot-powered pole lathe, turning another spindle for a Windsor chair he’s building for a client.
Most of the world has never heard of Fleming, a high-school English teacher who began making ladderback, Windsor and Welsh stick chairs in 1986. But he has started teaching some small classes (usually four students at most), and his reputation is beginning to spread. Several employees of Lee Valley Tools – including one of the company’s tool designers – have made chairs under Fleming’s tutelage. And Leonard Lee, the company’s founder, owns some of his chairs.
Orders are coming from far-off places, and students are beginning to make the long journey to Gould Street in Cobden, Ontario, to spend five days making a chair, listening to Fleming spin stories and forgetting that the 20th century ever happened.
About Welsh Stick Chairs
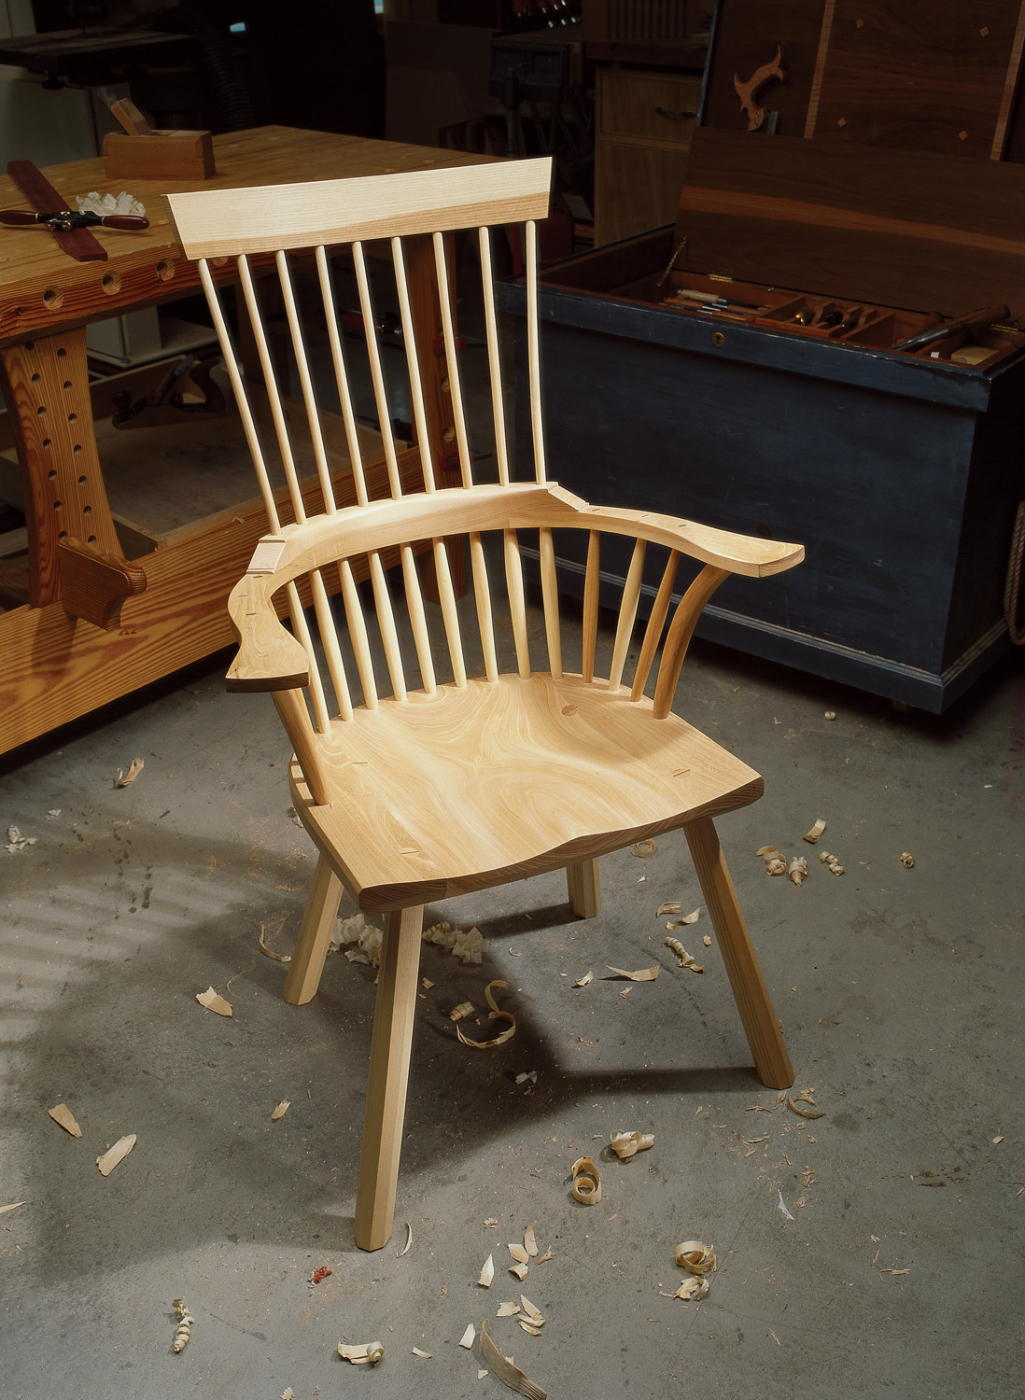
The Welsh stick chair is an uncommon form to the American eye. While it shares some of the features of the classic Windsor, it is in many ways less refined. Instead of elegant turned legs, Welsh stick chairs typically have octagonal or roundish hand-shaped legs. Many Welsh stick chairs also lack stretchers between the legs and were even occasionally made with three legs (which was better for dirt floors).
The seat, bow, spindles and crest are all similarly less refined than what you’ll find on a typical bow-back or sack-back Windsor. Despite their humble origins, I have always had a fondness for these chairs. While the Windsor chair has an elegance and delicateness like a swan, the Welsh stick chair has an appealing aggressive demeanor – like a large cat that is poised to pounce.
Relatively little is known about individual chairs or their makers because they were peasants’ chairs, made in a village by a carpenter, wheel-wright or coffin-maker. In fact, the form might be even more obscure if it weren’t for the work of one modern chairmaker, John Brown. Brown began building chairs in Wales after losing his job as a builder of wooden boats to the modern business of building plastic hulls.
Brown began building Welsh chairs, selling them and researching what little history exists of this folk craft. He came to the United States and introduced the form to a few influential chairmakers. He began writing a column in the British magazine Good Woodworking that was titled “The Anarchist Woodworker.” His 1990 book “Welsh Stick Chairs” (Lyons and Burford Publishers) is on the shelves of most well-read chairmakers.
With this book and Drew Langsner’s essential work, “The Chairmaker’s Workshop” (Lark), most woodworkers at home can puzzle out how to build a Welsh stick chair. Or, of course, you can take a class. Modern versions of Welsh stick chairs are much more refined than the originals. Few Welsh stick chairs have saddled seats or steam-bent crests or shaped arms. Most are very straight and quite severe.
Brown’s book contains dozens of photos and line drawings of Welsh stick chairs, plus a short history of the region and how it influenced the chairmaking there. And then there are 40 pages that show how Brown makes his “cardigan” chair entirely by hand and usually with a cigarette dangling from his lips.
Perhaps the most alarming fact about Welsh stick chairs, according to Brown, is how many of them have been lost. Until recently the chairs were more valuable as firewood. And for every existing one today, there are probably 100 ones that have rotted or been burned or simply thrown away.
A Chairmaker’s Shop
Located an hour and a half outside Ottawa, the village of Cobden and the nearby town of Pembroke are the last stops on Highway 17 before you penetrate the Canadian wilderness. Civilization falls quickly away on this highway until there’s little left but river, sky and the occasional Tim Hortons doughnut shop. By the time you reach Fleming’s shop, a tidy red building at the end of his home’s driveway, its rustic contents seem perfectly natural.
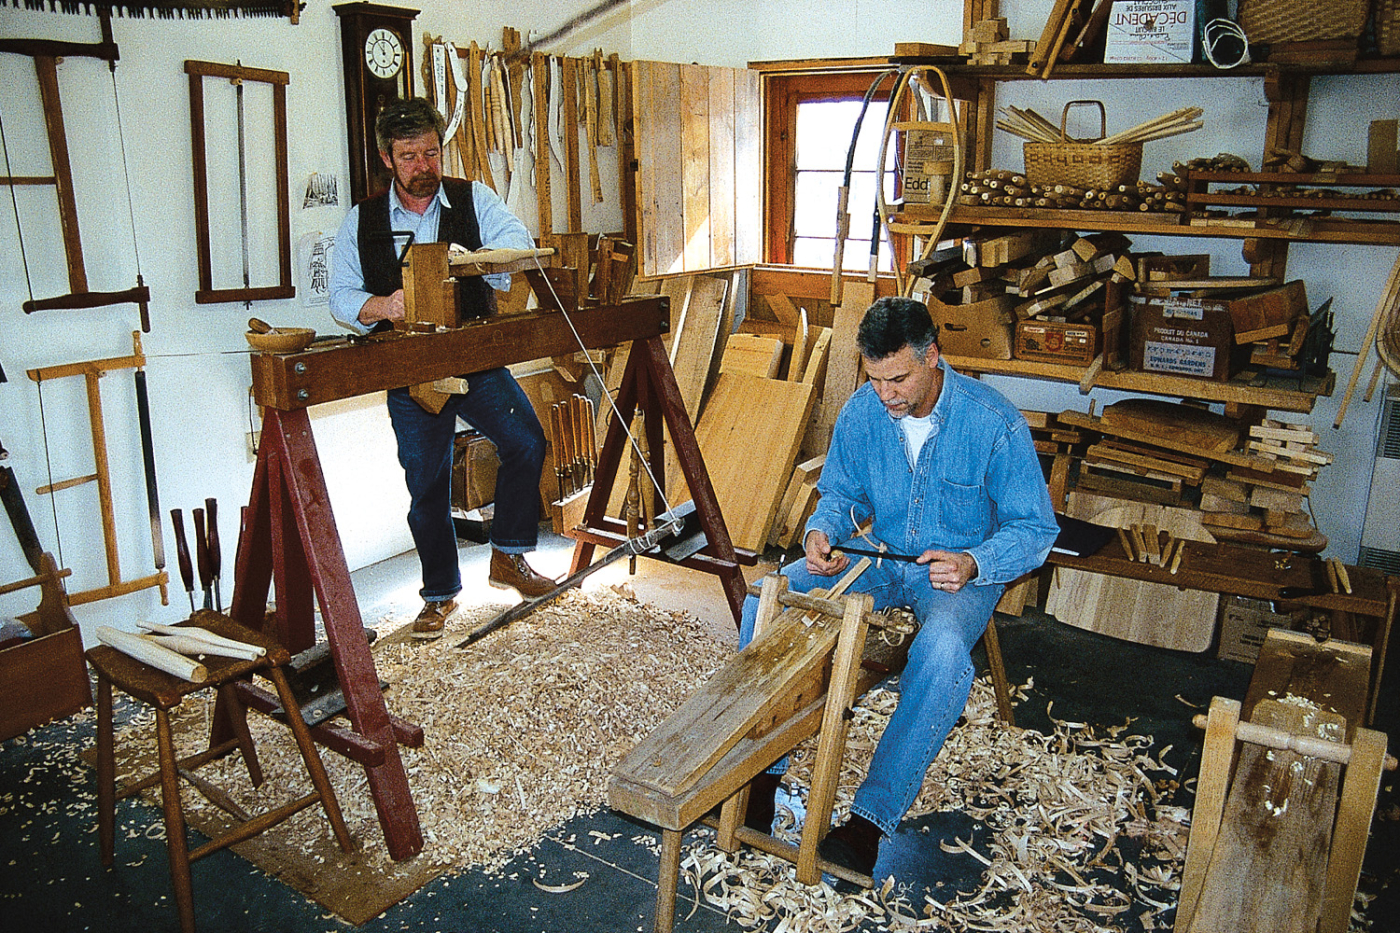
David Fleming turns a few spindles on the pole lathe as John Hoffman, the other student in the class, gets comfortable with the shaving horse and drawknife.
Though it’s only 25-feet square, the shop is roomy enough for three or four people to work comfortably because of the absence of woodworking machinery. The shop’s entryway is reserved for a few of Fleming’s finished chairs and a well-thumbed library of books on chairbuilding and traditional crafts. (Fleming read aloud several romantic passages about particular species of trees during my week there.)
Two shaving horses and a low workbench occupy the center of the room. The right wall is framed by shelves stocked with spindles and the timber for upcoming orders (Fleming is usually booked to the point where it takes him six months to fill an order).
A pole lathe squats in the back of the shop. Powered by Fleming’s foot and a long springy tree branch secured to the ceiling, he churns out a spindle every three minutes or so when he is busy. The left side of the shop has a cabinetmaker’s bench, a storage cabinet and one of the few 20th-century intrusions into the environment — a small benchtop band saw.
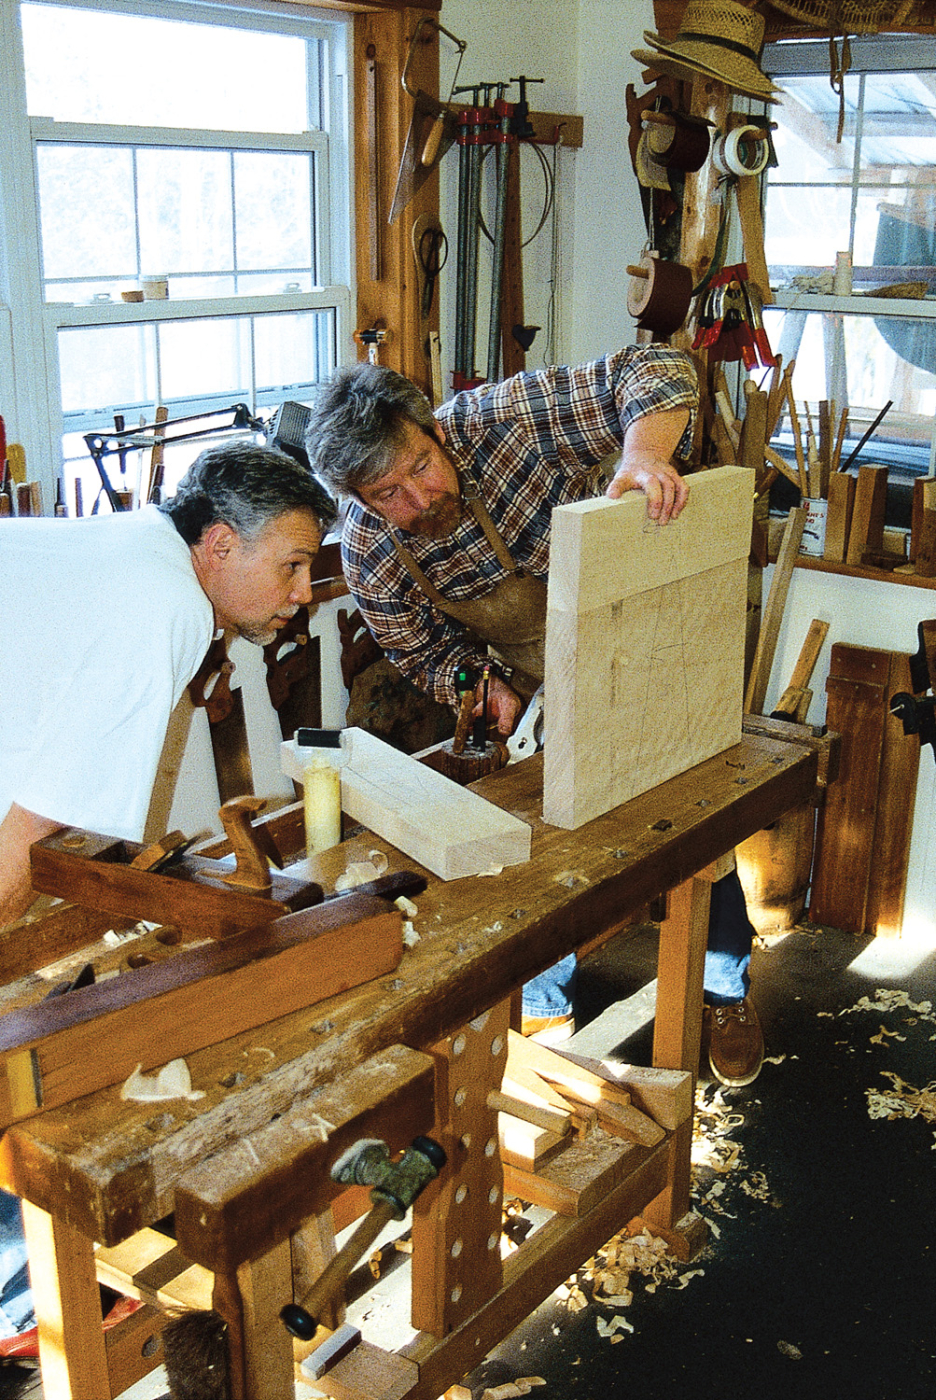
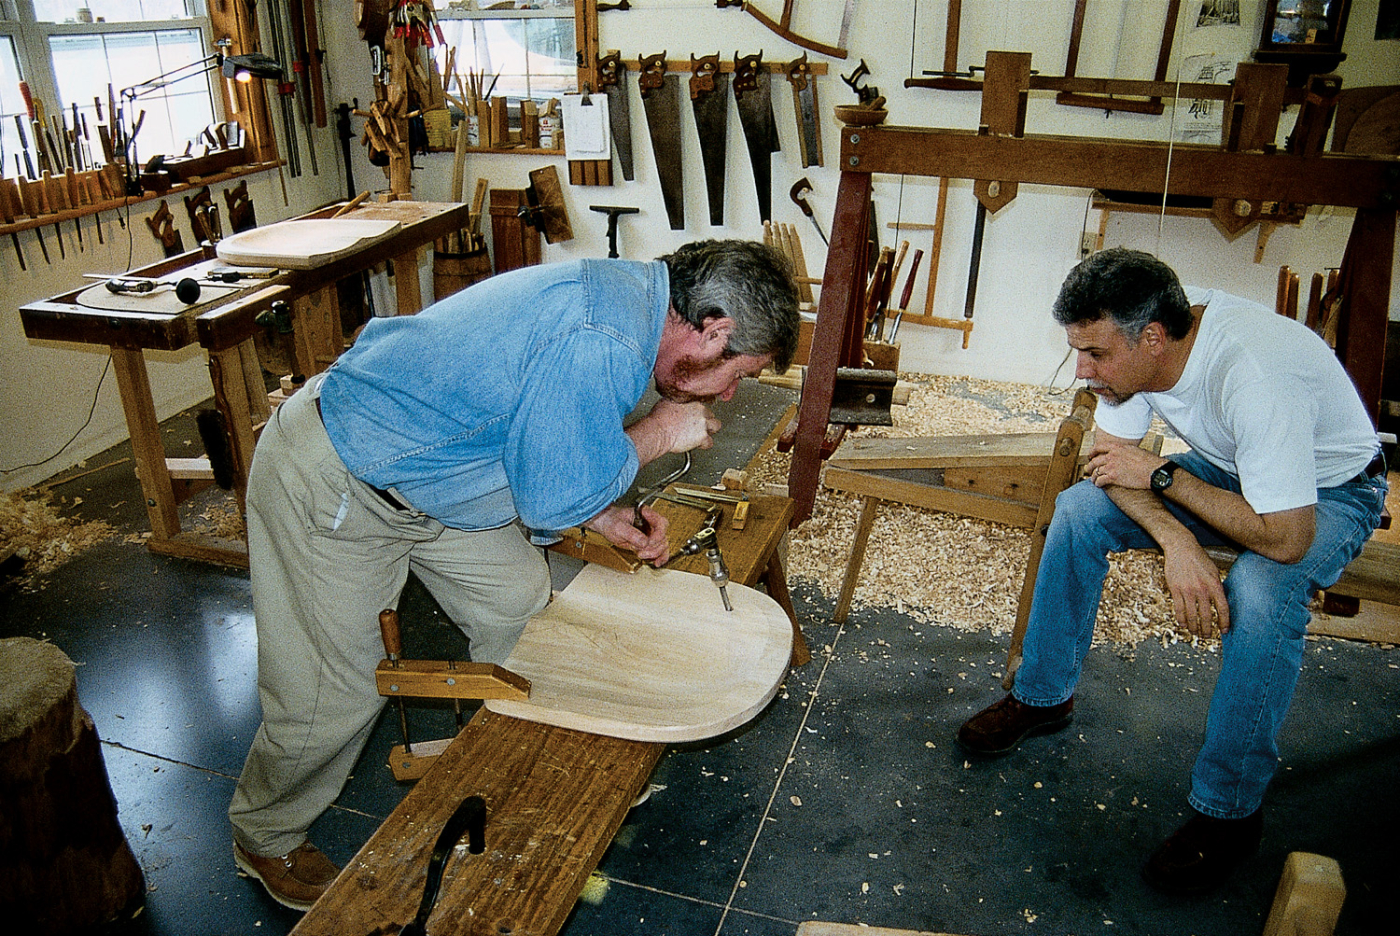
Hoffman and Fleming inspect the parts of the seat before gluing it up. After dressing each long edge with a try plane, students inspect the joint for a perfect fit by looking for gaps of light.
All four walls sport large windows (only a few electric bulbs are needed to light the shop) and dozens, probably hundreds, of well-cared-for traditional tools. Handsaws and frame saws hang on the back wall. They’re not for show; at any moment Fleming will fetch one off the wall and blaze through a board. The large windowsill on the left wall is populated by a forest of chisels, carving tools and clamps. And the front part of the room houses his planes, bit braces and all the specialty tools of the chairmaker’s trade.
It Starts With a Log
On the first day of class, we pull up in the driveway outside Fleming’s shop, and he is sitting outside in the unusually warm March sun dressed in a starched shirt and vest with two ash logs propped against some sawhorses.
“This,” he explains, “is some of the nicest ash I’ve ever had.” He runs his hands over the perfectly straight, clear and white wood. The wood is still green and wet, and because ash dries quickly, we need to jump right in to make the spindles for our chairs. Once the wood starts to dry it will be more difficult to work. So we fetch a wooden club, called a maul, and a froe and start splitting the wood on a stump inside the shop.
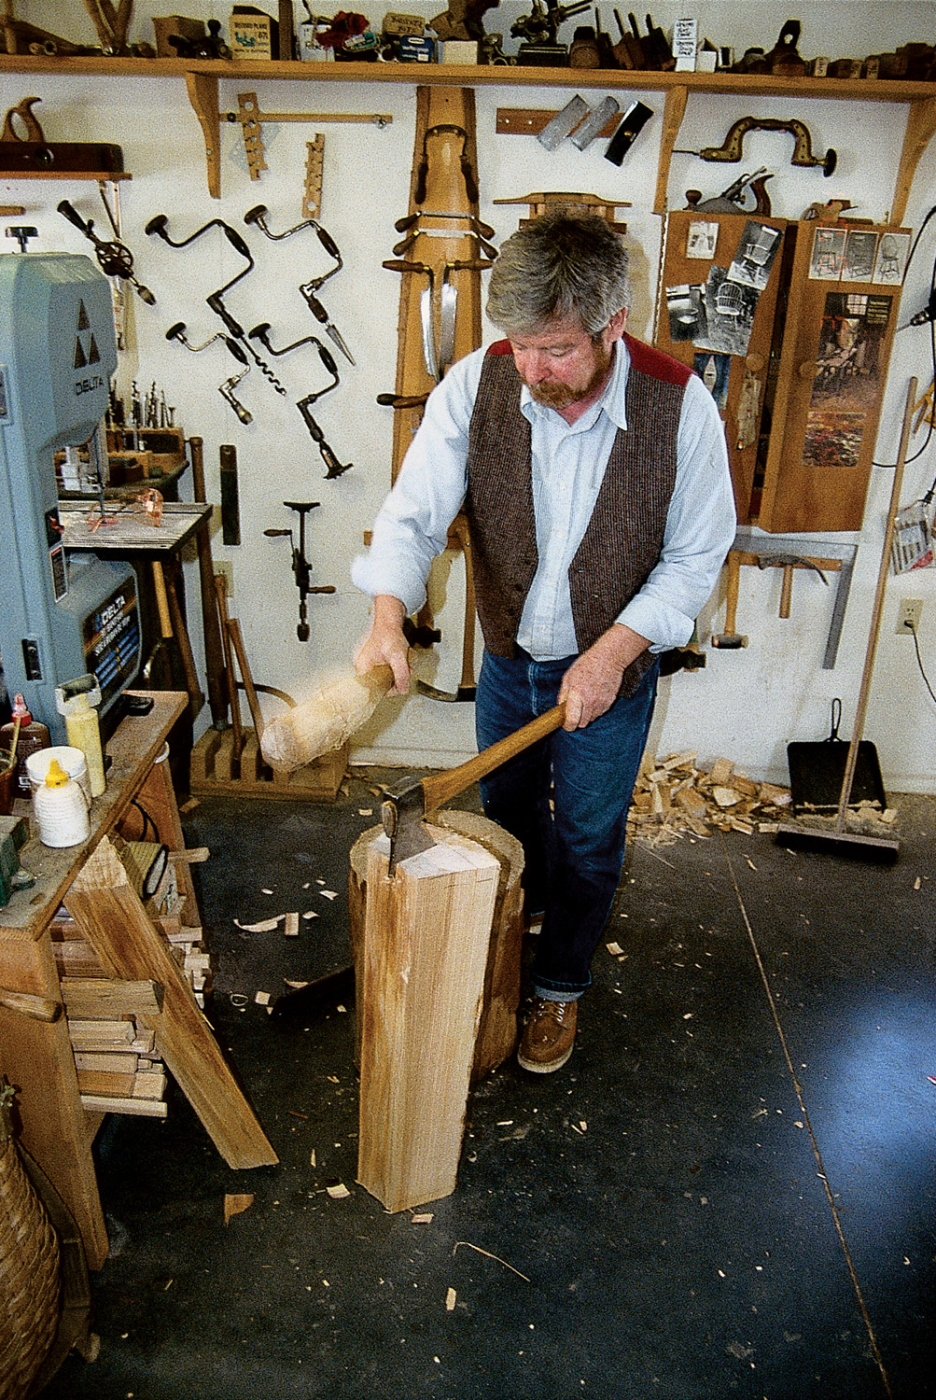
Using a maul and an axe, Fleming shows how to split the ash log into the square lengths that will become our spindles, crest rail and legs. With the wood still wet, it’s surprisingly easy to work.
At first glance the froe seems a primitive instrument, but it’s a surprisingly effective way to split the 1″ x 1″ sections we need for the chair spindles. A froe has the basic shape of a framing square. One leg is a handle; the other is a slightly wedge-shaped length of steel. You balance the steel edge of the froe on the end grain of the log where you want your split to begin. Then, with all your might, you strike the back of the steel wedge to drive it into the wood. The ash splits true. Once the cut begins, it’s simple work to push and pull the handle to drive the split to the bottom of the log.
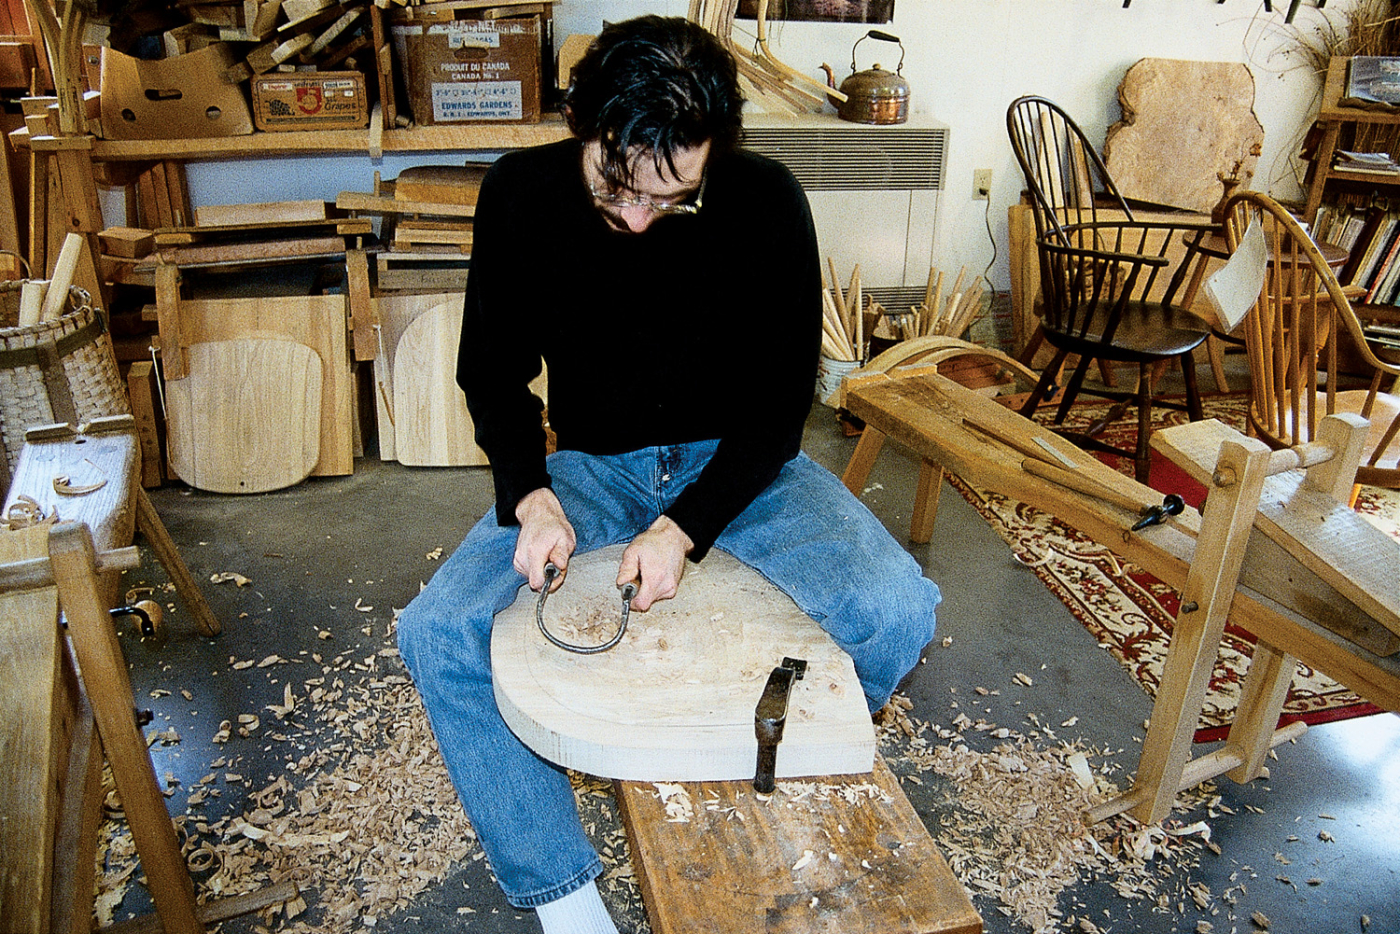
After the adze work is done, the scorp cleans up the rough stuff. Of all the hand tools we used during the class this one required more strength and endurance than any other.
We take the blanks to the shaving horse and learn to make the slightly irregular shapes into more regular square sections, which will be dried in Fleming’s wood-burning stove in his kitchen. With a sharp drawknife the wood comes off in long wet ribbons that have an earthy, primitive and intoxicating aroma. Fleming shows us how to taper the spindle blanks so they’ll be easier to shape round after drying.
Halfway through the morning, Sandy, Fleming’s wife, brings a fresh pot of tea to the shop, a ritual they observe during every class, and one I became quickly fond of. We take a break from the spindles and sit in Fleming’s chairs at the front of the shop. There are a lot of different historical examples of chairs in his shop and home, and Fleming explains the subtle differences in each and helps us decide how our chair is going to look when we’re done.
One of the advantages of Fleming’s classes is he takes only a handful of students at a time, usually just two or three, sometimes four. The small class size allows each student to work on a slightly different style of chair and make changes to the legs, arms or crest rail and still keep things manageable. In any given month, Fleming will build chairs for three weeks and spend a week teaching his “apprentices.”
“No one does a cookie-cutter copy of a chair here,” he says. “It’s like blues or jazz – it’s different every time you do it.”
Fleming’s students come from all walks of life. Some are experienced woodworkers, but many have very little (if any) shop experience. Either way, Fleming makes sure that each student leaves with a chair that he or she built.
The other reason that Fleming’s class is unusual is he is eager to teach students to build the Welsh stick chair, the genetic ancestor of the subtle and supple Windsor chair we’re all familiar with. Windsor chairmaking is enjoying a remarkable renaissance in the United States thanks to Michael Dunbar and The Windsor Institute in Hampton, N.H. Dunbar has taught more than 6,500 students to build Windsor chairs, including many new woodworkers. And a surprising number of his students have opened their own chairmaking shops or begun teaching the craft themselves.
Dunbar’s influence has even spread to the tool-making world. When he began teaching in 1980, it was difficult to find traditional chairmaking tools for sale, even in antique stores. But now there’s an entire cottage industry that revolves around the craft. Plus major manufacturers are starting to take notice, too.
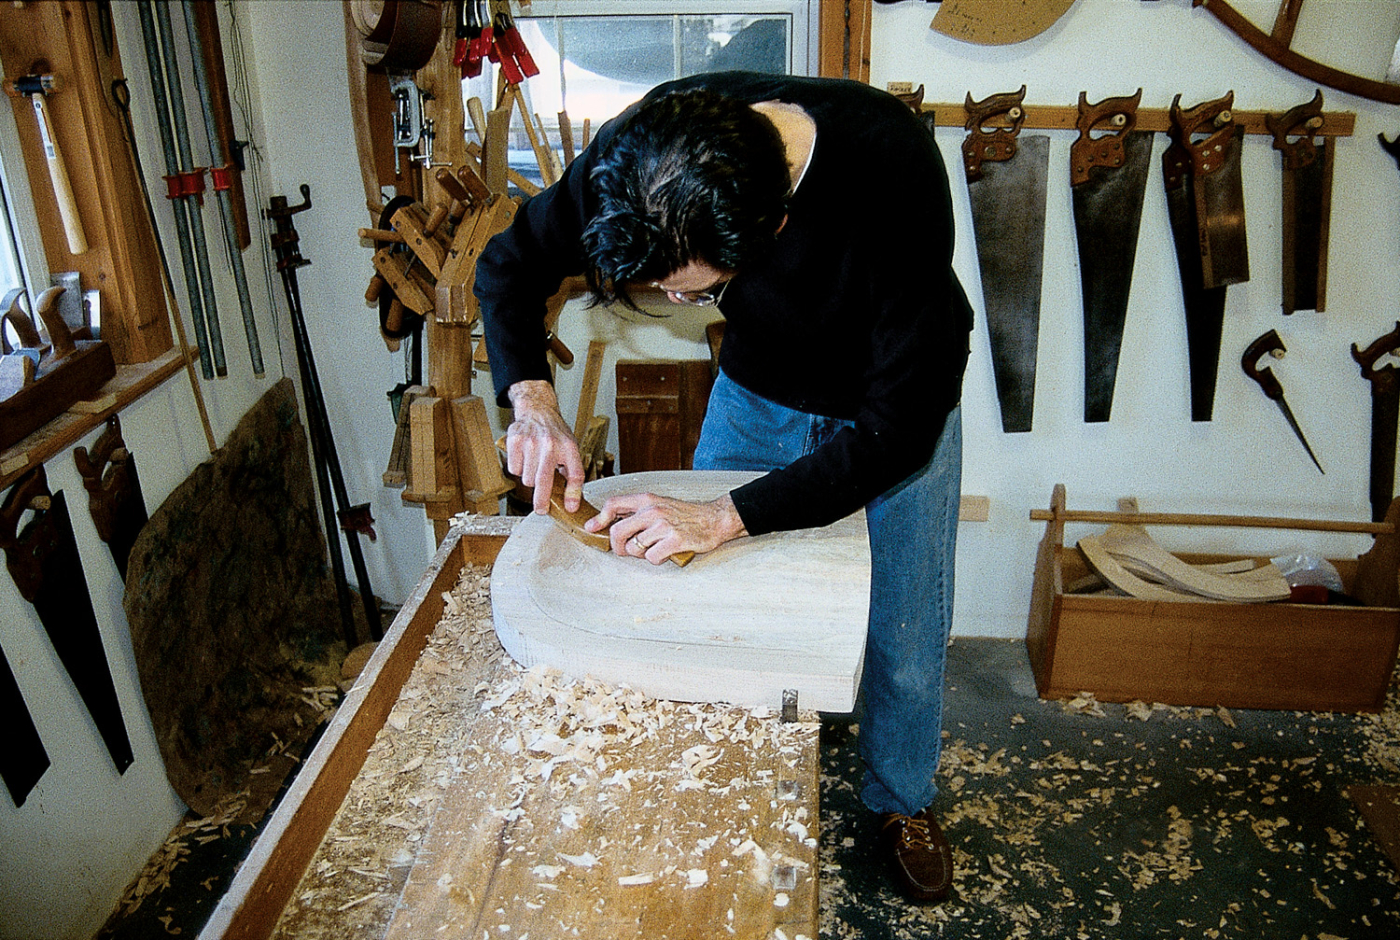
The travisher is essentially a spokeshave with a curved spoon-shaped bottom. It’s a joy to use a tool for the operation it was designed for.
And while the Windsor has enjoyed the spotlight thanks to these classes, the Welsh stick chair remains a bit obscure. There are fewer places to take classes in building this chair. Don Weber of Paint Lick, Ky., teaches this form regularly. And Drew Langsner’s school, Country Workshops in Marshall, N.C., also regularly offers classes. So the student who wants to make this more primitive and aggressive form of chair, needs to do a bit more searching. After talking to dozens of chairmaking students, my search lead me to Fleming.
Meet David Fleming
Though Fleming taught high school for 20 years before becoming a professional chairmaker, working with wood has always been a part of his life. When he was 6 years old he carried a jack knife and whittled constantly. In his 20s, Fleming began making snowshoes and birch bark canoes – he and Sandy camp even in the winter. As a teacher, Fleming had summers off and spent the time learning green wood crafts from Algonquin Indians.
“With building canoes and snowshoes, a lot of the skills are the same with ladderback and Windsor chairmaking,” he says. “You find the right tree, split it and work it with a drawknife and crooked knife.”
One day when he was in a small bookstore he picked up a copy of John D. Alexander’s landmark book, “Make a Chair from a Tree” (Pub Group West). And so, like thousands of other people who bought that book, Fleming began making ladderback chairs. A second event then launched him into abandoning teaching for chairmaking. A local doctor stopped by his shop one day, saw Fleming’s chairs and ordered 10.
“The high school teaching was fine,” he says. “But I needed a change. I thought I’d try something else.”
So he started building chairs on the side and demonstrating at craft shows. About 1988 he purchased “Make a Windsor Chair With Michael Dunbar” (Pub Group West), a book that is now difficult to find, and Fleming added Windsors to his repertoire. Business was so good by 1991 that Fleming finally bid the high school a “fond farewell” and became a full-time professional.
These days Fleming builds as many as four chairs a week – his business is about 40 percent ladderbacks and 60 percent Windsor-style chairs, including the Welsh stick. He builds them and Sandy finishes them.
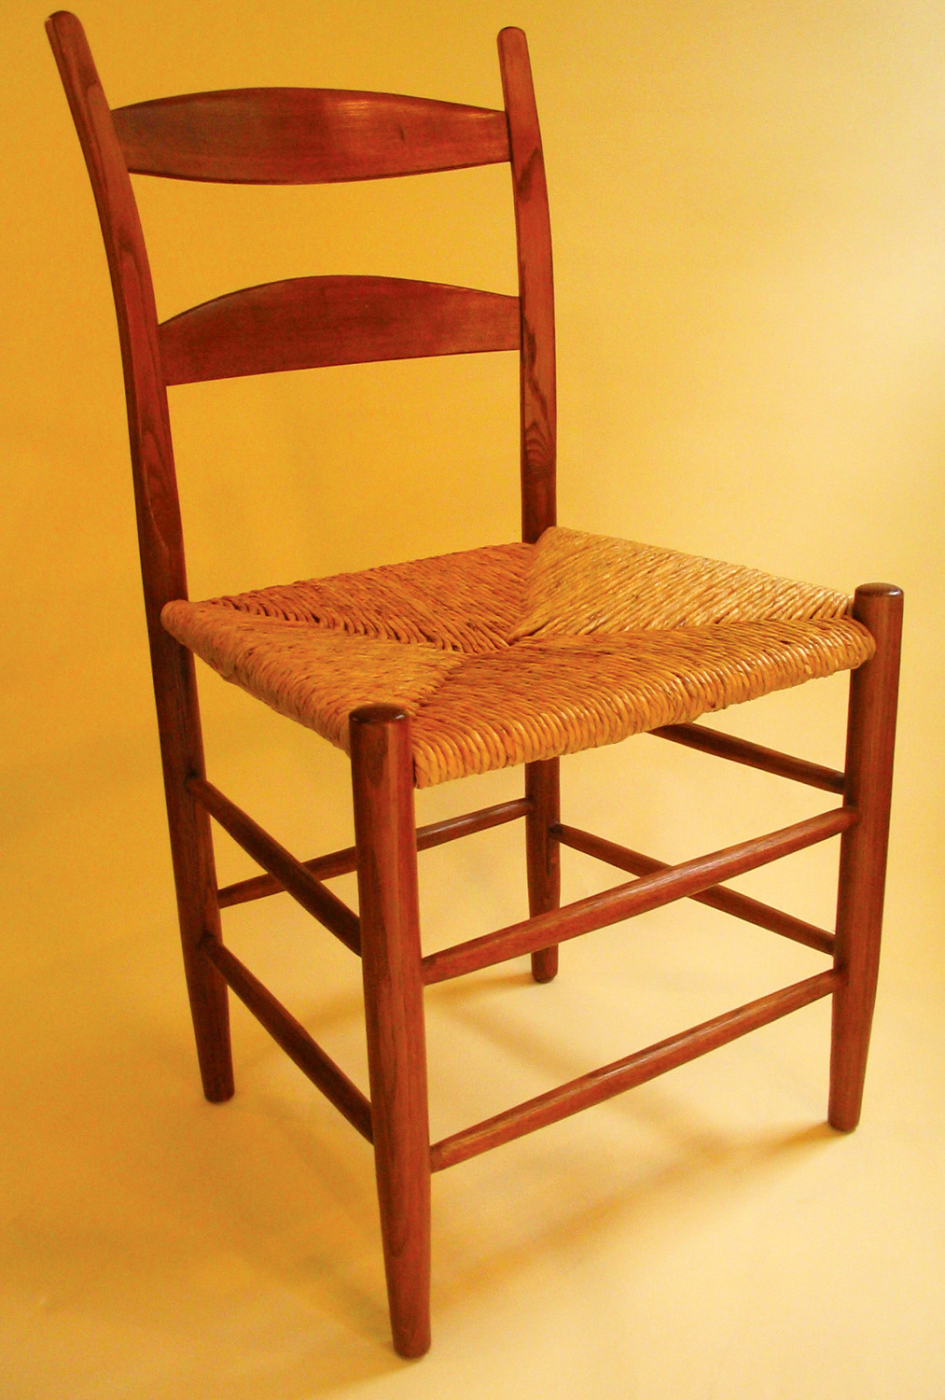
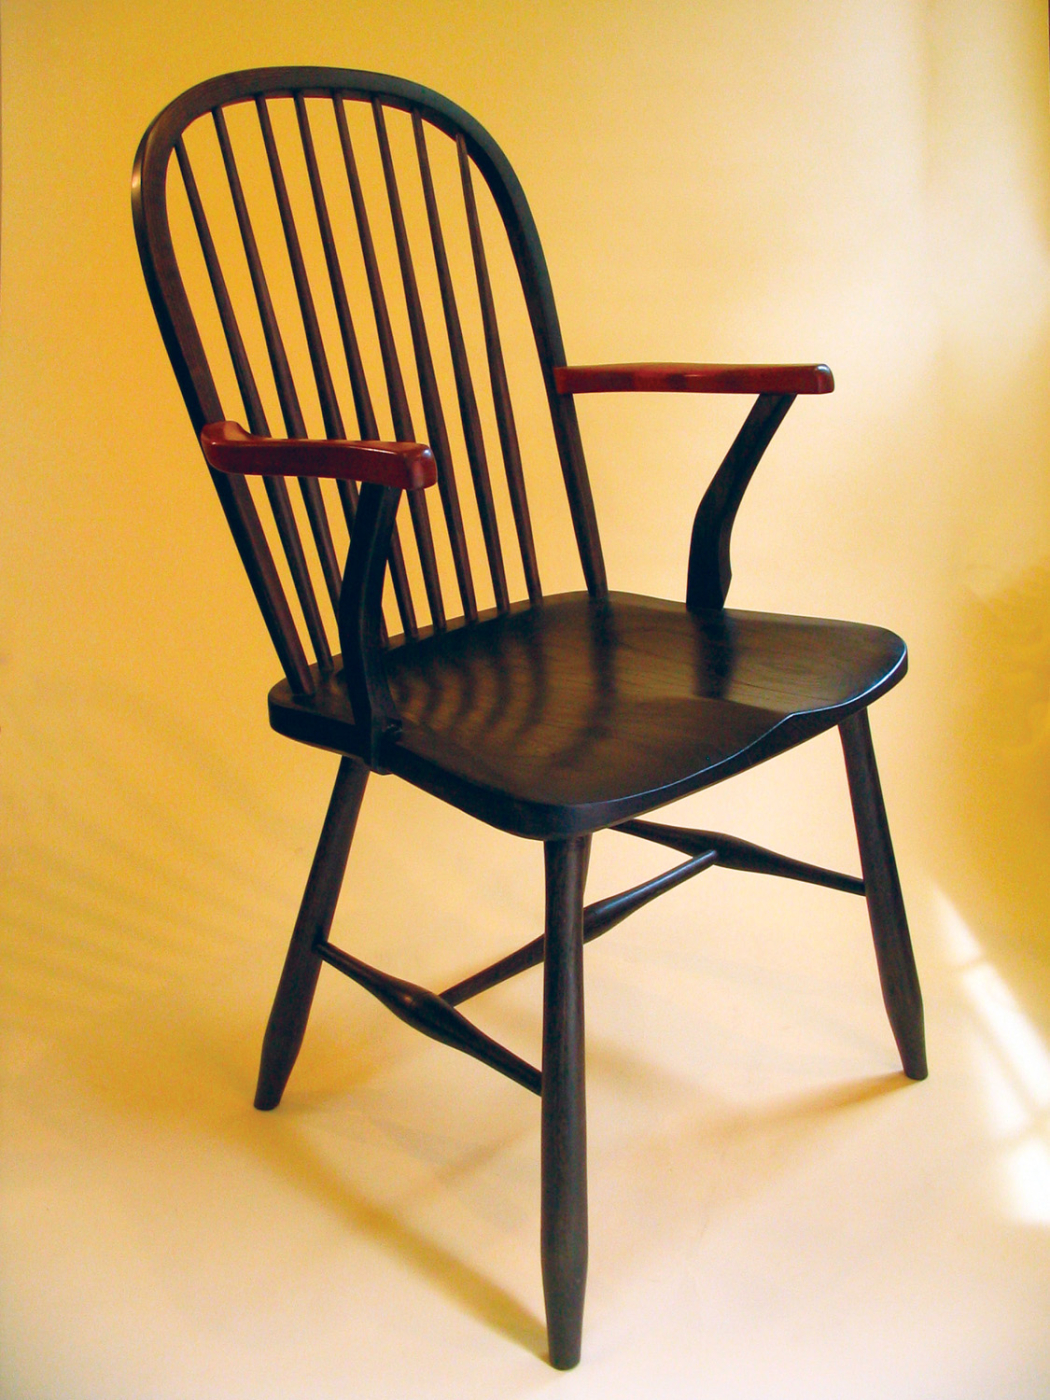
Two examples of Fleming’s chairs: a ladderback (above) in ash with a rush seat. And his “Buttermilk Creek Windsor,” a chair of his own design in elm, ash and mahogany.
Their 19th century home is filled with Fleming’s work, which students experience first-hand as they gather around the wood-burning stove each day to eat a rib-sticking lunch that Sandy has prepared. I spent the week sitting in one of Fleming’s Windsor chairs. Its comfortable contours (and my muscle fatigue) made it a challenge to stand up and begin the afternoon work. When the mood strikes him at the end of the meal, Fleming will pick up his guitar and sing a few jazzy songs.
Working Like a Chairmaker
After a couple days of this routine you fall into Fleming’s daily rhythm. In fact, despite the fact that the work is strenuous, I’ve never felt as relaxed as I did during my five days in Cobden. Part of that is the nature of the work (no noisy machines) and part of it is Fleming’s unbreakable calm.
After my disaster with the seat, the hours and days began to fly by. Though I had done turning on only one previous occasion, Fleming had me churning out spindles on the pole lathe after less than 30 minutes of instruction with the roughing gouge and skew.
The crest – or headrest – was also simple work. With a side axe, we dressed the green ash logs to rough size and then used wooden bench planes to reduce the stock to its finished dimension. After some time in Fleming’s homemade steamer, we bent the crest in a jig and clamped it overnight.
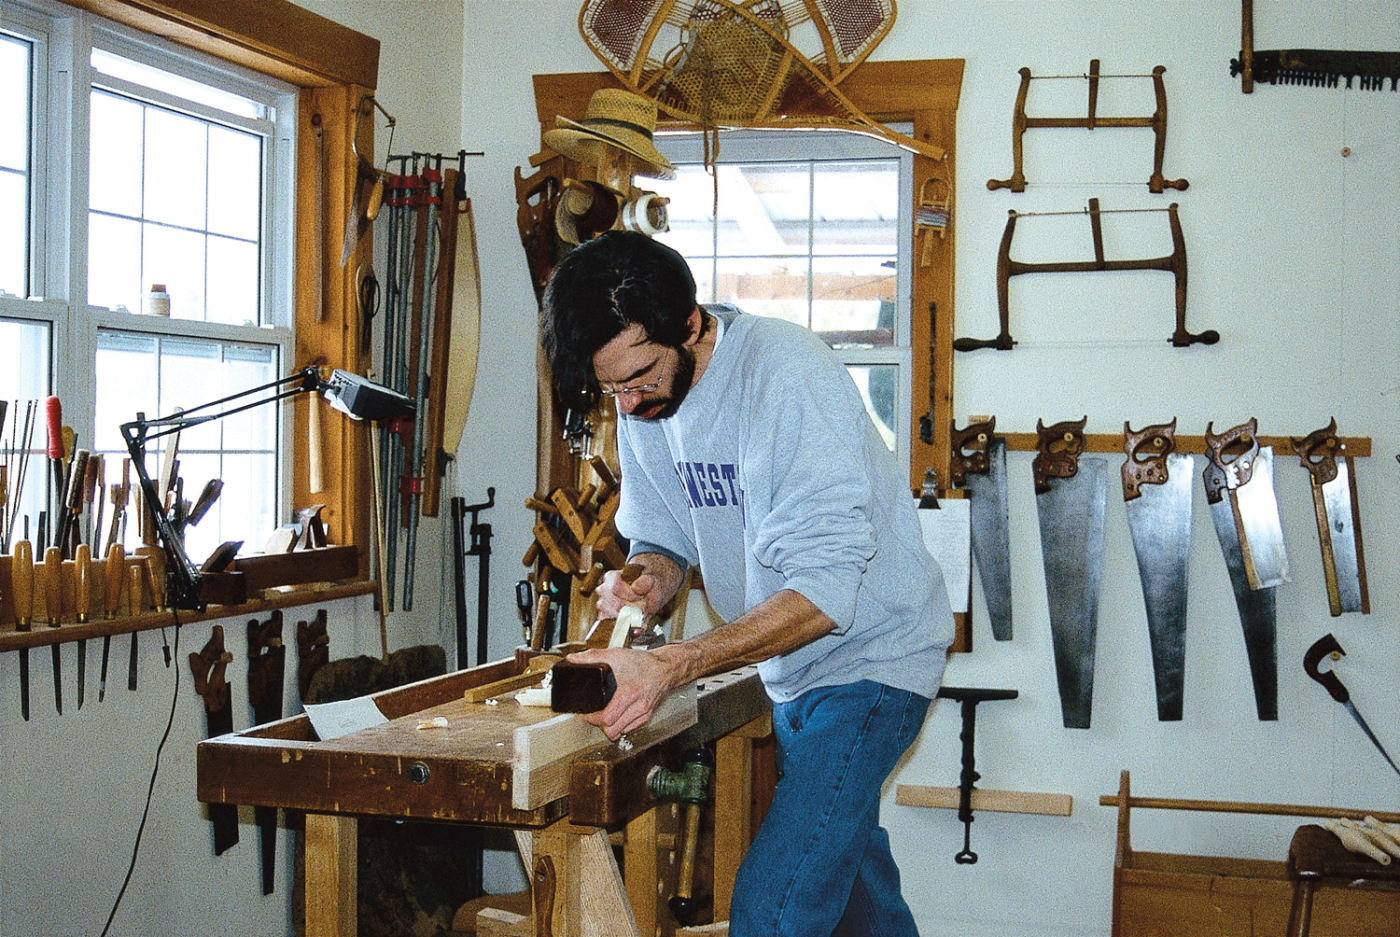
Here I’m shaping the crest rail before steam-bending. The crest began as chunk of ash, but after less than an hour of work it was a perfectly flat piece of wood with two straight edges.
Shaping the bow – or arms – was also straightforward. The bow of a Welsh stick chair can be made in several ways. You can bend it using steam, cut it out of one crooked piece of wood or piece it together using half-lap joints. I built my bow from three pieces of wood. After days of learning new techniques, it was refreshing to fall back on skills I knew to make these standard cabinetmaking joints.
And then came the holes.
Boring the seat holes takes a steady hand. For the beginning chairmaker, having a person check your progress is invaluable. Here Fleming shows Hoffman the correct body position for this operation.
Boring the holes for the legs and spindles was surprisingly demanding work. Fleming prefers to work with a bit brace and spoon bits for the most part. Add those unfamiliar tools with the odd angles needed in chairmaking and you quickly understand that chairmaking is a skill that demands repetition to master. All told there are dozens of compound angles in a stick chair, and nearly all of them are different.
Luckily, Fleming had some tricks up his sleeve. A couple jigs held our bow in position as we drilled through the bow and into the seat. (And here’s my one confession: I used a powered drill for some of my spindle holes.) Plus Fleming showed us how a simple 5-cent washer can keep our bits aimed true – it’s quite a trick.
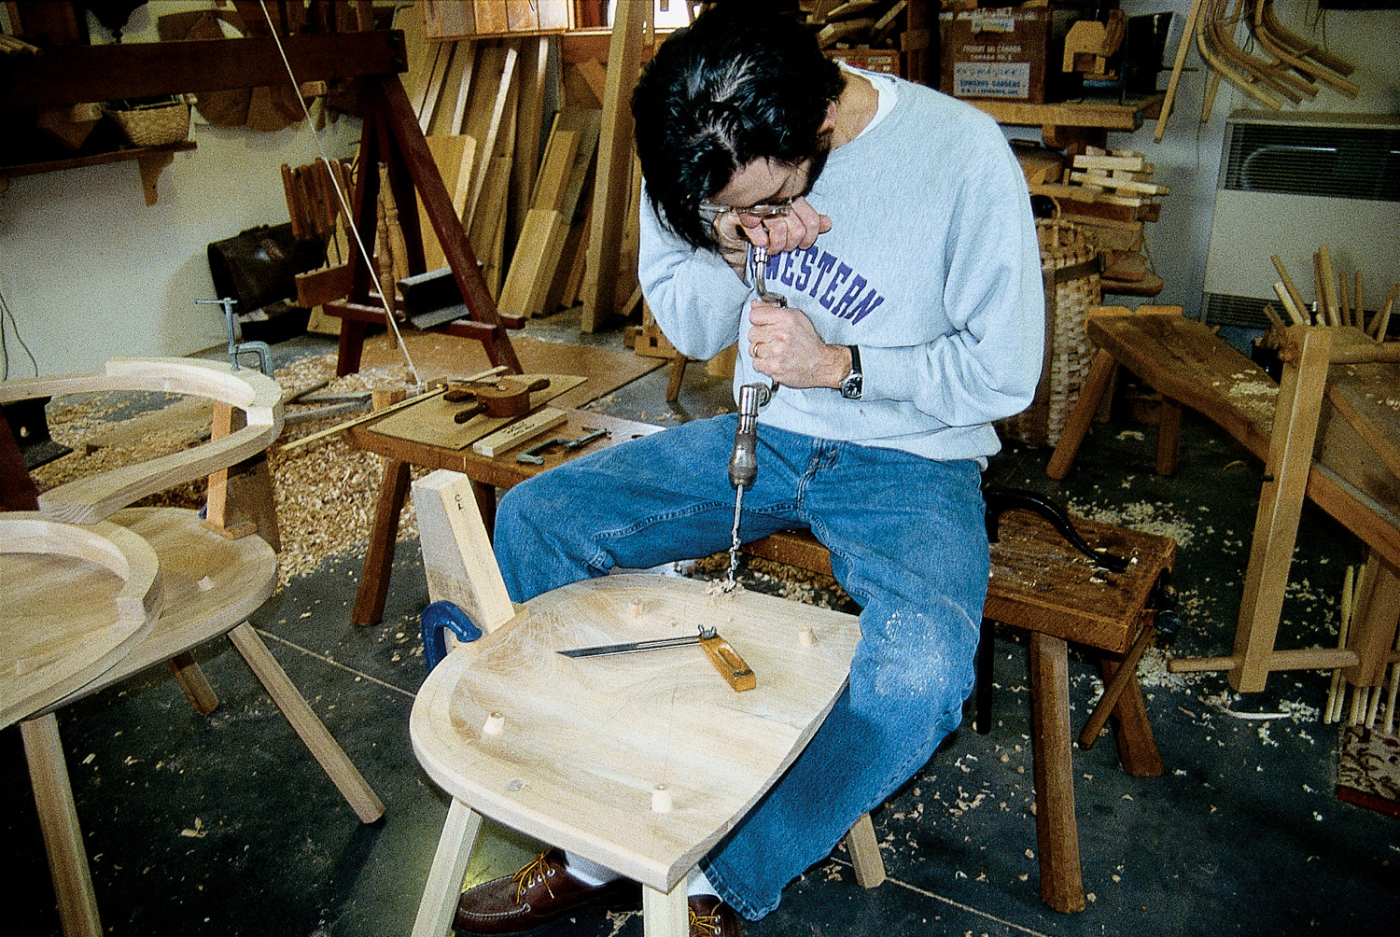
Boring the spindle holes in the seats. The sliding bevel on the seat and pencil lines guide the work.
One remarkable thing about making green-wood chairs is how your level of accuracy is different than when building frame chairs, which I’m much more familiar with. Green-wood chairmaking involves more eyeballing and relying on instinct and experience for good results – rather than a ruler and a shop drawing exclusively. It’s not that you can be sloppy when making a chair, it’s just that the rules are different.
The last evening was the most difficult. John Hoffman, the other student in the class, and I were determined to get our chairs assembled before we packed up the parts to carry them through customs into the United States. Fleming was happy to oblige and we drove ourselves mercilessly into the evening, fitting each spindle as we listened to an avant garde piece of music that seemed to go on for hours (and still occasionally haunts my dreams).
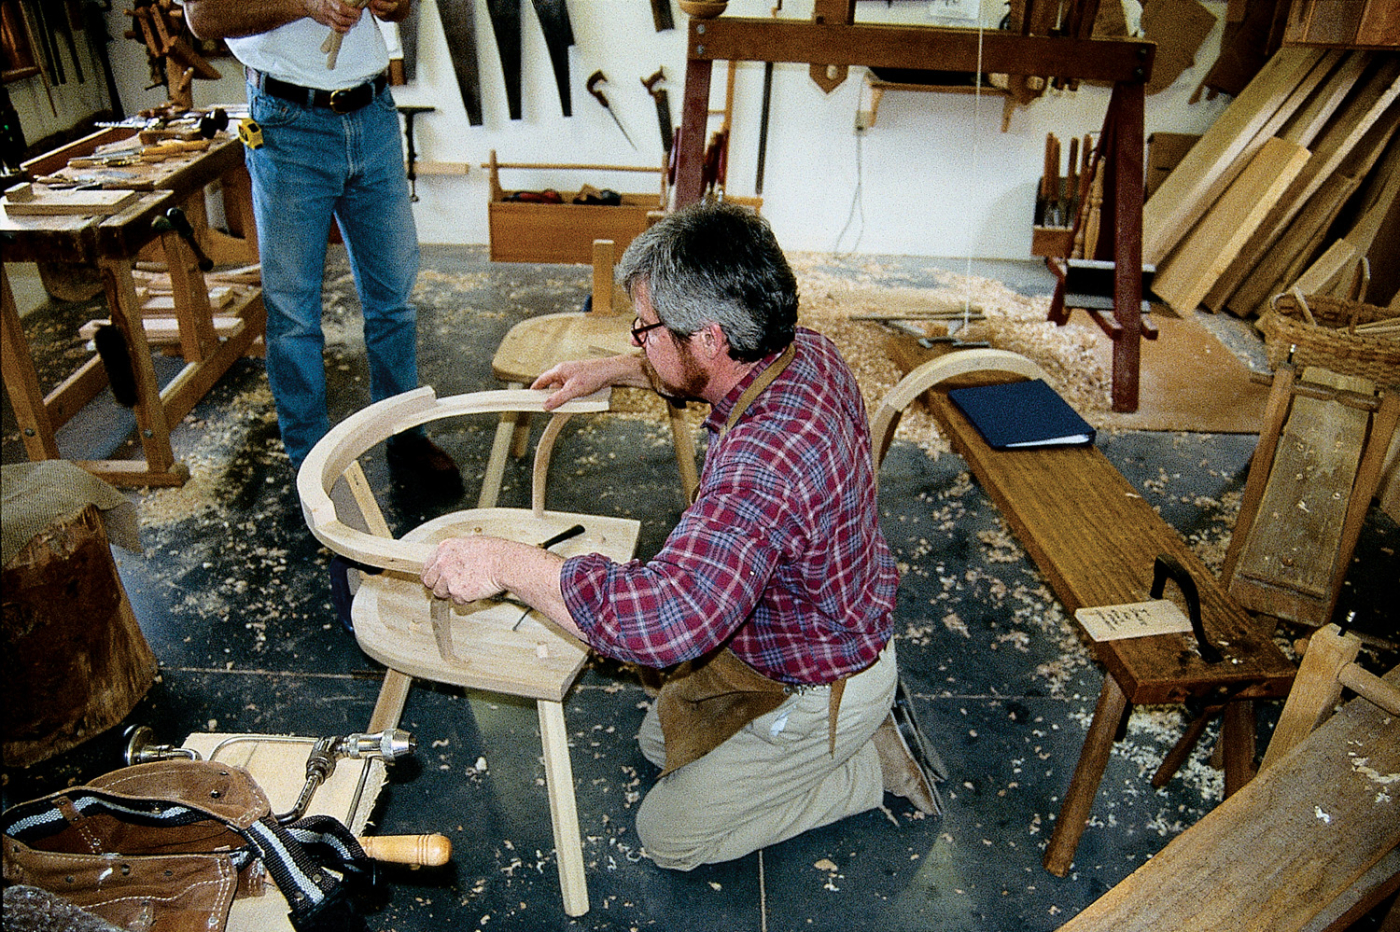
Fleming positions the bow on one of the drilling jigs and the “horns” of the chair, which are the curved spindles underneath the arms at the front.
In the end we both got our chairs assembled and sat in them for the first time – a magic moment. Fleming had some beer cooling in the basement and we bought a pizza to celebrate. The next day we walked our boxes of chair parts through tight international security. (“You say you have a chair in there, eh?”)
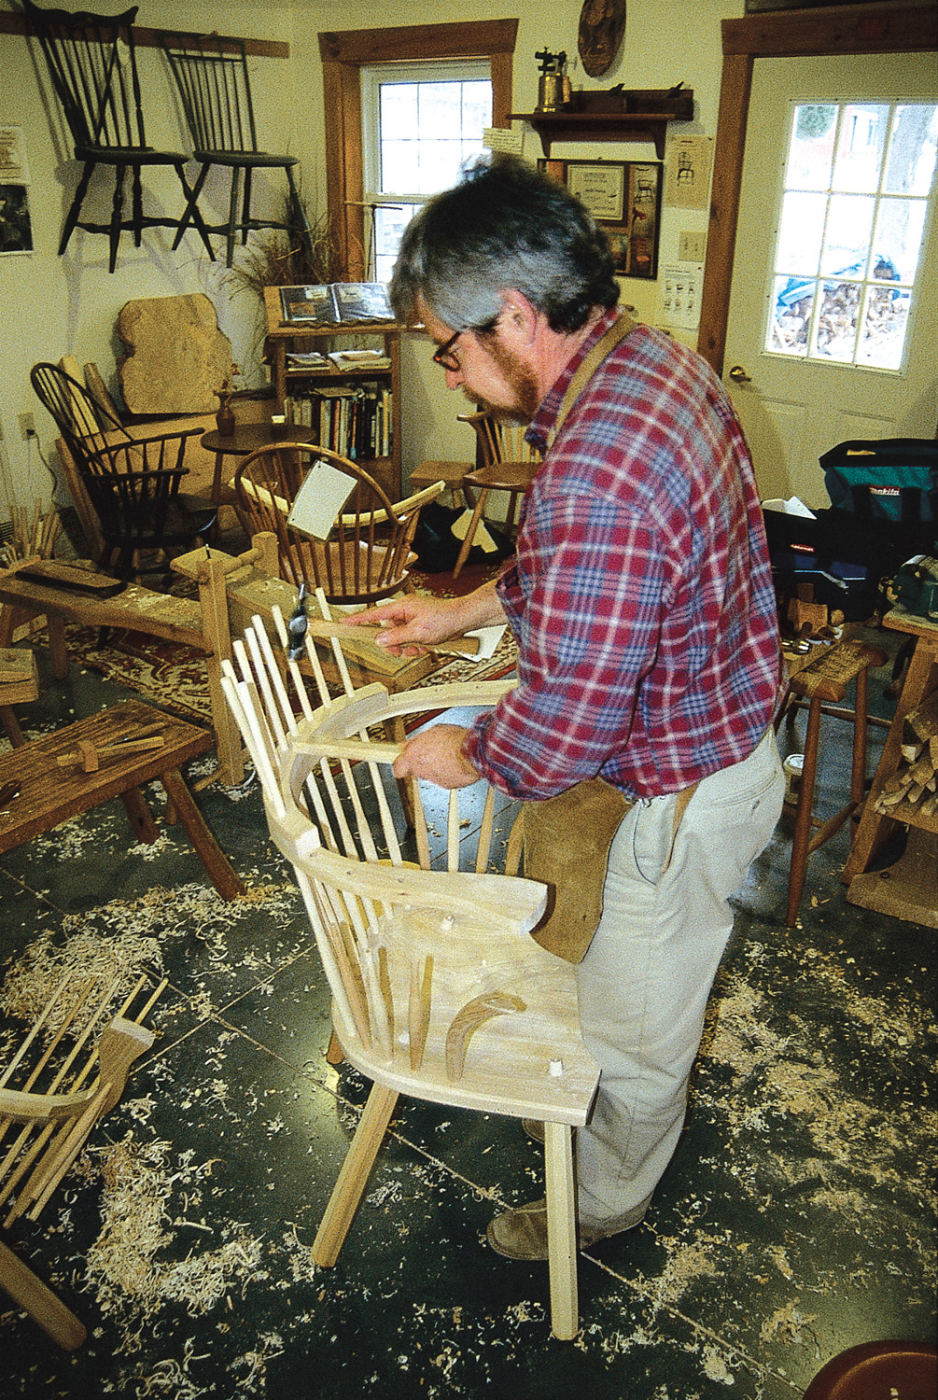
With all the spindles shaped and the holes drilled, Fleming tests the fit of the bow onto this assembly.
When I got back to my shop I laid out all the parts on my bench. It was then I knew that I had been bitten by the same chairmaking bug as Fleming and thousands of other woodworkers. Once I got that first stick chair assembled I began making plans for my second one. And then I’ll move on to replacing the hideous chairs in our dining room.
While I still have much to learn (this was my first green-wood chair after all), the lesson I’m mastering right now is to adopt the same steady patience that guides Fleming. As I take my scorp to a piece of tulip poplar that will be the seat of my next chair I wonder if I’m going to split this one, too. Or perhaps I’m going to saddle it too deeply. But then I stop and think about the class.
“Remember,” Fleming says, “there is always a Plan B.’”


