


We may receive a commission when you use our affiliate links. However, this does not impact our recommendations.
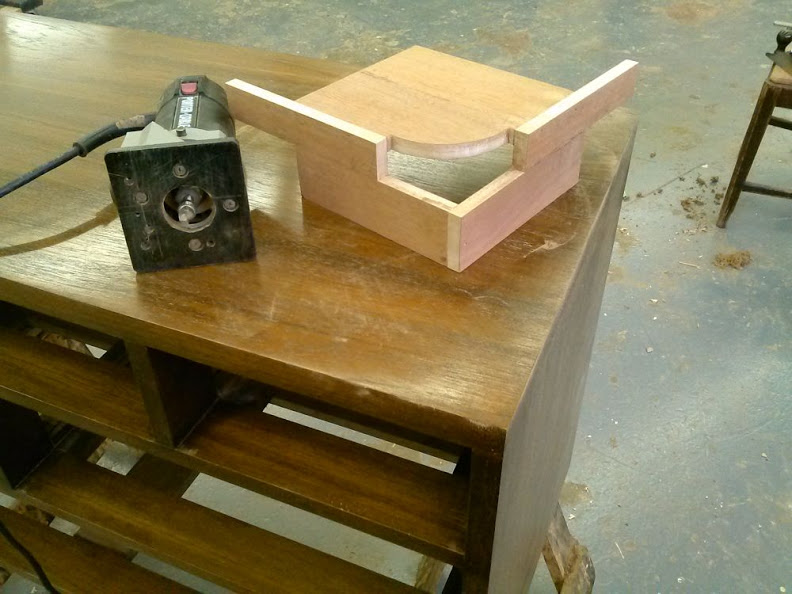
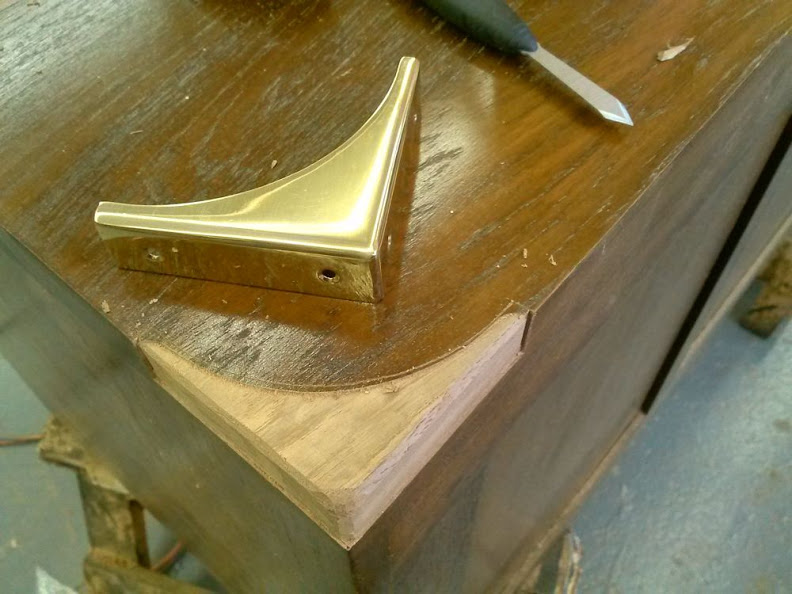
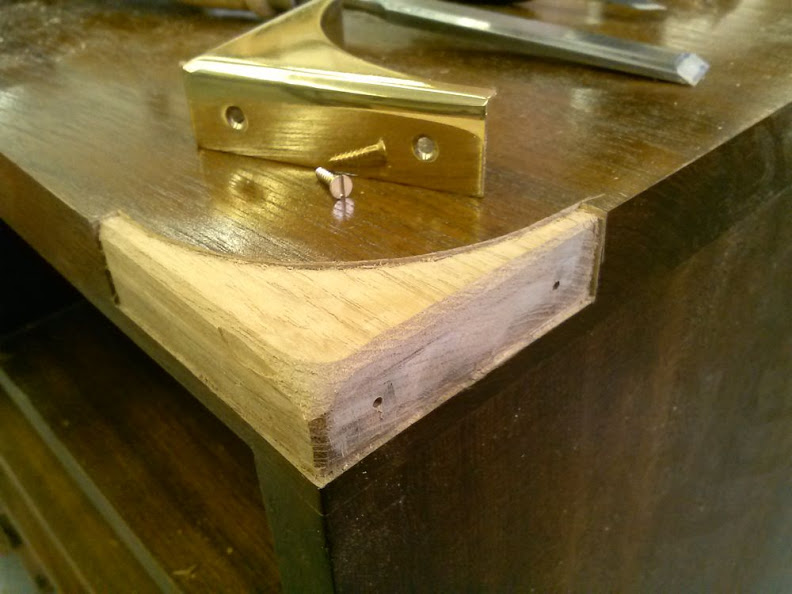
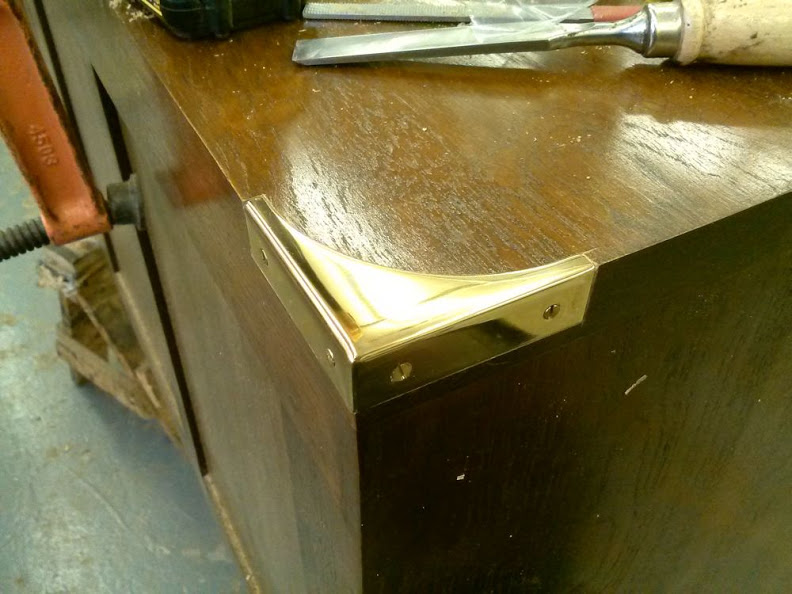
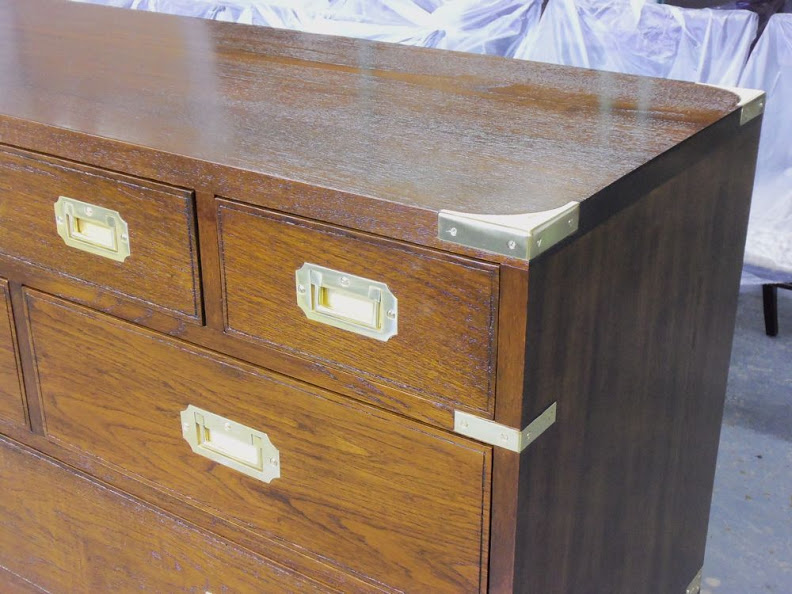
I made the template from 1/2 MDF. I constructed the template’s reduce along the contour of smallest corner from the eight that we bought. This way I ensured that after routing the recesses I would only need to do minor chiseling to enlarge them so they could fit the specific corner. If I used a bigger corner as my guide for the template, I would have surely ended up with gaps between the smaller corners and the generic recess that I routed for it. As I tell my students: we don’t have an “Undo” option in woodworking; it is better to under cut and adjust later than to over cut and end up adding patches of wood that would not look natural. The next group of pictures explains the routing process and the cleaning up procedure that followed.


Follow these links to read earlier entries on this project:
Installing Campaign Chest Hardware – Entry #1
Installing Campaign Chest Hardware – Entry #2: Templates
Installing Campaign Chest Hardware – Entry #3: Medium size handles
Installing Campaign Chest Hardware – Entry #4: Large size handles
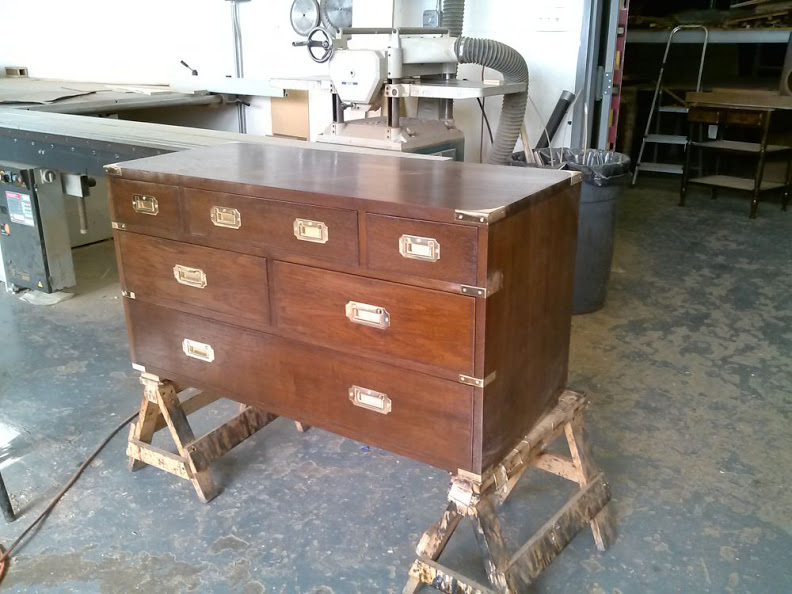
Installing Campaign Chest Hardware – Entry #5: Setting in the bracket corners
Here are some supplies and tools we find essential in our everyday work around the shop. We may receive a commission from sales referred by our links; however, we have carefully selected these products for their usefulness and quality.


