We may receive a commission when you use our affiliate links. However, this does not impact our recommendations.
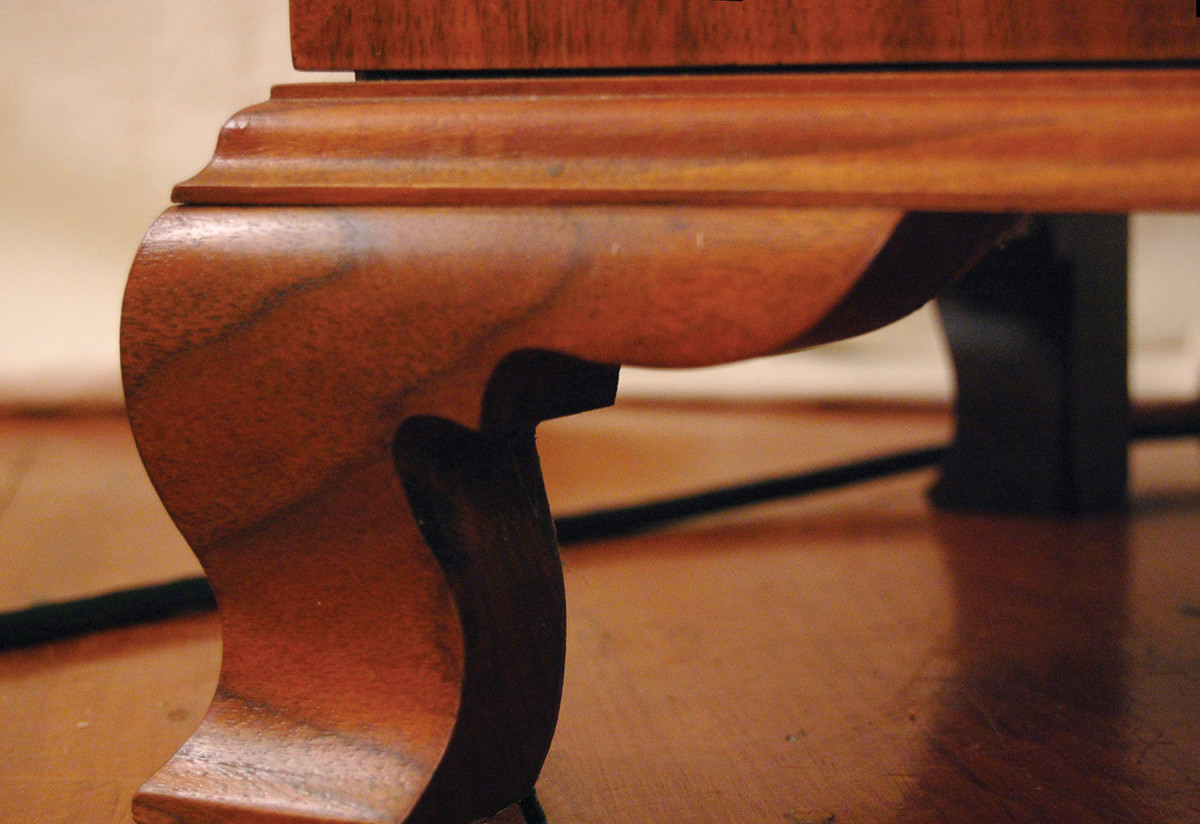
The roundabout way. Cyma curves abound in furniture designs both traditional and contemporary. Once you understand what lies beneath, it opens up the world of curves.
Invisible lines and circles explain the beauty of a series of fair curves.
I can still remember Holloway’s farmhouse. Even in summer when the fireplace was cold, the smell of wood smoke lingered in the air. That pungent aroma, combined with a skillet of fried chicken and fresh greens wafting in from the kitchen, pulled you into the heart of the house.
Wide plank floors squeaked as food made its way to a round oak table surrounded by old ladderback chairs. Not the most comfortable chairs, but if you pulled yourself around sideways and hooked an elbow around a back rung, you could settle in for the banter and laughter that always followed a meal.
In my memory, I can still run my hands over the curved contours and worn places on that old farm table and chairs. It’s a powerful connection, and if there is anything magic about design, it’s about making connections.
Often the most powerful connections are things hard to define. Compelling designs often convey vigor, strength, nature, youth, surprise or delight. A thoughtfully designed chair can recall feelings of warmth, safety, friends and health.
How does a design do even one of these things? There are a million answers to that question, but the short version is to engage multiple senses. A straight line may be the shortest distance between two points, but a curved line captures our eye, our touch and our imagination.
It’s What You Don’t See

Get the point. Cyma curves always flow above and below an imaginary straight line and are governed by the position of the middle transition point.
Many woodworkers are leery of tackling curves and with good reason. It’s not just the thought of leaving behind predictable straight lines and simple square joinery. It’s the fear of trying to sort through something in our mind’s eye that seems like a plate of spaghetti.
It’s hard to imagine how that confusing jumble could become a graceful pleasing curve flowing naturally across a crest rail on a chair back. But there are some hidden keys that can go a long way toward helping you gain skill and confidence.
First, let’s take a look at a simple “S” or cyma curve. This flowing line is ubiquitous in furniture design in both historical and contemporary work, and it has some invisible elements just beneath the surface.
Once you become aware of those hidden parts, it can help in deconstructing curves you see in the wild, as well as getting comfortable with applying curves to your own designs.

Tip of the iceberg. There is hidden structure behind every curve that can help you detect the true nature of what your eye actually sees.
We don’t really leave straight lines behind when we dive into the world of curves just like we don’t leave the past behind – it’s always a part of you.
Every cyma curve spans an invisible straight line. This straight line, or chord, defines the beginning, the ending, and the point where the arcs connect and transition from concave to convex.
This transition point is very important. You can alter a curve dramatically by shifting it.
Our imaginary straight line also supplies several other important keys. That flat line gives the eye a reference to judge the speed of the curved arcs.
Speed is a term to describe the character of a curve. A slow curve is gentle and gradual, while a fast curve is steep and plunges dramatically.
Our imaginary line orients the direction the cyma is flowing. Curves take a roundabout way to get from A to Z, and in doing so gently carry the eye along like a dry leaf before a breeze.
Once we see our imaginary chord, we can note with clarity whether our curve is flowing up or down, or a series of curves meandering along in a dance.
Secondly, each arc in our cyma curve has a fulcrum point. When you look at a cyma curve, try to imagine joining two sections of a circle together. In your mind, locate the pair of invisible fulcrum points and imaginary circles that lurk beneath the surface.
To the untrained eye, this might seem confusing at first, but as you gain understanding it will help you experiment with curves.
Note that when a cyma curve flows seamlessly or sweetly from concave to convex, a straight line that connects the two fulcrums will also pass directly through the transition point.
Simple Makes Sublime

Compass play. Use the simple method above to create an arc spanning two points. Then create a series of curved combinations of your own. Just see what sublime lines jump from the end of your compass!
Our goal is to have curves become second nature so that graceful fair curves flow intuitively from our inner eye to a pencil, gouge or drawknife in our hand. One way to help this along is with some simple and playful exercises with a compass.
We begin by learning to draw a gentle arc that uses three steps and leaves the compass in one fixed setting for all three steps. For this simple curve, we draw a straight line or chord and mark both a beginning and ending point for our arc.
Position the compass point at one of our ending marks and adjust the pencil until it just reaches the opposite mark. We want to establish a fulcrum out in space, so we swing the pencil upward in an arc toward an imaginary north pole.
Leaving our compass at this setting, reposition the point across to the opposite ending mark and swing a second arc upward until it crosses the one we just drew. Where these arcs cross is our new fulcrum to draw a gentle curve spanning the beginning and ending of our chord.
Now that you know how to generate this simple arc, use this method to experiment with combining different curved combinations along a line.
Draw a series of chords, then use dividers to step each chord off in simple divisions. Experiment by dividing lines into five, six, eight or nine equal parts, then draw different pairings of major and minor arcs, i.e., 2:3, 1:2, 3:5. See how many simple curved combinations you can generate.
For added fun, go back and overlay simple curves over the top of the combinations you’ve already drawn. You might find yourself delighted to see the flowing lines dance off the end of your compass.
Obviously there are innumerable curved combinations beyond this one simple compass arc. The goal is always to train the eye so your intuition guides your hand and tools. This simple exercise is just the first step in helping you tap into the connection between your hand and eye. PWM
George is the author of two design DVDs (Lie-Nielsen Toolworks) and writer of the
Design Matters blog.
Here are some supplies and tools we find essential in our everyday work around the shop. We may receive a commission from sales referred by our links; however, we have carefully selected these products for their usefulness and quality.