We may receive a commission when you use our affiliate links. However, this does not impact our recommendations.
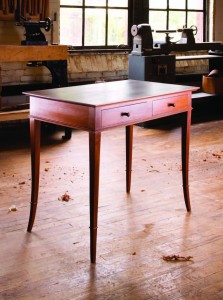 From a woodworking perspective, three things jump out at me in Mario Rodriguez’s “Providence Writing Desk.” First, it’s simply a beautiful piece with excellent choices throughout. Second, it utilizes some very durable and classic joinery, including the visually appealing carcase dovetail joint. But that joint is not visible in the final piece and, though fun to learn, is a lot like other, basic dovetail joints. So it’s the third highlight that I decided to write about for this post – the splayed legs. If you have a mental file going for “How to Build a Table or Desk That Looks Amazing,” you’ll want to tuck this information in there.
This is one of my “quick-start” guides. It assumes that you have an intermediate knowledge of the craft and can fill in some of the gaps. Use your problem-solving and have some fun with it. I have included an explanation of cutting the beaded leg cuff because that’s essential to the final look and visual impact.
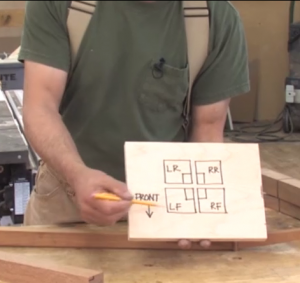 1. After squaring the four legs to 1 5/8”, draw a diagram and mark the tops and bottoms of each leg to keep you oriented on the inner and outer corners as you work.
2. Cut a two-dimensional leg template on a piece of scrap material, and use that template to trace your curves on the two outer sides. These sides are of course perpendicular to each other, creating the splayed effect.
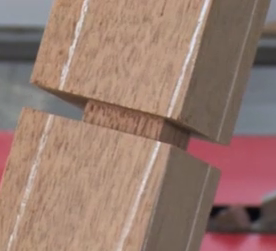 3. While the legs are still square, cut the dado for the beaded cuff. First cut all four sides to a depth of 3/8”, then go back and cut the two deeper sides. That is, you will need the same 3/8” depth from the point where the curve intersects the dado on the two outer sides. So recut the dado to a deeper level there. Be sure to test each of these depths on some plywood before moving into your leg blanks.
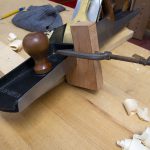
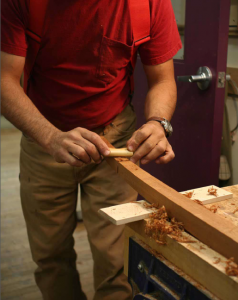 4. It’s time to shape the splayed legs. You can use hand tools or power tools for this. Either way, you will want to rough it out with a bandsaw. Then proceed to a spokeshave (pictured, Mario) and abrasives, or to a router jig on your router table.
How do you make the router jig? Well, I can’t give away the store. When you purchase the video for this project, it includes a diagram for this jig, as well as all the detailed steps for using it. Check it out, and tell us how it’s going!
–Dan Farnbach
Here are some supplies and tools we find essential in our everyday work around the shop. We may receive a commission from sales referred by our links; however, we have carefully selected these products for their usefulness and quality.


Beautiful piece of design and workmanship. I have a construction question. I have an understanding of the construction of the piece but how do you manage the wood movement issue where the legs and side panels with the beading meet. The mortise and tenons of the side panels into the leg will be glued more at the top than the bottom to allow the panel to expand away from the top of the leg but how does the beading around the leg cope with this movement?
I tried a dainty legged piece (plant stand) a couple years ago. I must have goofed selecting the oak I used for the legs as they kept moving with the weather. So much so that the movement was almost visible. I ended up destroying the thing and using the panels in a small clock.
Enough about my imbecility, I’m interested in seeing the router jig for curves in two dimensions. The whole point of the plant stand above was to do curved legs in multiple dimensions on the band saw. Looks like more PB&J lunches in my future…