


We may receive a commission when you use our affiliate links. However, this does not impact our recommendations.

I don’t turn pens much, and the word “fireplace” is a dirty word in our house (thanks to an incident involving a flaming log and full nudity). So my scrap pile is always overflowing. I give away scraps for kindling to my neighbors or I burn them in our outside firepit, but that is a hard sell during the hot humid months.
Recently I’ve been building ancient layout tools with my scraps, which has given me a lot of extra practice with my moulding planes and has been reducing my scrap pile. Giving away layout tools to fellow woodworkers is much easier than loading them up with kindling.
These layout tools – squares and straightedges – are European models from the 16th and 17th centuries. Almost all have some sort of decoration on their handles – usually moulding – and the blades are decorated with curves. Most have a hang hole.
You see these layout tools in old paintings and engravings of workshops. They lurk in the background, hanging on pegs, stashed below benches or sometimes lying on the floor.
If you have some moulding scraps and some thin pieces of wood, you can make these squares for yourself as well. They are handy to use, lightweight and can be as large as you please. Here are some suggestions and thoughts on their construction:
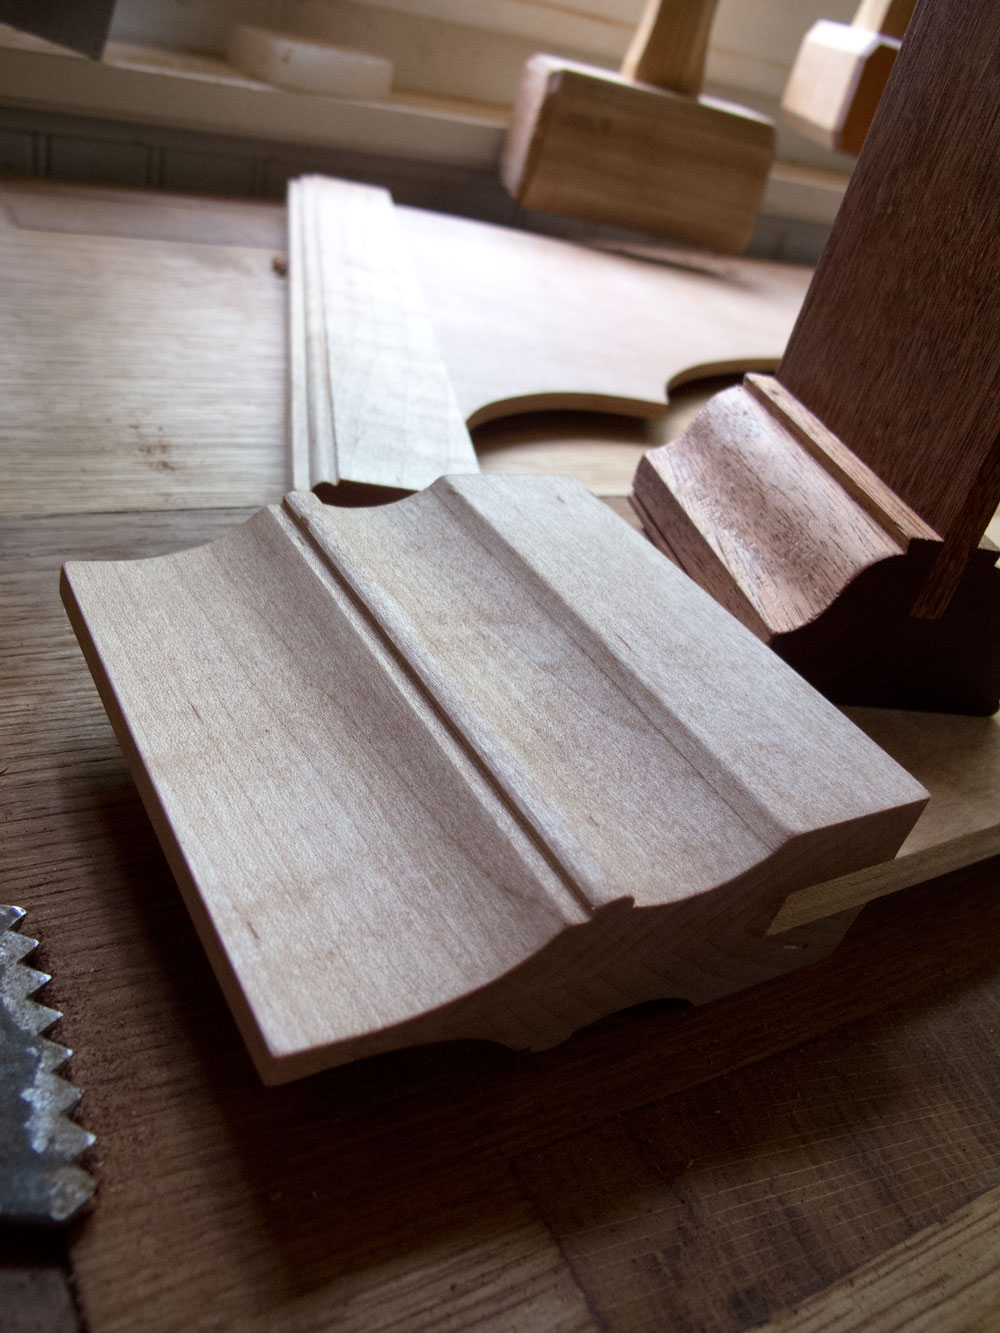
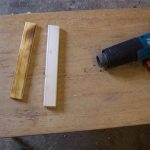
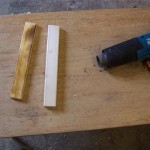
1. The “stock” or handle is made from thick wood, usually some stuff between 3/4” and 2” thick. In these early squares, the edges are typically moulded. Perhaps the handles were made from offcuts of moulding. It’s hard to say. What I can say about the moulding is that it makes the tools easy to spot in a shop lit only by daylight. The moulding leaps out at you, even when amongst a bunch of other project parts.
When you dress the moulding to make a square, shoot the edge that will hold the blade so it is dead straight and square. That will make the square much easier to true up after assembly. The groove for the blade is usually 1/4” wide and 1/2” to 1” deep.
2. The blade is made from thin stock, usually 1/4”-thick material. Look for scraps that are flat and quartersawn if possible.
It’s easy to invent some reason for the existence of the decorations on the blades, but I suspect they are mostly decorative. After building a dozen variations of these squares based on historical images I quickly learned an interesting thing about the decorations: The off-fall from cutting out the blade usually leaves another piece that is a second ideal blade.
Also, the decorations expose end grain to your shop environment, making the blade more responsive to changes in humidity.
3. The hang hole. When tool collectors find a manufactured tool with a hang hole, they pass on it or argue for a reduced price. I like hang holes so I can hang my tools. So don’t skip the hang holes.
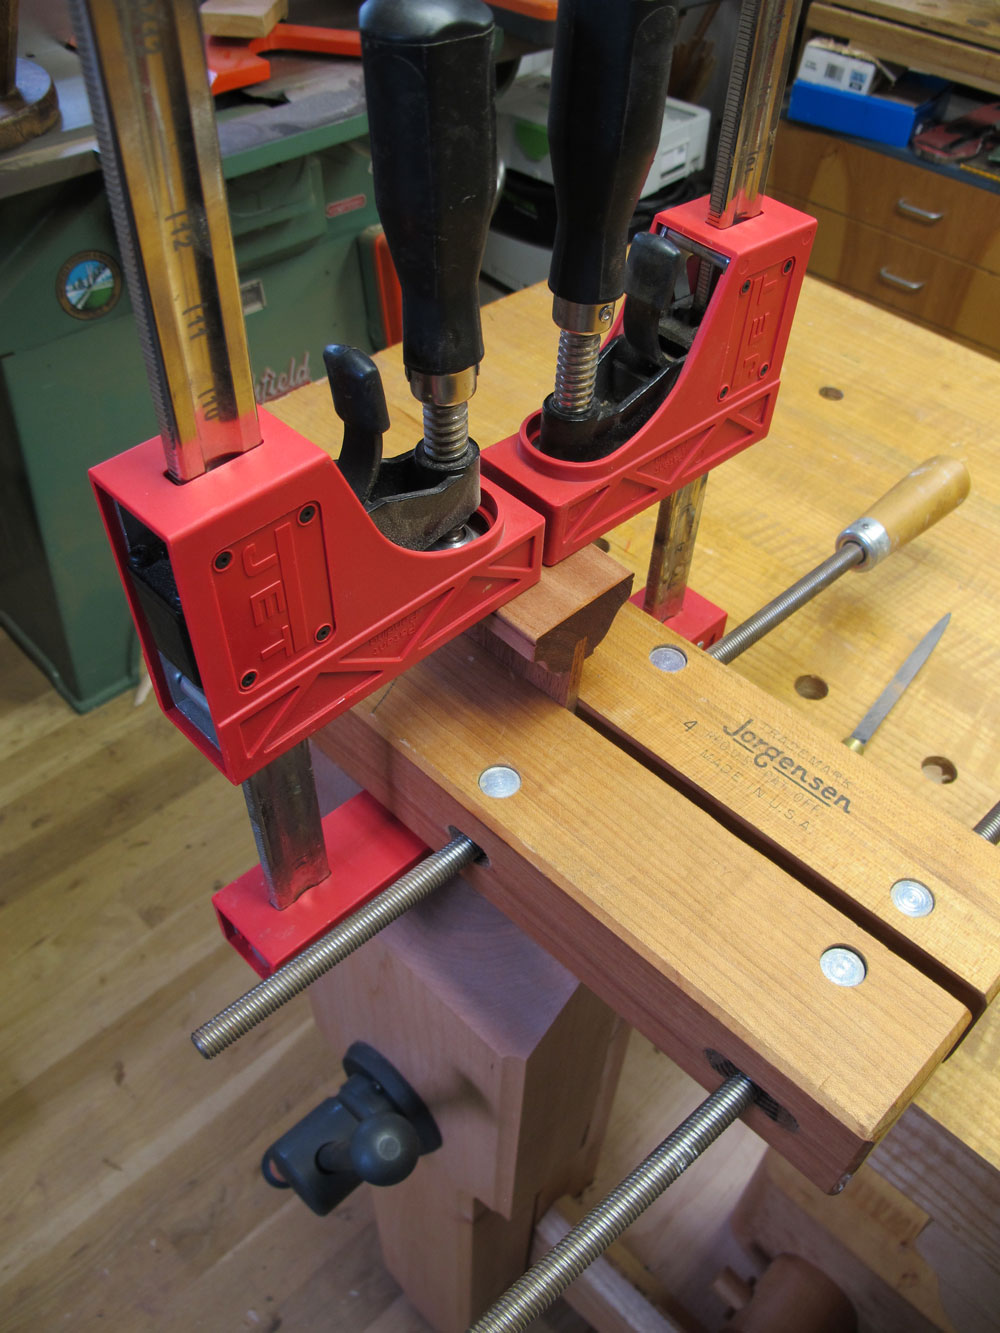
4. Clamping the blade to the stock can be tricky. The best method I’ve used so far is to clamp a handscrew to the blade. Then I use bar clamps to squeeze the handscrew and handle together. Drawboring the blade into the stock is another good method.
5. The finish. I typically finish my wooden layout tools for a couple of reasons. I want the tool to look obviously different than the unfinished project parts surrounding it on the workbench. Also, I’m less likely to confuse a finished bit of wood with garbage. Also, the finish helps prevent the tool from picking up dirt and pigment that could get transferred to your raw project parts.
Any finish will do. I use a finish that is equal parts boiled linseed oil, spar varnish and paint thinner. I rag it on and wipe off the excess. Two coats are plenty for these tools.
I’ve uploaded two SketchUp files to the 3D Warehouse that you can download for free. As I mentioned above, these squares can be any size that your scraps or needs allow. I drew these based on some historical examples.
You can download a SketchUp drawing of a straightedge/square based on one shown in the famous woodcut “Melencolia I” by Albrecht Dürer. Download that model here.
A wide square from “The Childhood of Jesus” by Hieronymous Wierix can be downloaded here.
— Christopher Schwarz


Here are some supplies and tools we find essential in our everyday work around the shop. We may receive a commission from sales referred by our links; however, we have carefully selected these products for their usefulness and quality.


Very cool. Reading this article has my gears turning, especially when looking at your wide square based on “The Childhood of Jesus” image. When using squares, I’m used to using the inside of the blade, and am somehow under the impression that using the outside of the blade or handle is strictly verboten. When I made my wooden square, I found that truing the inside of the blade after attaching it to the handle was a little tricky. Now I’m thinking that my methods may be backwards, and that using the outside of the blade may be more historically proper, and will make truing the blade much easier. This may be purely preference and opinion.
Also a great use for those moulding test pieces and small scraps that I can’t bear to throw away.