


We may receive a commission when you use our affiliate links. However, this does not impact our recommendations.
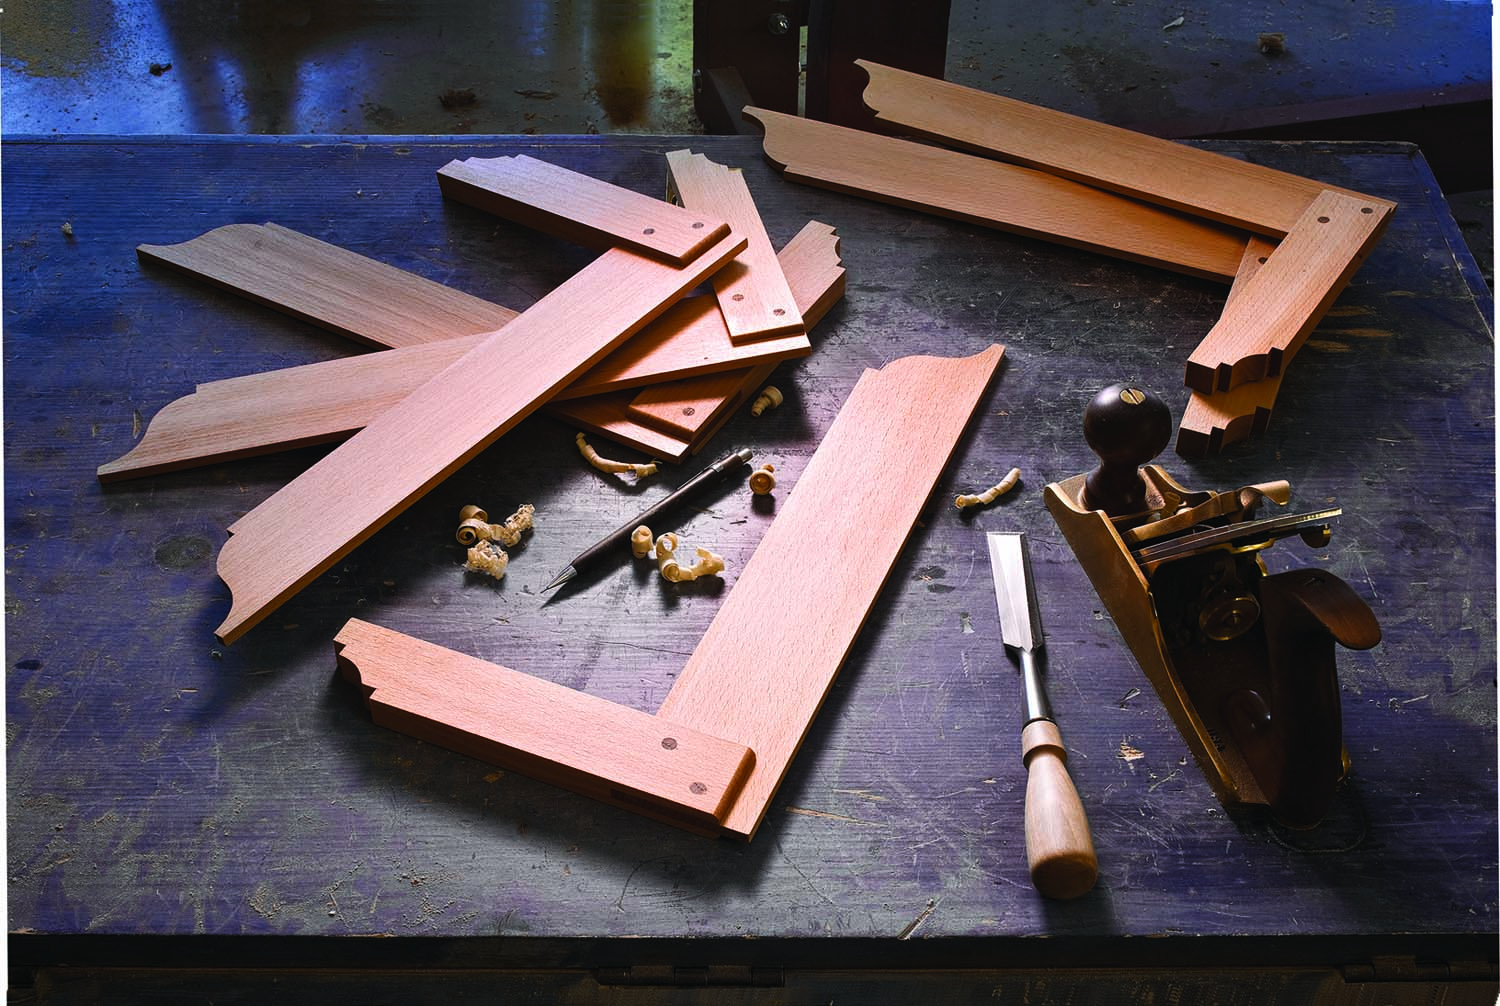
Built-in accuracy. Wooden try squares are more than accurate enough for woodworking. Plus they have other advantages – less weight and more reach.
One of the first tools I bought was a 9″ steel try square with a brass and rosewood stock. Like a supermodel, it’s nice to look at, but not so fun to deal with day-to-day.
Its blade is too short, it rusts when you look at it and it chews up the backs of my marking knives. It’s too heavy, and the rosewood stock is difficult to hold – I can’t get my fingers around the thing. But, I figured, that’s what they sell in the stores so that must be as good as it gets.
Then my mother went through a phase where she collected antique measuring and marking tools, everything from log rules to T-squares.
Lucky for me, she outgrew this phase and foisted her small horde on me. Most of the tools were useless to a woodworker, but I started using one of her homemade wooden bevel gauges and what I thought was a framing square to lay out my work.
Impressed by the weight and accuracy of the wooden tools, I made wooden straightedges and put away my 24″ Starrett.
And while browsing through André Roubo’s masterwork “Des Arts Et Metiers: Le Menuisier En Bâtiment,” I finally found the solution to my trying problem.
Plate 15, Figure 6
There among the other French layout tools was a nice wooden try square. And it was right below a square that looked like the framing square my mother gave me. Roubo called this square “le triangle,” and offered specific dimensions. Here’s a translation by Bjenk Ellefsen, a woodworking friend and native French speaker.
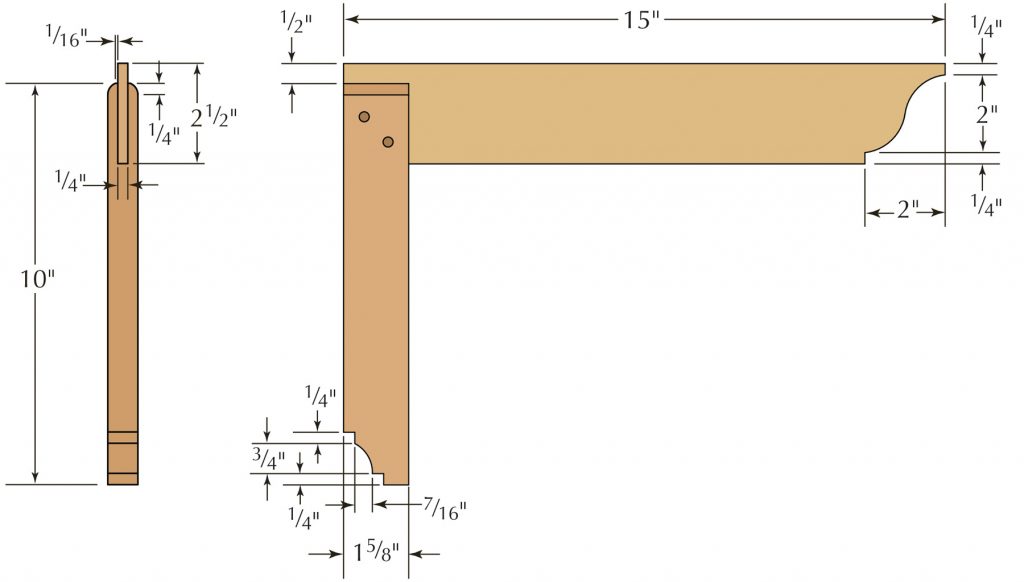
“The triangle is made of a handle and a blade; the handle ordinarily is 9 to 10 inches long by 11⁄2 inch wide, and about 10 lines of thickness: the blade must have a foot to 15 inches long, by three to four lines thick, and 2 inches to 21⁄2 wide. The blade must be mounted squarely in the middle of the handle’s thickness with a corner bridle joint along its width and made to project by 1⁄2 inch at the top of the handle.… In general, the use of triangles of which I have just talked about, is to support or drive the marking knife to mark right angles on the wood.”
Oh, about those unusual measurements: The French inch is a shade longer than the modern inch. And the French inch is divided into 12 “lines.” With that information in hand, I designed a square after Roubo and began building six of them using quartersawn European steamed beech.
Meanwhile, Across the Channel
As I was building the French squares I dug up my notes on early try squares and was amused to discover that a well-known try square built by Benjamin Seaton in1796 was similar to Roubo’s – minus the attractive curves. His square had a 15″-long blade and an 113⁄4″-long stock. So I thought I was on the right track.
However, there was one detail about the English squares in Seaton’s mostly unused tool kit that made me raise an eyebrow. All three of his wooden try squares had blades that tapered in thickness. The blades were thickest at the stock and as much as 1⁄32″ thinner at the tip.
What, I thought, is the advantage to a tapered blade? Roubo didn’t mention it as far as I could tell. I decided to investigate. One working theory was that the slight taper improved the tool’s accuracy over time. The taper exposes more end grain, allowing the blade to respond faster to changes in humidity (most of the moisture exchange in wood is via end grain). This same theory might explain why wooden smoothing planes are coffin-shaped and wooden straightedges are sometimes tapered on their top (non-functional) edge. There are other theories, by the way.
As I built Roubo’s squares, I made a couple with tapered blades. Then I put all the squares to work on some small cabinets.
Au Revoir Rosewood
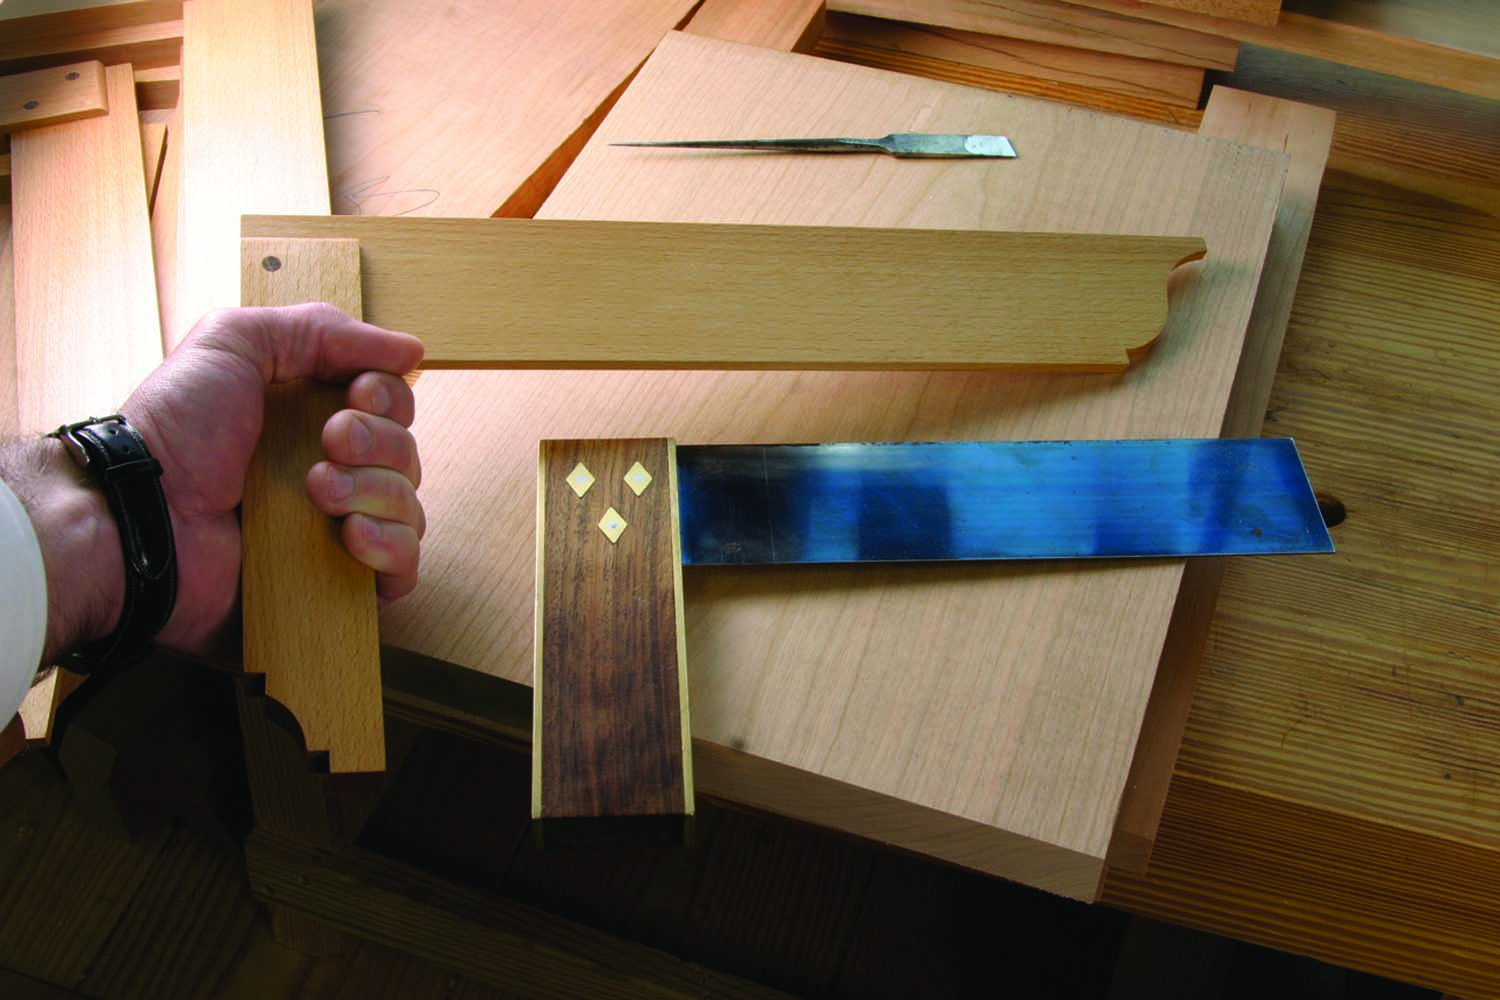
My rosewood square now needs to find a new home. The wooden square has a much longer reach, weighs half as much and is far easier to hold. Its stock has a familiar feel, like a saw handle. And because the handle is longer than on a traditional try square, it touches more area of my reference edge – a good thing.
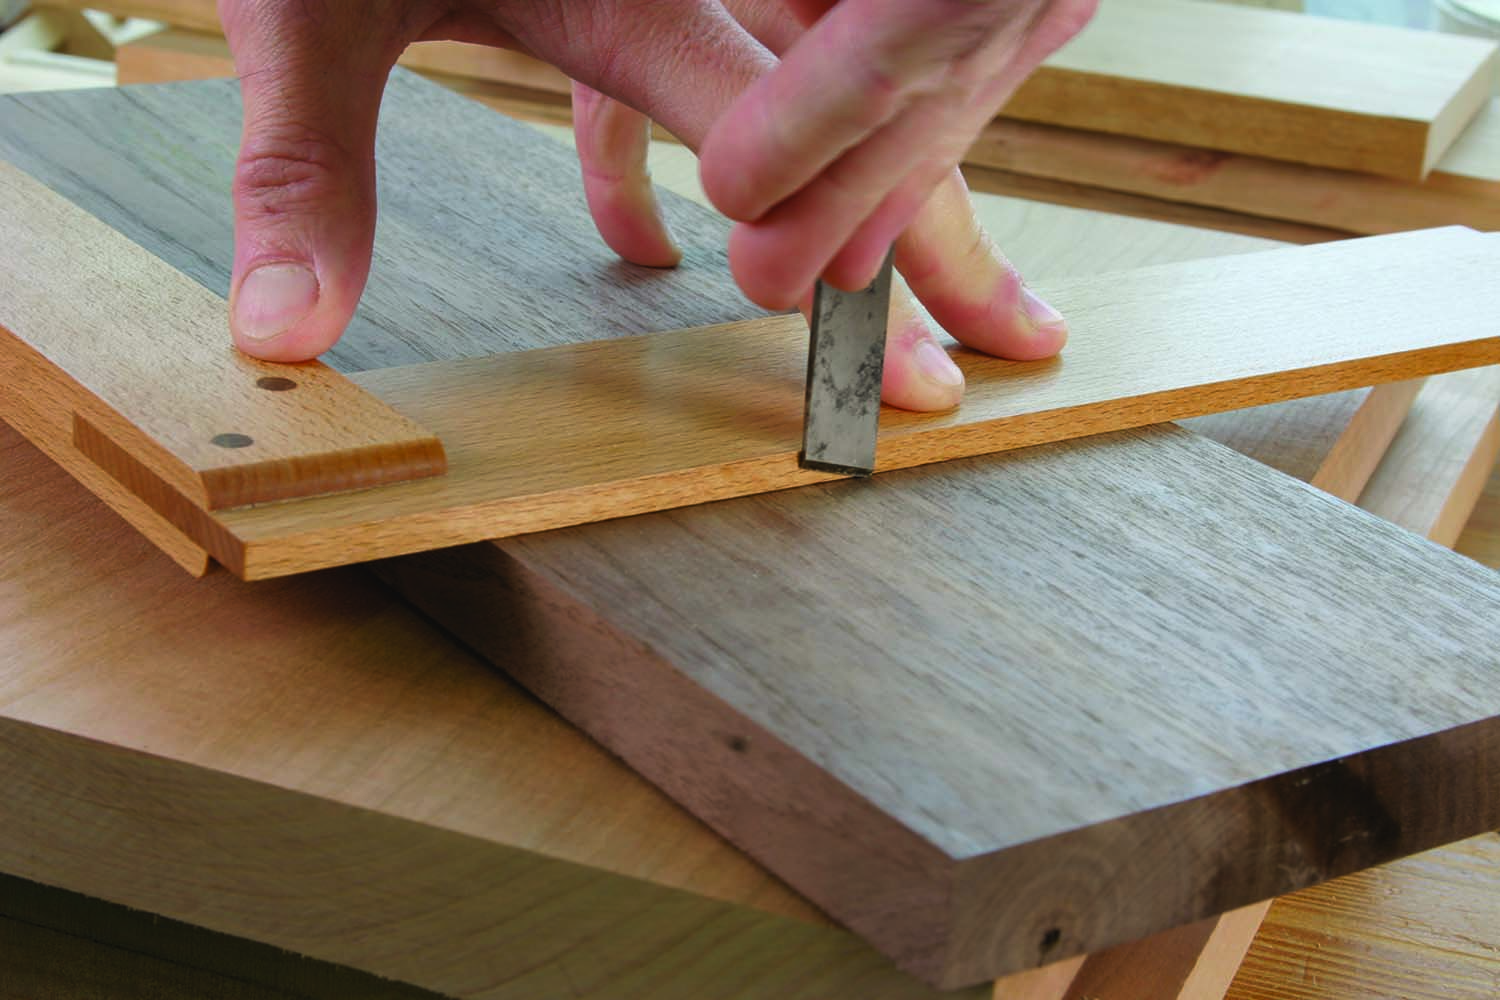
The right angle. The tip of my striking knife has an angle that suits a wooden square. A pointy-tipped knife would more easily slice the square.
A handle for hands. The narrower and longer stock of a wooden square makes it easier to hold and more accurate in use.
Putting the tool to use answered a lot of questions I had about it. Is it accurate? Using planes, files and a little sandpaper, it’s easy to true these squares so they are more than accurate enough for woodworking.
Will they need a lot of maintenance? Likely no. When I build layout tools using wood I use dry, quartersawn stuff. My wooden straightedges, for example, have needed trueing once in the last five years.
And what about that taper? After a few days I forgot which squares I had tapered. So I measured them with calipers.
The funny thing was that most of my blades tapered. As I was fitting the blades in the stock, I imagine that I used more downward pressure while planing the ends of the blades – those areas weren’t as critical as the ends that I had to fit in the handles.
Does the taper affect the function? Not really. Any downward pressure on the blade brings it in contact with the work.
Can you use a knife with this tool? Absolutely. It pays, however, to use a traditional striking knife instead of a spear-point knife. You have to be careful with the spear-point tool – it’s easier to slice the reference edge of your square.
And finally, what about the curves on ends of the square? Do they have a purpose? Roubo doesn’t mention the curves in his section on squares, though I imagine they could be used for laying out the occasional detail in a pinch. The curves are helpful to me in one way – they differentiate my squares from Senior Editor Robert W. Lang’s.
I think the curves on a try square have the same use as the nib on the handsaw – to catch your eye and confound generations of future woodworkers.
Here are some supplies and tools we find essential in our everyday work around the shop. We may receive a commission from sales referred by our links; however, we have carefully selected these products for their usefulness and quality.


Maybe the curves were/are meant to help readily identify the square as a tool and not some cut-off or cast-off from a long forgotten project.
Chris: I appreciate your post on making the tri-square or Try-Square so Try as you might, you need to make it square.
I had heard that the decorations on the ends were the indication of which surfaces were at 90 degrees. On your example the outside edge on the blade and the inside edge on the handle had the longer edge of the pattern.
However if you wanted to do a mark on inside a case for example Then you would be using the outside edge of the handle. These two surfaces were not necessarily trued up to be square. It would only be true if both pieces of the stock being used were perfect in their width dimension.
By making an inside and an outside pair of try-squares you would be assured of having accurate lines being struck. Just make sure that the decorative curves on the end show which surfaces of the square are at 90 degrees.