We may receive a commission when you use our affiliate links. However, this does not impact our recommendations.

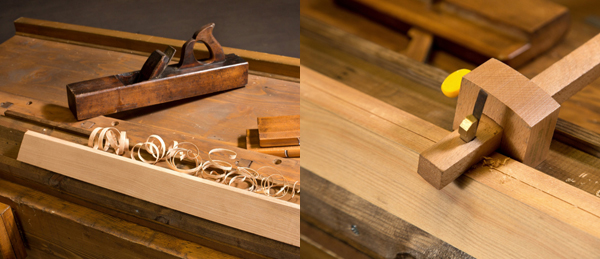
Larger moldings present quite a challenge for even the most heavy duty electric router. Start with a simple sketch and then carry the layout lines down the stock as shown.
Perhaps, like me, you enjoy owning tools that are versatile. I have two hefty, industrial-grade electric routers and a good selection of carbide-tipped cutters, which cover a lot of molding work. However, as you produce ever larger moldings, you can very quickly reach the limit of what a router will handle. For example, the molding shown above is beyond what a router can ever produce without some very creative set ups.
At this point, the humble wooden molding planes quite simply outshine their snazzy electric counterparts. Starting with a simple sketch on the end of your stock, it does not take very long to transform the plain 3×2 into a beautiful molding, in this case, a cornice molding.

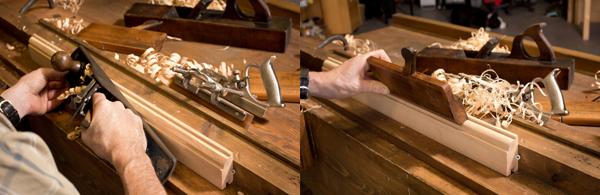
Number 10’s are a good pair to start your collection of hollow and round planes.
I used a matched pair of number 10 hollow and round planes for the cove and ovolo, and then a round number 16 for the large swept curve at the top of the cornice. It’s important to understand that hollow and round woodworking planes are usually used in conjunction with both rebate and plow planes. It’s sheer madness to expect that these specialist curved sole planes can be used effectively without some initial, mission critical preparation. Every curved sole plane needs directional control, or it will skate off sideways.
Cutting a Simple Cove With a Number 10 Round Plane
A lot of the corner can be removed with a coarse set wooden plane. I then use a slot cutter to cut a fine groove, right down the length of the work piece.
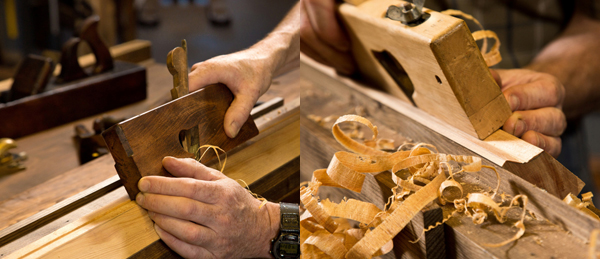
Holding a rebate plane at 45 degrees, I deepen the groove. I use a second rebate plane with the iron set to the opposite face to direct the groove, taking off waste from both sides, as required.

The final few passes with the round plane create a nice looking cove.
Cutting a Simple Ovolo With a Number 10 Hollow Plane
Preparation again is the secret to success. Start off with two rebates, planning the shoulder positions and depths, according the geometry of the ovolo you are creating. For example, I have cut two rebates about 3⁄4” back from the face- edge corner, about 3/16” deep. To stabilize the hollow plane, I have taken the corner off with a bench plane, forming a ‘track’ for the sole to glide along, with two points of contact so it can’t wobble.
With this preparation, the hollow plane can easily be guided straight and true, along the whole length, producing an elegant ovolo profile.
Hollow and round planes are not mysterious tools. When they are sharp and well set, they can be used very effectively and believe it or not, are even more versatile than your electric router! I believe a cabinet maker’s workshop revolves around the sharpening system. Keeping these planes sharp is a matter of minutes.

Working Wood 3, by Simon James
Working Wood 3 is part of the Artisan course of books and accompanying DVDs providing clear and inspiring woodwork instruction for all skills levels. Series 3 is all about getting your workshop set up for cabinet making with a great array of shop-made jigs and devices; learning the set up and use of many specialist tools, and developing a range of new woodworking skills and techniques.
Learn more about all of our woodworking books here.
Here are some supplies and tools we find essential in our everyday work around the shop. We may receive a commission from sales referred by our links; however, we have carefully selected these products for their usefulness and quality.