


We may receive a commission when you use our affiliate links. However, this does not impact our recommendations.

This workbench form is uncommon today, but it is still a sound bench because it allows you to perform all of the critical workbench operations with relative ease. Benches are a triumph of function over form.
When it comes to building or buying a bench, most woodworkers get wrapped up in what form it should take. Should it be a continental bench popularized by Frank Klausz? A Shaker bench like the one at the Hancock community? How about a British version like Ian Kirby’s?
Copying a well-known form is a natural tack to take. After all, when woodworkers buy or build their first workbench, they are in the early stages of learning the craft. They don’t know what sort of bench or vises they need, or why one bench looks different than another. So they pick a form that looks good to them — occasionally mixing and matching bits and pieces from different forms — and get busy.
That, I believe, is the seed of the problem with workbenches today. Many commercial workbenches are missing key functions that make work-holding easier. And many classic bench forms get built with modifications that make them frustrating in use.
What’s worse, the user might not even know that he or she is struggling. Woodworking is a solitary pursuit, and it’s rare to use someone else’s bench.
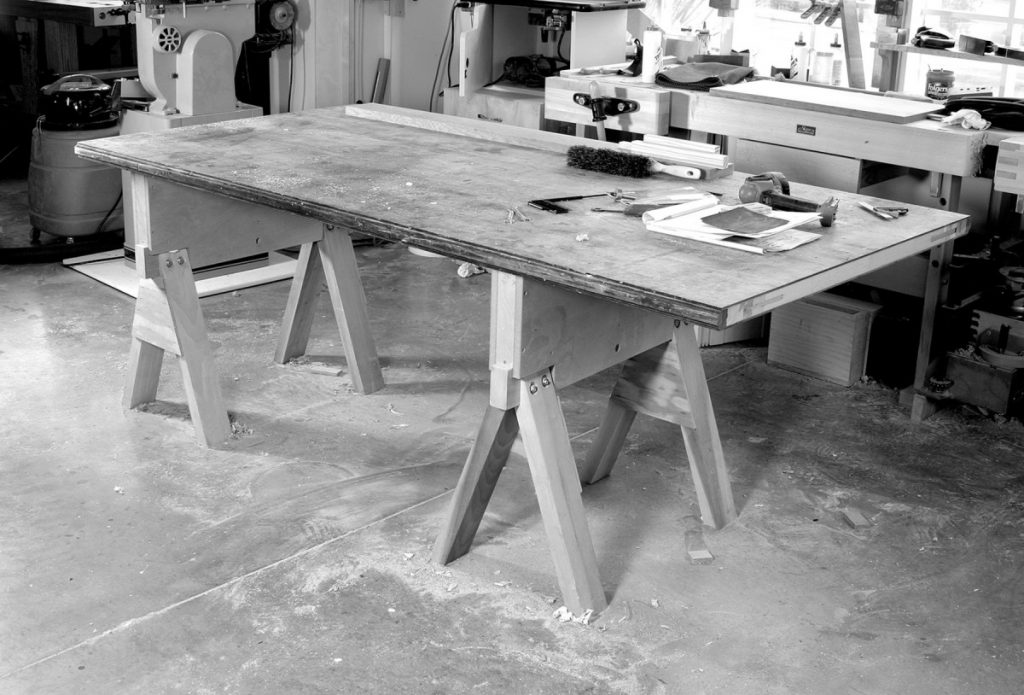
This rig serves as the assembly bench in the Popular Woodworking shop, but if you put a vise on it somewhere, it probably could serve as a workbench in a production shop. It is simple and allows great flexibility for clamping. But some basic operations with this setup would be tricky.
During the last 10 years, I’ve built a number of classic bench forms, and I’ve worked on craftsman-made and commercial benches of different stripes. I’ve been stunned by how awful some workbenches can be at some tasks, and I’ve also seen brilliantly realized designs.
And now, after all this work, I’ve concluded that it doesn’t matter what sort of bench you have as long as it performs a set of core functions with ease. I’ve boiled down these core functions into 10 rules for building (or buying) a workbench. As long as your bench obeys these rules (or most of them), you will be able to hold almost any workpiece for any task with a minimum of fuss. This will add speed and enjoyment to your time in the shop and reduce the amount of time you fuss with setups.
Do You Even Need a Bench?
Before we get to the rules, it’s fair to say that a lot of the best commercial woodworking today is done on benches that disregard many of these rules. In production shops, it’s rare to find a traditional bench used in a traditional manner. More often, a commercial woodworker will have something akin to a clamping table, or even a door on sawhorses. And they can turn out high-quality work that will blow you away.
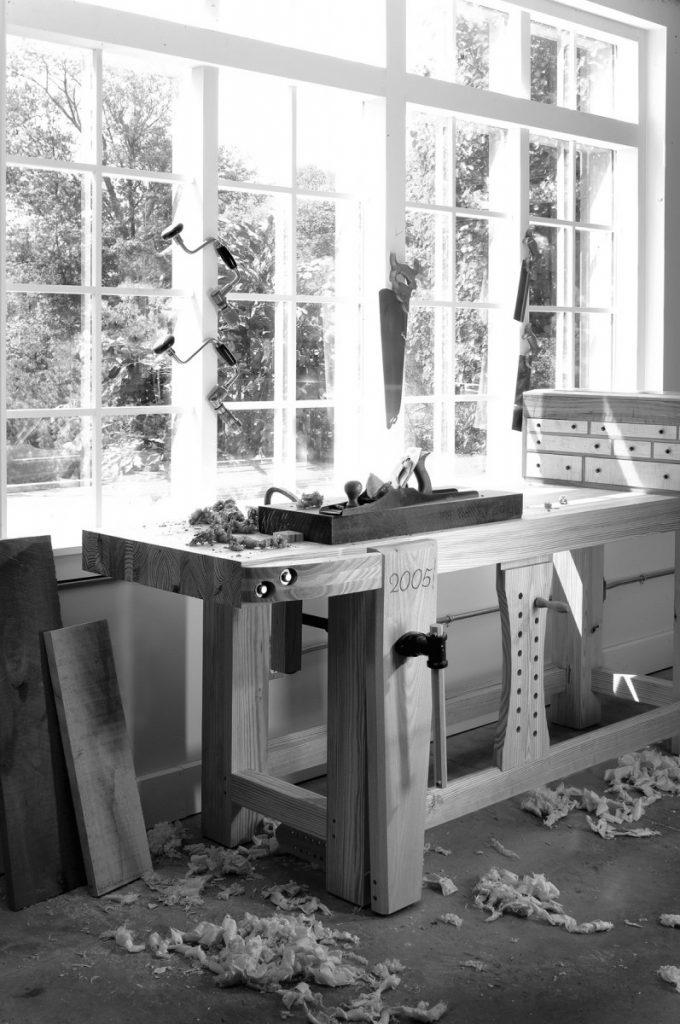
This French-style workbench weighs more than 325 pounds. The top is 4″ thick. The legs are 5″ square. All this mass absorbs vibration and makes every cutting operation smoother.
In 2006 I was teaching a class in hand work at a school where Thomas Stangeland, a maestro at Greene & Greene-inspired work, was also teaching a class. Though we both strive for the same result in craftsmanship, the processes we use couldn’t be more different. He builds furniture for a living, and he enjoys it. I build furniture because I enjoy it, and I sell an occasional piece.
One evening we each gave a presentation to the students about our work and I showed an image of the enormous French workbench I’d built the year before and discussed its unusual history.
Thomas then got up and said he wished he had a picture of his workbench: a door on a couple horses. He said that a commercial shop had no time to waste on building a traditional bench. And with his power-tool approach, all he needs is a flat surface.
It’s hard to argue with the end result. His furniture is beautiful.
But what’s important here is that while you can build with the door-off-the-floor approach, there are many commercial woodworkers who still see the utility of a traditional workbench. Chairmaker and furniture maker Brian Boggs uses more newfangled routers and shop-made devices with aluminum extrusions than I have ever seen. And he still has two enormous traditional workbenches that see constant use. Before Kelly Mehler opened a woodworking school, I visited his commercial shop and got a chance to inspect his vintage bench, which saw daily use.
The point is that a good bench won’t make you a better woodworker, and a not-quite-a-bench won’t doom you to failure. But a good bench will make many operations easier. It’s simply a tool: the biggest clamp in the shop.
Always overbuild your workbench by adding mass. There is a saying in boatbuilding: If it looks fair, it is fair. For workbenches, here’s a maxim: If it looks stout, then make it doubly so. Everything about a workbench takes punishment that is akin to a kitchen chair in a house full of 8-year-old boys.
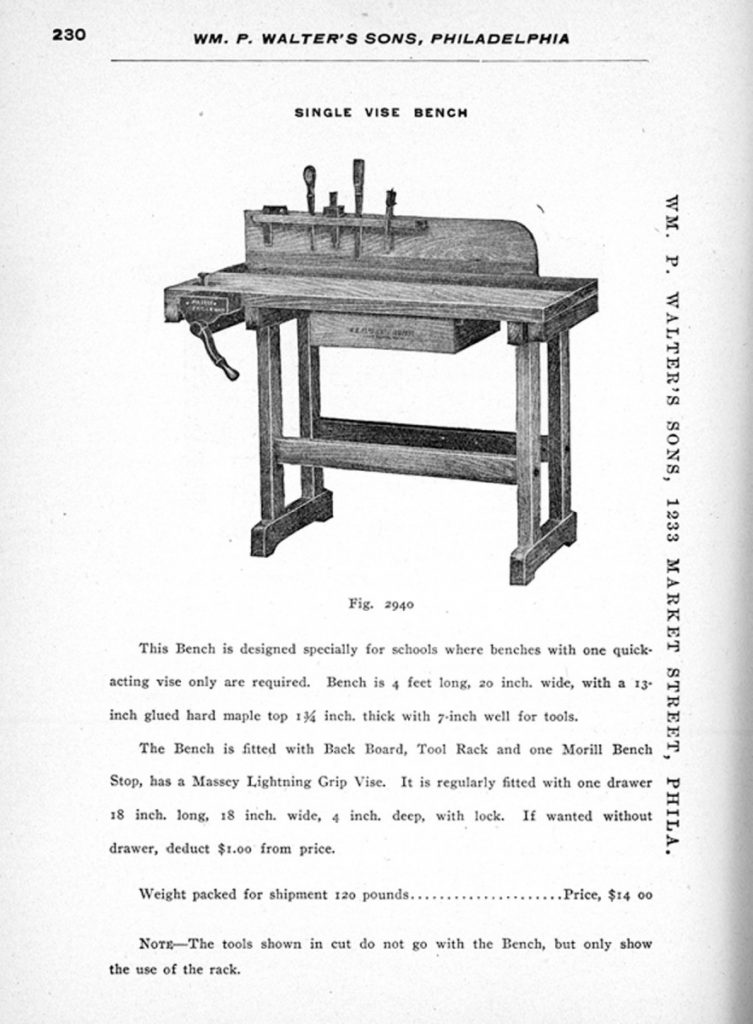
Spindly workbenches are nothing new. This anemic example from the early 20th century is too small and lacks mass. Sadly, there are modern ones that are even worse.
Rule No. 1: Always Add Mass
Early Roman workbenches were built like a Windsor chair. Stout legs were tenoned into a massive top and wedged in place. Traditional French workbenches had massive tops (6″ thick), with legs that were big enough to be called tree trunks. Later workbenches relied more on engineering than mass. The classic continental-style workbench uses a trestle design and dovetails in the aprons and vises to create a bench for the ages. The 19th-century English workbench uses an early torsion-box design to create a stable place to work. And good-quality modern workbenches use threaded rods and bolts to tighten up a design that lacks mass.
Many inexpensive commercial benches are ridiculously rickety. They sway and rack under hand pressure. You can push them across your shop by performing simple operations: routing, sawing, planing. If the bench looks delicate or its components are sized like a modern dining table, I would take a closer look before committing.
A big thick top and stout legs add mass that will help your work. Heavy cabinet saws with lots of cast iron tend to run smoother. The same goes with benches. Once your bench hits about 300 pounds, it won’t move unless you want it to move.
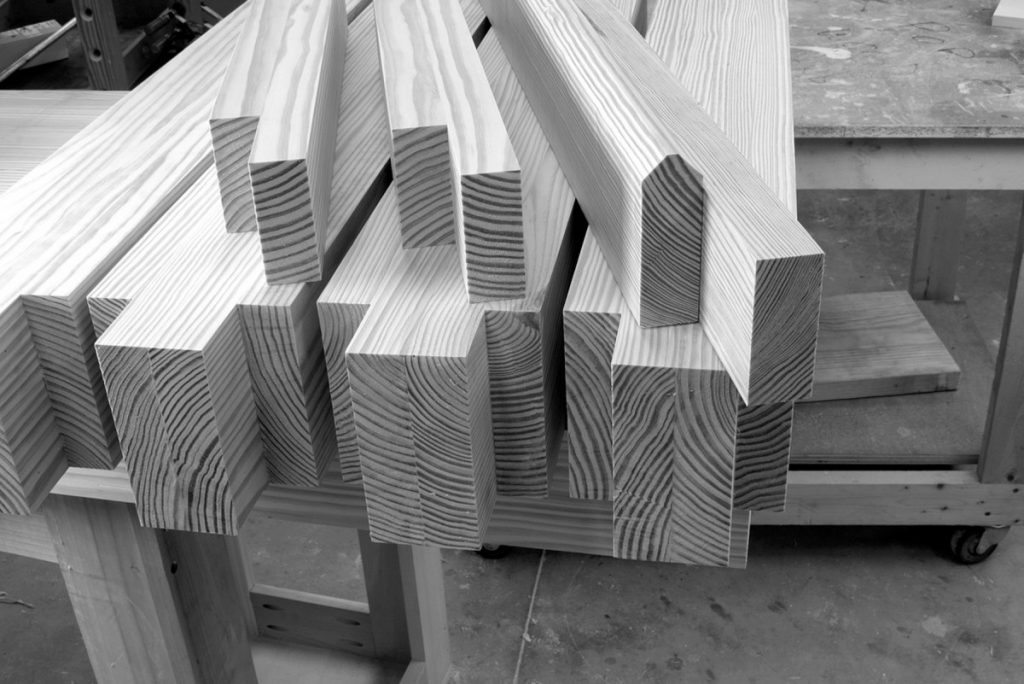
Think big when cutting the joints for your workbench. The small tenons are 11⁄4″ thick and 21⁄2″ long. The larger tenons are 21⁄2″ thick and 2″ long.
Rule No. 2: Use Stout Joints
Overbuild your workbench by using the best joints. These are times to whip out the through-tenon and dovetail.
If you followed rule No. 1, then rule No. 2 should be no problem. Your joints will be sized to fit the massive scale of your components. If you cannot rely on mass, then you should beef things up with superior joinery. While dovetails and through-tenons are overkill for a towel rack, they are good for a bench.
That’s because you are applying racking force to the workbench with typical operations and your vises will do their best to tear apart your bench. All wooden vises need to be overbuilt or they will self-destruct when you cinch them down hard. I’ve even seen a vise rip a benchtop from its base.
Make your tenons thick and your mortises deep. If you know how to drawbore a mortise-and-tenon joint, this is one good application. Have you ever been in a timber-framed barn? Did you look at the joints? They’re massive and pegged. Imitate that.
I think benches are a good place to practice your skills at cutting these classic joints, but some woodworkers still resist. If that’s you, you should investigate hardware to strengthen your bench. Threaded rods, bed bolts, Veritas bench bolts or even stove bolts can turn a spindly assembly into something rigid that can be snugged up if it loosens. The hardware won’t give you mass, but it will strengthen a rickety assembly.
Use a stiff, inexpensive and common wood to build your bench. Showcase benches made from exotic materials are nice. No argument there. But focus on the functions before the flash. I’d rather have a construction-lumber bench that followed all these rules than a beautiful European beech bench that skipped even one of these concepts.
These classic European workbenches were made from fine-grained steamed European beech. Shouldn’t you do the same? Not necessarily. Choose a wood that is like beech is in Europe: stiff, inexpensive and plentiful.
Rule No. 3: Pick Your Wood Based on Its Stiffness, Not Its Species
There’s a lot of confusion on picking a wood for a bench. Most European benches were built using fine-grained steamed European beech. And many woodworkers go to lengths to purchase precious beech for their workbenches. After all, who wants to argue with hundreds of years of tradition?
I do. European cabinetmakers didn’t choose beech because of some magic quality of Fagus sylvatica. They chose it because it was dense, stiff, plentiful and inexpensive. In the United States, beech is dense, stiff, hard to find and (sometimes) a bit spendy. You can, of course, use it to build a bench, but you will pay a pretty penny for the privilege. And it will have no demonstrable advantage over a bench built from a cheaper species.
Other woodworkers, tacking toward the sensible, use hard or soft maple for their benches, rationalizing that it is like the beech of the New World.
And indeed, the maples have all the qualities of a good species for a workbench.
Maple is stiff, resists denting and can span long distances without much of a support structure below it. But so can other species. In fact, if you went by the numbers from the wood technologists alone, you’d build your bench from shagbark hickory, despite its difficult nature. Once you look at the characteristics that make a good species for a workbench, you’ll see that white oak, Southern yellow pine, fir or just about any species (excepting basswood and the soft white pines) will perform fine.
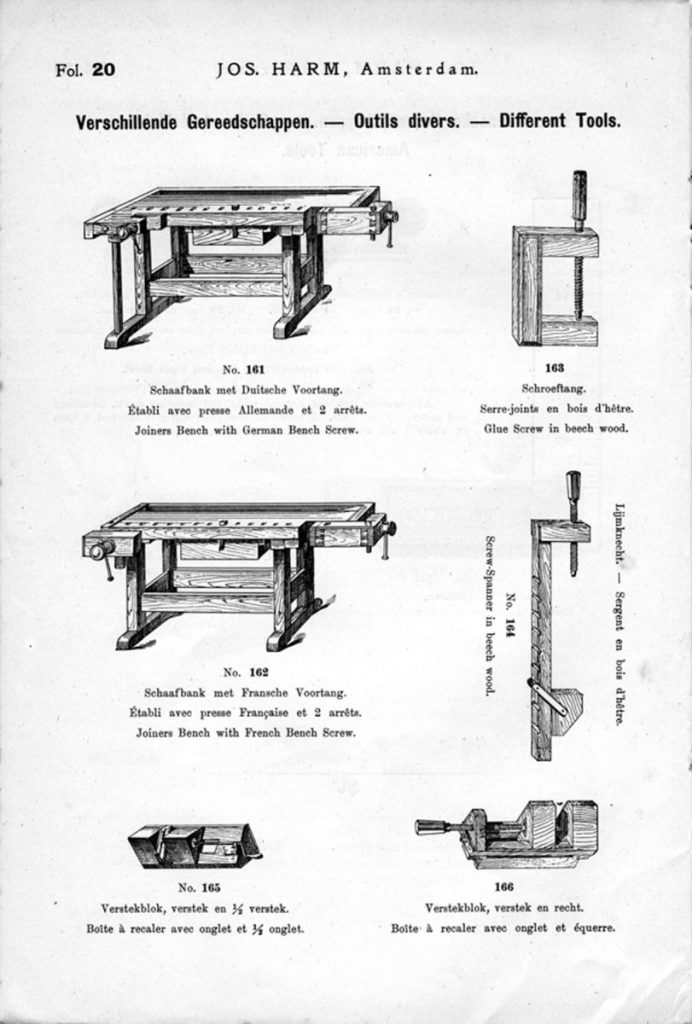
After you sketch out your workbench design but before you cut any wood, compare your design with historical designs of benches. If your bench appears to be a radical design or looks unlike anything built before, chances are your design is flawed.
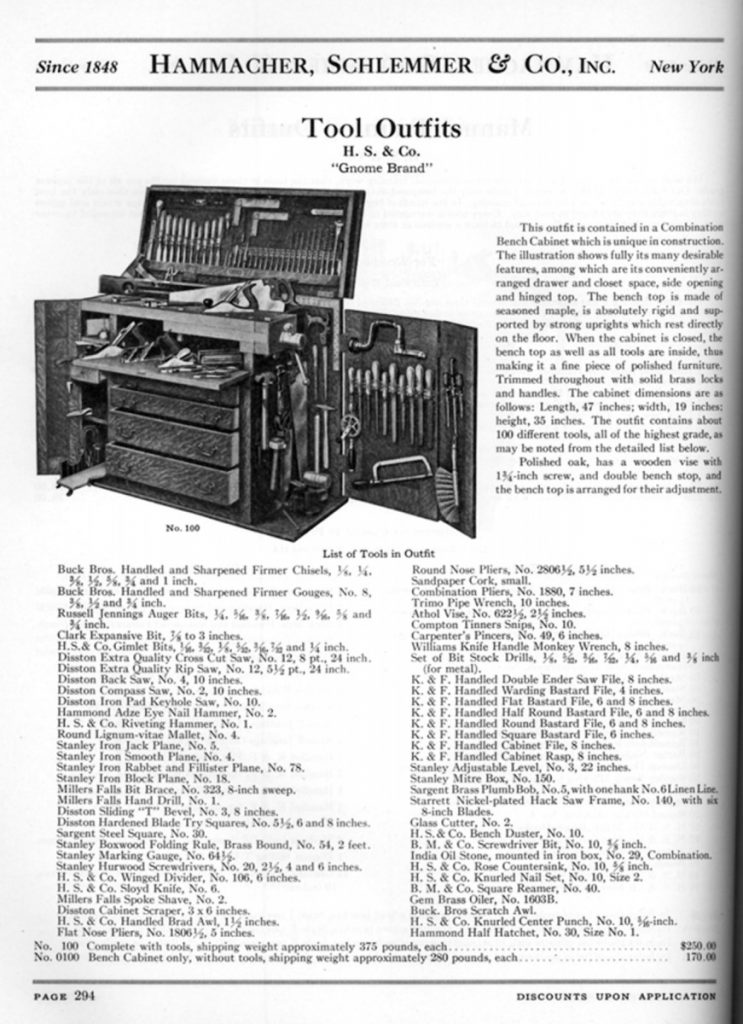
Here’s proof that odd workbench designs are nothing new. This Hammacher, Schlemmer & Co. bench from an old catalog is a study in tool storage. I’ve seen one of these in person and I can say this: I would not want to have to build anything using it.
Rule No. 4: Use a Tested Design
I’ve seen workbenches with pneumatic face vises. Why? I’ve seen a workbench that had two twin-screw vises: One vise for the right end of the workbench that was matched to work with two long rows of dogs along the length of the benchtop; and a second twin-screw vise on the face of the bench that was matched to two more rows of dogs across the width of the bench.
Now I’m certain that there are a few woodworkers who would really need this arrangement – perhaps someone who has to work on a circular tabletop on one end of the bench and a Windsor chair seat at the other. But for most people who build cabinets and furniture, this setup is redundant and neglects some critical bench functions.
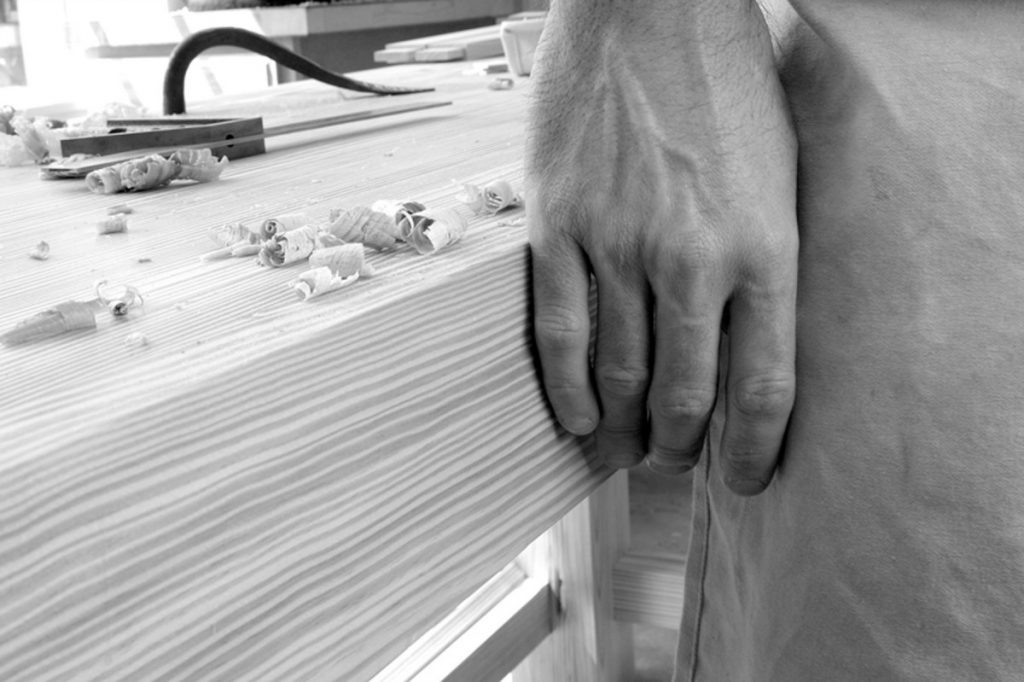
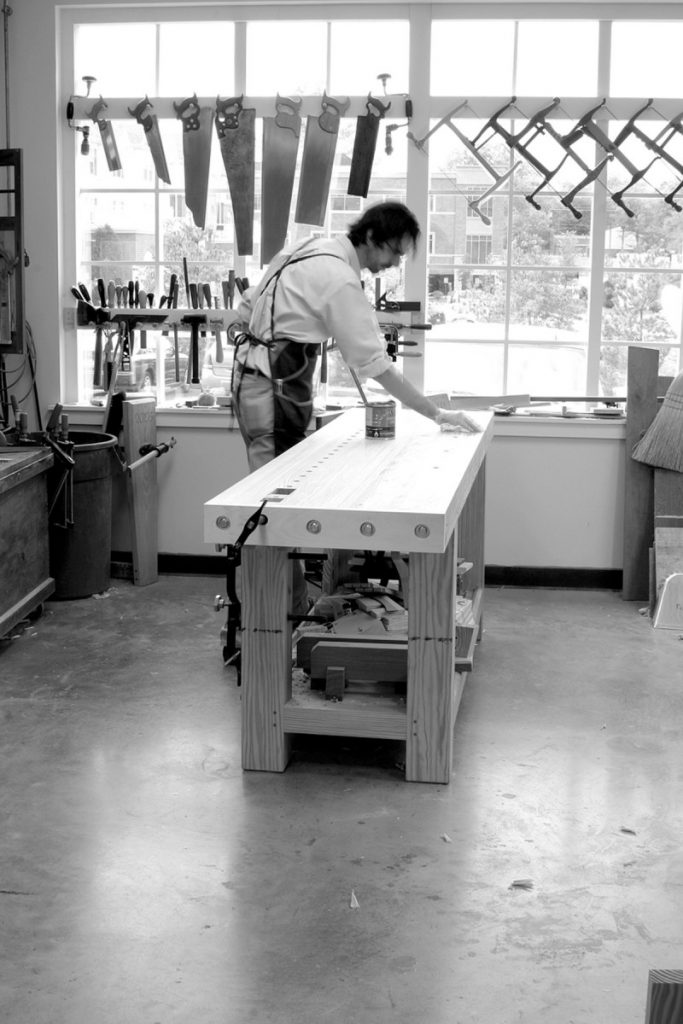
Here is how high my workbench is compared to my hand, which is hanging loosely by my side. I use hand and power tools in my work, and I’ve found this height is ideal.
Rule No. 5: The Overall Dimensions of Your Bench Are Critical
Your bench design cannot be too heavy or too long. But its top can easily be too wide or too tall. I think your benchtop should be as long as possible. Find the wall where your workbench will go (hint: Pick the wall that has a window). Measure that space. Subtract four feet from that measurement and that’s a good length for the top. Note: The benchtop must be at least 5′ long unless you build only small-scale items. Furniture-sized parts typically range up to 48″ long and you want to support these fully with a little room to spare.
I’ve made tops that are 8′ long. My next bench will be a 10-footer, the maximum that will fit in my shop. It is difficult to make or imagine a workbench that is too long. The same goes for thickness. It is the thickness that allows the top to be that long. If you make the top really thick (4″ or more), then it will offer unerring support and allow you to build your bench without any support system beneath. The top can perch on the legs and will not sag under its own weight.
The width is a different matter. You can have a bench that is too wide for a one-person shop. I’ve worked on benches that are 36″ wide and they have downsides. For starters, if you park them against the wall you’ll have to stretch to reach the tools hanging on the wall. If you assemble projects on your bench, you will find yourself dancing around it a lot more than you should.
But there’s more. Cabinetwork is sized in standard chunks. These sizes come from the human body; they aren’t arbitrary. A kitchen’s base cabinet is generally 24″ deep and 34-1/2″ high. This is important for a couple reasons. First: It means you don’t really need a bench that’s much more than 24″ deep to build cabinets. With that 24″ depth, you actually get some advantages, including the fact that you can clamp the cabinet to your bench from as many as three sides of your bench. That’s dang handy. A deep bench allows you to clamp your cabinets to the bench on only two sides (with a couple exceptions). Here’s the other thing to keep in mind: Kitchen cabinets are themselves a highly studied work surface. There’s a good reason that kitchen cabinets are 24″ deep. And it’s the same reason you don’t want your workbench much deeper either.
Now I’m not going to argue with you if you build really big stuff or have a bench that you share with another woodworker facing you; you might need more depth. But if you are like the rest of us, a 24″-deep bench is a powerful and right-sized tool.
On the issue of workbench height: Many bench builders worry about it and there are a wide variety of rules and advice. The bottom line is the bench must fit you and your work. And in the end, there are no hard-and-fast rules. I wish there were. Some people like low benches; some like them high.
So consider the following as a good place to start. After taking in my crackpot theories, your next stop should be a friend’s house or a woodworking supply store to use their benches and get a feel for what is right (it could be as simple as having a bad back that requires you to have a high bench, or a love for wooden handplanes that dictates a low bench).
Here is my experience with bench height: I started with a bench that was 36″ high, which seemed right for someone who is 6′ 3-5/8″ tall. And for machine woodworking I was right. The high bench brought the work close to my eyes. I loved it. And then my passion for handwork reared its ugly head.
If you get into hand tools, a high bench becomes less attractive. I started with a jack plane and a few smoothing planes. They worked OK with a high bench, but I became fatigued quickly.
After reading the screed on bench heights, I lowered the height of my 36″ bench. It seemed radical, but one day I got the nerve up and sawed 2″ off the legs. Those two inches changed my attitude toward planing.
The 34″-bench height allowed me to use my long leg muscles to propel the plane forward instead of my arms.
Now, before you build your next bench at 34″ high, stop for a minute. That might not be right for you. Do you use wooden stock planes? If so, you need to consider that the wooden body planes can hold your arms about 3″ to 4″ higher off the workbench than a metal plane can. As a result, a wooden plane user’s workbench should be lower.
This is as good reason as ever to get to know someone who has a good shop you can visit and discuss your ideas with. It is better not to make this decision on paper alone.
But there are other factors you must consider when settling on the bench’s height. How tall are you? If you are over 6′ tall, you should scale your bench a bit higher. Start high and cut it down if it’s too high. And prop it up on some blocks of wood if it’s too low. Experiment. It’s not a highboy; it’s a workbench.
Here are other things to consider: Do you work with machinery? If so, a bench that’s 34″ from the floor – or a bit lower – can be good. The top of a table saw is typically 34″ from the floor, so a workbench could be (at most) a great outfeed table or (at least) not in the way of your crosscutting and ripping.
Of course, everyone wants a ballpark idea for where to start. So here it is: Stand up straight and drop your arms against your sides in a relaxed manner. Measure from the floor to the place where your pinky joins your hand. That has been the sweet spot for me.
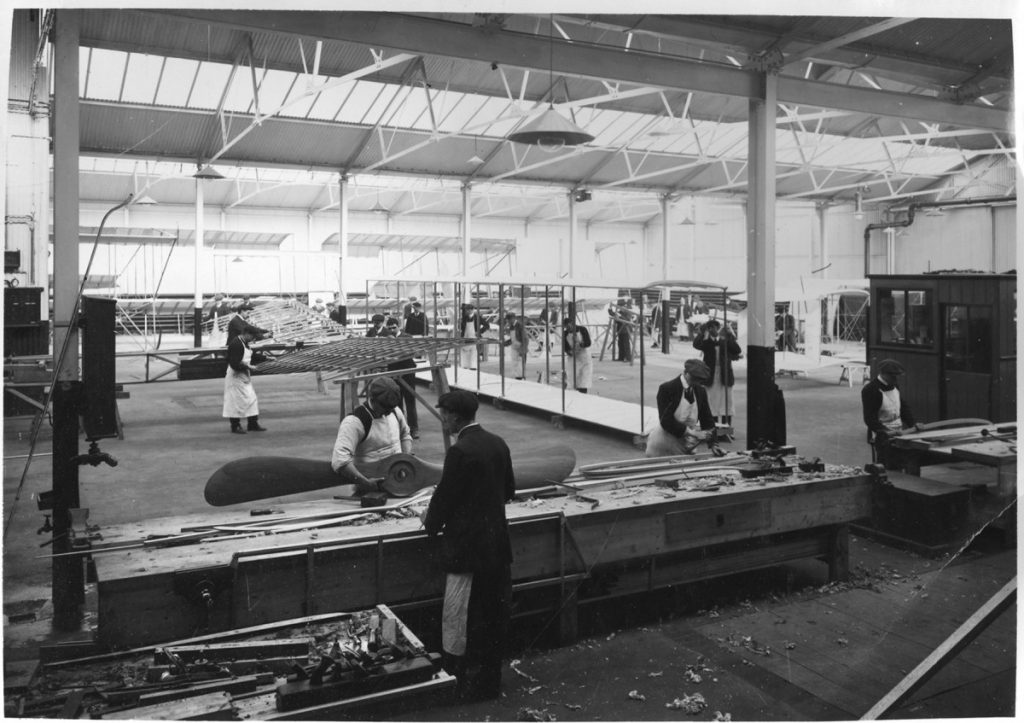
This early 20th-century airplane factory had the right idea when it came to workbench length. With a long bench, you can work on one end and assemble at the other – no need for an assembly bench. Thus, a big bench actually saves floorspace.
Rule No. 6: Benches Must Hold the Work in Three Ways
All benches should be able to grip the wood so you can easily work on the faces, the ends and the edges. Many commercial benches fail on this point.
Submit your bench to what I call the Kitchen Cabinet Door Test. Imagine a typical kitchen door that is 3/4″ thick, 15″ wide and 23″ long. How would you affix that door flat on your bench to level its joints and then sand (or plane) it flat? How would you clamp the door so you could work on the ends to trim the top rail and tops of the stiles so the door will fit its opening? And how will you secure that door on edge so you can rout its hinge mortise and plane off the saw-blade marks without the door flopping around? Does your bench pass this test? OK, now ask the same questions with a door that is 3/4″ x 15″ x 38″. And then try a board that is 3/4″ x 12″ x 6′.
How you accomplish each of these three functions is up to you and your taste and budget. To work on the faces of boards, you can use a planing stop, a grippy sanding pad, a tail vise with dogs, clamps or hold-downs.
To work on the ends of boards, you can choose a shoulder vise (especially for dovetailing), a metal quick-release vise, a leg vise or a twin-screw vise. And you can use all of these in conjunction with a clamp across your bench. The vise holds one corner of the work; the clamp holds the other corner.
Working the long edges of boards is tricky with most benches. In fact, most benches make it difficult to work the edges of long boards, doors or face frames. There are a couple ways to solve this. Older benches had the front edge of the benchtop flush with the front of the legs and stretchers so you could clamp your frames and long boards to the legs. And the older benches also would have a sliding deadman (sometimes called a board jack). It would slide back and forth and had an adjustable peg to support the work from below. Another old form of bench, an English design, had a wide front apron that came down from the top that was bored with holes for a peg to support long work.
Here’s another historical bench that shows some difficulties. The drawers will interfere with clamping things down to the bench. With no dogs or tail vise, this bench could be frustrating to work on.
Rule No. 7: Make Your Bench Friendly to Clamps
Your bench is a three-dimensional clamping surface. Anything that interferes with clamping work to your benchtop (aprons, a drawer bank, doors, supports etc.) can make some operations a challenge.
We had a phase at Popular Woodworking where we tried to design a cupholder into every project. It started innocently with a deck chair. Who doesn’t want a cool beverage at hand? Then there was the dartboard. What goes better with darts than beer? I think we came to our senses when designing a series of cupholders into a Gustav Stickley Morris chair reproduction. Do you really need a Big Gulp-sized hole in your Morris chair? I didn’t think so.
The point of this story is to illustrate a trend in workbench design that I personally find troubling. It’s a knee-jerk reaction to a common American complaint: We don’t think we have enough space in our shops to store our tools and accessories. And how do we solve this problem with our workbenches? By designing them like kitchen cabinets with a countertop work surface.
This design approach gives us lots of drawers below the benchtop, which is great for storing the things you reach for every day. It also can make your bench a pain in the hiney to use for many common operations, such as clamping things to your bench.
Filling up the space below the benchtop also prohibits you from using any type of holdfast or holddown that I’m aware of.
If you build drawers below the top, how will you clamp objects to the benchtop to work with them? Typically, the banks of drawers below the benchtop prohibit a typical F-style clamp from sneaking in there and lending a hand with the setup. So you can’t use a typical clamp to affix a router template to the bench. There are ways around these problems (a tail vise comes to mind) but the tail vise can be a challenge to install, set and use.
You can try to cheat (as I have) and install the drawer bank so there is a substantial space underneath the benchtop for holdfasts and clamps. Or you can give your bench a large overhang to allow clamping (as some Shaker-style workbenches did) but then you have to start engineering a way to hold long boards and assemblies on edge.
Place your vises so they work with your tools. Vises confuse many workbench builders. They’re bewildering if you’ve never spent much time working at a bench to develop a taste for the peccadilloes of all the idiosyncratic forms. There are a lot of weird configurations in the world, from a table with no vises to the bench with a vise on every corner.
Rule No. 8: There are Good Rules for Placing the Vises on Your Bench
Classic workbenches have some sort of vise at the front left corner of the bench. This is called the face vise. Why is it at the left? When we work with hand tools, especially planes, right-handers work from right to left. So having the vise at the left end of the bench is handy because you will always be planing into the vise that is gripping your work, and the work can be braced against the screws of the vise. So if you are a lefty, placing your vise on the front right corner makes sense.
So with that left corner occupied by a vise, where are you going to put the a second vise that is designed to grip boards so you can work on their faces? (The classic vise for this is a tail vise.) Well the right side of the bench is free (for right-handers) and there is no disadvantage to placing it there, so that’s where it generally goes.
Messing with this arrangement can be trouble. I’ve seen face vises on the right corner of the bench of people who are right-handed. They said they liked it better for crosscutting with a handsaw. But when and if you start handplaning, that vise will be in the way because it won’t be ideal for gripping long stock. It will be holding the tail end of the board and the plane will be trying to pull it out of the vise.
An oil-varnish blend (any brand) is an ideal finish for a workbench. It resists stains, doesn’t build up a film and is easy to apply. Two coats are all I ever use.
Rule No. 9: No Fancy Finishes
When finishing a workbench, less is more. A shiny film finish allows your work to scoot all over the bench. And a film finish will crack when struck by a hammer or dead-blow mallet. Choose a finish that is easy to apply, offers some protection and doesn’t build up a thick film. I like an oil/varnish blend (sold as Danish Oil), or just boiled linseed oil.
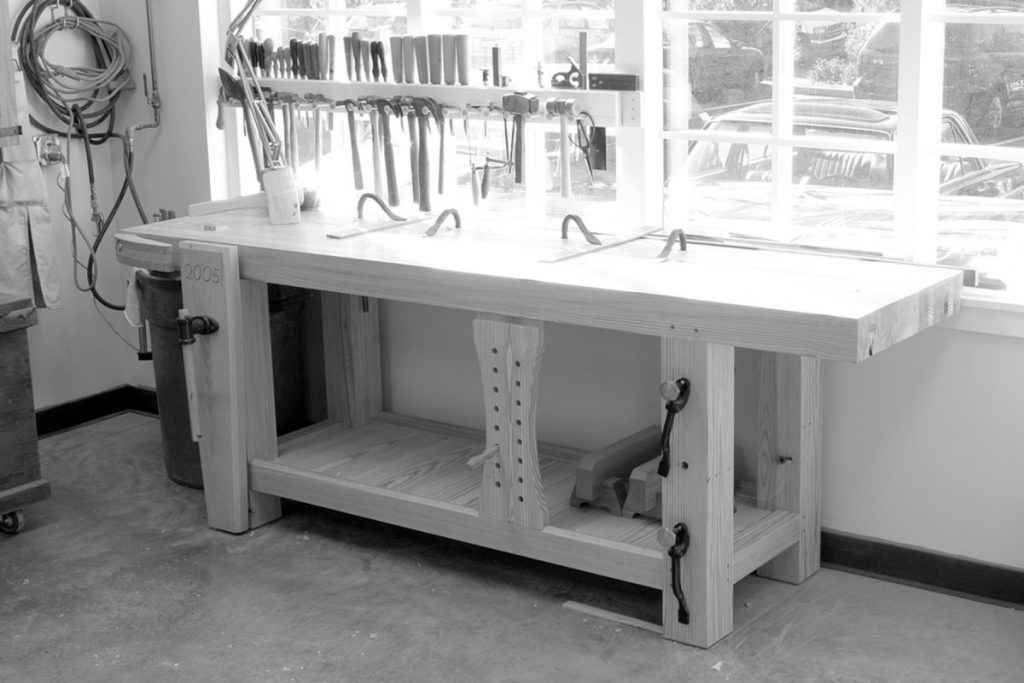
With your workbench against the wall, you have the wall and the mass of your bench holding things steady as you saw your workpieces. You also can keep your tools at arm’s length. And, the windows cast a useful light on your workbench.
Rule No. 10: Get a Window Seat
Try to place your bench against a wall and under a window, especially if you use hand tools. The wall braces the workbench as you are planing cross-grain and sawing. The light from the window points out the flaws in the work that your hand tools are trying to remove. (When I work with hand tools, I turn the overhead lights off. I can see much better with fewer light sources.)
For machine work, I find that placing the bench by a window helps with some operations, though not all. When power sanding, for example, the raking window light points out scratches better than overhead fluorescents.
In general, when working with power tools, I tend to pull my workbench away from the wall so I can work on all sides of it. When working with routers, you sometimes have to work with odd clamping setups so that you can rout around a template. So having access to all four sides of the bench is handy. Power tool setups thrive on overhead light – and lots of it. So being by the window is nice, but not as necessary.
Here are some supplies and tools we find essential in our everyday work around the shop. We may receive a commission from sales referred by our links; however, we have carefully selected these products for their usefulness and quality.


