We may receive a commission when you use our affiliate links. However, this does not impact our recommendations.
For the ultimate edge, use a leather strop.
I have a special set of chisels that I only use for paring. To do a good job, they have to be wicked sharp—and stay that way. My secret weapon isn’t a fabulously expensive honing stone. It’s a cheap, homemade strop.
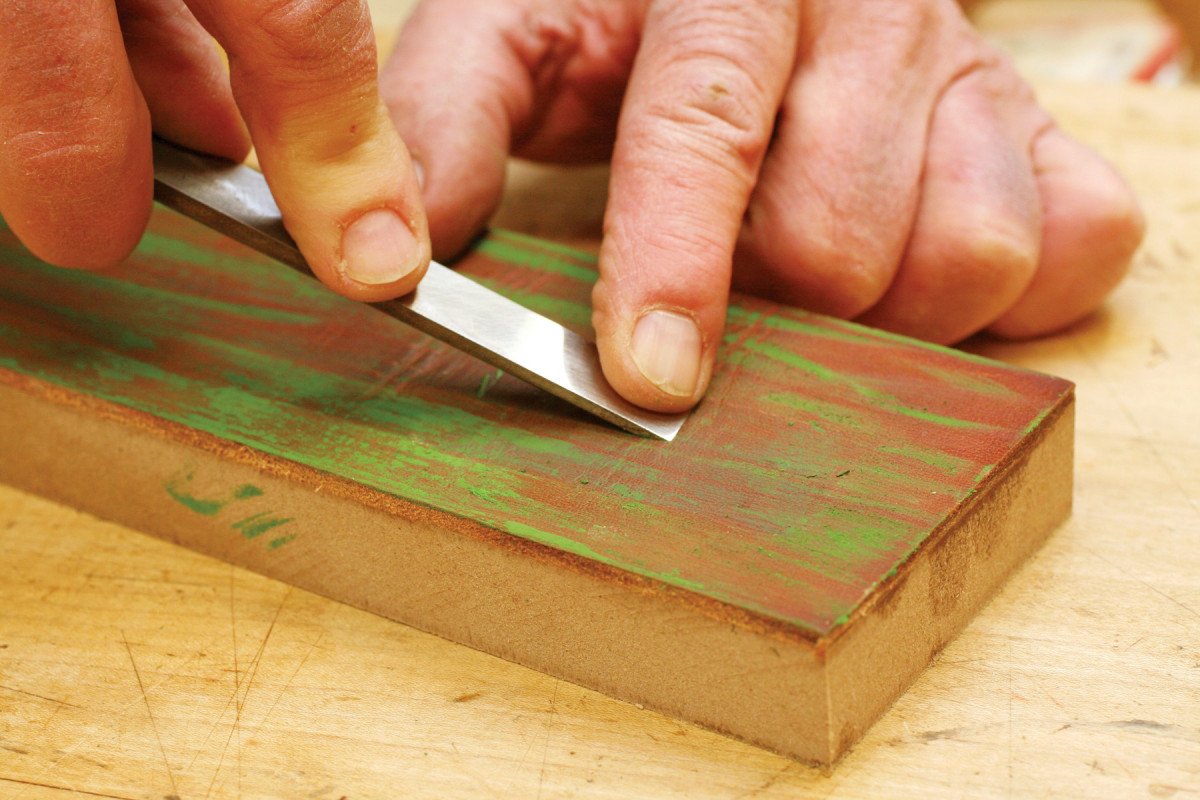
1. Paring end grain requires an extremely sharp edge. When my chisel feels a bit dull, I go right to the strop to restore its edge.
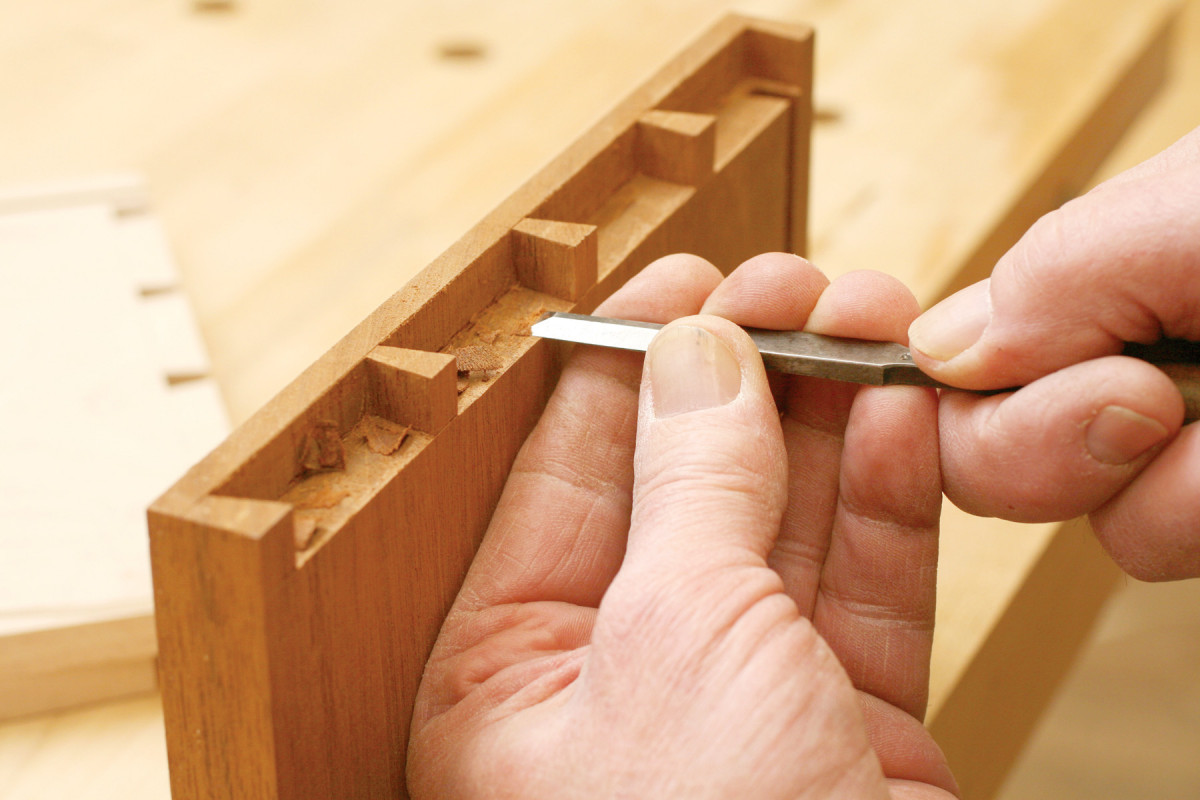
I use these chisels a lot when I’m cutting dovetails (Photo 1). Whenever a chisel feels the least bit dull, I renew its edge on the strop. This only takes a moment, but the results are dramatic. When I pare end grain, for example, I routinely get tissue-thin shavings, not dust. I use the strop quite often, so I store it right next to my chisels (Photo 2).
2. My strop lives on the wall next to my bench, always ready to go. Stropping a chisel takes less than a minute.
A strop is a very simple device. It’s just a thick piece of firm leather, about 2-3″ wide, glued to a block. The leather is charged with a thin layer of 0.5 micron honing compound. A strop will serve you for many years: The leather won’t wear out, and one stick of compound is probably all you’ll ever need to buy.
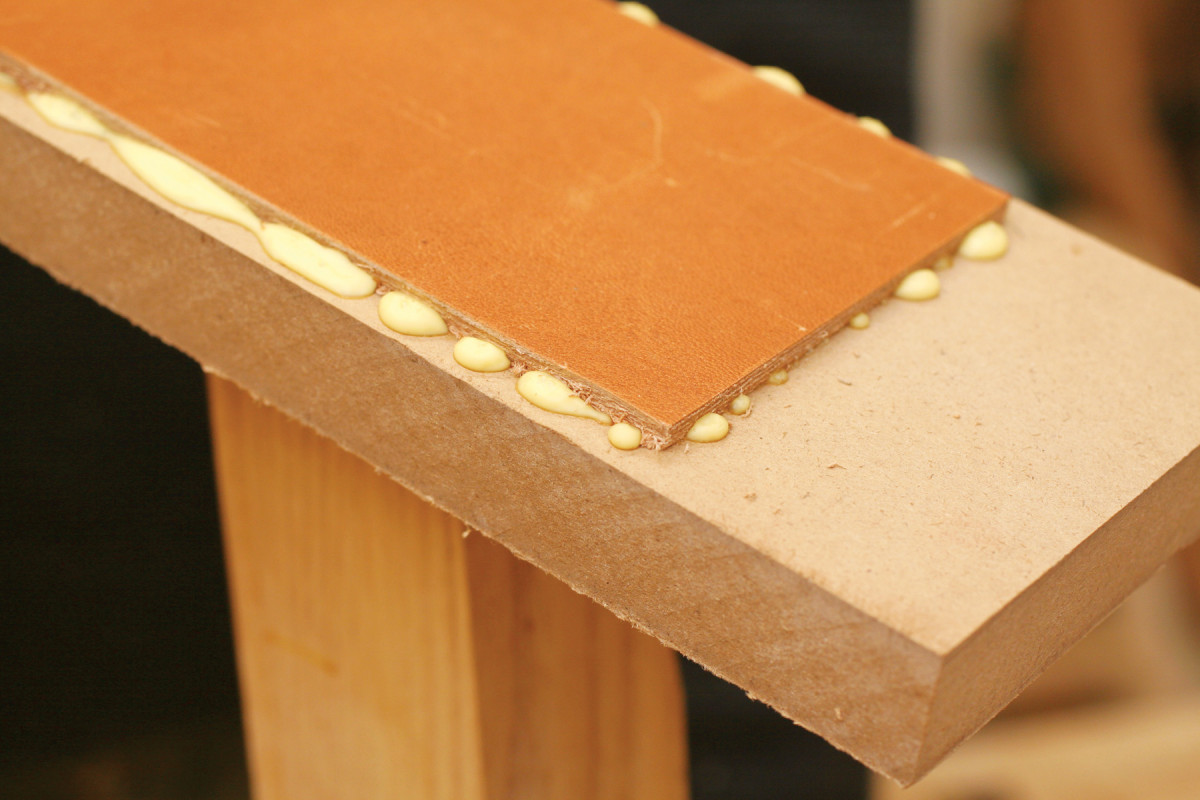
3. To make a strop, glue a thick, stiff piece of leather to a block. MDF makes an ideal block—it’s very flat and stable.
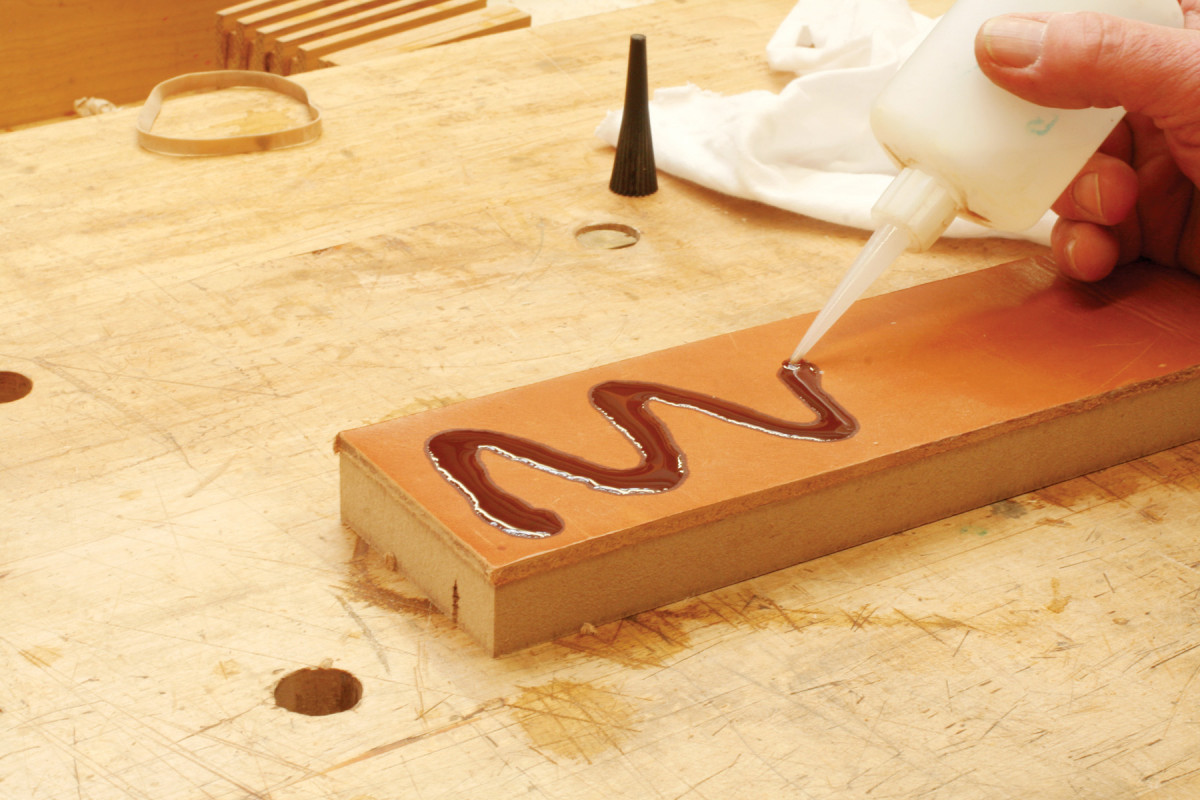
Here’s how to make one. Cut the leather about 10-12″ long, then cut a board slightly wider and longer than the leather. Spread a thin layer of yellow glue onto the board and place the leather on the board (Photo 3). Clamp a second board on top of the leather to keep it flat. After the glue dries, use your tablesaw to trim the block flush with the leather. Next, apply a thin coat of mineral oil to the leather (Photo 4) and rub on some honing compound (Photo 5). Your strop is ready to go.
4. Prepare the strop by applying a light coat of mineral oil. Work it into the leather—you only have to do this once.
Before I explain how to use the strop and describe what it does to an edge, let’s return to my set of paring chisels. They’re made of high-quality steel, so they can hold a thin edge. (A chisel with a low-angled bevel requires less effort to push when paring than one with a steep-angled bevel.)
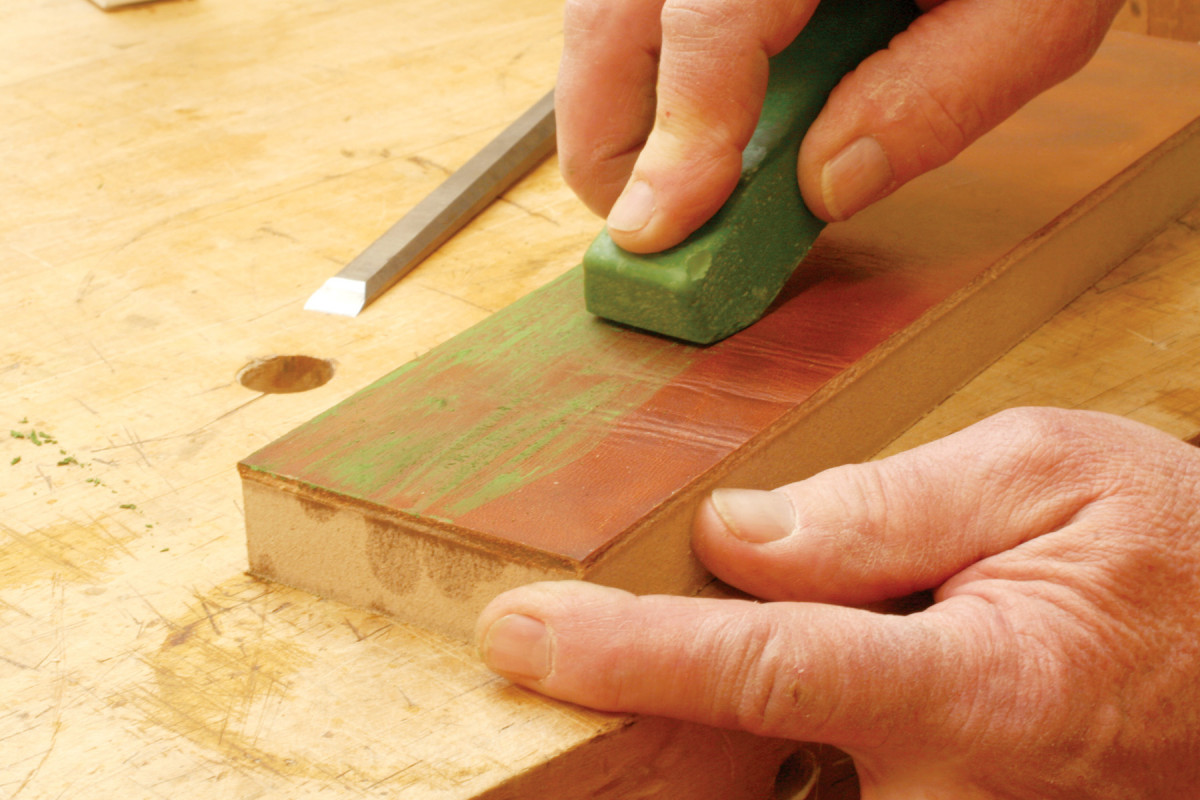
5. Rub honing compound onto the strop. The compound lasts a long time—I only recharge the strop every 3 months or so.
I grind these chisels at 20°, then hone on 500, 2000 and 8000 grit Shapton waterstones. I don’t use a guide. Instead, I rock the chisel on the stone until I feel both the bevel’s heel and toe contact the surface. Then I start honing, maintaining that angle, until I feel a wire edge on the back of the chisel. I remove the wire edge on the 8000 stone.
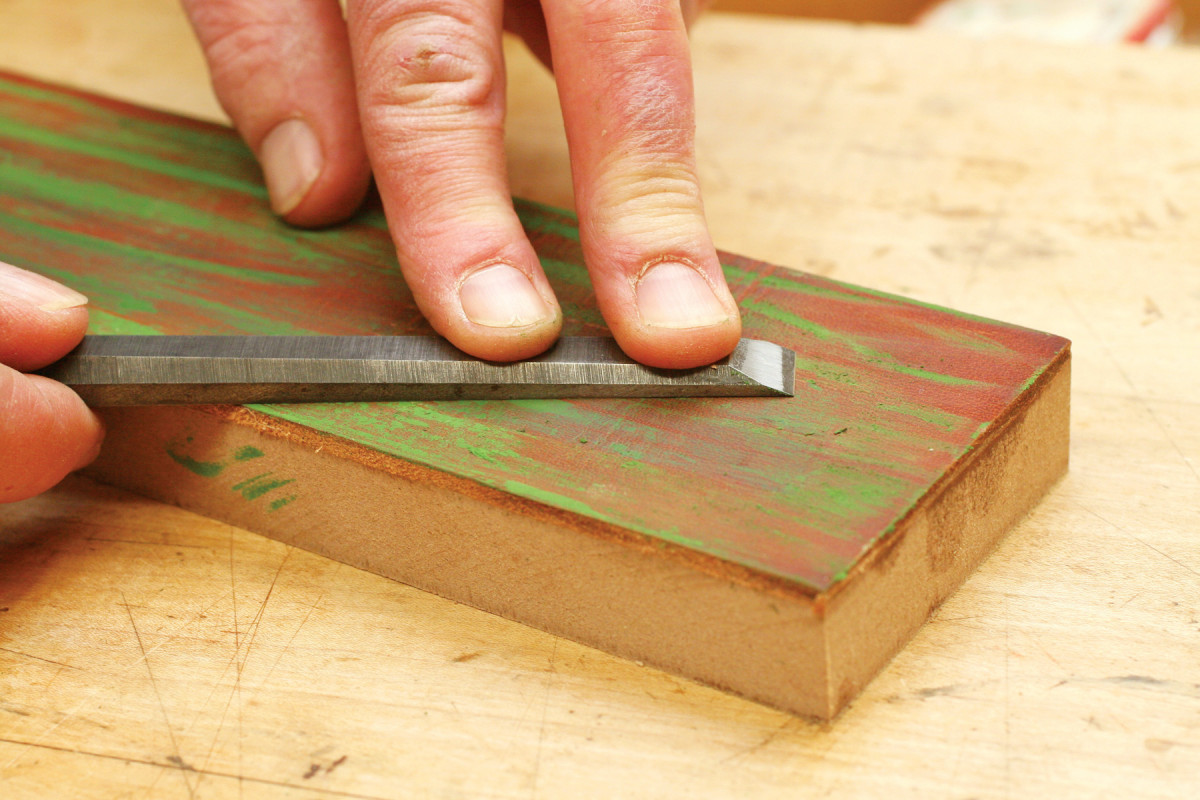
6. Strop the back of your chisel, as well as the bevel. Hold the chisel flat on the strop, so you don’t round the edge, and pull it back.
Next, I go to the strop. Again, I rock the chisel to find the bevel, press hard, then pull the chisel backwards down the strop. I repeat this process three or four times, making sure I maintain the bevel’s original angle. I also strop the chisel’s back (Photo 6).
What does the strop do? It polishes the edge—making it sharper; and slightly rounds over the edge—making it stronger. I’m convinced that a stropped edge lasts longer than an edge that’s only been honed. It’s amazing!
Here are some supplies and tools we find essential in our everyday work around the shop. We may receive a commission from sales referred by our links; however, we have carefully selected these products for their usefulness and quality.