We may receive a commission when you use our affiliate links. However, this does not impact our recommendations.
Like an oil change. Flattening my benchtop is routine maintenance. How do I know when it’s time? My handplanes stop giving me predictable and flat results. That usually tells me it’s time to true the top.
Is it necessary? And if so, what are the best techniques?
Like any tool or machine, a workbench requires accessories (jigs, fixtures, appliances) and occasional maintenance to actually do anything of great value. A bench without a bench hook is a dining table. A bench with a cupped work surface is an exercise in bewilderment and wasted effort.
There are a variety of ways to go about flattening a workbench top, including some that are patently nuts. But before I march down that list of your options, I ask: Does the top need to be flat?
Whenever I’m in an old barn, workshop or even an antique mall, I can’t resist poking around the guts of any old workbenches I find. When my wife and I take the kids on a hayride, I end up in the chicken house checking out the 18th-century wooden screws on a face vise. When we visit living history museums, the kids are chasing the animals, and I’m asking the guy dressed as a cooper if I can poke around the undercarriage of his bench.
I’ve found little evidence that these benches were flattened regularly. Many of them bear toolmarks that are deep and of varying ages. I’ve seen benches that are so worn from use that the edges look as round as a pillow. One bench I saw in Columbus, Ohio, was so worn away in one spot that its 3″-thick top was less than an inch thick.
And when I check the 19th- and early 20th-century books, there’s very little attention given to the workbench top. While there is detailed instruction on sharpening, tool maintenance and the act of building a bench, flattening its top isn’t often listed as routine shop maintenance. At most, they’ll note that the top should be flat.
There are several explanations for this:
1. Workbench flatness is overrated and a product of our modern obsession with granite surface plates and dial calipers.
2. Early woodworkers would use “planing trays” – a disposable workshop appliance that attached to the bench and allowed woodworkers to plane cabinet-scale parts at a variety of angles.
3. Or a flat workbench was so important to those who handplaned panels and furniture components that its flatness was a given.
I don’t have the answer, but I suspect that all three are true to some degree. If you’ve ever done any handwork on a bench that was cupped, bowed or twisted, then you know that it’s not a good way to work. The downward pressure from a handplane (particularly wooden-bodied planes) can bend your work into a low spot in the bench. When using long planes in particular, a low spot will prevent you from ever planing the board flat.
You can use small wooden wedges under your stock to support it and prevent it from bending into a low spot on your bench, but the problem is that you will have difficulty knowing when your board is flat. A workbench top that is fairly flat is also a fair way to gauge of the flatness of other boards.
Two Solutions for Tops
So my recommendation is that if you can wield a handplane (even just enough to be trouble), then you should either use a planing tray or strive to keep your top fairly flat. You can overdo this. It’s not necessary to flatten the top using methods that involve a machinist’s straightedge and feeler gauges. And I would ward you away from methods that use a router that runs on a carriage suspended over your bench. I’ve watched people do this, and it is a lot of trouble to build these devices.
I think there are two smart paths: Learn to use a jointer plane (flattening a workbench top is the best practice for this) or remove your benchtop and take it to a cabinetshop that has a wide-belt sander.
(Side note: Some workbench designs can be flattened using home woodworking machines. One such design has a benchtop that is made of two thick 10″-wide slabs with a 4″-wide tool tray screwed between them. Simply remove the screws and run each 10″-wide slab through your portable planer. Reassemble! Side, side note: I dislike tool trays, a.k.a. hamster beds.)
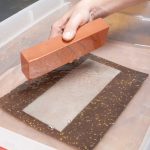
I can hear the workbench purists squirming from where I perch. Won’t sending a workbench top through a wide-belt sander embed it with grit that will mar the workpieces of future projects? Not in my experience. Once you dust off the top and put a finish on it, such as an oil/varnish blend, the grit becomes part of the finish.
Plus, even if there is a little #220-grit in my benchtop, that fine grit is a lot kinder to my workpieces than what else gets embedded in my bench during my normal work: bits of dried glue, dyes, pigments and occasional stray metal filings.
Flatten it With a Handplane
Because I don’t have a wide-belt sander, I prefer to use a handplane to do the job. Once you do this a couple times, you’ll find that it’s a 30-minute job – and a lot less lifting than carting a top across town. The first time I ever tried to flatten a benchtop with a handplane (years ago) I was 100 percent successful, and I just barely knew what I was doing.

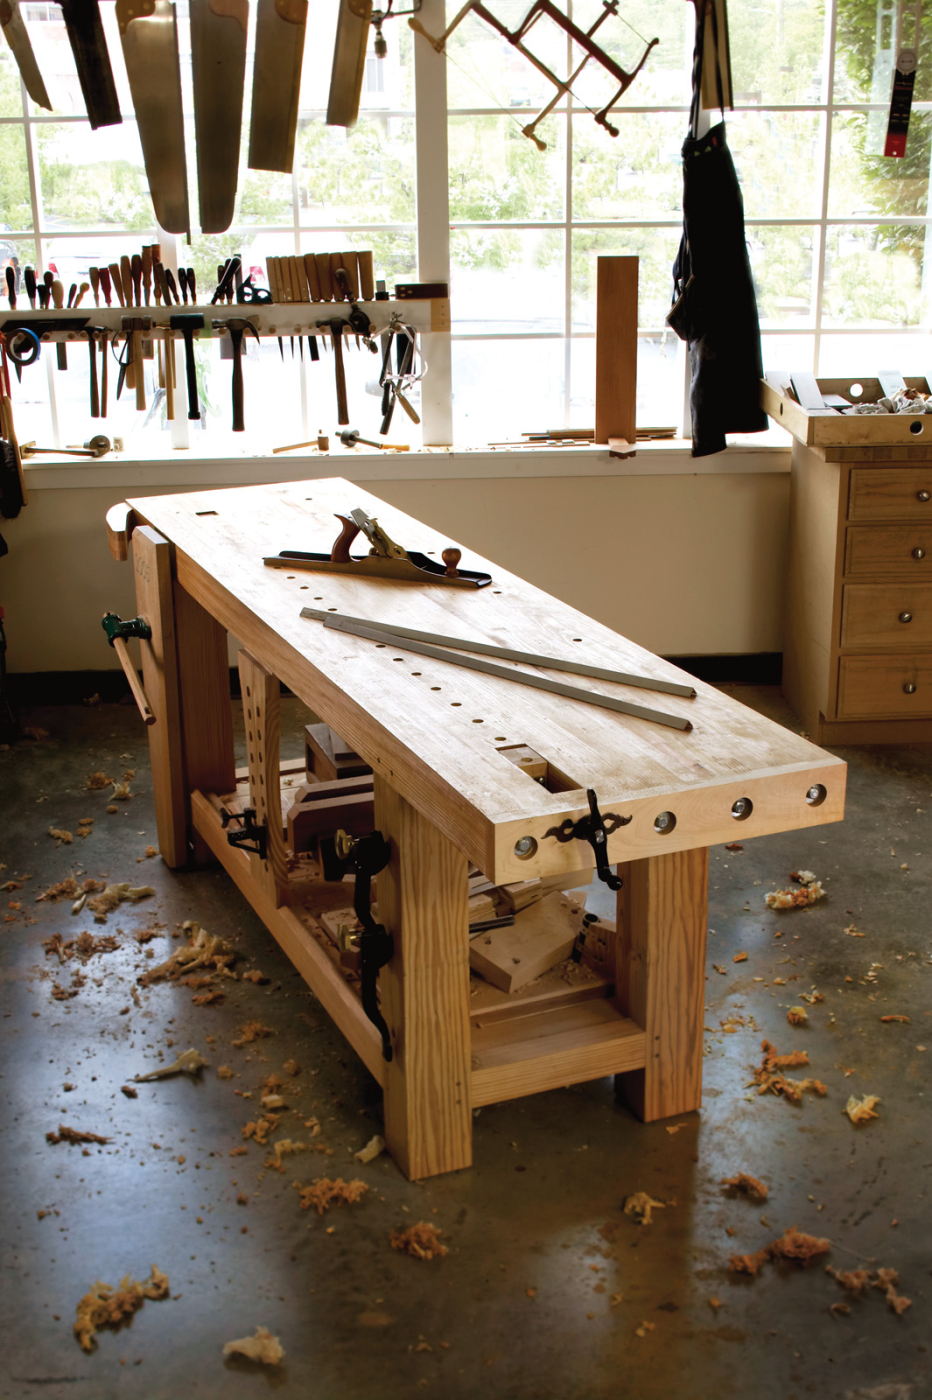
1. In the right light. Move your bench so that one end points to a window. This makes it easier to read your winding sticks as you look for gaps underneath them and for alignment across their lengths.

2. Look for warp. My winding sticks here are 36″-long aluminum angle. Place one winding stick at the far end of your bench and the other one about 24″ away. Sight across them both,
looking for high and low spots. Move the far winding stick to the
other end of the benchtop and repeat.
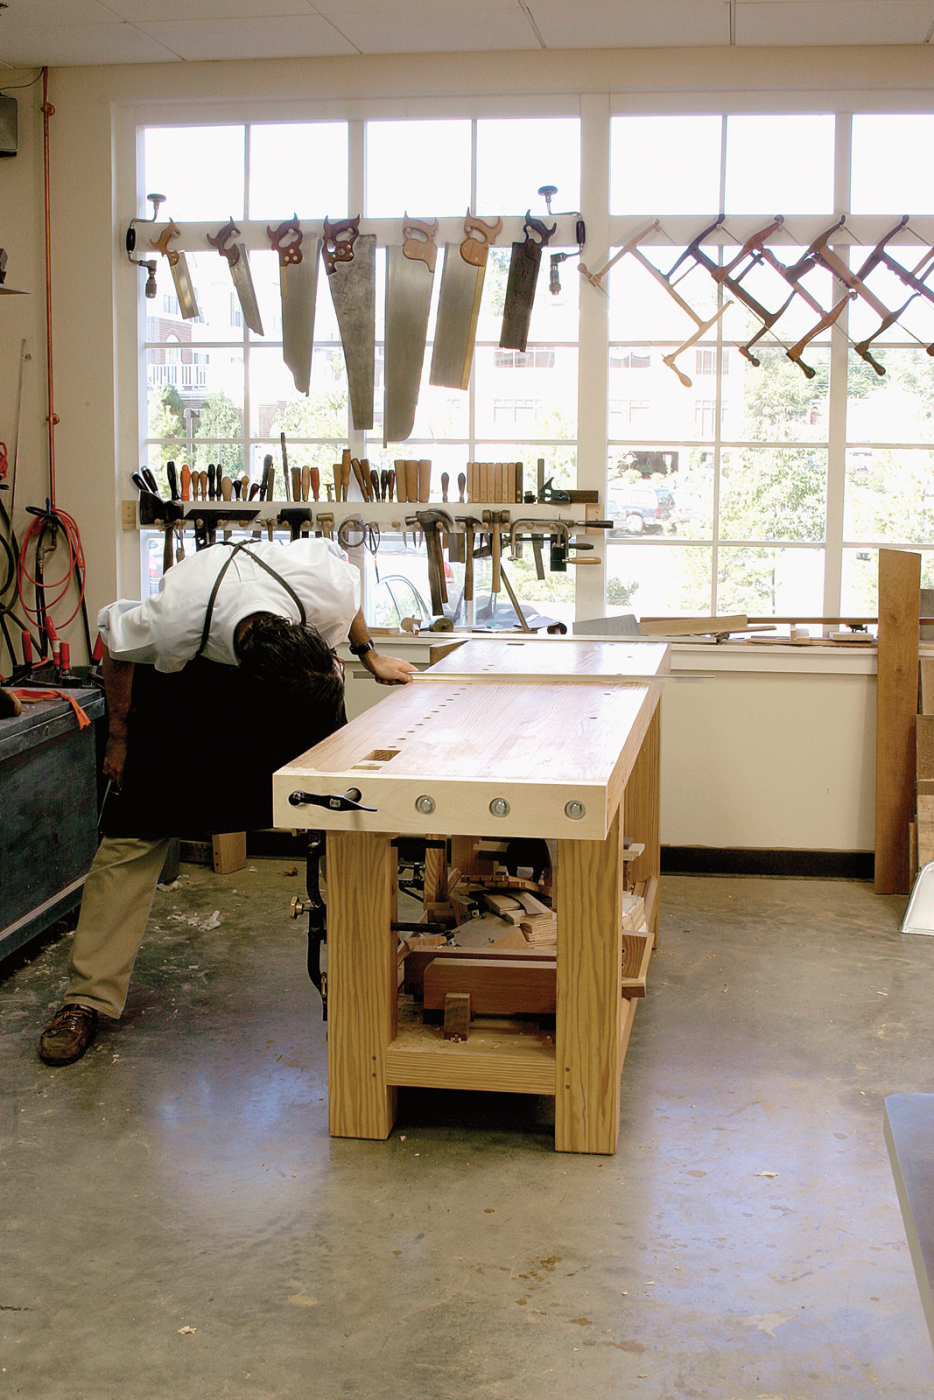
3. Cup or bow? Now that I know the geography of the top, I’ll drag one stick all along the top and watch the gap under the winding stick. This quick check confirms my suspicions about where the high spots are (and they are usually along the long edges of the top).
Flattening a benchtop is like flattening a board on one face. First you remove the high spots. These high spots could be at the corners or there could be a hump all along the middle (though I have never had one of these in my benchtop). Find the high spots using two winding sticks – parallel lengths of hardwood or aluminum angle that are longer than your bench is wide.
Mark any high spots in chalk or pencil and work them down with a bit of spirited planing using a jack, fore or jointer plane set to take an aggressive cut and equipped with a cambered iron. Get things close. Check your results with your winding sticks.
Fetch your jointer plane and work the entire top using diagonal strokes that overlap. Repeat that process by going diagonally back the other way across the top. After each pass, your shavings will become more and more regular. When your shavings are full length, your top is flat (enough). Now plane the entire top with the grain and use slightly overlapping strokes. It should take two or three passes to produce regular full-length shavings. You are finished. So finish it with some oil/varnish blend and get back to work.
Need details? Visuals? I’ve prepared a pictorial essay of the process that should help you get started. My digital camera codes each photo with the time it was taken. The first photo was snapped at 10:46 a.m. By 11:44 a.m. I was done. And remember: I’d stopped to take photos about the process, and each photo had to be illuminated with our photographic lights. I think the photography took longer than the actual work.

4. Stop spelching. Before I get down to business, I’ll cut a small chamfer (1⁄16″ to 1⁄8″) on the long edges of the top. This will prevent the grain from blowing out (the British call this spelching) when I plane cross-grain.

5. In my cups. In general, my tops become cupped in use. So I remove the two high hills by working directly across the grain. In this instance the cup is slight, so I started with a jointer plane. If the cup is severe, start with a jack plane so you can take a thicker shaving

6. Across and down. Every stroke across the top should overlap the stroke before. The shavings will give up easily (though I am told that the iron will dull more quickly). Work from one end of the top to the other. Then back down. Repeat until the plane’s cutter can touch the hollow in the middle.

7. Diagonal makes a difference. Work across the top diagonally now, overlapping your strokes as before. Take care at the starting corner and stopping corner – your plane’s sole won’t have much support. You can proceed with speed during the middle strokes.

8. And the other way. Switch directions and work diagonally the other way across the top. Repeat these two types of passes until you can make shavings at every point in a pass.

9. Finish planing. Now reduce your depth of cut and use your jointer plane along the grain of the top. Overlap your stokes and repeat your passes until you are getting full-length shavings.
10. For the obsessed. You don’t have to smooth-plane your benchtop, but it’s good practice with a large laminated surface. You can begin smooth-planing with the grain; there is no need for cross-grain or diagonal strokes.

11. Cross-grain shavings. When working across the grain, this is what your shavings should look like. Take the heaviest cut you can manage and keep your handplane under control.

12. Diagonal shavings. Full-length shavings taken at 45° will look like thick ribbon. Shoot for a thickness of .005″, or perhaps a bit more.

13. For the obsessed II. If you smooth-plane your benchtop, set your tool to take a shaving that is .002″ or less. You can take even more if your top is behaving and it is a mild wood.

14. Wipe on, wipe off. Rag on two coats of an oil/varnish blend. When everything is dry, a coat of wax will help your top resist glue, but it will make it slippery (a bad thing – hand-tool users don’t want their stock sliding everywhere).
Here are some supplies and tools we find essential in our everyday work around the shop. We may receive a commission from sales referred by our links; however, we have carefully selected these products for their usefulness and quality.