


We may receive a commission when you use our affiliate links. However, this does not impact our recommendations.
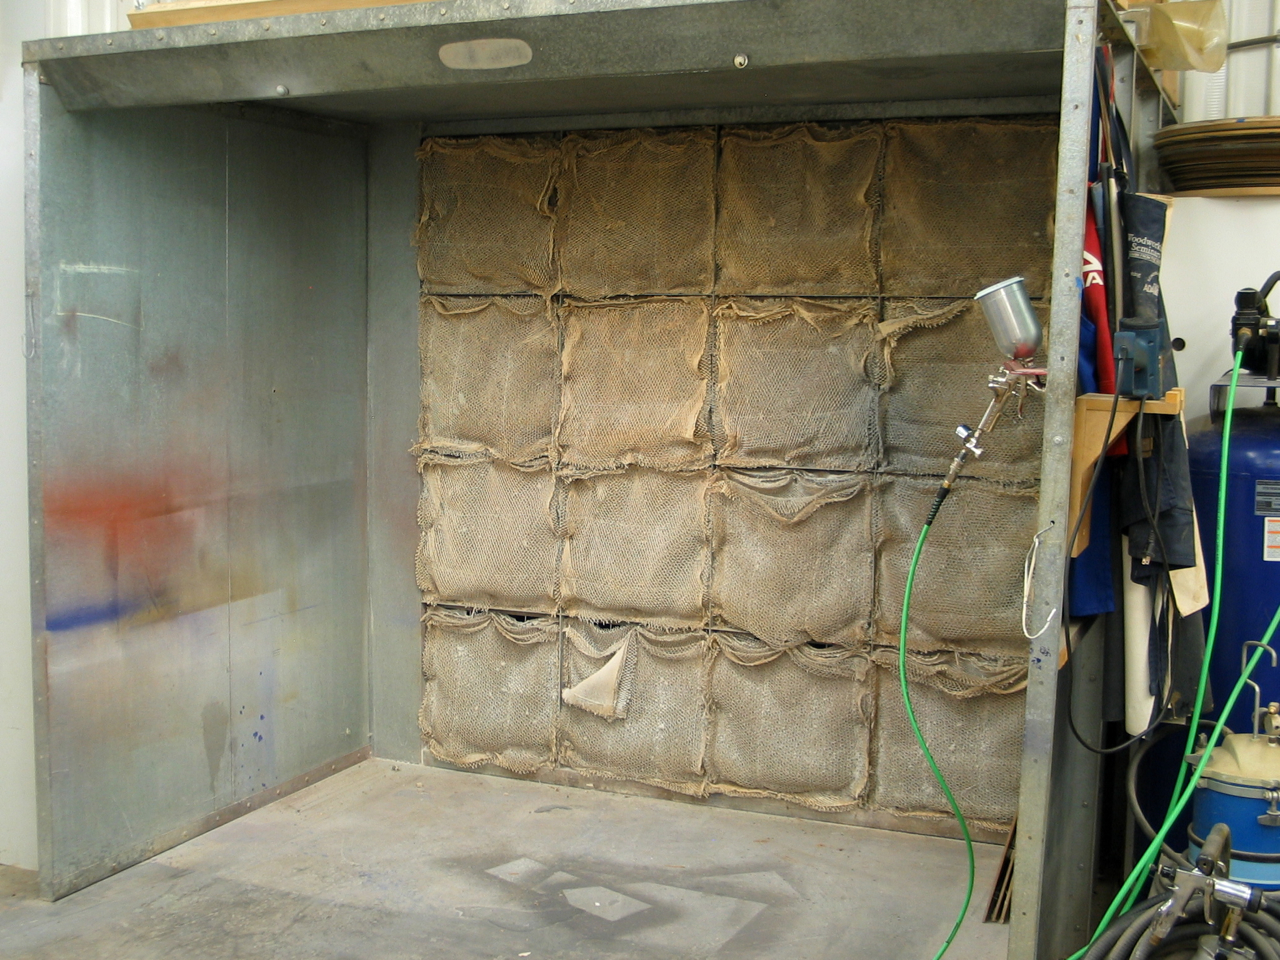
Here’s what a professional spray booth looks like.
In the December, 2001 issue of Popular Woodworking (issue # 125) I wrote about how to construct a simple but safe home spray booth. This article was reproduced in my book, “Flexner on Finishing.”
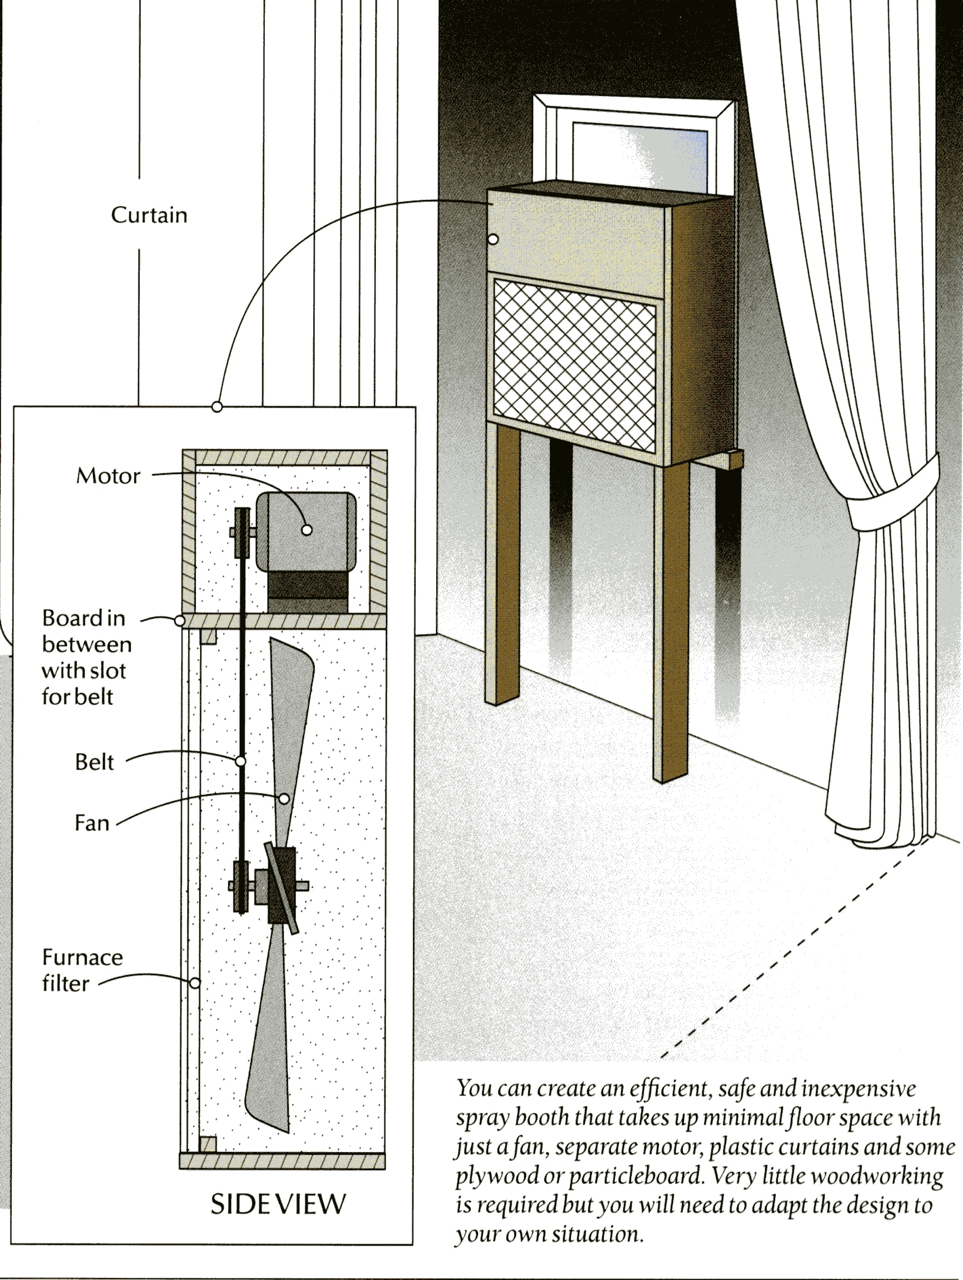
This is the drawing of a home spray booth from my article.
But what if you have more space, do a lot of finishing and would like to have something more like what professionals use but still don’t want to devote that much space? This sounds pretty much like my situation when I moved my shop home from the 3,000 sq. ft. building I had been renting.
The requirements for a spray booth are as follows:
- Steel construction for fire safety.
- Filters to catch and hold overspray before it gets to the fan.
- A chamber, called a plenum, for collecting the air to be exhausted. This exhaust chamber makes it possible for air to be drawn uniformly through a much larger square footage of filters than the simple diameter of the fan.
- A large enough fan to create an airflow of 100 feet-or-more per minute, which is enough to pull “bounce-back” overspray away from the object being sprayed. The fan and motor are also “explosion proof” to eliminate sparks that might cause a fire or explosion from contact with solvent vapors.
- Sidewalls and a ceiling to create a work chamber or “tunnel” for directing the flow of air through the filters.
- Ceiling and sometimes side lighting so the operator can see a reflection off the surface he or she is spraying. (Working with a reflected light source is the only way an operator can know if the finish is being applied wet and without orange peel, runs, sags or other problems.)
I want to highlight the next-to-last requirement because this is where I was able to save space by using curtains instead of steel walls. The curtains, which come from www.goffscurtainwalls.com are heavy-duty welders curtains. By pulling the curtains back when I’m not spraying, I open up a big space for doing other things.
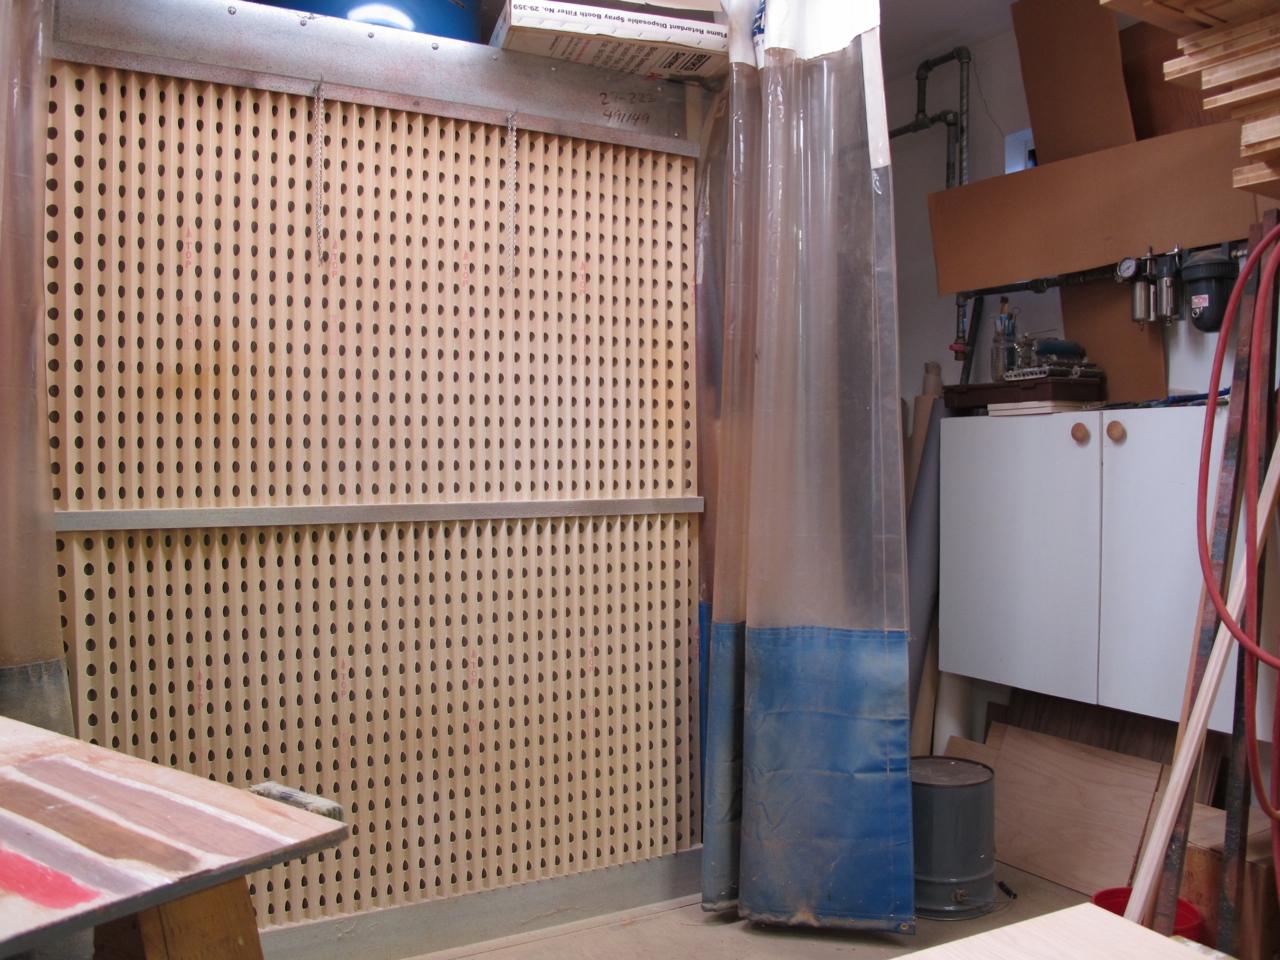
My spray booth is similar to the professional one pictured above except that I use curtains for the sides instead of steel walls.

By pulling the curtains back, I can use the space as a photo studio.
In my case, because I do a lot of photography, I’m able to use this space to double as a photo studio.

 Want to learn more about finishing from Bob Flexner?
Check out his book “Flexner on Finishing,” at shopwoodworking.com
Here are some supplies and tools we find essential in our everyday work around the shop. We may receive a commission from sales referred by our links; however, we have carefully selected these products for their usefulness and quality.


This is just the sort of booth I need to build. Is there more info in one of your books or a magazine? For example what size motor did you use, and what is that material at the back of the booth with all the holes in it?