We may receive a commission when you use our affiliate links. However, this does not impact our recommendations.
Click here for part 2
At the beginning of our Live Edge class last summer, one of my students, Lisa, showed me the lumber that she milled a few years earlier and decided to bring it over to be used in her project. These were one massive slab of maple and two thick beams milled from a fallen tree. Lisa milled the wood from a salvaged log from her brother’s yard (see detailed description below) and wanted to use the wood to build a desk.
By now, the greenwood timber had already dried out naturally and was stable enough to be processed. In my book Working Reclaimed Wood I talk at length about the potential of abandoned logs, storm-felled trees and backyard diseased trees as good sources for making furniture, turned and carved objects, and sculptural work.
These non-commercial salvaged logs (and limbs) can be of great use to us. Instead of letting them decompose in the woodland behind our homes, be dumped into the landfill, or simply turned into mulch, we can reclaim them and incorporate them into our projects. Logs and billets can be milled with a chainsaw or portable mill, then left to dry in a solar kiln, in a shed, or in a dry basement.
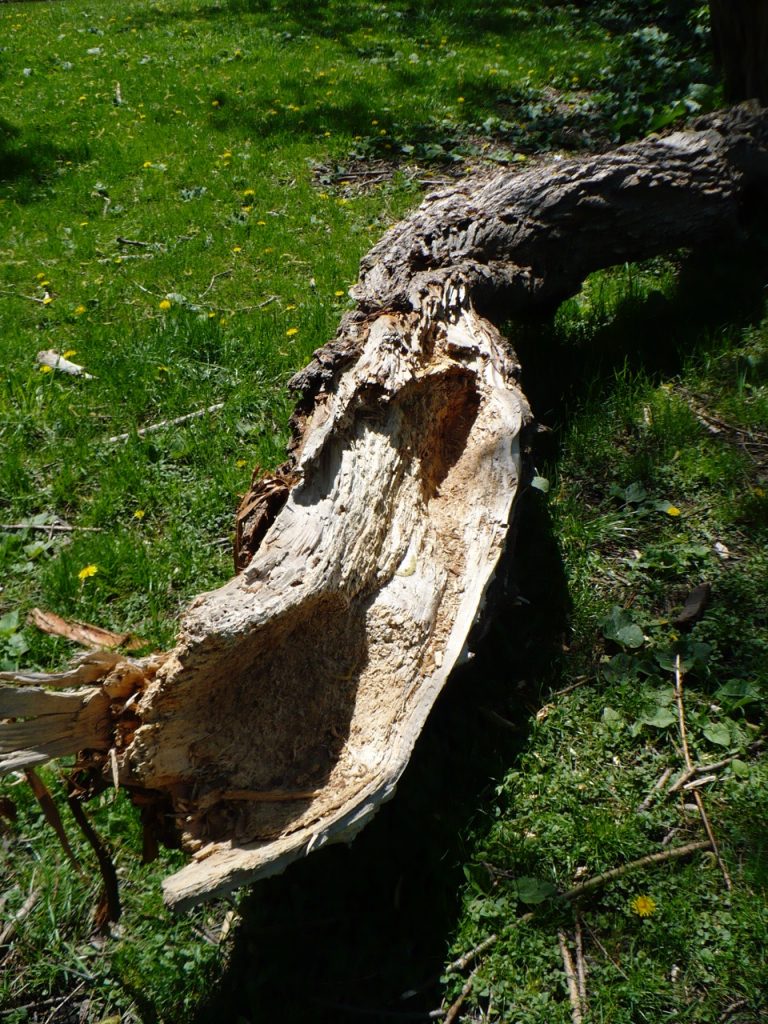
A storm-felled limb.
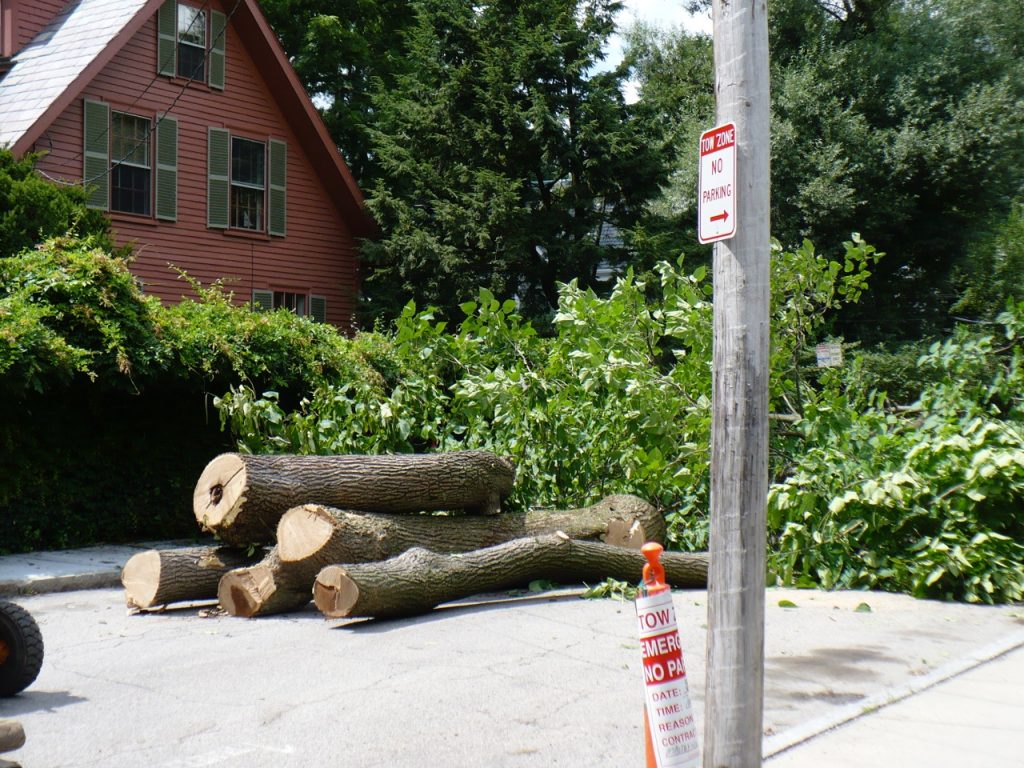
Backyard trees are often cut down into short segments. In this case, an old and diseased chestnut tree from a neighbor’s yard was gradually cut down, one trunk segment after the other.
In the picture: Some backyard logs waiting for their turn.
Here are a few words from Lisa about the fascinating journey her timber gone through:
“The tree that yielded the timber for my desk grew at my brother’s house in Oceanport, New Jersey. He had to have it cut down and knew that I was interested in live edge work. He kept the 6-foot-long section that was 20 + inches in diameter behind some bushes in his yard, and at one point he told me it was floating in water. After about a year he helped me get it on my truck with a loader. We tied it down and I drove it to a mill in central Jersey. Because I didn’t know what I was going to make, we decided on several slabs of different widths, from one inch to 3 to 4 inches, and a few 2 x 4’s, and a 4 x 4. I brought every bit if it home.
The drying process took some time. First I stacked it flat with stickers on a cement floor in an unheated pole barn. Several of the boards started growing mold. I had to unstack outside under an eve, and used plain vinegar to kill the mold, wiped them down and let them dry outside for a few days. Then I moved them all to a small wooden building with some sun and for two years I kept my eye on them.”
When Lisa showed me the massive slab I knew that it’s substantial thickness would allow it to support the joinery technique that we talked about. The idea was to form square tenons at the top of each leg and then fit them into excavated mortises in the slab. We planned on using the two hefty beams to make the four legs but we immediately faced a design challenge. Each one of them was a few inches short of the total length of two legs placed head to toe. The reality is that when working with reclaimed wood you sometimes needs to contend with dimensions that are too short or too thin, and as a result you have to think creatively about how to deal with these constraints.
Obviously, there are many times when a reclaimed wood warehouse is able to offer you colossal beams and timber that the commercial lumber yard would not even dream of. But for many projects that involve reclaimed material salvaged from the side of the road, random backyards or even demolished buildings, the dimensions of your acquired “building blocks” are often smaller than the nominal dimension of what you can get in a lumberyard.
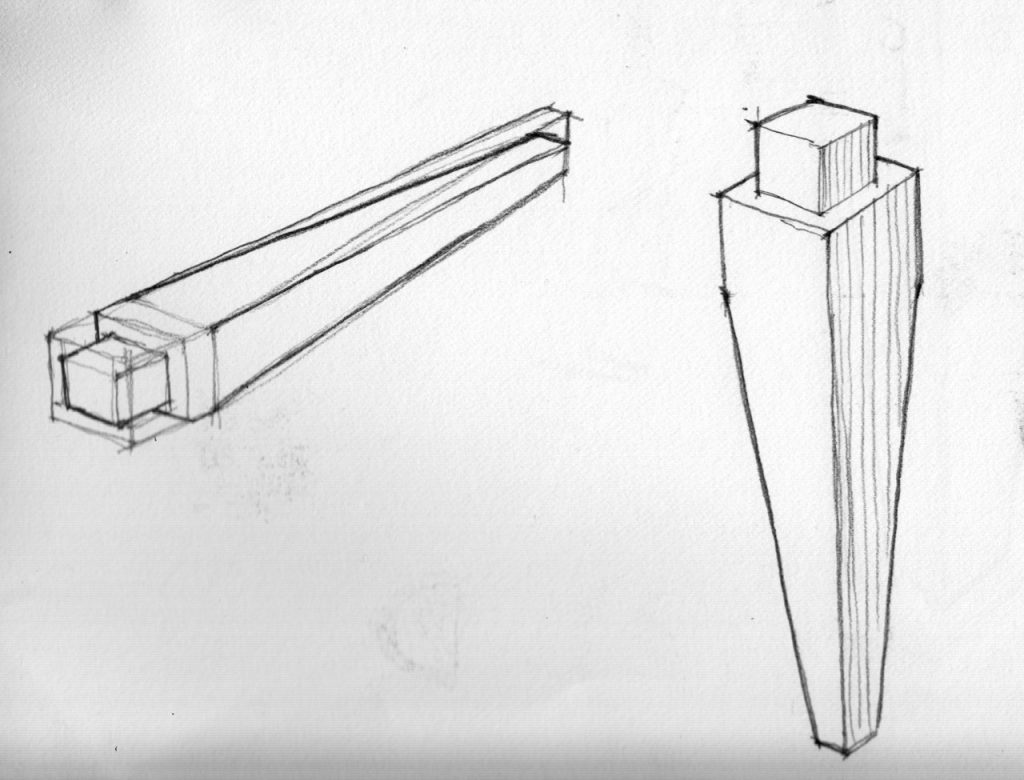
After weighing our options, we came up with a way to circumvent our lumber limitations. Here’s what we did: since our design called for tapered legs my solution was to separate the not-long-enough beam into two tapered sub blanks that overlapped each other, thus allowing us to gain back the missing length.
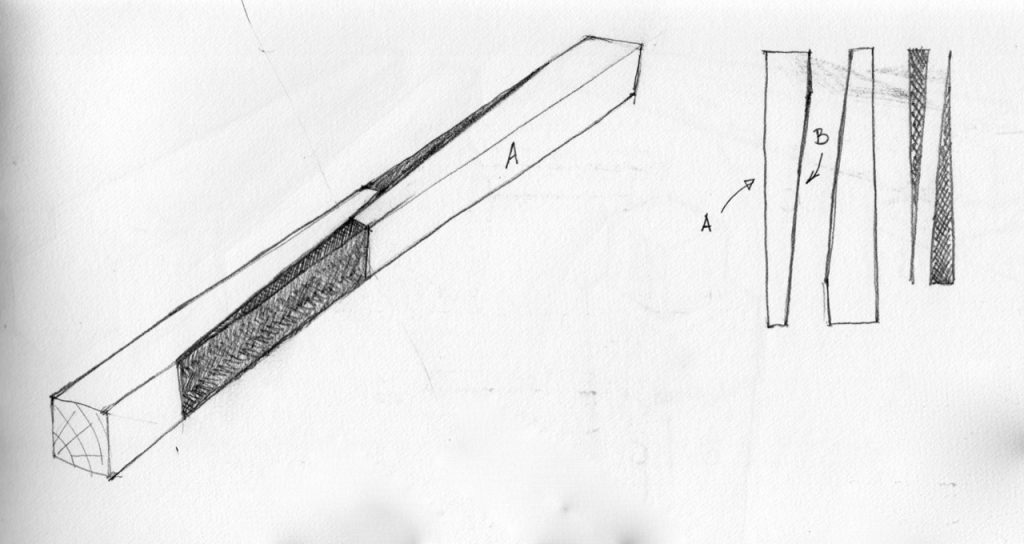
Separating the not-long-enough beam in half along the intended taper line allowed us to gain a few extra inches for each of the legs. The first taper is denoted with the letter (B).
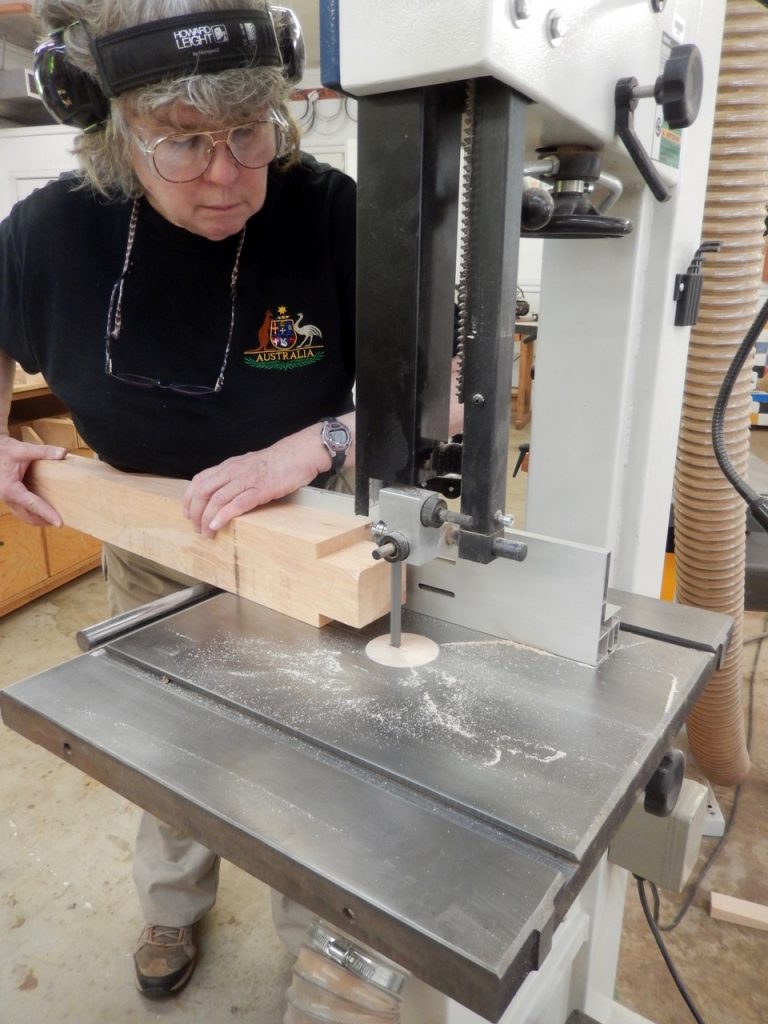
Lisa used a bandsaw to separate the two tapered sub blanks from the beam. Next she shaped four tenons at the top of each leg blank. While most of the tenon shaping was done on the bandsaw, she did square off the shoulders of the tenons on the table saw.
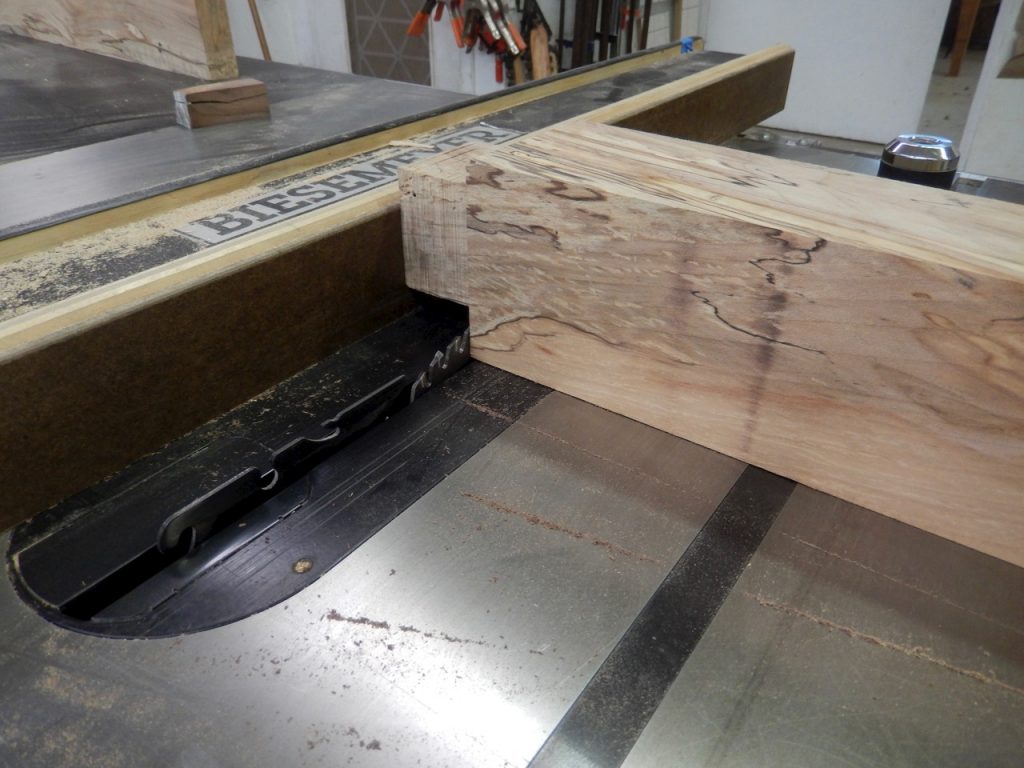
Using the bandsaw, Lisa sawed most of the tenon’s shoulders.
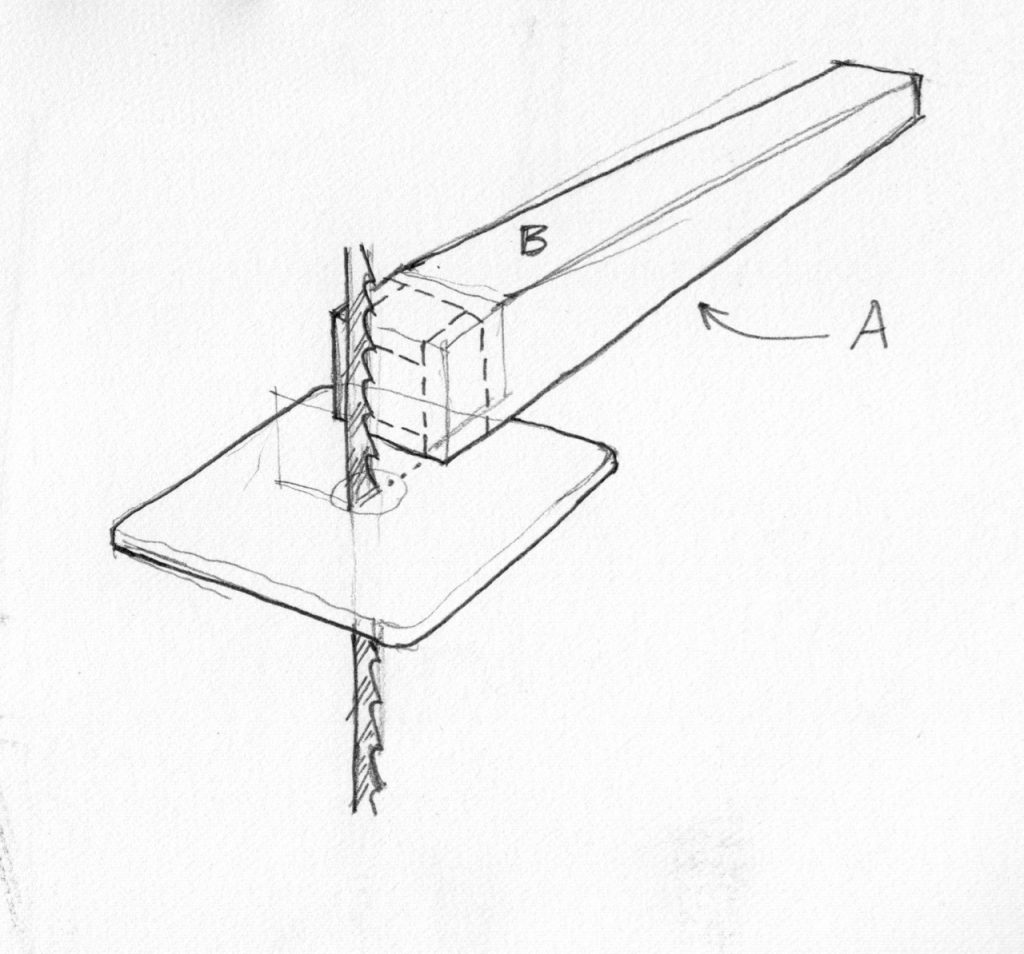
By relying on the table saw’s fence as a reference surface to heal the top of the tenon against, Lisa fed, then rotated and fed again, the shoulders of the tenons to the saw blade. Using the miter gauge set at 90 degrees she pushed the three right angle facets of each leg across the blade.
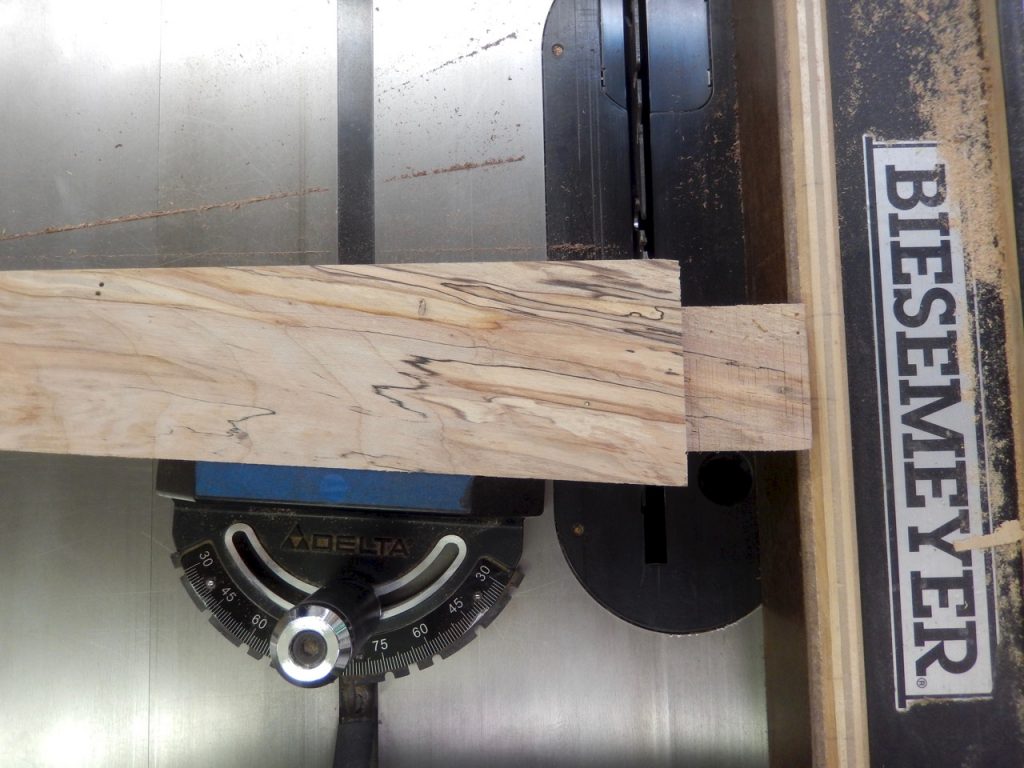
Before she was ready to trim the fourth tenon shoulder she adjusted the miter gauge to match the taper angle.
After the tenons on the four legs were done she returned the legs to the bandsaw to cut a second taper on each one of them. By now the legs were tenoned and tapered.
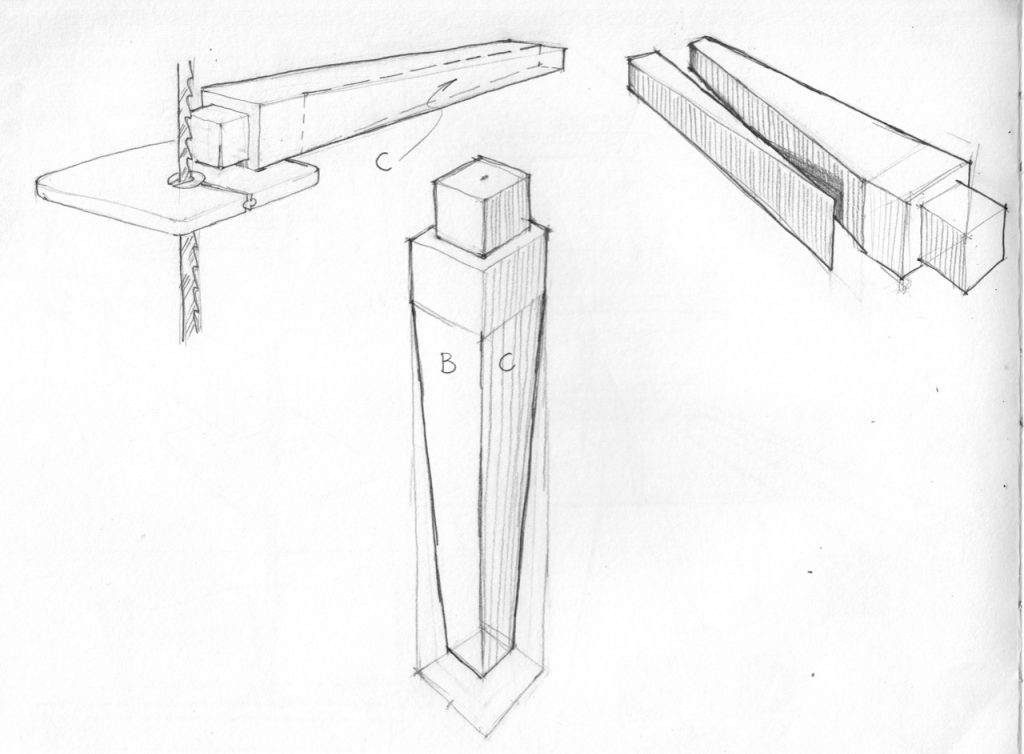
After she completed forming all the tenons and trimming their shoulders on the table saw, Lisa returned to the bandsaw and ripped the remaining taper (C).
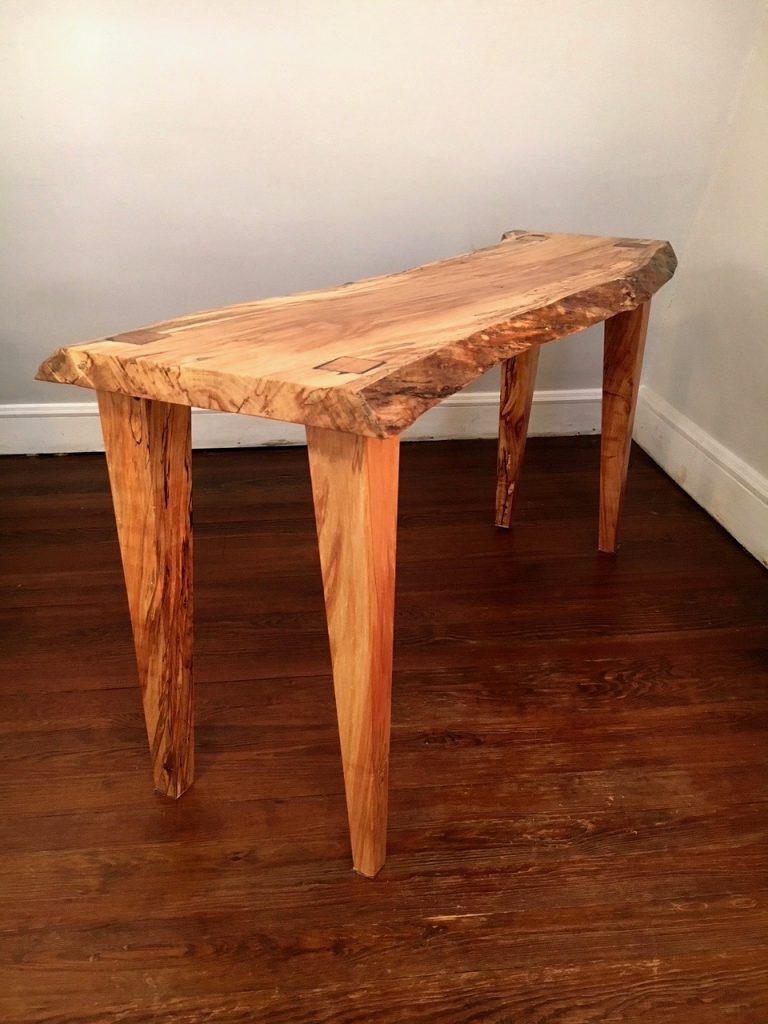
The finished legs.
Next time I will show how Lisa made the mortises and finished the table.
Here are some supplies and tools we find essential in our everyday work around the shop. We may receive a commission from sales referred by our links; however, we have carefully selected these products for their usefulness and quality.