We may receive a commission when you use our affiliate links. However, this does not impact our recommendations.
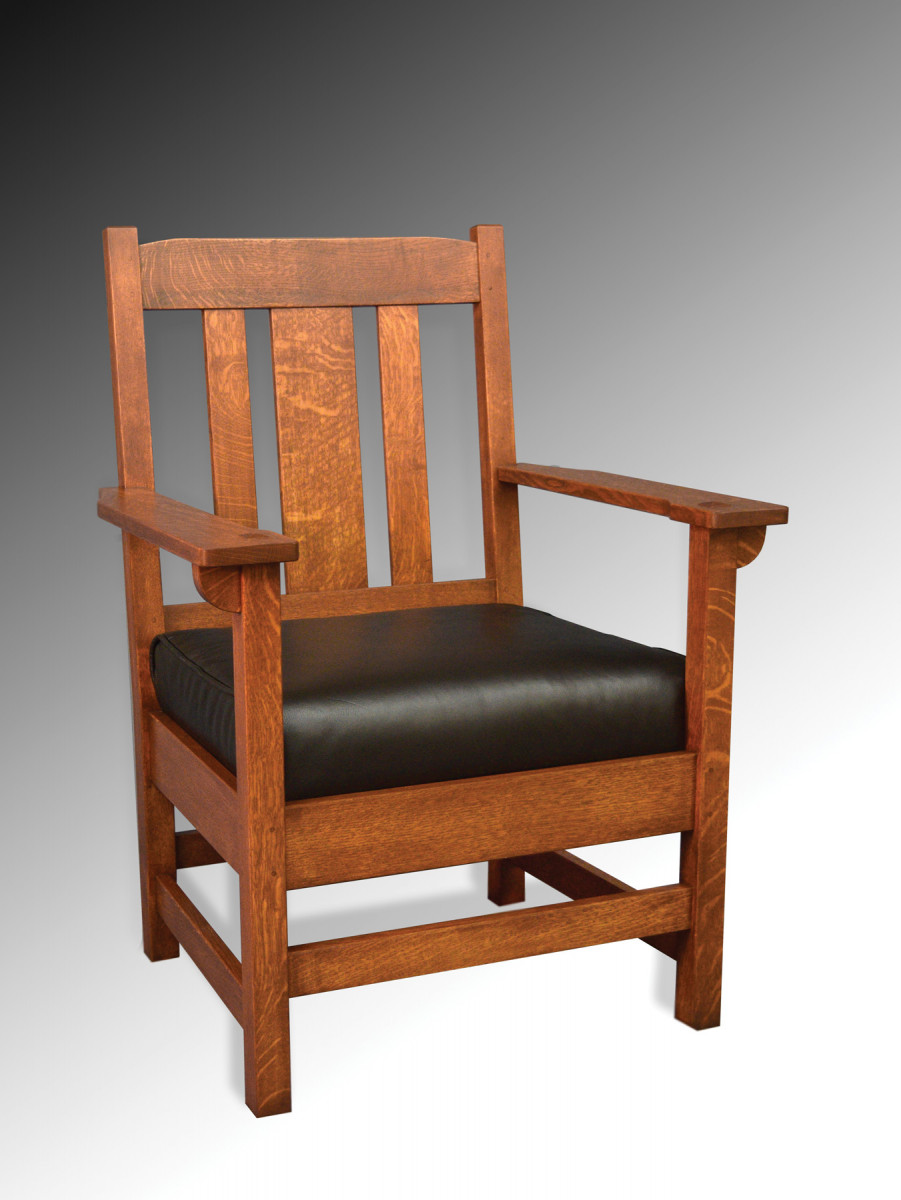
Build this timeless chair with modern methods.
When I was 17 years old, my family had an old craftsman style armchair that we’d inherited years earlier. It was an antique chair with solid bones but badly in need of refinishing. It had all the right details, from the through tenons in the armrests to the dark finish and leather seat. I spent a week stripping the finish and carefully sanding that chair down to bare wood. Alas, as teenagers will do, I moved on to other interests and never finished the project. But I never forgot about that chair.
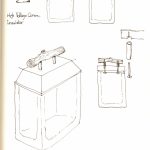
A Simple Template
 Wanting to recreate a similar armchair, I rummaged through my lumber stash for some 8/4 white oak. I was getting low on thick stock, but I found just enough for the four legs and backrest rails. The front legs are straight and square, but the rear legs angle backward for comfort, and require a template. The template is made from a piece of 3/4” MDF 42″ long x 41/2” wide. Lay out the leg shape on the MDF and cut out the template. The angled front of the leg template can be cut with a tapering sled at the table saw. The back of the template can be started with the table saw, and finished at the band saw. Sand the template to final shape and your leg template is complete.
 The legs are roughed out at the band saw then pattern routed to final shape. The template is slightly longer than the leg part to safely guide the cut. You won’t be routing any end grain here, which is a tricky proposition I like to avoid. Before removing the leg from the template, mark the cut lines at the top and bottom. Then trim the legs to final length and head to the mortise.
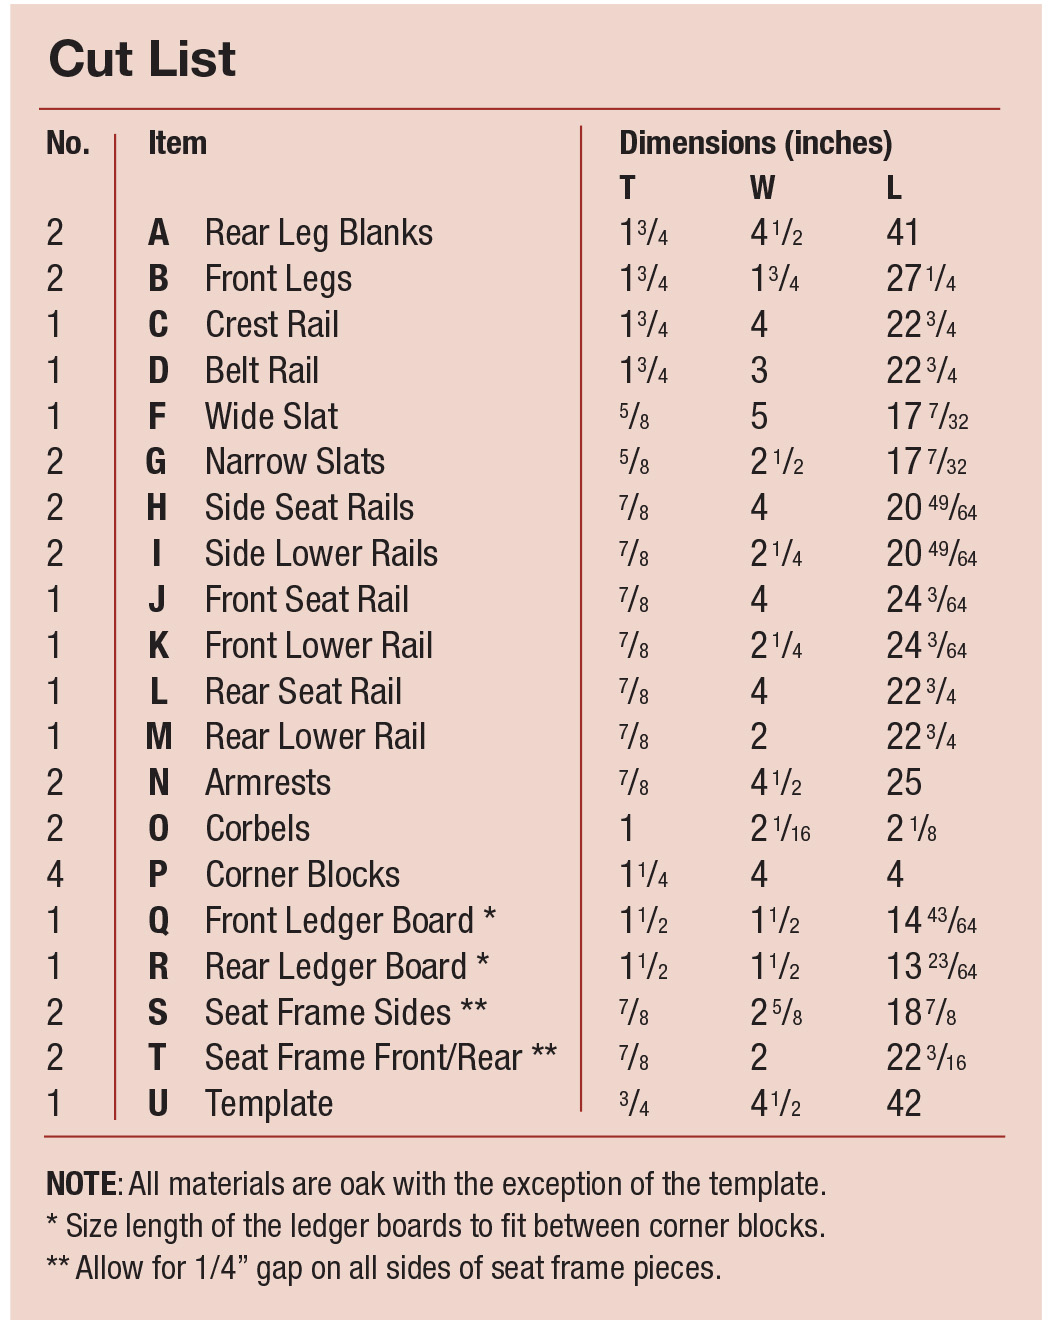
Limbert Side Chest Cut List
 Mortising
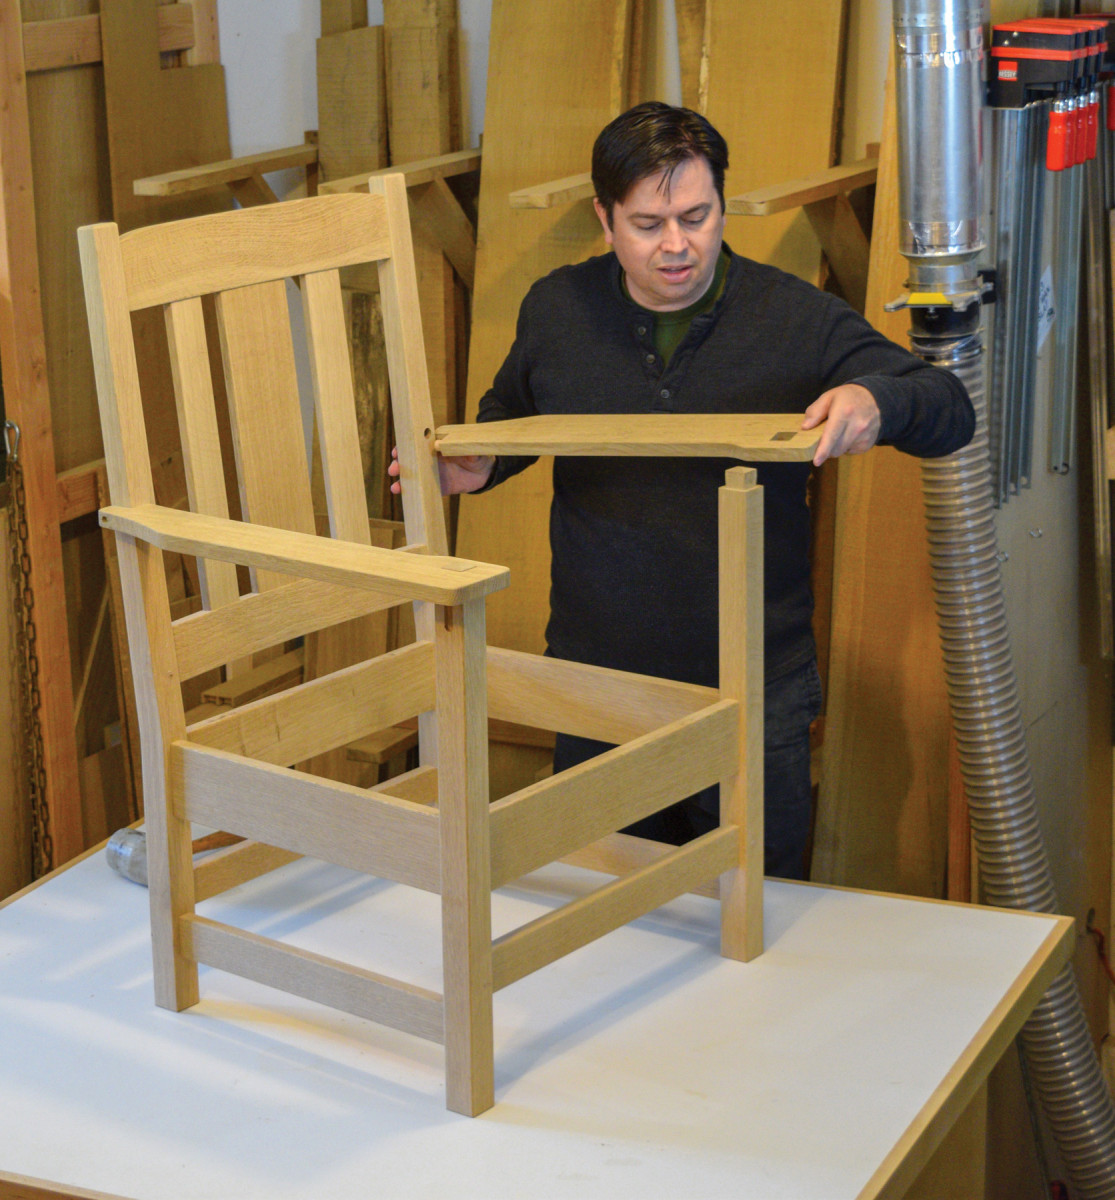
1. The signature through tenons and 5/8″ dowels provide aesthetically pleasing strength to the arms.
This chair, inspired by an uncatalogued Charles Limbert design, calls for slightly angled side rails, but we’ll address that when it comes time to cut the tenons. There are no angles to contend with since the mortises are all straight and square. Study the materials list carefully, as the lower rails aren’t all the same dimensions. The rear lower rail is 2″ wide, while the others are 2 1/4” wide.
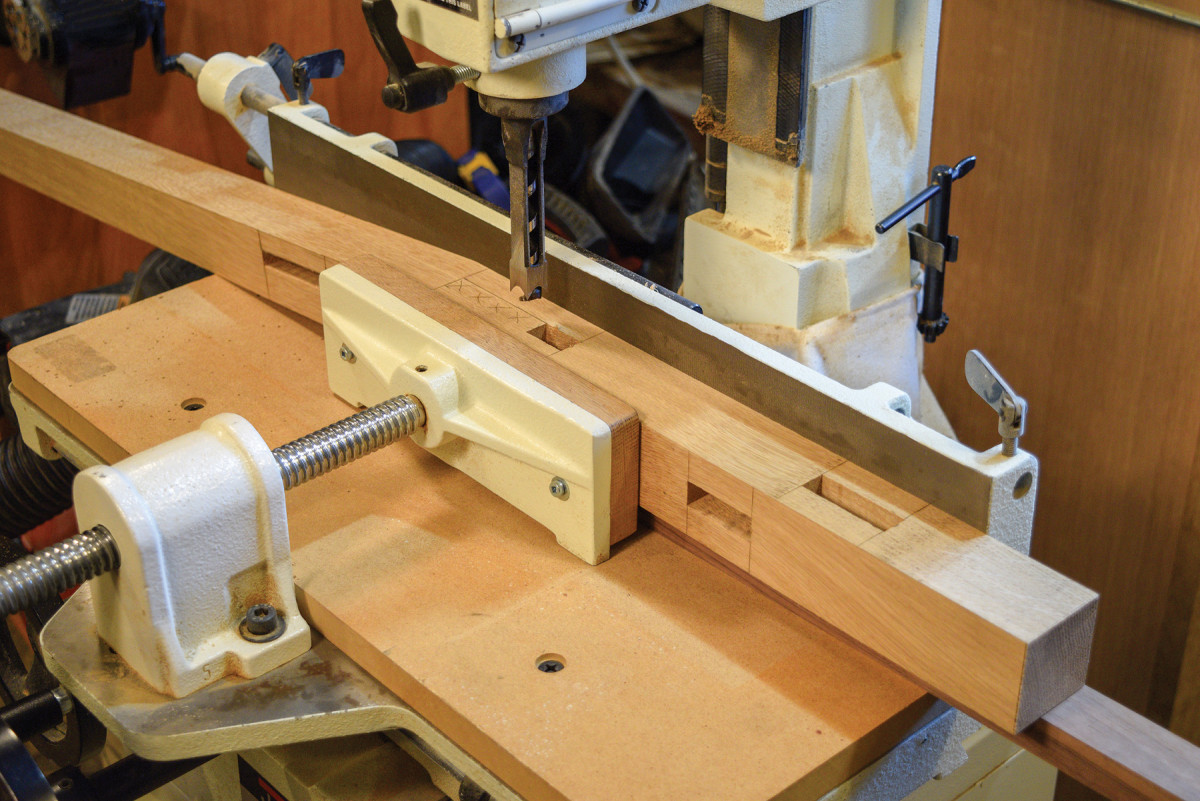
2. For consistency, reference the outside edge of each leg against the mortise fence. The angled rear legs are elevated on a scrap to keep the mortises running straight and true.
Lay out and cut 1/2“-wide mortises for the seat rails and lower rails. All of the lower framework tenons feature 1/4” shoulders. Next switch to a 3/8“-hollow mortising chisel, and cut the mortises for the crest rail and belt rail. Cut these mortises referencing the front side of the rear legs. Just like the 1/2” mortises, these are 1 1/8” deep.
Angled Tenons
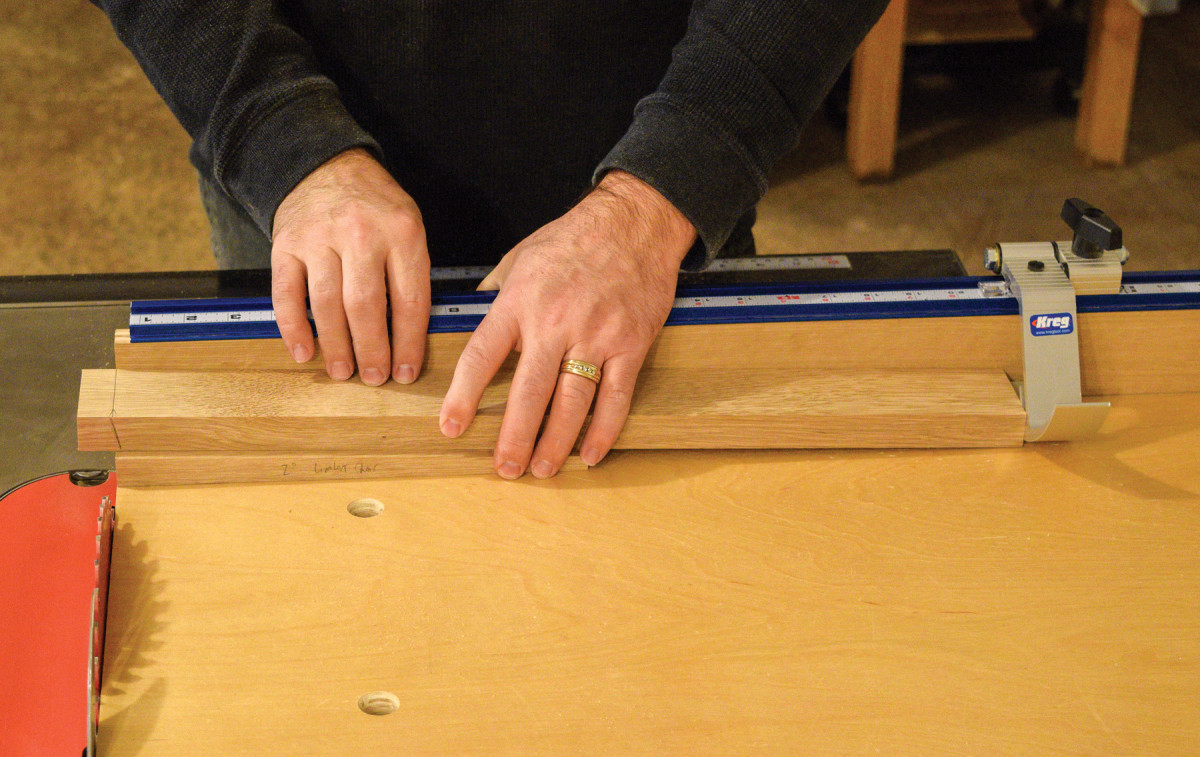
3. Position a wedge on a crosscut sled, and cut one end of all four side rails. Then set a stop block, and trim each rail to final length.
With all of the leg mortises established we can start thinking about tenons. The side seat rails and side lower rails angle outward a modest 2°. While that may not sound like much, it results in the front legs standing nearly 15/16” wider apart than the rear legs. Especially with armchairs, I find angled rails help with accessibility and comfort. The usual knock against angled tenons (as opposed to angled mortises) is that it weakens the tenon. With Craftsman style furniture, the angles are slight and won’t compromise strength in any meaningful way.
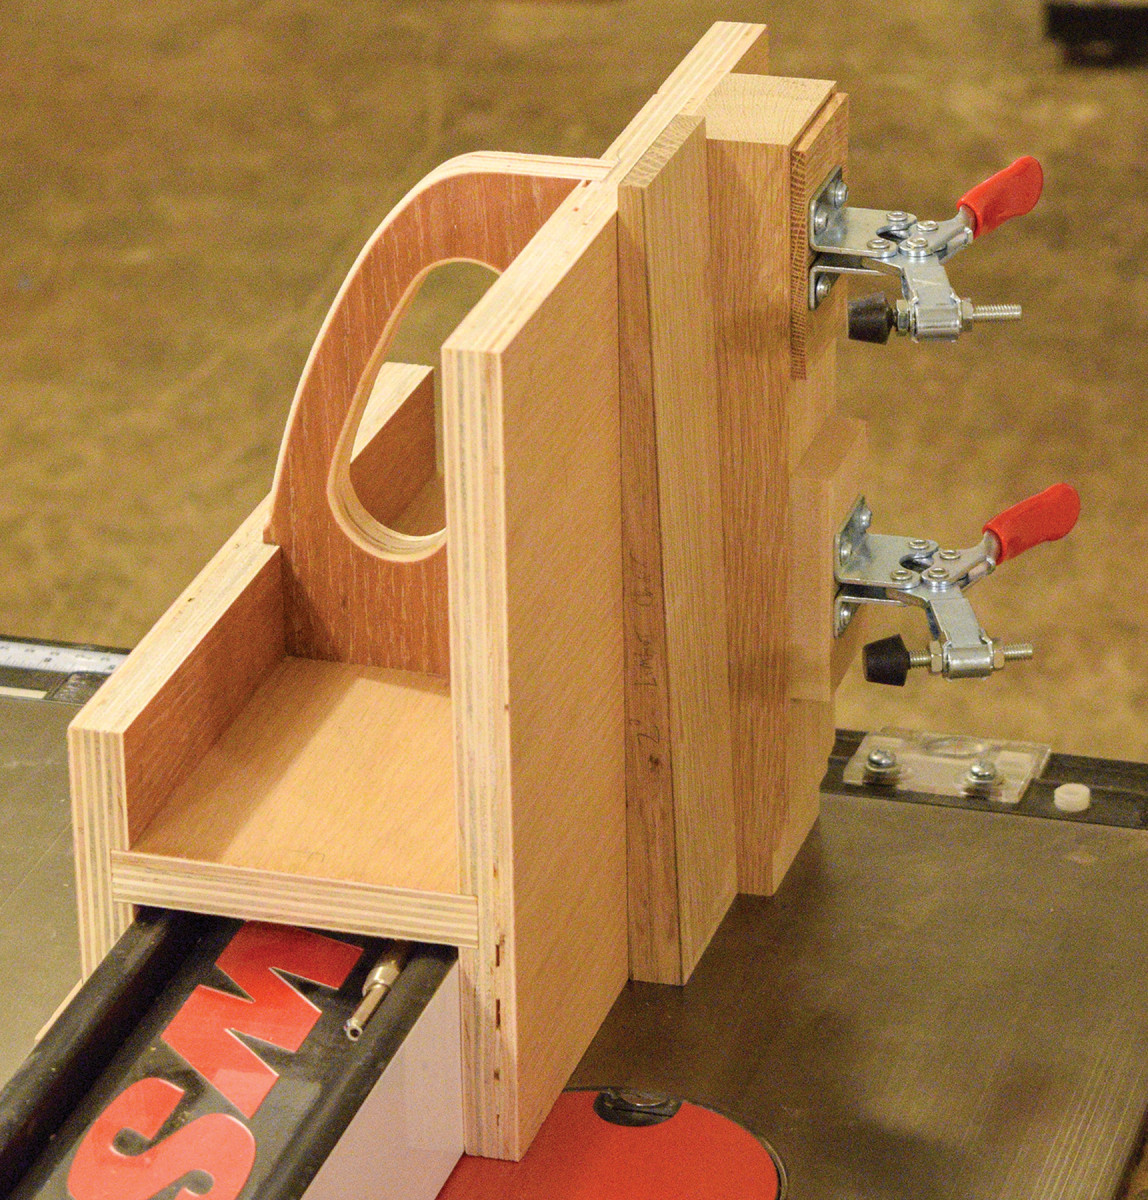
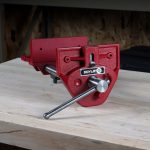
4. Position a wedge against the thick vertical fence of your tenoning jig. For the first cheek cut, position your workpiece directly against the wedge.
If you’ve never tackled a chair with angled joinery it can seem complicated. The method I use to cut angled tenons is stone simple, and if you have a dado set and a few scraps of plywood you’re nearly ready to start. Build a simple tenoning jig from 3/4” plywood, and a thick hardwood block for a vertical fence. Add a pair of inexpensive toggle clamps to your jig, and mill up rails for the chair. It’s not a bad idea to make an extra rail part or two, just in case.
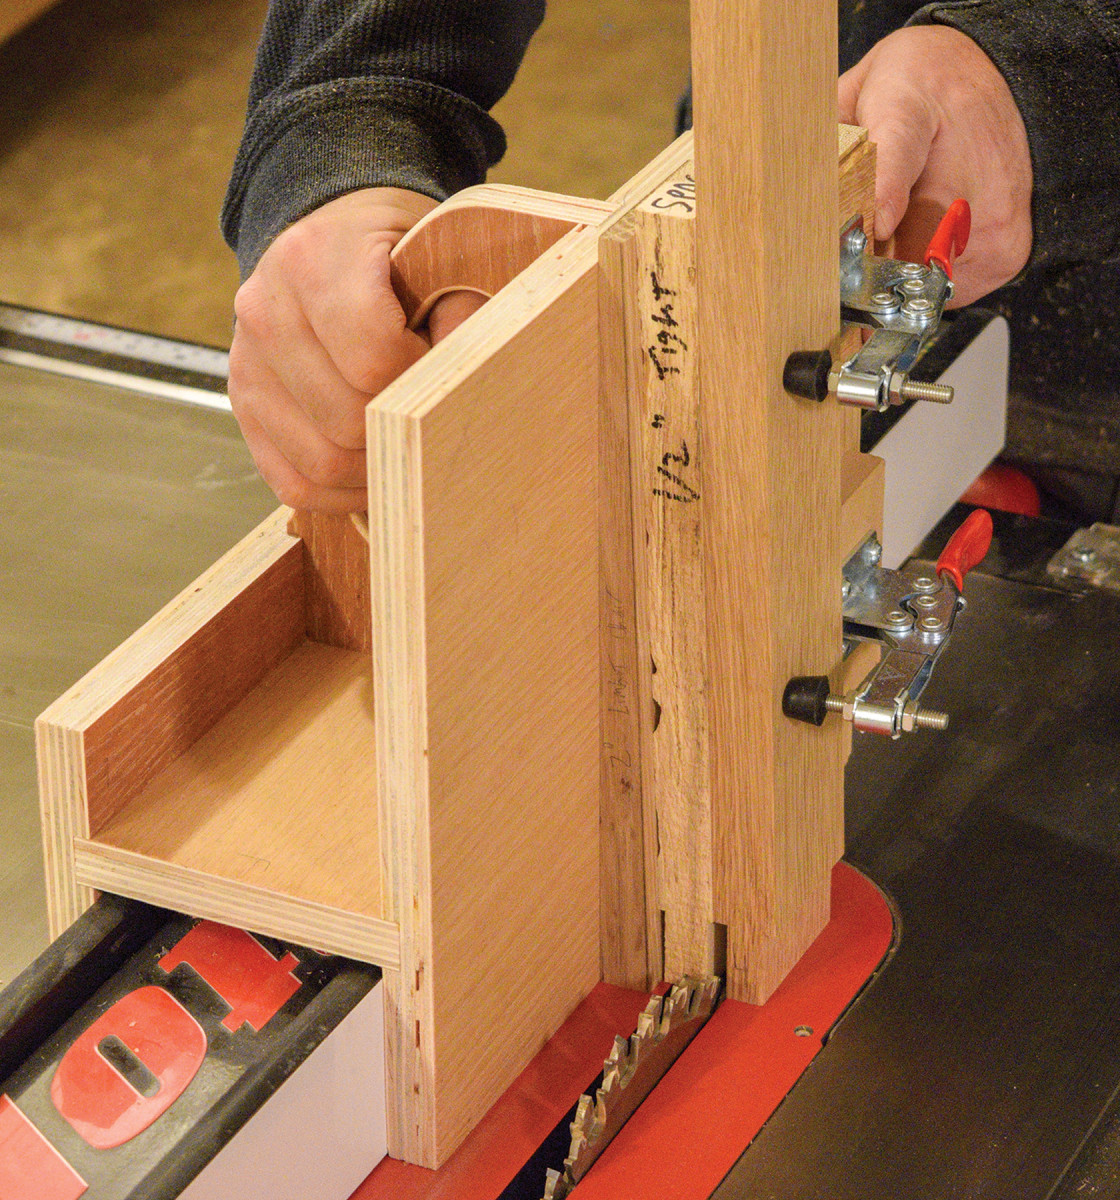
5. To make the second cheek cut, add a spacer between the wedge and workpiece.
Cut an angle on one end of all four side rails. The easiest way to do this is to make a hardwood wedge angled at the required 2°. Lay the wedge on a crosscut sled to position the workpiece correctly. Then set a stop-block for the finished length of 203/4“, and flip the rail end-over-end and cut the piece to length. A word of caution: this is the step that decides what face of the rail will be the “show face” so think about board orientation before you cut. With both ends of the rails angled and cut to length, install a 1/4” dado blade on the table saw and put your new tenoning jig to work.
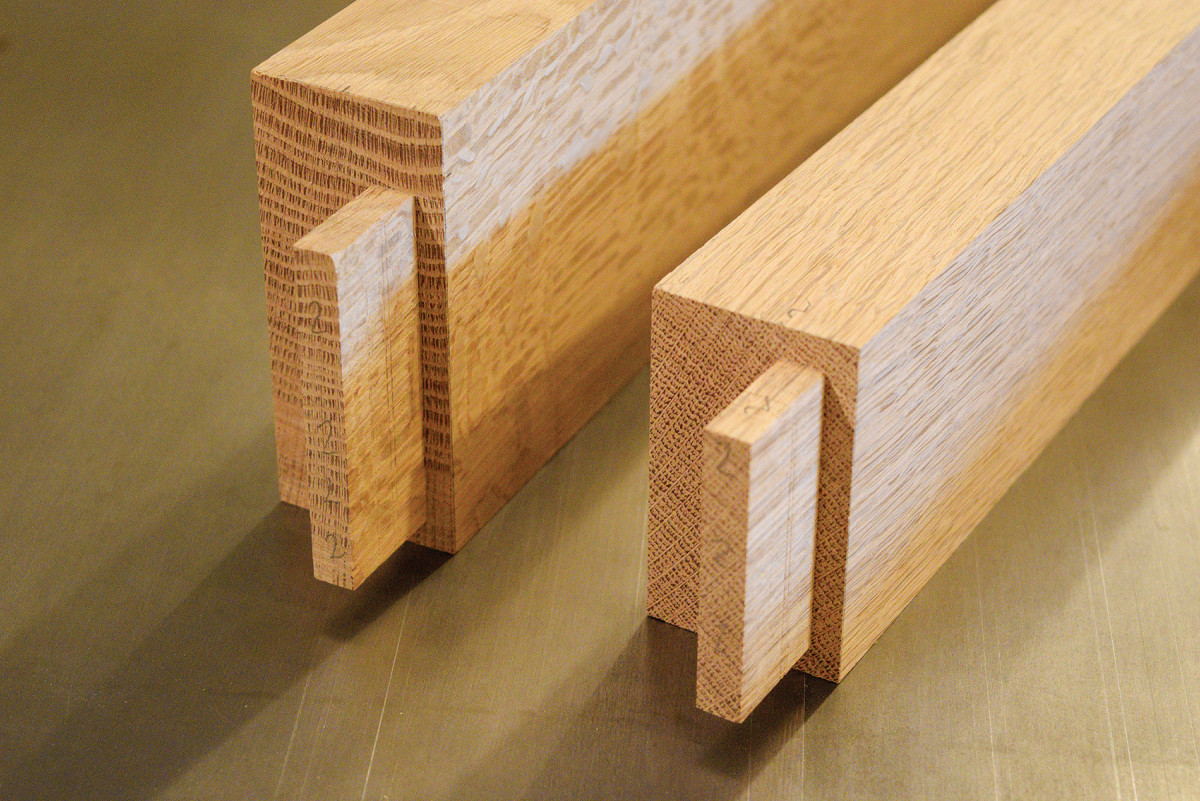
Use the same hardwood wedge to orient your workpiece in the tenoning jig. Adjust the rip fence for a 3/16” shoulder, and set the blade height to 1 1/8“. Once the rip fence and blade height are set, they don’t change for the remainder of the cheek cuts. Make sure the angled end of the rail is sitting flat on cast iron, and go ahead and make the first pass. Then add a spacer block between the angled wedge and your workpiece to make the second pass. If you sized your spacer thickness correctly then the tenons will fit perfectly time after time. The spacer is sized by the desired tenon width plus blade width. In this case a 1/2” tenon plus a 1/4” dado stack requires a 3/4“-thick spacer block.
While maintaining the same blade height used for the cheek cuts, adjust the rip fence for the shoulder cuts. Rotate the wedge and workpiece 90° in the jig, and trim one shoulder. Then flip the wedge end-for-end lengthwise so the wide end is on top, and complete the other shoulder cut. The toggle clamps won’t work for the shoulder cuts so retract them and use a couple hand clamps instead.
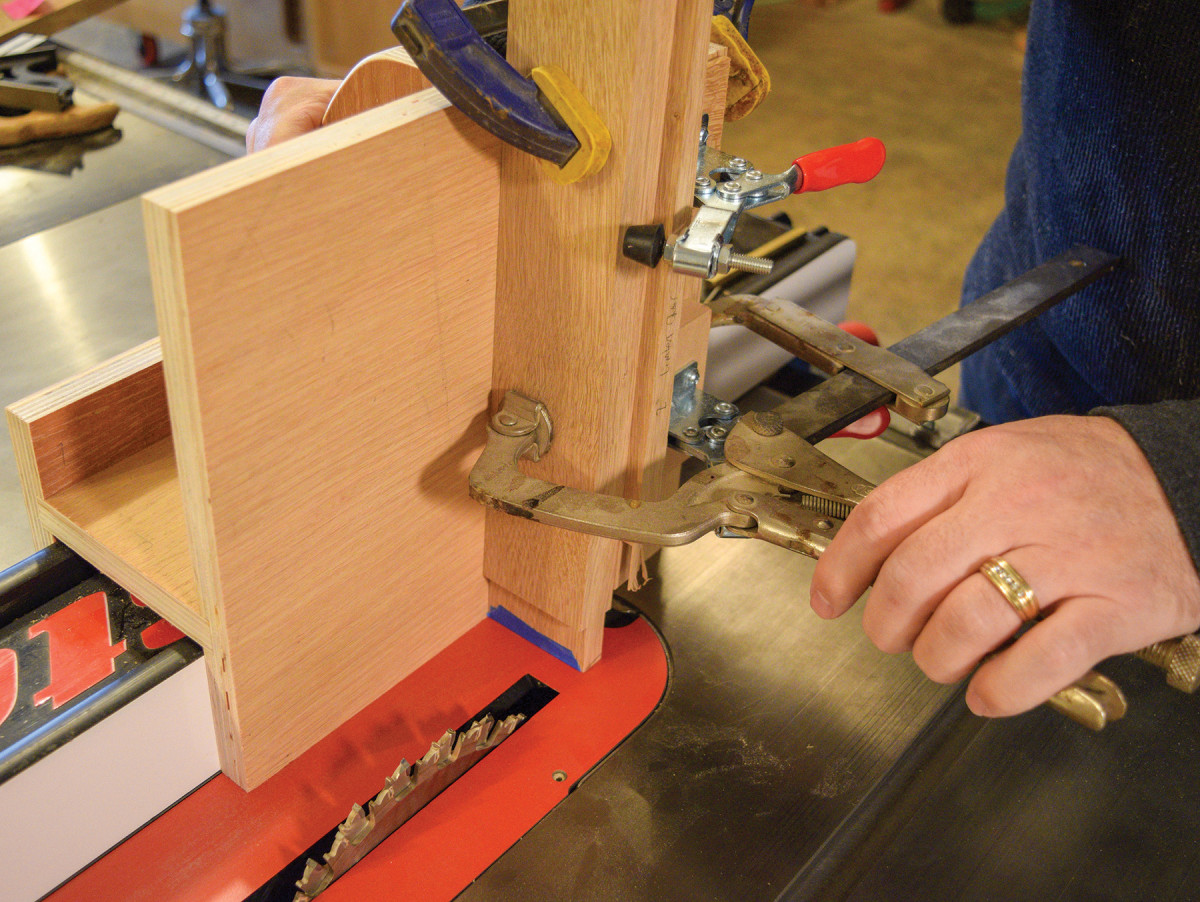
6. Turn the wedge and workpiece sideways and secure them to the jig with auxiliary clamps. The rip fence is adjusted to create the 1/4″-wide shoulders, however the blade height is unchanged.
There really is no doubt about correct workpiece orientation for all operations with the tenoning jig. When the angled end of the rail is flat against the table saw, you have the correct orientation. If there’s a gap where the workpiece meets the table saw, you have the wedge or workpiece flipped the wrong way.
The only quirky thing about cutting the shoulders with a dado blade is the potential for visible scoring lines on the workpiece. To prevent this issue, I simply used painter’s tape as a spacer to slightly elevate the rail. Two layers of tape are enough to do the trick. There will be a smidge of material on the shoulders to clean up, but don’t even bother reaching for your shoulder plane, a sanding block takes care of it in short order. If you happen to have a box-joint blade set, with teeth that are ground flat, you can skip the tape trick entirely.
Helpful Tip
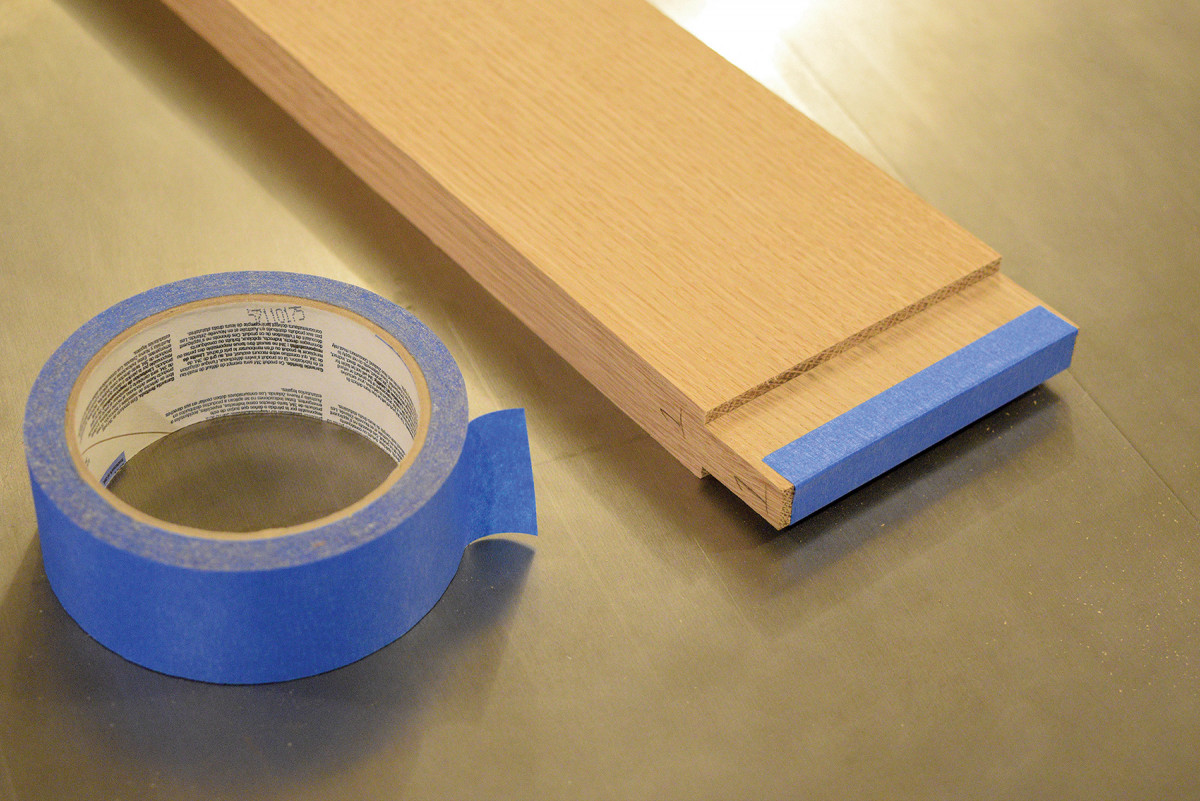 Before trimming the tenon shoulders I applied two layers of painter’s tape to the end of each tenon. This prevents the “bat ears” on my dado blade from marring the cut. Cleanup the smidge left by the tape with a few swipes of a sanding block. If you happen to have a box-joint blade set, with teeth that are ground flat, you can skip the tape trick entirely.
Rest Your Back
7. The crest rail and belt rail are made from 8/4 stock and feature offset tenons. As always, do the joinery before the curves.
With the lower part of the chair nicely underway, it’s time to think about the backrest. There are only five parts involved—two curved rails and three slats. The curved rails are made from 1 3/4” thick stock, and finish out at 7/8” thick. The offset tenons need to be cut while the rail blanks are still rectangular, so load up a full dado stack and get to work. One other wrinkle to consider is that the tenon of the crest rail isn’t only offset front-to-back, but also asymmetrical top-to-bottom. Because the top of the crest rail is curved the top shoulder is 3/4” and the bottom shoulder is 1/4“.
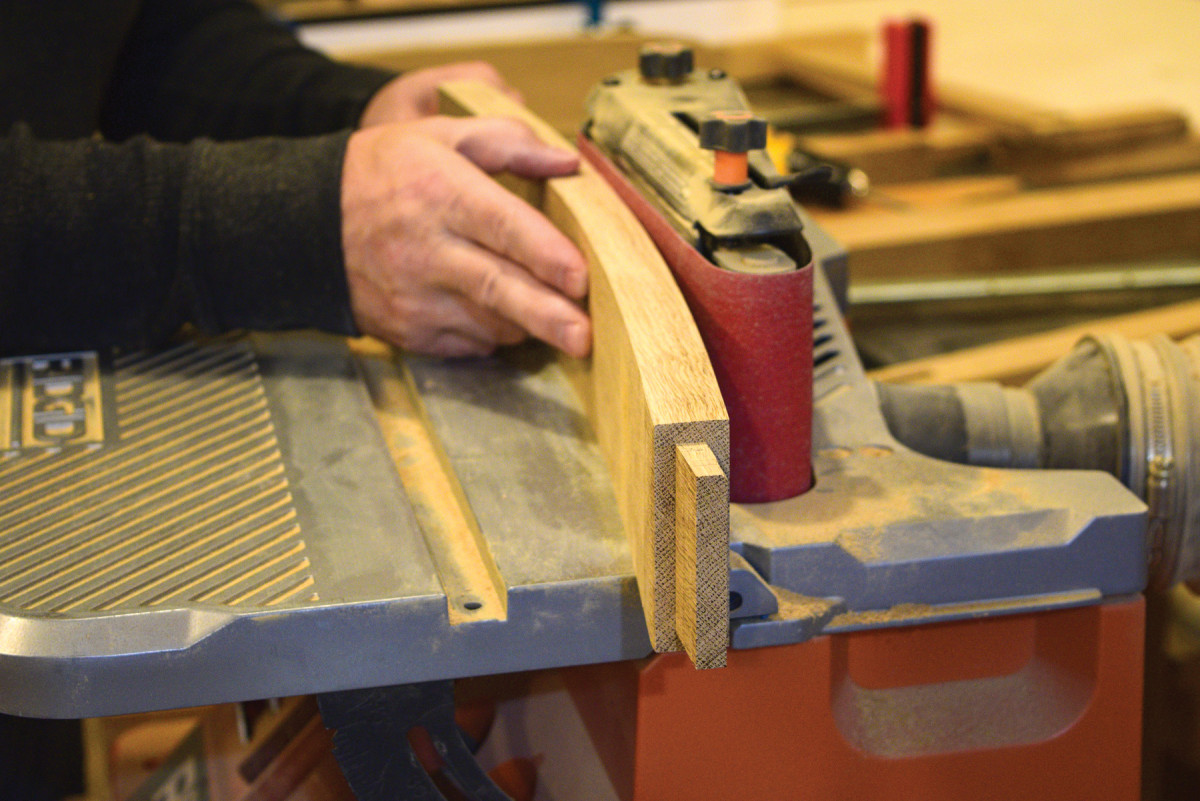
8. Sand the crest rail and belt rail smooth with an oscillating edge sander. Starting with a course #50-grit belt makes the process go more quickly.
With the joinery complete on the crest rail and belt rail, lay out the curve with a bowstring jig and trim close to the line at the band saw. Then it’s just a matter of smoothing the curves with an edge sander. Once the convex side is fair, I re-mark the line on the concave side with a combination square. This ensures that the curved rails will be consistently 7/8” thick.
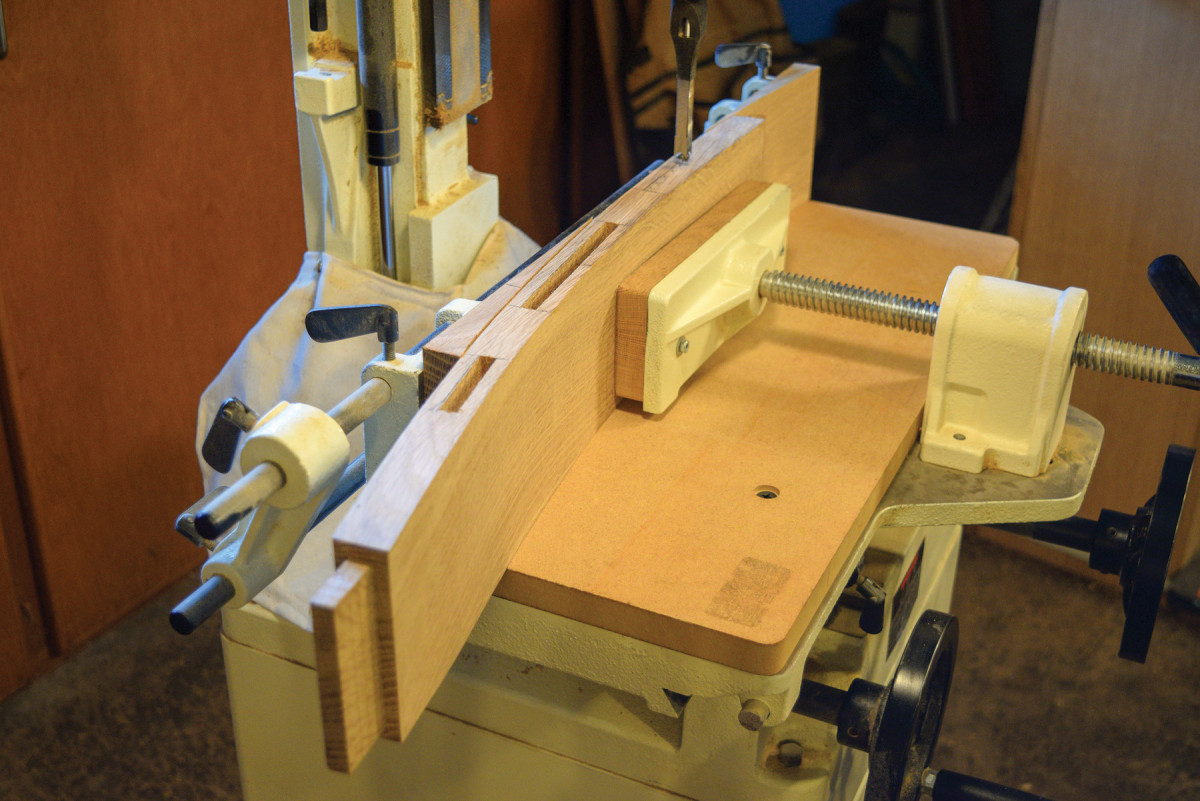
9. Save the offcuts from the curved backrest rails as they are useful for positioning the rails in the mortiser. The crest rail and belt rail mortises are 1/2″ deep.
Back at the mortiser, install a 5/16” hollow chisel and plunge out three mortises in the curved backrest rails. Use the offcuts from your rails as wedges to align the workpiece in the machine. If your mortiser has a sliding table that’s all you need for properly aligned mortises. If you have a mortiser with a fixed table you might consider adhering the offcuts to a piece of plywood as an impromptu fence. Then you could move the plywood fence, along with the workpiece, for straight and consistent mortises.
Tenons & Corbels
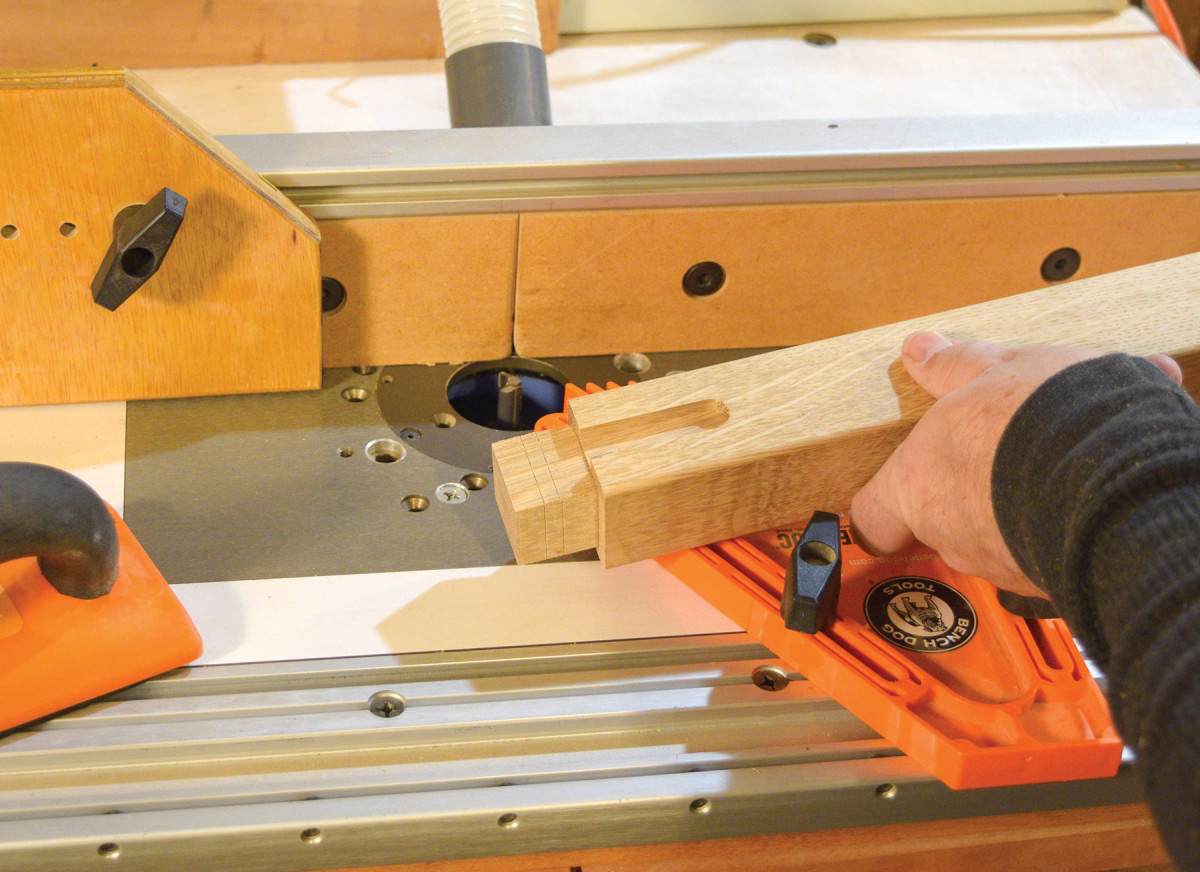
10. Rout a shallow groove in the front legs to receive the small round corbels. Featherboards and push pads help make a controlled cut.
The front legs extend through the armrests for that classic through tenon detail. Go ahead and form the 11/4” square tenon on top of the front legs. The tenon should be 11/8” long so it projects 1/4” past the armrest.
11-12. Raise a stub tenon on the corbel blank before shaping and cutting the parts to length. Cutting the tenon before the mortise may seem out of order, but in this case it works well.
Then prepare the front legs for the corbel that supports the armrest. Rout a 1/2” wide x 2″ long centered groove in the outer edge of the legs at the router table. Make sure your bit depth is 3/16” or less. If the bit depth is greater than 1/4“, it will spoil your newly formed tenons.
 The corbels are quite small, so it’s best to start with an extra-long blank. That way you can mill the stub tenon on the blank before cutting the corbels to length.
Rest Your Arms
13. Use a sanding stick to slightly undercut the mortise as you work up to the layout line. Test fit the armrest 180° from its intended position to isolate the mortise fit from the notch joinery that hasn’t been cut yet. Once the mortise seats fully onto the shoulders mark the protrusion directly on the tenon.
The armrests are up next, so you’ll need a pair of 7/8” boards that net out at 25″ long x 4 1/2” wide. Start by marking the mortise location where the front leg will pierce the armrest. Using a mortiser, cut close to the layout marks but leave some material for hand trimming.
Make up a few sanding sticks that have self-adhesive sandpaper on two sides. Size the sticks about 1″ wide, and long enough to hold onto both ends. Back-bevel the mortise wall slightly and check the fit frequently. Before long you’ll have a snug joint without visible gaps.
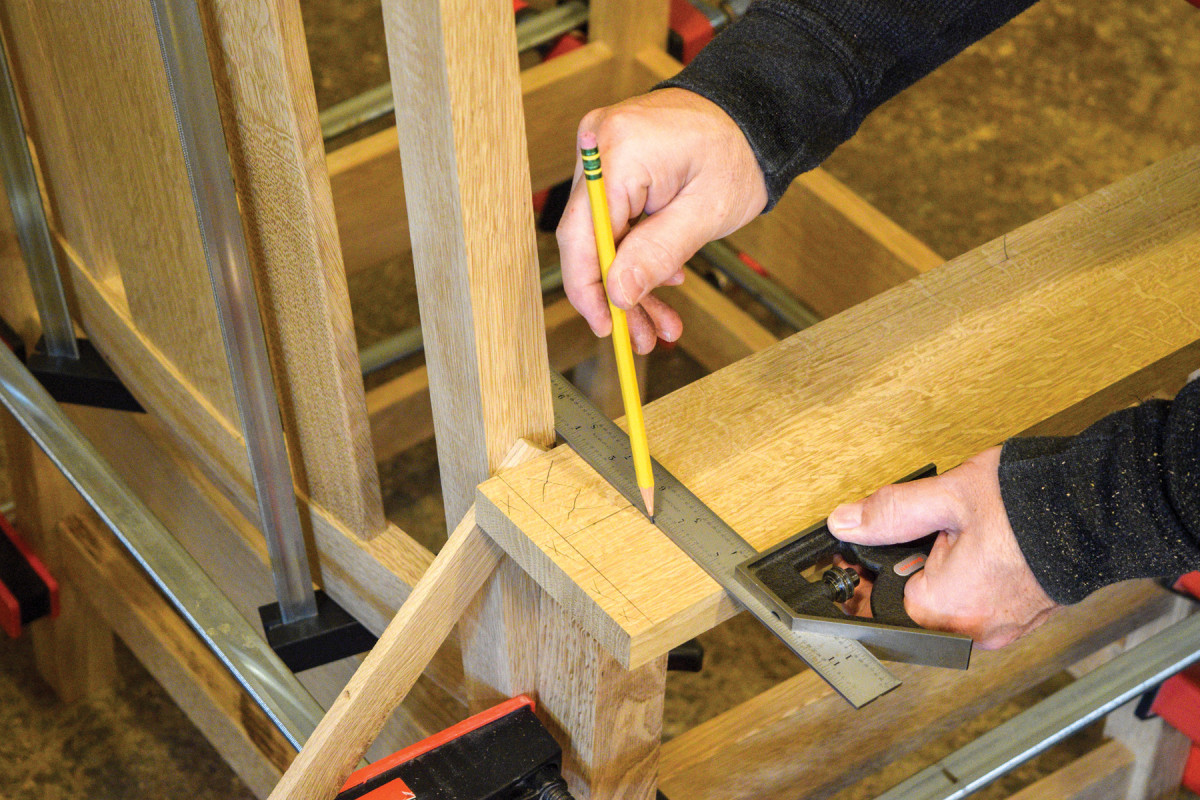
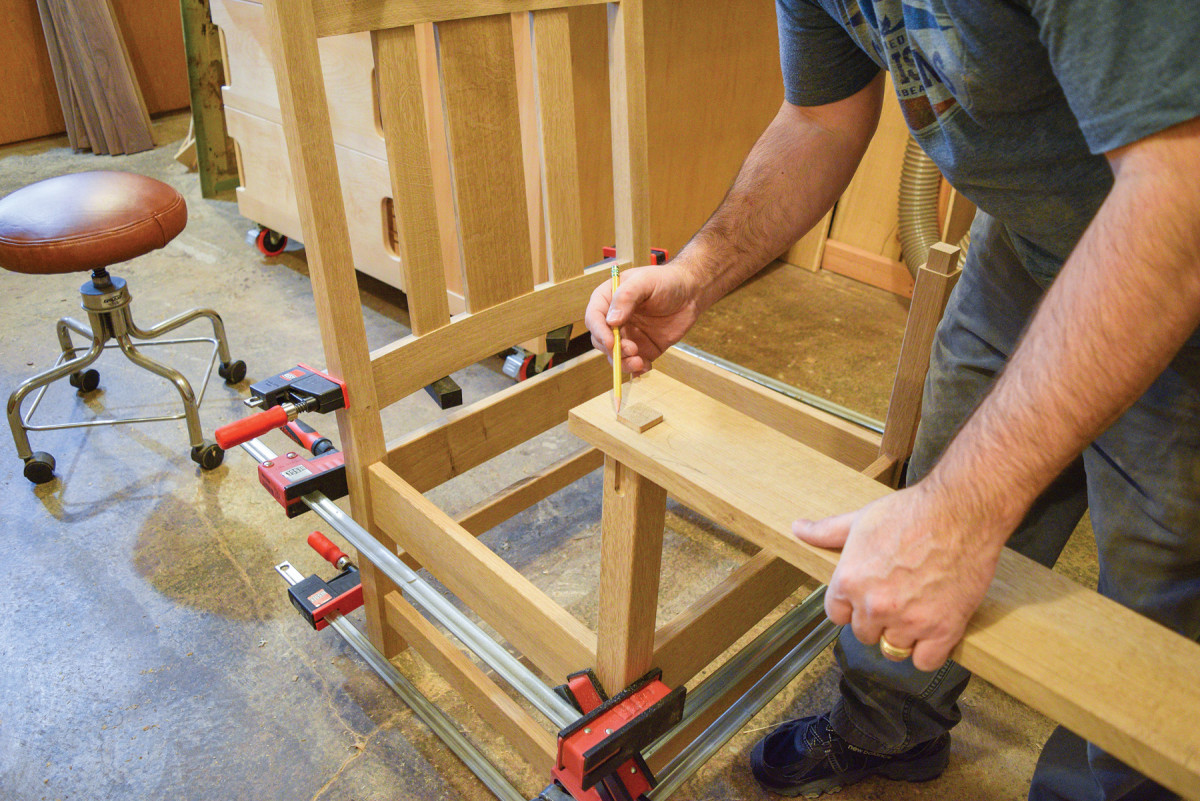
14. A scrap board supports the armrest at the correct height for determining the notch location. Place a spacer between the rear leg and armrest, and transfer the notch location to the armrest.
Once the mortise fits the tenon you can cut a scrap to 26 1/8” long and clamp it alongside a rear leg. This will allow you to easily set the armrest on the tenon shoulders and the scrap board to transfer information from the chair to the armrest. Clamp the armrest to the chair and mark the extent of the rear leg on the armrest. Since the front legs are wider apart than the rear legs you’ll need a thin spacer placed between the armrest and rear leg. The spacer is approximately 5/16” thick, but size yours to make the blade of a combination square flat across the rear leg. Then remove the spacer, and swing the armrest over to contact the rear leg and transfer the angle to the armrest. Calculate the width of the notch (approximately 11 1/16” wide), and cut it out at the band saw. The tables on most band saws actually tilt left and right, however you may have to adjust the bolt that stops the table at 90°. After making the angled cuts and straight cuts at the band saw you’ll need a stroke or two with a dovetail saw to remove the notch from the armrest.
After spending some time working on my precious armrests I got a little gun-shy about cutting the notch. In fact, I remember feeling this way with every single armchair I’ve built. To allay my fears, I made a mock armrest out of 7/8” thick stock. After chopping a quick mortise, I was able to confirm the notch size with the temporary armrest and proceed with confidence.
Now that the bulk of the joinery for the armrests is complete you can have some fun shaping them to final size.
Prior to Assembly
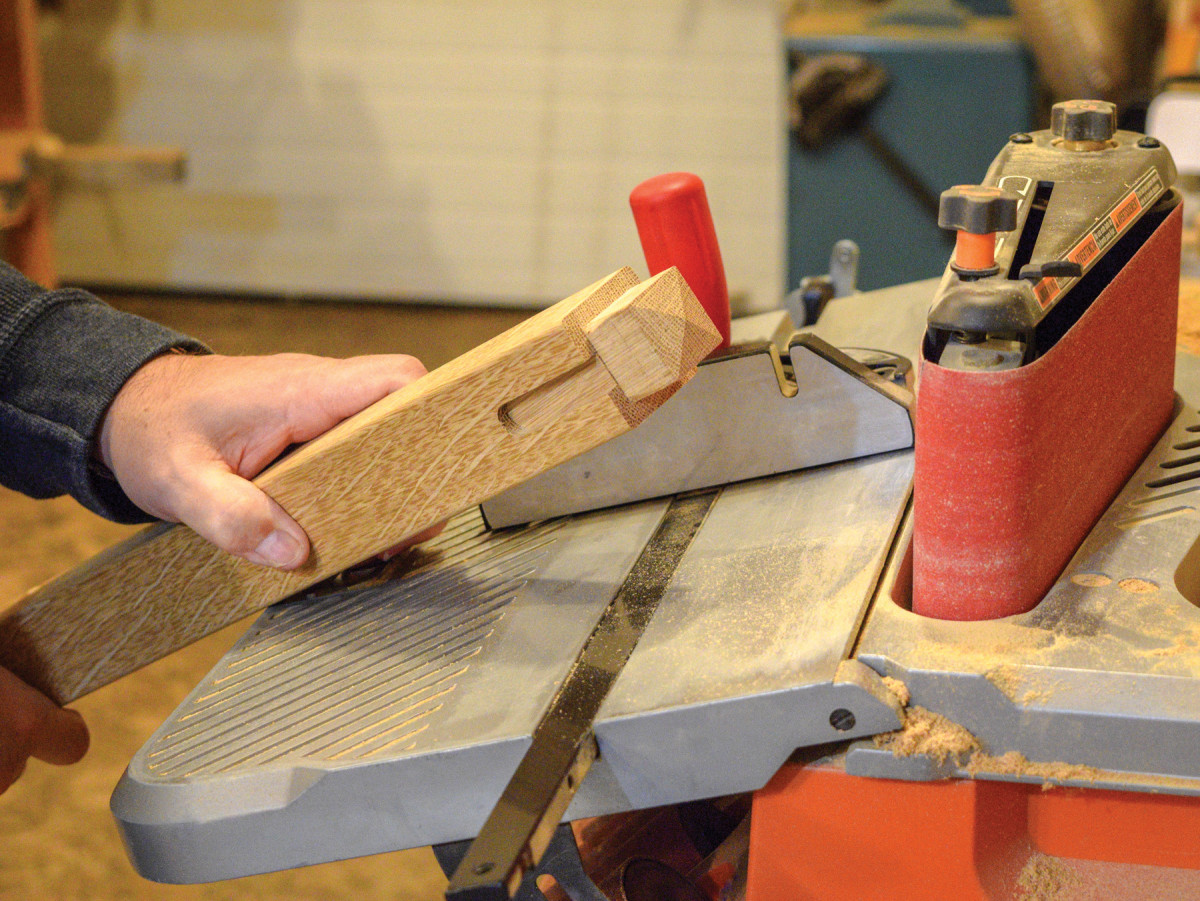
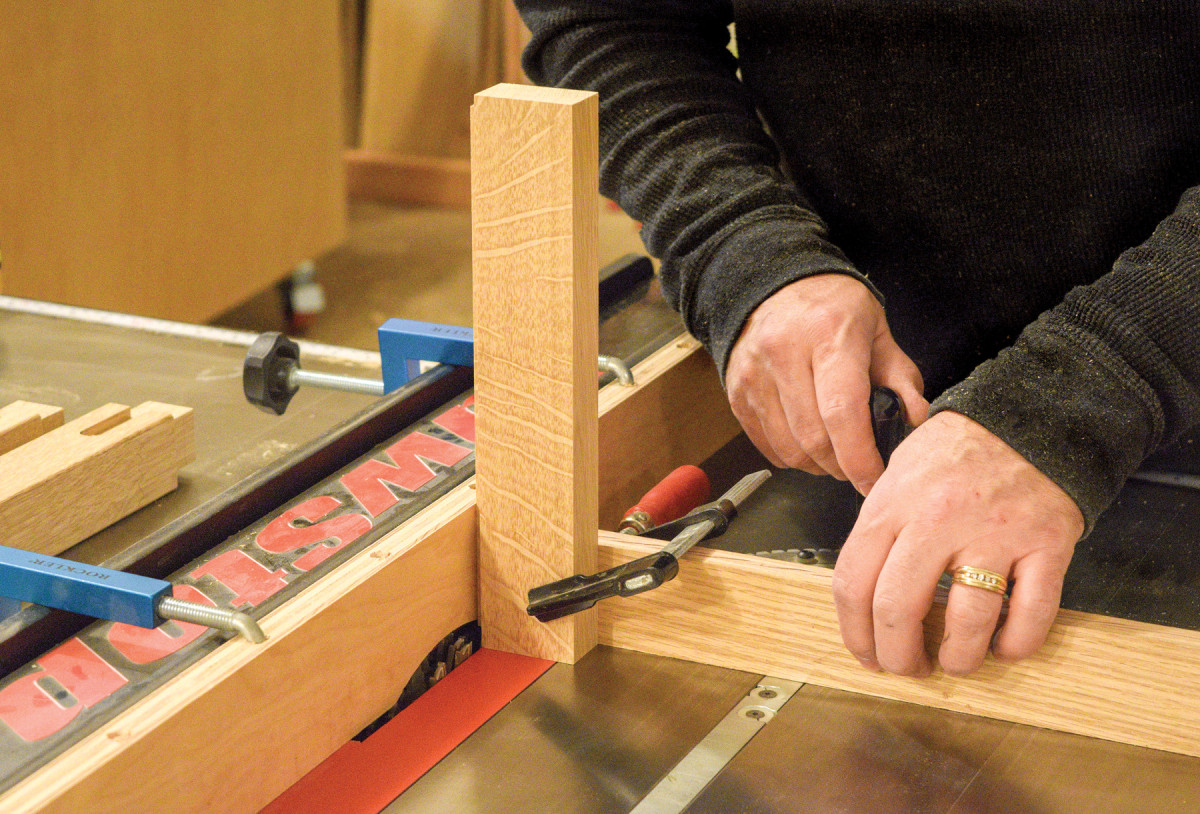
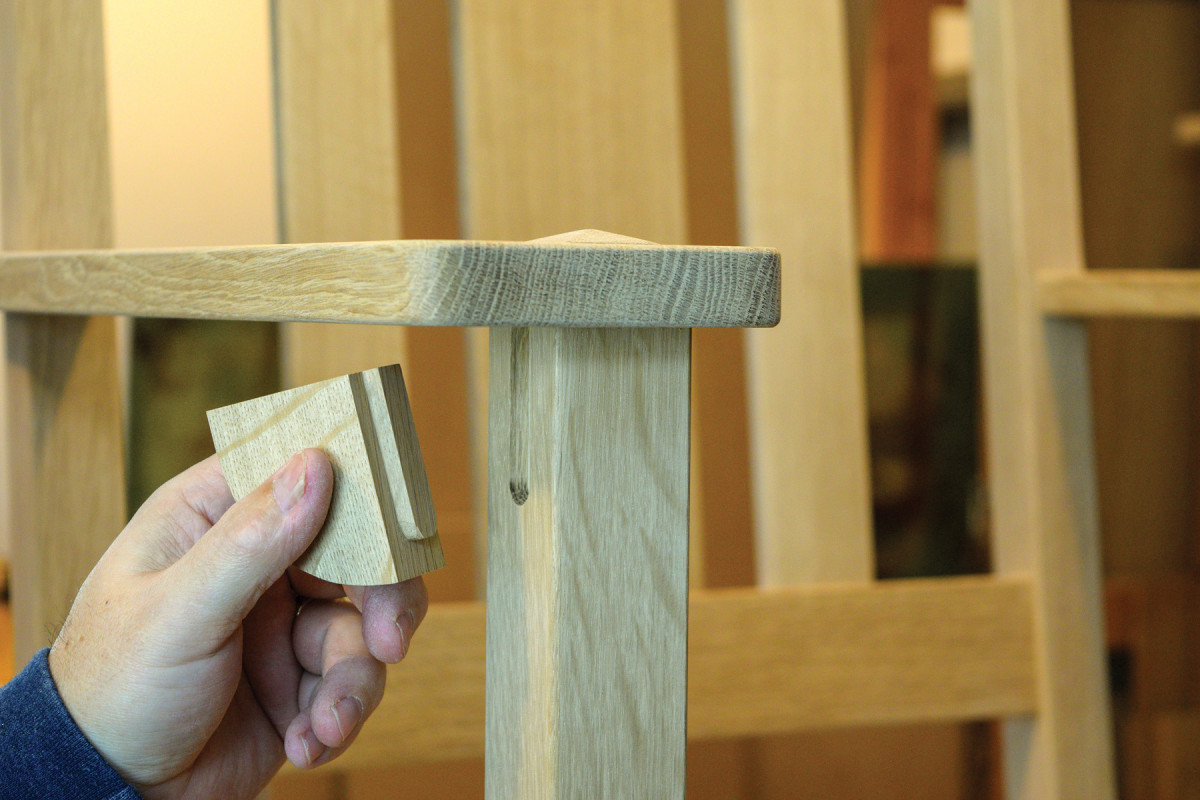
15. Form the pyramid shape atop the front legs with an oscillating belt sander and miter gauge.
The hallmark of an Arts & Crafts armchair is the pyramid-shaped through tenons. My preferred method for making these involves an oscillating belt sander. Tilt the table to 15° and make use of a miter gauge to form the pyramid shape. The plans allow for an extra 1/4” leg length which is just about right at that angle. I start with an #80-grit belt to form the basic shape, then switch to a #120-grit belt for final smoothing.

16 Drill a 5/8″ diameter hole in the end of the armrest approximately 5/8″ deep. Use dowel centers to locate a receiving hole in the rear legs.
Then you’re ready to make front and rear sub-assemblies. Glue the front legs together with the front rails to form one assembly, while the rear legs plus the backrest plus the rear rails form another. Set these sub-assemblies aside to dry and move on to the next step.
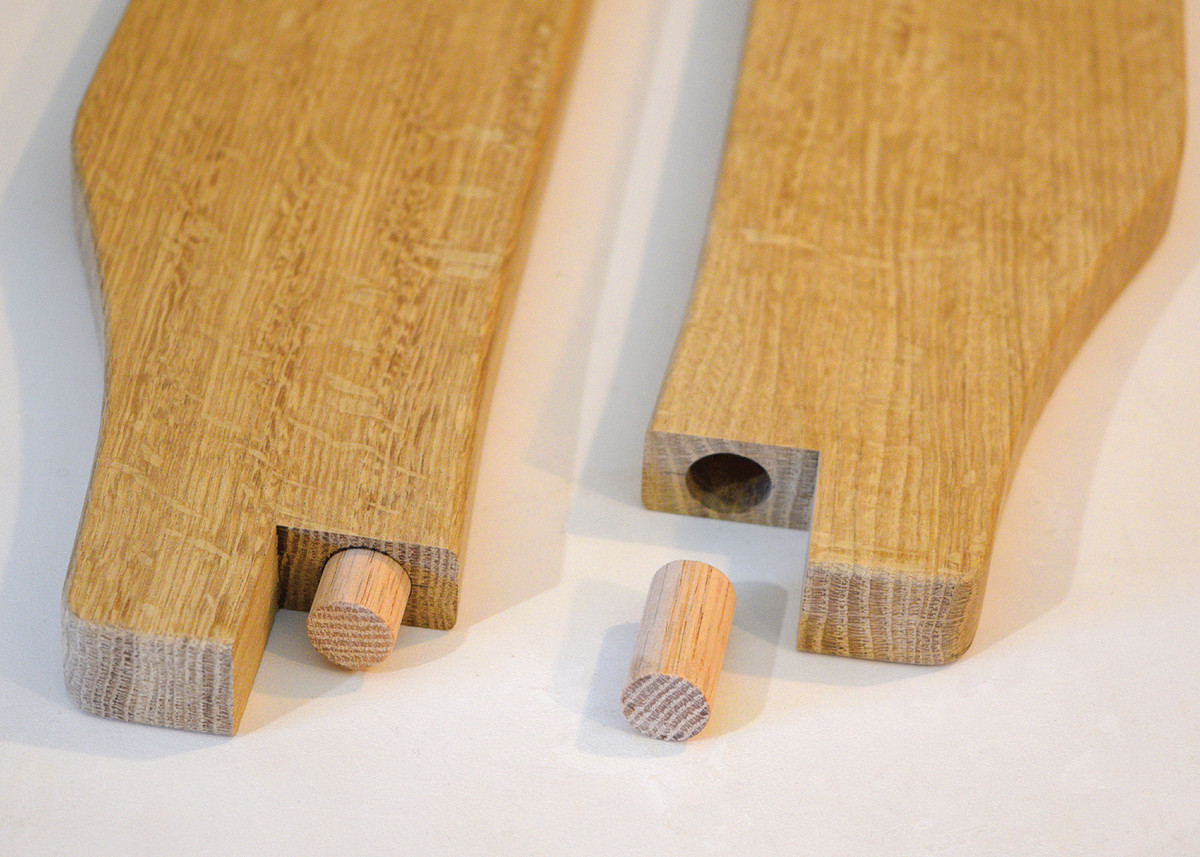
17. Next, glue 1 1/4″ long dowels into the armrests.
The armrest-to-rear leg connection is reinforced with a 5/8” hardwood dowel and screw. Drill a hole in the end of the armrest, and use a dowel center to locate the mating hole in the rear legs. Use the scrap board you made earlier to position the armrest at the correct height.

18 Finally, install the armrest by inserting the dowel and coaxing it into position over the front leg tenon.
Counterbore and pre-drill a hole through the side of the armrest for a screw. Make some matching plugs with a tapered plug cutter, and have them ready for the final steps. Then glue the two sub-assemblies together with the side rails. To simplify assembly, the armrests can be added in a separate step.

19. Drill a 3/8″ counterbore, and a 1/8″ clearance hole for the 2 1/2″ long screw that reinforces the armrest joint. Tapered white oak plugs tidy things up.
The only parts that remain are the corner blocks that reinforce the chair and the seat frame. The seat frame is made with 7/8” thick hardwood and assembled with half-lap joints.
20. Groove and stub tenon joinery registers the corbel in position to support the armrest. Add some glue and clamp it in place.
The seat frame is sized 1/4” smaller in all directions than the chair opening and needs to follow the angled side rails for a proper fit. If you build the seat frame a little wider than required you can angle the outer edge rather than making more angled joinery.
 Add your finish of choice and a cushion, and you’ll have an heirloom of your own.
Here are some supplies and tools we find essential in our everyday work around the shop. We may receive a commission from sales referred by our links; however, we have carefully selected these products for their usefulness and quality.