We may receive a commission when you use our affiliate links. However, this does not impact our recommendations.
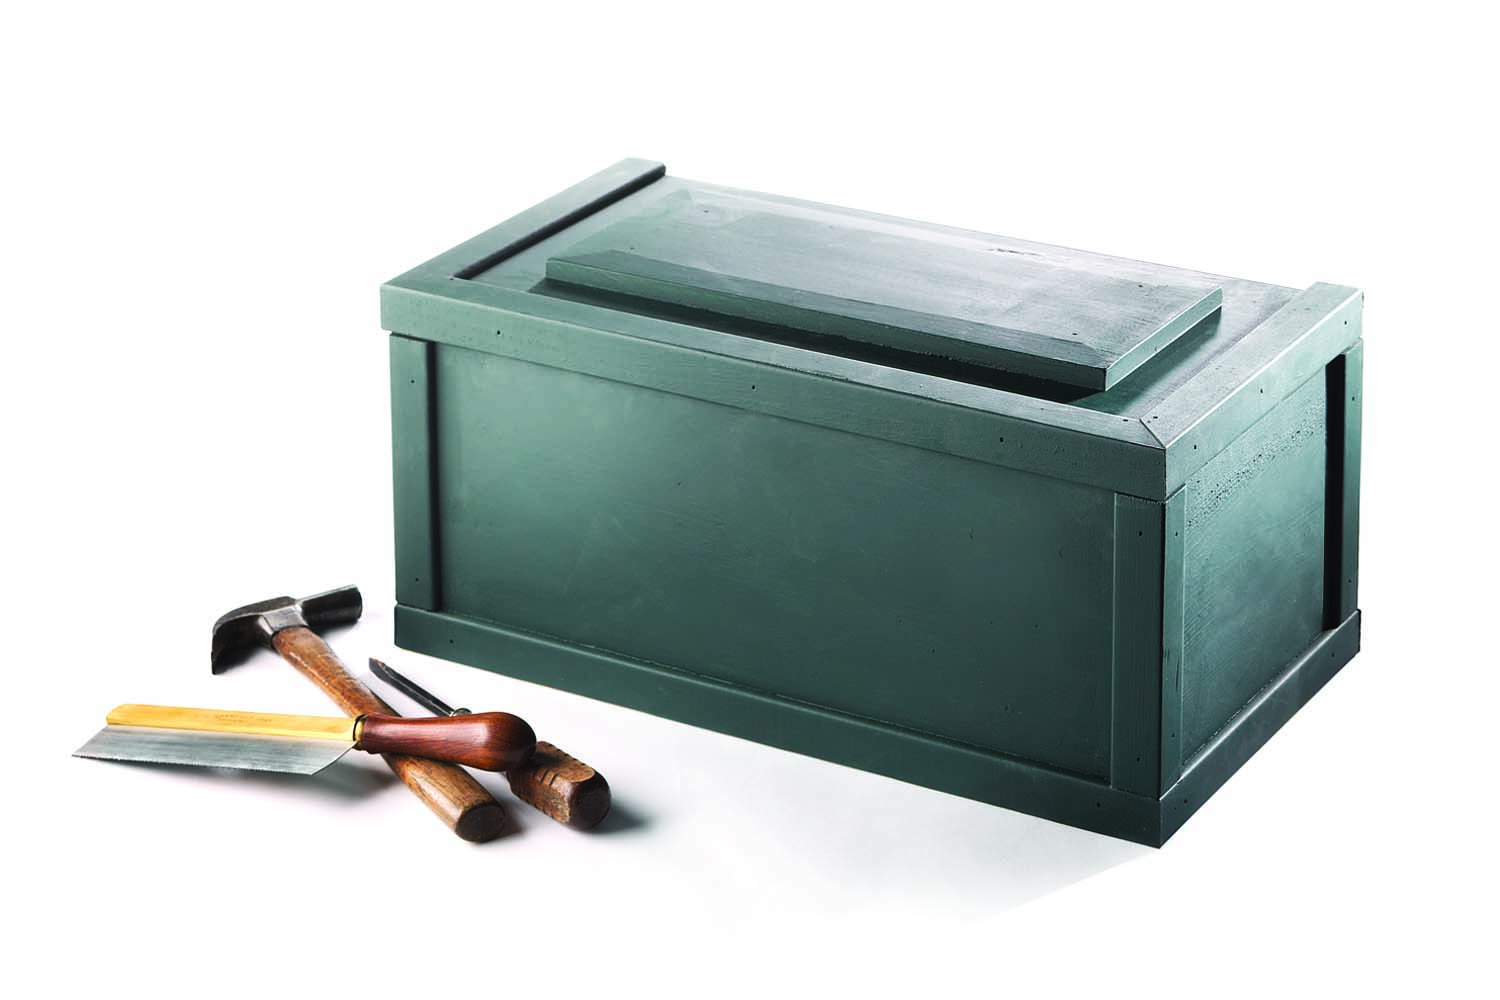
Household tools. This “Gentleman’s Tool Chest” is an adaptation of a 19th-century example that would have been stocked with a small but fancy set of household tools.
A simple box for basic household tools.
Common in the 19th-century, a “Gentleman’s Tool Chest” typically contained a set of fancy household tools including the first “multi-tools” – a handsome handle into which a variety of tools including gimlets, drivers, chisels and the like could be fitted. The chest might also include a small brass-backed saw, a filigreed square, dividers, a brass hammer and more – “showcase tools” for the squire who simply liked to putter around the house.
This project is an adaptation of a 19th-century example, made simpler by the use of dimensional lumber, nailed butt joints and applied moulding – and it was built using a small set of tools (though a powered miter saw was certainly not found in the gentleman’s tool set!).
A Basic Box
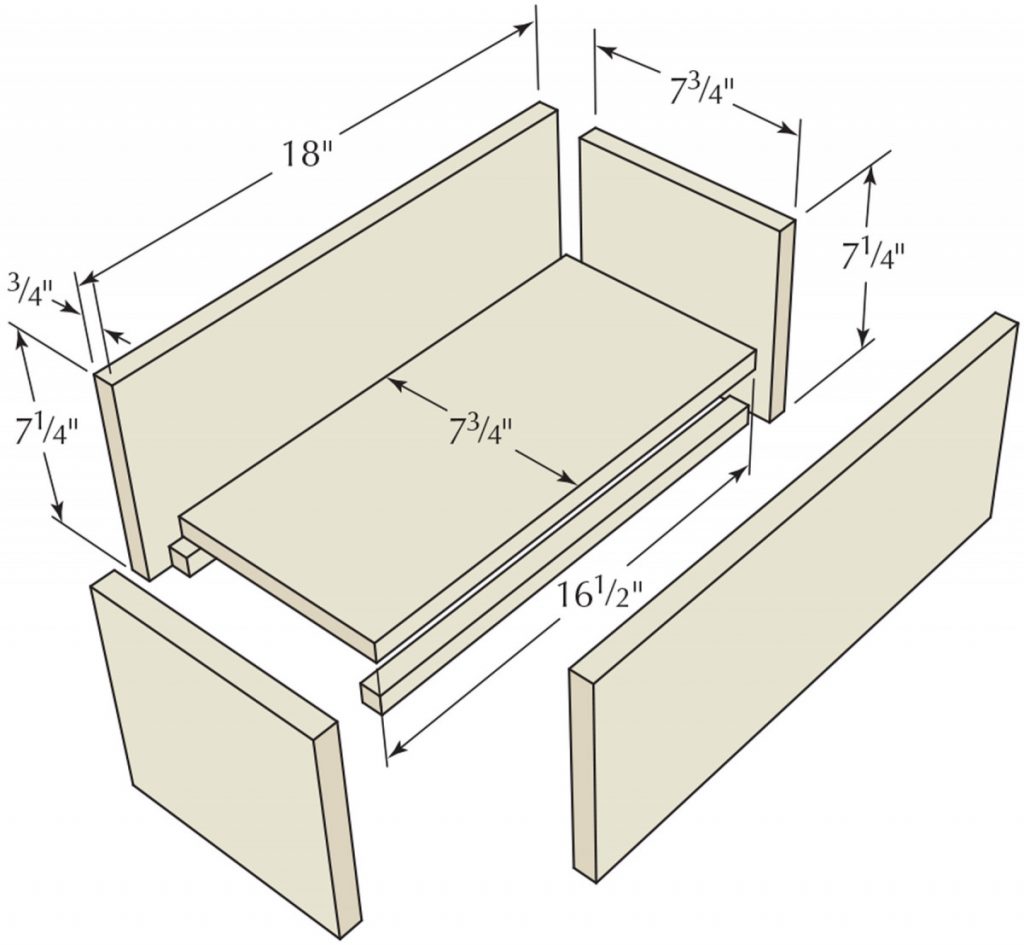
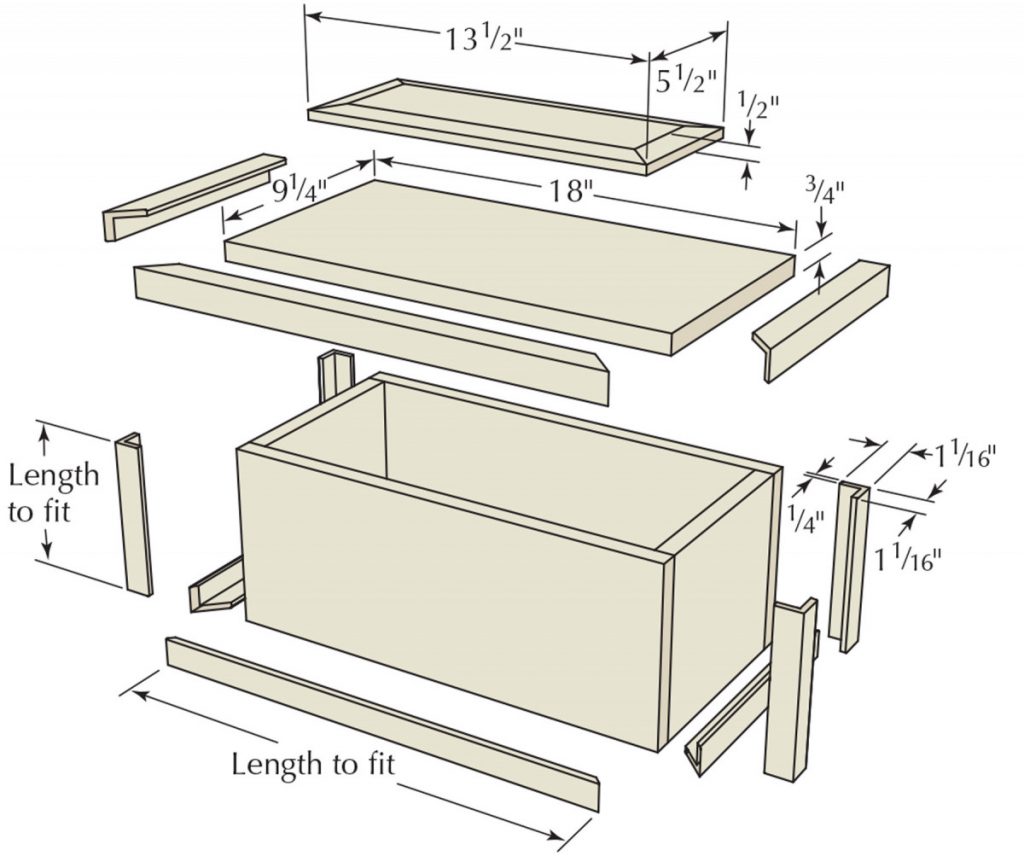
The basic box construction couldn’t be simpler. Cut two 18″-long pieces of 1×8 (which is, of course, actually 7-1⁄4″ wide) and two 7-1⁄4″-long pieces at the miter saw. Clamp them into a box shape with the front and back overlapping the ends. Drill three pilot holes through the long grain of the front and back and into the end grain at each corner, eyeballing the location at the top, middle and bottom of each corner. There’s no need to be persnickety about a symmetric layout – the joint will be covered with moulding. Sink 4d finish nails in your pilot holes to secure the box parts together.
Glue cleats at the bottom edge of the front and back (nail them – or clamp them in place until the glue dries).
To fit the bottom to size, cut a 16-1⁄2″-long piece of 1×10, then clamp a straightedge to guide your jigsaw’s shoe, and cut it to 7-3⁄4″ wide (or just a hair under), and use your block plane to trim it to the perfect width and length to drop snugly onto your cleats. Nail it in place.
The lid is an 18″-long piece of 1×10 (9-1⁄4″ wide), attached with two butt hinges mortised into the back and lid.
Gussy it Up
Miters galore. The trickiest part of this build is getting all the miter joints to fit snugly. I find it’s easiest to hold one 45° corner in place while I mark the moulding at the inside back corner for the second cut (no measuring). And I always mark an angled line on the top of the moulding in the direction my second cut needs to go.
With the basic box built, let’s make it look better. That’s going to involve a lot of 45° miter cuts of what my local home center calls “outside L” (a.k.a. “corner moulding”). You’ll need at least 12′ or so (but you might want to buy a little extra).
Mitered moulding gets wrapped around the entire bottom; on the lid, the two front corners are mitered while at the back of either side the cut is at 90°.
Start by setting your miter saw to cut a 45° angle and snip off one corner of the moulding with the L-shape tucked in against the saw’s fence and base, so that the moulding is supported on two sides. Now slide your piece down about 20″ and make a second cut and repeat two more times. (Overcut all your moulding pieces with the necessary angle on one corner.) Now do the same to cut four 11″-long pieces (two for the top, two for the bottom).
Slide one 20″-long piece of moulding over the front edge of the top, line up the cut at the corner, then use a pencil to mark at the back where your cut for the other corner begins. Do the same with all your pieces – and mark the correct cut direction for the second angle (just to keep things straight – er, angled).
Back at the miter saw, reset for 45° in the other direction, make the cuts for the other ends of your mitered pieces, then reset to 90° for the lid’s two side pieces.
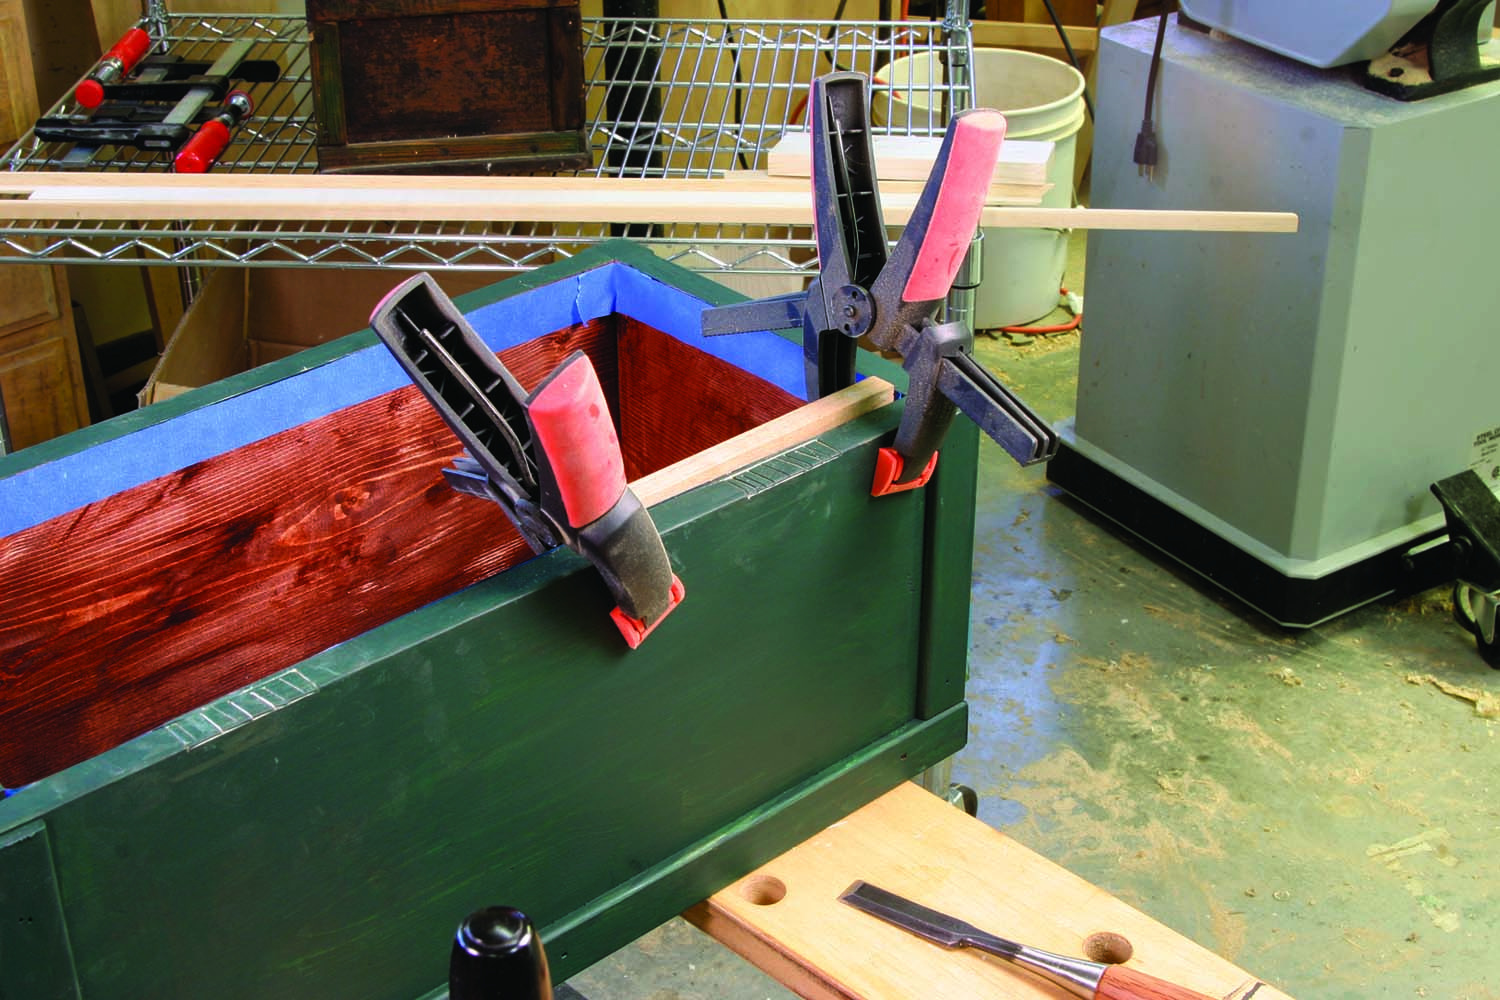
With the pieces cut and fit, glue and nail the long piece to the front of the box lid. On the lid sides, apply glue at the front; use nails at the front and back (to accommodate seasonal movement and cross-grain construction). Attach the bottom pieces in the same way.
With your miter saw set for 90°, set a stop 6-1⁄8″ to the left of the blade and cut the four pieces that wrap the corners, then nail them in place butted against the bottom moulding.
Top Panel
Back it up. When cutting the hinge mortises on the top edge of your back, clamp an offcut on the backside; the narrow piece of stock that forms the back of the mortise is fragile.
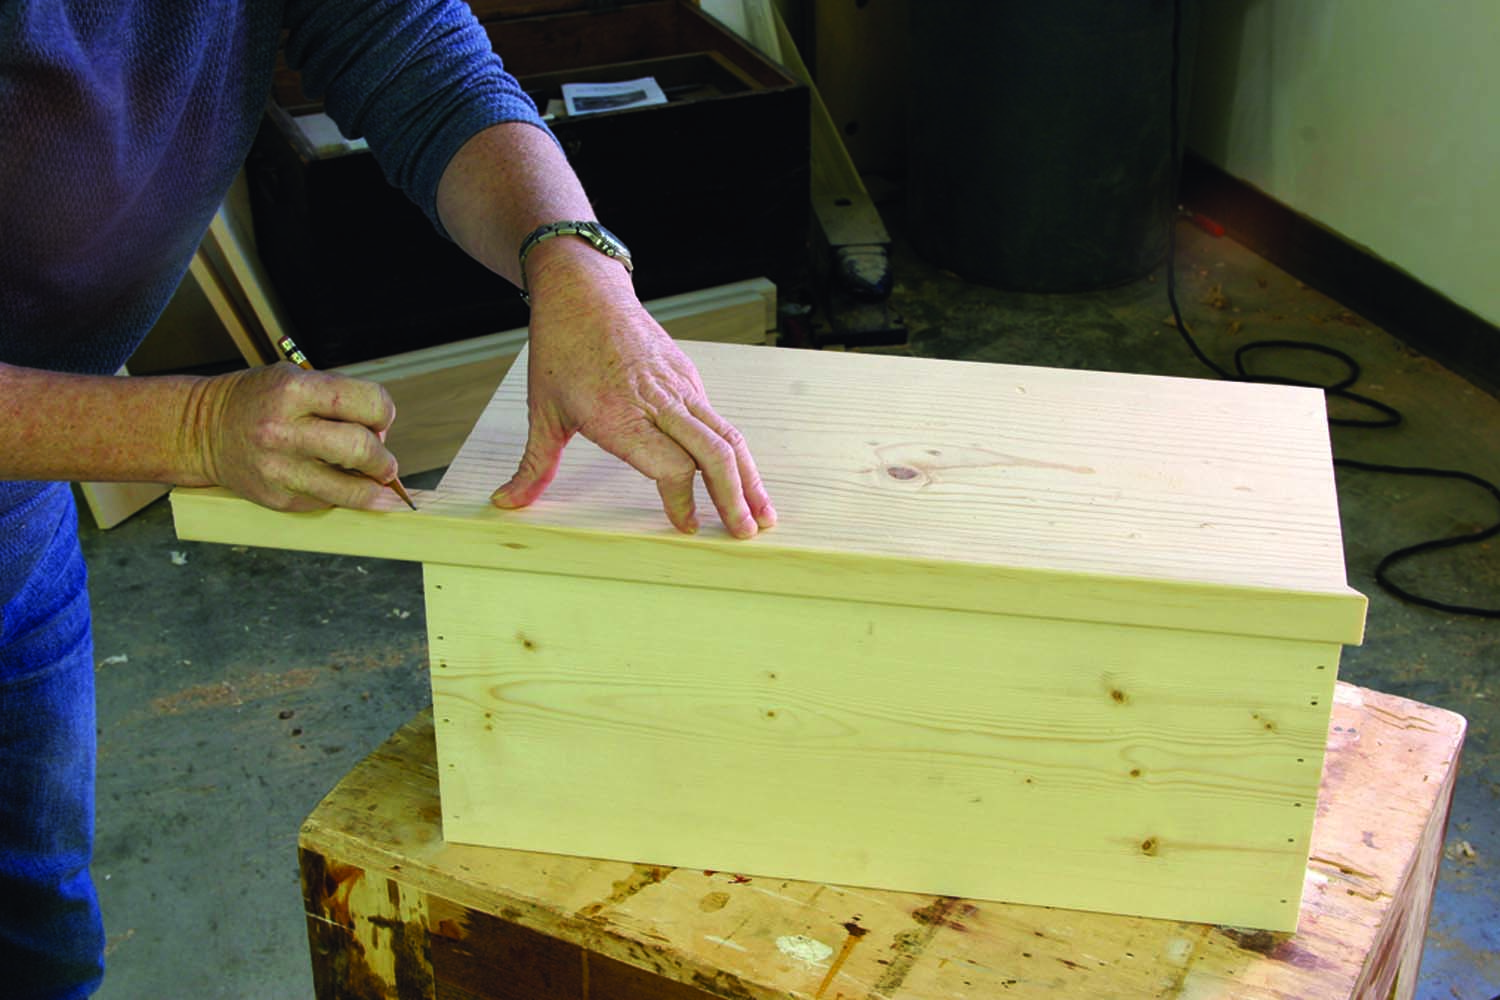
To dress up the top more, cut a 1⁄2″ x 5-1⁄2″ x 13-1⁄2″ piece of poplar (or whatever 1⁄2″-thick stock is available at your home center). Set a combination square to 1″ and mark a line in from each edge of the top face. Use a block plane to cut a bevel from the edge to your lines. Center the panel inside the moulding on the top, then glue and nail it in place.
Finishing Touches
The hinges are 2″-long brass butt hinges with 5⁄8″-wide leaves, mortised into the underside of the lid and the back. I used my combination square to mark the depth and width for each mortise, defined those extents with a chisel, then removed the waste with a series of chisel cuts.
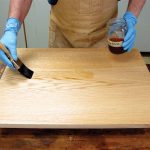
The finish is mahogany gel stain on the inside, and two coats of dark green latex paint on the exterior.
This “gent’s box” is now ready to be loaded with my (not-so-fancy) set of household tools.
BLOG: Discover more about period Gentleman’s Chests.
PLAN: Download the free SketchUp plan.
Here are some supplies and tools we find essential in our everyday work around the shop. We may receive a commission from sales referred by our links; however, we have carefully selected these products for their usefulness and quality.