We may receive a commission when you use our affiliate links. However, this does not impact our recommendations.
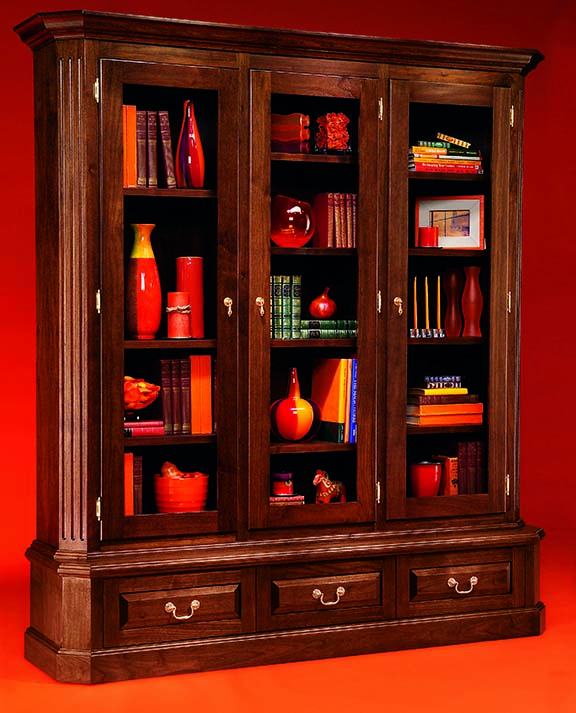
Grand Walnut Bookcase
Rich Walnut, elegant details and secret storage in a design that's fast and straight forward to build
By Randy Johnson
Sometimes a new piece of furniture conjures up images from a distant A big project like this does require a bit of experience. You’ll |
You may also like… |
The modular design of this cabinet makes it easy to build and move. |
Click any image to view a larger version. |
Secret storage below the drawers provides a hiding place for valuables. |
Lipped doors are easy to fit and hang and will even hide gaps caused by the doors being slightly warped or out of square. |
Both the lower drawer unit and the upper bookcase units have hollow ends. They act as torsion boxes, strengthening the units. |
Gluing the angled corners can be tricky, but it’s easy with a pair of plywood cauls. They hook around the front stile to prevent slipping and apply pressure to the corner’s face. |
Trim the base top of the drawer unit even with the case. A perfect fit is important, and it’s much easier to achieve with a flush-trim router bit than by measuring and sawing. |
Temporarily attach the drawer front with a few dabs of hot-melt glue. Open the drawer and drive in the screws that will permanently hold the front. When you’re ready for finishing, remove the front and scrape off the hot glue. |
The bookcase section is composed of three independent boxes, which make assembly a lot easier than handling one larger cabinet. The center unit, shown here, has bare plywood edges that will be covered by the side units’ stiles. |
Flute the corner boards for the bookcases with a core box bit on your router table, tipping the board onto the router bit at the beginning and up at the end. Start and stop marks on the router fence provide the starting and stopping points of the flute. |
Join the three bookcases with coupler bolts. Use a clamp to hold the cases together and double-check that the face-frame rails and stile line up flush at the top and bottom of the cases. |
Assemble the doors. Check that they are flat by sighting down a pair of winding sticks. Add shims, if needed, under the clamps until the top edges of the winding sticks align with each other. After the doors are out of the clamps, to avoid warping, make sure to store them flat until you install them. |
Cut the crown molding. Nesting the molding against the table and a tall auxiliary fence simplifies mitering, because it doesn’t require a compound miter setup.
|
Attach the crown molding to the mounting board with a brad nailer. Use a spacer to create a lip on the bottom side. This lip will overhang the top edge of the bookcase units and hide the joint. |
Add triangular glue blocks behind the crown molding for added strength. This crown assembly is screwed to the top of the bookcase. This story originally appeared in American Woodworker November 2005, issue #118. |
|
Here are some supplies and tools we find essential in our everyday work around the shop. We may receive a commission from sales referred by our links; however, we have carefully selected these products for their usefulness and quality.