We may receive a commission when you use our affiliate links. However, this does not impact our recommendations.

Feed the block slowly into this small blade. Forcing it will only give you a rough cut and possibly cause the blade to bow to one side.
There comes a time to give your ruler a rest so you can give your woodworking whimsy a chance to tickle your imagination. How do you know when that time is? When your curiosity is captured by your first glimpse of a band-sawn box sculpture, of course! Whether flowing or comical, elegant or a mere blob, a well-executed band-sawn box requires no mind-numbing calculations and is an eye-catching, functional project that anyone can display with appreciation.
Although I design them principally to hold jewelry, these boxes find their diverse places among stone, gem and coin collectors as well as functional art appreciators. My dad has a walnut wave box, drawers gushing with gift golf tees; I haven’t lost my car keys once since making a habit of putting them in the snake-shaped box by the phone. At one arts festival, a Saudi Arabian oil princess bought several of my pricey designs to use as gift boxes for some rather expensive jewels, while students visiting from various European, Asian and South American countries purchased them as gifts for their art teachers back home.

Smooth pattern cuts are accomplished by keeping the blade guide close to your work. Feed slowly to prevent straying from the lines.
Band-sawn box technique is easy enough for the beginner to tackle, but challenging enough for the seasoned veteran to say, “Hey, that’s cool! How’d you do that?” Plus, if your shop is not equipped to the ceiling with a sampling of every tool, the basic ones will work quite well.
My favorite band-sawn box designs are the ones that convey a theme of movement — ones that make the wood appear to bend and sway and flow. Thus Tsunami (or tidal wave) was born. The radiant ripples of the curly maple drawer pulls complement the splash of light sapwood on this aqueous walnut box. Originally a large four-drawer design, I scaled this one back a bit and simplified it by adapting it to two drawers.
Begin with a block of hardwood 11″ long by 5-1/2″ wide by about 4″ thick. It won’t hurt to be a tad on the generous side of any of these measurements, as absolute accuracy is not required to make this type of box. I recommend laminating 4/4 or 5/4 kiln-dried stock to avoid any cracking you might get with a solid, air-dried block (see “Simple Lamination” on the next page). Choose one of the 11″ x 5-1/2″ faces to be the front of your box, then square the bottom edge to the back of the block. The simplest way do this is to run the bottom over the jointer with the back against the fence, removing only small amounts of material at a time. Alternatively, using the table saw, raise the blade to just over half the thickness of the block, rip a small amount off half of the bottom of the block, then flip the block over front-to-back and do the same so that the bottom is flat. Now you can transfer the pattern onto the face of the block. You can either trace it with carbon paper or attach a copy with a light application of spray adhesive.

Glue and clamp the back slice on, making sure all surfaces are contacted. Go lightly on the glue close to the inside backs of the drawer cavities to prevent too much excess glue from squeezing into the box innards.
Next, tune up the band saw and tension a 3/16″, 10 TPI (teeth per inch) regular-tooth blade. Test the tension on a thick scrap to make sure the blade won’t bow in a thick cut. Re-tension, if necessary. Set the fence to 1/4″ from the blade. With its bottom on the table and its back to the fence, rip a 1/4″ slice off the back of the block. Set the back slice aside, and adjust the blade guide height to just above the thickness of the block as it lies on its back. Cut the drawer blocks out according to the pattern lines. Turn the saw off to back out of each cut.
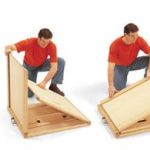
Once the drawer blocks are removed, use any type of drum sander (an oscillator works best) to soften the saw lines inside the box cavities. Don’t sand too much off the insides though, or else the gaps left when you replace the finished drawers will be too large and unsightly. You can glue and clamp the back slice onto the back of the box once you’re done sanding the inside. Three 10″ handscrew clamps work the best, as they contact the entire width of the box and prevent the wood from sliding around as you clamp it. But any number of other clamp designs will work just as well if you add a flat clamping block on either side of the box to ensure contact with all surfaces. Don’t squeeze the entrance kerf at the bottom of the box closed while clamping the back on. You’ll need room to chisel and sand a roundover there later, integrating it into the design. While that dries, set the band saw fence to 1/4″, readjust the blade guide height accordingly and slice the back off each drawer. Then set the fence to 1/2″ and slice the front off each drawer. Next, mark the cuts that hollow out the drawers, using the pattern as a guide. Alternatively, you can customize the sizes of the drawer sections once you remove the clamps from the box. Do this by setting the blocks (without their fronts and backs) into their respective cavities in the box body. Mark the sections using a square to keep the lines level and perpendicular to the bottom/top and sides of the box block.

Rip 1/4″ off the back and 1/2″ off the front of each drawer.
Adjust the blade guide height and make the hollowing cuts in the drawer blocks. Then glue and clamp the fronts and backs onto the drawers. Clamp them as accurately as possible to avoid having to sand them to excess. While they dry, select an attractive piece of 3/4″ scrap from your wood pile to serve as the drawer pulls. Trace their shapes and cut them out. Use a push stick for safety with these small pieces. You can cut the outer shape of the box body at this time too, but don’t be too concerned if the outer shape is rough at this point.
Once all the clamped parts are thoroughly dry — this can be anywhere from a couple hours to overnight, depending on temperature and humidity — you can begin belt sanding. Set the belt sander in the vertical position, with the table square to the belt. If there is a guard obstructing the top cylinder, remove it, as you will use the shape of the cylinder in your sanding and shaping process. This is the creative part, and there are no set rules to follow, except to keep a firm grip on your work. Don’t get over-aggressive when feeding your work into the belt — the belt just might get aggressive right back by pulling a drawer out of your hands and throwing it to the floor! It is important to note at this point to sand the outer shapes of the drawers with a light hand. You want to remove all the saw lines, but you don’t want to remove so much material that the drawers leave huge gaps at the tops when placed back into their cavities in the box.

If you take it slowly, a 3/16″ blade can achieve sharp curves in the corners when hollowing out the drawers.
Begin belt sanding the outer box shape with a coarse 60- or 80-grit belt. First lay the box flat on the table and smooth the saw lines out to the pattern shape. You’ll need to use the cylinder at the top of the sander or a drum sander with a 3″ drum for the concave surfaces. While you have the coarse paper on the sander, grind, shape and round the edges of the front and back of the box. Curve in the concaves at the bottom and side using either the cylinder on the belt sander or a drum sander. This type of “carving” adds a sense of depth rather than flatness to the box by varying the roundness of the edges. Don’t be afraid of removing too much material on the thick edges. They will be rough, but they round out nicely with 80-grit paper on a soft-padded palm sander. Shape the drawer pulls in the same way, taking care not to sand too much of your fingertips off in the process. Be sure the backs of the pulls, which will be glued to the drawer fronts, are flat. Continue on through medium and fine grits to remove the coarse sanding lines. To make palm sanding easier, belt sand with the grain on the sides with the medium and fine grits to remove the cross-grain lines. Do this by feeding the box sides in a gentle upward motion against the pull of the belt.

When shaping the box edges, feed the wood into the belt with an upward motion. In general, take more wood off on the thicker edges, and less where it’s thin.
On the router table, round over the drawer fronts with a 3/8″ roundover bit. With a hand-held router, round over the edges of the drawer cavities in the box body with a 3/8″ roundover bit.
Palm sanding with 80-grit makes quick work of the hard edges you roughed out on the belt sander. From there, palm sand the entire project with a succession of medium and fine grits, making certain to remove any cross-grain lines that may be left over from belt or drum sanding. You can roughly chisel and sand a roundover in the saw kerf edges at any time during your palm sanding operation. Hand-sand beginning with 80-grit to make quick work of rounding over the chiseled kerf edges. Continue sanding, working through progressively finer grits, and stop with 180. Hand-sand the drawer pulls to soften their shape, apply a thin layer of glue to the flat backs, and position them on the sanded drawers. Eye them up to your taste for symmetry, using the pattern as a guide, then apply hand pressure for a couple minutes to clamp and set the glue.
While you’re waiting for the drawer pulls to dry, do a final touch-up sanding with 180-grit by hand over the entire box, especially around the edges and in the cavities of the box. Use a sharp chisel to chip off any glue squeeze-out on the inside of the drawer cavities where the back was clamped onto the box. When the drawer pulls dry, lightly chisel and/or sand any squeeze-out there also.

A little twist of the wrist over the top cylinder can create some interesting effects in your box’s inner curves.
Band-sawn boxes lend themselves well to an oil finish. Oil is much easier than trying to spray or brush a varnish inside those box cavities, but that’s just my humbly biased opinion. Whichever type or brand of oil you decide to use, make sure you wet sand with 600-grit wet or dry paper between the first and second coats. Wipe off any excess oil with a dry cloth. And make sure each successive coat is thoroughly cured before applying the next one. This will ensure a smooth, even, luxurious finish for those curves — a treat for the fingertips as well as the eye.
Thought you were done? You still need to flock those drawers yet. A flocking kit is simple to use and comes with basic instructions. Seal the insides of the drawers with a coat of shellac or other varnish so the flocking adhesive won’t soak in too much. Using a cardboard box turned on its side as a mini spray booth to catch the excess flocking material, pump a heavy coat of flocking into the drawers until all the wet spots are gone. Tap out the excess and pump more flocking material in if any wet spots reappear. Then, collect the over-spray of flocking and let the drawers dry overnight. When dry, vacuum out the loose fibers and dust off the drawers. A light coat of paste wax, well-buffed, will make the drawers glide smoothly.

You can taper the drawer pulls to add depth if you choose, or you might decide to leave them flat and just round the edges a little. Experimenting with these little shapes not only gives you an idea of what you can do on a larger scale with your box, but comes with the added benefit of a manicure, too.
Once you see how easy and liberating the less-structured process to make a band-sawn box can be, you may just decide to give up squinting at those 1/16″ lines on your ruler. And maybe your unusual woodworking technique will catch the eye of a rich princess….PW
Click here to download the PDF for this article.
Lois Keener Ventura runs www.knothomedesigns.com.
Here are some supplies and tools we find essential in our everyday work around the shop. We may receive a commission from sales referred by our links; however, we have carefully selected these products for their usefulness and quality.