


We may receive a commission when you use our affiliate links. However, this does not impact our recommendations.
Tips for Making Book-Matched Panels
Succeed with a touch of artistry and skill.
By Seth Keller
The longer I’ve worked with wood, the more I’ve appreciated that no two boards are alike. I like variety! But when I make a door panel or a cabinet side, I often want perfectly symmetrical boards: a book-matched pair in which the two boards mirror each other.
I make book-matched panels by sawing through the middle of a thick board, splitting it in two. It’s just like opening a book—you never know exactly what you’ll find inside! With the perfect board, the effect is stunning. Here are some tips to help you find those boards, to make the most of those that are seemingly too thin or too narrow and to glue them into striking patterns.
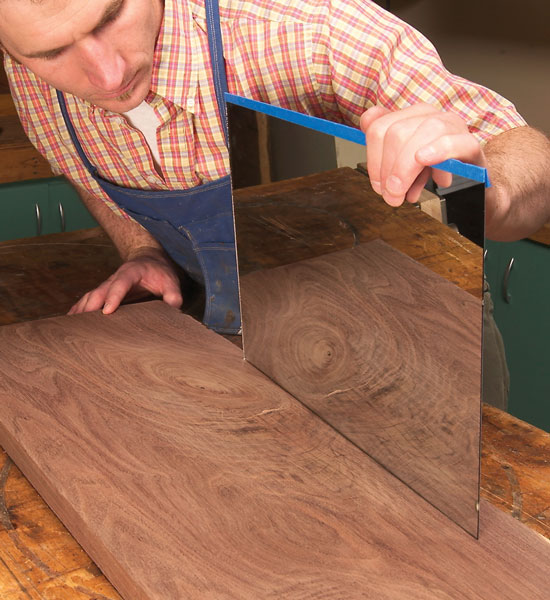
Make magic with a mirrorMy friends laugh about resawing magic, but I really do use a mirror before crosscutting and resawing a board into book-matched panels. By shifting the mirror, I can gain a fairly good idea how the finished panel might look. Angle the edge this way or that way? Crosscut here, or maybe down there? Just like a magic act, this mirror trick is really a lot of fun. I only wish the mirror could tell me what the inside of the board looks like. The outside is just a hint. |
|
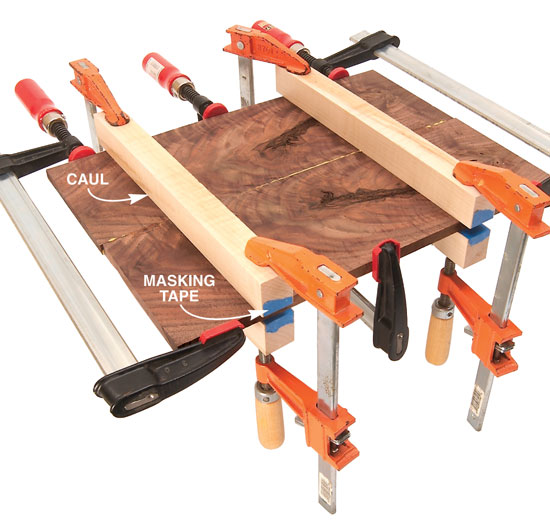
Align with caulsIt’s hard to clamp thin resawn boards together. The clamps won’t stay on the edges. The joint pops apart. The seam won’t stay even. Any of these situations can become a calamity if you’ve got glue on the boards, but cauls can save the day. Cauls are straight, stout boards that hold the panel rigid. Tape prevents the cauls from adhering to the panel. Here’s the gluing order: First, put tape on the cauls. Next, apply glue to the two book-matched panels and butt them together. Clamp the cauls to the panel in opposing pairs. Finally, place clamps across the panels and squeeze the joint tight. |
|
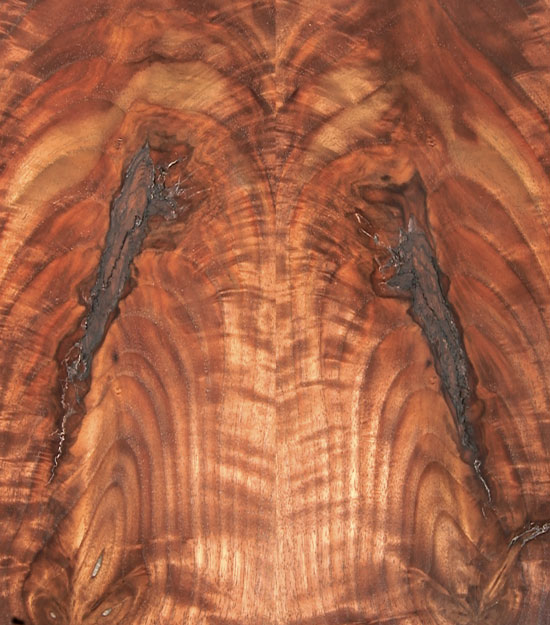
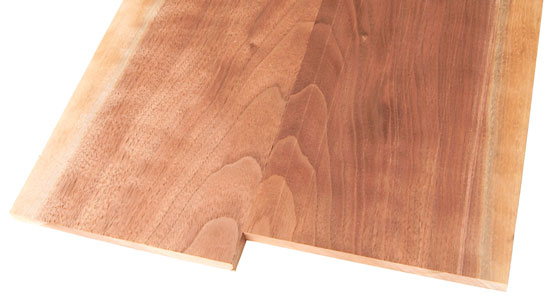
Think inside the boardIgnore the straight edges the sawmill gave you. If you can imagine new edges running at skewed angles to the factory ones, you can create spectacular mirror images. This poor walnut board was cracked, had sapwood running down one side and featured an ugly bull’s-eye figure. But it was crotch-wood, cut near a branch, with curly grain and dramatic colors. After I sawed new edges and split it open, look how splendidly it turned out (see photo, above). Wow! |
|

Make panels extra longExtra length makes it easier to align grain patterns by sliding one board past another. If you could cut a board with a knife, the way veneer is made, the grain on both boards would line up perfectly. But in the real world, sawing and jointing remove at least 1/8 in. between the boards. This lost wood means the boards’ figure won’t be identical. Look at the edge of the board you’ll resaw: The greater the angle at which the grain leans, the more offset the grain patterns will be. To be on the safe side, I usually roughcut the boards I’ll resaw at least 2 in. longer than the panel’s finished length. After sliding one board past another, I look for good balance but don’t expect all the figure to be perfectly aligned. I match the most prominent lines and disregard the rest. |
|
Add thickness before sawingSometimes you have the perfect board for book-matching, but it’s not thick enough. After bandsawing and planing, you might end up with a panel that’s only 1/8 in. thick. This won’t do, but don’t toss that board away. You can salvage the piece by gluing two more boards of the same species, one on either side, like a sandwich. Now you’ve got a thick board that’s easy to resaw, joint and plane into two boards that are the thickness you need. The panel’s back won’t be book-matched, of course, but if it’s a cabinet side, who’s going to know? |
|
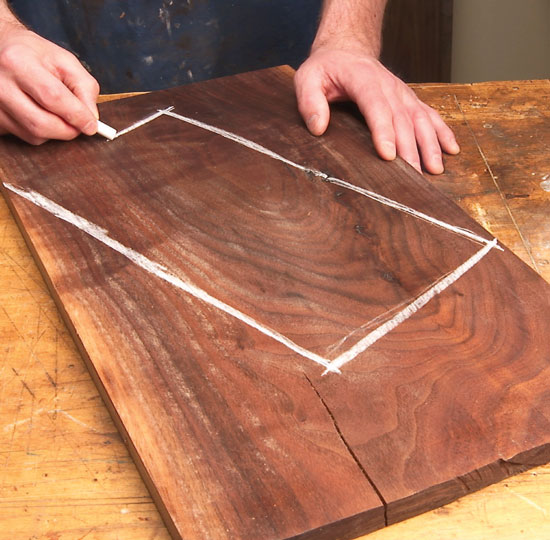
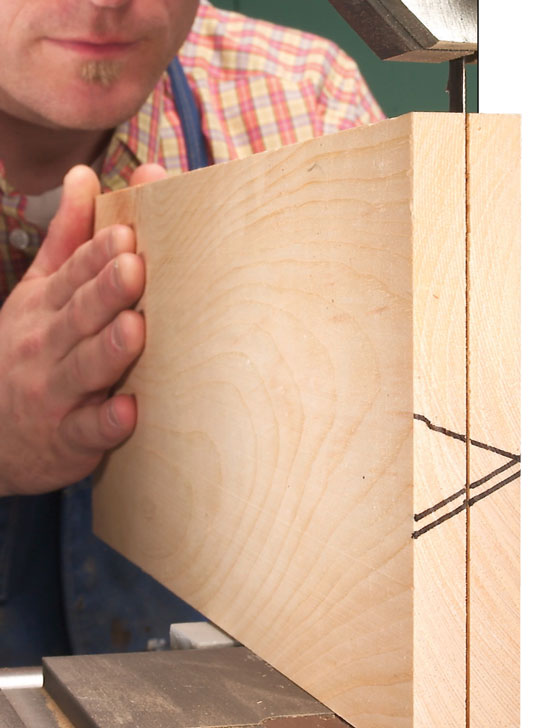
Mark the edgesDo you ever get confused about what goes where? After machining a pile of resawn boards, I’ve had trouble identifying exactly which boards go together and which faces are the inside ones, the perfect matches. Sometimes an outside face can look suspiciously like an inside face. To prevent this predicament, I now mark my boards with a cabinetmaker’s triangle before I saw. This mark positively identifies the inner faces, because the triangle’s halves can go back together only one way. I use different line patterns or colors to distinguish one board from another. |
|
Sand after gluingThe high-tech way to level glued-up book-matched panels is to use a drum sander. If your boards have really wild grain from around a crotch or a knot, this is definitely the way to go. With a drum sander, there’s no way you’ll get tear-out. |
|
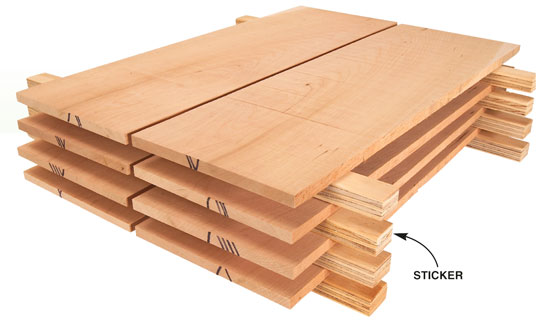
Saw, sticker and stackPatience pays off when making book-matched panels, whether they’re large or small. After you saw, stack your boards in a pile. Separate each layer with stickers, so air circulates freely. Wait a few days before jointing and planing. This gives each board a chance to twist or cup if it wants to. These forces are virtually unstoppable, so it’s better to give in than fight. Here’s your consolation: This approach improves the chance that your book-matched panels will stay flat when installed in your project. |
|
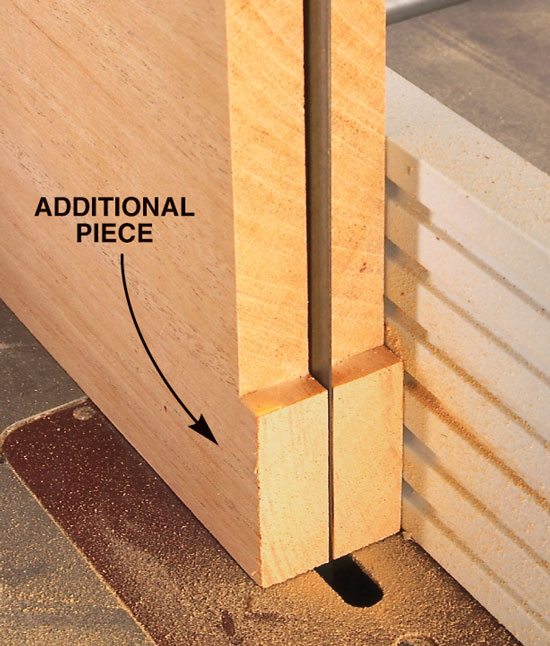
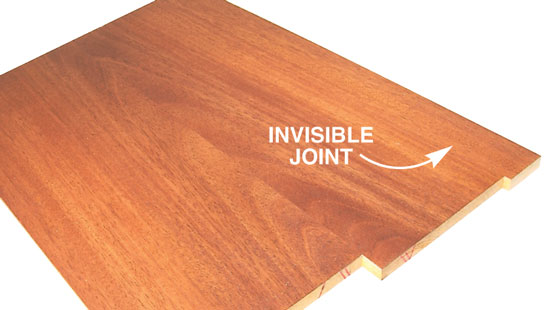
Add width, then sawWhat do you do if an ideal board isn’t wide enough? Get out the board stretcher? I wish. No, the best solution is to edge-glue an additional piece before you resaw. This works best when you’re working with wood that has straight-grained figure. Straight grain glued next to straight grain can make a nearly invisible joint, particularly if the panels and the additional pieces come from the same parent board. |
|
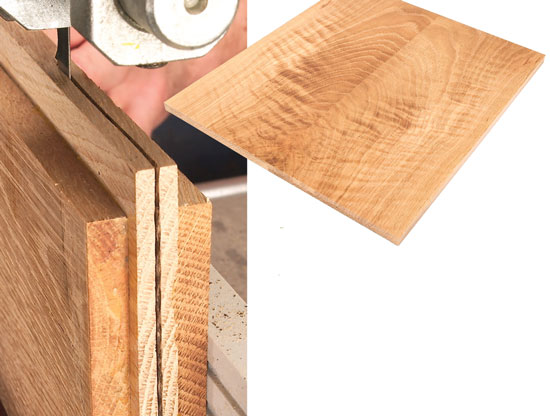
Seek unusual figureLook twice at this panel—can you see an elephant’s head? I didn’t see this one at first, but boards with weird figure are often good candidates for resawing into book-matched panels. Keep your eyes open for boards with swirly grain or knots near an edge or those whose figure runs out along an edge. When they’re book-matched, the two mirror images make something new and entirely different, just like a folded ink blot. I prefer abstract patterns to elephants’ heads, but children sure like this one. |
|

|
This story originally appeared in American Woodworker October 2006, issue #124.
|
|
Here are some supplies and tools we find essential in our everyday work around the shop. We may receive a commission from sales referred by our links; however, we have carefully selected these products for their usefulness and quality.


