We may receive a commission when you use our affiliate links. However, this does not impact our recommendations.

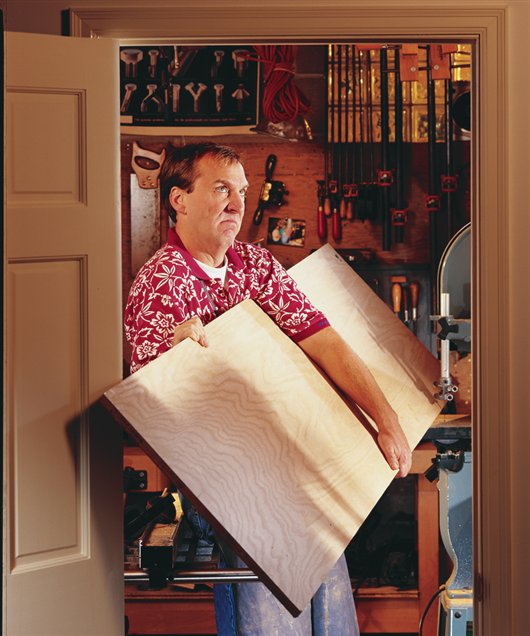
Is Your Shop Too Small?
Tips for
making
king-size
projects in
a pint-size
shop.
By George Vondriska
n a recent poll of woodworkers, the
most common complaint,by far, was that
their shops were too small. Even one guy
with 5,000 square feet thought he was
cramped!
In spite of that, most of us would like to
be able to turn out dining room tables,
kitchen cabinets and other big projects.
Well, if your shop and tools are small,
but your dreams are gigantic, here are
some ideas that will help.
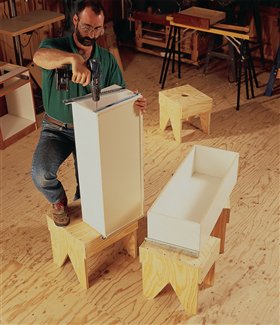
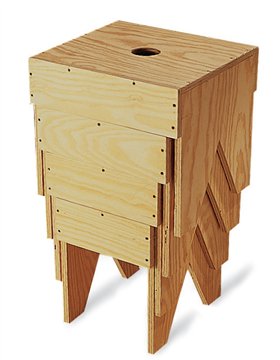
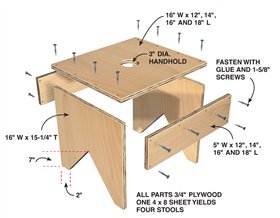
A nest of crickets
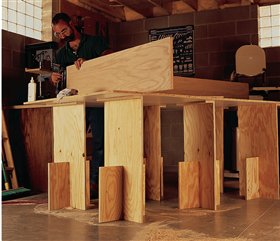
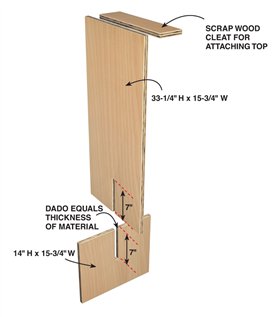
Call them low boys, stools or crickets—
whatever you call them, these
stands are amazingly useful. And
because they nest, they’re perfect for a
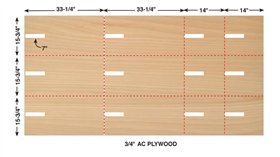
cramped shop. You can make four of
them out of one sheet of 3⁄4-in. plywood.
The 16-in. height is just right for
large work that might not fit on normal
sawhorses. For working around the
house, that extra height makes it easy to
reach the ceiling. If that’s not reason
enough, when your buddies come over
to give you “helpful” shop advice,
you’ve got plenty of seating.
|
|
Click any image to view a larger version.


|
Use a router for crosscuts
Ever tried to trim the ends on an
8-ft. dining table in a shop that’s
only 9-ft. wide? The trick is to
use a router instead of your tablesaw.
Rough-cut the top with a circular
saw or jig saw first, using a
fine blade to avoid splintering.
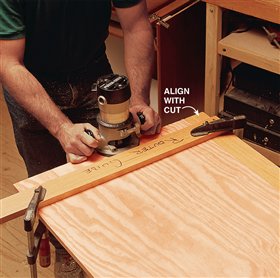
Then use a simple T-square jig
and a router with a straight bit to
trim the work to length.
Note that one leg of the
T-square has already been
trimmed by the router, so you
can simply line up that end with
your cutting line. Hang on to the
jig and use it only with that router
and bit. I once made a bunch of
cabinets without using a tablesaw
at all. I simply rough-cut the
pieces with a circular saw (see p.
50), then trimmed them to final
size with a router.
|
|

|
Cut dadoes with a router
Here’s the scene: You’re building an
entertainment center and the sides are
7-ft. high and almost 3-ft. deep (big
enough for that big-screen TV you’ve
always wanted). But the sides have to
be dadoed for shelves. Forget trying
to use a dado head on
the tablesaw, unless you happen
to have 8-ft. rails on your saw!
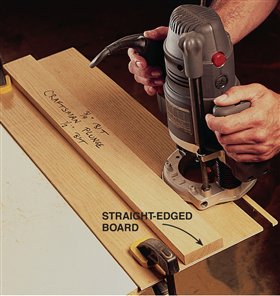
Instead, use a router and this easily
made jig:
Make the jig from a straight board
and a piece of 1⁄8- or 1⁄4-in. plywood or
hardboard wide enough to extend 4
in. on either side of the board. Glue and
screw together, then trim the bottom board using
your router and a
straight bit. The diameter of
the bit should be whatever size you
plan to use for the dado. I trim one side with a
1⁄2-in. bit and the other side with a 3⁄4-in. bit.
To cut the dado, simply line up the edge of the
jig with wherever you want the dado.
|
|
Making the jig

|
Ceiling drawers
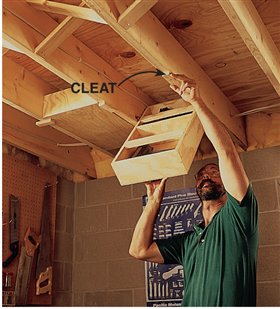
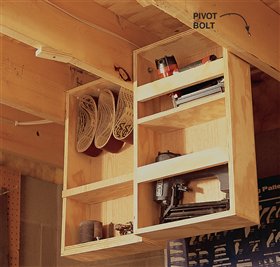
To eke out every cubic inch of
storage in a basement shop, try
these boxes that hang between
your ceiling joists. When a
drawer is down, you have easy
access to its contents. A lag screw
or bolt works well for a pivot
and a pair of pivoting cleats holds
each drawer in place. They’re
perfect for tools and supplies you
don’t need to get at all the time.
|
|


|
Collapsible work stands
In a small shop, the more things that can be folded
up and moved out of the way, the better. These
work stands are easy to build, easy to store and
cheap. They’re especially good for finishing and
gluing up panels. One sheet of 5⁄8-in. AC plywood
will yield six stands. If you make them the same
height as your tablesaw they will double as infeed
and outfeed supports.
|
|


|
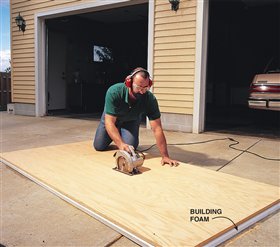
Rough-cut plywood
It’s awkward to manhandle plywood in a small
shop and sometimes your cuts aren’t accurate
just because the sheets are so unwieldy. One solution
is to rough-cut the pieces with a circular
saw and then make final cuts on your tablesaw.
Lay the plywood on top of a piece of building
foam, use a fine-tooth blade in your saw and set
the saw so it cuts just 1⁄8-in. deeper than the plywood.
Then simply kneel on top to cut. It’s much
easier than sawhorses.
Make sure that you leave a factory edge on
each piece that you cut. Although you may have
to trim it off later, it’s essential as a reference for
your first cut on the tablesaw.
|
|

|
Pay for service
For some situations, the easiest
thing to do is to pay a
larger shop to do the work.
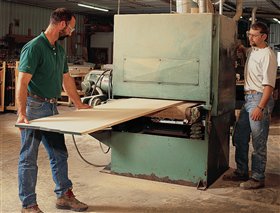
For example, a wide belt
sander, shown at left, is great
for leveling glued-up tabletops,
especially if the grain is
curly or otherwise difficult to
plane. You’ll find one in cabinet
shops and even some large
school shops. Cost to have
this done is variable, but generally
low.
|
|

|
Joint edges with a router
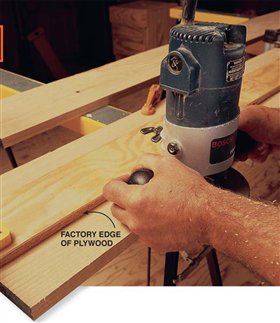
Trying to joint the edges of 8-ft. long by 12⁄3-
in.-thick hard-maple boards on a small jointer
can end in disaster. Use a router, guided
by a long straightedge, instead. The factory
edge on a piece of hardwood plywood is
sufficiently straight. Clamp the straightedge
to the board so you’re removing about 1⁄16 in.
Use a straight 1⁄2-in. or 3⁄4-in. bit with a guide
bearing above the bit (available from mailorder
sources like Jesada Tools, 800-531-
5559; around $30).
|
|

|
Easy-to-store clamp racks
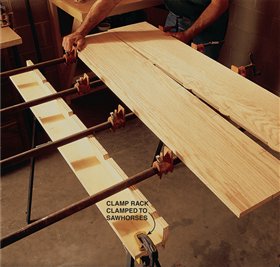
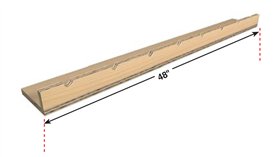
In a small shop, there’s no room
for a dedicated glue-up table,
and often no room for much of
an assembly table either. But you
can make room for edge gluing
with these clamp racks that fasten
to sawhorses when needed.
|
|


|
Product Recommendations
Here are some supplies and tools we find essential in our everyday work around the shop. We may receive a commission from sales referred by our links; however, we have carefully selected these products for their usefulness and quality.


