We may receive a commission when you use our affiliate links. However, this does not impact our recommendations.
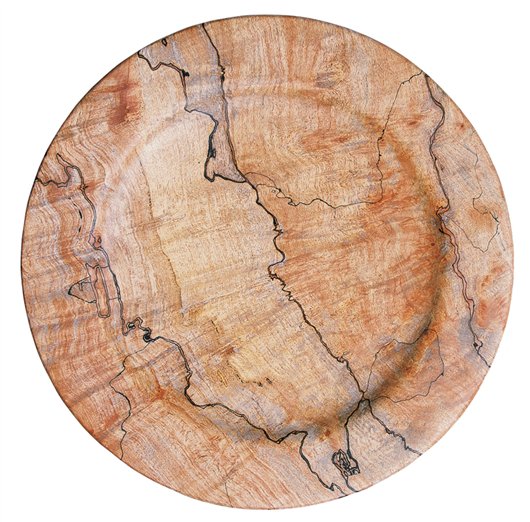
Turning Plates
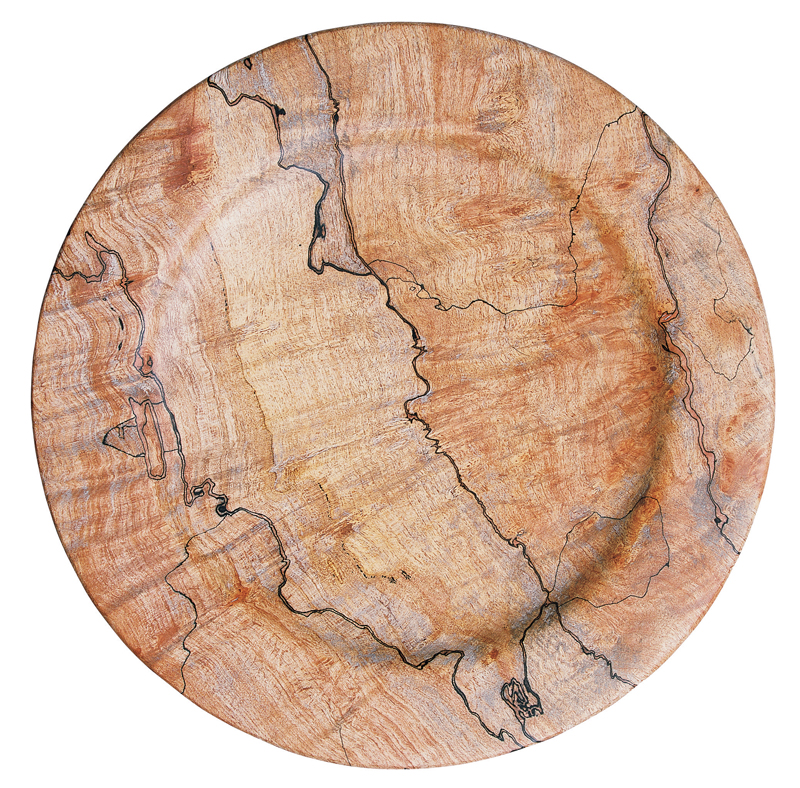
Got an offcut from a beautifully
figured board? Turn it into
a plate! Standard 3⁄4-in. wood
and a shop-made chuck are
all you need.
By Steve Blenk
|
The trick is to figure out how to hold such
a thin piece of wood on the lathe. It’s so thin,
there’s hardly anything to grab onto. Here’s a
safe and simple system for turning a plate
from thin wood.
All you’ll need is a small face plate, a
medium-sized bowl gouge (3⁄8-in. to
1⁄2-in.), a round-nose scraper, some masking
tape and a large, thick chunk of wood for the
chuck.
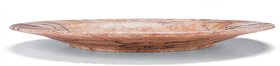
A plate blank that’s 9- to 10-in. wide works
best. It can be glued-up or cut from a wide
board, just as long as one side is flat and
smooth. You’ll need that flat surface in order to
glue the plate blank onto a mounting block.
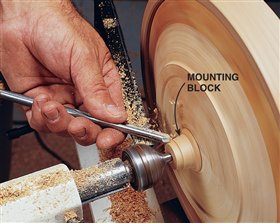
To make the blank, cut off a square piece
from the wide board and cut it into a rough circle
with a bandsaw. Draw a 3-in. circle in the
center of the blank’s smooth side. Then make
a 3-in.-dia. mounting block from a piece of
1-in.-thick wood that’s been surfaced on both
sides. Screw the mounting block onto a small
face plate. Now follow the photo sequence
and create your own stunning plate.
|
|
Click any image to view a larger version.
|
|
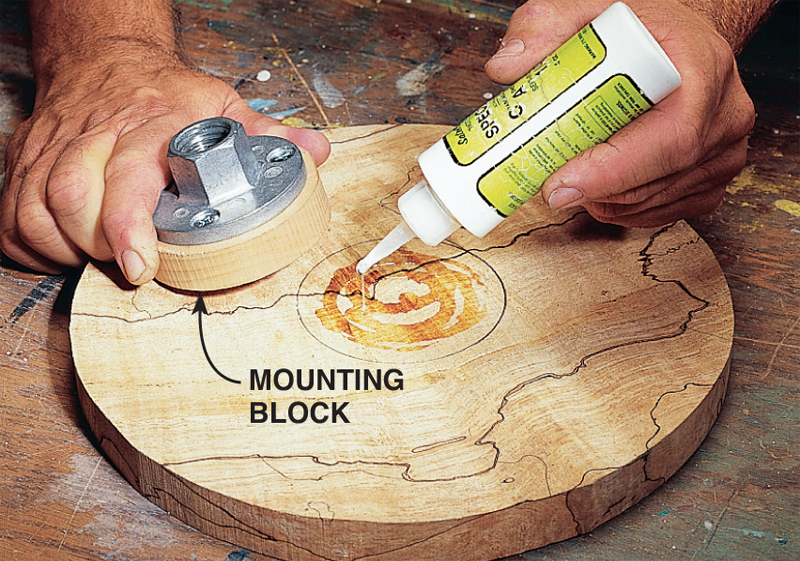
1. Glue the mounting block onto
the plate blank. Use medium- to thickviscosity
cyanoacrylate (CA) glue. It
dries quickly, so you’ll be ready to turn
in two to three minutes.
Adjust your lathe to run at its lowest
speed.Then mount the face plate on
the lathe and true up the face and
edge of the blank with a bowl gouge.
|
|

|
|
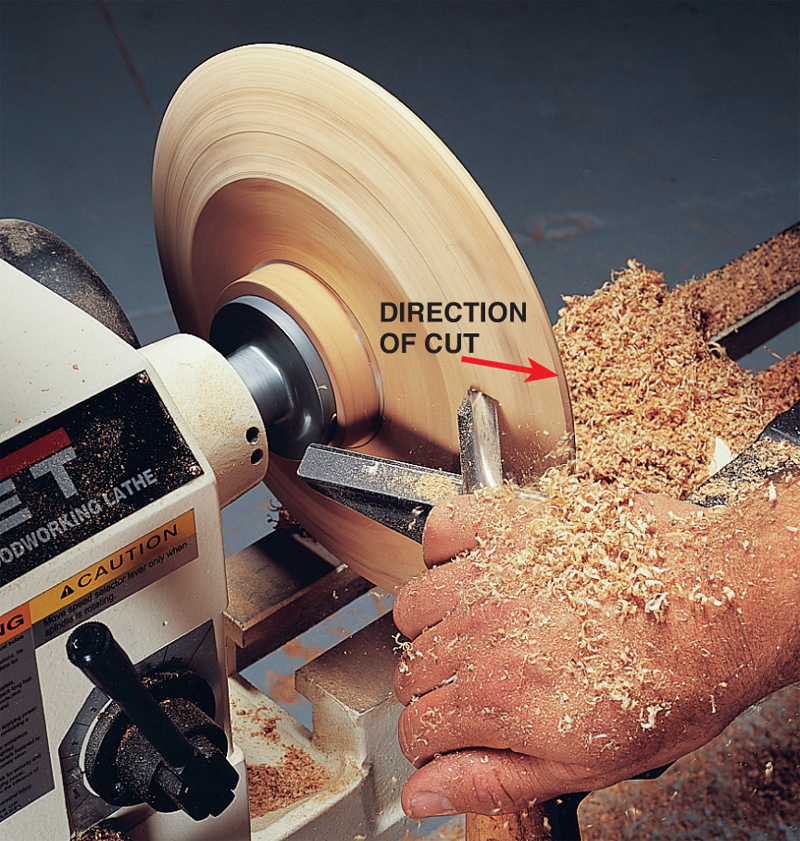
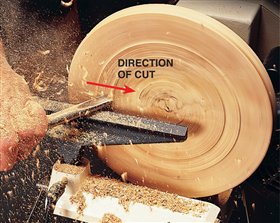
2. Round the plate’s rim with
the bowl gouge turned on its side.
This prevents the gouge from
catching and is called a “closed
cut.” Move in the direction of the
arrow and swing the handle of the
gouge around the corner. Ride the
bevel of the gouge on the plate,
keeping the cut very light.
|
|

|
|
3. Flatten the face of the plate.Work
from the outside to the center. Keep the
bevel of the gouge rubbing against the
plate to make this shearing cut.
Because you are working with thin
material, use light shearing cuts, especially
around the rim.You can place your hand
behind the rim to reduce vibration.
|
|
|
|
4. Cut a cove to define the rim.
Drop the handle of the gouge below
the level of the tool rest so the gouge
won’t catch. Keep the bevel riding on
the plate.
Next dish out the center of the plate
with shearing cuts. Measure the depth
of the plate before you cut too deep.
If you’re careful you should be able
to make a very smooth surface across
the entire face of the plate with the
gouge.You can move right on to
sanding. But if you’ve had some
trouble and there are tool marks you
can’t get out, reach for a scraper.
|
|

|
|
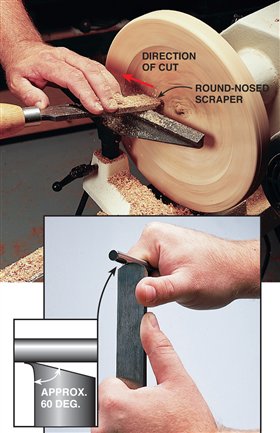
5. Scrape the face of the
plate with light cuts for a
smooth surface.Move
from the center out to the
edge. Raise the handle of
a round-nose scraper
above the level of the tool
rest so its cutting edge
won’t grab.
Burnish a scraper’s
edge at a 90-degree
angle. Grind the scraper
first at 60 degrees, then
remove the wire edge
with a sharpening stone.
Burnish with a single pass,
using hard pressure (see
Sources, below.
|
|
|
|
6. Remove most of the waste from the back side of the plate. Move the bowl
gouge from the center out to the edge.Take the rim down to its final thickness.
Again, you can support the rim with your hand to reduce vibration.
Sand the face of the plate and apply a finish as it spins on the lathe. Sand and finish
the outer edge of the back side as well.Then remove the face plate from the lathe.
|
|

|
|
7. Make a rim chuck to hold the face side of the plate.Make the chuck from a wide
piece of hardwood.The wood should be at least 11⁄2-in. thick or make the chuck from two
3⁄4-in.-thick pieces of marine plywood that are glued together. (Marine plywood is free of
annoying voids.)
Turn a recess into the face of the chuck.The plate should fit snugly within it, but you can
insert paper shims if it’s a little loose. (You can re-use the chuck for smaller plates by
turning another recess.) Drill a hole through the chuck so you can pop out the plate with
finger pressure.
Once the plate is mounted, snug up the tailstock to the mounting block to hold the
plate securely in the chuck.
|
|

|
|
8. Reduce the mounting block to a
1⁄2-in.-dia. stub tenon with the bowl
gouge.Then shape the plate’s base and
complete the underside of the rim. Sand
and finish the back while it’s still
supported by the tailstock.
|
|
|
|
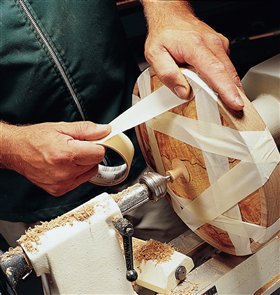
9. Tape the plate into the rim
chuck. Use plenty of wide
masking tape. Adjust the lathe
to run at its lowest speed.Then
back off the tailstock and cut
off the stub tenon with the
bowl gouge.
Use light cuts so you don’t
dislodge the plate. Sand and
apply finish to the rest of the
plate’s bottom. Remove the
tape as soon as possible so it
doesn’t leave any marks.
|
|
|
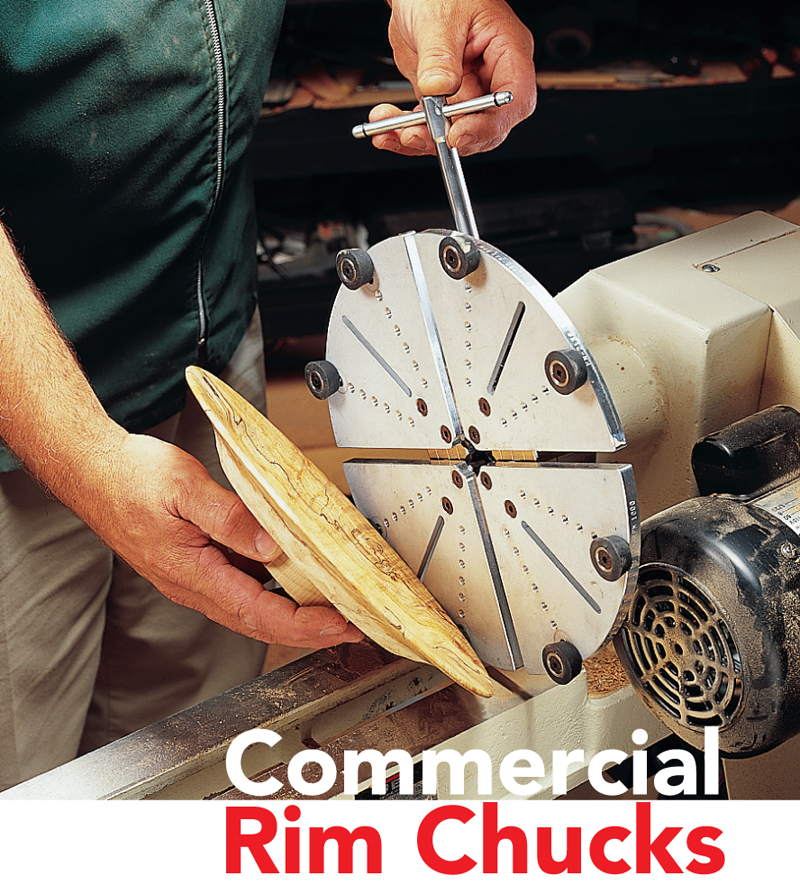
Commercial Rim Chucks
If making a wooden rim chuck for every plate you turn seems like too
much work, try a commercial adjustable rim chuck. A turn of the wrench
simultaneously moves four aluminum jaws in and out to firmly anchor your
plate. Eight rubber buttons screwed into tapped holes in the jaws hold the
edge of the plate.
Pictured at the right is a set of Jumbo Jaws mounted on a Oneway Stronghold
Chuck. They can hold a plate from 23⁄4- to 11-in. diameter.
|
|

|
Fig. A: Cross Section of Typical Plates
Try these classic
shapes for starters or
copy any piece of china
that you like.The
thickness of your wood
plate shouldn’t be less
than 3⁄16 in.
|
|

|
Sources
(Note: Product availability and costs are subject to change since original publication date.)
Packard Woodworks, 800-683-8876, Plate Finish.
If your plate will have food served on it,
use Behlen’s Salad Bowl Finish. It’s a quick drying
food-safe varnish,125701, 1 pint.
Hock Handmade Knives, 888-282-5233, Unhandled 3⁄8-in. Burnisher, #BR375.
Lee Valley Tools, 800-871-8158, Veritas Scraper Burnisher
#05K35.01.
This story originally appeared in American Woodworker February 2000, issue #78.

|
|
|
Product Recommendations
Here are some supplies and tools we find essential in our everyday work around the shop. We may receive a commission from sales referred by our links; however, we have carefully selected these products for their usefulness and quality.