We may receive a commission when you use our affiliate links. However, this does not impact our recommendations.
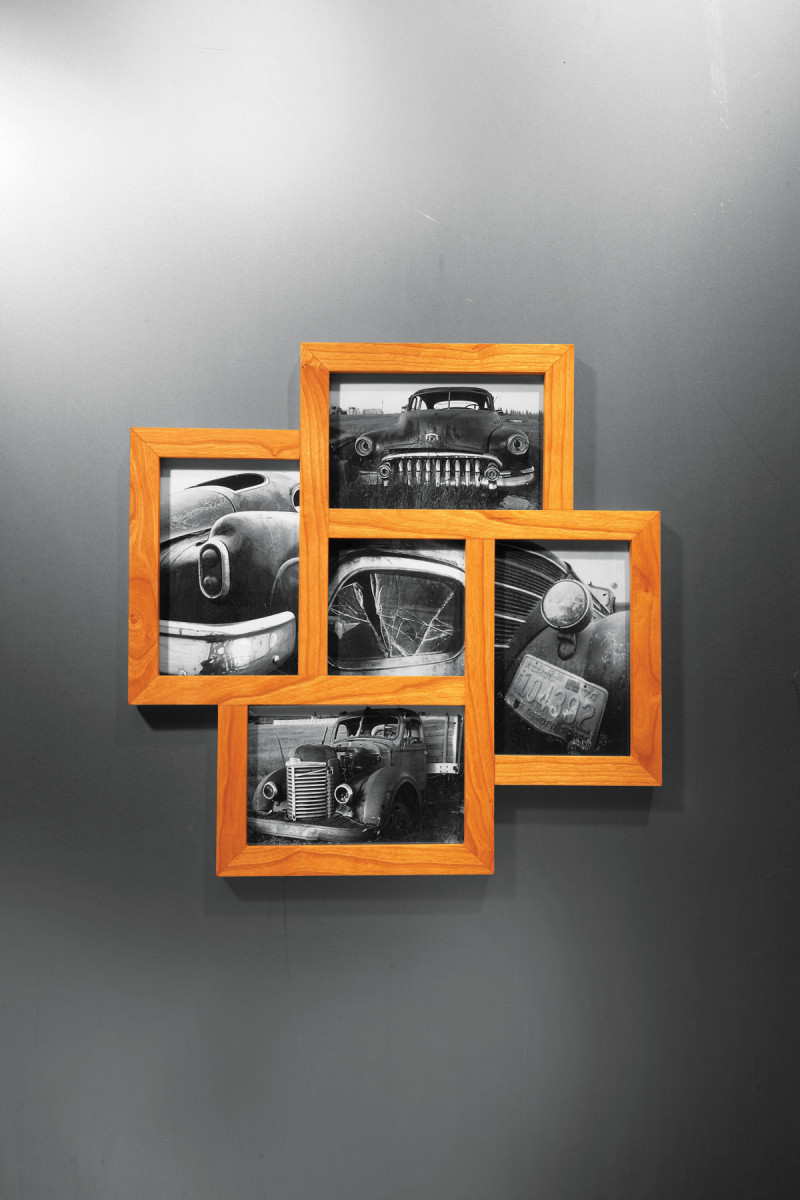
If a picture is worth a thousand words, this frame reads like a book!
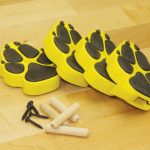
Here’s a 5-for-1 deal that’s hard to refuse. This neat little frame displays two 4″ x 6″ portrait images, two 4″ x 6″ landscape images and one 4″ x 4″ image in a 13-1/2″ x 13-1/2″ package. Made from a single 3/4″ x 4″ x 22″ board, it assembles with half-lap joints and miters that are reinforced with decorative splines. This frame contains only three parts, so it’s easy to build—you simply make multiples of each part and assemble them. A couple of simple jigs make building multiple frames just as easy.
Cut the frame parts
1. Cut all the frame parts from one long blank. First, cut rabbets on both ends and two dadoes. Then rip the blank into four pieces sized to fit the dadoes.
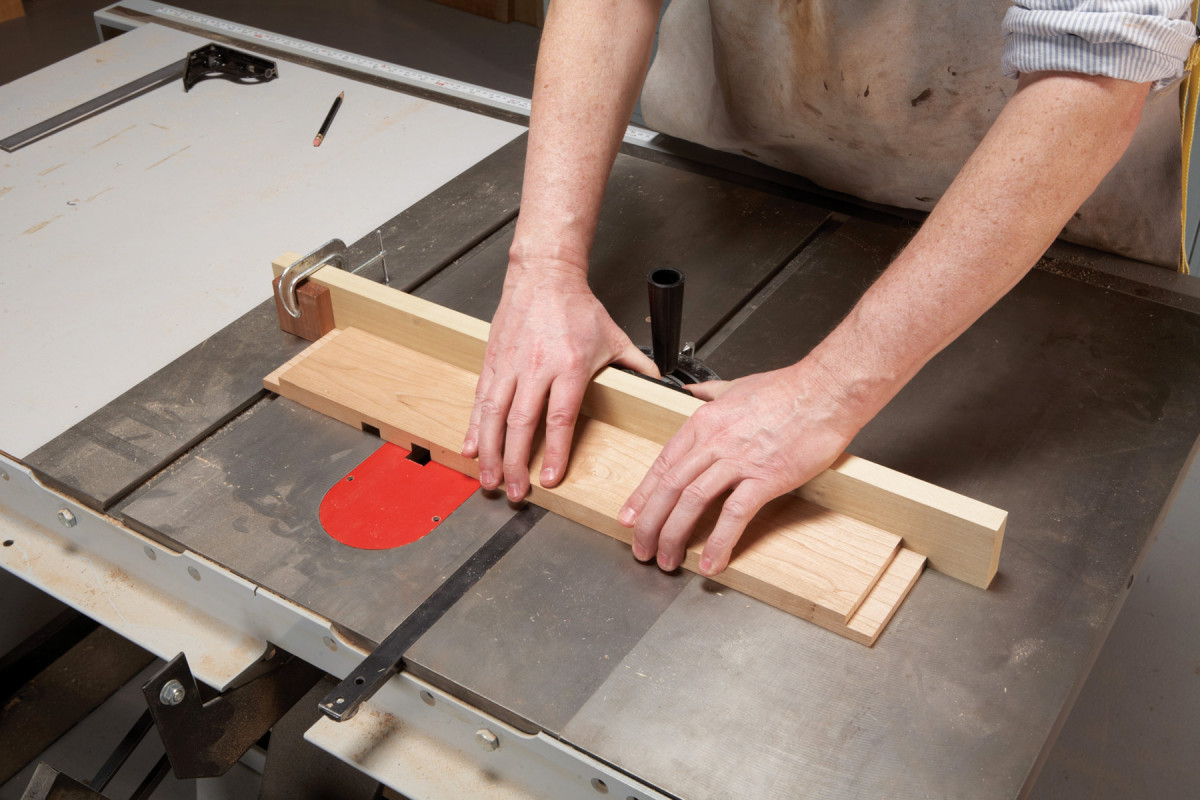
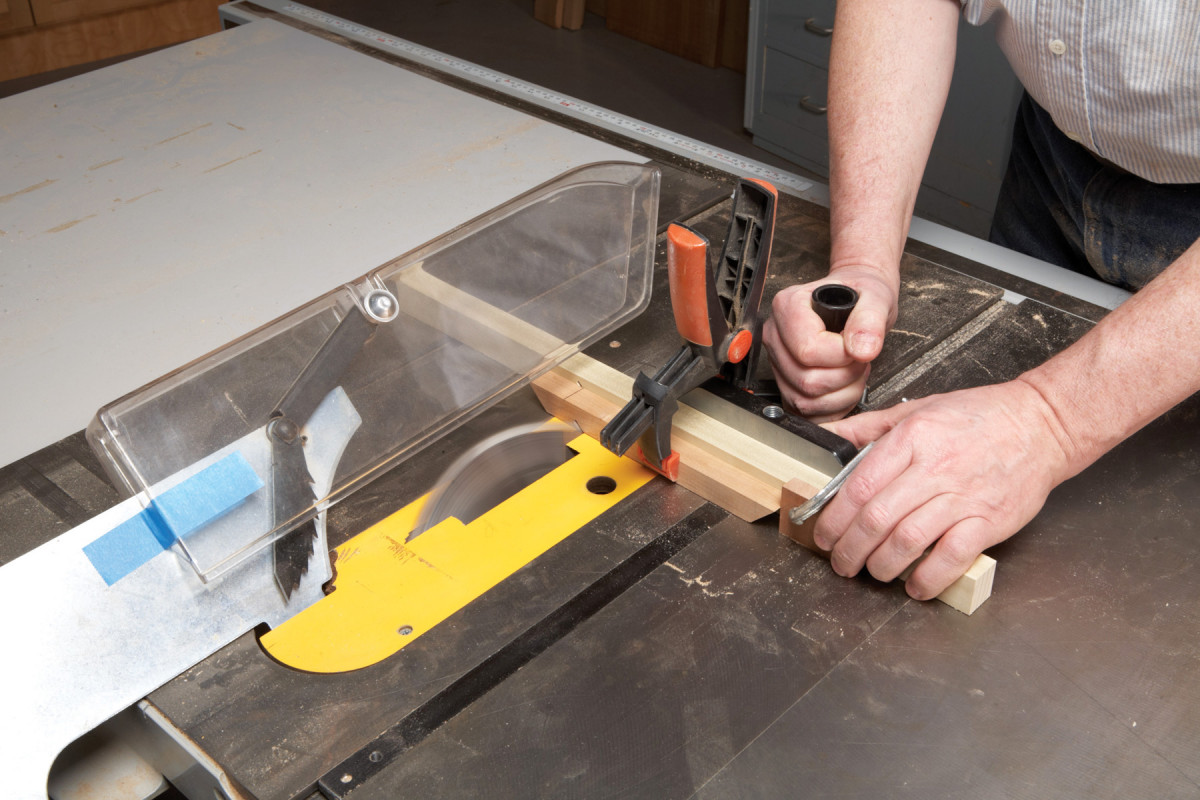
Install a dado set in your tablesaw and use the miter gauge and a fence with an clamped-on stop block to cut the 3/8″ x 3/4″ rabbets and dadoes in the blank (Photo 1 and Fig. A). These cuts must be precisely sized and located, so use a test piece to ensure accurate setups. Note that the rabbets are cut on one face of the blank and the dadoes on the other face. Cut the rabbets first. Then reposition the stop block (and flip over the blank) to cut each dado.
Rip the blank into four 3/4″ wide pieces. Each one of these pieces contains the three different frame parts. Make test cuts on scrap stock first, to ensure that these four pieces snugly fit the dadoes. I follow an old-timer’s advice for fitting joints: “A joint shouldn’t go together without friction, nor need a hammer. It should be just tight enough to knock together with your hat.”
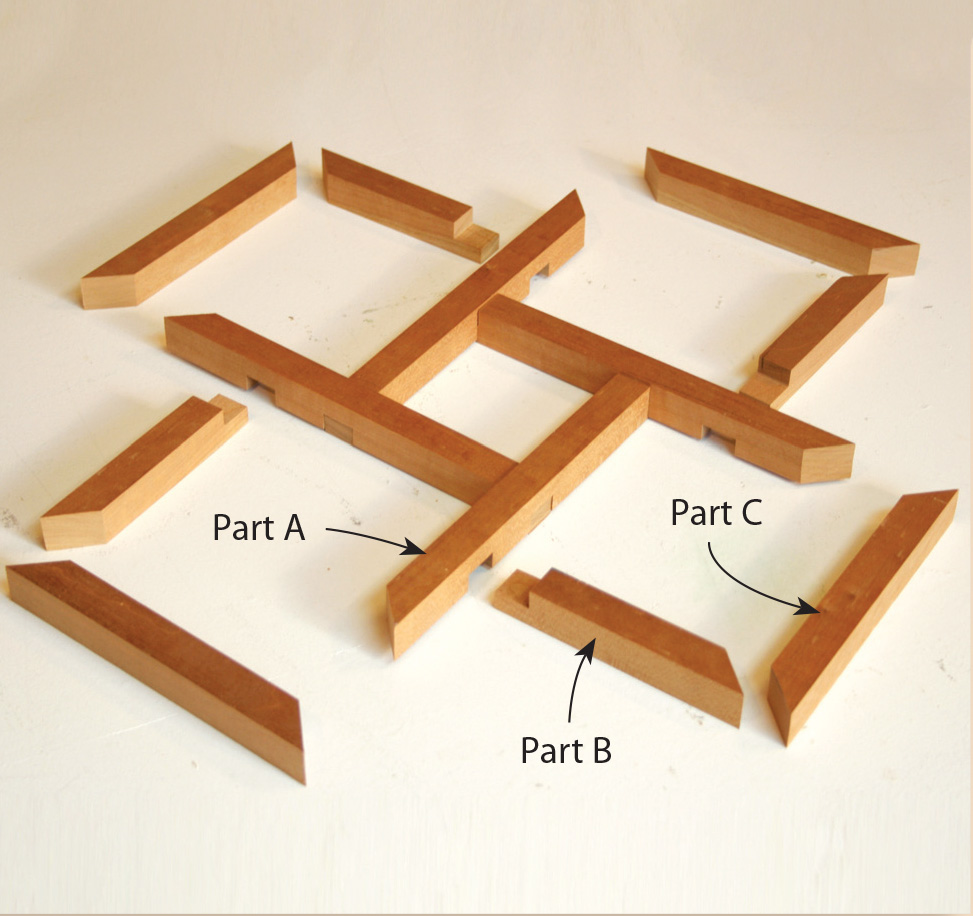
2. Cut each long piece to create the different frame parts. To create the first part, miter the end that has the dadoes. Before you cut, make sure the dadoes face the blade.
Install a new fence on the miter gauge to cut each long piece into the three frame parts. The first parts are rabbeted at one end and mitered at the other (A, Fig. A). Start by cutting a kerf through the fence with the blade tilted 45˚. Orient the long piece with the dadoes facing the blade and mark it for cutting at 9-1/4″. Align the mark with the kerf in the fence and clamp the stop block in position. Then miter each piece (Photo 2).

3. Miter the opposite end of the offcut to create the second frame part. This time, make sure the rabbet faces the blade.
The second parts (B) are similar, except that their miters slope in the opposite direction. These parts share one critical 4-1/4″ dimension with parts A (dimension “X,” Fig. A). These dimensions must match for the frame’s miter joints to fit properly. Mark the four offcuts from the previous step, orient each piece with its rabbeted end facing the blade and carefully align the mark with the kerf in the fence before you cut (Photo 3).
4. Miter the remaining offcut to create the third frame part.
The last parts (C) are mitered at both ends. They’re made by shortening the mitered offcuts that remain from the previous step (Photo 4). Wait until the other parts are glued together before cutting these parts to final size.
Glue-up
5. Test-fit all the parts before gluing. Assemble the four parts A to form a pinwheel. Then install parts B. Cut parts C to fit after parts A and B are glued together.
Assemble parts A and B without glue to test their fit (Photo 5). Make sure the rabbet shoulders butt flush, the joints are square and the critical “X” dimensions match. Glue parts A together first. Apply glue to the appropriate rabbets and dadoes and assemble the center pinwheel. Clamp each joint and let the glue dry. Then glue and clamp parts B. Remove the clamps and place the frame on a flat surface. Then cut, fit, glue and clamp each part C separately.
Install splines
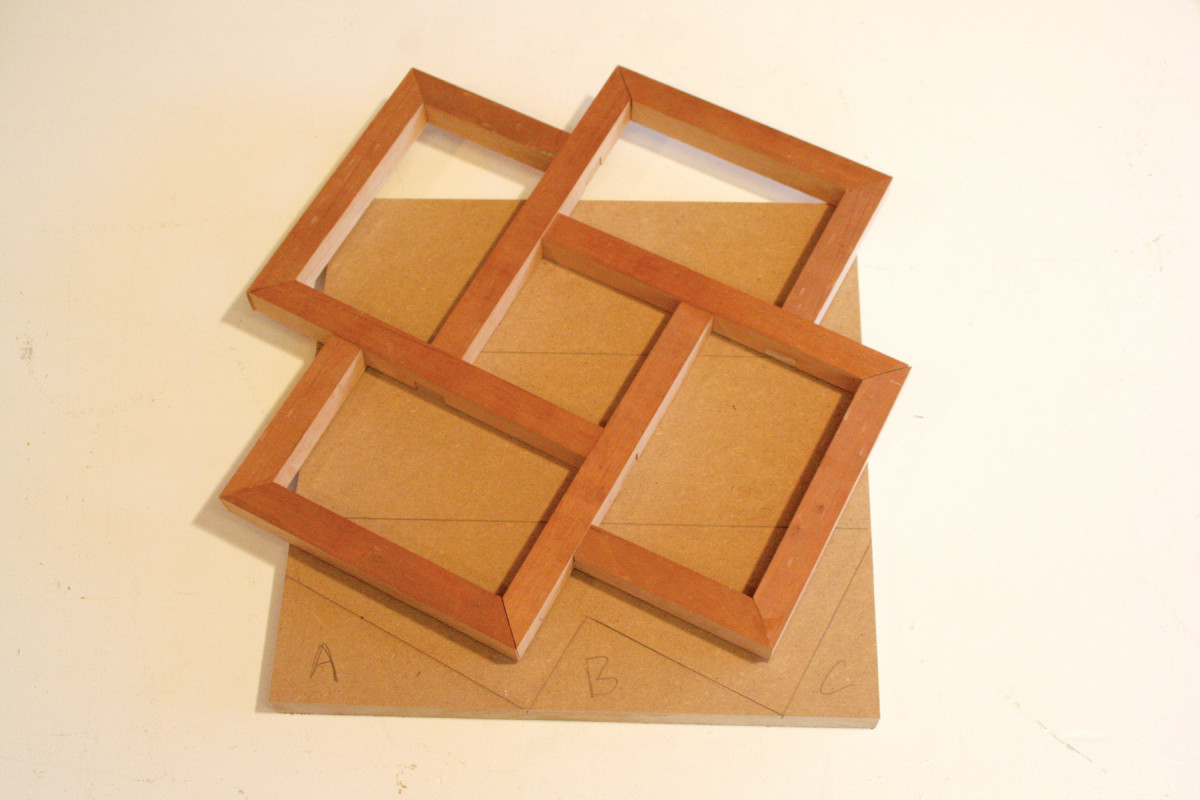
6. Make a jig to cut slots for the spline. Mark the frame’s profile on a 12″ x 12″ MDF blank. Then cut the blank into three equal pieces. Cut pieces A, B and C and sandwich them between the other two pieces.
Make a jig to cut slots for the spline in the frame’s mitered corners (Fig. B). Center the frame on the bottom edge of a 12″ x 12″ piece of 3/4″ MDF and transfer its jagged bottom profile (Photo 6). Label the three triangular sections as shown. Cut the blank into three 4″ x 12″ sections. Then cut out the three triangles and glue them to one of the two remaining MDF sections. Screw on the remaining MDF section and test-fit the frame. Widen the opening, if necessary, by adding playing card shims between the triangles and the outer piece of MDF.
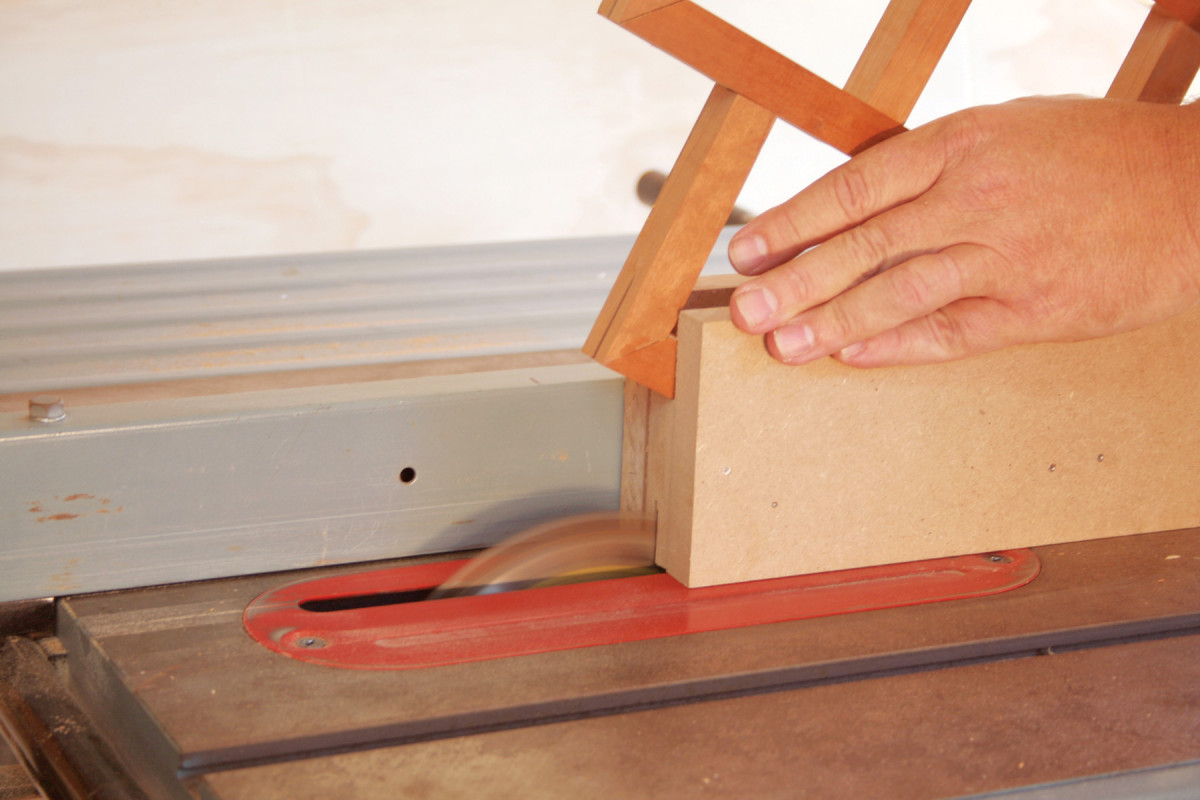
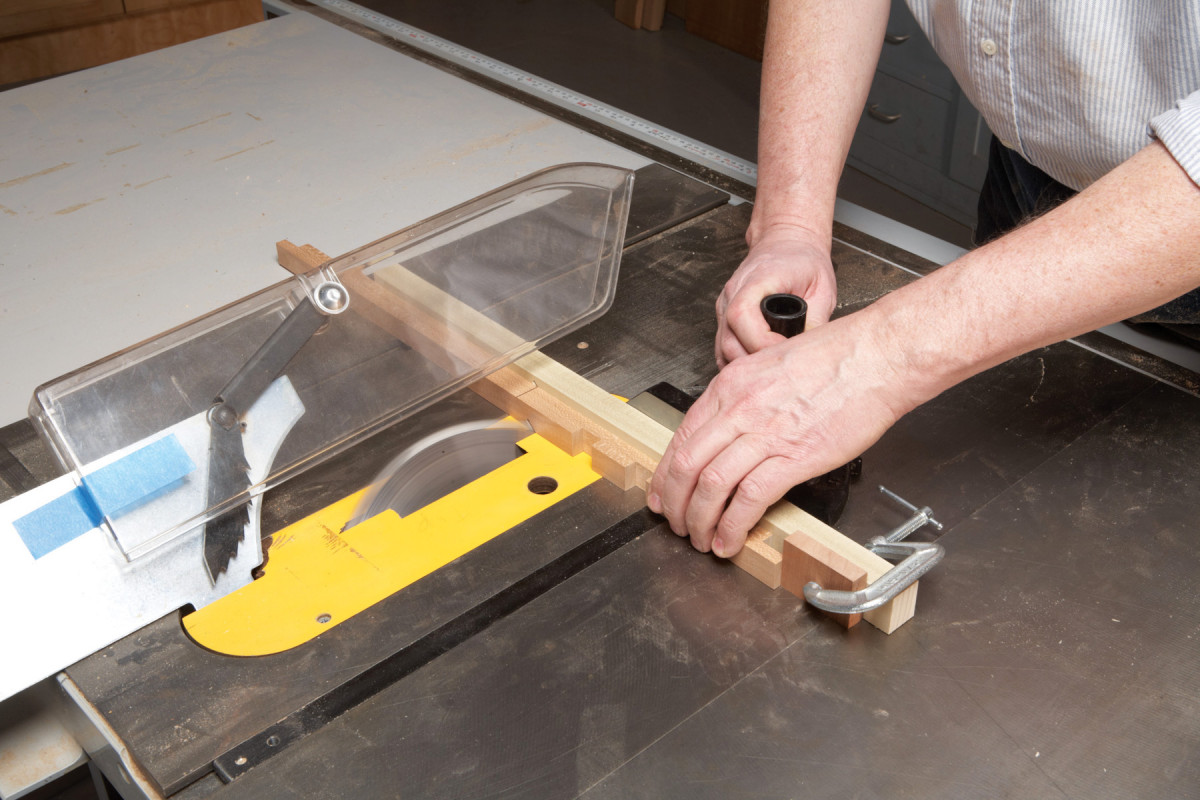
7. Cut saw-kerf slots for the spline in each miter joint. Rotate the frame 90˚ after each pass.
Set the tablesaw fence so the blade will cut through the center of the jig. Set the blade’s height at 1-1/2″. Then install the frame in the jig and cut 1/8″ wide slots in all the miters (Photo 7). Because of the frame’s orientation in the jig, the slots will be longer on one face than the other.

8. Glue splines in the miters. Saw off the waste and smooth the edges by sanding.
Use the bandsaw to cut the spline stock. I compress each piece of spline in my bench vise. Glue makes the wood fibers rebound and swell to create tight joints (Photo 8). When the glue has dried, trim the splines with a saw and plane or sand them flush.
Final touches

9. Rout rabbets in the back of each frame and square all the corners. Apply the finish and then install the glass, photos and backing.
Rout 1/4″ wide x 3/8″ deep rabbets on the back of the frame (Photo 9). (This depth hides the end grain from view in the half-lap joints.) Square the corners of all the rabbets—this is a pain in the neck to do by hand. To ease the job, I start by drilling out the corners with a 3/8″ Forstner bit. This leaves visible scallops at each backside corner, but it makes removing the remaining waste much easier.
Apply your favorite finish. I used wipe-on polyurethane followed by a coat of paste wax. Install a sawtooth picture hanger on the top horizontal frame part. To make sure the frame hangs level, center this hanger on the 4″ x 4″ middle frame. Cut glass and backing material (hardboard, foam core, etc.) for your photos and install them in the openings. Use turn buttons to hold everything in place.
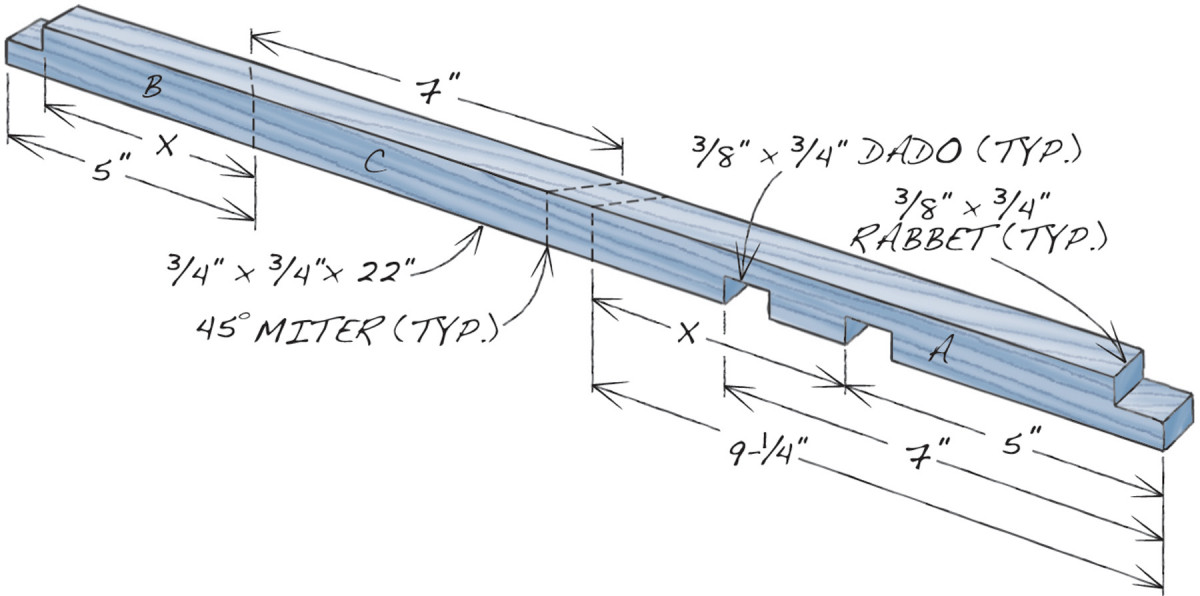
Fig. A) Frame Parts
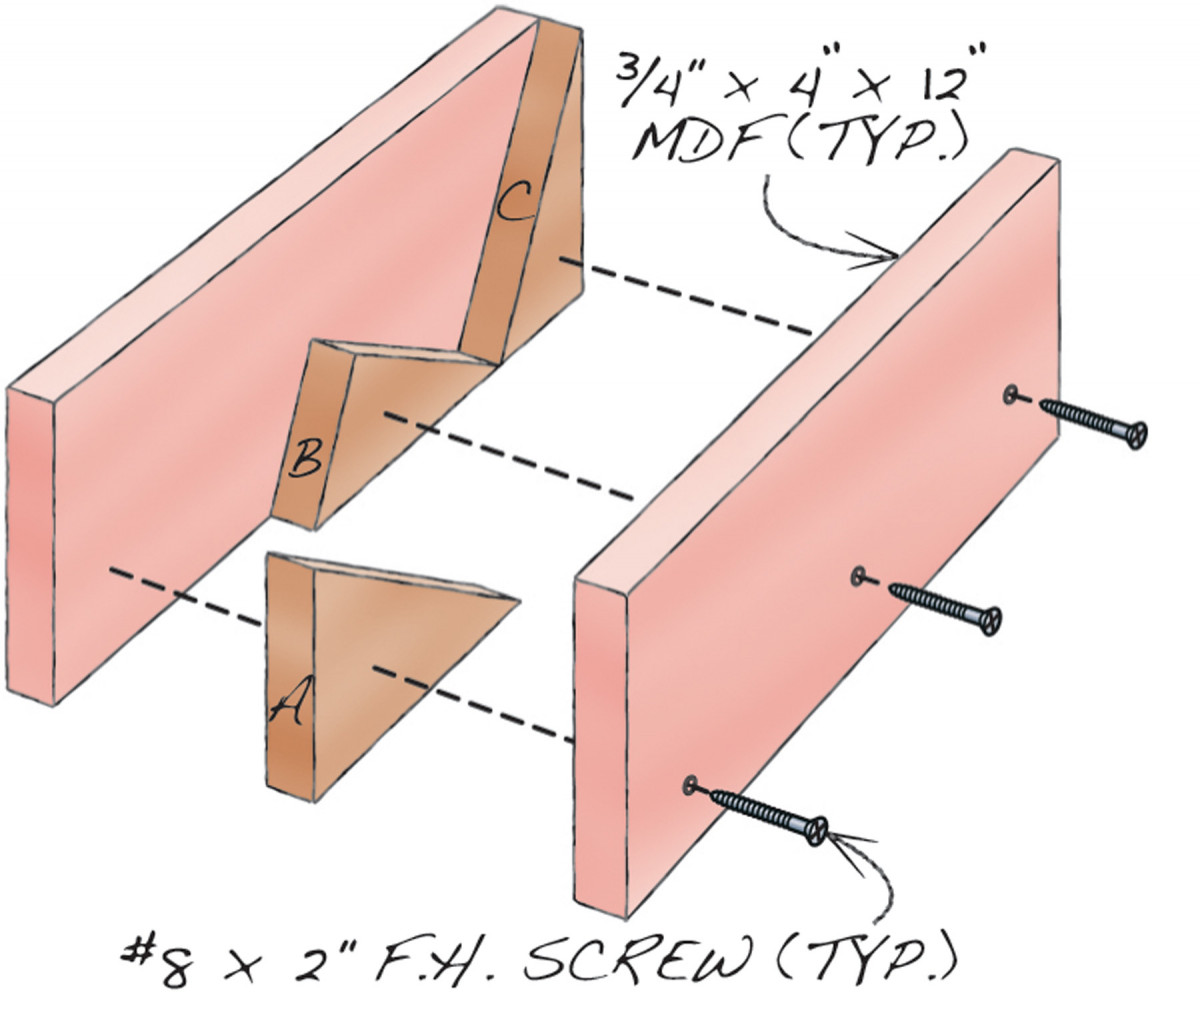
Fig. B) Slotting Jig
E. Richard Crockett is a third-generation woodworker in Houston, TX. His very understanding wife Maria has never parked her car in their garage.
Here are some supplies and tools we find essential in our everyday work around the shop. We may receive a commission from sales referred by our links; however, we have carefully selected these products for their usefulness and quality.