


We may receive a commission when you use our affiliate links. However, this does not impact our recommendations.
Get hooked. Bench hooks make your handsawing safer and more accurate. After working with one for a couple weeks, you will wonder how you ever got by without it.
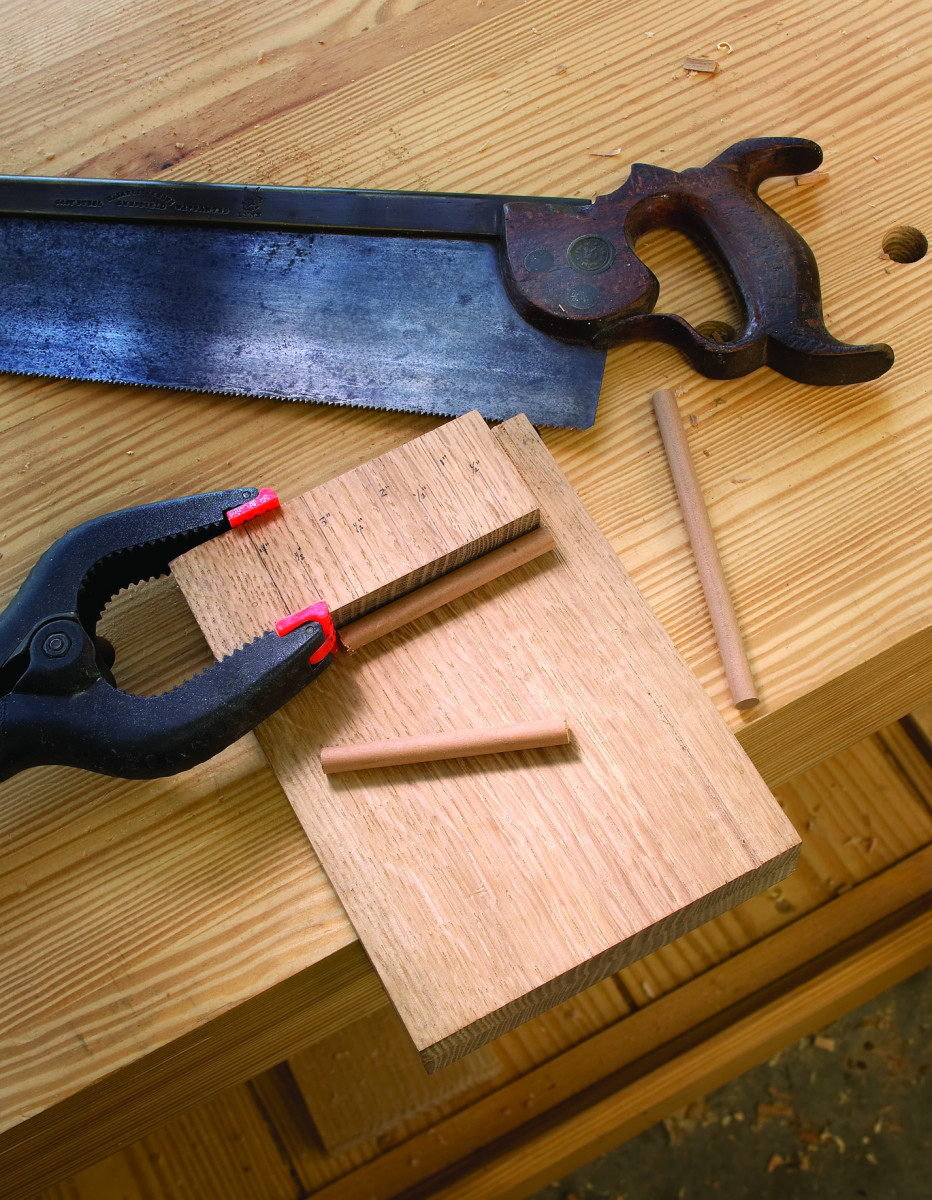
The single most important hand-tool appliance is 3 sticks of wood.
Owning a backsaw without owning a bench hook is like riding a bicycle without handlebars. This simple hand-tool appliance (three sticks of wood) uses the force of the tool and gravity to hold your work as you saw. And it helps guide your tool so your cuts are right on the line.
It also allows you to make cuts with ease that are terrifying (or should be terrifying) on a power saw. A bench hook also can serve as a shooting board for trimming the face grain and end grain of small pieces of work with the help of a handplane. Plus, building one takes minutes, not hours.
Now I wish I could tell you that I’ve cooked up a new design of bench hook that trumps traditional designs. I haven’t. In fact, I think that’s an unlikely thing to accomplish.
The only “improvement” that we moderns can offer is to make it with power equipment, which improves the long-term reliability of the bench hook. Here’s what I mean:
All bench hooks have three parts: The bed, which is the flat part where you put the work; the fence, which is what you push the work against; and the hook, which lips over the front edge of your benchtop.
Early bench hooks were made from one piece of wood. The bed, fence and hook were all sawn from a single piece of thick stock. Later bench hooks were made from three pieces of wood, but the grain of the fence and the hook were at 90° to that of the bed, so your bench hook could self-destruct (thank you seasonal expansion and contraction) before the appliance got completely chewed up by your saw.
With the help of accurate, modern table saws, it’s easy to make bench hooks so that the grain direction in all three pieces is aligned. And that’s exactly what you should do. (Or even make it out of plywood.)
Bench Hook Cut List
No. item dimensions (inches) material
T W L
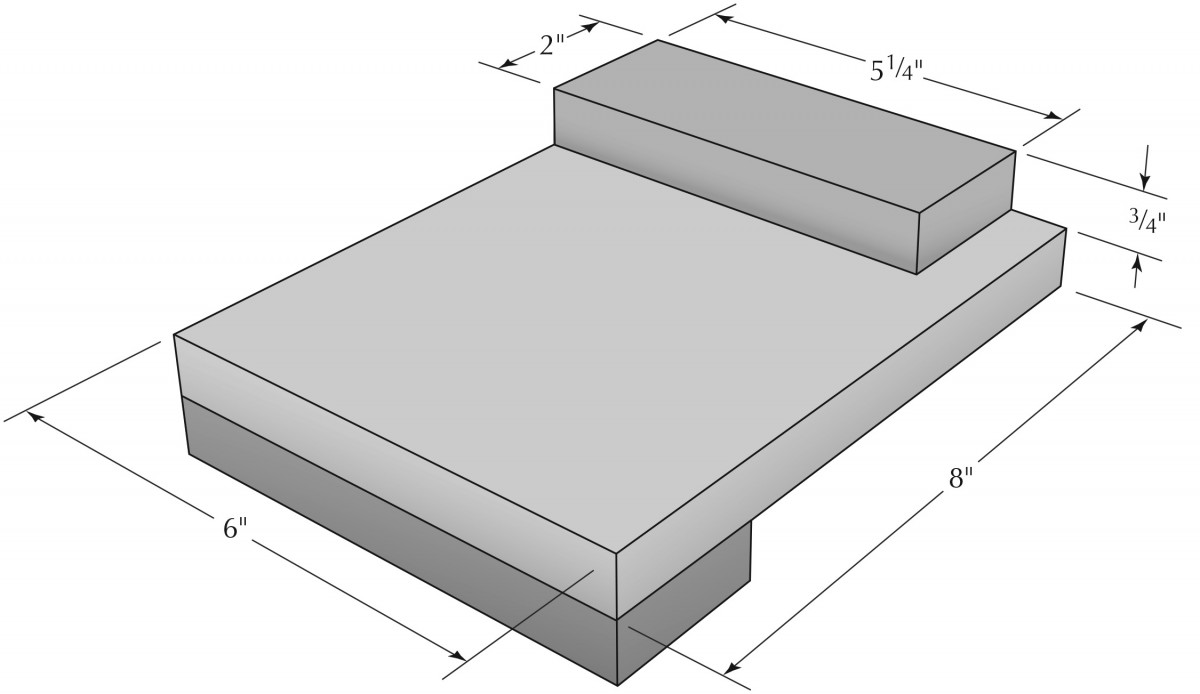
❏ 1 Bed 3⁄4 x 6 x 8 Hardwood
❏ 1 Fence 3⁄4 x 5 1⁄4 x 2 Hardwood
❏ 1 Hook 3⁄4 x 6 x 2 Hardwood
 Part Sizes and Assembly
Bench hooks can be almost any size. The sizes shown in this article make a bench hook that’s convenient for most sawing. Glue and nail the three parts together, using a square to ensure the fence is square to the bed.
With your bench hook assembled, mark a scale on its fence in 1⁄2” or 1⁄4” increments. The scale helps you cut short bits to length. When the glue dries, you’re ready to go to work. Don’t apply a film finish to the bench hook; that will only make it slippery and difficult for you to keep your work in place. Then make a second bench hook without the fence. This second appliance supports long workpieces hanging off your first bench hook.
Using the Hook
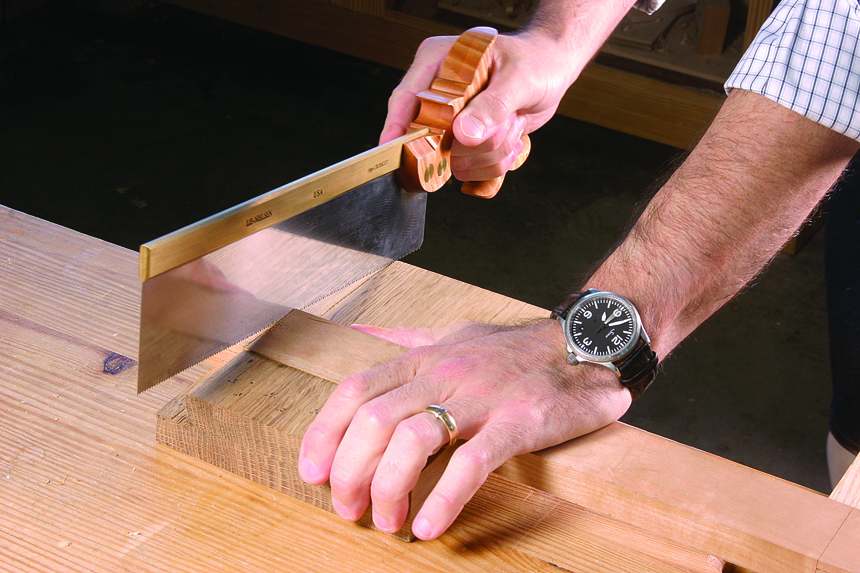
Advance on two fronts. When you mark your cut line on the face of your work, wrap it around the board’s edge as well. Then saw by advancing on two lines whenever you can. This greatly improves accuracy.
The first rule of bench hooks: They are disposable. You will cut them up until they’re unusable. So don’t fret when you slice up the bed. In general, you place your work against the fence and hold it there with your off-hand while you saw with your dominant hand. As with all sawing, it’s best to advance on two lines instead of one – so try to saw through an edge and a face at the same time. This trick will make all your saw cuts more accurate.
In general, I line up the edge of the bench hook’s fence with the line I’ve marked on the wood. Lining up your fence and your cut line creates one longer line, and that’s a visual cue that will help you saw straighter.
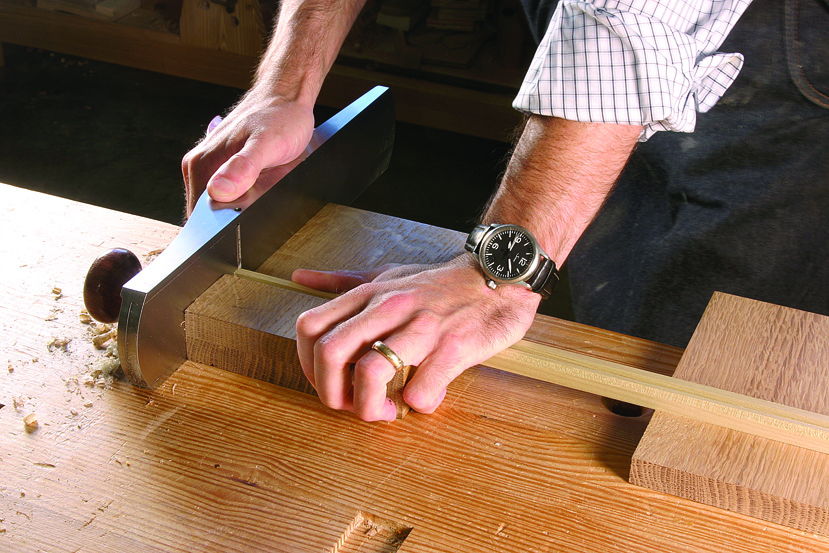
Shoot ends. Flip your bench hook over to use it as a small shooting board. A heavy plane with a sharp iron makes this easy. A block plane with a dull iron makes it almost impossible.
As with all sawing, allow your sawing arm the freedom to move back and forth without rubbing against your torso. That helps improve your accuracy, too.
Using a bench hook allows you to do things safely, accurately and more quickly than with any other setup. I like to use them to cut small parts to precise lengths. I simply clamp a spring clamp to the fence at the desired dimension and butt my stock against the clamp. There’s no better way to cut short dowels for pegging joints.
Bench Hooks and Planes
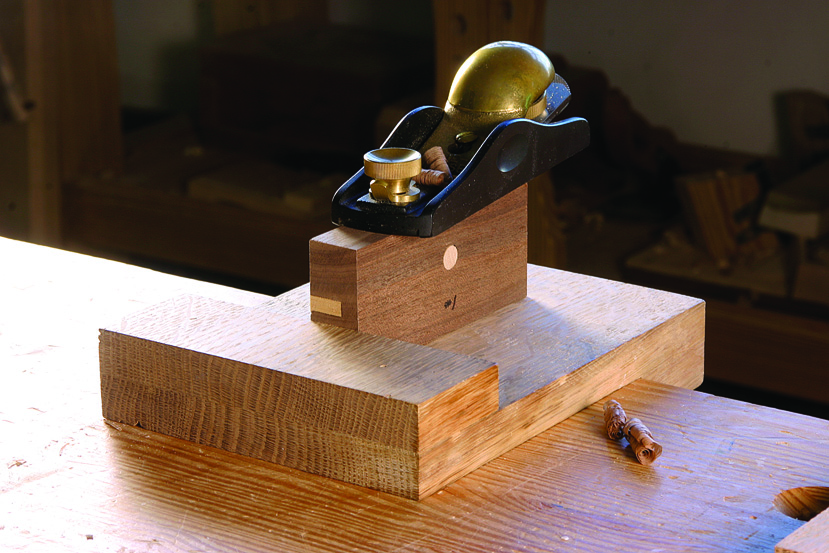
Shoot edges. The fence of your bench hook is a great planing stop when sizing small pieces. The only limitation is the thickness of the fence. It needs to be thinner than your stock. If you are going to shoot like this a lot, I’d make your fence 5⁄8″ thick instead of 3⁄4″.
I use my bench hook with a plane just as often as I use it with a saw. When working the shoulders and cheeks of tenons with a shoulder plane, I push the work against the fence with my off-hand and plane with my dominant one.
I also use the bench hook like a small shooting board. Flip the bench hook upside down so the fence hooks over the benchtop and you are working into the hook. The extra-wide hook prevents (or reduces) blow-out on the outfeed side of your cut. Your handplane (choose a tool with lots of mass) rides on your benchtop. Butt your stock against the sole of the plane then push the plane forward to shave off a little bit of the work. This is a great way to fit mullions in a divided-light door.
You also can use the bench hook to plane the long grain of short pieces. Push the part’s end grain against the fence of the bench hook and plane away. This is easier than trying to secure little bits in your vise.
Once you have made a couple bench hooks, you’ll start using them to hold your work instead of reaching for a clamp. I secure stuff against them for chiseling and rasping all the time.
Most important, I think you’ll like your backsaw a lot more and use it for more operations. I’ve been in too many shops where backsaws were assumed to be freehand tools, so the resident woodworker was either a highly skilled sawyer or a highly frustrated one.
Here are some supplies and tools we find essential in our everyday work around the shop. We may receive a commission from sales referred by our links; however, we have carefully selected these products for their usefulness and quality.


