


We may receive a commission when you use our affiliate links. However, this does not impact our recommendations.
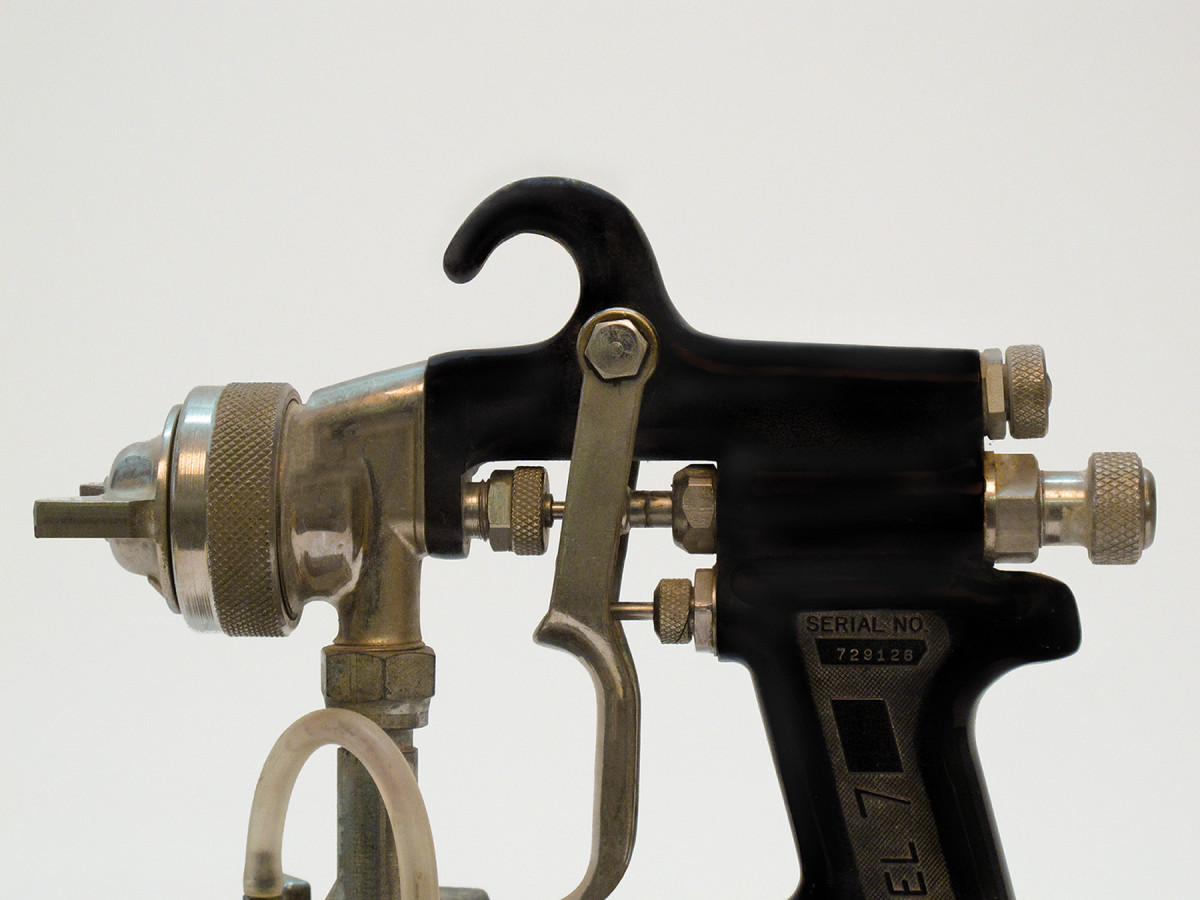
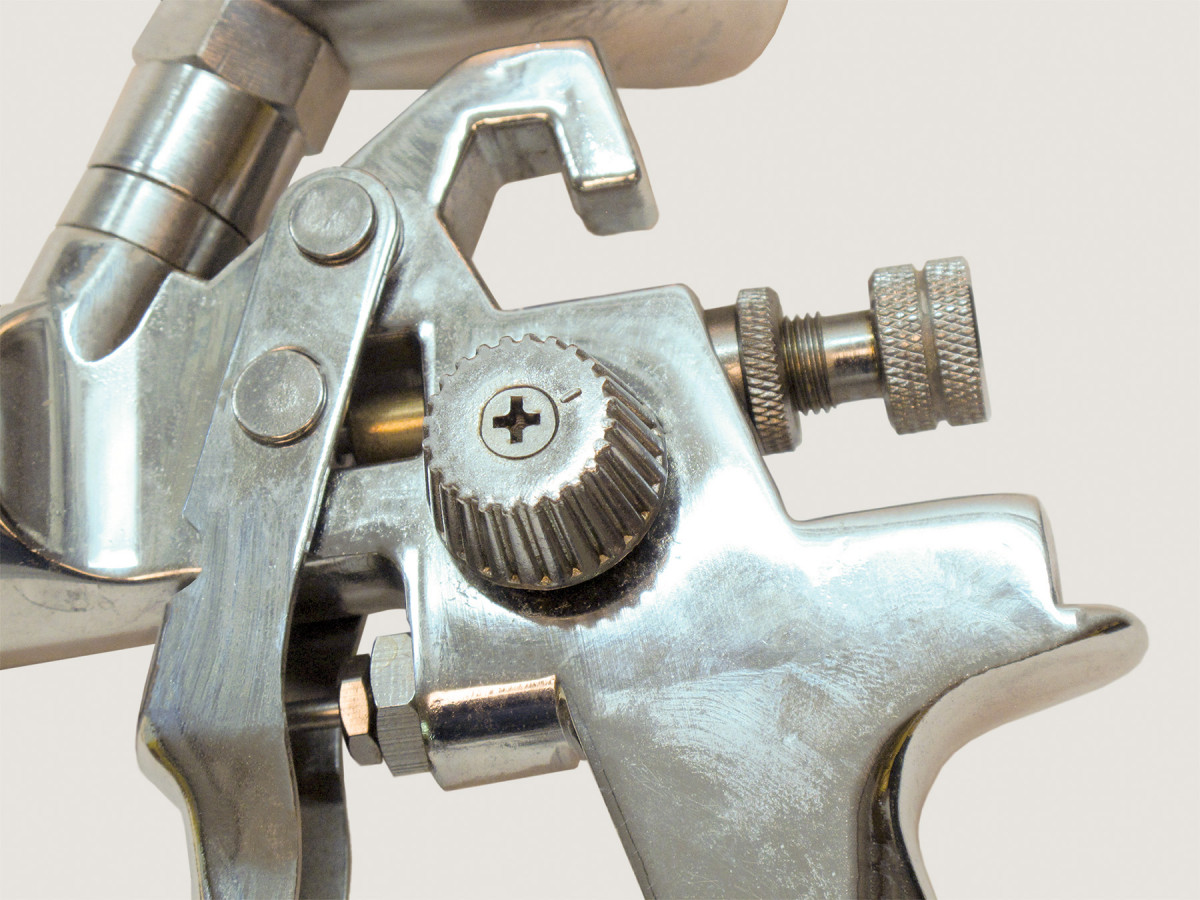
1. On most spray guns the fluid and fan-width control knobs are on the backside of the gun. The fluid control knob is the lower one in this example. It always lines up with the fluid nozzle and needle.
The critical parts are the fluid nozzle and air cap.
As I have said many times, spray guns are pretty simple tools. By comparison, they aren’t any more difficult to use than a router. Still, there are a couple of critical parts you should be familiar with to get the best results. These are the fluid nozzle and the air cap.
NOTE: This article doesn’t cover airless or air-assisted airless spray guns. Airless are popular with painters who want to cover large surfaces quickly and don’t mind the small trade off in quality, and air-assisted airless are popular in industry and large cabinet shops that have a high volume of work to be finished.
Introductory Remarks
2. Sometimes the fan-width control knob is on the side of the gun rather than the back.
I previously explained the basics of spray guns and how to choose which to buy. Here’s a short review of the article.
Spray guns work by using air to turn a liquid stream of fluid (paint, finish, stain, glue, whatever) into a mist. This is called atomizing. There are two sources of air: compressors and turbines. Compressors produce air under high pressure. Turbines produce high volumes of air under low pressure. Both can be used to power HVLP (high-volume-low-pressure) spray guns. These are the newer type spray guns that came on the market about 30 years ago and are now so widely used that it’s become difficult to find the older high-pressure spray guns.
The advantage of HVLP is equivalent quality atomization at much lower pressure, so there is less bounce-back and therefore less waste.
Fluid Needle and Nozzle

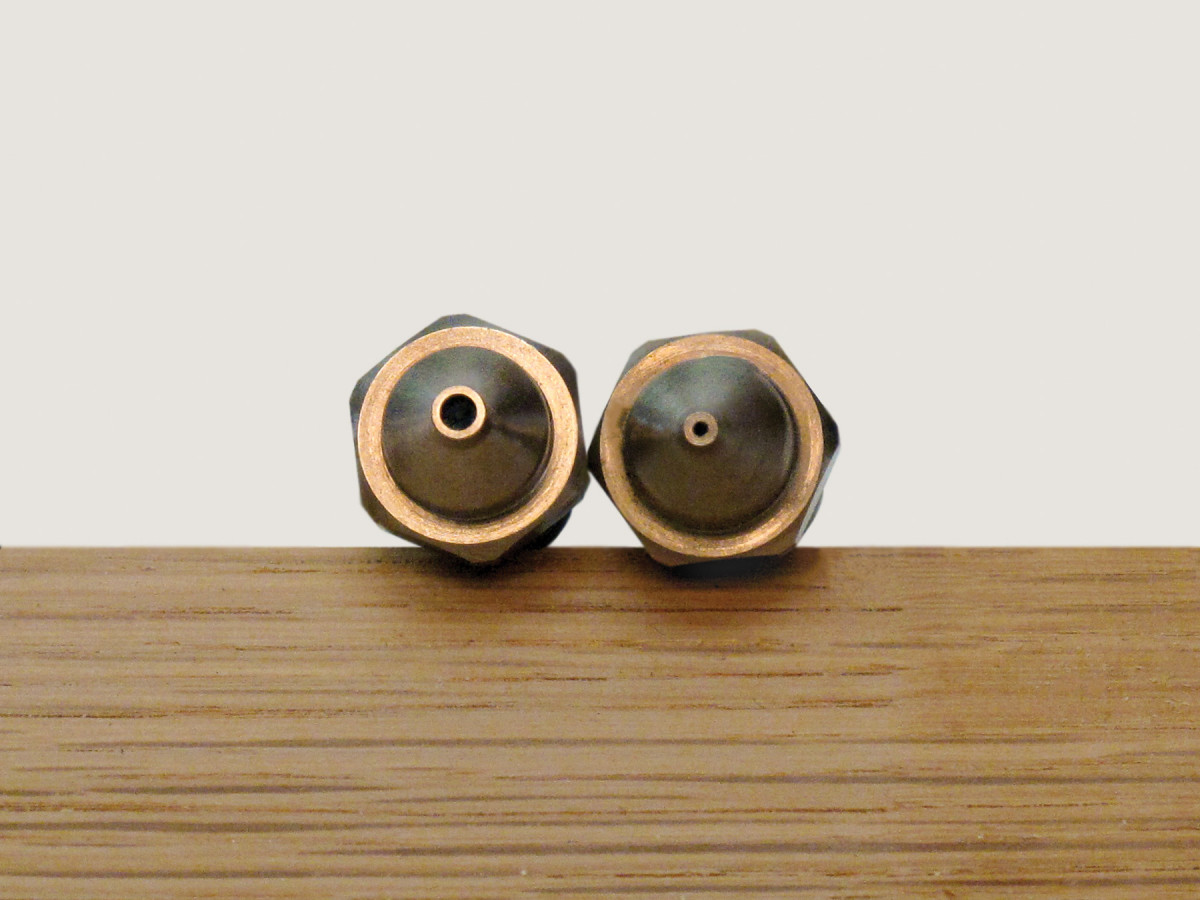
3. Needles and fluid nozzles are usually sold in sets. Some manufacturers mill their needles to a more gradual taper so they can be used with several different sizes of fluid nozzles. These fluid nozzles are 1.3mm, 1.4mm and 1.5mm.
The fluid needle and nozzle are sold as a pair, though with some brands one size needle can be used with several size nozzles. This is accomplished by milling the needles to a more gradual taper. Either way it’s critical that the needle “seat” well into the orifice of the nozzle so it doesn’t leak.
The purpose of the fluid nozzle is to control the amount of fluid that exits the spray gun. Larger orifice nozzles allow more fluid to exit and also allow for thicker materials, such a paints and adhesives, to be sprayed. Smaller orifice nozzles restrict the flow. Typical sizes used for most stains and finishes range from 1.8 mm (0.07 inches) to 0.5 mm (0.02 inches).
Off-the-shelf spray guns usually come with a 1.4 mm (0.05 inches)
nozzle. You may find that this works well with everything you spray. It usually does. But if you want more control, especially if you spray a variety of surfaces or a variety of liquid materials, you may want to use different size nozzles. Better quality spray-gun manufacturers offer fluid needles and nozzles in a number of sizes.
Air Cap
4. The size of the hole in fluid nozzles makes it easier or harder to get thicker liquids, such as paint and adhesives, through. Smaller hole sizes require more air pressure or thinning of the fluid material to get it through and atomized well.
Air caps are also commonly sold together with fluid nozzles and needles as a set. But you can interchange air caps and fluid nozzles to improve atomization. If your source of air is a compressor, you can also use a different air cap to widen the spray pattern or fan width.
The air cap contains a number of holes to atomize the fluid and shape the pattern. The air that comes through the center hole and other holes next to it atomizes the fluid. The air that comes through the hole, or holes, in the horns shapes the pattern. The larger these holes the wider the possible spray pattern as long as there is enough air.
Making Choices
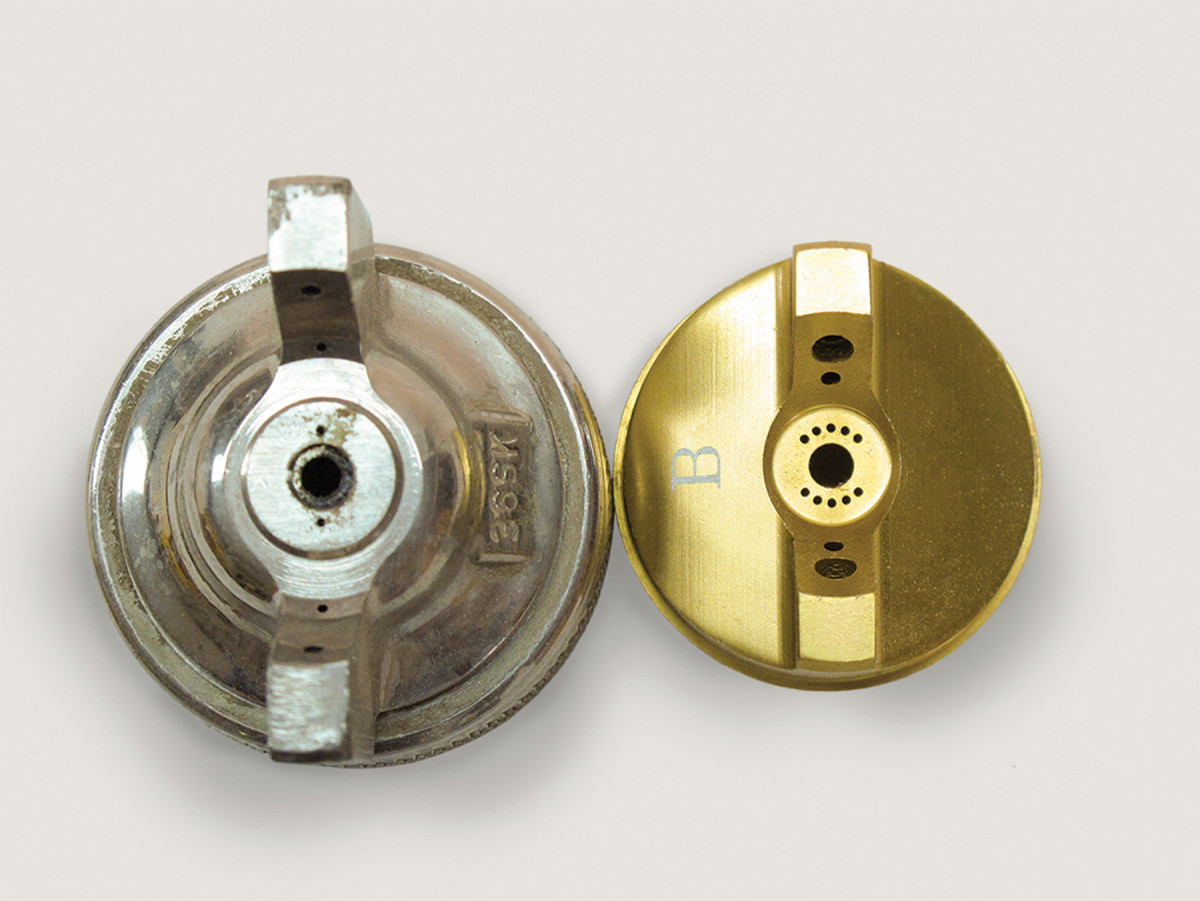
5. The hole in the center of the air cap and the hole, or holes, to the side atomize the fluid. The holes in the horns are smaller on high-pressure air caps (left) and larger on HVLP air caps to let more air under very little pressure through.
So how would you mix and match air caps and fluid nozzles to improve the quality or efficiency of your work? There are five variables: viscosity of the fluid material; the amount of air your compressor or turbine produces; the speed at which you want to spray; the size and shape of the object you’re spraying; and the quality of results you want.
The thicker the liquid you’re spraying, the larger the fluid-nozzle orifice you should use because it’s harder to push thicker liquids through small holes. Smaller orifices will cause you to have to move the spray gun more slowly over the surface. The exception is the pressure-pot setup where you could turn up the pressure to compensate.
It’s obvious that you have to have enough air from your compressor or turbine to atomize the liquid you’re spraying to reduce orange peel and move at the speed you want or you won’t get good results. You can compensate for too little air, however, by using a smaller fluid nozzle and air cap or by thinning the material so it doesn’t take as much air to atomize it. Either way will result in your build being less.
If you want to increase your flow rate, or the speed at which you can move over the surface, you will need to use a larger fluid nozzle and air cap, as long as you have enough air, of course, to get good atomization.
Your efficiency or ability to reduce waste is determined by the size and shape of your work. For example, if you are spraying a large tabletop, your efficiency is increased by using a needle/nozzle set and air cap that gives you the widest possible fan width for fewer passes to cover the surface. By contrast, if you’re spraying chairs with narrow legs and arms, you want a narrow pattern to reduce overspray. You can achieve this in two ways. One is to use a needle/nozzle set and air cap that gives you that narrow pattern. The easiest way for most amateurs and small shops is simply to close down the fluid and fan-width control knobs, usually located at the gun’s back.
The quality of your work is measured by the amount of orange peel you get. The less obvious the orange peel the higher the quality. Orange peel is usually caused by spraying too thick a liquid with too little air or by moving the spray gun too rapidly across your work. To correct the first problem, increase the air pressure (from a compressor) and change to a larger needle/nozzle set and air cap, or thin the material. To correct the second problem, slow down or thin the material. You won’t be able to increase the amount of air with most turbines.
For most projects you can probably get by with the needle/nozzle set and air cap that came with your gun. But it’s good to know that you have more control if you want.
Here are some supplies and tools we find essential in our everyday work around the shop. We may receive a commission from sales referred by our links; however, we have carefully selected these products for their usefulness and quality.


