We may receive a commission when you use our affiliate links. However, this does not impact our recommendations.
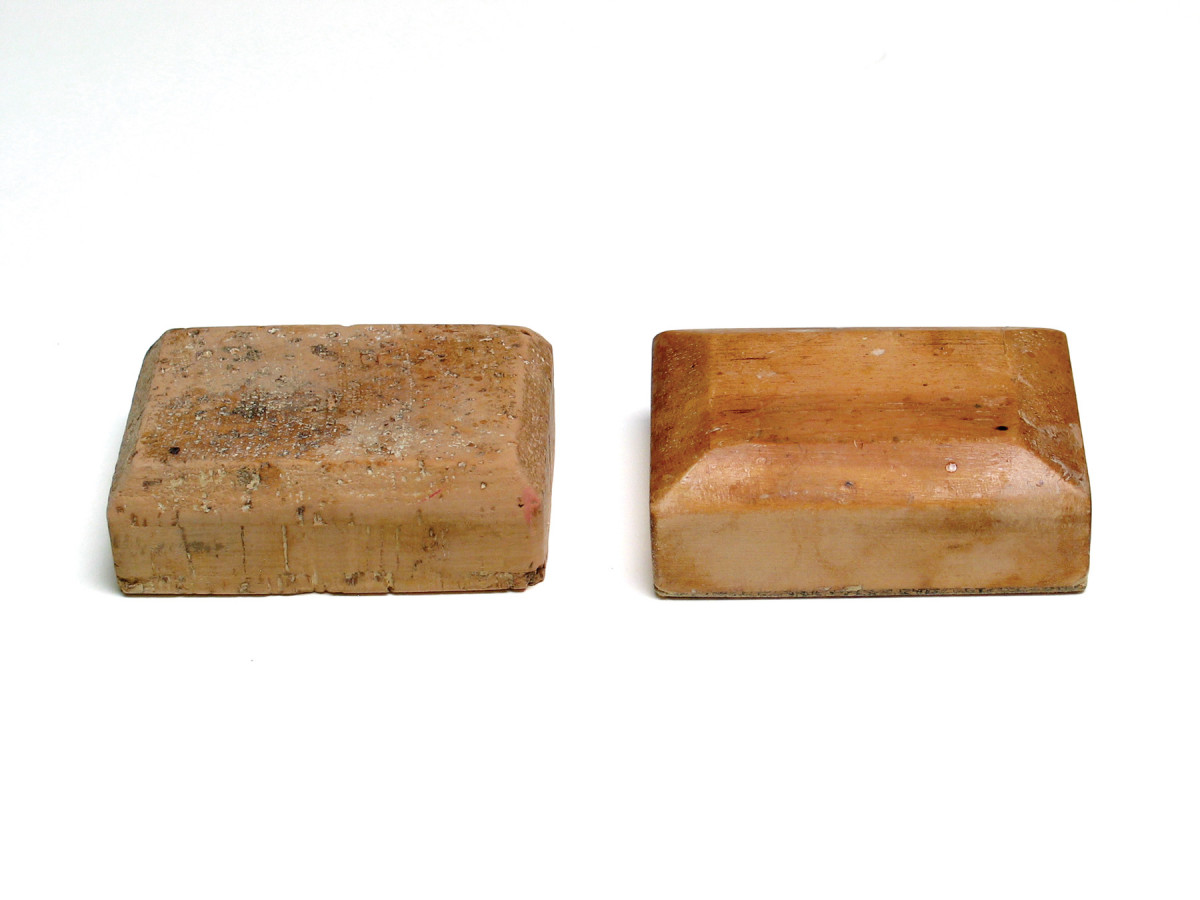
Sanding blocks. This solid cork sanding block from Denmark (left) was the model for my own wood and cork block (right).
Efficient, cheap and simple to make.
This magazine puts a lot of emphasis on hand tools – that is, tools without motors. Common subjects include handplanes, chisels, scrapers etc. But when it comes to sanding, it seems that most people use random-orbit sanders. These have motors! Why not sand by hand, also?
I love sanding by hand. Sure, I own pad, belt and random-orbit sanders, but I rarely use them. On large projects, I’ll sometimes spend 10 or 15 minutes with a random-orbit sander to get a rest and relieve the boredom. But that’s it. I’m quickly back to hand-sanding because I find it faster. It’s also more efficient because I never get “squigglies,” which are so prevalent with random-orbit sanders. I also enjoy the aerobic exercise.
The biggest downside of hand-sanding is working up a sweat and dripping on the wood. Drips can cause darker spotting under a stain or finish if the sweat-induced raised grain isn’t totally sanded out.
Alternatives
When hand-sanding a flat surface, you should always back your sandpaper with a flat block. Commercial sanding blocks, usually made from hard rubber or plastic, are widely available, but these blocks are very wasteful of sandpaper. You don’t use all the grit.
Increasingly popular with woodworkers are rectangular sanding blocks with sandpaper on four sides around a hard core of foam. These aren’t wasteful of sandpaper, but they are considerably more expensive than sheets of sandpaper. So they are wasteful of your money.
Also, you are more limited in the sandpaper types and grits from among which you can choose than you are with the wide variety of types and grits in sheet form.
So instead of using these wasteful and limiting products, I make my own sanding blocks from softwood with 1⁄8“-thick cork glued to the bottom. I modeled this block after the solid cork blocks that everyone used when I worked in Denmark in the mid-1970s.
Sanding Block
Here’s how I make the sanding block.
I shape a piece of softwood (pine or fir) to 11⁄4” thick x 23⁄4” wide x 37⁄8” long. You could adjust these dimensions slightly if needed to comfortably fit in your hand. But keep in mind the efficiency of these measurements when it comes to the use of the sandpaper.
If you want a little more heft, you could use a hardwood.
I then glue 1⁄8“-thick cork to one face using PVA (white or yellow) glue, cutting the piece of cork slightly larger than the final dimensions to allow for slippage. I’ve found cork sheets of this thickness at craft stores and auto-parts stores (sold as gasket cork).
Finally, I trim the excess cork and chamfer the top of the block so it fits more comfortably in my hand.
There’s no need for a finish, and one would be counterproductive anyway because most finishes become gummy after extended contact with skin and sweat.
Efficiency of Design
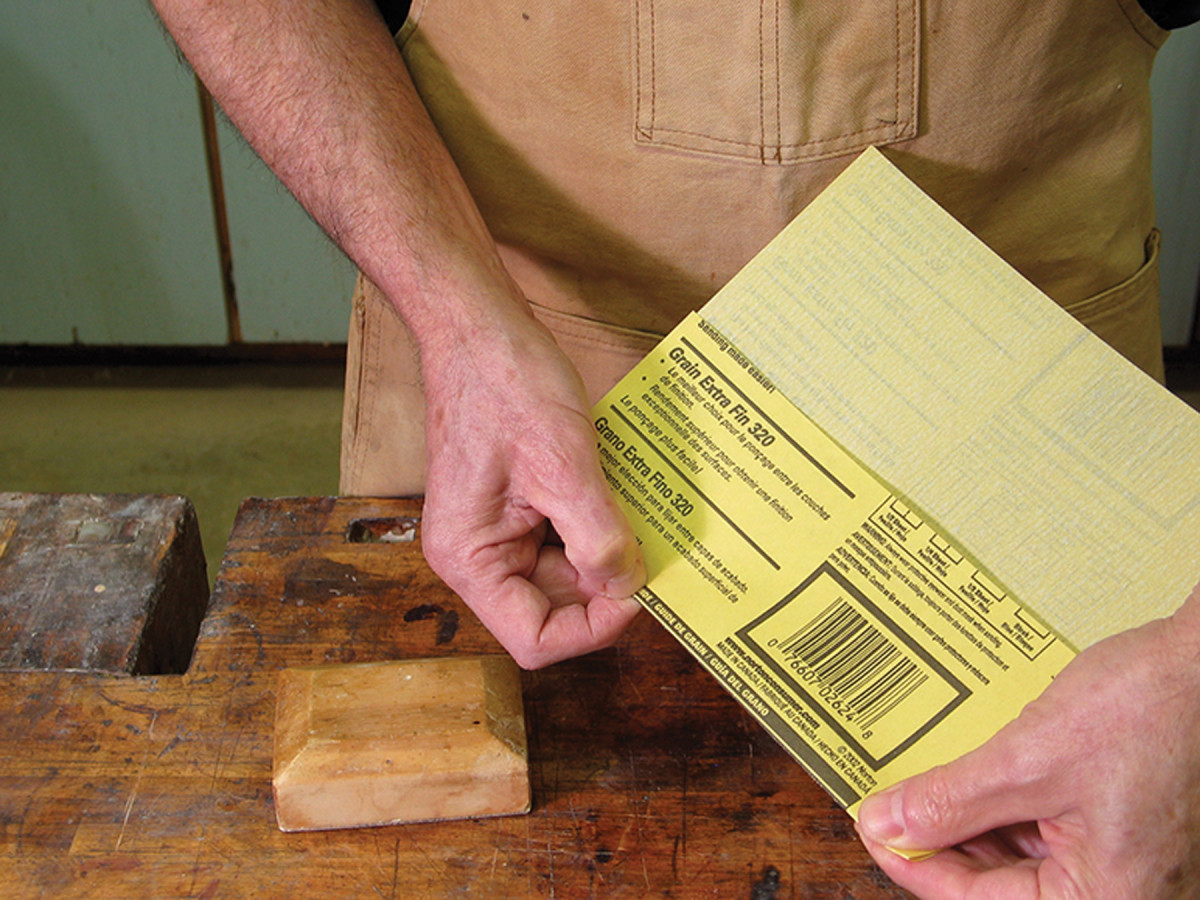
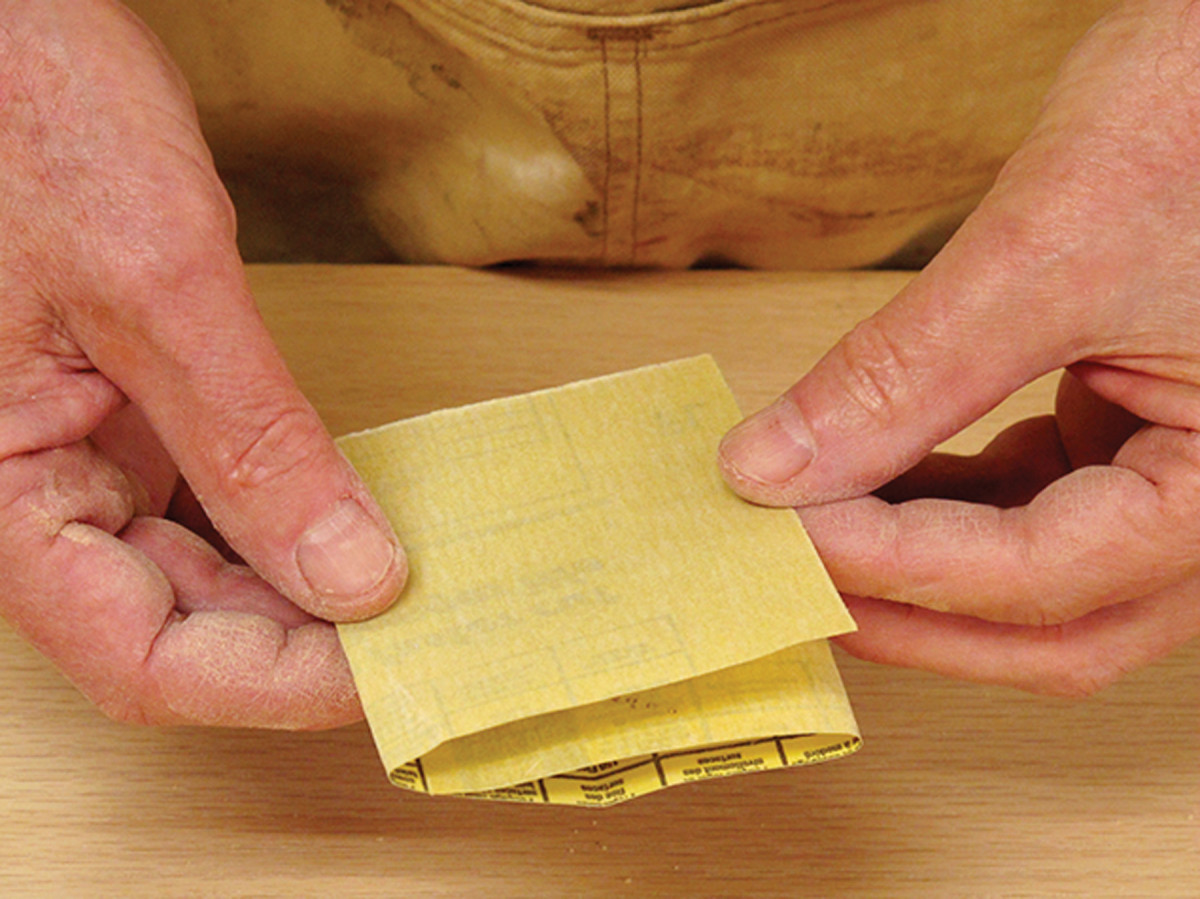
Folding & tearing. To create the proper size of sandpaper for use with the sanding block, fold the sandpaper into thirds across the width, crimp the edge with your thumb and index finger, then tear it. Finally, fold, crimp and tear the remaining two-thirds in the middle.
 Someone in Denmark must have put a lot of thought into the design of this sanding block because it is so efficient.
Take a standard 9″ x 11″ sheet of sandpaper and tear it in thirds crosswise. (You could cut it with a knife or scissors, but you will quickly dull the tool and it won’t be faster.)
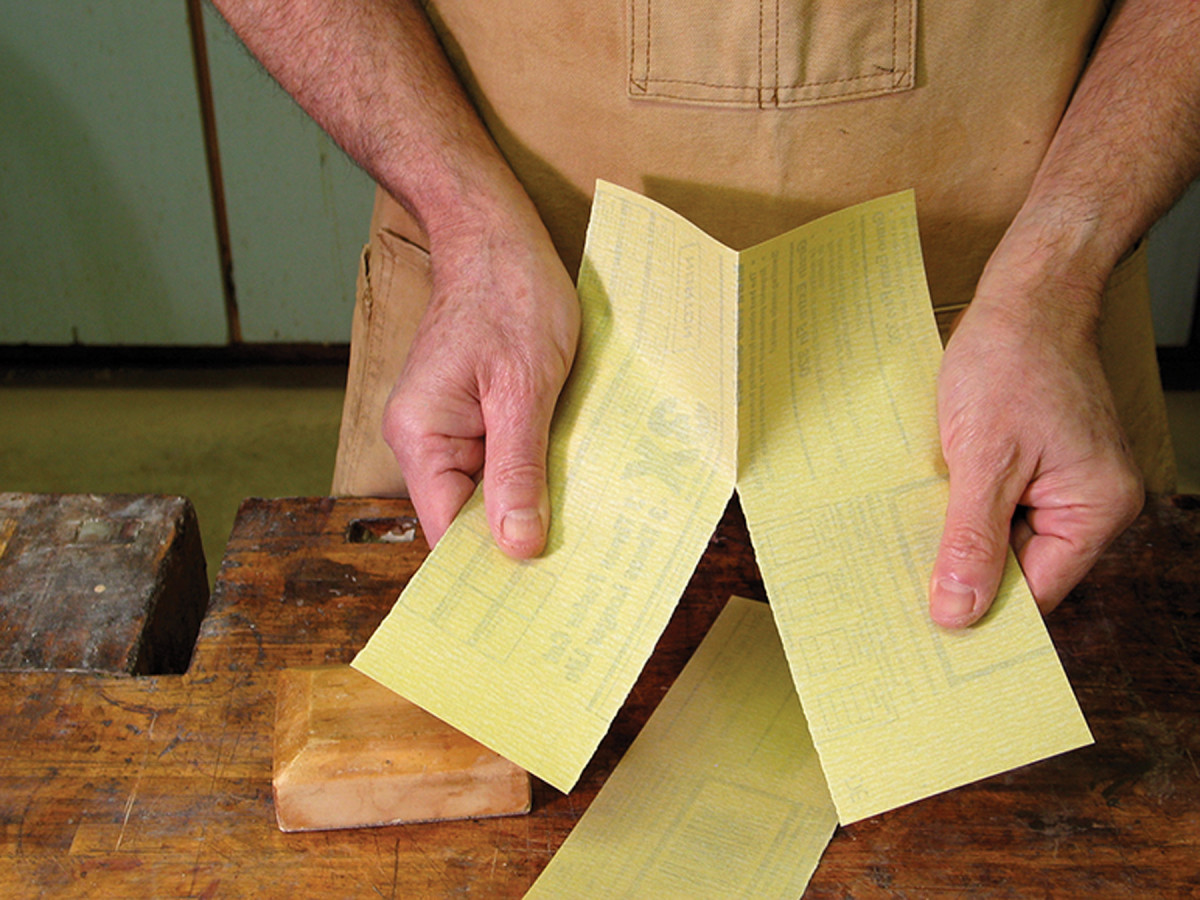
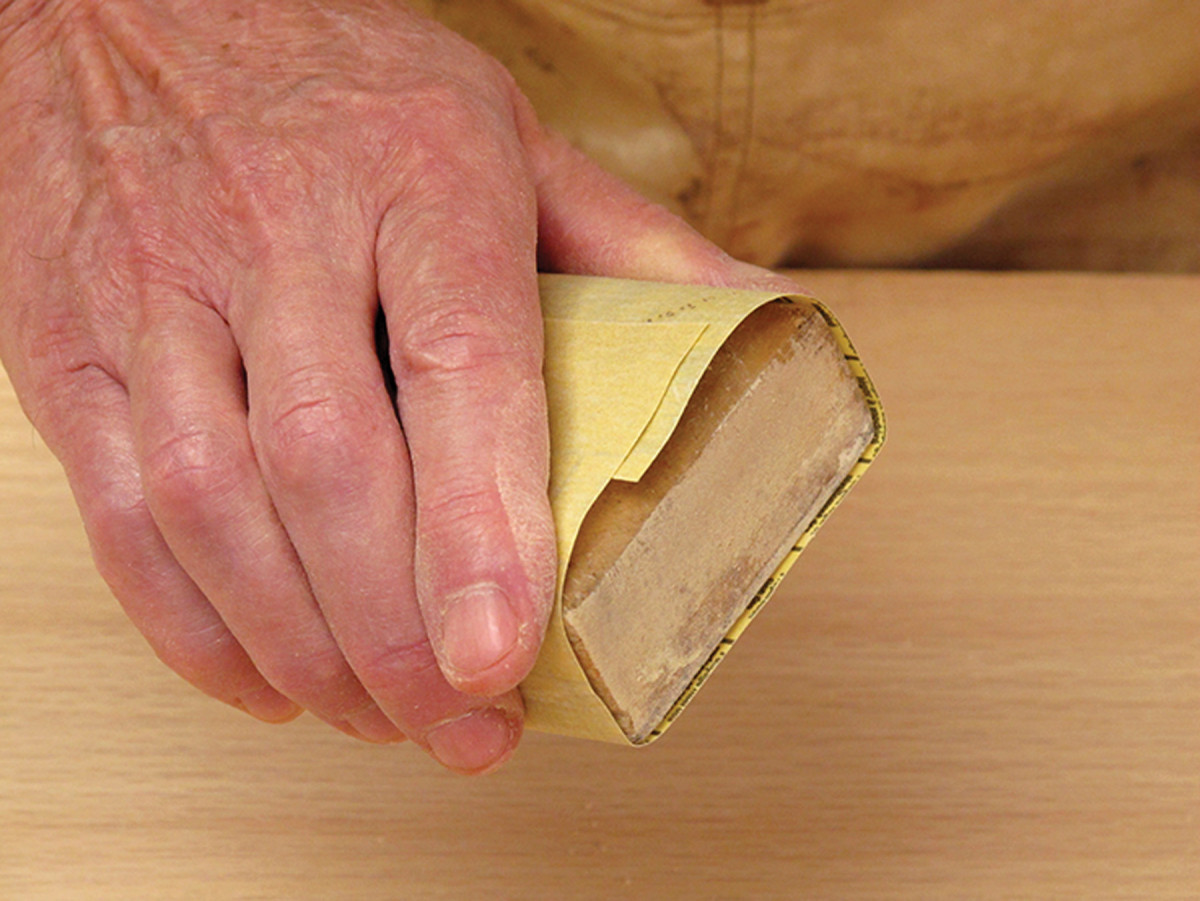
Gripping sandpaper. To get maximum use of the sandpaper with the sanding block, fold a third of the sandpaper sheet in half lengthwise and wrap it around the sanding block so there’s just enough of the two-flap side to grip with your fingers. When you have worn that face of the sandpaper, flip it and use the opposite face.
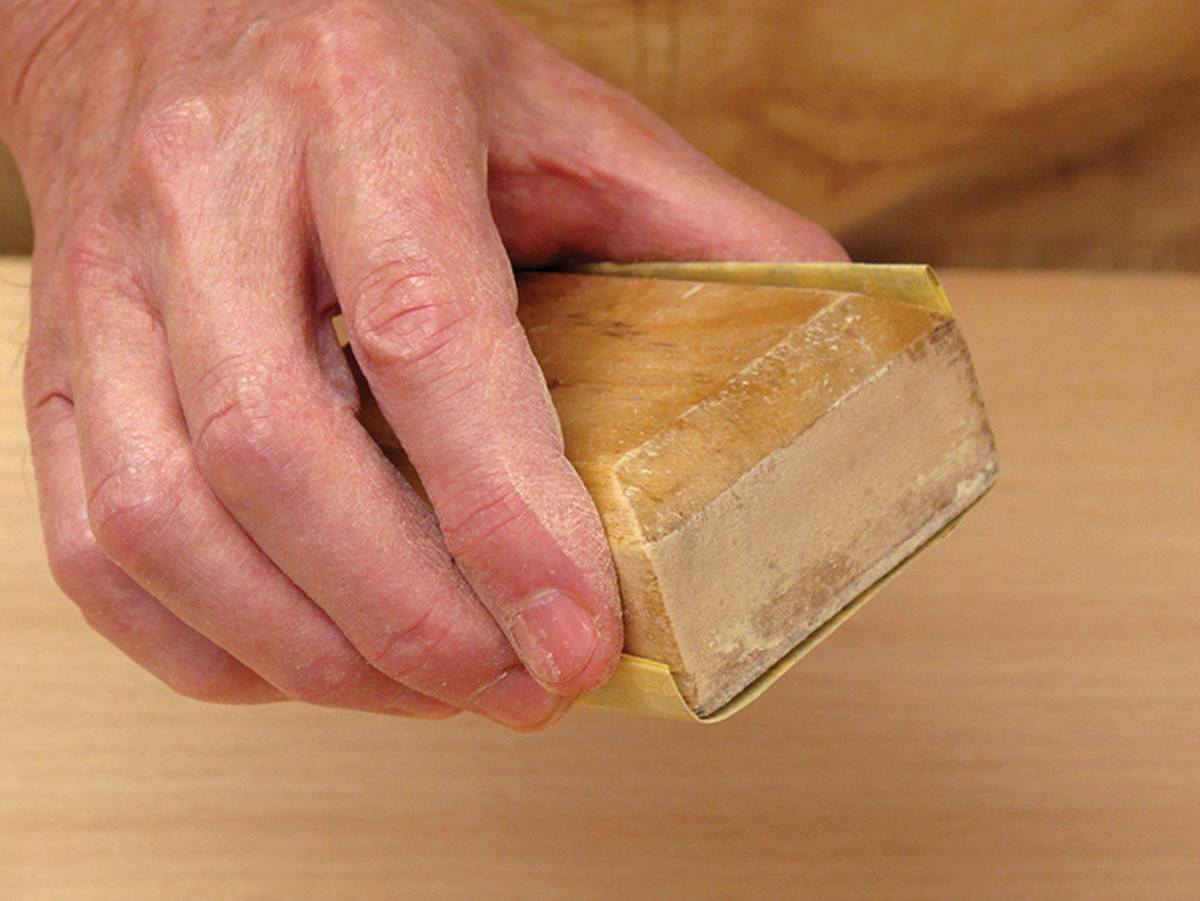
Use it all. After wearing both opposite faces of the sandpaper dull, wrap the sandpaper around the sanding block and use the middle face.
I don’t measure the thirds. I merely fold one side of the sandpaper to about the midpoint of the remainder, then crimp the fold with my fingers. Then I fold the paper back on itself (breaking the stiffness) and tear it. Finally, I fold the remaining two-thirds in half and tear it again.
Simple; Fast
Without sanding block. An added beauty of this system of using sandpaper efficiently is that you can easily convert back and forth from sanding flat surfaces with the sanding block to sanding three-dimensional surfaces without the block.
I then take one of the thirds, fold it in half lengthwise and wrap it around the cork side of the sanding block, holding it in place with my thumb and fingers. I use my fingers to hold the edge with the two flaps and my thumb to hold the edge with the fold. I wrap the paper so the edge with the two flaps rises up the side of the block just enough for me to get a grip. This part of the sandpaper will be the only part that is wasted, so I want to minimize it.
Also, by keeping this part minimal, enough of the folded side is left to give me three entirely separate surfaces from one-third of a sheet, or nine surfaces total from one sheet of sandpaper.
When I have sanded with one of the surfaces until it becomes dull or clogged, I flip the sandpaper and use the opposite side of the fold, holding the sandpaper in the same manner. When I’ve sanded that side dull, I open the folded paper and wrap it around the block to use the middle third, the third with the fold in it.
I can’t think how you could make more complete use of a sheet of sandpaper.
When sanding surfaces clamped between bench dogs on my workbench, I often use both hands, placing one on top of the other. Of course, there is no right- or left-handedness to the block, so I can also use either hand individually.
I have several of these sanding blocks (easier to find that way) and I use them interchangeably for sanding wood and sanding finishes, including sanding up to #600-grit or finer with wet/dry sandpaper and a lubricant. It’s easy to remove dust or sludge by knocking the block against the workbench or wiping with a cloth. You could, of course, have separate blocks dedicated to each type of operation.
A further advantage of this system is that I can use the same third-of-a-sheet of sandpaper to sand efficiently without a block. I simply fold the third-of-a-sheet in thirds again, and flip the outer faces to use a full 100 percent of the sandpaper. By having grit against paper on one of the inside folds, rather than paper against paper, as occurs when you fold sandpaper in half, the “pad” of sandpaper holds together better and makes sanding much easier.
Here are some supplies and tools we find essential in our everyday work around the shop. We may receive a commission from sales referred by our links; however, we have carefully selected these products for their usefulness and quality.