


We may receive a commission when you use our affiliate links. However, this does not impact our recommendations.
 Adding finish to a project is one of the most rewarding parts of building something. As I’ve been finishing up the trim work in my kitchen remodel (lots of cherry), I was reminded of just how beautiful the transformation is going from raw wood to the first coat of finish. I’ve been using a few coats of Briwax Hard Wax Oil on all the doors, face frames and trim.
For me, it strikes the balance between ease of application (and repair), wear, and feel. It’s low VOC and doesn’t stink up my back porch finishing room. The finishing regimen is pretty straightforward: sand to 180 grit, apply two or three coats of finish, rub out the finish with 0000 steel wool and wax. And then have a bit of finish on hand to touch up the inevitable dings and scuffs you add to your cabinet as you install it by yourself.
Because I’ve been working on my kitchen for more than a year, though, I’ve been finishing cabinets and trim in fits and spurts. And when I went to add finish to the most recent batch of trim, I was met with an unwelcome surprise: a gel-like skin on the surface of my Briwax Hard Wax Oil. Here’s what happened:
Even though the remaining finish (about a half pint) was sealed airtight in the original container, it had started to cure. This isn’t an issue when a can of finish leaves the factory – it’s filled to the brim, so there’s no room for air in the can. But as soon as the finish is exposed to air, it starts curing. And that half-full can of finish had enough air (and time between uses) that the curing process did its damage. Fortunately, I could skim off the gel, strain the rest of the can of finish through mesh cloth, and I could salvage a bit of what was left (at $30 a can, I’d say I lost about $5 worth).
So what can you do to fix this? The best thing to do is use a full can of finish on one project in a short period of time. I’ve been skunked before. When I made my dining room table, I thought I’d build a bunch of other things and want to use General Finishes Arm-a-Seal on all of it, so I bought the big jug (and “saved” money buying in bulk). I lost about half of it due to the same trapped oxygen and curing scenario.
What I should have done was decant the finish into smaller containers and kept each one sealed until I needed it. I’ve also seen some woodworkers add glass beads or marbles to a jar of finish to raise its level in the container to meet the lid (basically using the volume of the marbles to displace any oxygen in the container). That sounds like a hassle and a mess, but some people swear by it.
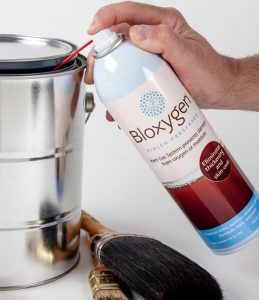
But what I’ve found works best in practice, is just springing for a can of Bloxygen. Bloxygen does what the name implies – it blocks oxygen from reaching the finish, and stops it from curing in the can. Bloxygen’s main ingredient is inert argon gas. It’s heavier than air, so a few puffs of it into your can before you seal it forms a protective gas layer over the finish. You don’t need to use a lot of it or try to replace all the air in the can with it (one can of Bloxygen should last you at least a year). It’s using your money smartly.
I now keep a can of Bloxygen at all times with my finishing supplies, and I waste less finish. As you start to get into the world of premium wood finishes, spending good money on the good stuff, adding a can of Bloxygen to your kit is good insurance against making sure that finish will still be good to use next time you have a project that calls for it.
Here are some supplies and tools we find essential in our everyday work around the shop. We may receive a commission from sales referred by our links; however, we have carefully selected these products for their usefulness and quality.


