


We may receive a commission when you use our affiliate links. However, this does not impact our recommendations.
The tabletop on our for the I Can Do That project in our February 2010 issue, appeared a bit blasé. So to pep up the look, I thought inlay. Knowing I didn’t have the time to create, or the desire to purchase wood inlay, I turned to trompe l’oeil. Trompe l’oeil is French for “fool the eye.” You create an optical illusion that’s sometimes very involved, or it can be very basic. For this project I chose very basic, a 1/4″ wide line of paint that surrounds the tabletop. Or maybe it’s strips of ebony?
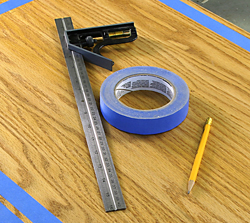
To add this visual interest to a project, you need three tools and paint. The tools are a probably laying around your shop, within easy reach. A combination square, pencil and blue painter’s tape is all that’s needed.
Layout work begins the process of deception. Set your combination square to 1-1/4″, then make a few marks along each side of the tabletop. Place enough lines to allow easy alignment of the tape. Pull off a section of tape, carefully place it at your lines and press the tape to complete the seal. If the tape is not in contact with the table surface, you’ll get a fuzzy edge in your finished faux inlay.
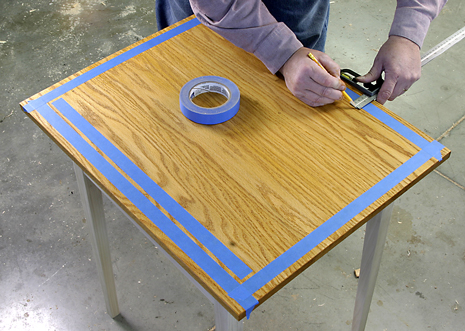
With the outside line established, move inward a 1/4″ and repeat the steps to position the second line of tape. When placing the tape, don’t worry about stopping exactly a 1/4″ from your outside line, lap right over the first run of tape. Work all four sides as shown in the above photo.
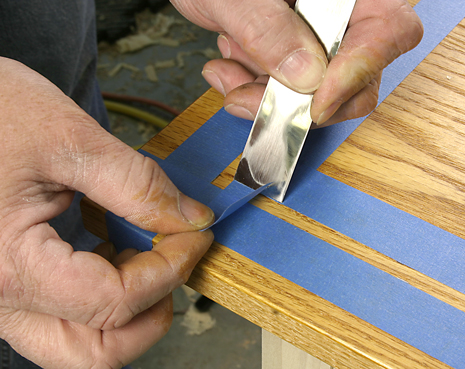
To trim those corners, grab your 3/4″ chisel. Align the chisel at the lap , it’s easy to see due to the two layers of tape , then press firmly and rip the tape off. There should be a perfect, straight tapeline left.

With the tape positioned and trimmed, stir your paint and cover the 1/4″ area between the two lines of tape. A couple light coats are better than one heavy layer and you’ll find that filling in the wide grain of oak (as in our project) takes a bit more work than if you’re painting on maple of poplar.
After the paint dries , you can force dry water-base paint with your hairdryer , peel the tape from the tabletop and admire your artistic abilities.
Here are some supplies and tools we find essential in our everyday work around the shop. We may receive a commission from sales referred by our links; however, we have carefully selected these products for their usefulness and quality.


It’s a nice idea, but I don’t think this would be considered Tromp-l’œil, which usually features a realistic perspective view of a 3D object or scene. I would call it a "painted detail" or, if I wanted get fancified, "faux inlay."
Now if you painted an image of your combination square with its shadow on the top, that would be Tromp-l’œil. But I *Can’t* Do That! 😀
Glen,
that’s a great detail! I can’t wait to read the full article.
Great idea Glen. Another simple approach that could be done with hand tools or power tools is to run a 1/4" wide by 1/4" deep groove in the same place that you painted and instead doing inlay or marquetry you could fill it with epoxy mixed with die and sand it flush with the surface. Sort of like using sulfur in old Amish or Dutch blanket or dowery chests. Or you could bet more elaborate and carve and fill designs.