


We may receive a commission when you use our affiliate links. However, this does not impact our recommendations.
 In continuation of the story of our live edge waterfall coffee table, today I will show a way to accurately cut a miter joint on a live edge slab with a circular saw.
If you do not have a table saw you can use a circular saw pushed against a clamped guide to saw the miter. To ensure an accurate miter you will have to saw at 45 degrees across a path set at an appropriate right angle in relationship to the center line of the slab. And you will have to make sure to push your saw against the guide you clamped to the slab.
This is how you can do it:
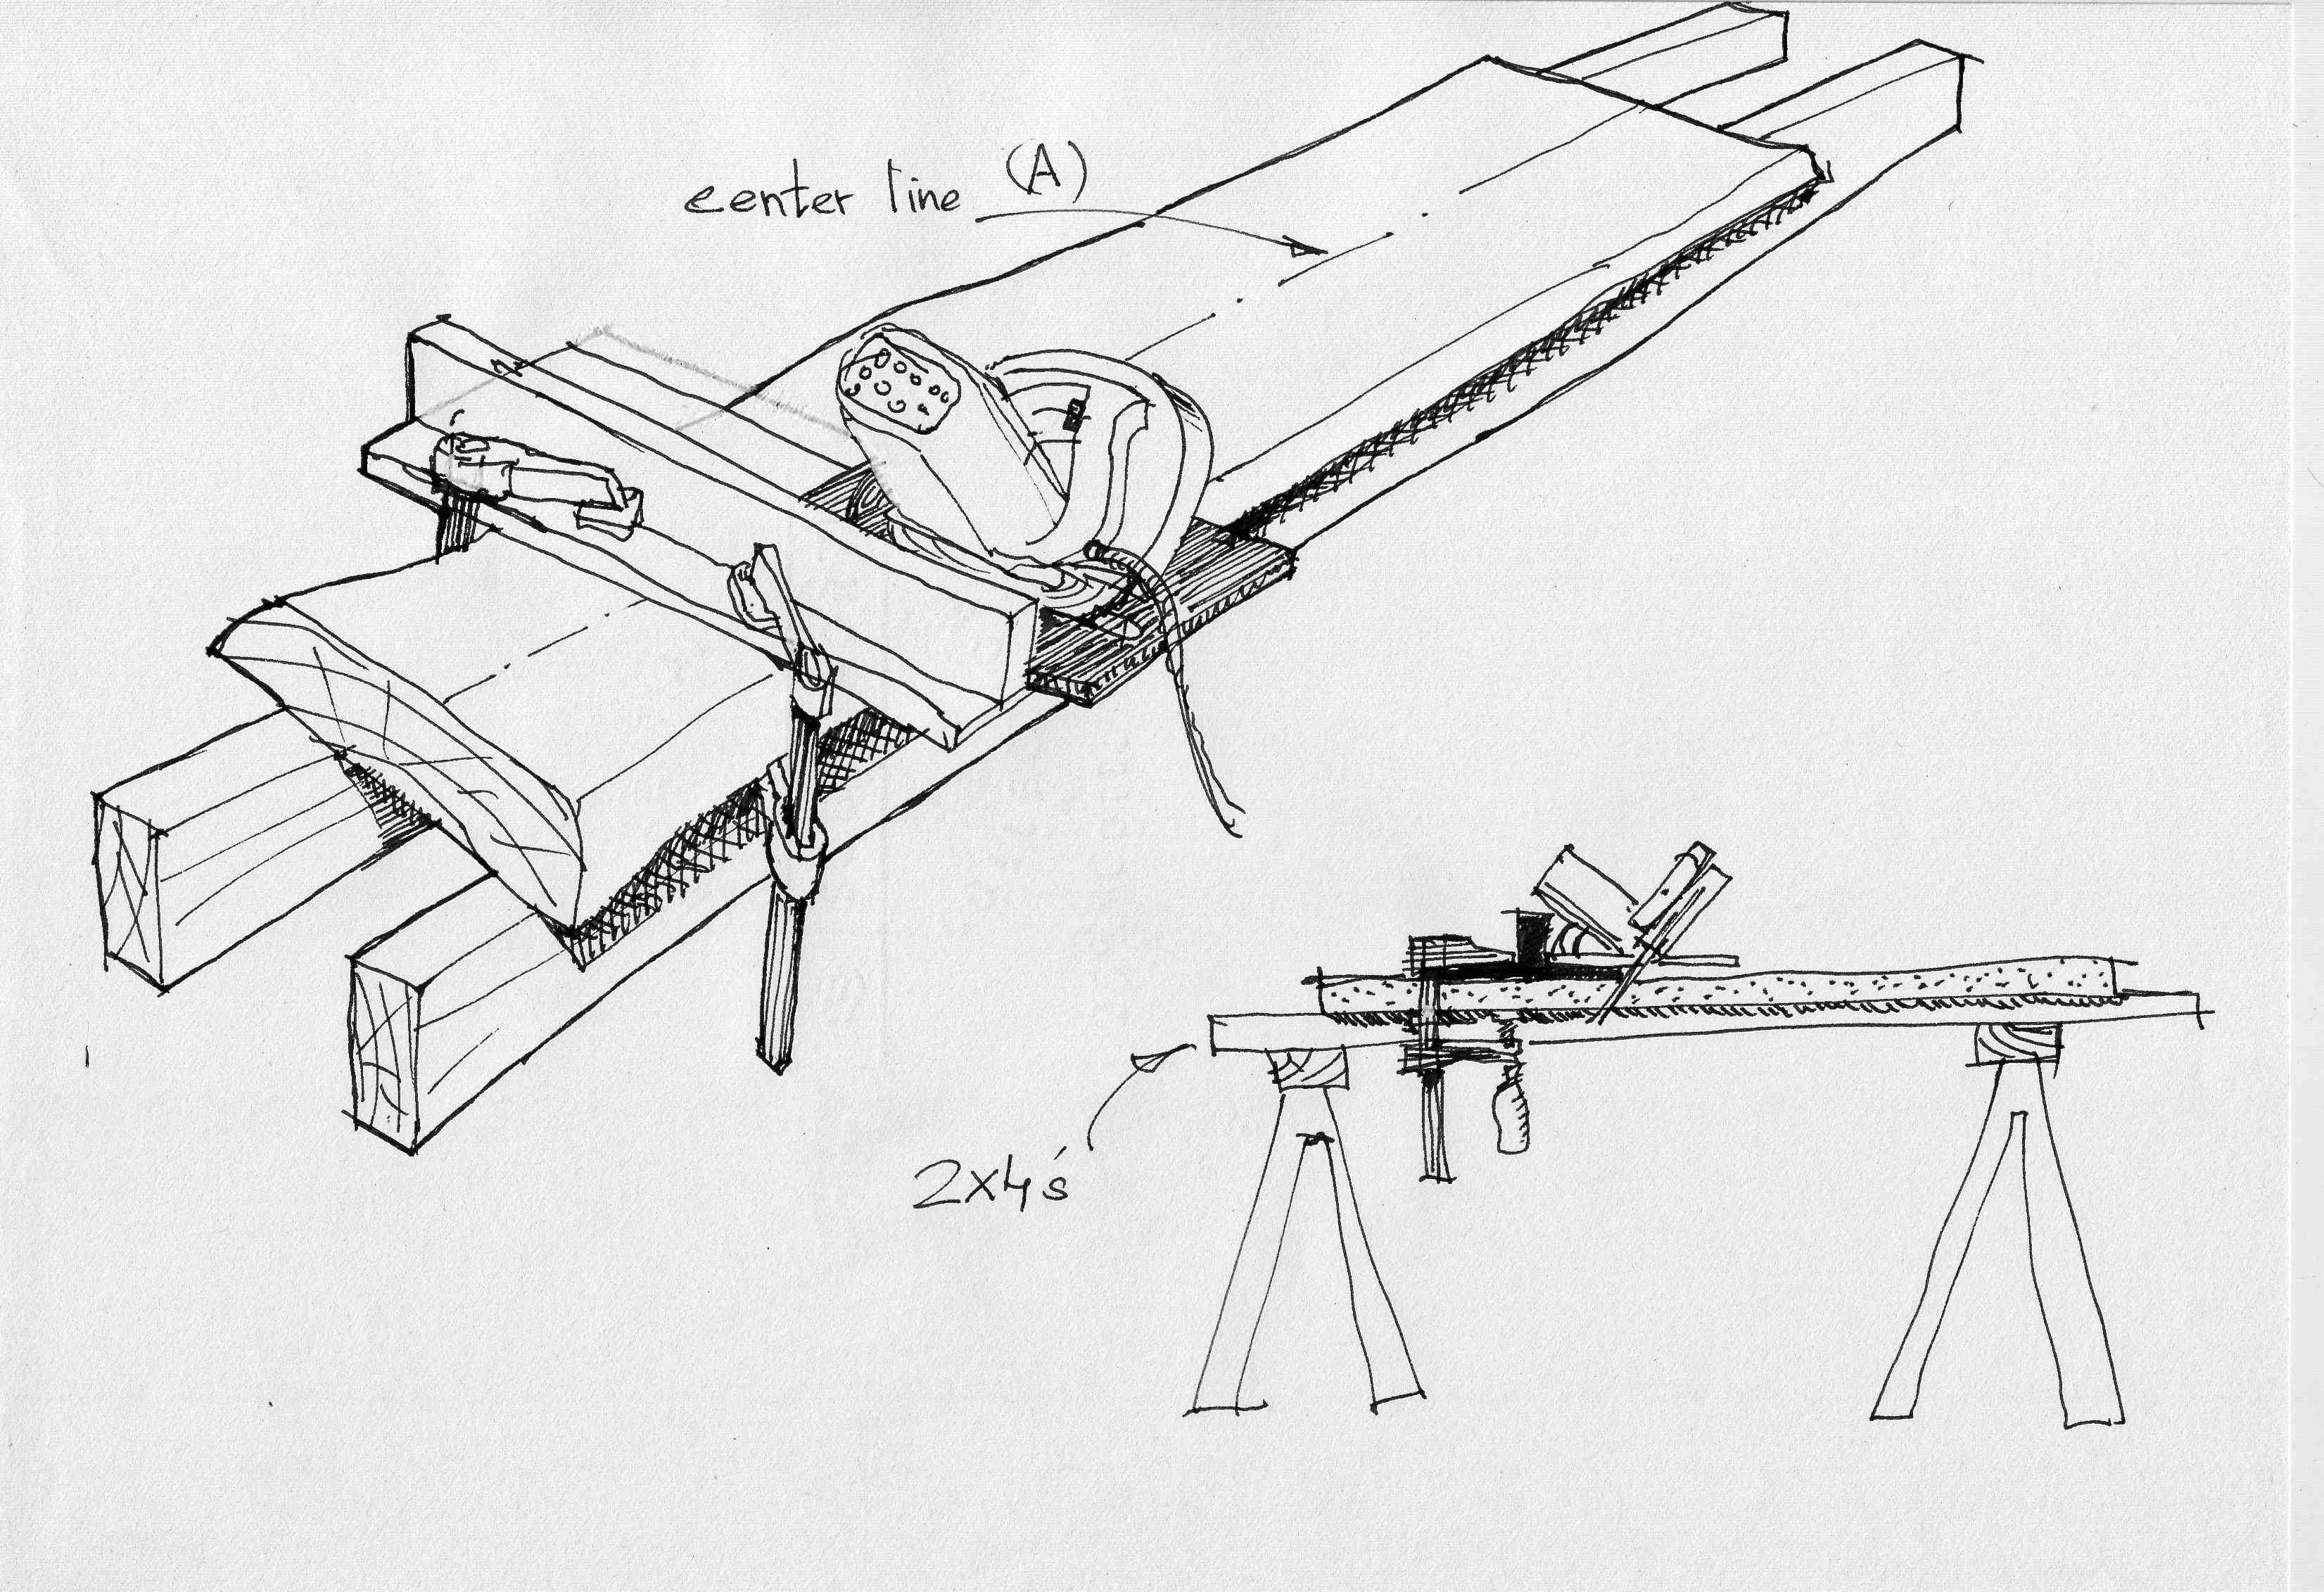
- Lay your slab on a stable surface with a reliable sacrificial liner under it, such as two 2x4s or a plywood sheet.
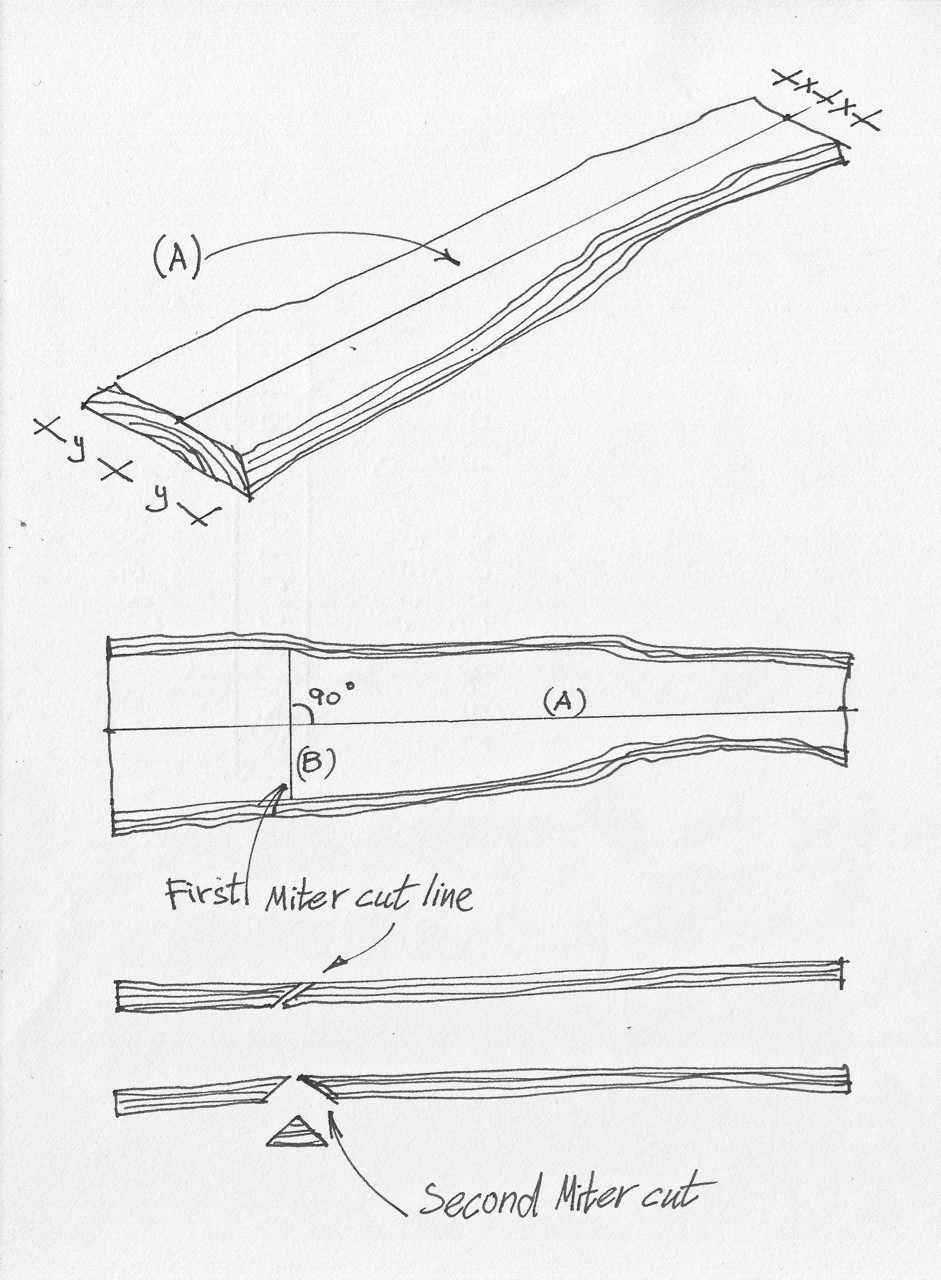
- Draw a center line (A, shown below) from the the slab’s foot edge (the crosscut at the end of the slab) to the the opposite head edge.
- At the place you want the miter to be, draw a right angle line to the center line with a carpenter’s square or a draftsman’s triangle (B).
- Clamp your circular saw guide adjacent to line (B) and saw the slab to form the first part. This part can be the top or a leg depending on your decision which to cut first.
- Unclamp your saw guide and reposition it on the remaining slab.
- Cut the slab going from the opposing side to form the second 45 degree miter.
- Now you have two parts with complimentary miters that once joined together (after some necessary inner reinforcement, which I will talk about later) create a waterfall effect.

Next time: how to cut waterfalls on the table saw.
Here are some supplies and tools we find essential in our everyday work around the shop. We may receive a commission from sales referred by our links; however, we have carefully selected these products for their usefulness and quality.


where do you place the fence for the second cut?
Hi Yoav,
Great info on this popular joint and something I have often wondered about but never tried. I would be inclined to try this on dimensional lumber first just to get comfortable with the process before I would feel comfortable tearing into a precious slab.
BEWARE The tapering width. With a 2″ slab, the interior-most edges of the live edge at the 90 are from
4″ apart and are likely to be of quite different widths there. I will do two things: (1) select a slab with
much less taper. (2) favor one live edge and make my “centerline” parallel to that edge to minimize
that 90 interior mismatch. This is likely to give you a front/ back situation on your table/bench but that’s better than having two back sides. This is a great project for a poor boy like me, more time than money.
I would like to hear some ideas on the joinery here – to be strong enough for use as a bench, yet hidden.
Quick question: It looks like it would make the most sense to cut the miter on the “free” piece first (in this case the top) because then the registration face of the guide would still be attached to the same place on the other piece allowing an accurate second miter. Am I reading this right?