We may receive a commission when you use our affiliate links. However, this does not impact our recommendations.
Shop scraps and a few simple techniques will get you spinning along
Large turning projects can be daunting. A large bowl, for example, requires gluing up a blank or sourcing part of a tree trunk. When first mounted on the lathe, such stock can be off balance and result in so much vibration that the lathe may start to walk across the shop floor.
Platters are a great alternative to bowls. They can be made as large as your lathe capacity allows so their size can look impressive, plus you can use kiln-dried lumber so your turning blank can be laid out and machined to keep it in better balance when you turn on the lathe. And chances are you already have leftover wide lumber on hand from past projects.
The skills required to turn platters range from beginner to advanced; the difference is the shape and the level of detail you add to your turning.
The walnut platter I made is about 14″ in diameter and the blank was about 1 1⁄2” thick. As for the turning skills required, this piece falls in the relatively easy range. I used only four turning tools to make it: a round-nosed scraper, a 1⁄16” parting tool, a small spindle gouge and a 1⁄2” bowl gouge with a swept back “fingernail” grind on the cutting edge. This last one did nearly all the material removal and final shaping.
Workholding Strategy
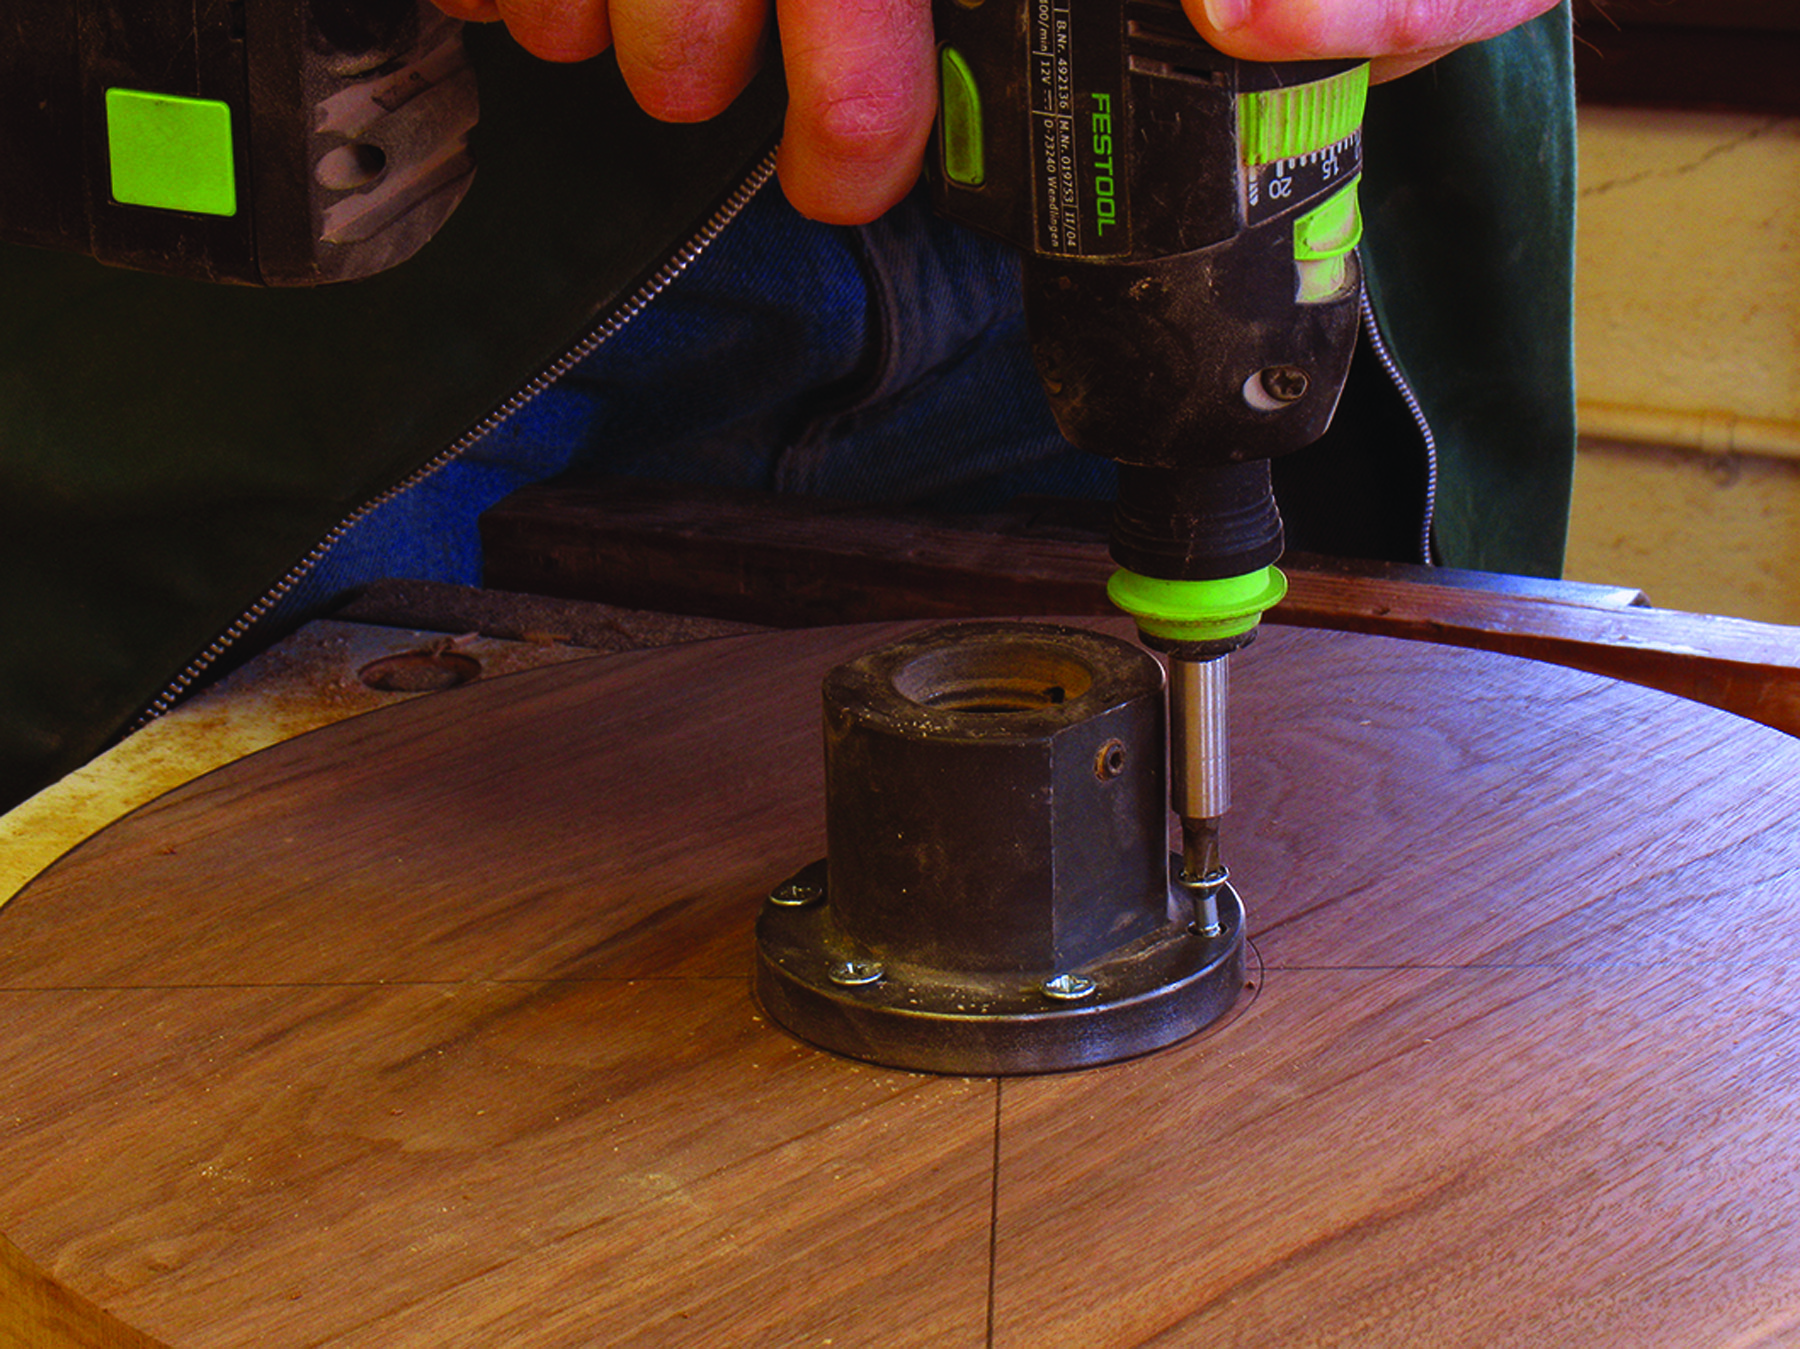
Dead center. The face plate is carefully positioned in the center of the top side of the turning blank and attached with #10 screws.
When turning spindles, holding the work is straightforward. The blank is mounted between the drive center on the headstock and live center on the tailstock. With platters (and bowls), you need a different workholding strategy because at least once during the turning process the work is removed then remounted with it flipped in the opposite direction.
A common strategy is to hold the stock with screws and a face plate mounted on the lathe headstock. The face plate is usually fastened to the intended top of the work. That’s because you typically remove enough material from this side to eliminate the screw holes. The live center is often used to help hold and stabilize the work while the initial outside shape is roughed out.
With the bottom of the work outboard (facing the tailstock), preparations are made for holding the piece when it’s reversed, so you can work on the turning’s face. Usually, the work is remounted and held by a four-jaw scroll chuck. These chucks are mounted on the headstock and have a variety of jaws that clamp the work securely.
Start Turning
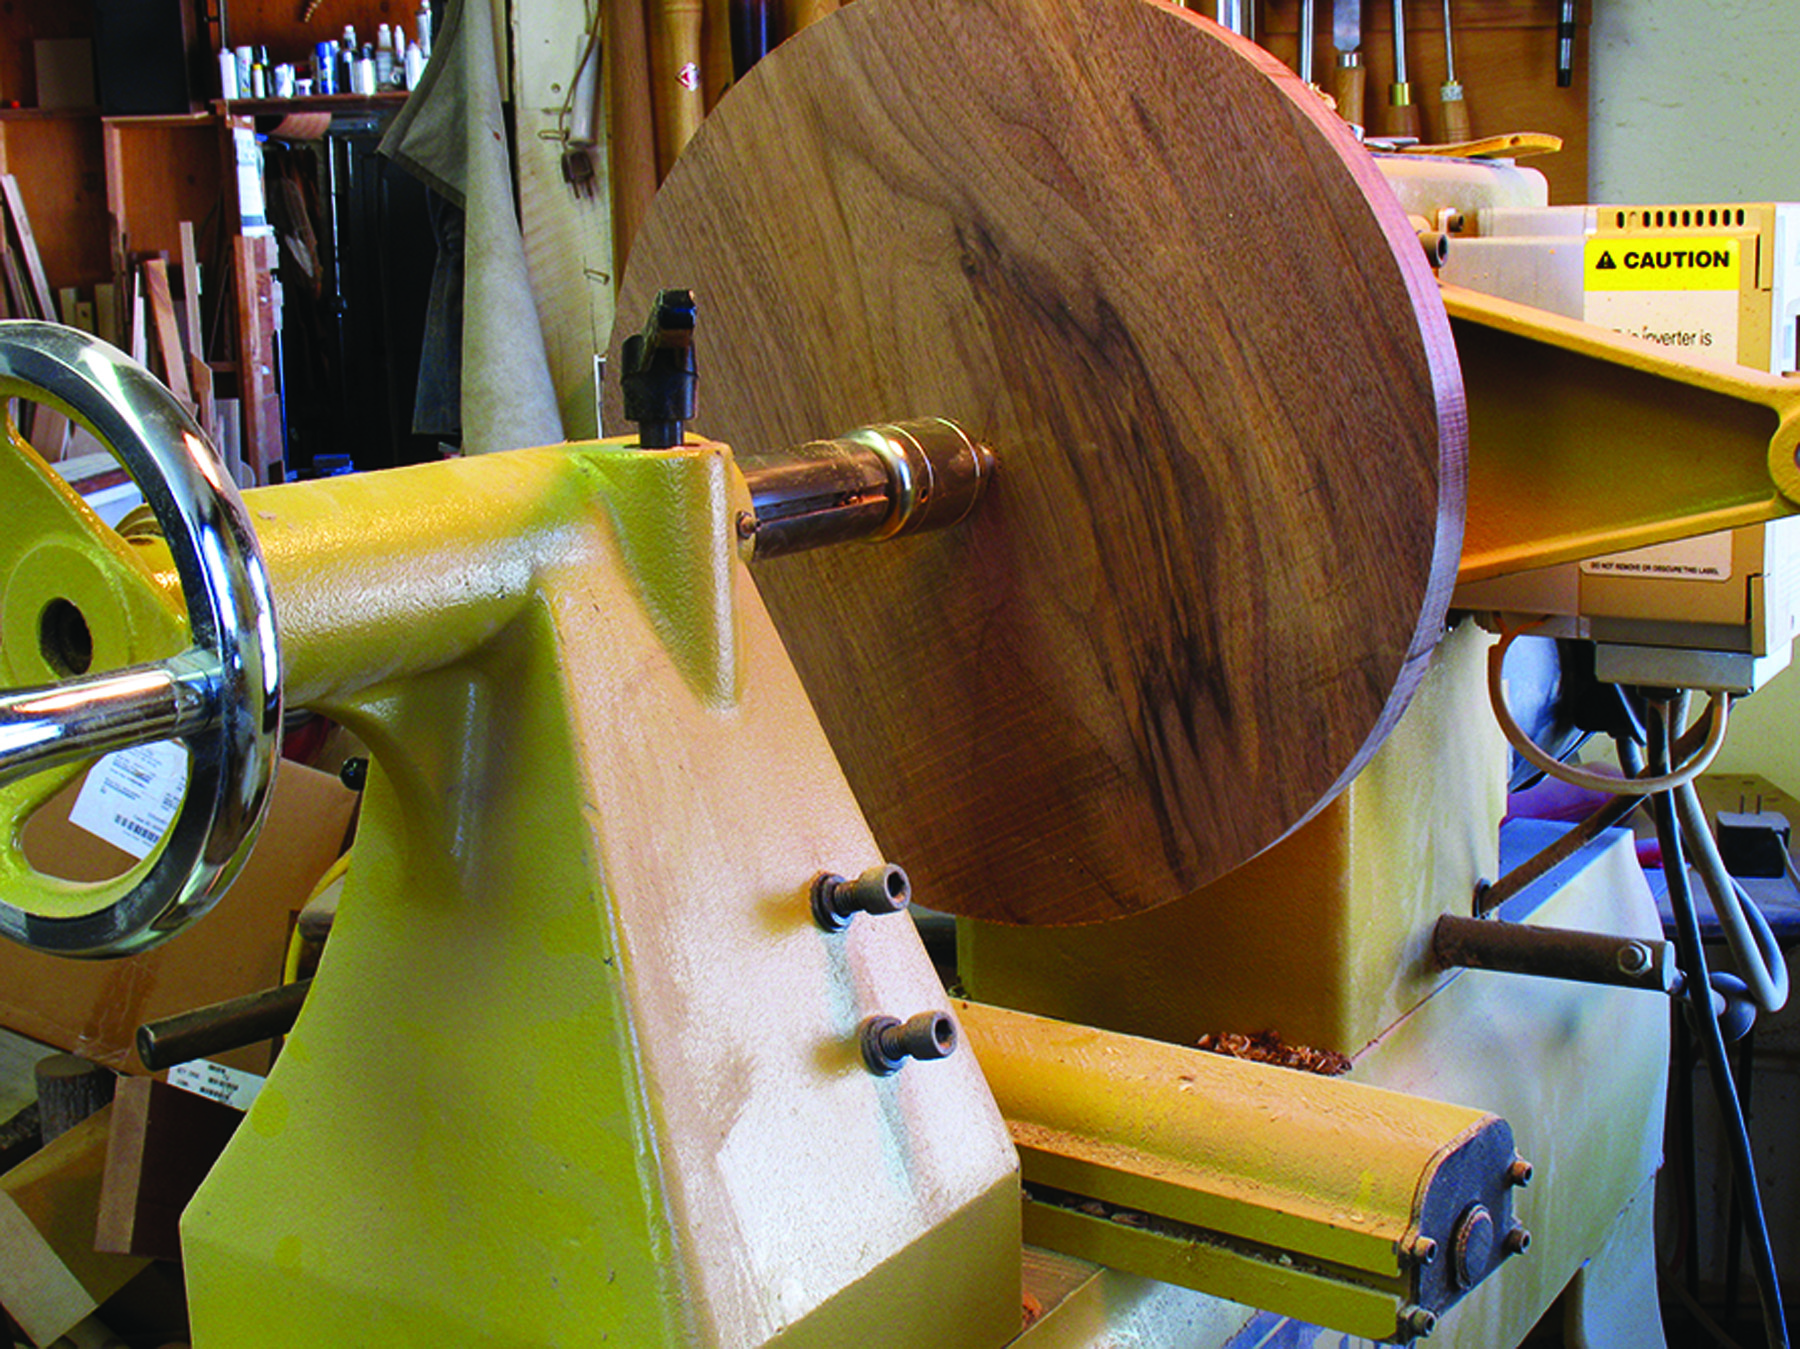
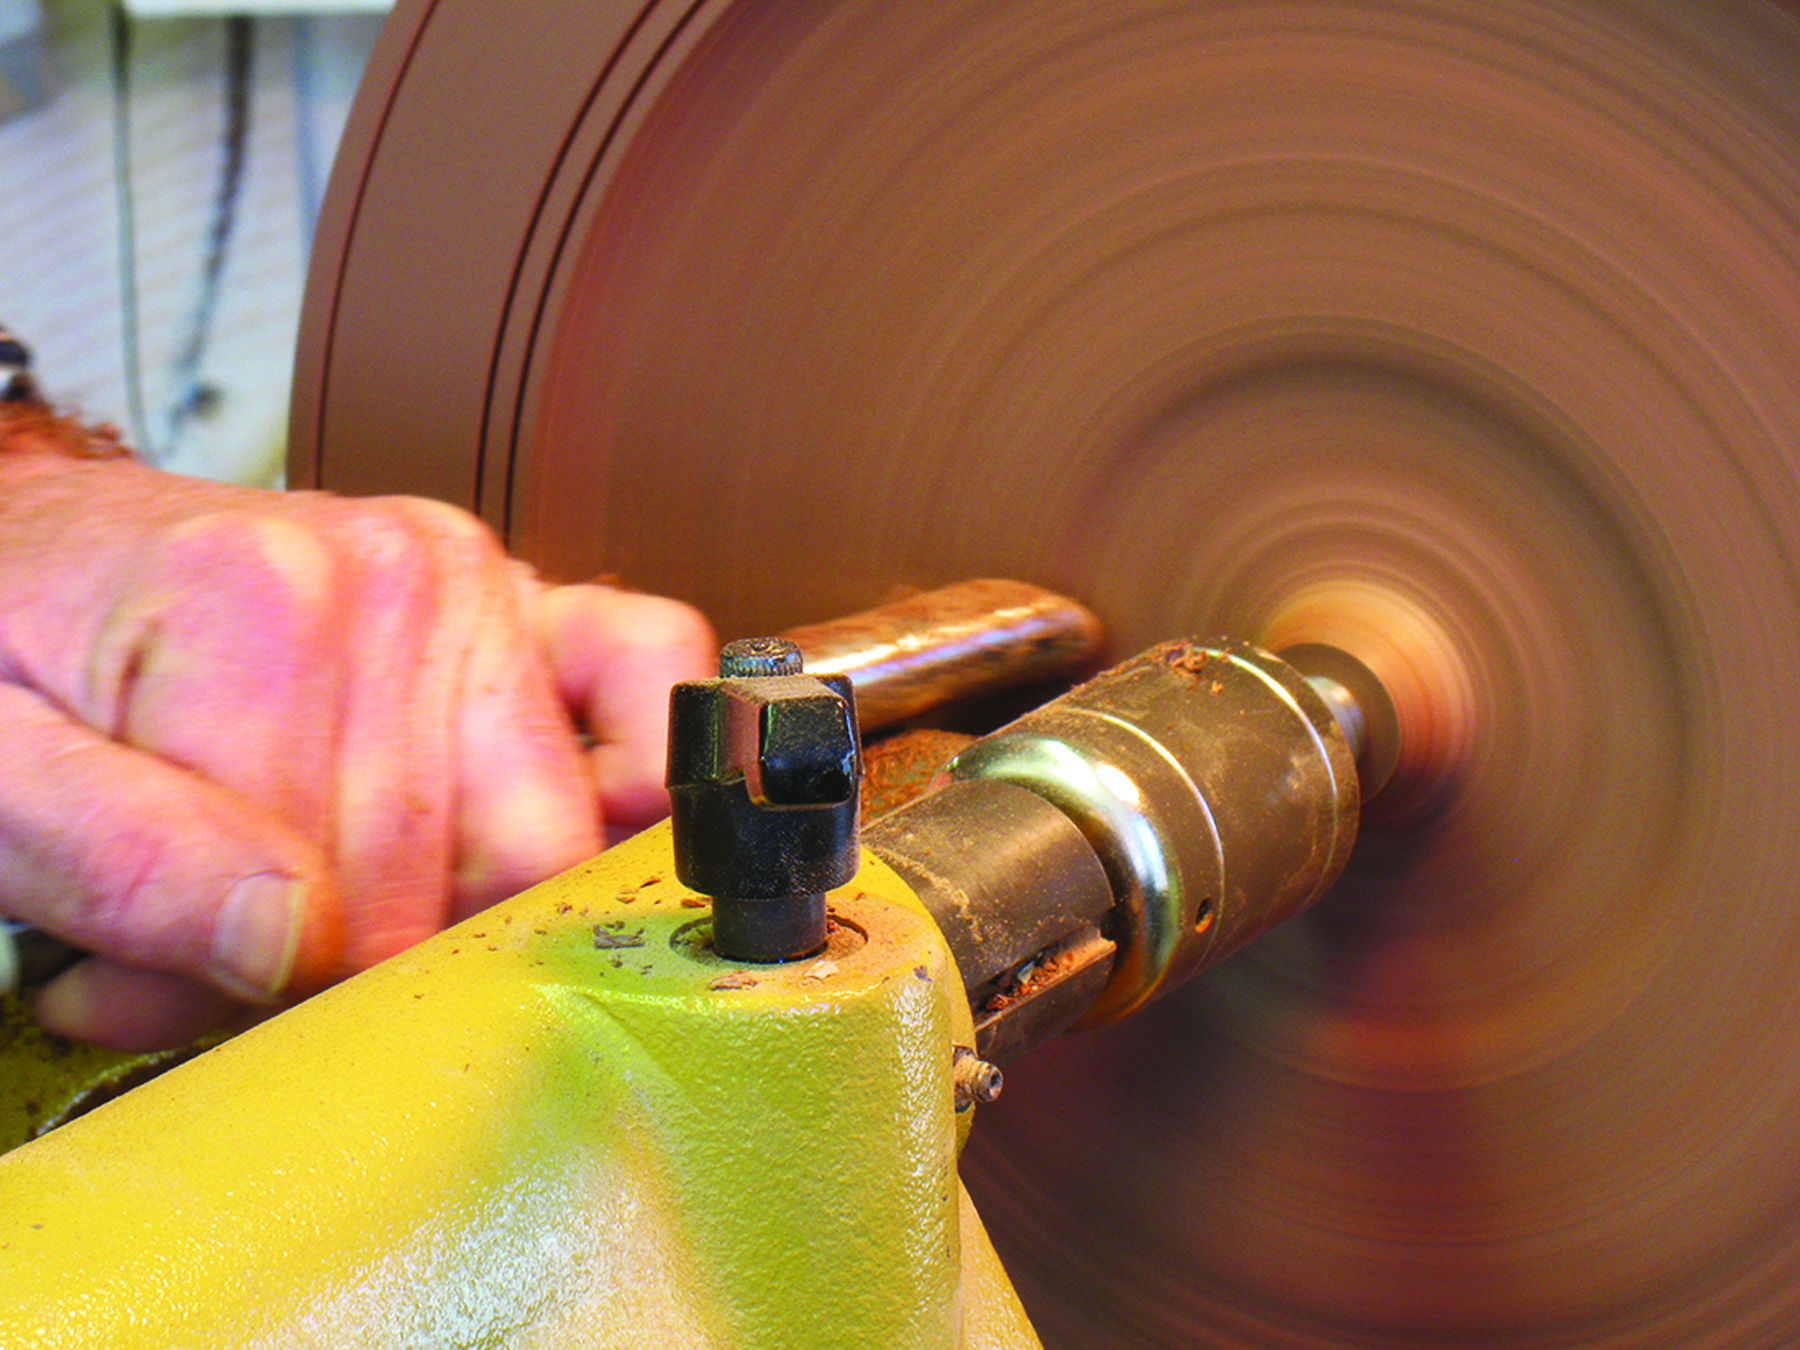
Double strength. While the face plate primarily holds the work, bring up the tailstock on the outboard side. Because you’ll be leveraging pressure when truing the rim and face of the work, the extra holding power of the live center adds another measure of safety.
With your platter blank cut close to round on the band saw and the face plate secured in the center of the blank’s top, mount the work on the lathe’s headstock. The face plate screws on to the threaded spindle. For extra holding power, bring up the live center to further secure the work. I always use a live center until the last minute before I need to turn away the place where it contacts the work.
Set the height of the tool rest to just below the center of the work, and perpendicular and as close to the blank as possible. (Turn the work by hand to make sure the blank clears the tool rest all the way around.)
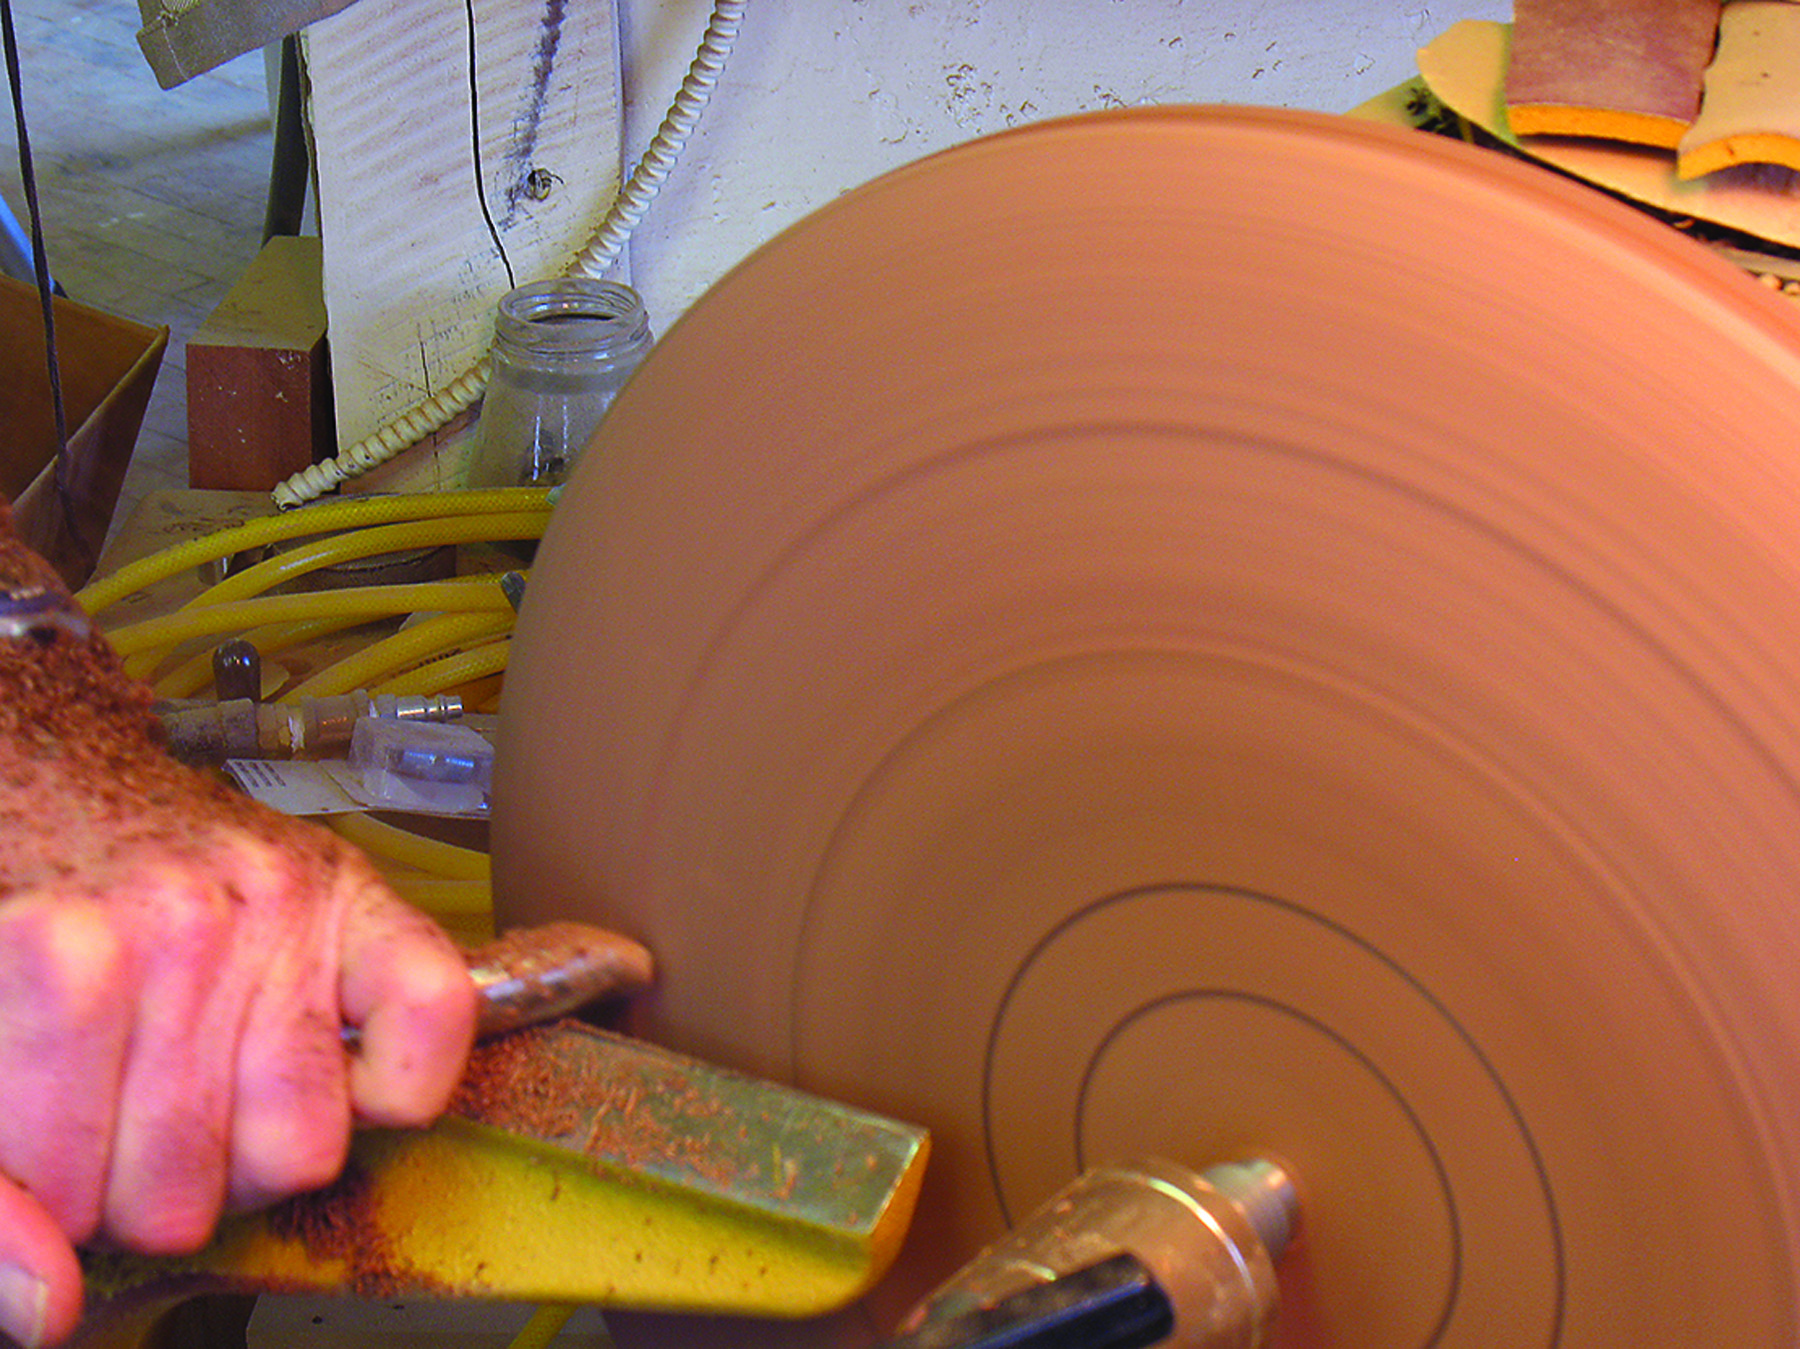
Start the lathe on slow speed while standing to one side of the work. It’s a good safety precaution should the work somehow be thrown from the lathe. Slowly increase the lathe speed to a medium-slow range. Start cutting the blank using the bowl gouge to make the perimeter a true circle. This will help balance the piece. The cut starts on the face of the blank and continues across the thickness. Use the tip of the cutting edge placed at about 90° to the face. The objective is to create a shoulder for the bevel of the cutting edge to ride against, which supports the tool for the rest of the cut.
To avoid blowing out the grain as you exit the cut, stop just before you reach the opposite face. Then start a second cut from the backside. You may need to repeat these cuts until you have a truly round blank.
Shape the Bottom

Round up. The first turning task is making the blank truly round. With the lathe set to about 500 rpm and the tool rest close to the work, make the cut with a bowl gouge across the thickness of the blank.
Turning the bottom of the platter is a rather simple matter. There are just three things to accomplish: Form the outside edge profile, keep a large portion of the bottom flat so the platter doesn’t tip when in use, and turn a slight recess in the center to hold the work with the chuck when it is reversed to shape the opposite face.
I start by turning the edge profile. This is done making a series of cuts at the platter’s perimeter. Began by taking material away close to the edge with the bowl gouge, then make another cut a bit farther in and so on. Once I have the basic shape with the edge thinned to where I want it, I begin to refine the shape taking shallow cuts until I arrive at a flowing, fair curve that’s free of any tear-out.
With the edge profile done, begin turning the rest of the bottom. Make a few light cuts starting close to the center, pulling the gouge toward the outside. Take only as much material as is needed to flatten the bottom with a seamless transition to the edge profile.
A bit on edge. To turn the edge profile make a series of cuts pulling the bowl gouge from inside to out. The tool is rolled over on its edge while making these cuts.
The remaining work on the bottom is near the center of the platter, so you can now safely move the tailstock out of the way. To finish up this side of the platter, turn the dovetail-shaped shallow recess you’ll need to hold the work when it’s reversed (see the illustration at right above). My chuck jaws are about 2 1⁄2” in diameter when fully closed, so I cut my recess to 2 5⁄8“.
I cut the recess to a depth of about 3⁄16” using a thin parting tool. Next, I remove most of the waste with the bowl gouge, then switch to a small spindle gouge to remove material near the recess perimeter. The dovetail profile is cut with the parting tool held at an angle, then I use a spindle gouge to remove the last bit of waste in the corner.
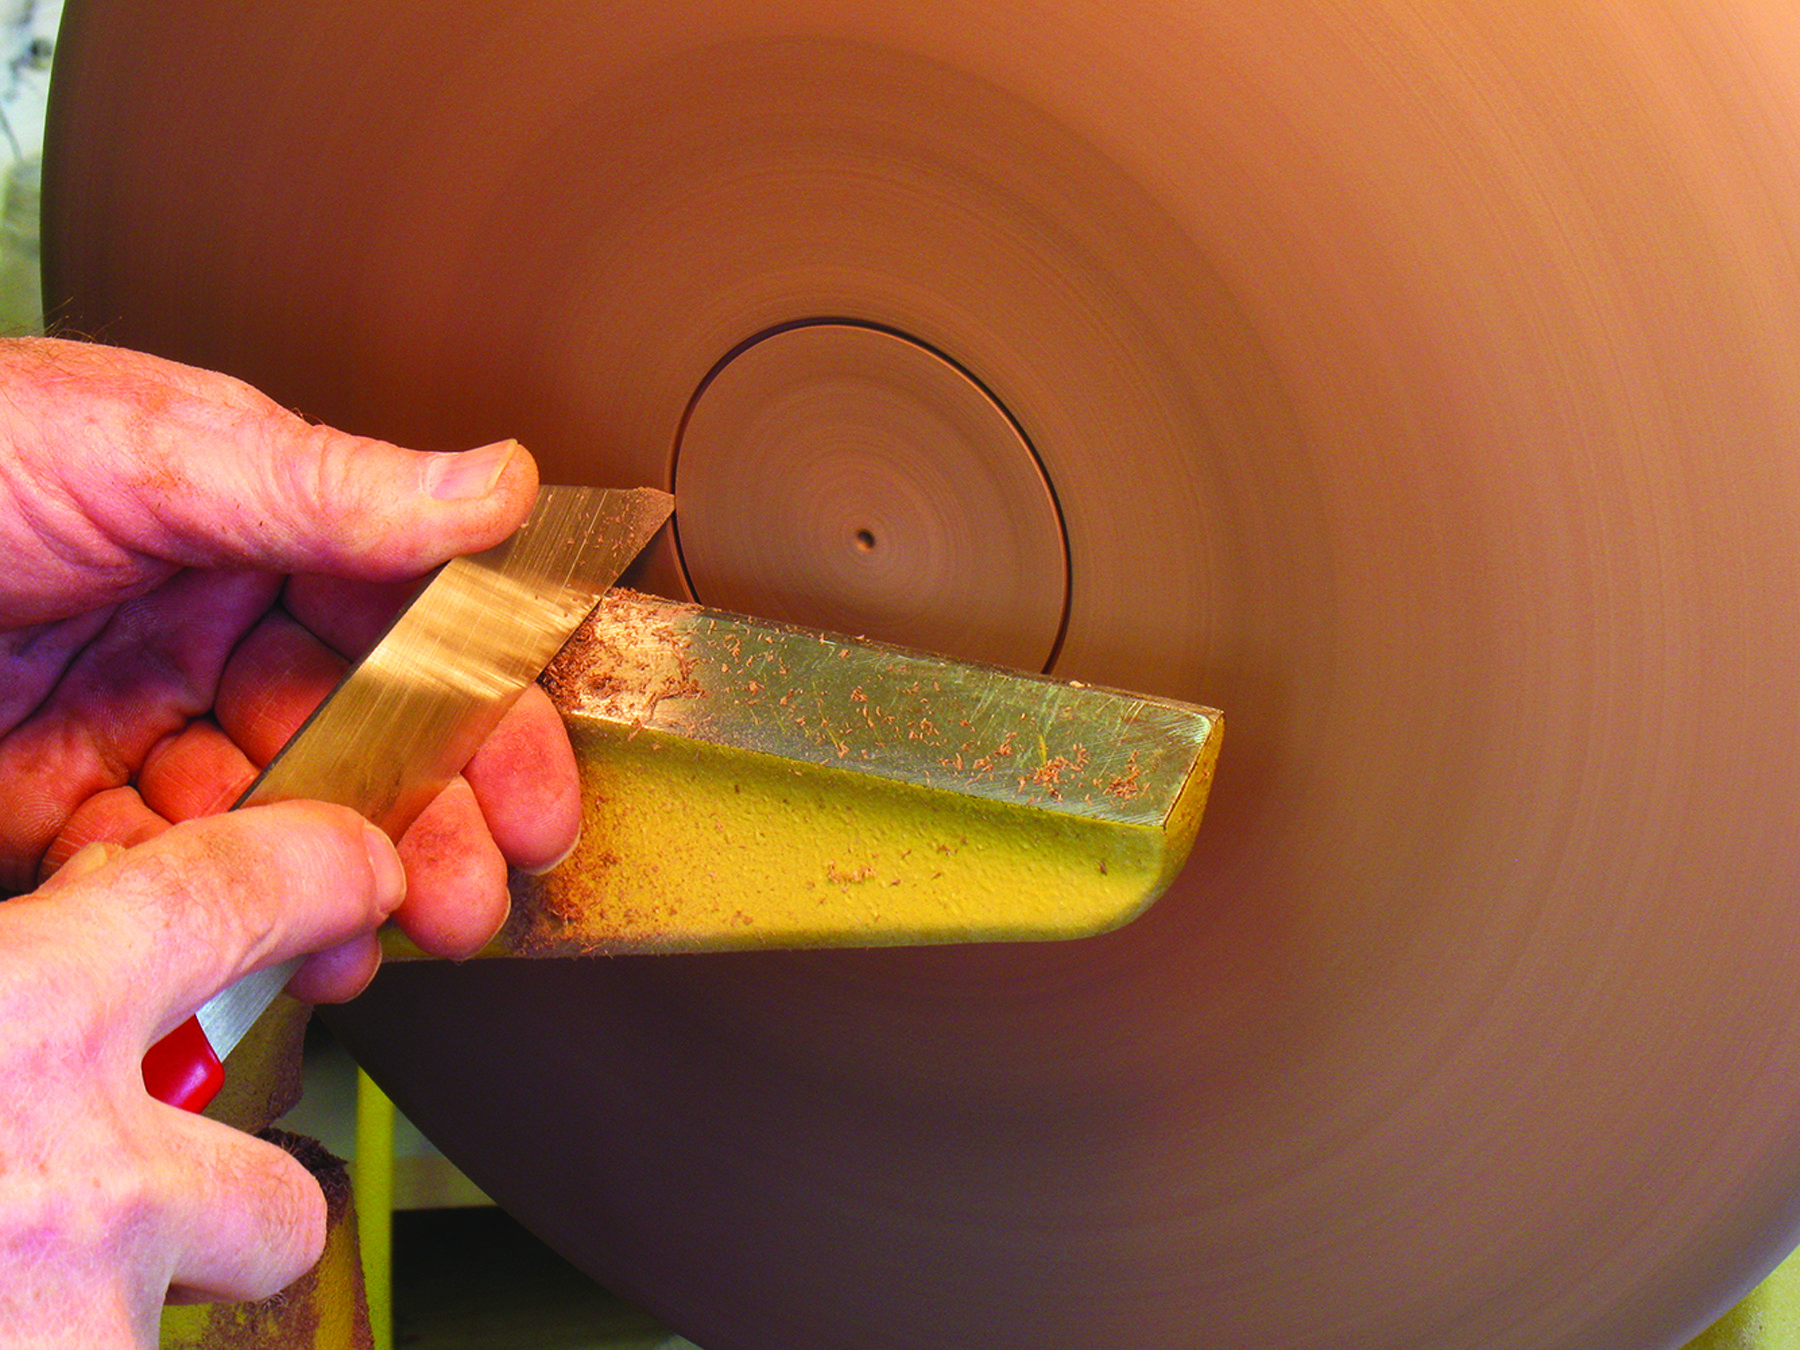
Just hold it. I use a 1⁄16″ parting tool to establish the perimeter of the chuck recess on the platter’s bottom. I also use the tool to make the edge profile match the dovetail shape of the chuck jaws after the recess is hollowed.
To finish the bottom, sand it while it’s still mounted on the face plate and easy to access. Depending on how sharp your turning tools are and your ability to cut cleanly, you might begin sanding with #150-grit sandpaper – but if you have tear-out you may need to drop back to #100 grit.
I use an angle drill with a soft, spongy pad for sanding while the work is still on the lathe. If your lathe has a reverse-direction feature, sand with the lathe running in reverse at a relatively slow speed. Progress through the sanding grits up to #220 or #340.
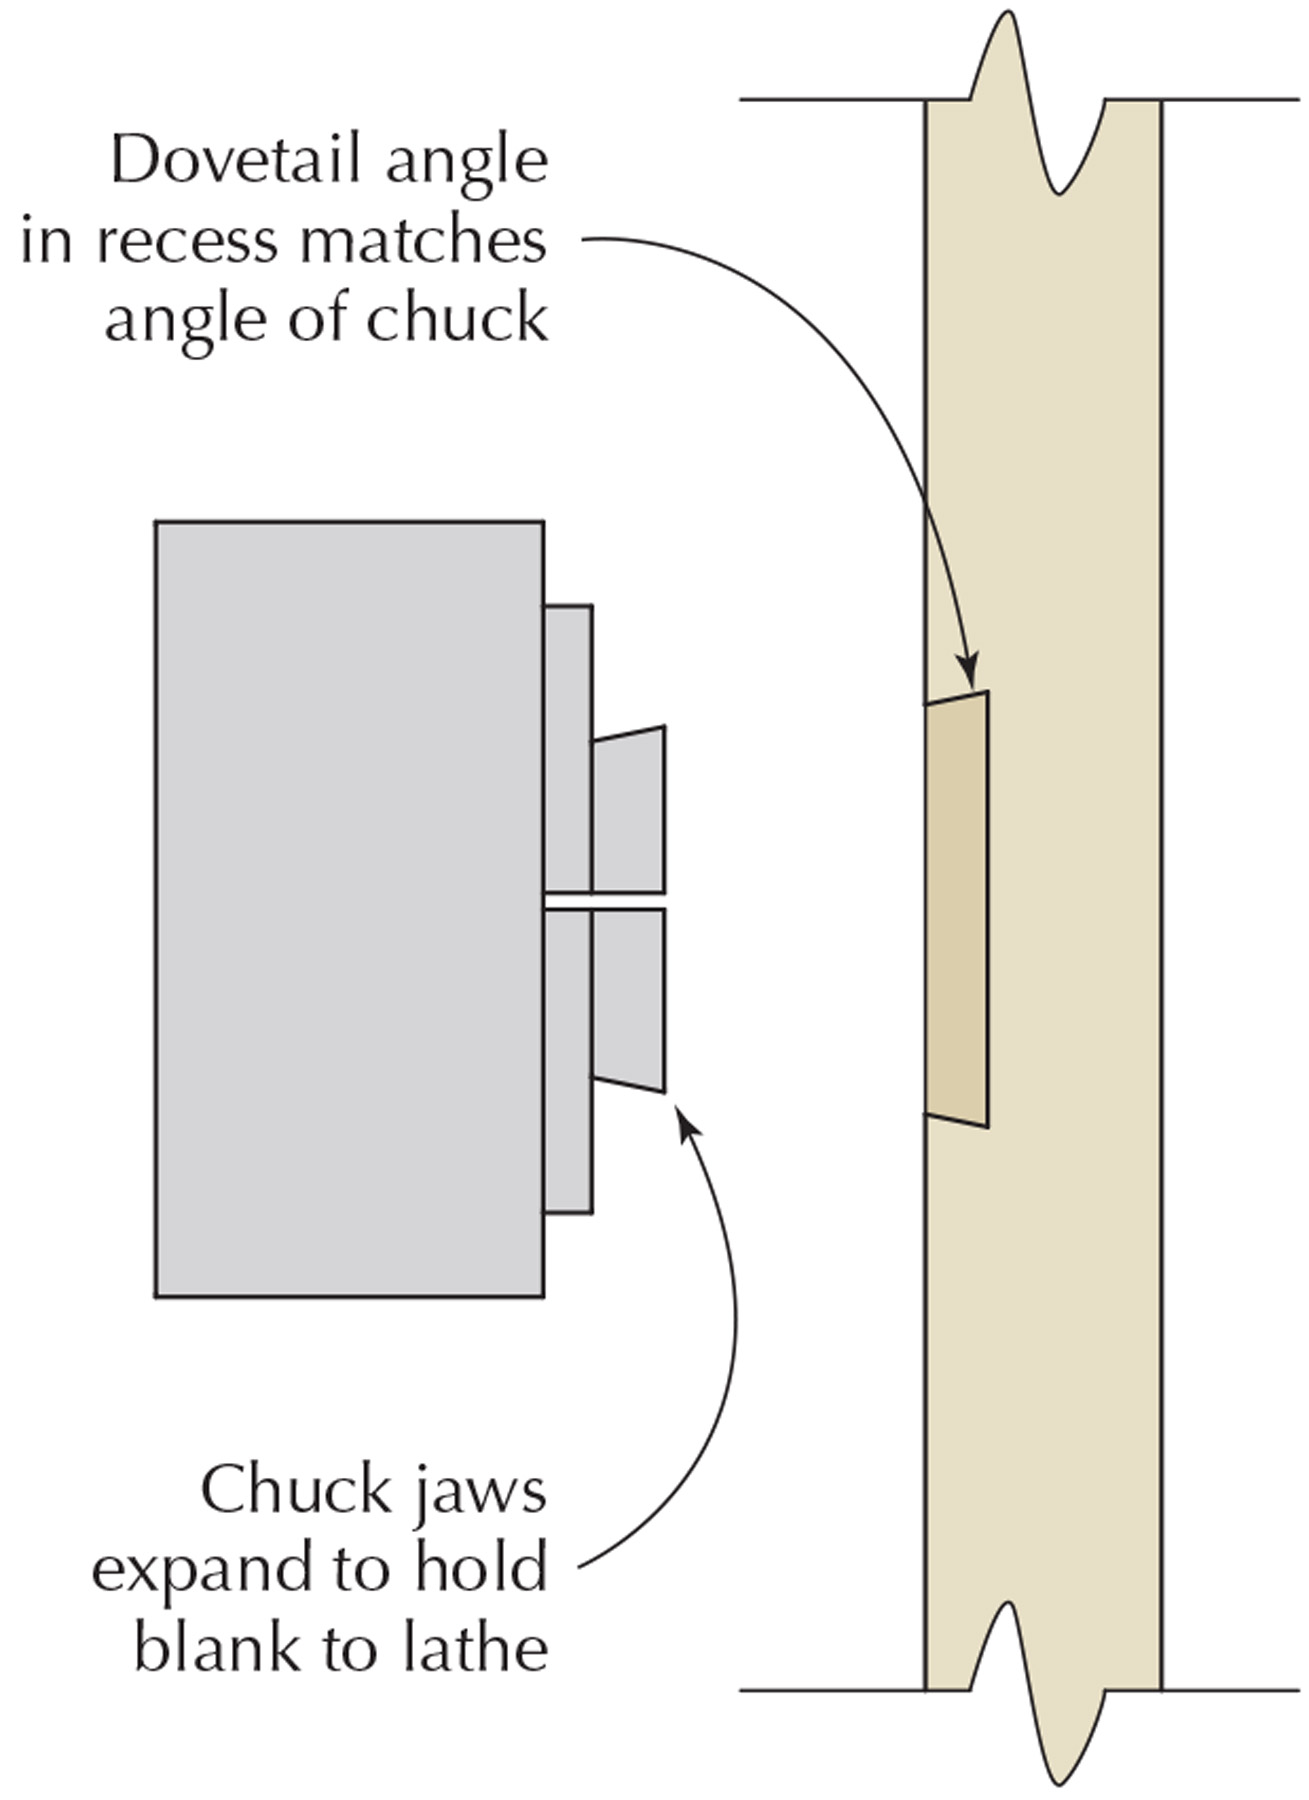
Chuck it in there. A four-jaw scroll chuck holds the work by clamping the jaws on a tenon turned on the work or by expanding the jaws into a round mortise in the piece.
Reverse & Turn the Front
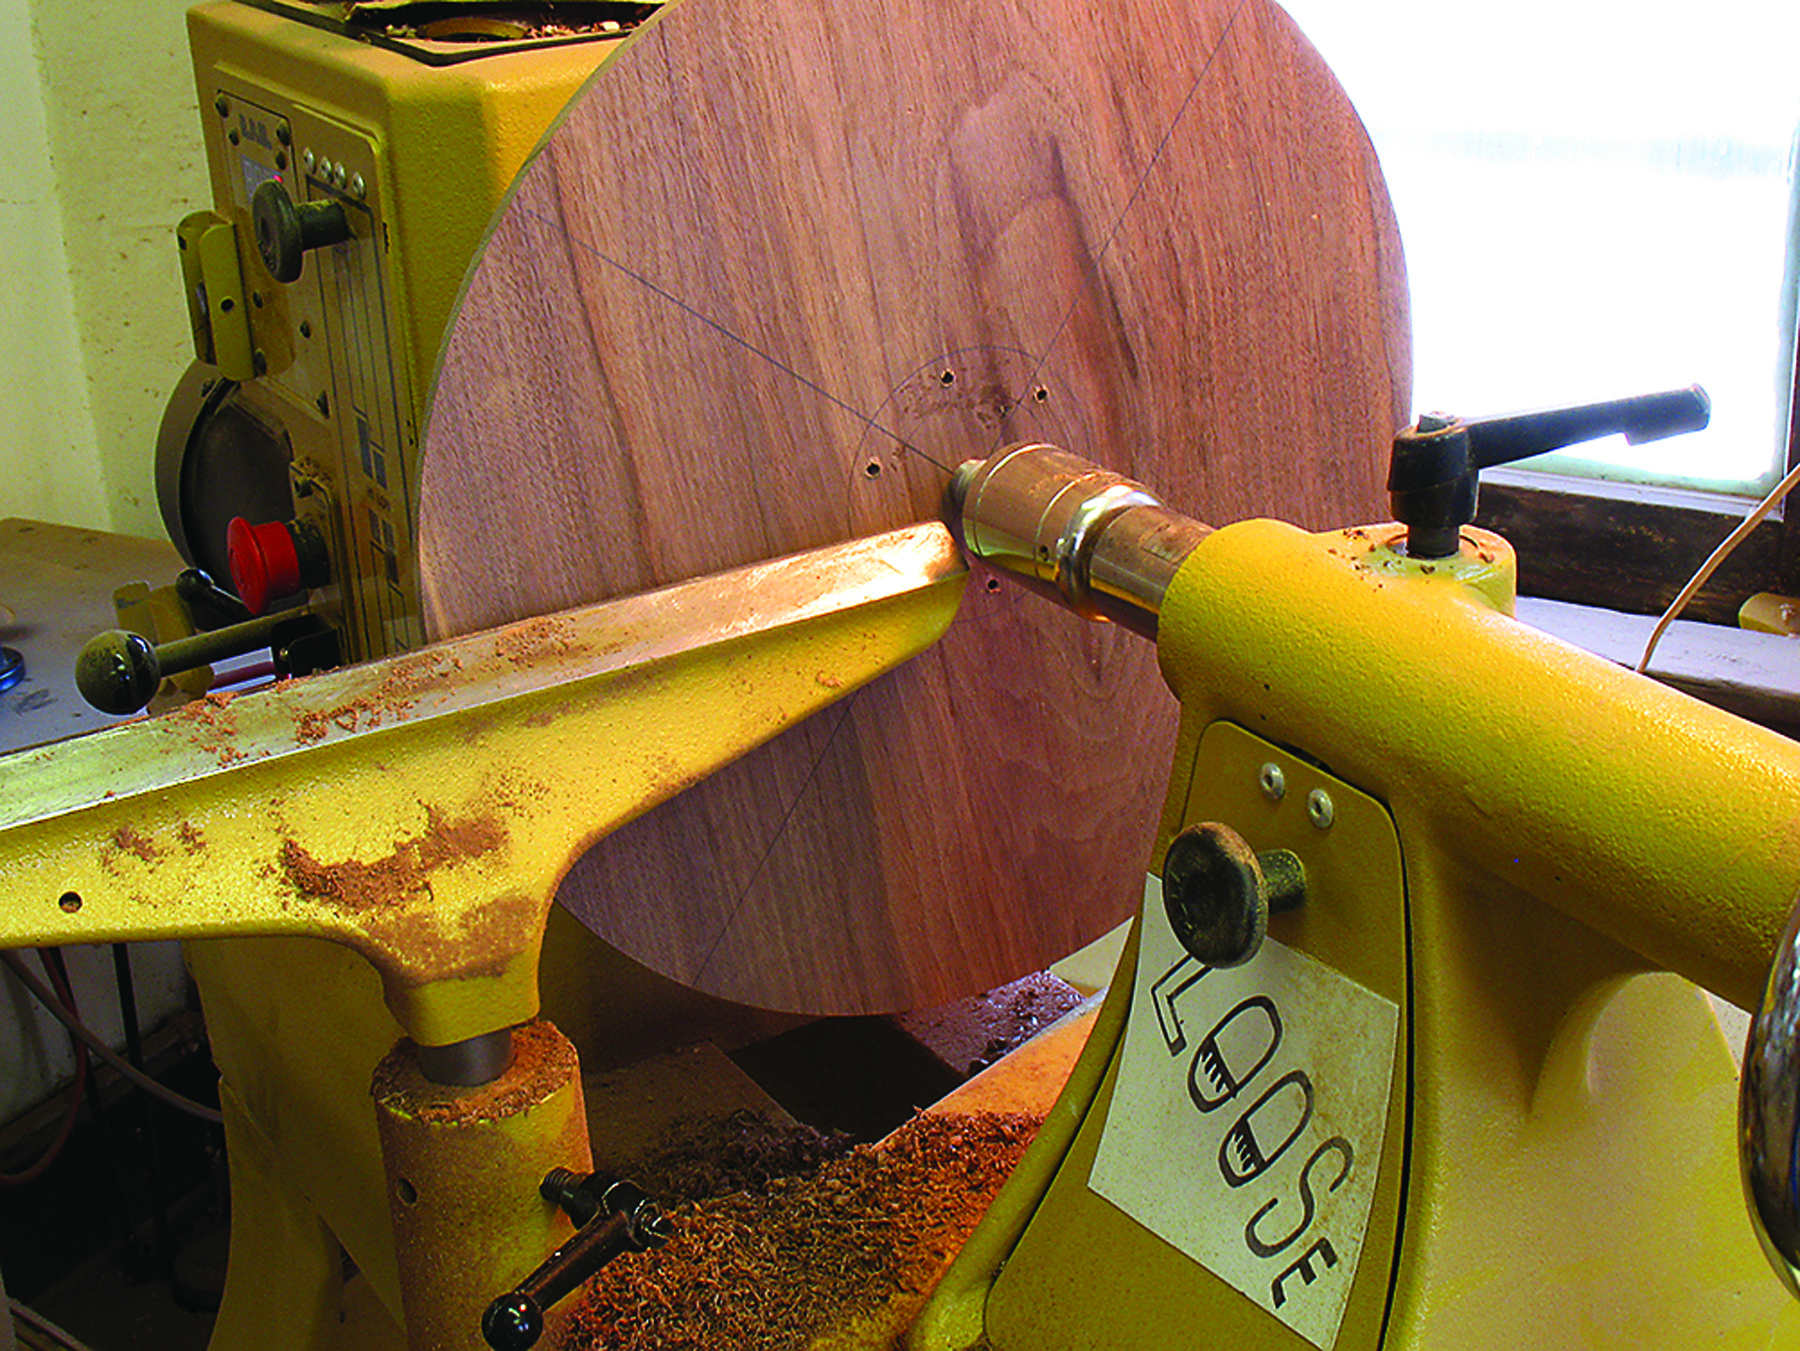
Reverse direction. To work on the platter front, reverse it on the lathe and secure it with the scroll chuck on the bottom and the live center on the front.
Remove the face plate and mount the chuck on the spindle. Mount the platter on the chuck jaws and expand them until the chuck loosely holds the work. Next bring up the live center on the tailstock and apply medium pressure to the platter. Now you can fully tighten the jaws of the chuck and the live center.
Turning the platter’s front is similar to turning the back. Start by making sure the outside 3″ are flat using the bowl gouge. You likely won’t need to remove much material. You’ll also want to make sure your final cuts leave a surface free of tear-out because once you cut the small groove details on the rim, you won’t need to work this area until sanding.
Cut the grooves with the narrow parting tool to a depth of about 1⁄8“. The first one is about 3⁄8” from the outside edge. The width of the rim is 2 1⁄2“. The innermost groove is 1⁄4” from where the dishing starts and the third groove is spaced 3⁄8” from it.
Dish it Out
Dish it out. The central field of the platter’s face is lowered using the bowl gouge. Make a series of cuts pulling the tool from the center toward the rim. I take about a 1⁄16″ deep cut on each pass.
Carve the waste to lower the center field of the platter by making a series of cuts with the bowl gouge from the center toward the rim. For now, stop a bit short of the rim and don’t worry about the transition to it.
As the dishing begins to form the face of the platter, establish the transition point between the rim and the dished area – but you needn’t perfect the shape of the transition until the dishing is completed. If your blank started like mine did at 11⁄2” thick, you’ll lower the center field about 5⁄8” to cut slightly deeper than the screw holes that held the face plate. It’s best to take even amounts of material on each pass while dishing out the center; this will help keep the area flat.
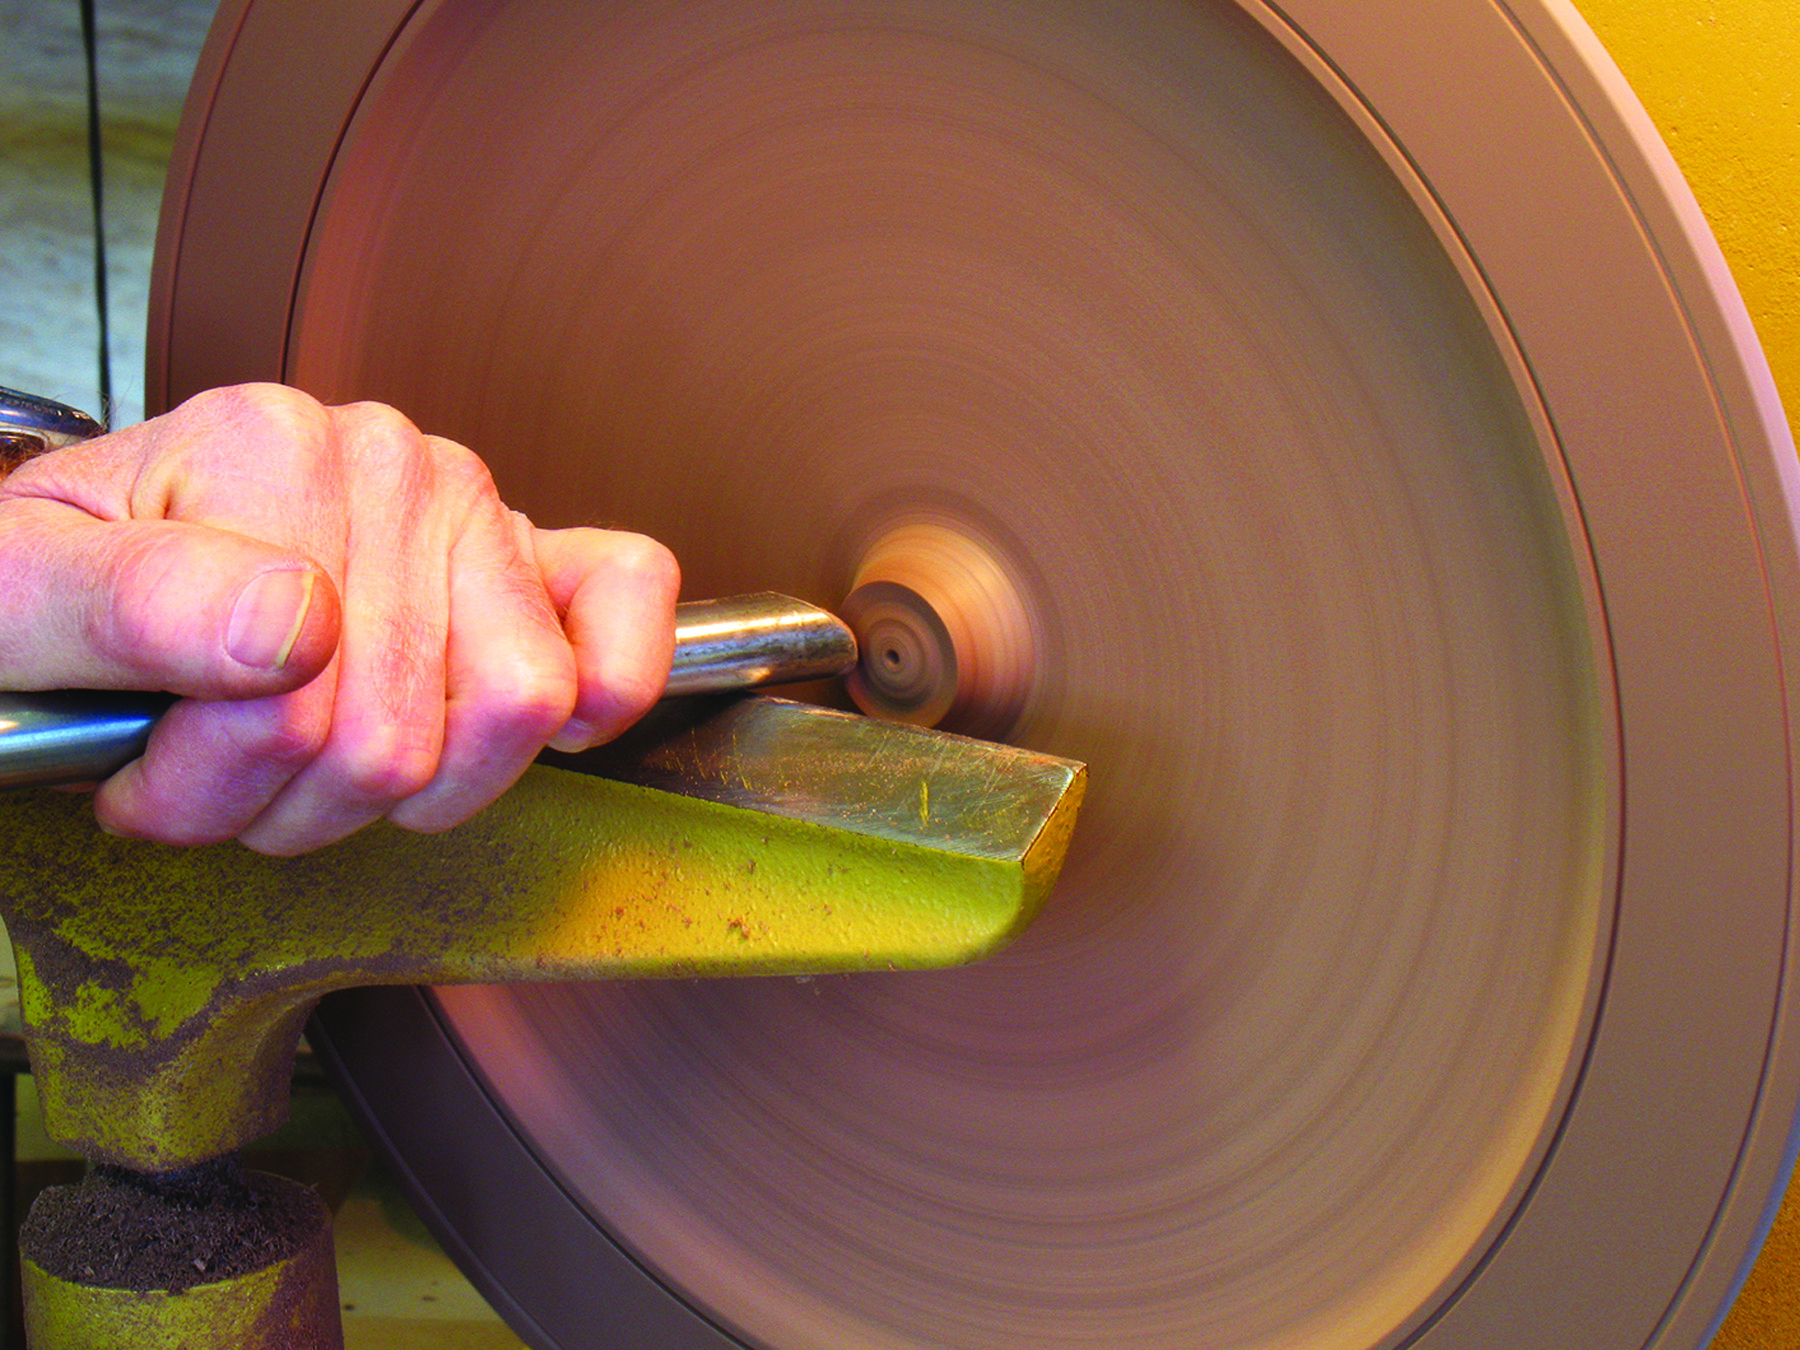
Down to the nub. Carve away the nub where the live center in the tailstock held the platter. To start the cut, the tip of the gouge must be at dead center on the work or else the tool will spin right off.
With the center sufficiently lowered, work on the transition between the rim and central field. This is an important profile detail that, to look good, needs to be a fair curve. And if you don’t cut the radius deep enough where it starts at the inside edge of the rim, the profile will look too weak. Make the cut with the bowl gouge starting on the rim and cutting downhill toward the lowered area. Remember to start the cut with the tool’s tip held about 90° to the rim to establish a shoulder for the tool to ride against. But be careful – the tool can dig in and pinwheel across the rim, ruining the piece.
With all the heavier cutting near the outside of the platter done, pull the tailstock back and pare away the nub left in the center. Find the center with the tip of the bowl gouge and peel it away in a series of cuts, but leave it a bit high off the surface. Then switch to a round-nose scraper and take small cuts until the nub is removed and the bottom is flat.
Sand & Finish
Take your time sanding the platter face – it’s the face at which people will be looking. So be careful when power sanding to avoid rounding over details that should remain crisp, such as the inside and outside edges of the rim. Start with #150 grit and progress up to #320, removing the scratches from each previous grit before moving on.
I simply used a couple applications of linseed oil on my walnut platter. Your finish choice will depend on how you plan to use your platter. If it’s for display and decoration only, a nice polyurethane or lacquer finish would be a good choice – and if you follow this route, grain-filling the walnut (or any other open-pored wood) enhances your work. If you plan to put your platter in service, a non-toxic oil finish is the better choice (and wait until the oil is fully cured before allowing any food to contact it).
Whether you plan to use your platter for serving guests hors’ d’œuvre or plan to make a few of them as holiday gifts, this simple project is sure to impress.
Blog: Learn some tips for turning large-diameter tabletops from Steve Shanesy.
Blog: Discover why lighting your lathe is essential, and a fixture that does the job.
Here are some supplies and tools we find essential in our everyday work around the shop. We may receive a commission from sales referred by our links; however, we have carefully selected these products for their usefulness and quality.