We may receive a commission when you use our affiliate links. However, this does not impact our recommendations.
 These once-standard tools have a place in the modern shop.
When the last grains of sand run through my hourglass, I know how I want to check out. I want to drop on the shop floor in the middle of a project. The mortician will have to pry my woodworking machines out of the cold dead fingers of my left hand. He will then have to pry my hand tools out of the cold dead fingers of my right. The last two tools he will wrest from my grasp will be my drawknife and my wooden spokeshave. I am so dependent on these two tools, that I am sure when that final moment comes, they will be in my hands.
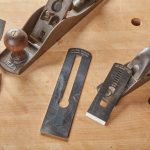
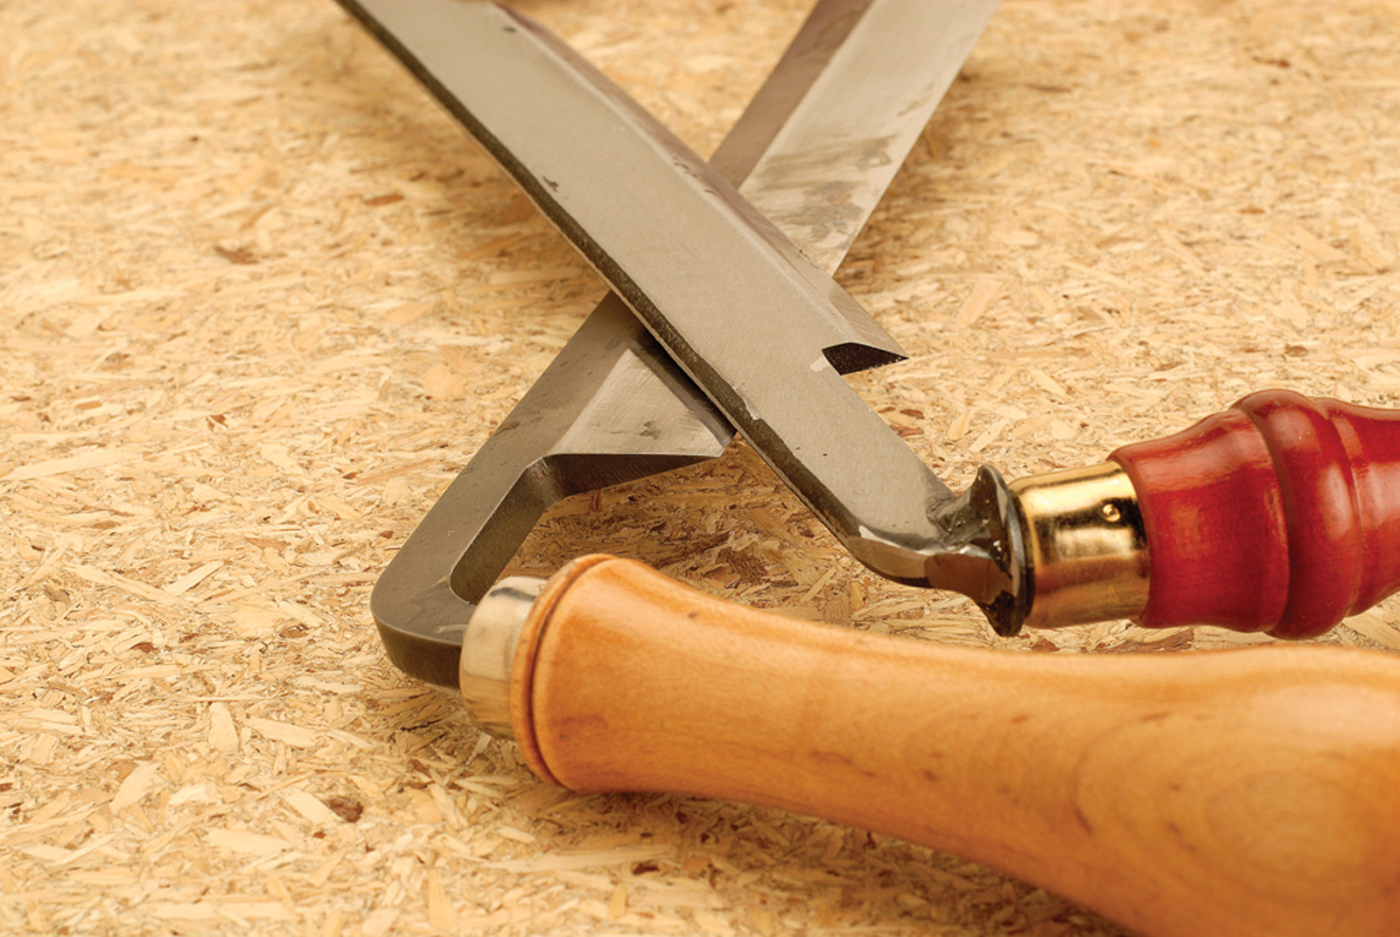
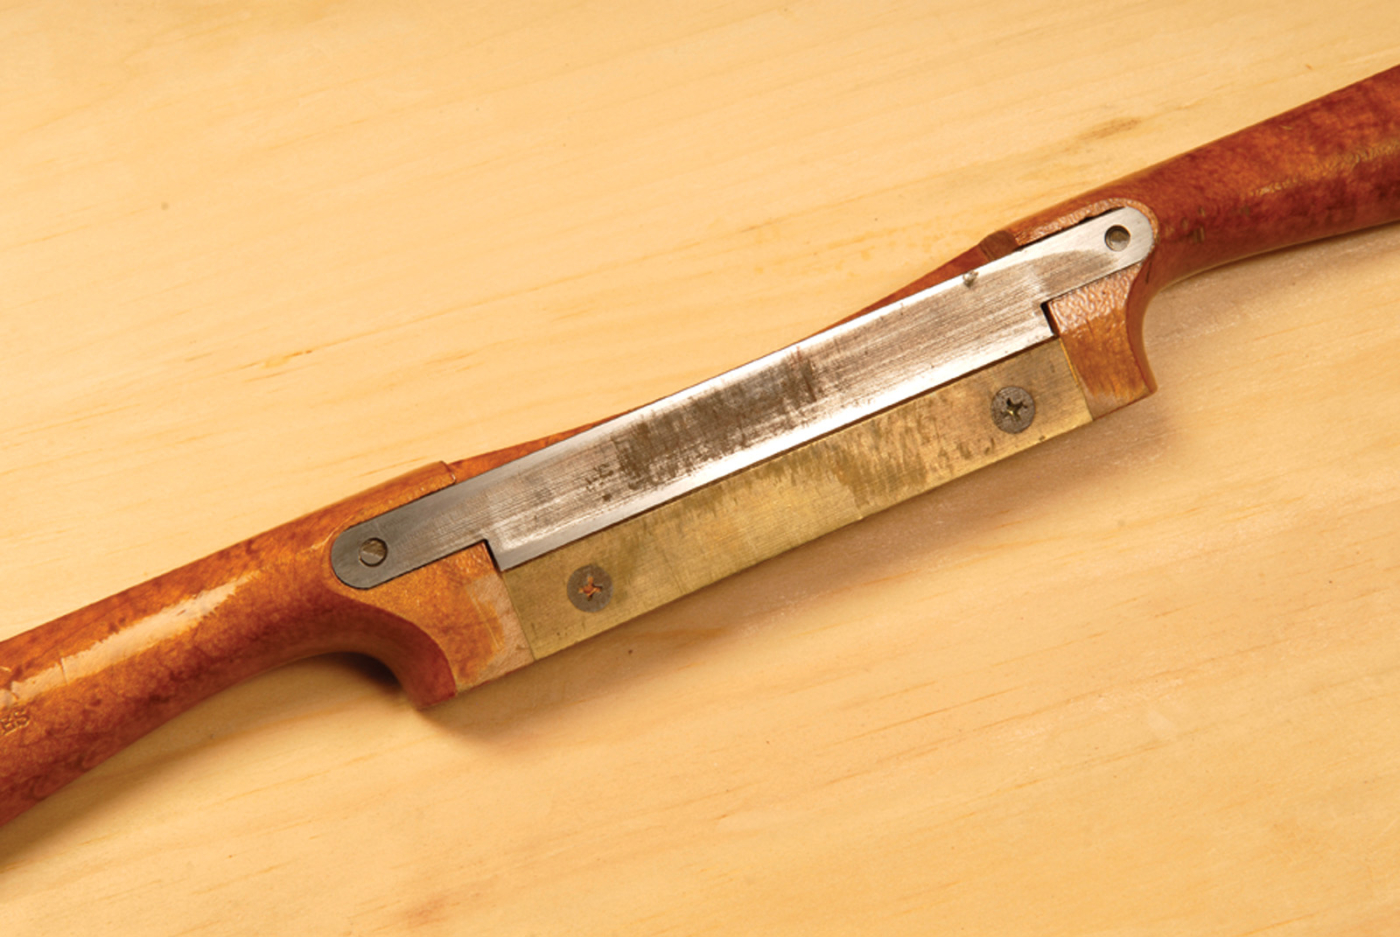
Traditional tools. Drawknives and spokeshaves used to be standard in any toolbox – often in multiple sizes. And they’re still useful today. As the name implies, the drawknife (pictured at top of article) is used on the pull stroke. A spokeshave (shown here) is usually pushed, but on straight-grained wood can be pulled.
Early records show that a drawknife and a spokeshave were in every woodworker’s kit. In fact, these guys often owned more than one. Why? These are two of woodworking’s most useful tools. Today’s woodworkers will benefit as much from them as did the old guys. I am writing about the two tools together because that is how they are often used – together.
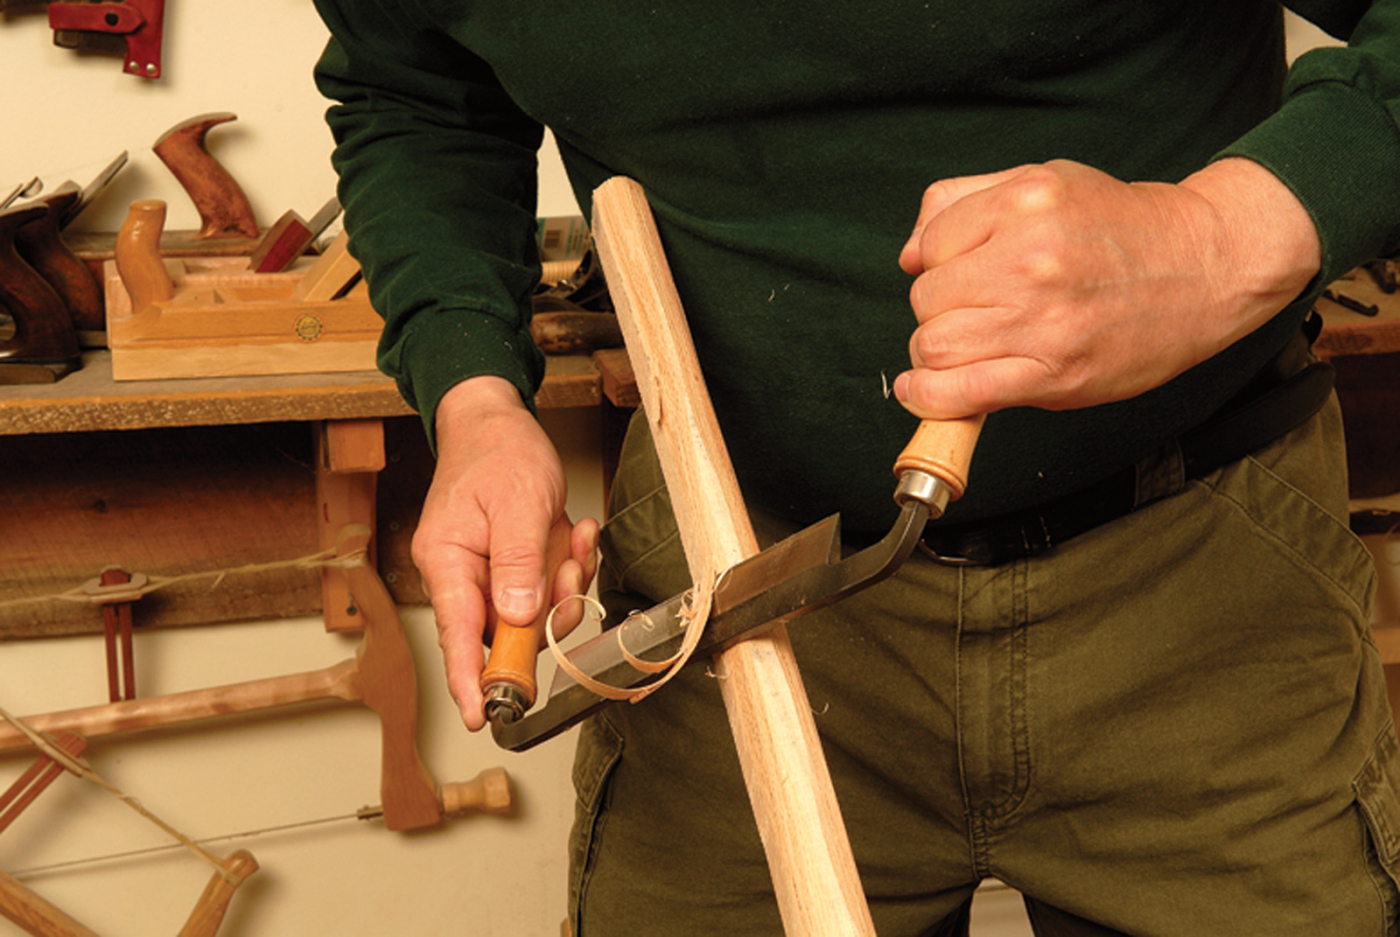
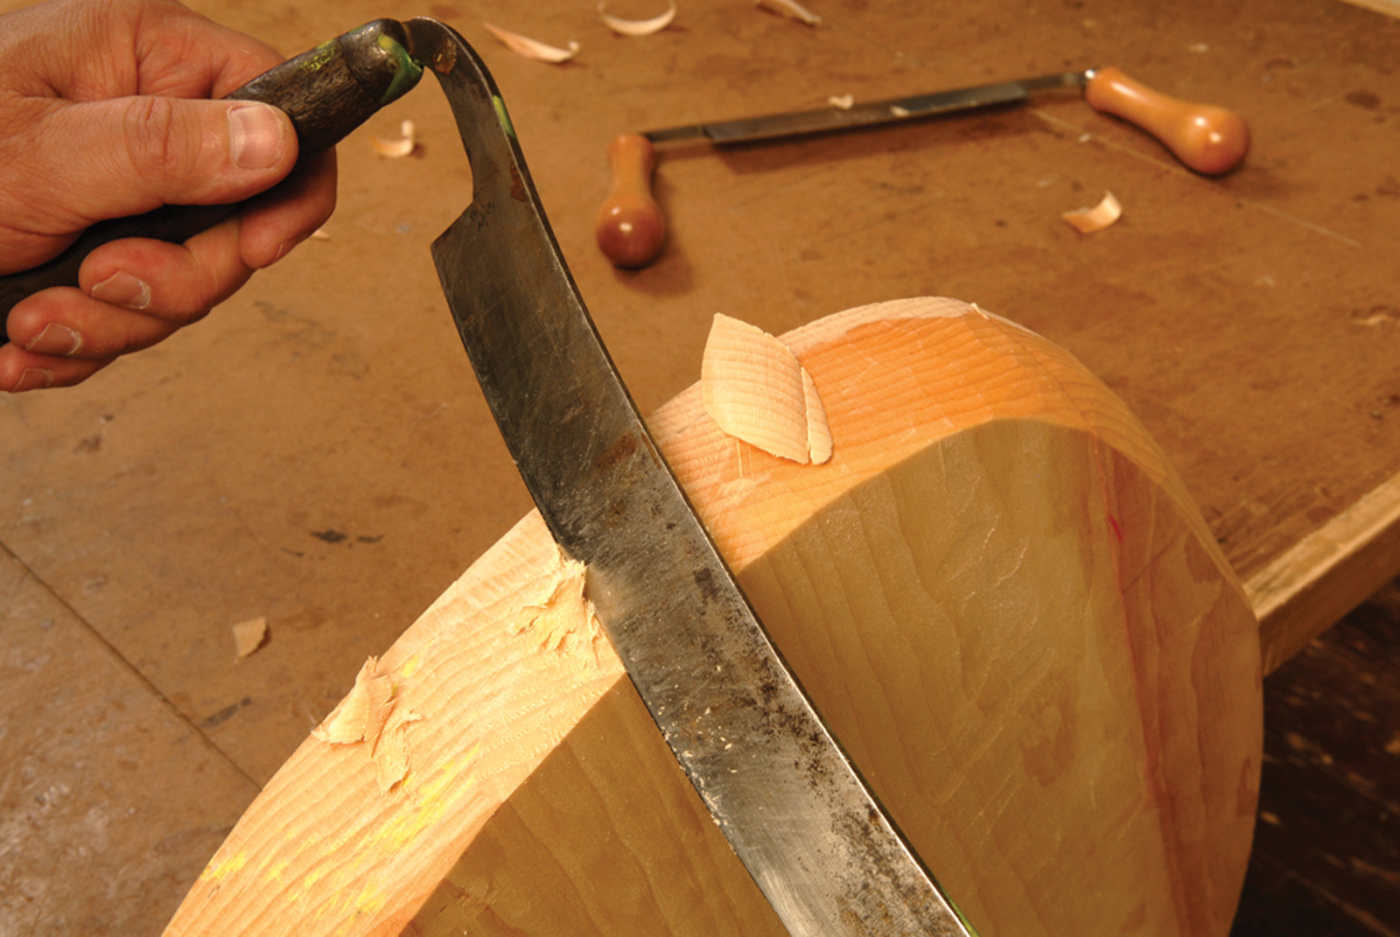
As its name implies, the drawknife is a knife that is used on the pull stroke. Using two hands provides a lot more control. Pulling with arm, shoulder, back and leg muscles places a great deal of force behind the blade. An experienced user can slice a shaving as thick as his thumb, or cut one as fine as a human hair. This means a drawknife can accomplish quick stock removal, fine work and everything in between.

A versatile tool. Taking a hair’s breadth off a workpiece is quick work for a drawknife – as is heavy stock removal, and anything in between.
Old Tools Abound
The problem for today’s woodworker is to find a good drawknife. Many sold in stores and catalogs will not generally work. The reason is simple. The tool is supposed to be a knife, but toolmakers insist on grinding their drawknives like a chisel. A 45° bezel won’t work any better on a drawknife than it would on a pocketknife.
Bad grind. The modern drawknife on top in the picture above is ground with a chisel edge, which severely limits its usefulness. Look for one with a knife edge (they’re easy to find on eBay and on old-tool web sites).
Happily, our predecessors bought scads of drawknives back when toolmakers still knew what they were doing, and many of them are still around. You should have no trouble finding a good knife on eBay or from old-tool dealer web sites. Look for one with tight handles, that has not been beat, or ground down to nothing. Drawknives were made with cutting edges more than a foot long or as short as 4″. An 8″ to 10″ knife is the right size for most work.
When choosing a knife, don’t be tempted by the ones with folding handles. They look nice, but leave them for the collectors. The extra length created by the hinge places the handle too far away from the edge. You sacrifice control. Drop handles cause a similar problem. They lower your hands out of the plane of the cut, sacrificing power.
Get a Grip on your Drawknife
There are many different ways to grip a drawknife, depending on your goal. How you hold the knife is a function of your work. Here are some examples of the different ways it can be held:


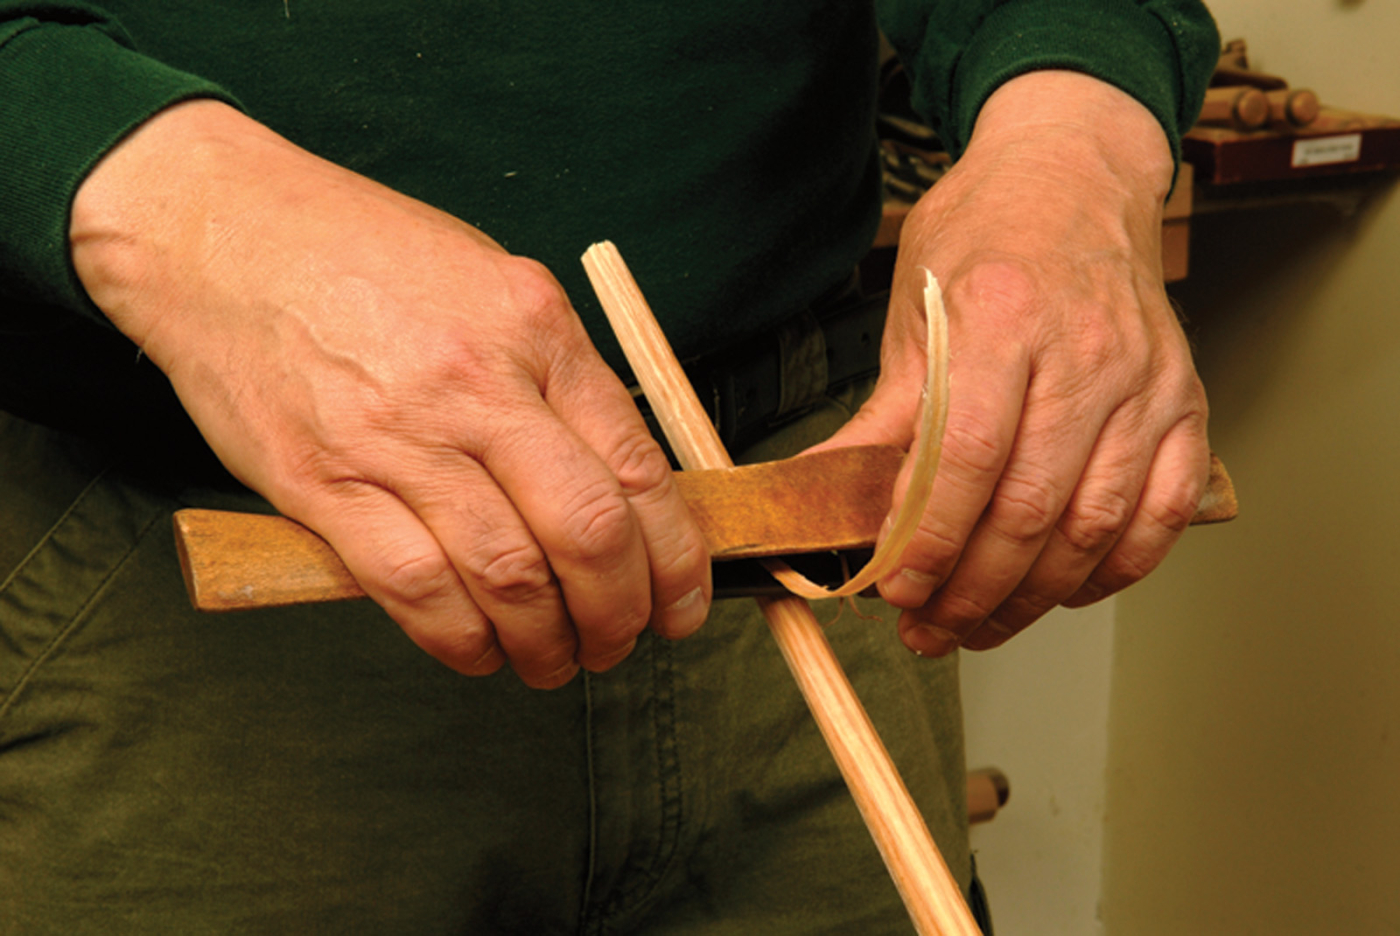
A drawknife’s handles are misleading. They suggest that you hold a drawknife like you did the handlebars on your tricycle. In fact, how you hold a knife is a function of the work, and a straight grip on the handles is only one of many possibilities. A drawknife is frequently used on end grain. Then, you have to choke up on the control handle (the right hand if you are right-handed). Sometimes I hold the blade vertical, then my right hand holds the handle with an overhand grip. The important point is to not get locked into a misperception and be limited by it.
I tell students that a drawknife is a slicing tool, not a two-handled hatchet. This means you do not use it by hacking. My analogy is a butcher cutting meat. He starts close to the handle and makes a slicing stroke that ends with the point of the blade. The result is a clean, easy cut. So too with a drawknife. Start the cut close to your control hand. Lift the blade ever so slightly to create some clearance behind the cutting edge and to engage it. As you pull the knife, make a slicing cut that ends up at the far end of the blade. The closer you are to end grain, the shorter the radius of the slicing arc.
Besides an easy, glassy smooth cut, using the knife this way has other benefits. By slicing, you distribute the cutting action along the entire cutting edge, and it will stay sharp longer. Pulling directly toward yourself, or hacking as with a hatchet, places the wear all in one spot on the blade. This area becomes dull faster, and you will eventually develop a hollow in the cutting edge.
Unclean cut. If you hold the knife upside down, the angle of the blade is higher and you’re likely to get a crumply shaving and rough surface.
Once you understand how a drawknife cuts, you will understand the flaw behind a common misconception. Some woodworkers hold the knife upside down. This position – with the bezel down – changes the cutting action. You have created a high-angle cut that will not slice. To better understand, imagine paring with a chisel. You place the bezel up, raise the handle slightly to create clearance, and cut with a slicing action. Consider what kind of cut you will get if you try to pare with the bezel down, and how much control you will have in this position.
The guys who use a drawknife this way argue they have more control. They mistake a limited cut for control. In accepting the limited cut they sacrifice the drawknife’s most important feature: its ability to remove wood fast. Furthermore, the higher cutting angle will not cut as cleanly and it creates more friction, which dulls the edge faster. I liken using a drawknife upside down to training wheels on a bike. If you only know how to ride with training wheels, you mistake them for control because you don’t fall. Better to take a few spills and learn how to really ride. Then, you truly have control.
Sharpening
A drawknife will eventually need to be sharpened. In fact, if you buy an old one, it will need some work before you can use it. Never grind a knife-edge tool. I sharpen my knives with sandpaper adhered to a wooden block. A drawknife edge is a special case, in that it is only one half a knife. The bottom of the blade is flat, as on a chisel-edge tool. That is where I begin. Hold the block, or the stone, flat on the surface and work back and forth. Be very careful not to raise the block, as this will round the edge, aggravating the very condition you are trying to correct.
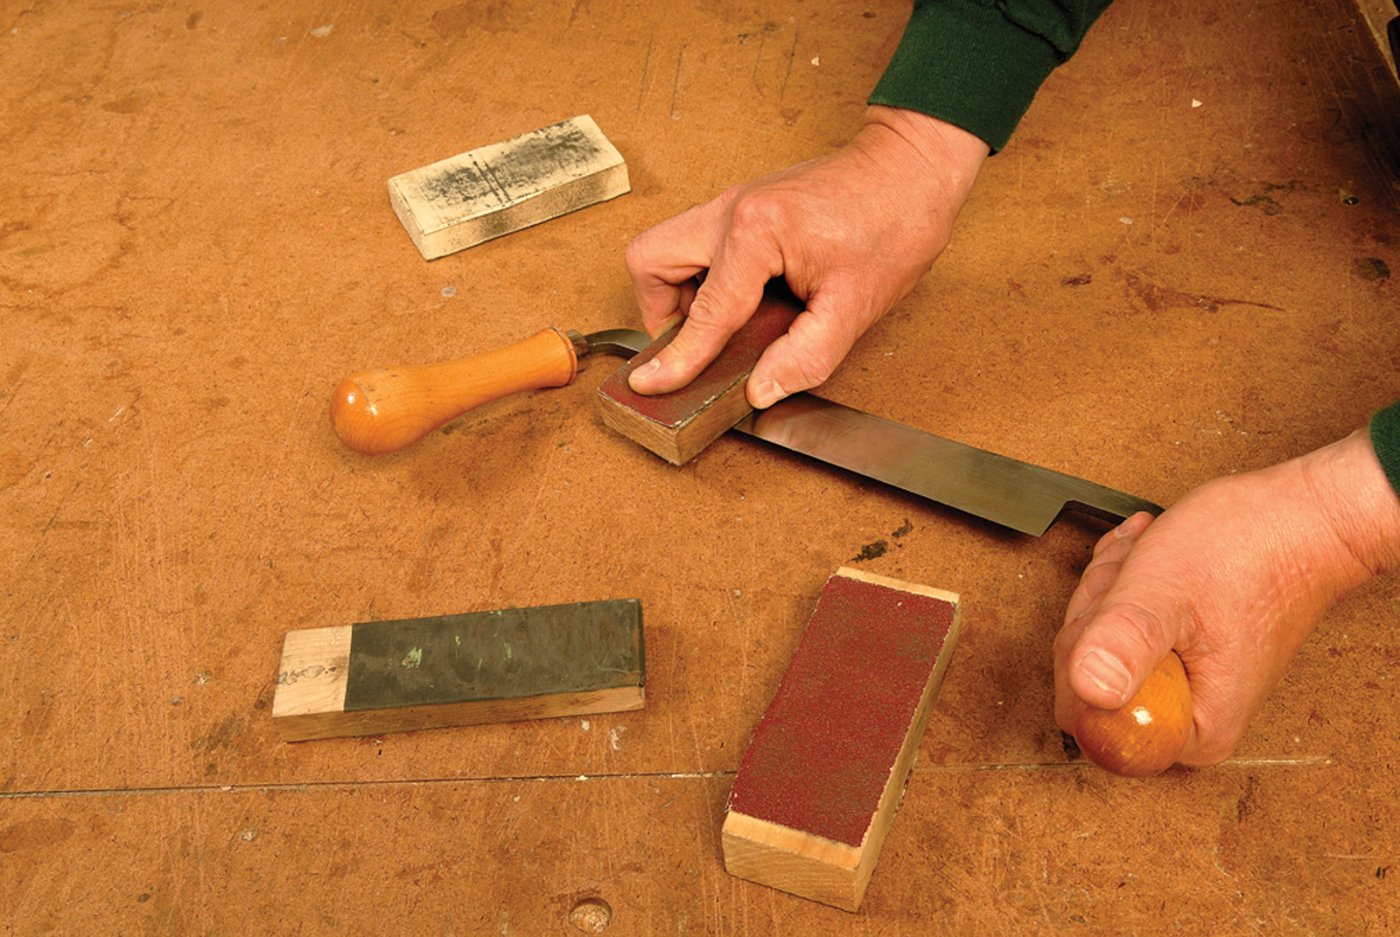
Flat bottom. Although the blade should be ground with a knife edge, the back of the drawknife should be flat, like a chisel.
Next, work the bezel, or upper surface of the edge. This surface is curved like your pocket knife. If you work only the cutting edge, you will gradually increase the angle and reduce the tool’s ability to slice easily and cleanly. So while honing this surface, be sure to gradually lower the block so you are dressing the entire curve, rather than just the edge. In other words, do not just sharpen the blade. You also have to maintain the curve’s original shape.
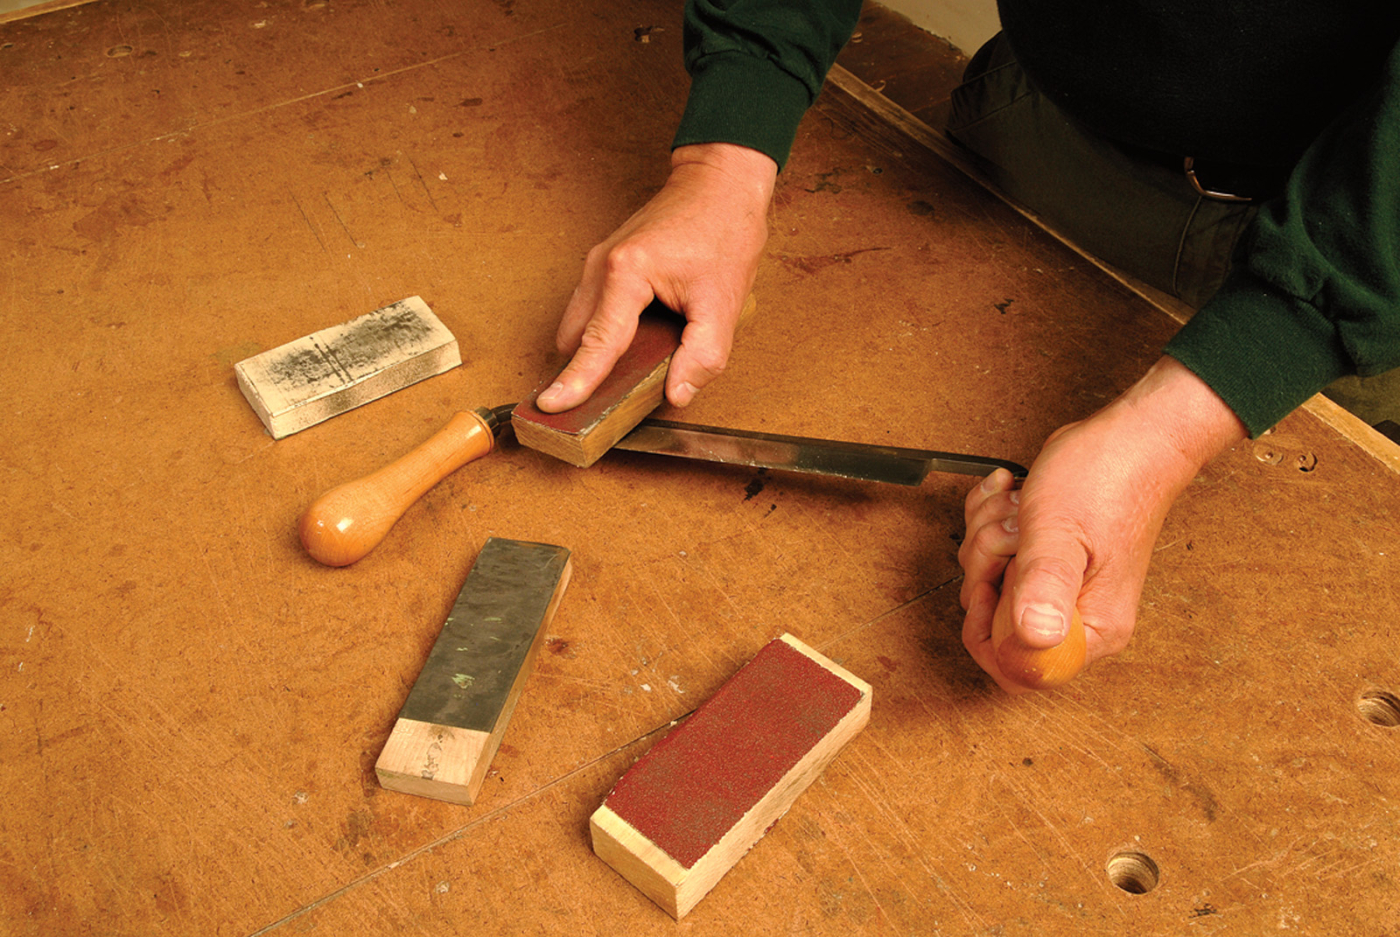
Dress all surfaces. Make sure you dress the entire curve on the front of the blade to maintain its original shape. Don’t just dress the edge, or the angle will gradually increase.
Work the lower surface and the upper curve through several grits. It is not necessary to create an edge as sharp as on a chisel or plane blade, but it causes no harm.
A word of safety about drawknives: The tool has an open, unprotected cutting edge. I hang mine on a wall.
This protects the tool and me. If you store the tool in a drawer or tool box, wrap or cover the edge. Otherwise, it can give you a real nasty bite when you reach in for the tool.
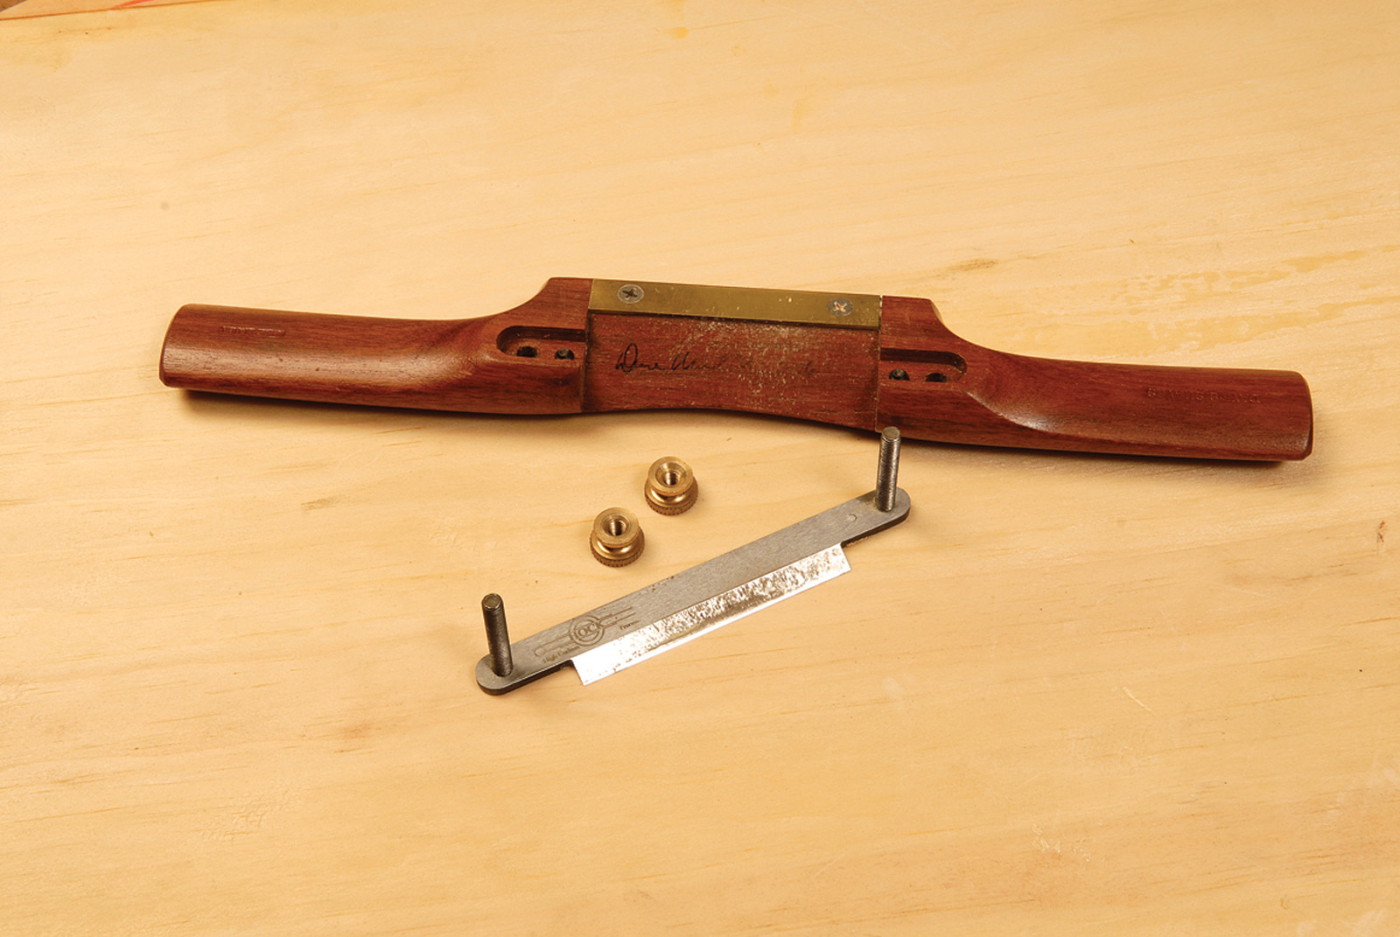
Spokeshave
The spokeshave usually cleans up after the drawknife and brings your work down to the line. The tool will create a finished surface, or one that requires only a light sanding. The difference in the two tools is that while the drawknife can also make fine cuts, the spokeshave cannot do heavy jobs. It is a lightweight tool intended for fine work.
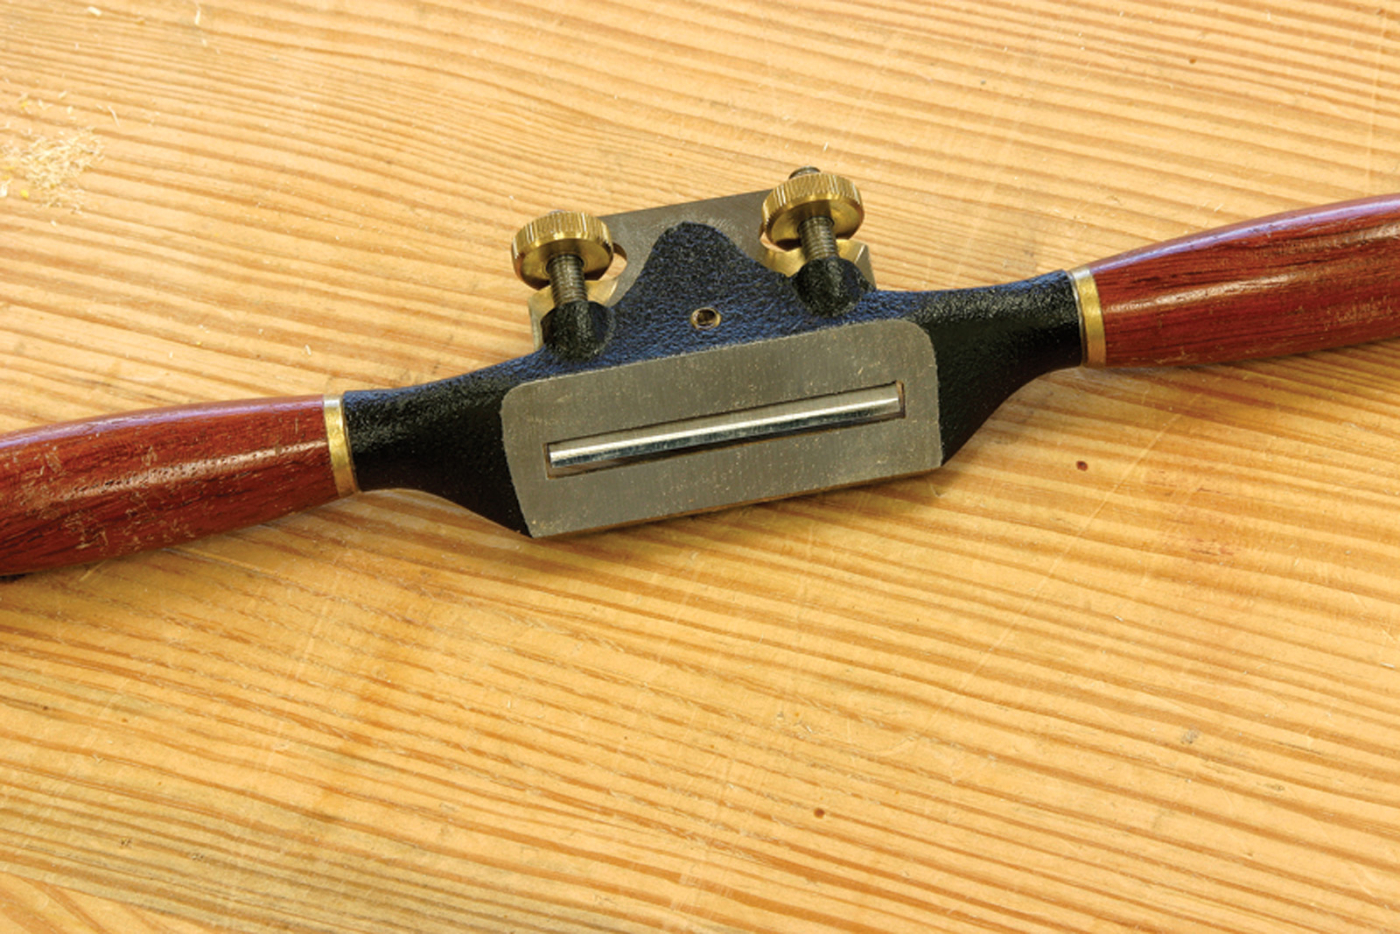
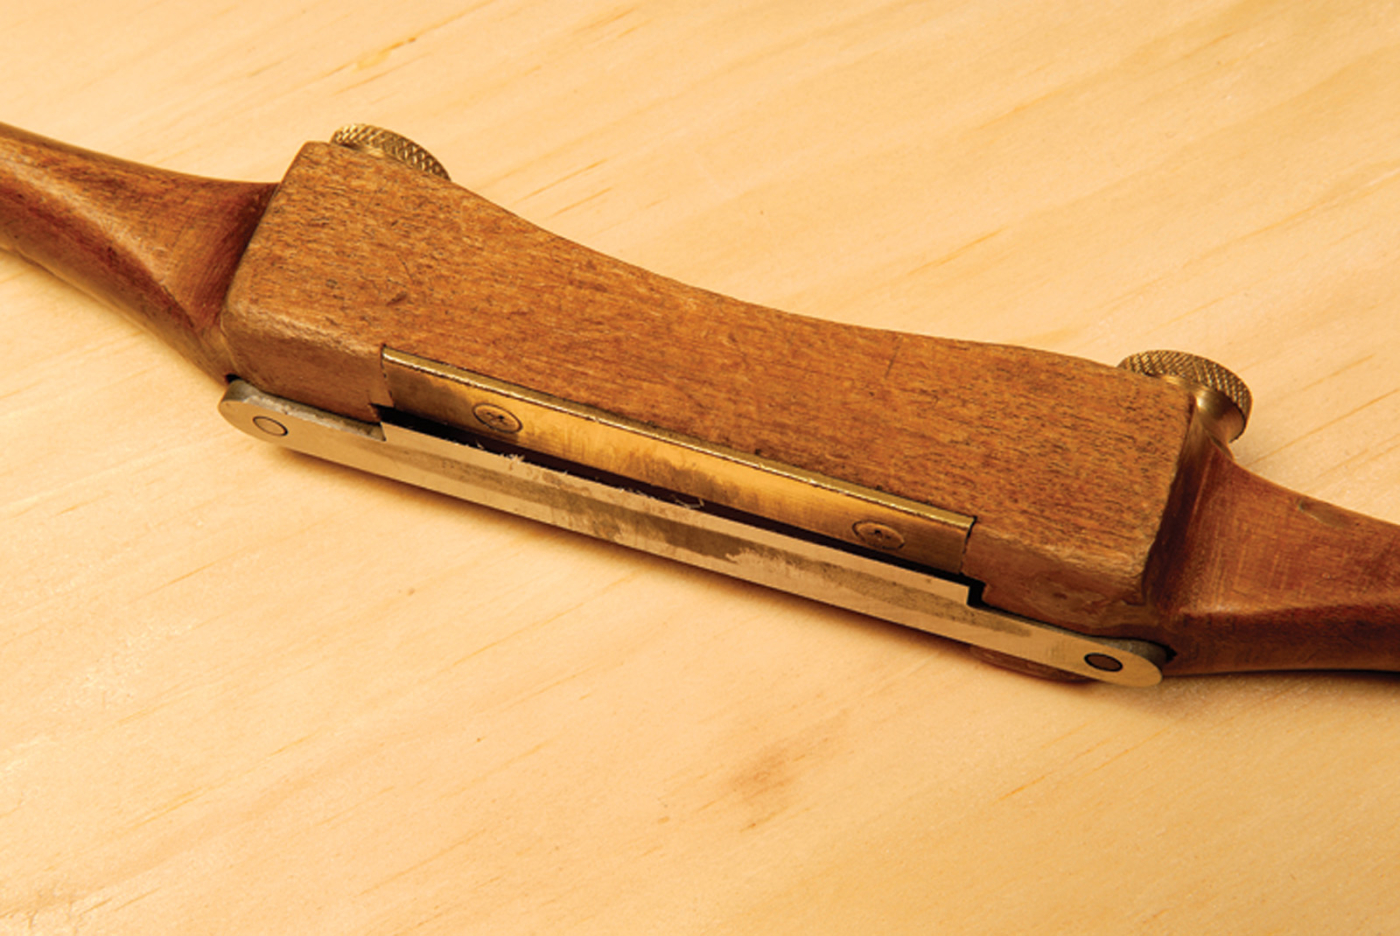
When I use the term “spokeshave” I am referring to the type with a wooden body. While the metal-bodied version has the same name, it works in a very different way, and nowhere near as well. Take a minute to look at the two tools below. The wooden shave’s cutter is close to parallel with the sole and the bezel is placed up. It is the same configuration as the drawknife. The metal version’s cutter is bedded at 45°, with its bezel down, in the same configuration as a plane and a drawknife used upside down. The wooden version’s cutting angle is much lower, making it a true shave. This lower cutting angle is the reason the tool works so well on end grain, and cuts so effortlessly with the grain.
Material difference. The difference is more than material between a wood-bodied and metal- bodied spokeshave. Notice the difference in cutting angles – when assembled, the wooden- body’s blade is close to parallel with the sole.
While you may have to hunt to find a good drawknife, wooden-bodied spokeshaves are readily available. They are not mass-produced and do not show up in catalogs. Rather, they are made by individual tool makers, and have to be purchased from their websites. Most of these shaves are as good as any shaves made in the past. My shaves were all made by Dave Wachnicki of Dave’s Shaves.
There is another advantage in dealing with these individual makers. In the past, common-grade shaves were made of beech. Best grade were boxwood. Neither is a particularly pretty wood. Today’s shave makers work with highly figured woods, and their shaves can be spectacular. If you own a small piece of really special wood, they are happy to make it into a shave for you.
Materials Matter
Some companies sell low-angled shaves with metal bodies. I do not like these. Chatter is a spokeshave user’s biggest problem. A wooden body absorbs shock better than metal and reduces the tendency to chatter. I prefer to stick with wood.
Like drawknives, shaves were once part of every woodworker’s kit. Having a wooden body and a lightweight cutter, fewer of them have survived. Of those that have, a large percentage are worn out. Because shaves wear quickly, I strongly recommend you not use an old shave. Put it on display as an artifact, but spare it. You’ll be real happy with a new one.

Multiples. It’s hard to stop at just one spokeshave; multiples allow you to dedicate specific tools to specific jobs.
While you can manage very well with just one drawknife, you will find that the more familiar you become with wooden shaves, the more of them you will want to own. I have about a dozen. It is more efficient to dedicate a shave for a certain job. The more jobs, the more shaves.
Spokeshave Setup
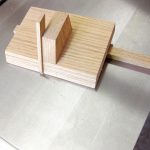
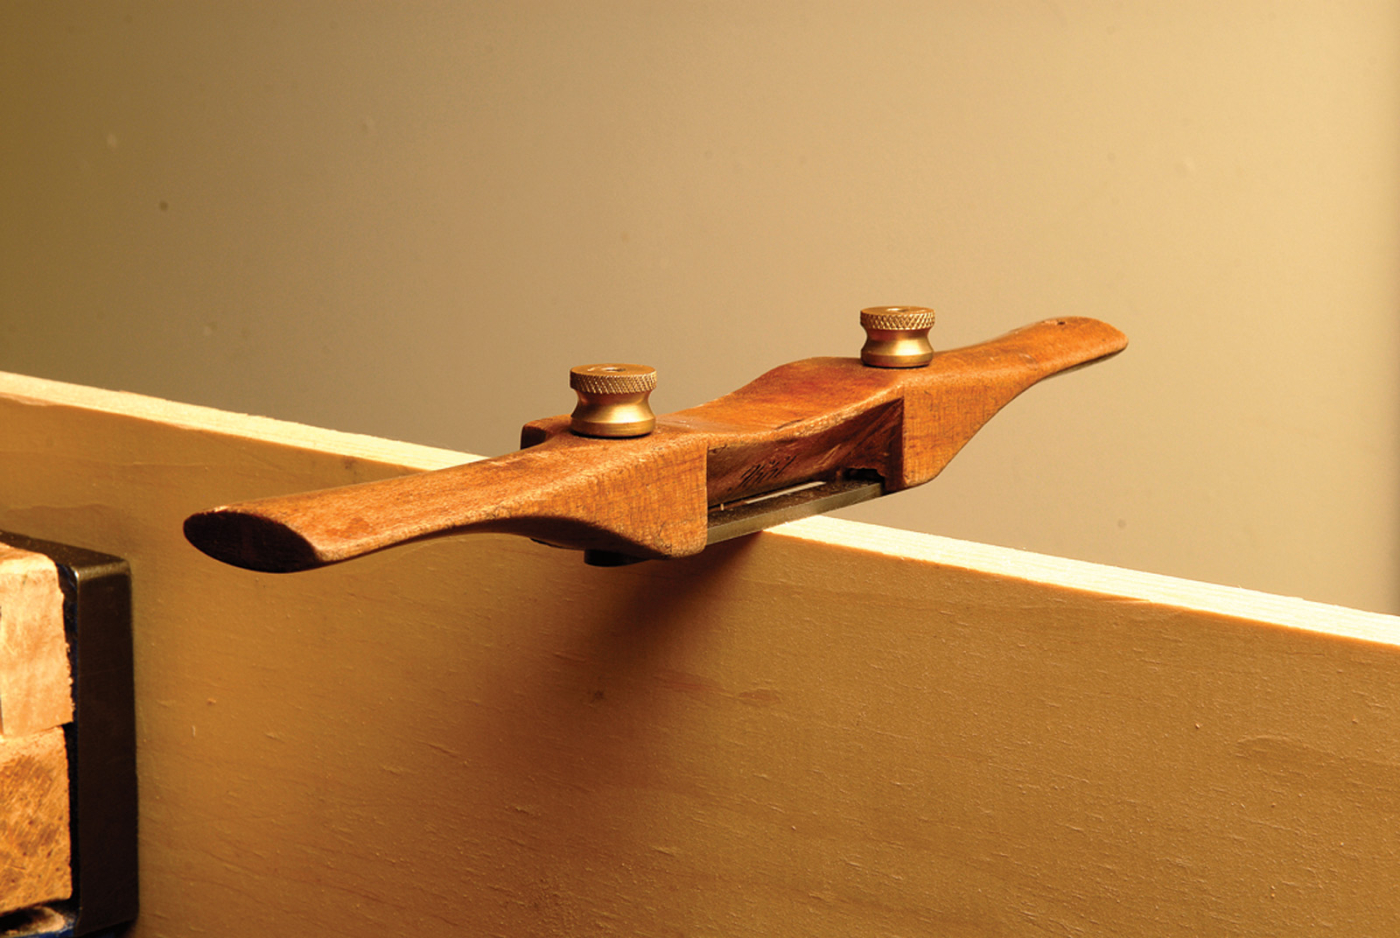
Unlike a drawknife, you have to set up a spokeshave. Most of today’s shaves have a top adjustment, which allows you to set the tool without removing the cutter. Adjustment is usually made by turning a small Allen screw. If not, you will have to examine the tool to see how it is adjusted. The trick in setup is to cock the blade so it is higher on one side than the other. In this configuration, you have every setting you need. When you want to take a very light cut, move to the shallow side of the blade. To make a deep cut, move to the deep end. Much of your work will be done with the medium setting in the middle.
Tricky setup. Set the blade so that it’s a bit higher on one side; that way, by moving the tool left and right, you have every setting you need without changing the tool’s setup.
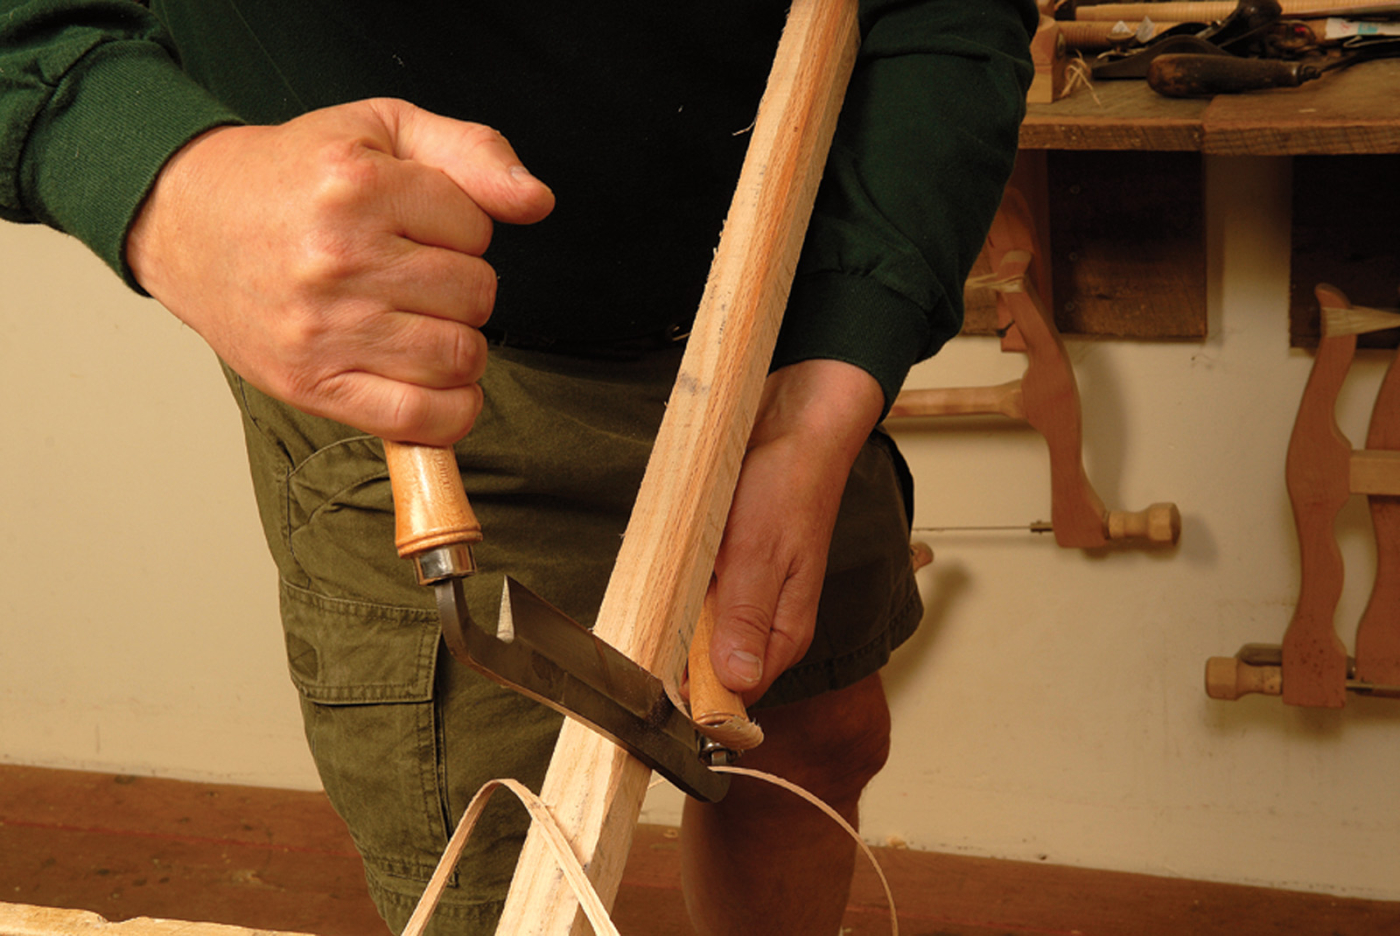
The drawknife is designed to be pulled. A spokeshave can be pushed or pulled, depending on the job. However, 90 percent of the time, the tool is pushed. The only time it can be effectively pulled is when whittling very straight-grained wood. An example would be Windsor chair spindles.
Proper stroke. A spokeshave is, 90 percent of the time, used on the push stroke. However, if you have a straight-grained workpiece such as a chair spindle, it can be pulled effectively.
A shave is a very lightweight tool. Unlike a much heavier bench plane, gravity is not giving you any assistance. You provide all the force needed to engage the cutting edge. Without sufficient pressure, the tool will either skate or chatter. When pulling a shave, the tool is controlled by your wrists, and any downward pressure is provided by your shoulders, way out at the far ends of your extended arms. This is sufficient when whittling, as little weight is required to engage the cutting edge.
However, most of the work you do with a shave is shaping, which involves cutting across grain. In this case, the muscles involved in pulling a shave are inadequate. When you push a shave, you can apply weight from your upper body down onto the tool. It is your weight that keeps the edge engaged and cutting.
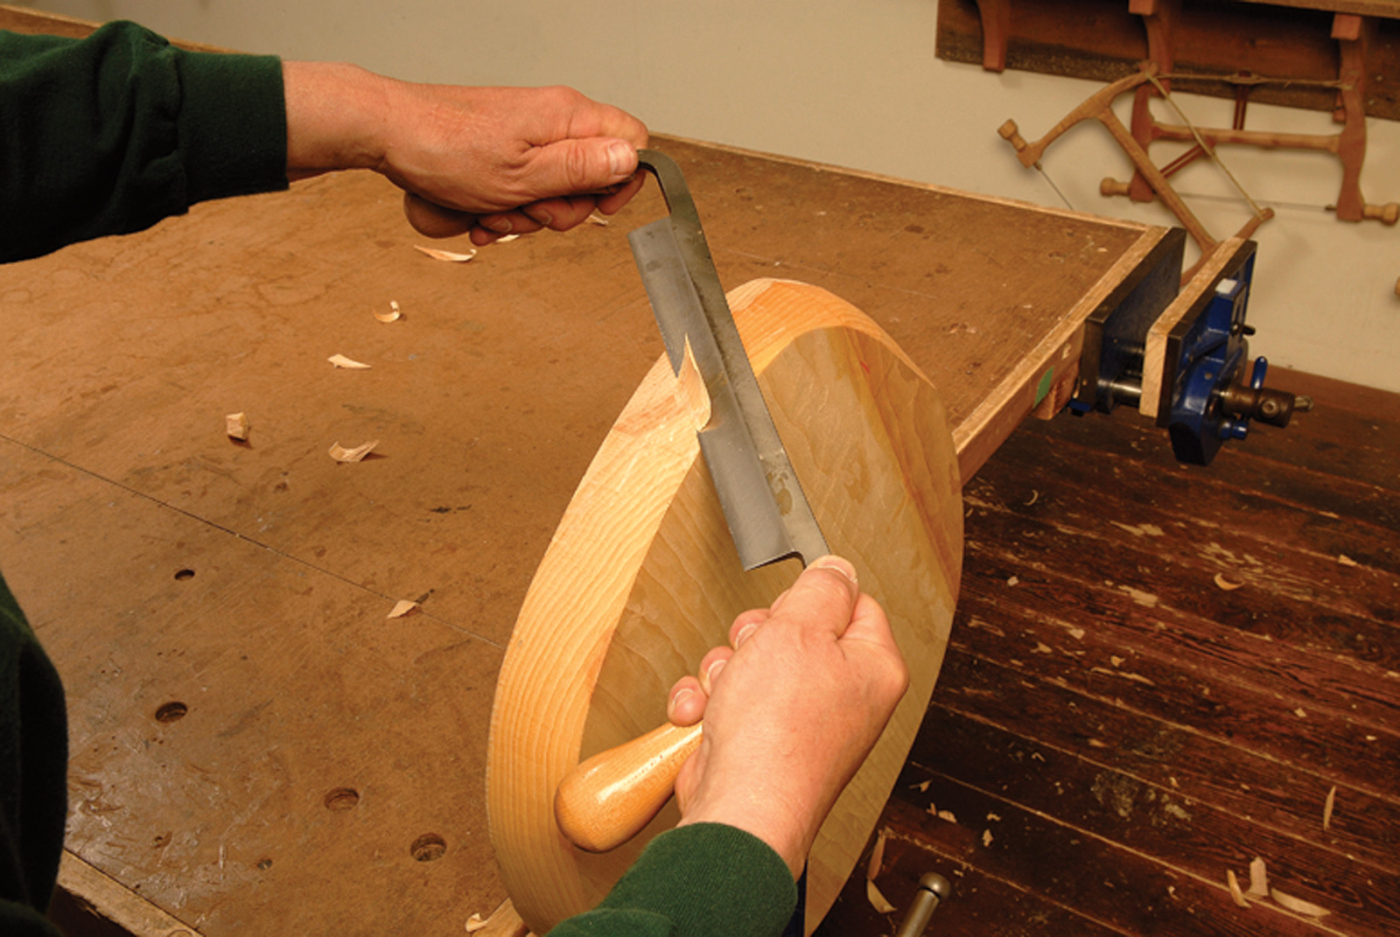
Proper Handling
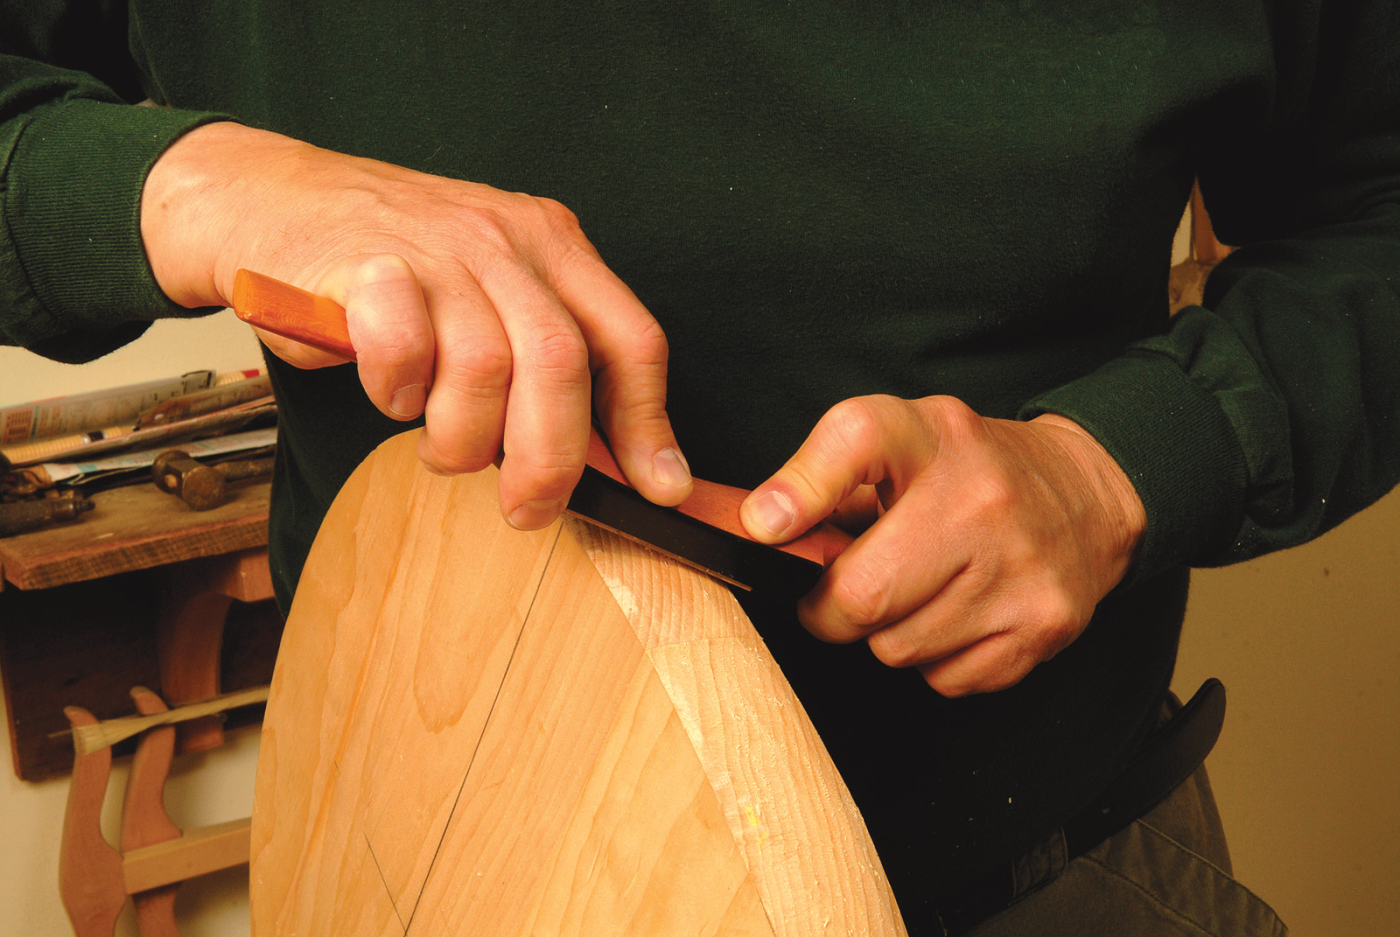
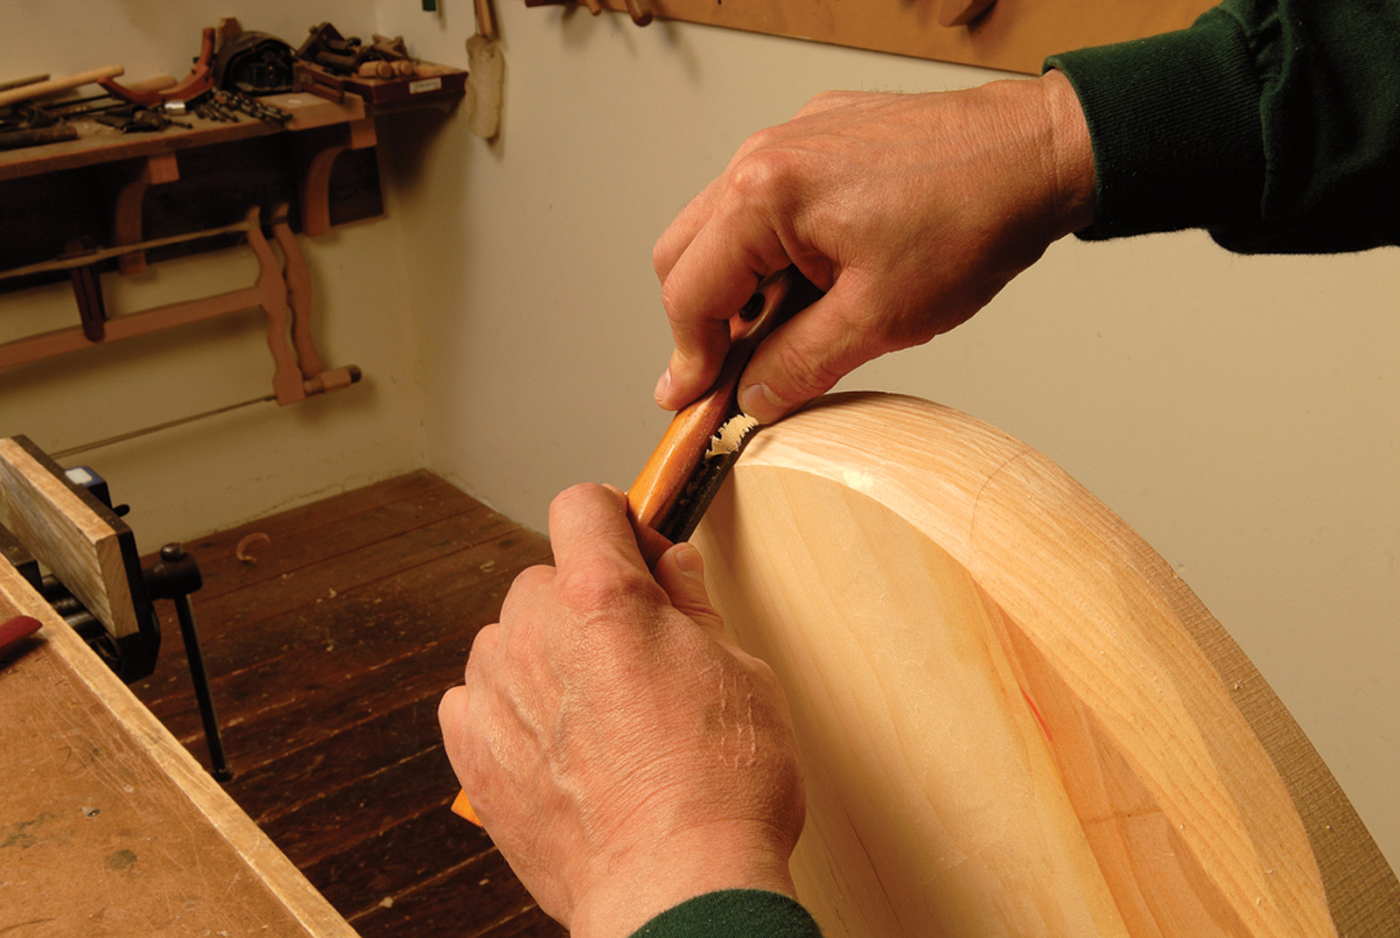
Like the drawknife, the spokeshave’s body seems to suggest you grip it in your hands by the handles. In reality, you pinch a spokeshave in the center of its stock with your fingers. The only difference in your grip when whittling and shaping is the position of your thumb. When pushing, place the thumb of your control hand low on the stock, close to the cutter. Your thumb provides forward force behind the cutter, while your shoulders provide weight over it. The result is a clean cut with little or no chatter.
In a pinch. The handles suggest that one grip the shave by the handles. However, more control is gained by pinching it in the center.
A spokeshave’s low cutting angle can make it a challenge for the first-time user to engage the cutting edge. Use this trick: Lay the tool on the flat of its blade. Rock it forward until it is now resting on its cutting edge and the sole’s front corner. That’s the placement. You’re ready to cut.

Training. Set the shave flat on your work, then place your thumb in the curve to slightly increase the angle; that’s the correct angle for use.
Like all other edge tools, a spokeshave works best when its cutter is slightly askew, rather than being worked straight on. When you work end grain, all the downward force you can muster still may not prevent chatter.
Try increasing the amount of skew. If this doesn’t work, try skewing the blade in the other direction. In woods with a pronounced difference in early and late wood, such as pine and oak, what appears as chatter may actually be washboarding. The edge cuts easily through the softer growth and rides up over the harder.
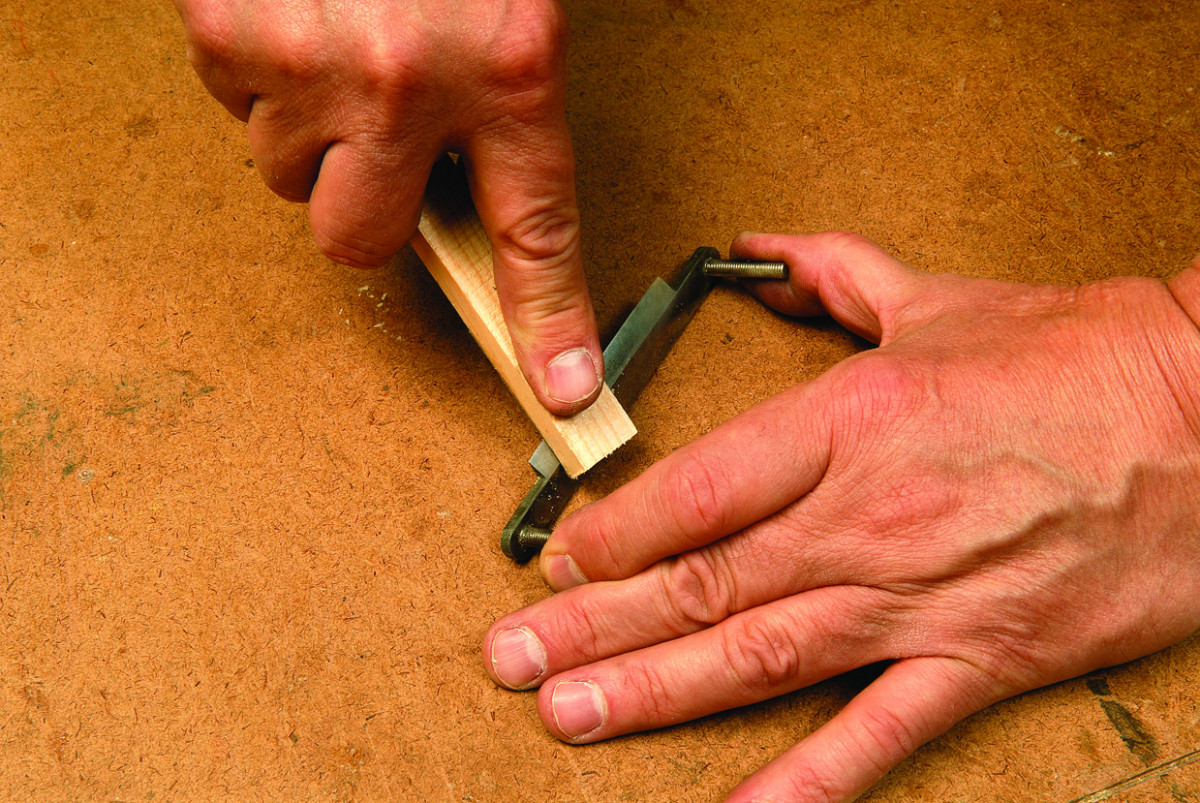
Cheap sharpening jig. A piece of sandpaper stuck on a small piece of wood is perfect for removing any rounding in the blade. But this is a time consuming method.
Each pass makes the situation worse. When you skew the blade in the other direction you run the cutter across several layers of growth and the hard part of several annual rings is shaved along with the softer.
Sharpening
A spokeshave cutter is small, so it sharpens pretty readily. The problem is that being small, it’s hard to hold. I start by lapping the flat bottom. Check the edge in good light to be sure you have removed even the most microscopic rounding caused by wear.
Now, hone the bezel. I use a piece of fine sandpaper adhered to a strip of wood about the size of a tongue depressor. The problem is to avoid changing the bezel angle with repeated honings.
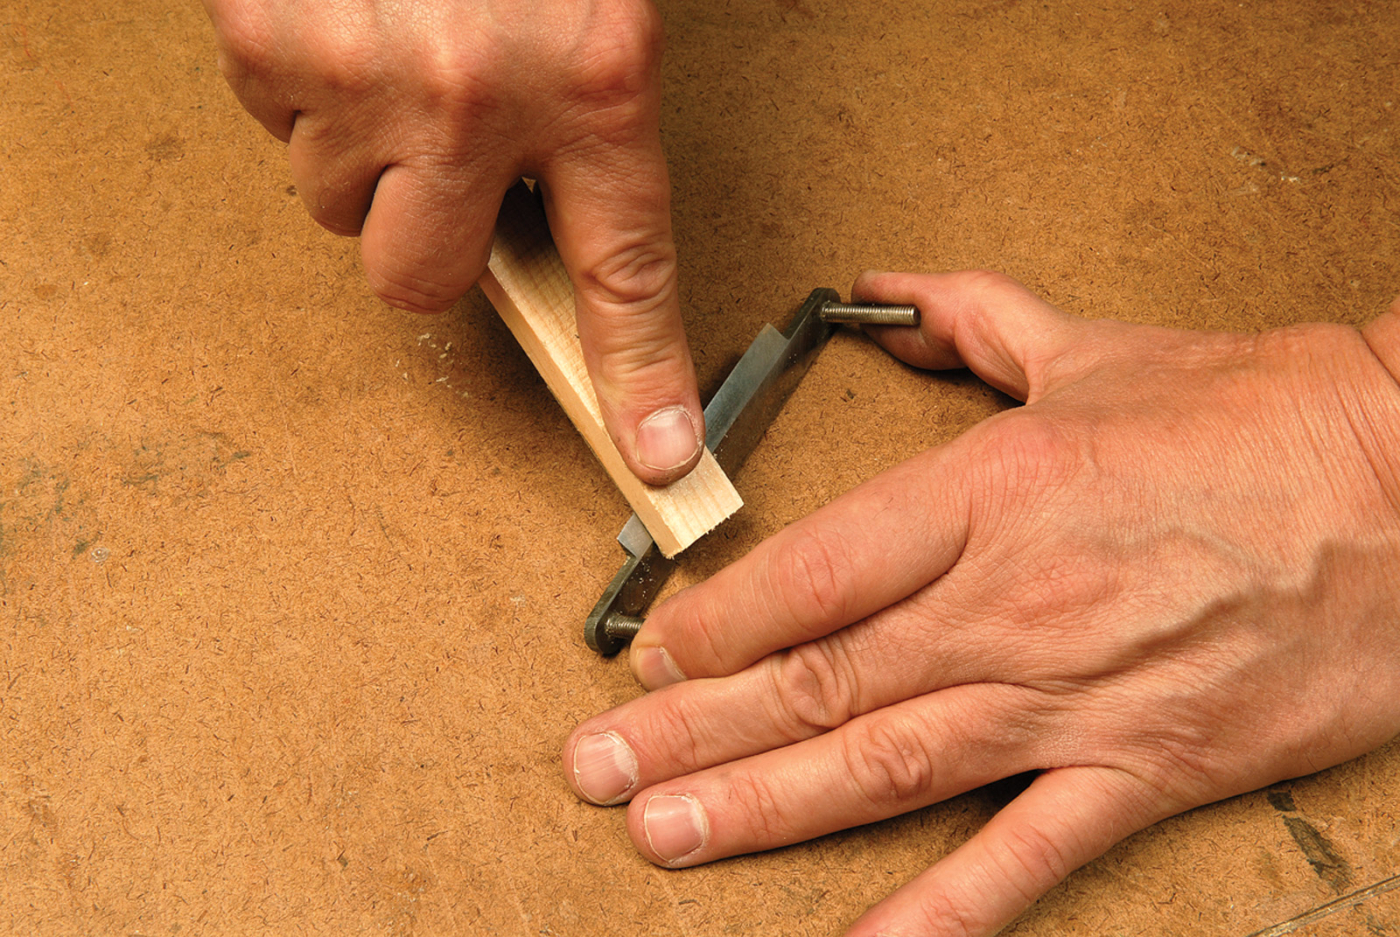
Cheap sharpening jig. A piece of sandpaper stuck on a small piece of wood is perfect for removing any rounding in the blade. But this is a time consuming method.
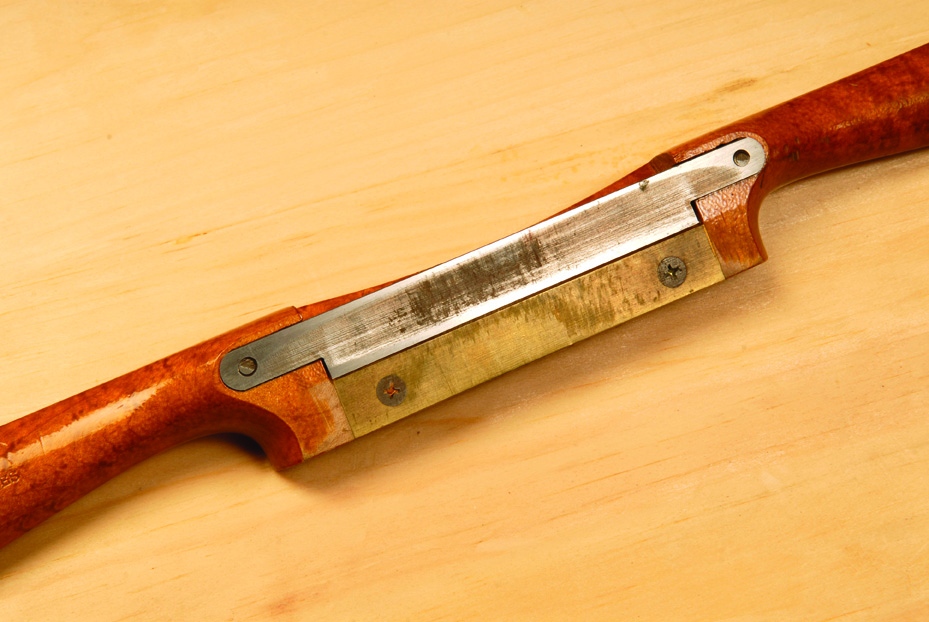
Hollow grind. Cutters with hollow-ground bottoms make sharpening fast – only two narrow strips of metal have to be dressed rather than the entire blade surface.
This is a lot of work to do with a small strip of wood. I recently acquired a Work Sharp. This system has made the process a piece of cake. It quickly flattens the cutter and dresses the bezel. I repeat the procedure through several papers and my shave will cut translucent end-grain shavings.
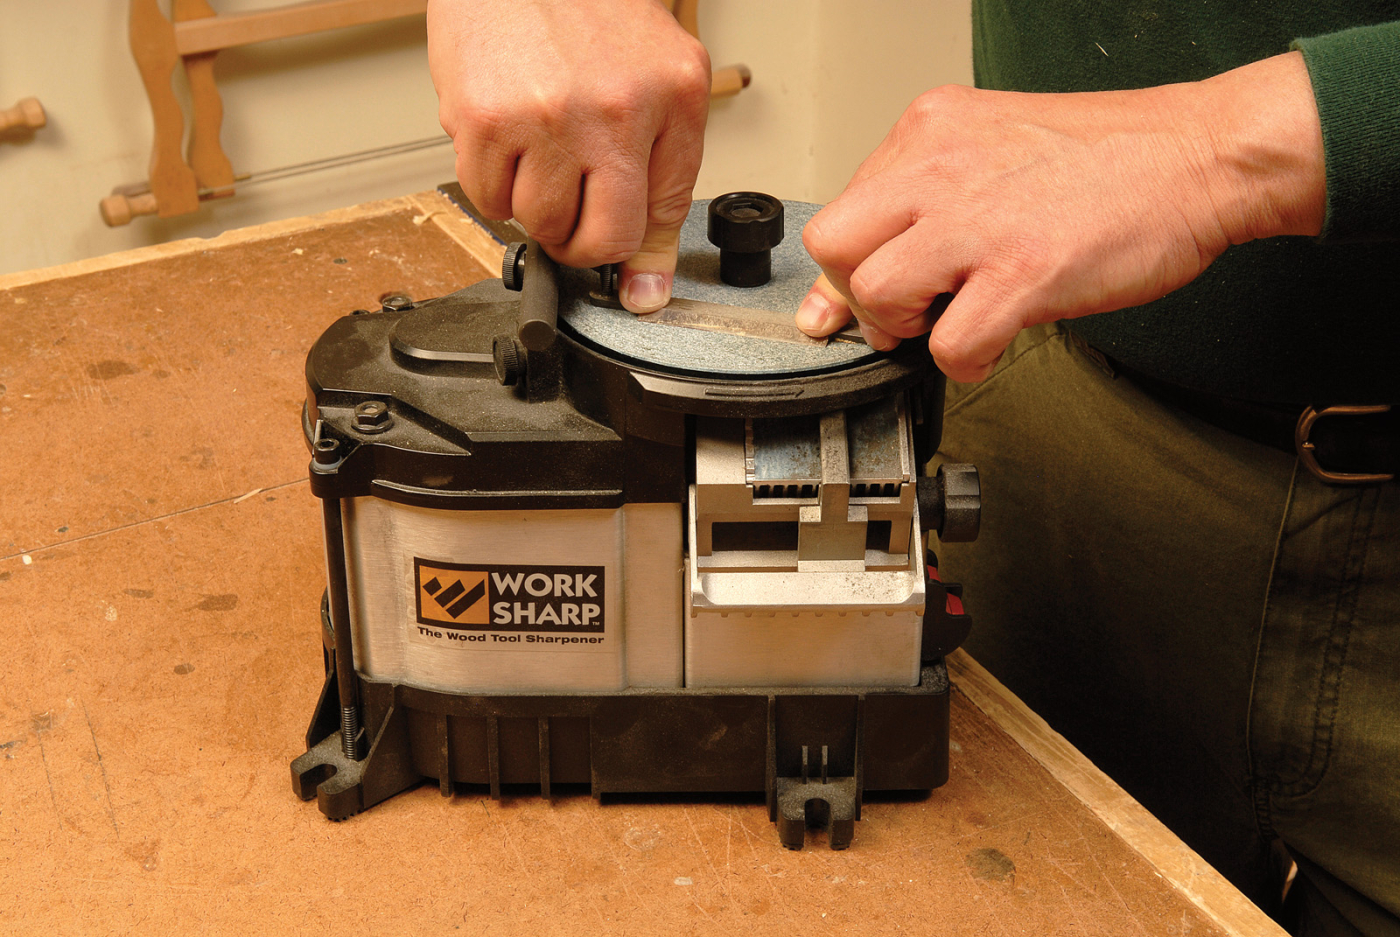
Work Sharp. A more expensive – but easier-to- handle – blade sharpening method is the Work Sharp.
I have refitted most of my shaves with hollow ground cutters. These cutters have a holloww bottom that speeds up sharpening even more. I only have to flatten two narrow strips of steel, rather than the entire surface.
Hollow grind. Cutters with hollow-ground bottoms make sharpening fast – only two narrow strips of metal have to be dressed rather than the entire blade surface.
Here are some supplies and tools we find essential in our everyday work around the shop. We may receive a commission from sales referred by our links; however, we have carefully selected these products for their usefulness and quality.