


We may receive a commission when you use our affiliate links. However, this does not impact our recommendations.

Some simple adaptations turn this 19th-century bench into a modern mudroom necessity.
There is an old Shaker hymn called “Simple Gifts” that begins with this line: “Tis the gift to be simple.” This bench carries many of the qualities that the Shakers valued. The design is straightforward and driven by function, yet it’s also graceful and elegant. The construction is obvious and building it doesn’t require anything beyond simple tools and techniques.
The antique Shaker bench that inspired this piece actually led two lives. It was originally made without a back at the Hancock Shaker village. As it got older (and presumably the brothers or sisters using it also got older) wood was scabbed onto the back of the ends, and the backrest was added, making it more comfortable.
Made of pine, the original was longer – 94″ –and likely was used with a dining table. I liked the look and simplicity of this piece, but I decided to make a shorter version for use in an entry hall or mudroom.
I used cherry, and happened upon a single board that was wide enough, and long enough, for the seat and the end pieces. If you’re not as fortunate, you’ll need to glue up stock for width, which is what I was planning to do on the way to the lumberyard.
Adapting the Design
The original seat was 1″ thick, and the corbel supports were short pieces at each end. Because I would be using 3⁄4“-thick materials, I extended the seat supports to run all the way between the ends to brace the seat and strengthen the overall structure.
The second design change was to the ends – on the original the arched cutout that creates the legs of the bench wasn’t centered on the end. Because the back was added, the cutout was pushed forward. I put the cutout at the mid-point of the ends and made it taller and elliptical.
Easy Layout, Strong Joinery
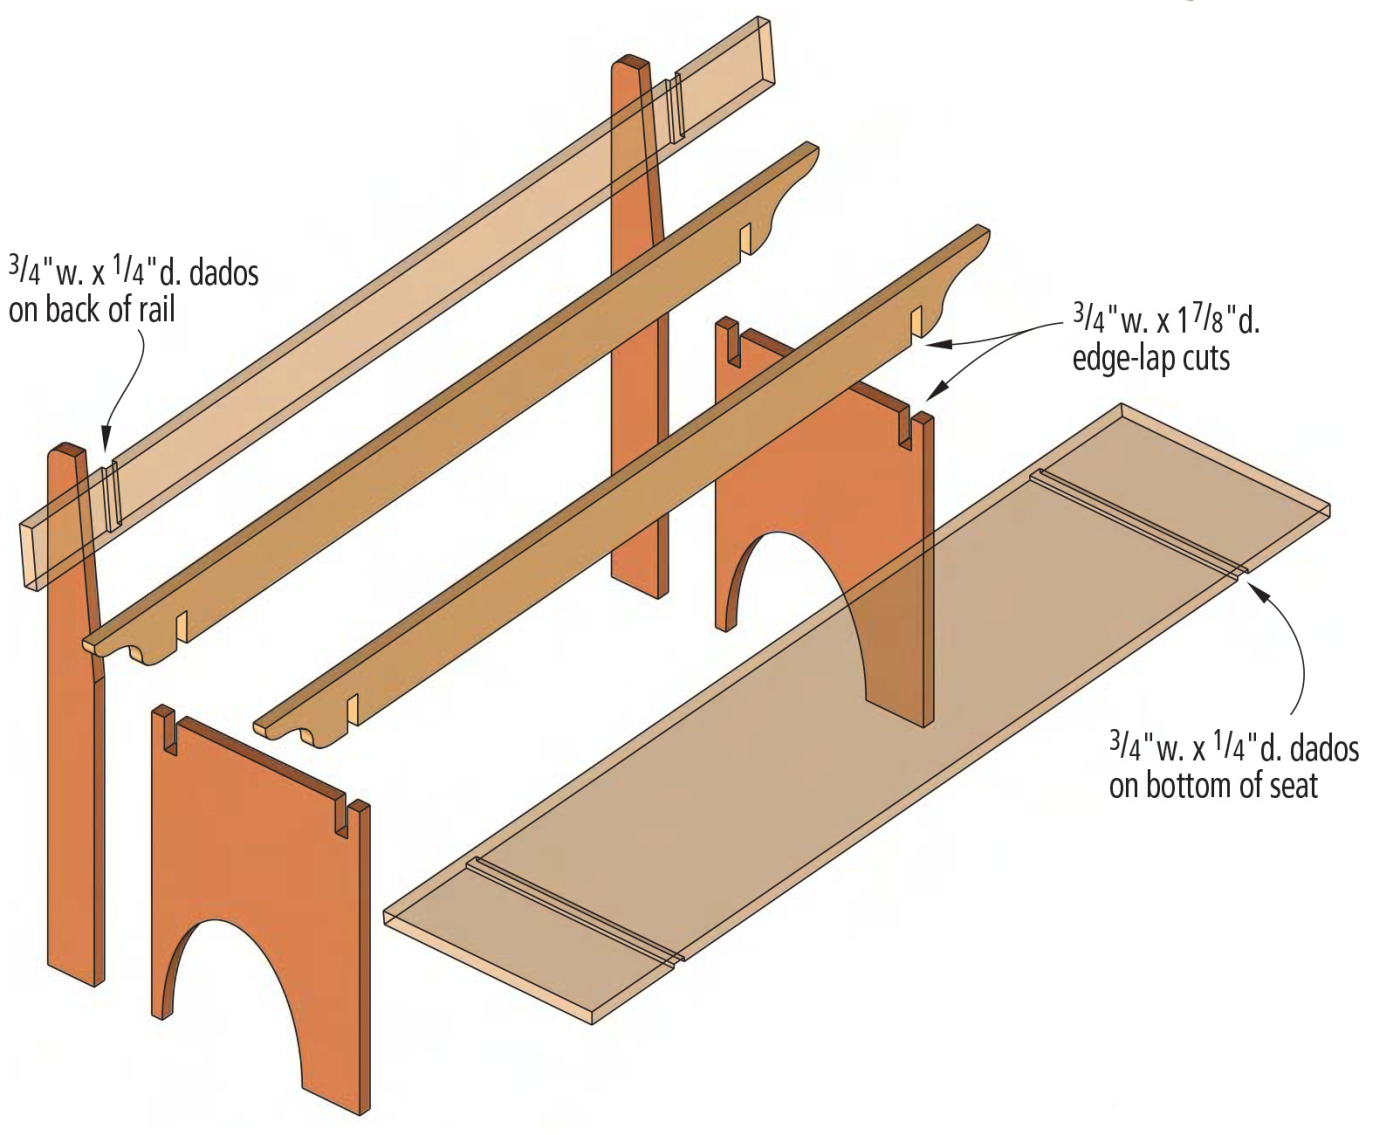
I stayed with the simple joinery of my example; a dado in the bottom of the seat to capture the ends and two more in the back rail to capture the back supports. Lap joints where the seat supports meet the ends complete the joinery.
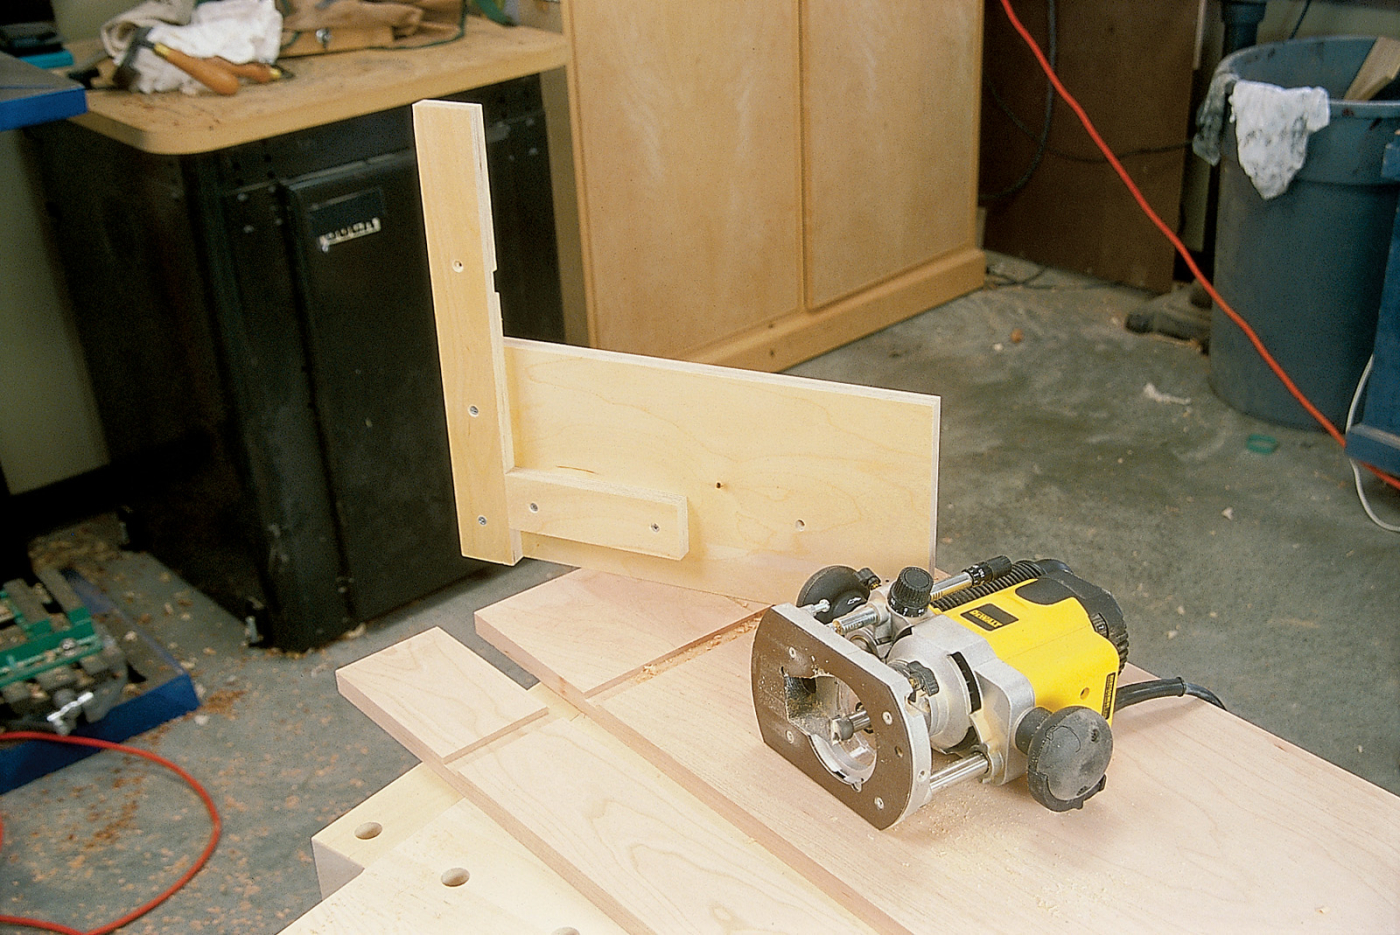
This T-square jig locates the exact position of the router bit. The addition of an end stop on the bottom of the jig puts the cuts the same distance from the ends of both the seat and the back rail.
After all the parts were cut to size, I routed the 3⁄4“-wide x 1⁄4“-deep dados in the bottom of the seat, and the back of the back rail. I made the T-square jig shown above to guide the router, and to locate all of the joints the same distance in from the ends.
With the dados cut, I made a test assembly of the two ends and the seat. When I prepared the stock, I planed everything to just more than 3⁄4“. I made some final adjustments to the thickness of the ends with a hand plane to get a nice snug fit in the dados.
With these three pieces fit together, I turned them upside down on my bench. After making sure that the ends were square to the seat, I marked the seat supports’ locations working from the ends.
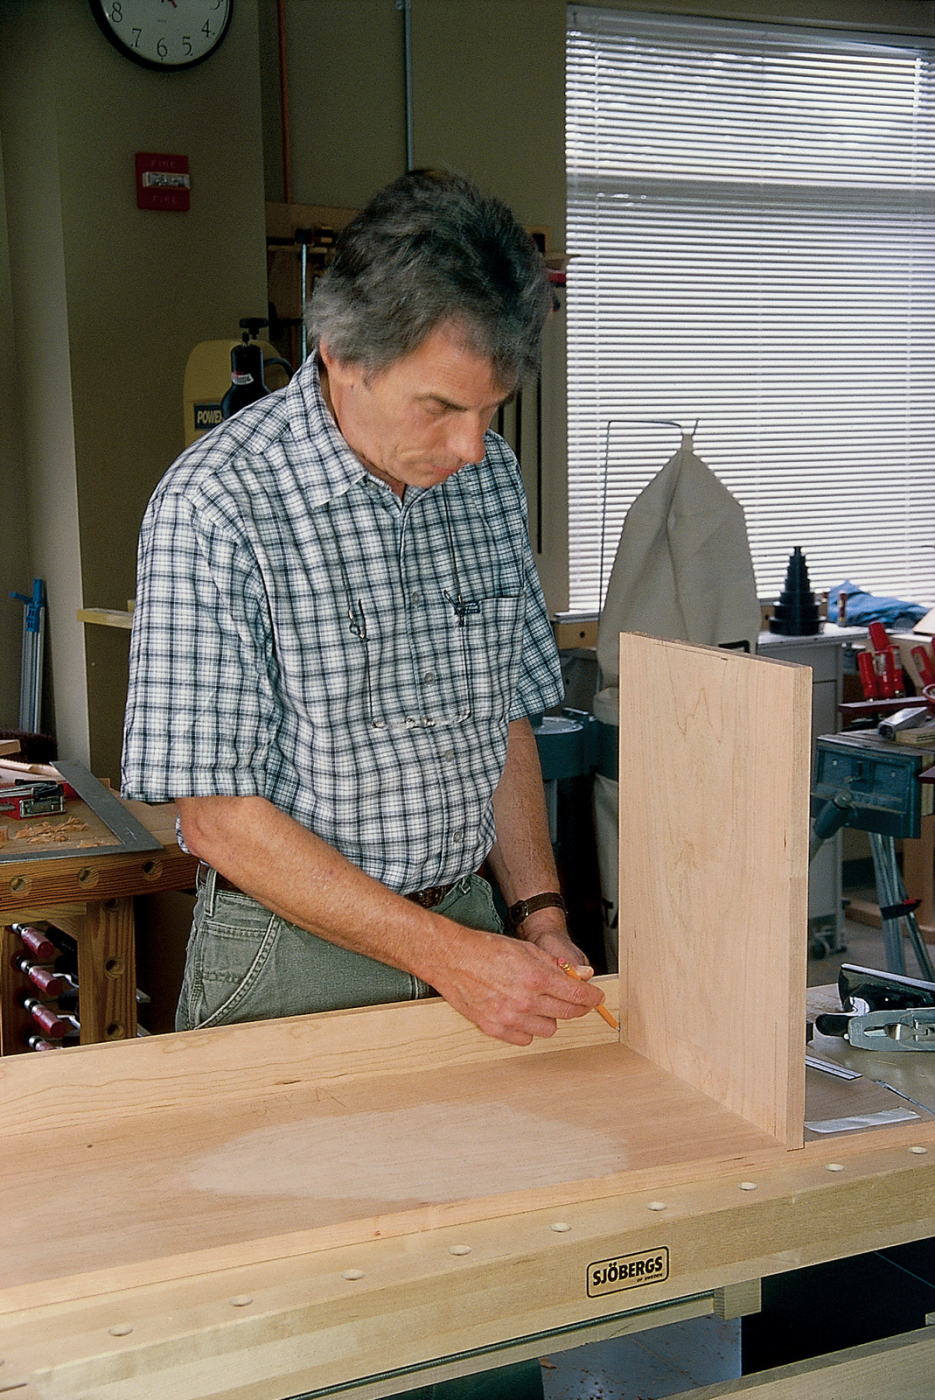
With the ends placed in the dados in the bottom of the seat, you can mark the location of the lap-joint cuts in the seat rail without measuring.
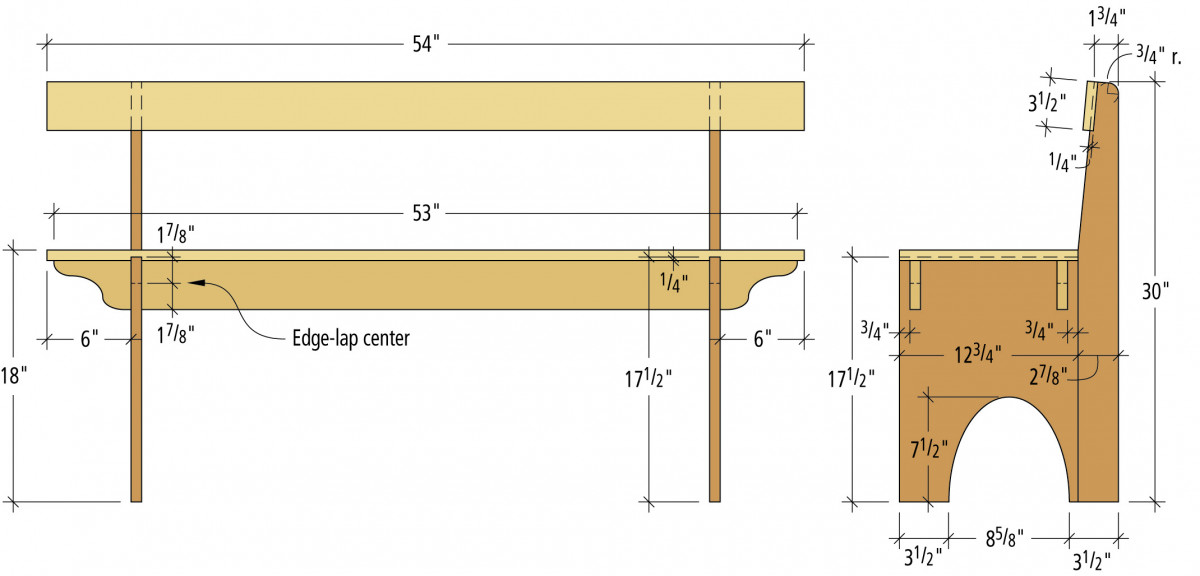
While I managed to avoid having to measure for the locations of the lap joints on the stretcher, I did need to measure for the depth of the cuts. Because the ends recess into the 1⁄4” dado in the seat, the lap joint cuts need to be 1⁄8” deeper than half the width of the support rails. The cuts in the rails and ends were marked at 17⁄8” using the end of my adjustable square.
Guiding Hand Tools
Like the dados in the seat, there are numerous ways to cut the lap joints. The seat supports are rather long, so I decided not to risk using the table saw, but cut them with a Japanese hand saw and guide-block. With the guide block clamped on the edge of my layout lines, it was easy to keep the saw straight, and I had the long cuts made quickly.
 I used a jigsaw to make the bottom cuts, but I could just as easily have used a coping saw. I used the same guide block to pare the sides of the joints with a chisel. I also used a rasp to fine-tune the fit. These joints are relatively easy to make, but you need to be careful – if you try to force them together, there is a good chance that the pieces could split, especially with cherry.

After the bottom of the joint has been cut, use the same guide block to guide the chisel to pare the sides of the joint.
I like to sneak up on a good fit by testing the slots next to the adjacent slot rather than in them. If the wood should split, don’t despair. You can usually glue the split pieces back together without losing any strength, or the repair ever being visible.
With the lap joints complete, I turned to the back supports. By making them as separate pieces, cutting the back taper is very simple. I used my band saw and started the taper 1⁄4” above the intersection with the seat, tapering to 13⁄4” at the top of the support. After making the cuts, remove the saw marks by running the pieces over the jointer, then cut the radius at the top of the ends with a jig saw or coping saw.
To make the ends a single piece, I simply glued the back supports to the ends. I used a butt joint, and had to be careful while clamping this up to keep everything aligned. You might want to add some biscuits to help keep the pieces in the same plane. Once the glue was dry, I cleaned up the joints with a card scraper, and I was then ready to cut the decorative curves.
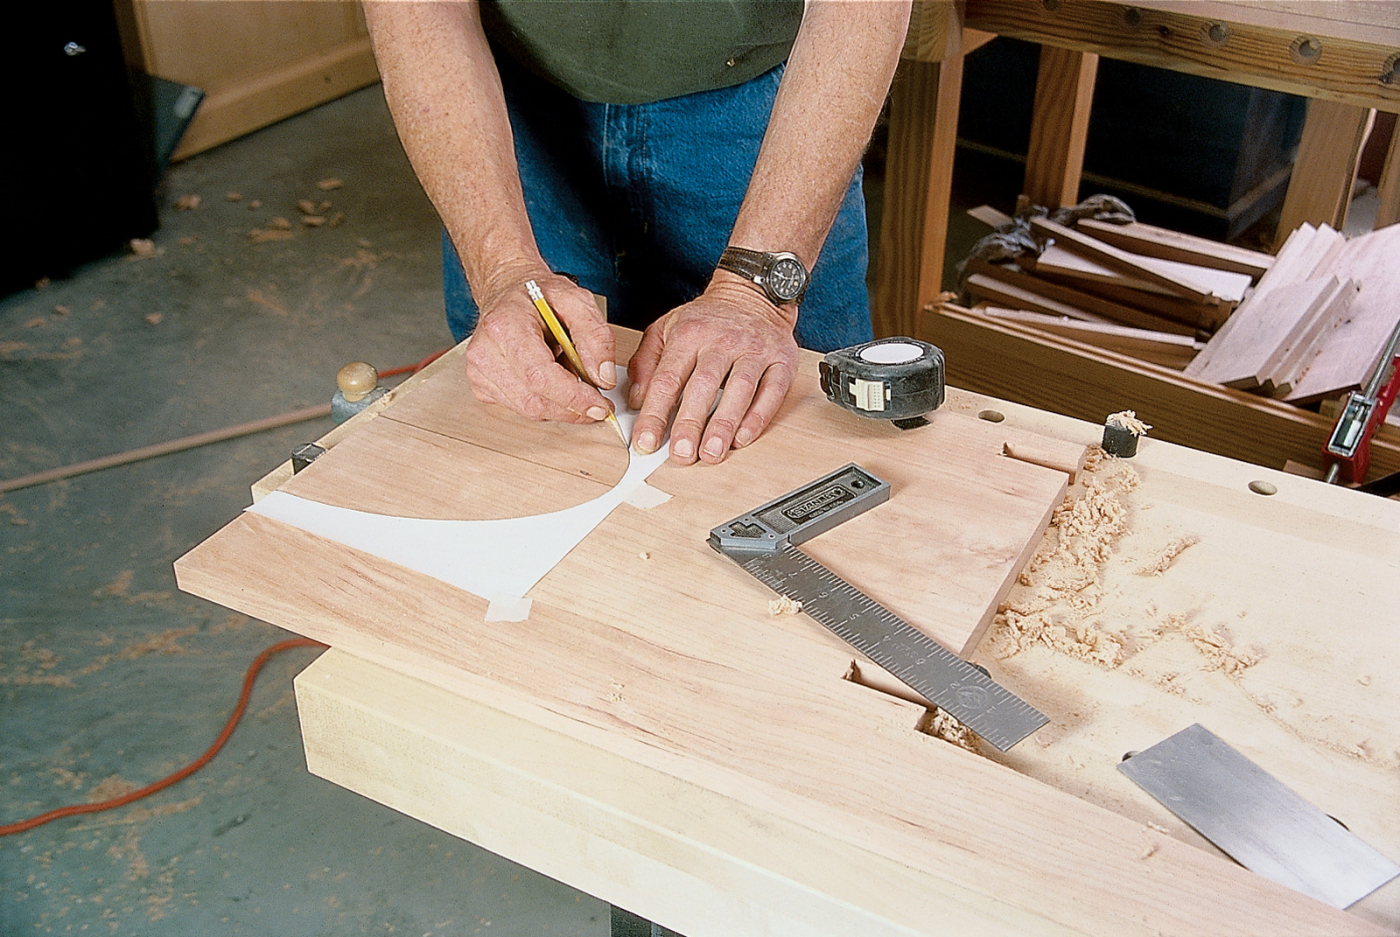
After the joints are cut and the back extension is glued on, position the paper pattern and mark the arched cutout.
I made a full-size pattern of the cutout in the ends, and the corbel at the end of the seat supports. I transferred the patterns to the pieces and then made the cuts with a jigsaw. I cleaned-up the cuts by sanding the curves with an oscillating spindle sander. Again, there are many ways to make these cuts and smooth the surfaces. A band saw or coping saw could have made the cuts, and the curves could be smoothed with a spokeshave, a card scraper or a sanding block.
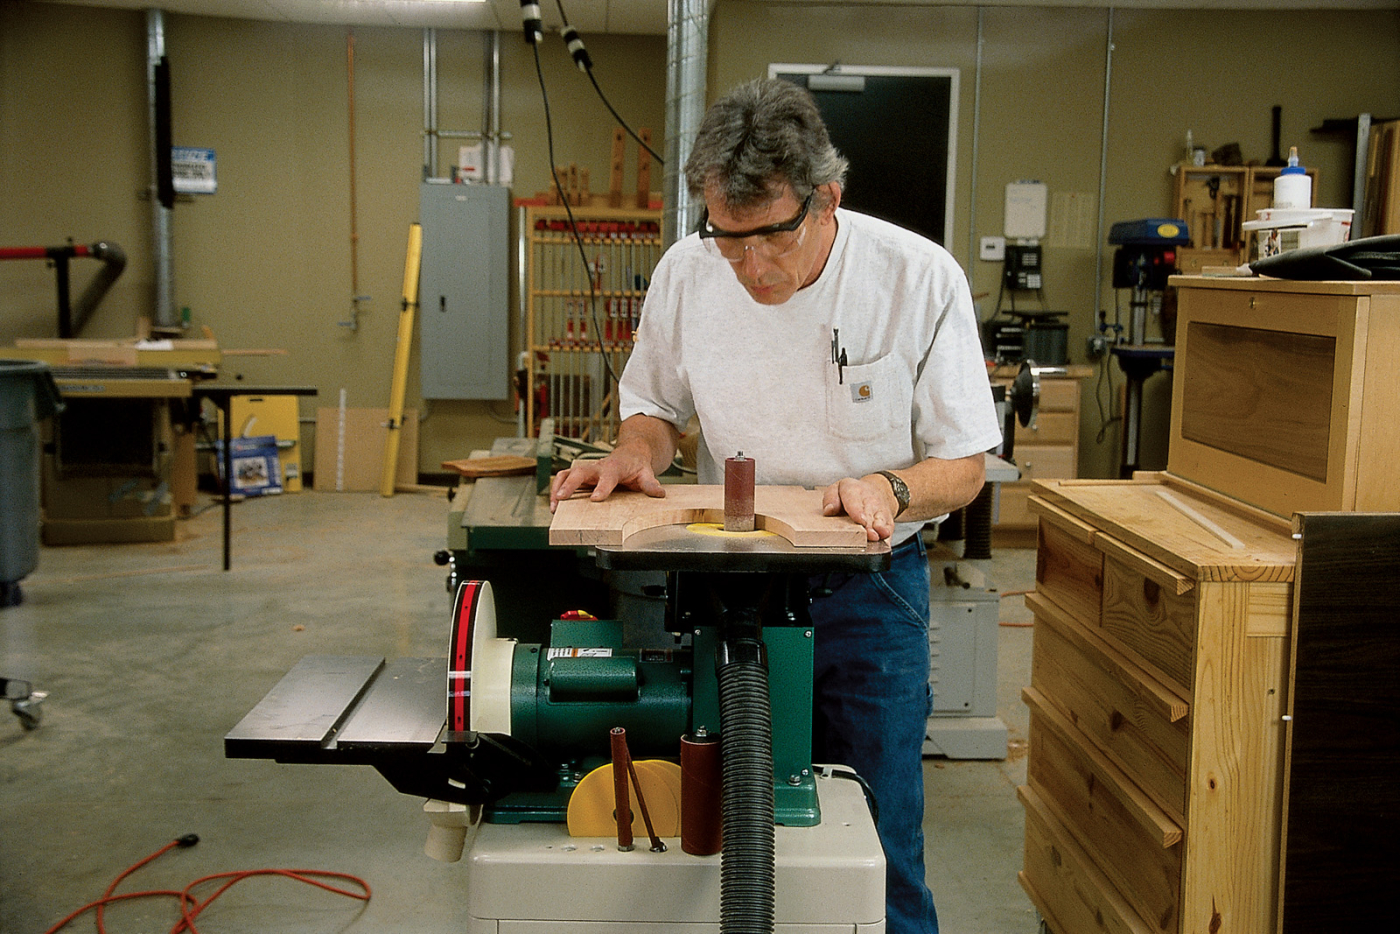
The oscillating spindle sander is ideal for cleaning up the saw marks and sanding to the inside of the pencil line.
Edges with Character
I prefer to ease the sharp edges on a piece like this by hand with a block plane, and I did most of this before assembling the bench, being careful to avoid the areas in the vicinity of the joints. I could have used a router with a roundover or chamfer bit, but I enjoy the process of doing it by hand, and I like to vary the radius in different areas, adding character to the piece. With a router, I would have ended up with a sterile sameness on every edge.
The edges on the inside curves of the end cutouts were shaped with a spokeshave as shown in the photo below. After everything was put together, the edges near the joints were eased with a knife, a skew chisel and a rasp.
A spokeshave eases the edges the block plane couldn’t reach.
I did most of the sanding before assembly, sanding to #150 grit by hand with a sanding block. I avoided sanding in the areas of the joints to keep the joints from becoming sloppy. While hand sanding can be tedious, it leaves a much better surface, particularly on narrow edges, than using a random-orbit or palm sander.
Because the lap joints have a good deal of mechanical strength, I didn’t need to clamp them together. I did clamp a “speed square” in the corners to keep things from racking while the glue dried. After an hour, I put glue on the top of the end pieces, and the top of the support rails. Then I clamped the seat and back, and left the assembly overnight for the glue to dry.
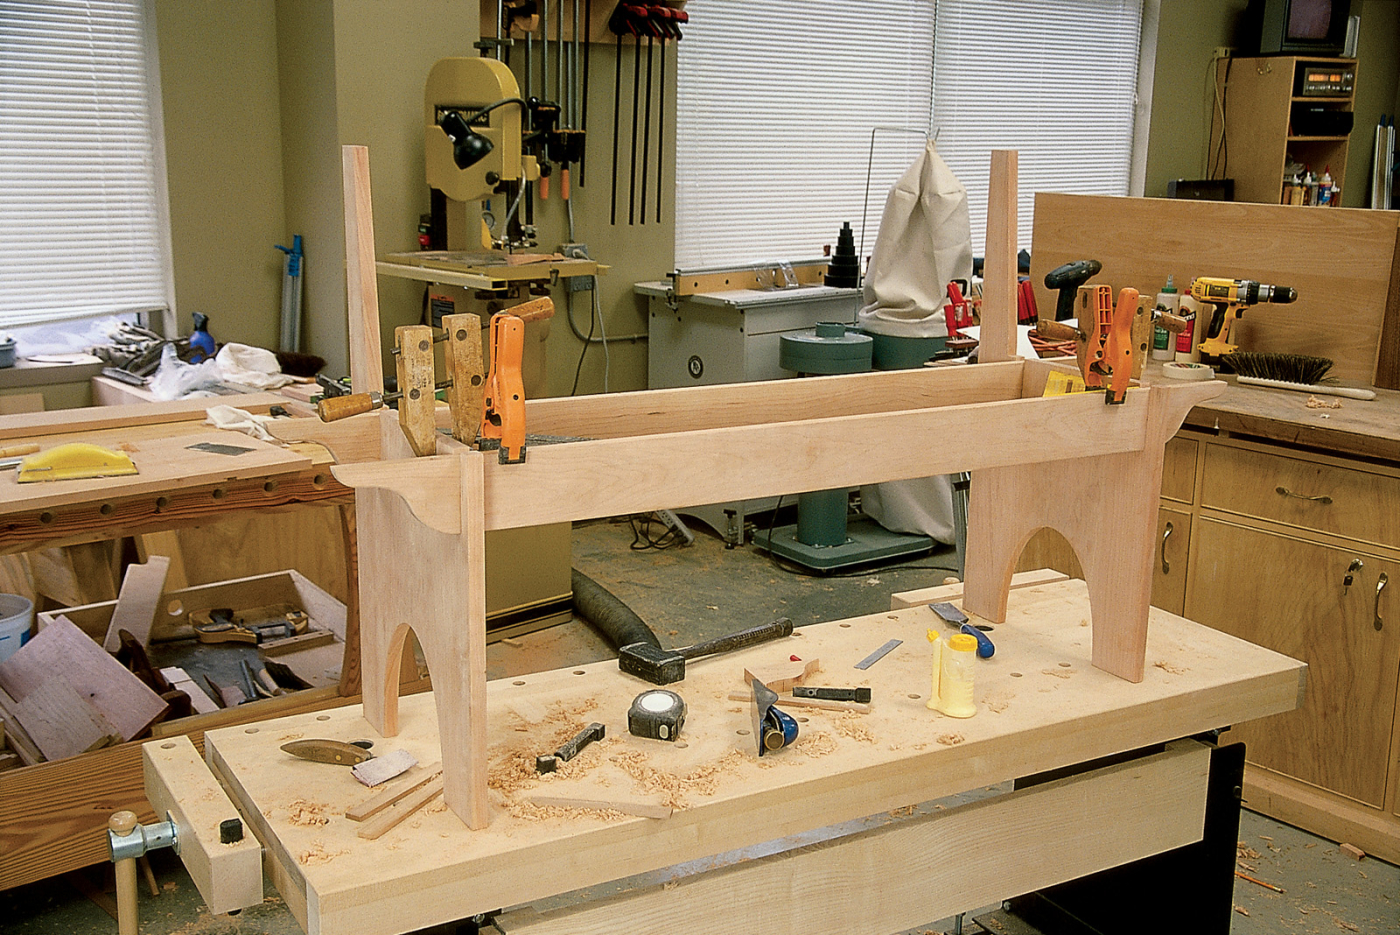
The lap joints should slide together with hand pressure and don’t need to be clamped together. Speed squares clamped in the corners keep the assembly from racking while the glue dries.
A Bit of Insurance
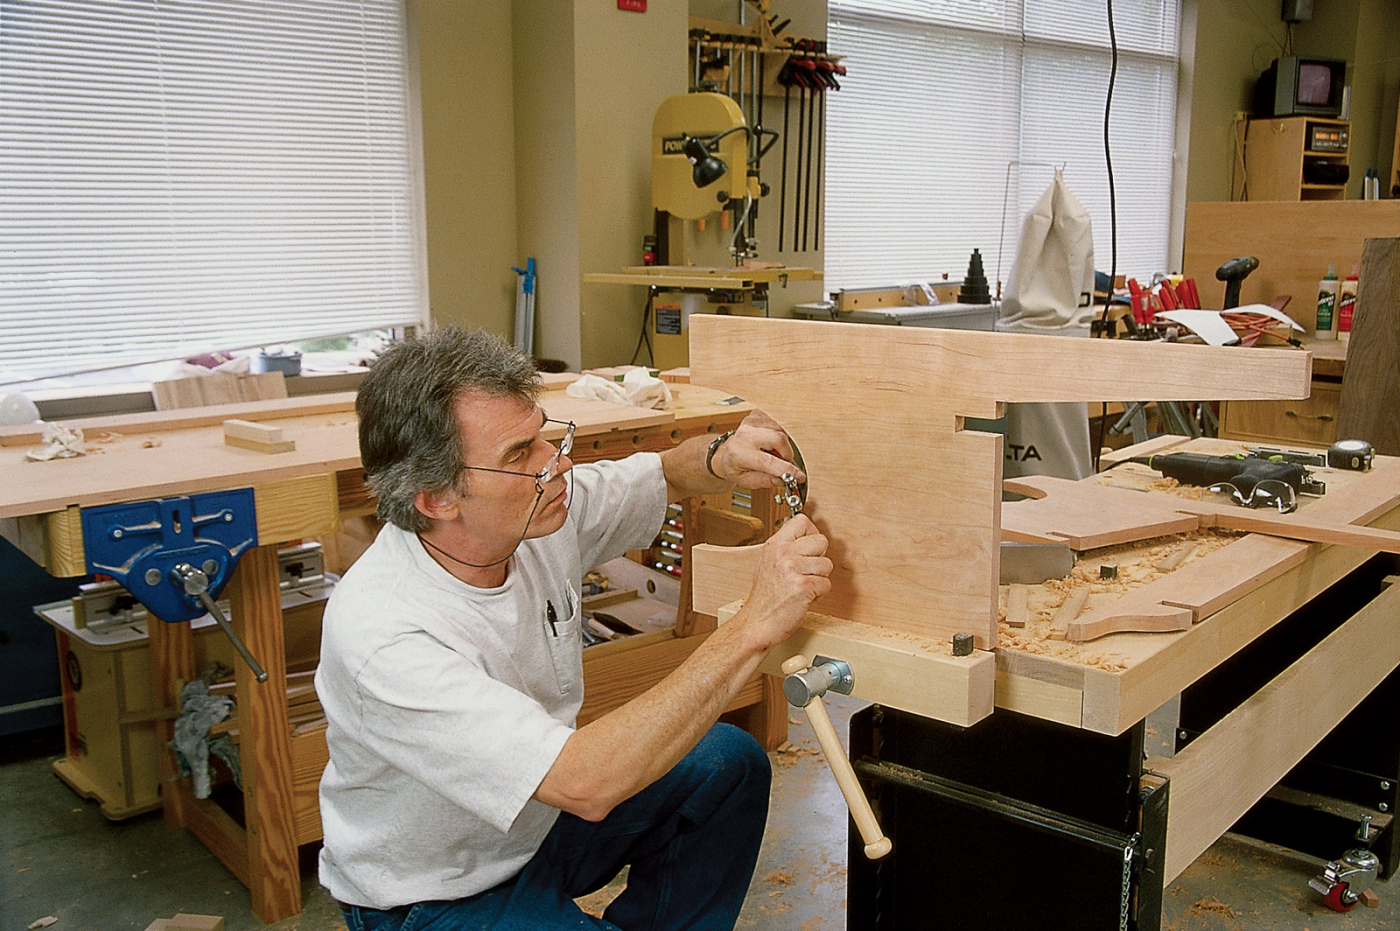
In the photo of the original Shaker bench, the ends of the dowels or plugs are visible on the face of the back rail and on the front edges of the joints for the seat supports. I decided to reinforce these joints, as well as the dado in the seat, with #8 x 13⁄4” screws, covering the screw heads with contrasting plugs of black walnut.
Years ago I did repair work on wooden boats, and plugged screws were the way we held nearly everything together. Here are a couple of tricks from those days that speed the process considerably.
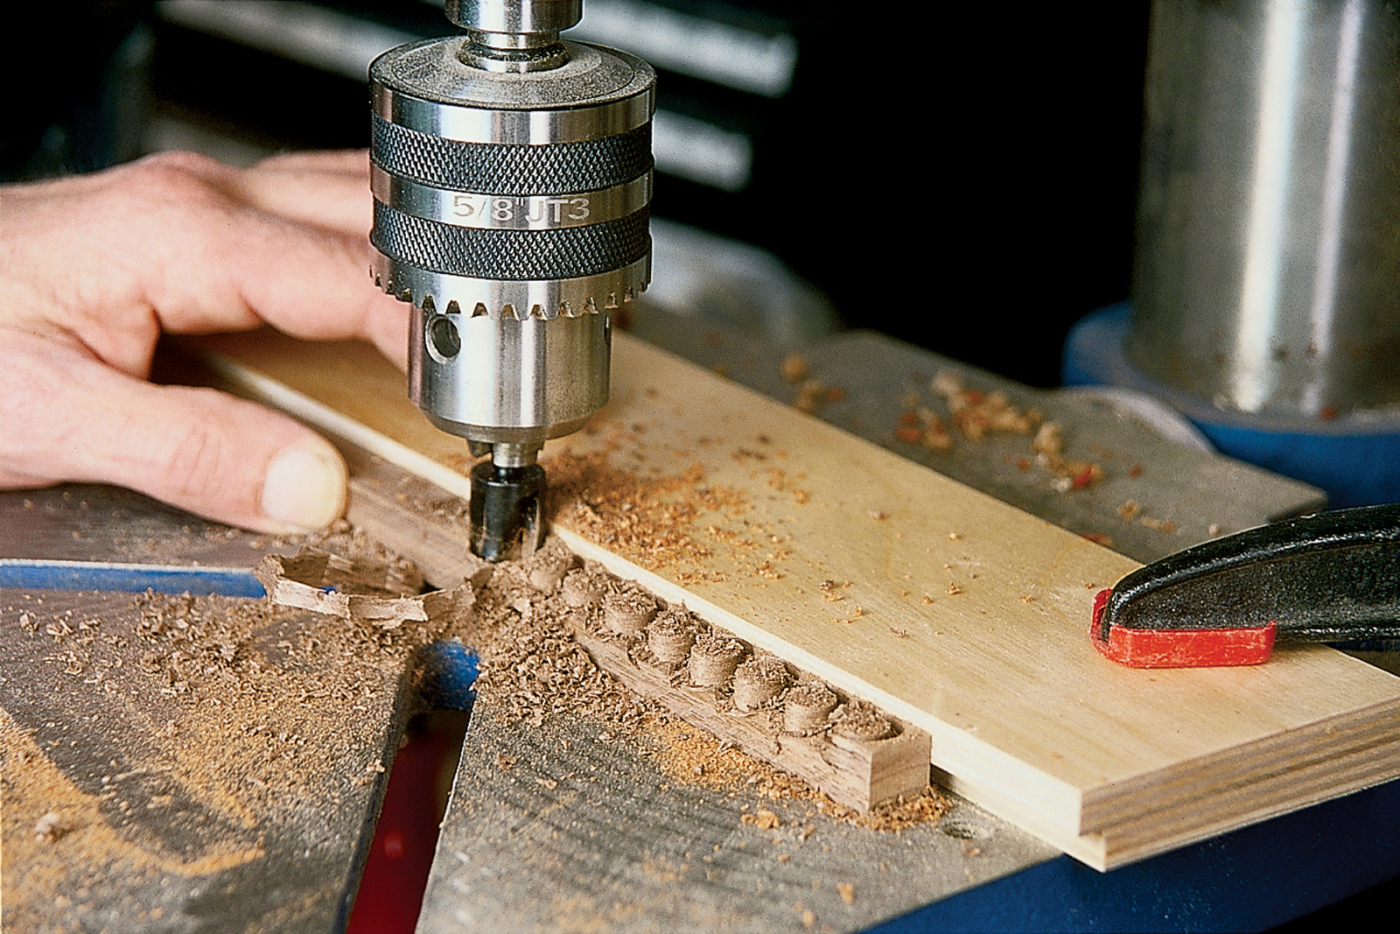
Spend a little time preparing stock for plugs, and they will be easier to cut. The rabbet in the fence keeps chips from building up.
Most people cut plugs in a random pattern in a piece of scrap and then pry them out with a chisel. If you rip the scrap to roughly the outside diameter of the plug cutter, and use a fence on the drill press, the plug cutter won’t need to remove so much material, and it won’t tend to wander.
The second benefit is that the plugs don’t need to be pried loose with a chisel. Set the blade height on the table saw to 1⁄8” less than the strip of plugs, and set the fence so that the plugs are on the outside of the blade. Use a push stick to carefully make the cut, and you have a strip with the plugs still attached. You can easily break them off when you’re ready to use them.
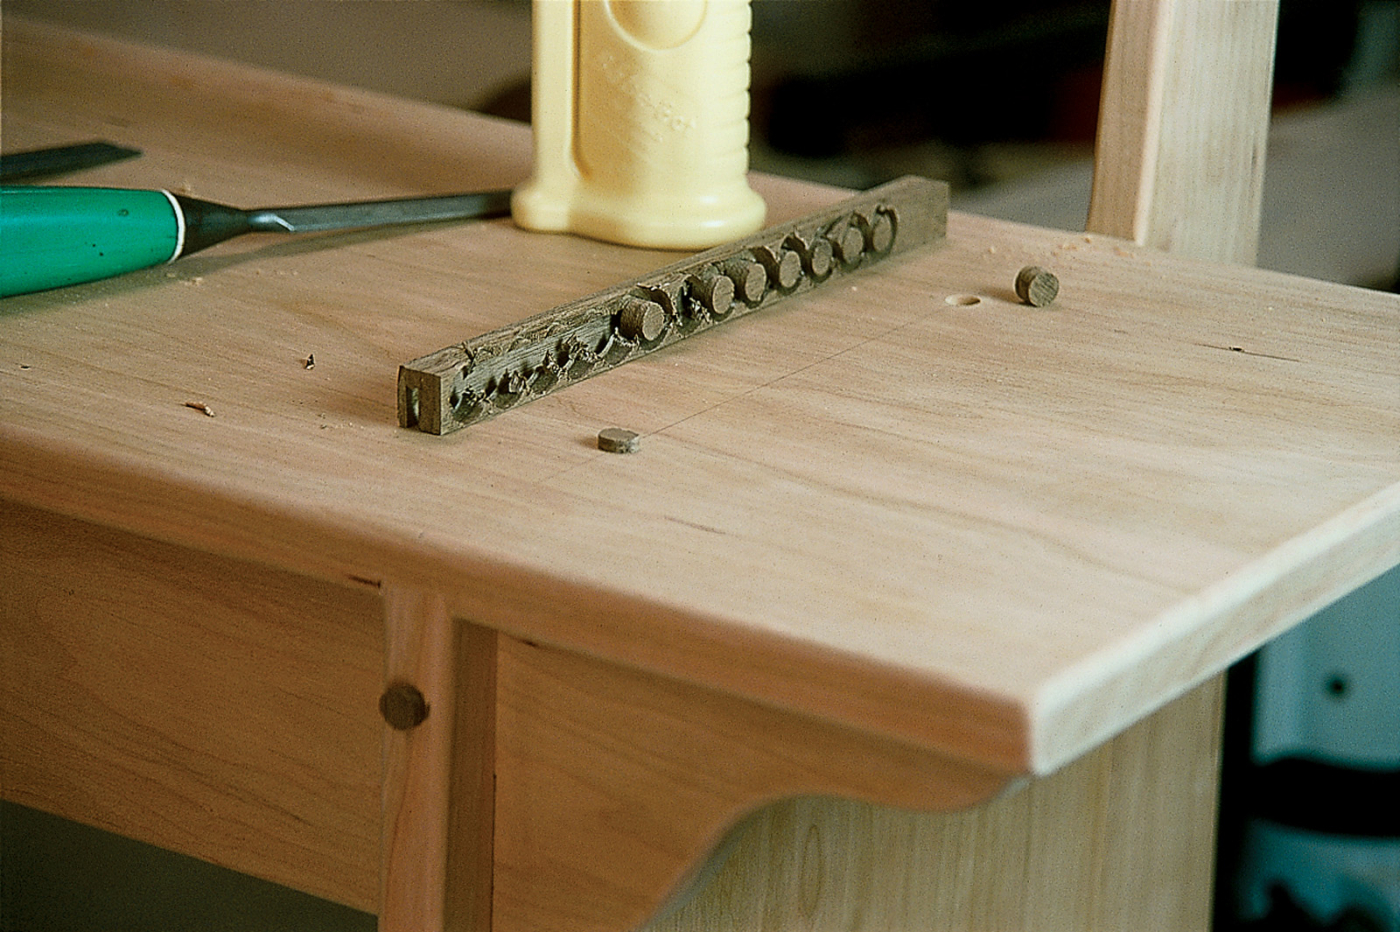
Keeping the plugs barely attached to the strip keeps them manageable. Break them off from the strip by hand.
Flush-cutting handsaws can be used for trimming the plugs, but I prefer to use a chisel. Pay attention to which way the grain is running on the side of the plug, and make the cut with the edge of the chisel on the “downhill” side. I hold the chisel slightly above the surface, and one smack with a mallet removes most of the plug. A paring cut, pushed by hand, leaves the plug flush with the surface.
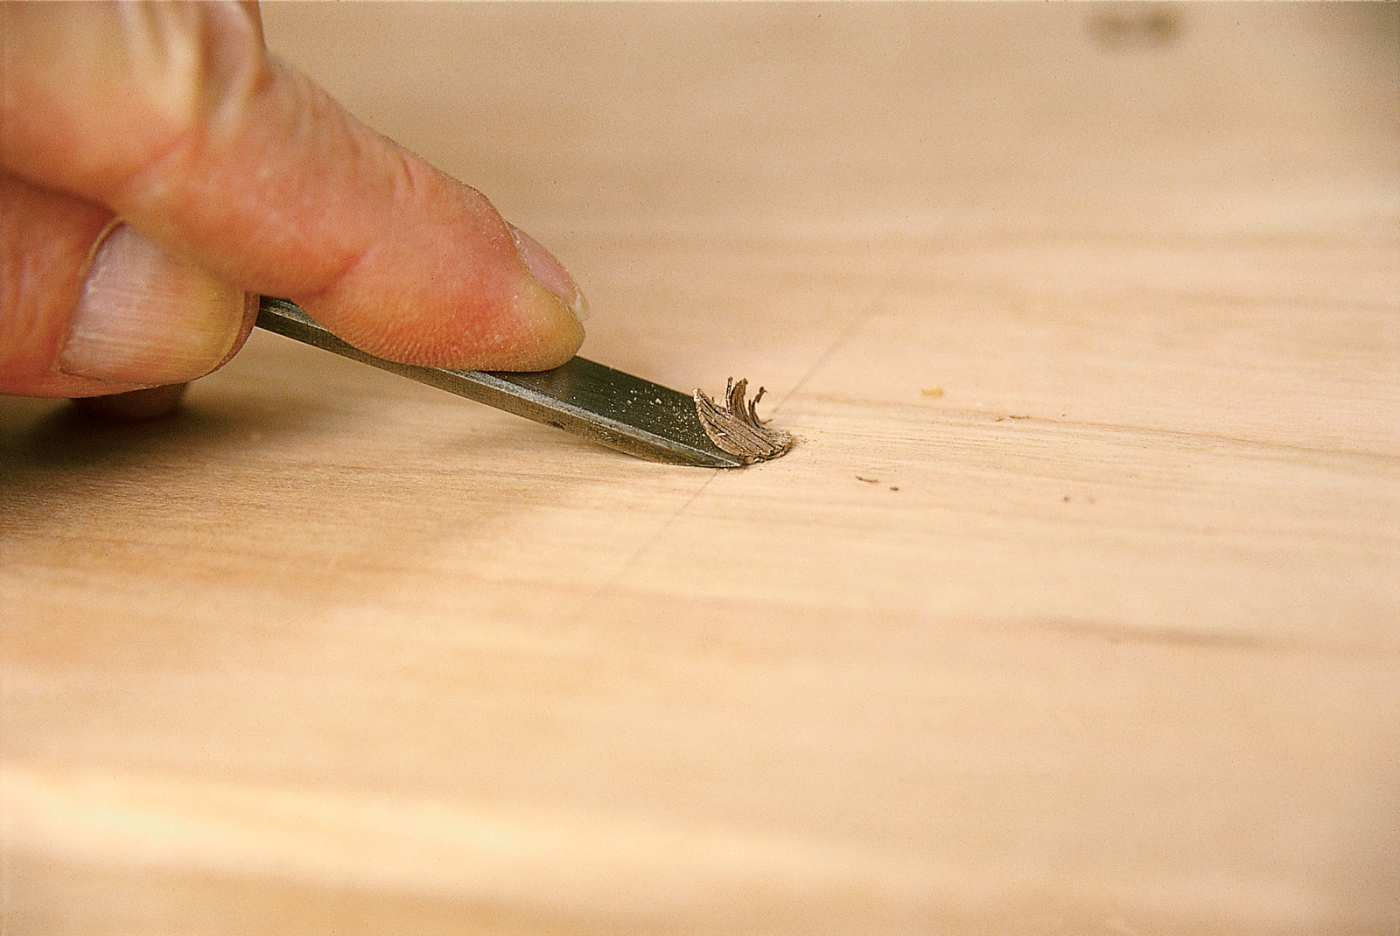
It’s faster to trim the plugs with a chisel than with a saw, and if you keep an eye on the grain direction they will be flush with the surface.
If I’m not sure which way the plug will break, I’ll make the first cut higher up, so that the plug is entirely above the surface, and then make the final cut in the direction that the first cut broke. This technique is faster than sawing, and a minimal amount of work with a scraper leaves the plug smooth and flush with the surface, as there are no saw marks to be sanded out.
A Fitting Finish
With the entire piece assembled, it was time to finish the work on the edges of the bench and to give everything a final sanding. I sanded all of the edges with #120-grit sandpaper, followed by #150. With the majority of the flat surfaces sanded to #150 grit before assembly, only some minor sanding was needed before the entire piece was hand sanded with #240-grit sandpaper.
Cherry is truly a beautiful wood, and it’s my opinion that an oil finish brings out the best of its character and figure. I used a Danish oil finish, and wiped it on, working in the oil with a nylon abrasive pad, and keeping the surface wet for about 45 minutes.
After wiping the surface dry with a rag, I set the bench in the sun for a few hours, turning it every half hour and wiping off any oil that bled out. This exposure to the sun darkened the wood, giving a jump start to the patina that cherry develops as it ages.
The next morning I applied a second coat of oil, keeping the surface wet for 20 minutes before wiping it dry. I let the oil dry during a long weekend, and applied two coats of paste wax, worked in with a nylon pad and then buffed.
We tend to think that the furniture we sit on needs to be intricate in design and complicated to build. This Shaker bench proves otherwise.
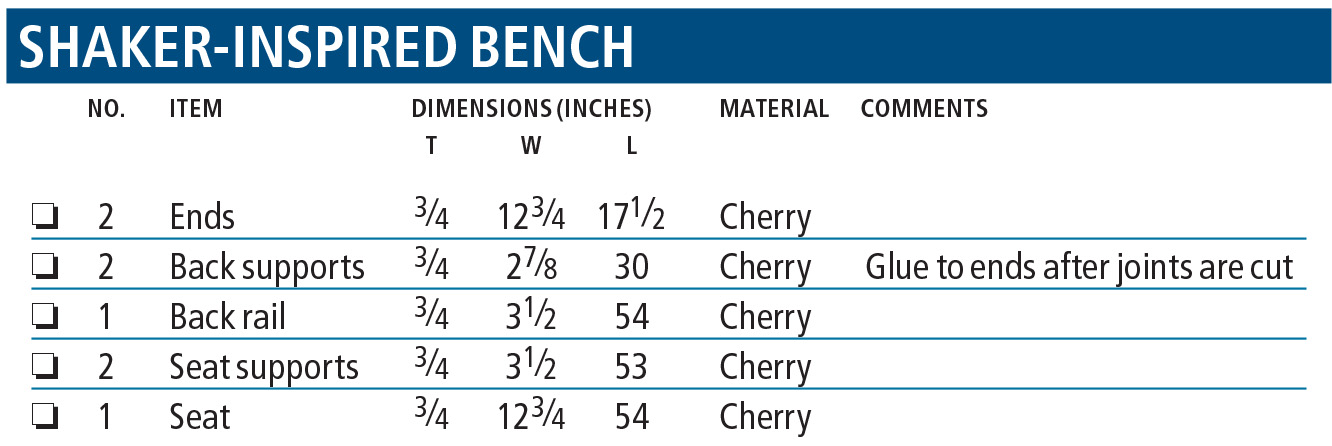
Shaker-inspired bench cut list

Here are some supplies and tools we find essential in our everyday work around the shop. We may receive a commission from sales referred by our links; however, we have carefully selected these products for their usefulness and quality.


There is a dimension missing from the drawing. It is the width/depth of the side support where it meets the seat. There is a dimension callout, but no dimension provided. This is necessary to taper the upper part of the side supports.