


We may receive a commission when you use our affiliate links. However, this does not impact our recommendations.
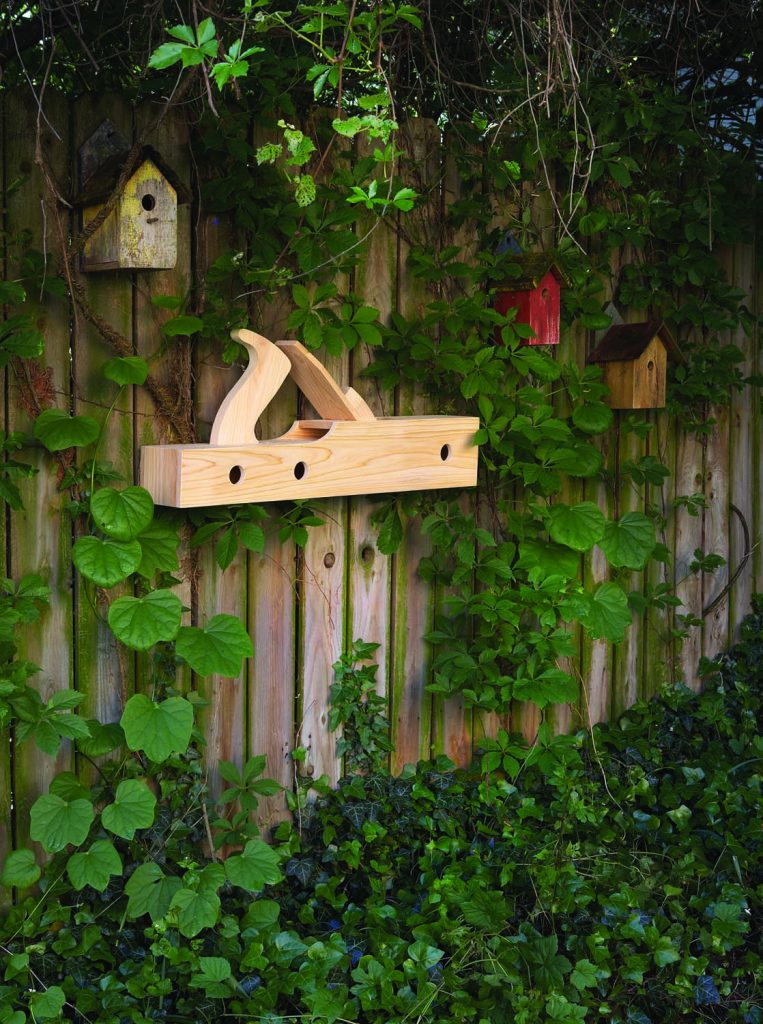
For birds both plane and fancy. This birdhouse would look great in your yard, above the door to your shop or even in your shop
Yet, inspiration works in weird ways. While visiting Maine in February I saw an enormous birdhouse that looked like a jointer plane hanging outside Liberty Tool, an ironmonger. I just had to have one to hang above my shop door.
Simple, Quick & Fun
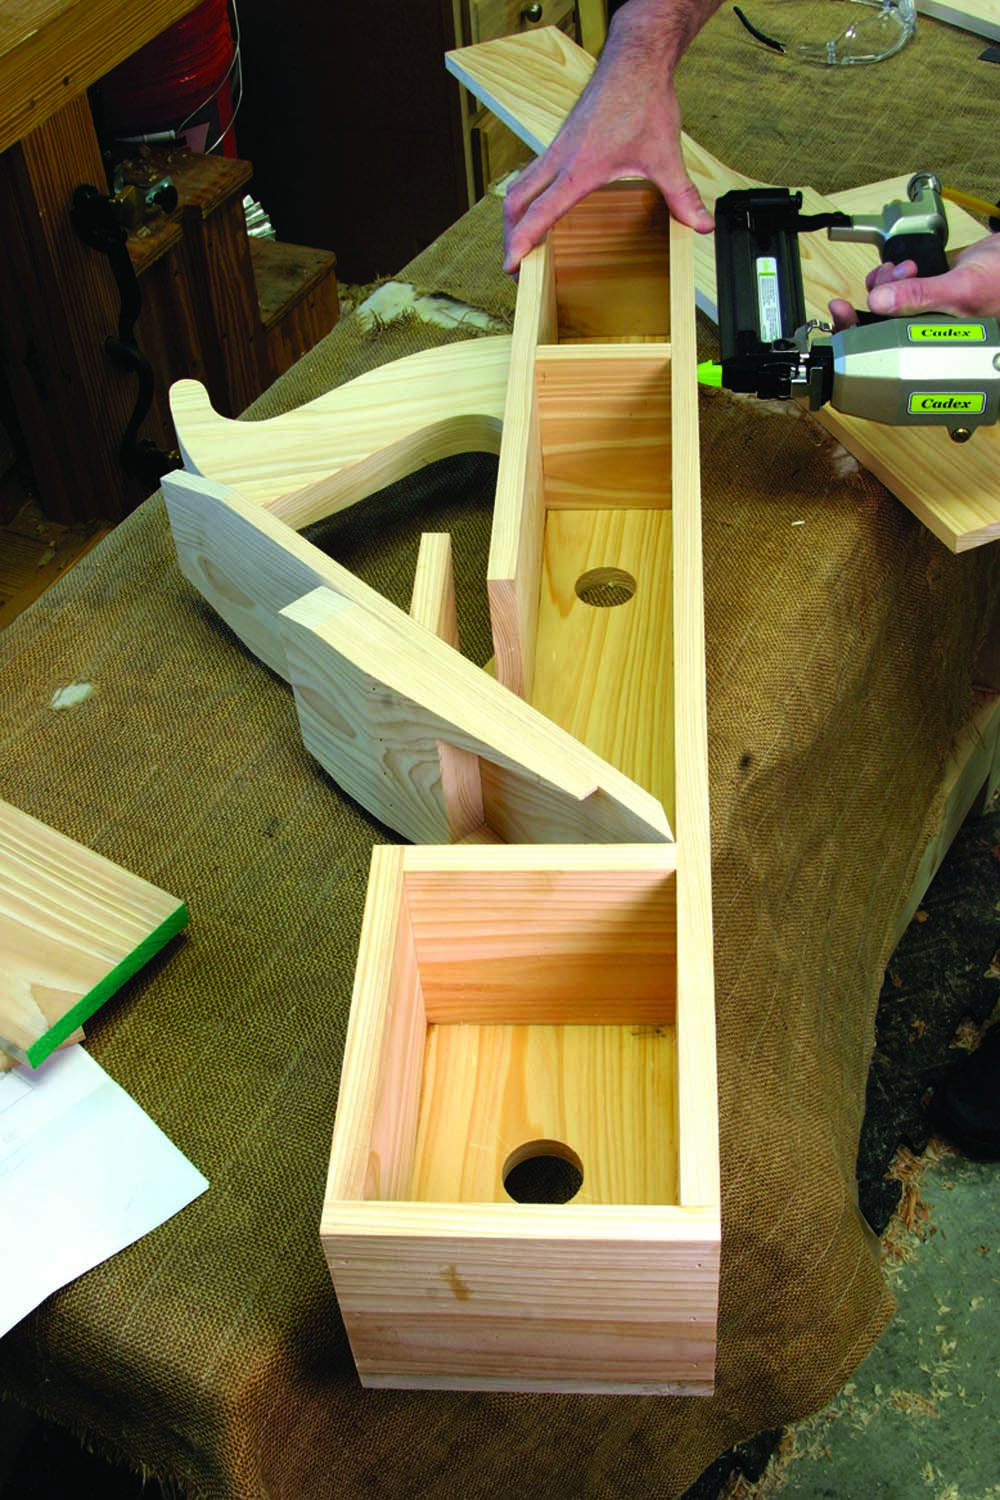
This plane is hollow. Glue and nail all the interior pieces as shown before you screw the second sidewall in place.
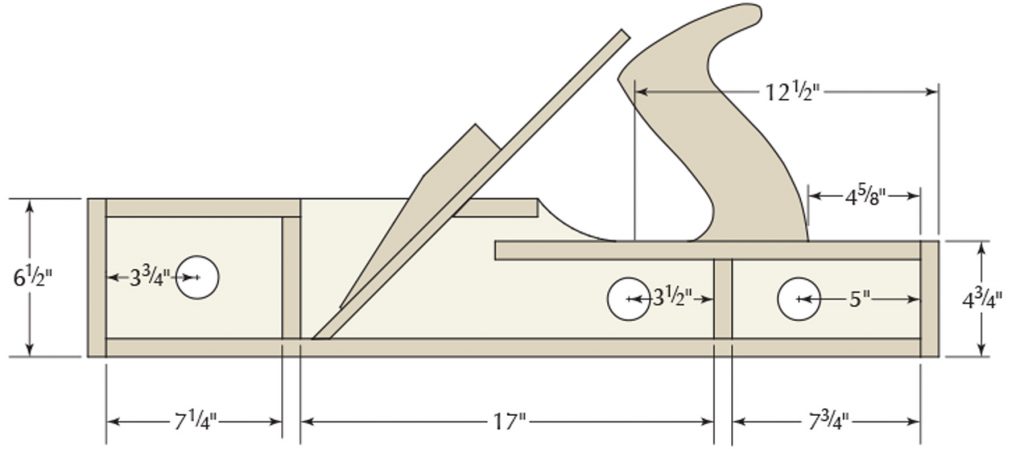
This birdhouse is based on a Marples 14“ razee jack plane I own. I scaled it up to 35“ long so it would look good above a standard door. If you’d like to make yours bigger, you can scale our model by downloading the free SketchUp file through our web site.
You’ll need about 10 to 12 board feet of a weather-resistant wood. I used cypress. And don’t forget the waterproof glue and stainless (or galvanized) fasteners.
The whole project takes about three hours, so it also was great therapy for me after coming off of an intense three-month-long project.
Begin by gluing up the wood for the thick wedge and the tote. These pieces are made by gluing two pieces of stock face-to-face. Clamp them up and set them aside for the glue to dry.
Next Up: The Sidewalls
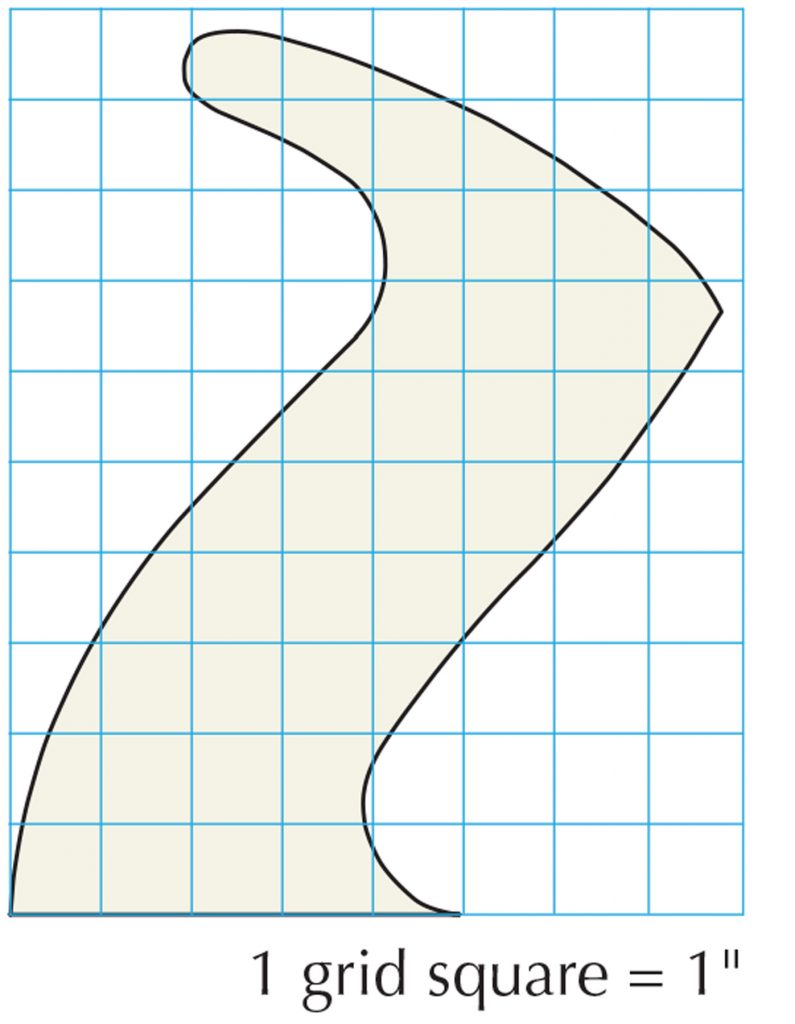
After ripping all your parts to width, begin by shaping the two sidewalls. Lay out the razee shape on one sidewall using the drawing as a guide. Cut the shape on the band saw and clean it up with a spindle sander. Then use the first sidewall to lay out the pattern for the second.
Cut that one close, then tape the two sidewalls together and shape them simultaneously so they are identical. I used the spindle sander here as well.
Assembly. What, Already?
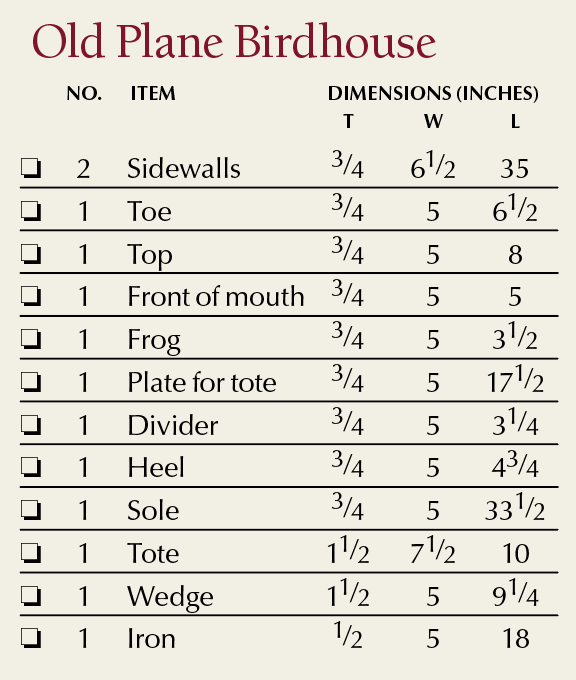
Cut the interior parts to size: the toe, heel, top, front of the mouth, frog, divider and sole. Sand or plane them smooth, then get your nails out.
Glue and nail these seven pieces to the sidewall that will eventually have the entrances for the birds (you’ll bore those holes later).
Now shape the tote. Remove the thick piece that you glued up earlier from the clamps and cut it to size using the patterns and drawings provided above. Dress it smooth and then screw the tote to the plate for the tote. Glue and nail the finished assembly to the sidewall.
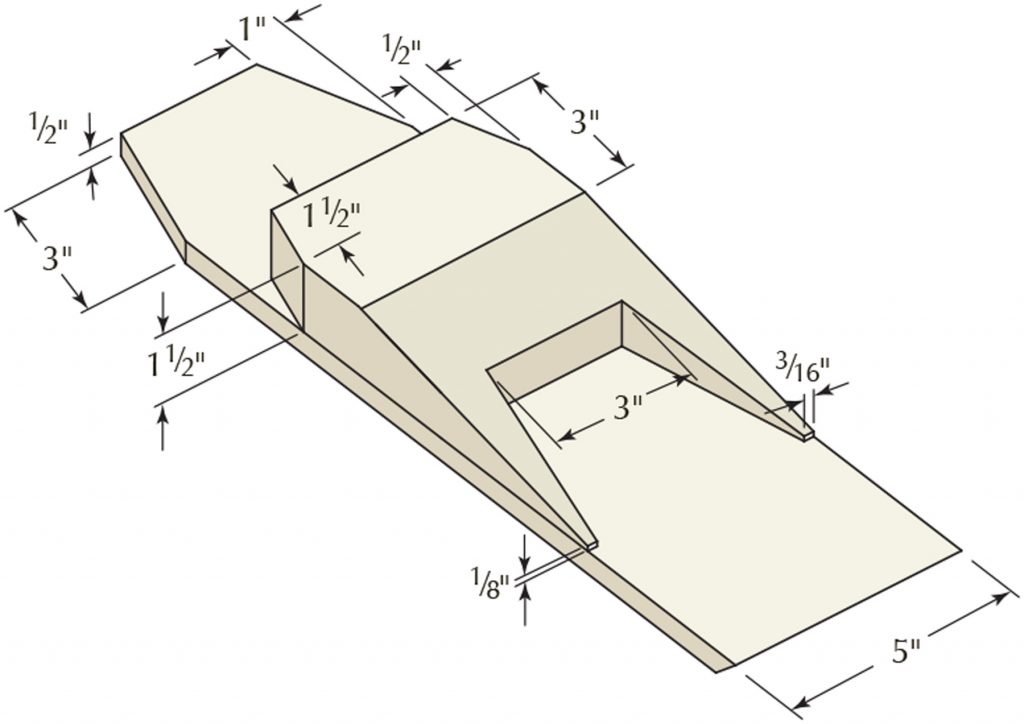
Shape the iron and the wedge using the drawings to guide you. Glue and nail them in place to the sidewall and the frog.
Be Bird-friendly
Drill some ventilation and drainage holes in the sole and in the top of the plane using a 1⁄4” bit. Then decide what sort of birds you want to attract and drill entrance holes that are based on the species (a quick search on the Internet will call up the hole sizes for a variety of birds). I want to attract Purple Martins, so I drilled my holes at 17⁄8” in diameter.
So that the birdhouse is easy to clean, attach the second sidewall to your birdhouse using No. 8 x 11⁄4” stainless screws.
To hang the birdhouse, I made a French cleat. One half gets screwed to the sidewall. Its mate gets screwed to the house, right above my shop door.
And what about having the birdhouse hanging over my shop door? That seems stupid. Maybe. But perhaps the threat of some loose-boweled birds will prevent my neighbors from pestering me when I’m working in the shop.
Here are some supplies and tools we find essential in our everyday work around the shop. We may receive a commission from sales referred by our links; however, we have carefully selected these products for their usefulness and quality.


