We may receive a commission when you use our affiliate links. However, this does not impact our recommendations.
 We improve a contemporary design to make it sturdier, a bit curvier and easier to build.
 We improve a contemporary design to make it sturdier, a bit curvier and easier to build.
Editor’s note: This article originally appeared in the August 2005 issue of Popular Woodworking Magazine.
It was about 1 a.m., and I was at the grocery on a bleary-eyed run to buy orange juice for the family’s breakfast. The only other shopper that hour was a woman tooling through the frozen food aisle. Perched atop her mound of food was a box that contained the disassembled parts to some shelves much like these.
At that moment it became official; these shelves are now everywhere – even among the pork rinds and toaster pastries at the corner store.
And so this begs a question: Why would we tackle such a ubiquitous design for the magazine?
Simple. We can make them better than the stuff at the store.
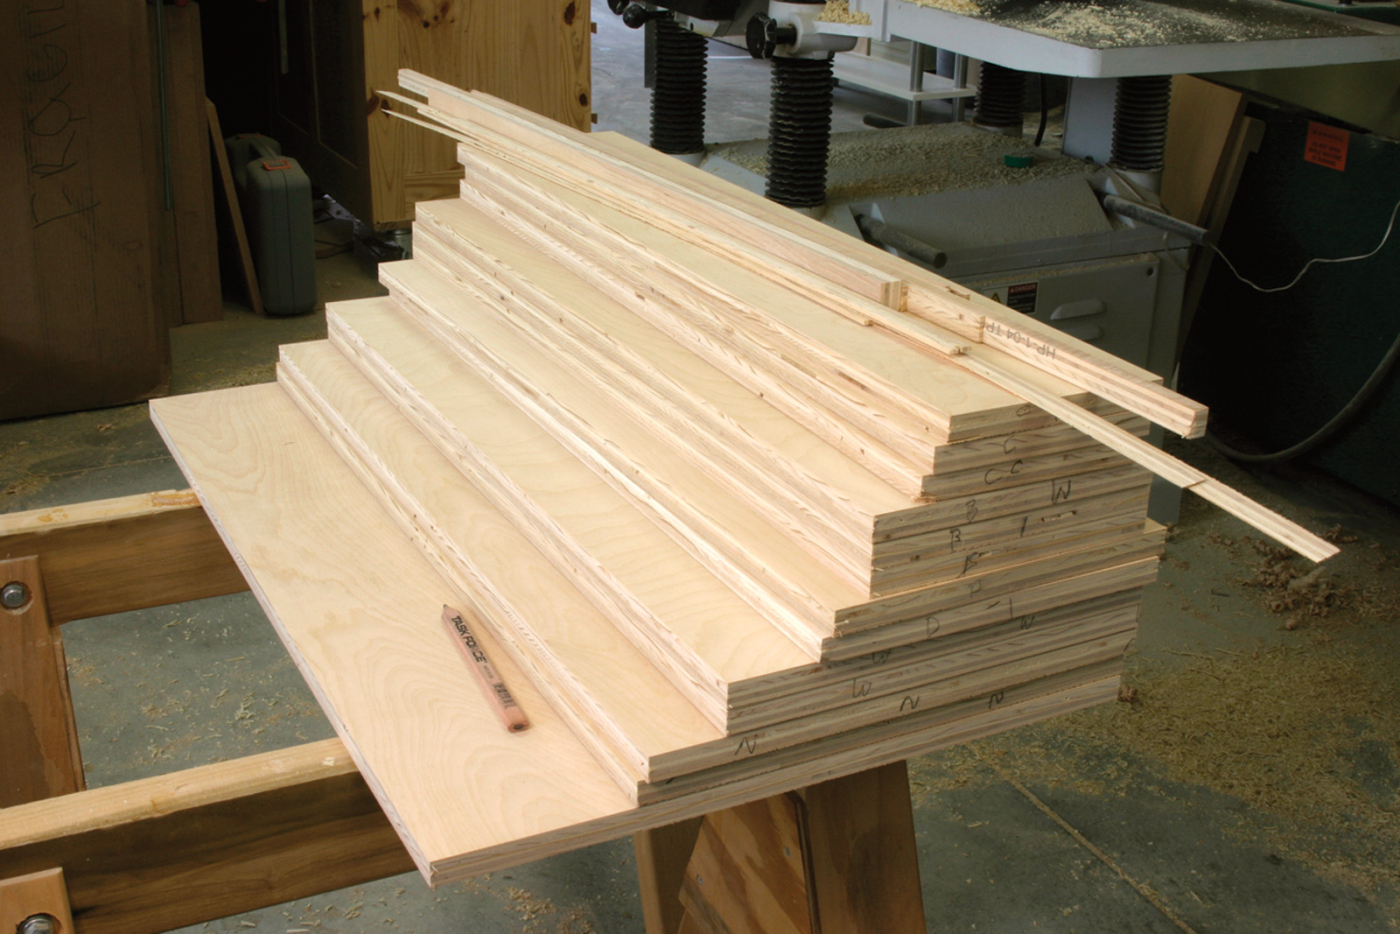
Take care when cutting your plywood because every kerf counts. Shown is my stack of finished shelves. That little pile on top of the shelves is the waste that was left from an entire sheet of plywood.
Many of the so-called leaning shelf designs I’ve examined have flaws. Some rack unacceptably. Some use a lot of extra material to become sturdy. Many have top shelves that are too narrow (3″ in some cases). Others have lower shelves that cantilever too much out the back.
It was time to fire up the CAD software and start drafting.
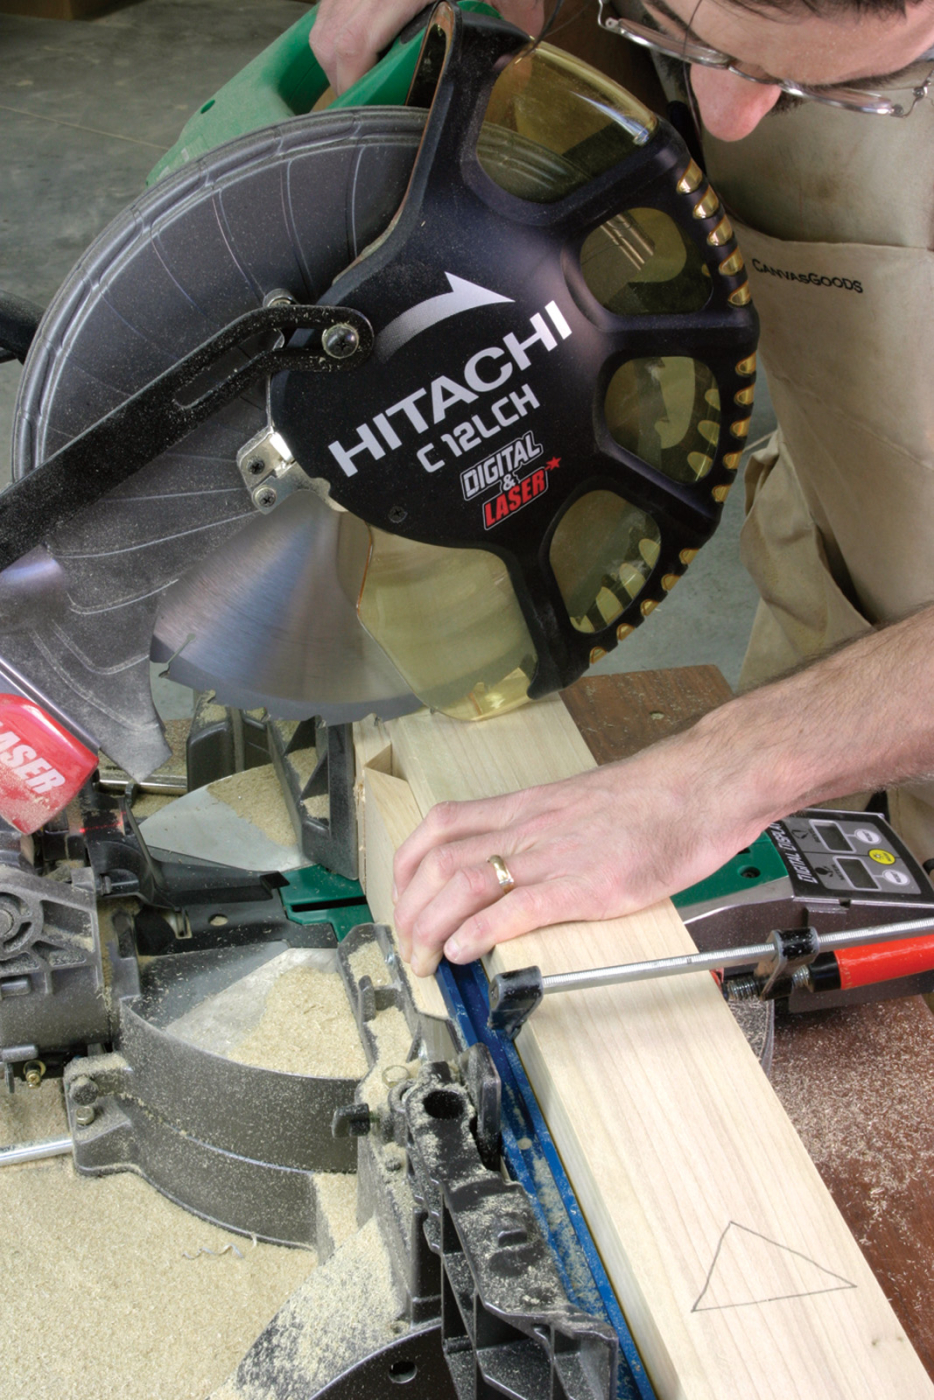
Cutting 85″-long pieces all to the same size is impossible on most table saws. So I gang-cut the pieces on my miter saw. Clamp your mating uprights together and crosscut them simultaneously. This way if they’re a little off, they’ll still match.
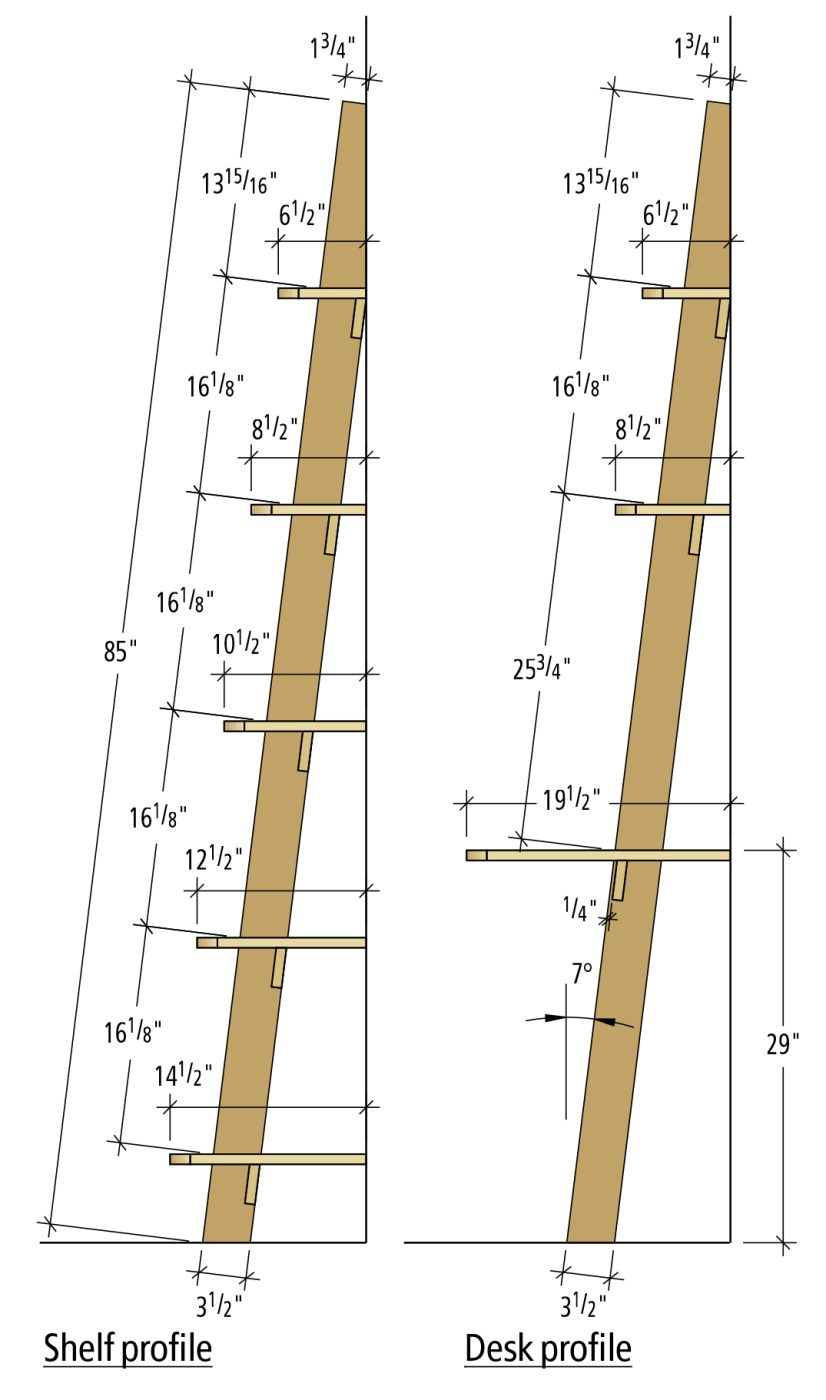
After numerous experiments and revisions, I discovered that these shelves actually are more of an engineering equation than a woodworking project. The leaning angle and the height of the units work together to determine the depth of the shelves. Getting these factors to work together to produce sensible shelving is trickier than it first appears. So take care if you want to modify this design – small alterations make big differences.
I also sought to squeeze out the maximum amount of shelf space from the minimum amount of material. After additional work in CAD, I squeezed it down to this: To build two shelf units and one desk unit, you’ll need to buy:
• One sheet of 3⁄4” plywood
• Six 8′ 2 x 4s
• 35 linear feet of 1 x 4s
• 70′ of edge tape
For this investment in material, you’ll get 30 linear feet of shelving and a desk – not bad.
Construction is simpler than any bookcase I’ve built. The shelves rest in dados in the uprights. The uprights are prevented from racking by braces that are pocket-screwed into the shelves and uprights. There’s no back, no top and no bottom.
It was so simple, in fact, that I decided to add some visual interest by cutting curves on the braces and front edges of the shelves.
Begin Construction
 I always like to begin a project that uses plywood by first breaking the 4′ x 8′ sheets into smaller sizes – plywood takes up a lot of room in small shops.
Using the cutting diagram below you first want to crosscut the full sheet into three equal-sized pieces that are 31 3⁄4” long. These are a bit oversized so you can trim them down on your saw and remove the factory edges from the plywood. Then you can easily rip the shelves to their finished widths using the diagram as a guide.
 Now you need to work on the uprights. Dress your stock as true as possible and then cut it to its finished length.
Now lay out the locations of all the dados on the uprights. Because these dados are cut at a 7° angle I recommend you mark out every joint to avoid a blunder.
Now you should make a few test dados in a scrap piece to find the best bit for the job. Plywood varies in thickness from sheet to sheet. And straight bits designed for plywood come in slightly different diameters, too. Your best bet is to mill a 3⁄4” x 3⁄4” dado in a scrap and see how the plywood shelves fit into it.
Different Diagonal Dados
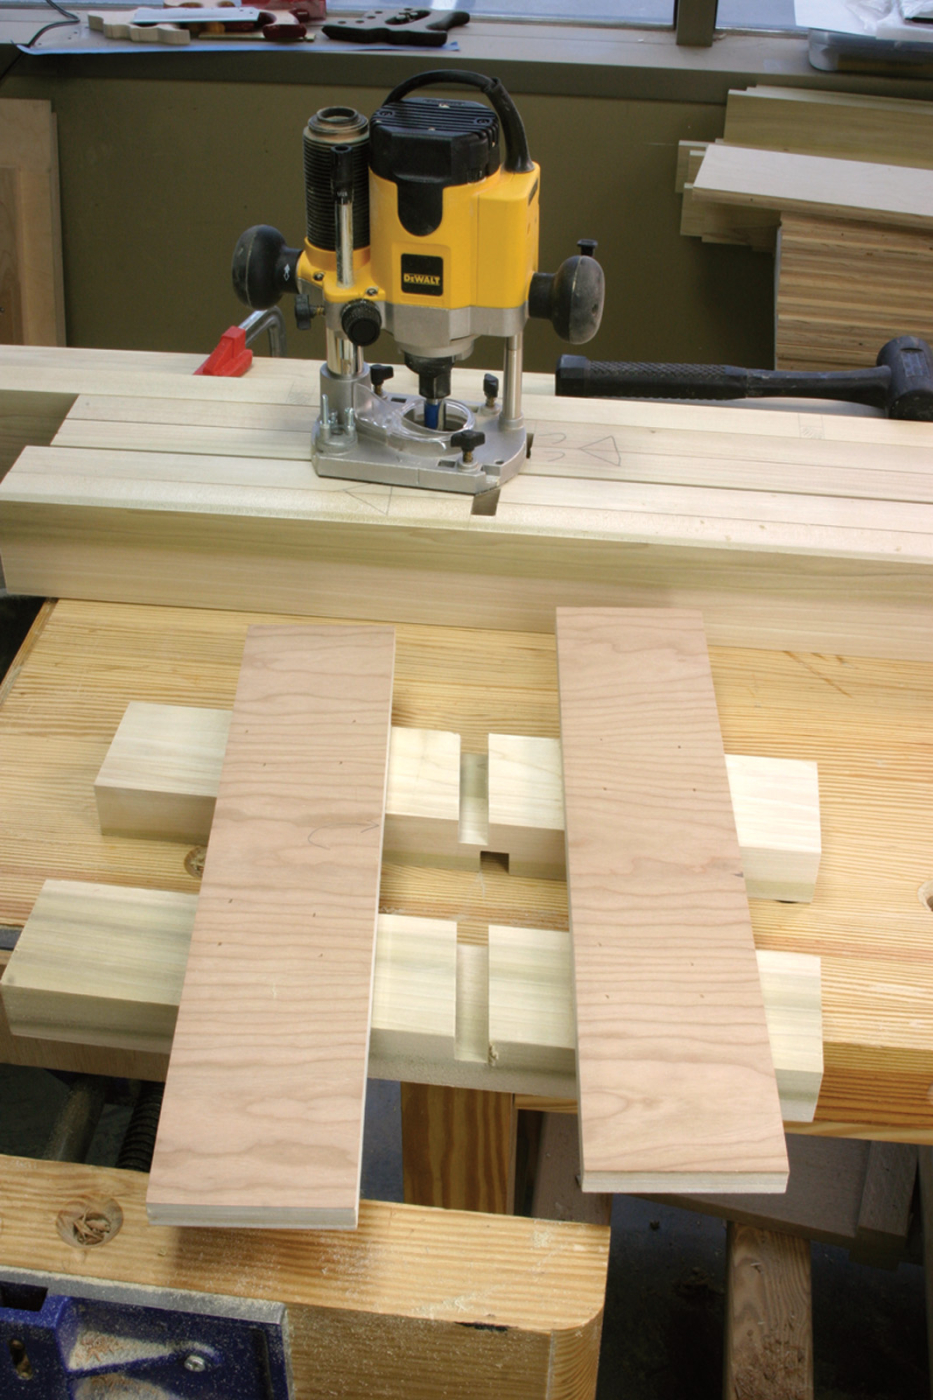
To build a dado jig, draw a 7° angle on your scrap and then build the jig around that line and your router’s baseplate using scraps, glue and nails.
You need to make two router jigs to cut the angled dados in the uprights – one for the left-hand uprights and one for the right-hand. I know that it seems like you should be able to make just one jig and flip it around, but the geometry doesn’t work that way.
I like dado jigs that capture the router’s base on both sides. This ensures the router won’t wander, and it allows me to make the occasional climb cut without the tool jerking severely.
Also note that a router with flat edges on its base will make your dado locations more accurate. With some round-base routers, the bit isn’t always in the dead center of the baseplate.
Clamp the jig to an upright and your workbench, and rout all the dados – I like to use three passes (increasing depth) to keep from taxing the router or the bit.
Matching Angles
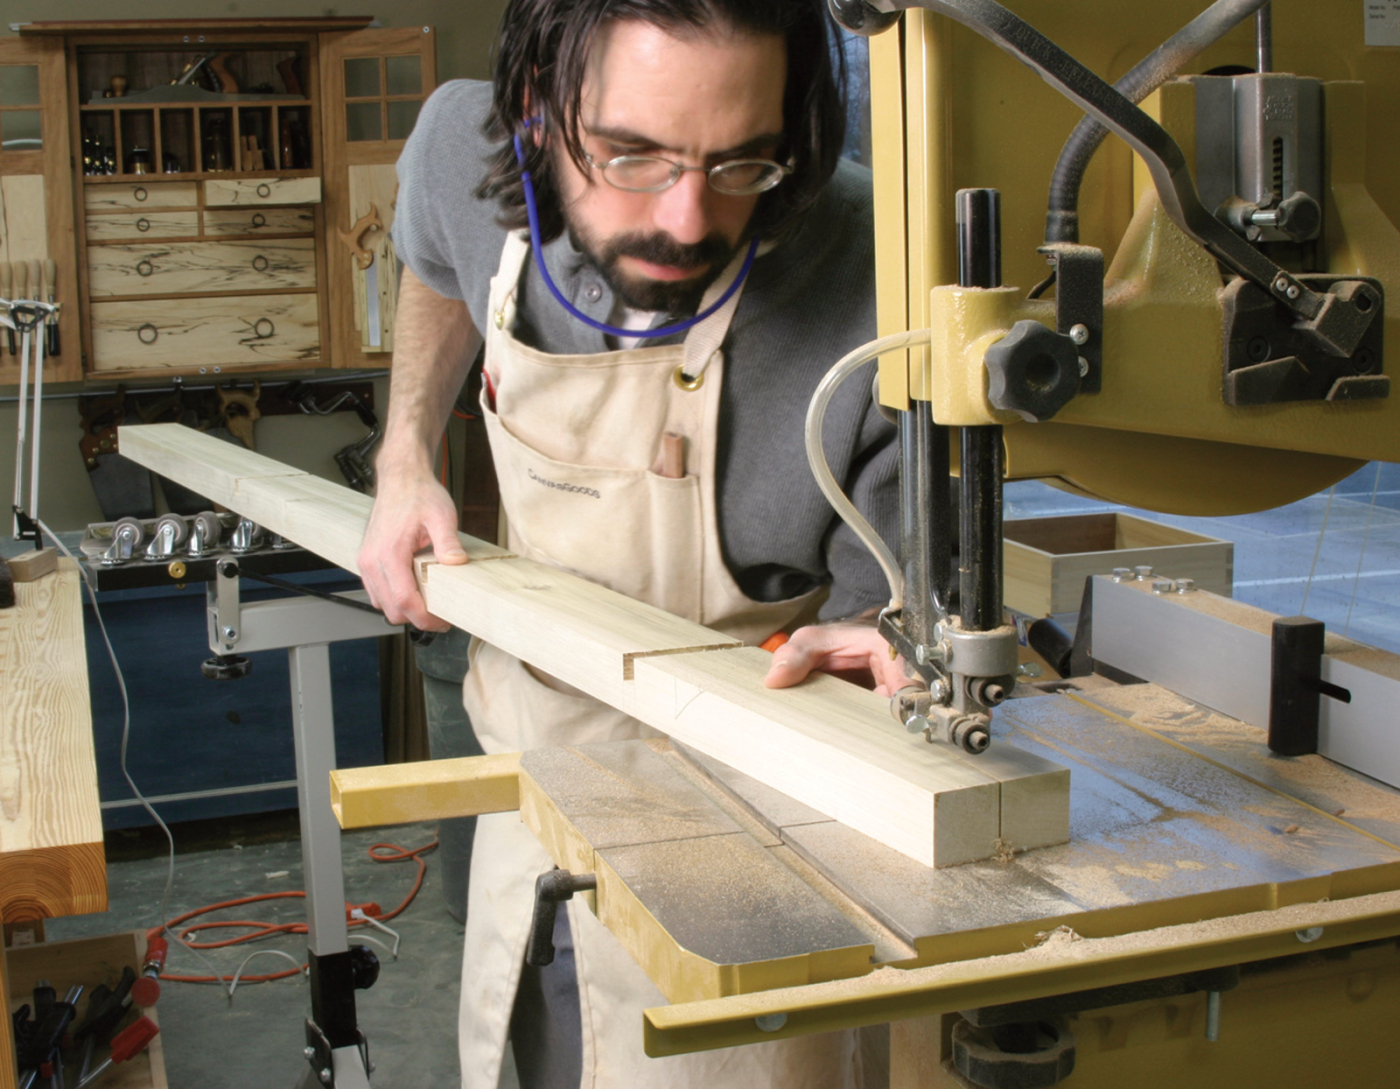
I’m sure that some of you will figure out a way to do this on the table saw, but the band saw is far quicker for me. A roller stand holds the bottom end up while I make the cut at the top end.
With the dados routed, you can now cut the angles that allow the shelves to tip back against your wall. Set your miter saw to make a 7° miter. Clamp two mating uprights together and trim the feet simultaneously.
Now you need to cut the long miter on the top of the uprights. The best way to do this is mark your cut line, cut it close on the band saw and clean up the cut with a hand plane.
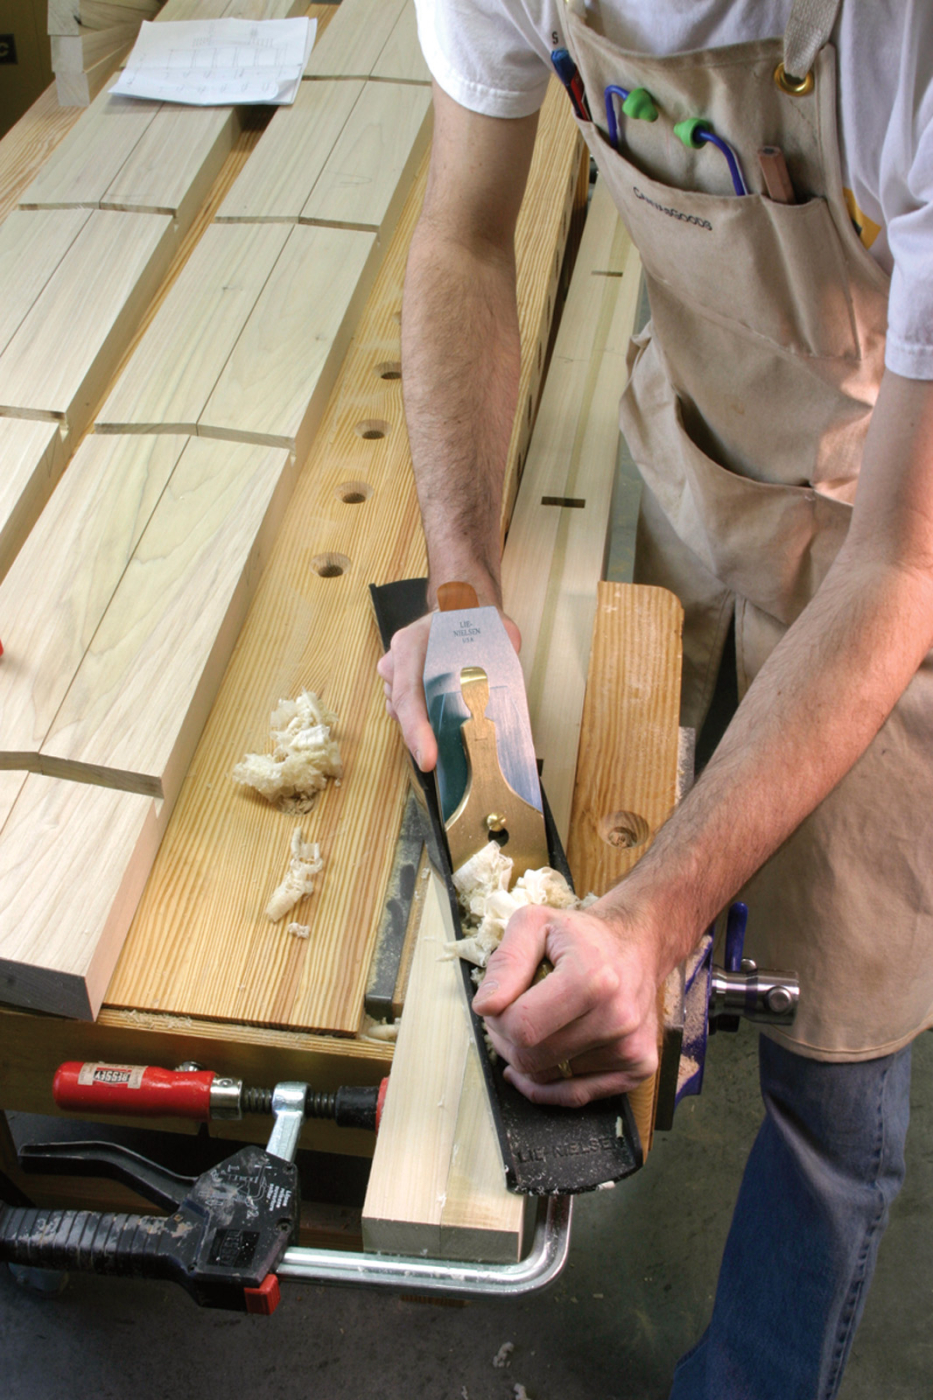
With the angle cut, clamp two mating uprights together and plane down to your line. The longer the plane the straighter your surface will be.
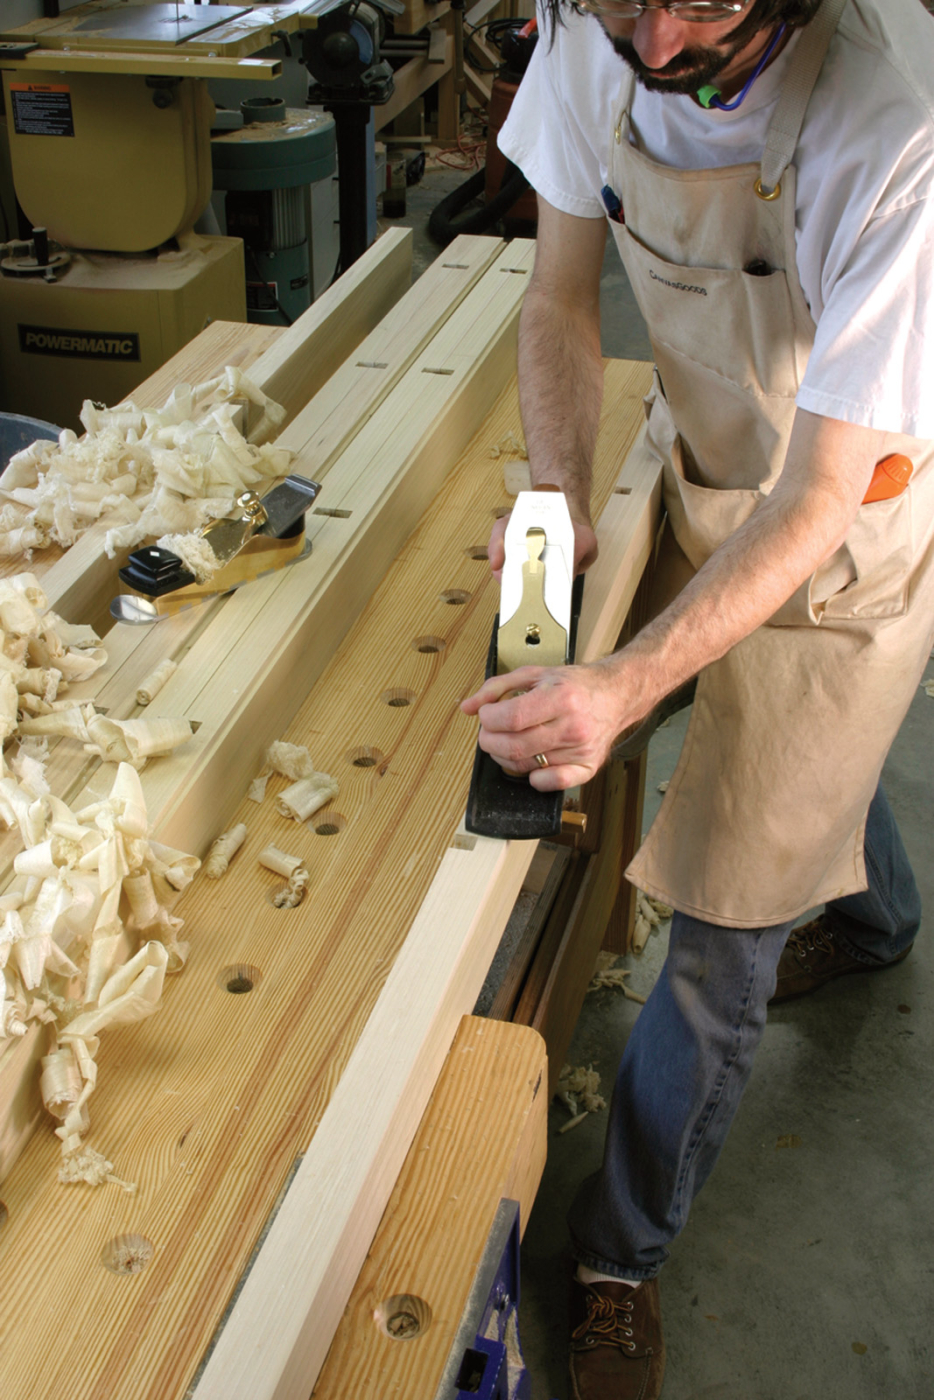
I used poplar for my uprights, which is easy to plane. After removing any bow with my jointer plane, a pass or two with a smoothing plane is all this forgiving wood needs to be ready to finish.
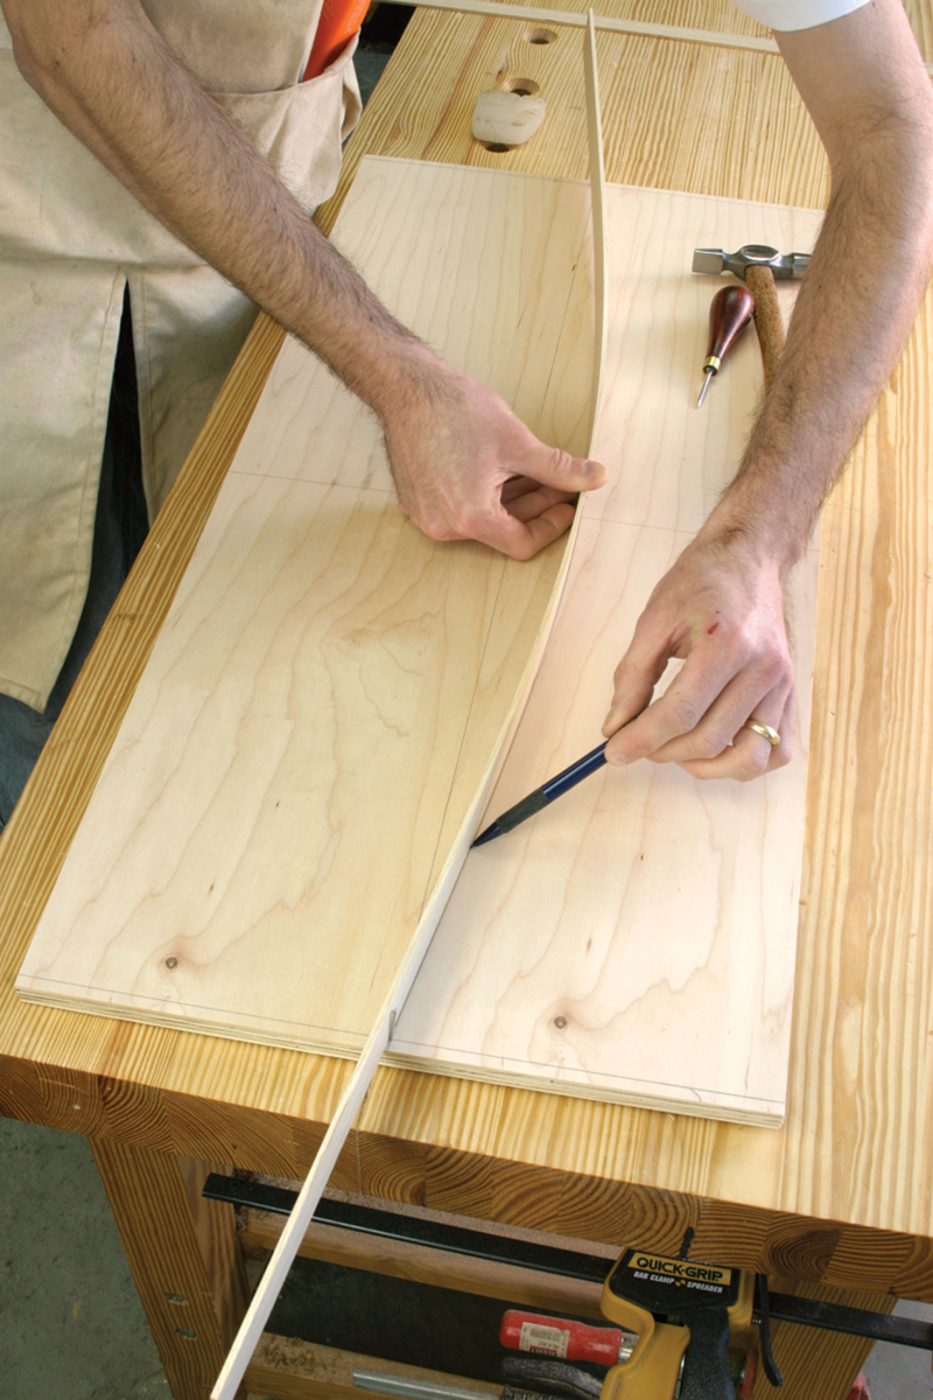
Marking out this angle looks like a challenge, but we have made it easy for you. At the top of the upright, make a mark halfway across the width of the upright at 1 3⁄4“. Now make a second mark. This one should be where the bottom edge of the top shelf hits the back edge of the upright. Join those two marks with a line.
Finish up your work on the uprights by routing a 1⁄4” x 1⁄4” rabbet on the outside corner of each upright – this adds a shadow line and gives you a bit of forgiveness when lining these units up against your wall. Now sand or plane your uprights to prepare them for finishing.
Shelves and Braces

With the 7° bevel cut on one edge of a brace, check it against an upright. You’ve hit the right angle when the brace fits in perfectly where the dado meets the back edge of the upright.
Because the braces need to fit tightly between the uprights, I cut them each about 1⁄2” longer than necessary at first and trim them to fit the assembled unit.
The first step on the braces is to cut a 7° bevel on one long edge of each part. To accomplish this, I beveled the blade of my table saw to 7° and ripped one long edge of a spare brace. I then placed it up against an upright to make sure the geometry worked.
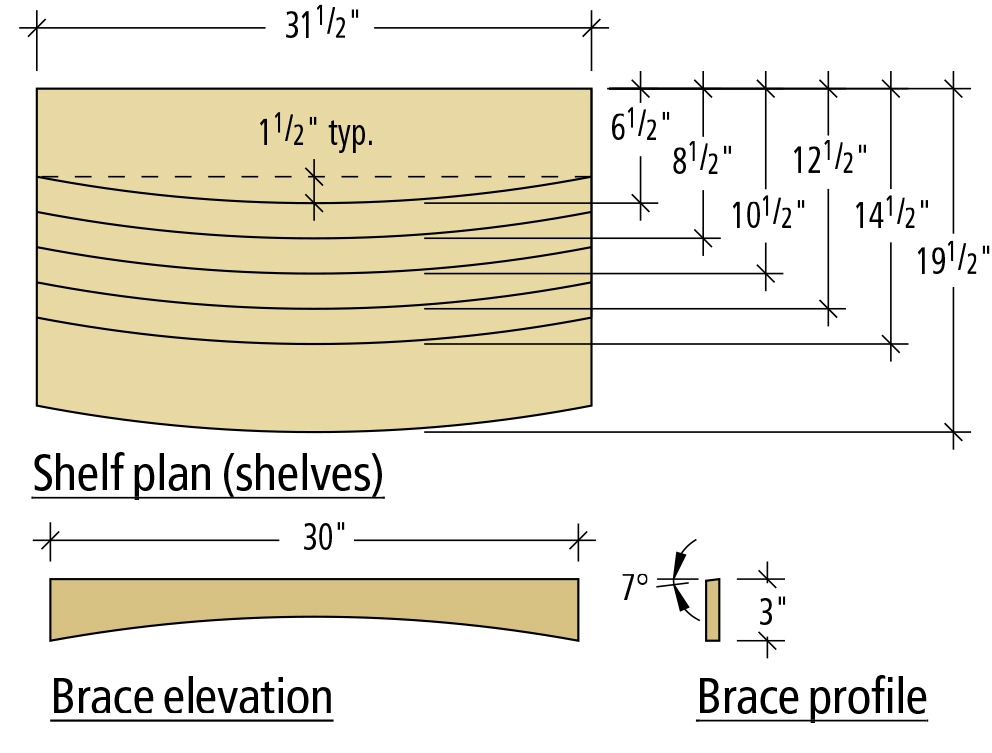
If you’re going to add a curve to your braces and shelves, you should make two routing templates to ensure the curves are consistent – one template is for the shelves and the other template is for the braces.
I make both templates from one piece of plywood because the curves are the same radius – one is an inside curve and the other is an outside curve.
To make the two templates, bend a flexible scrap between two nails as shown. Bend the scrap 11⁄2″, hold it in place and trace a line on both sides of the scrap. Now you’ve marked lines for both the inside and outside curves. Band saw between these lines and clean up the sawn edge of the two templates.
Once you’ve created the two curved templates, I recommend you nail some scraps to the template that will position your braces and shelves exactly where you want them on the template for routing. This will save you time.
Before you break out the router, however, use the templates to mark the curves on your braces and shelves, and then cut close to this line using your band saw.
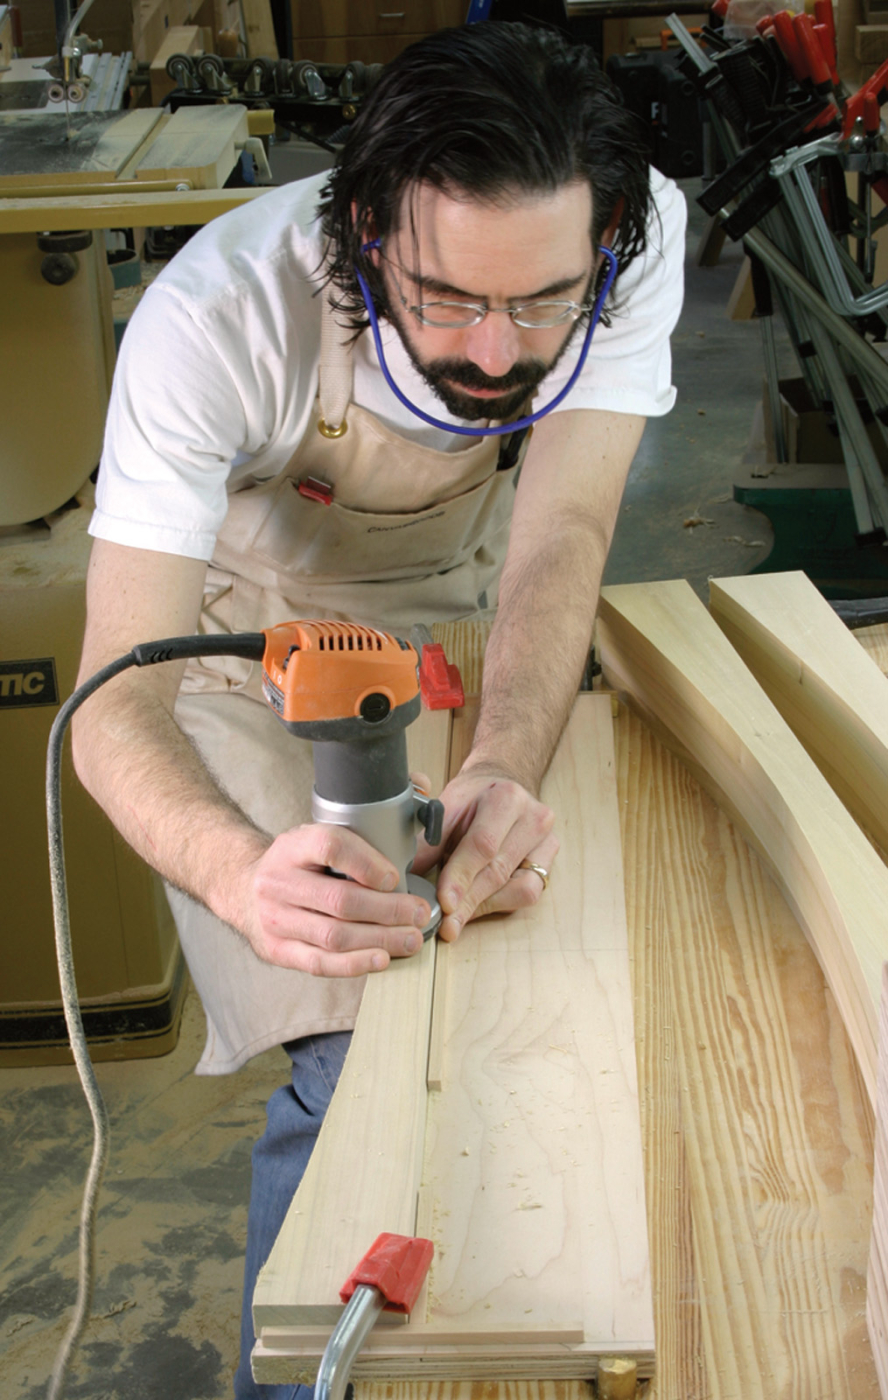
When routing the braces, you might have to climb cut some sections because the grain is likely to reverse on you in the curve. If you take a light cut and hold the tool securely, this is a generally safe operation. But do take care.
Then rout the curve on the braces and shelves using a pattern-cutting router bit. Now you want to add edge tape to the front and sides of the plywood shelves. I quite like the Fastedge edgebanding from FastCap. It’s peel-and-stick stuff, which makes it especially suited for curves. And it’s available in a wide variety of sizes, lengths and species.
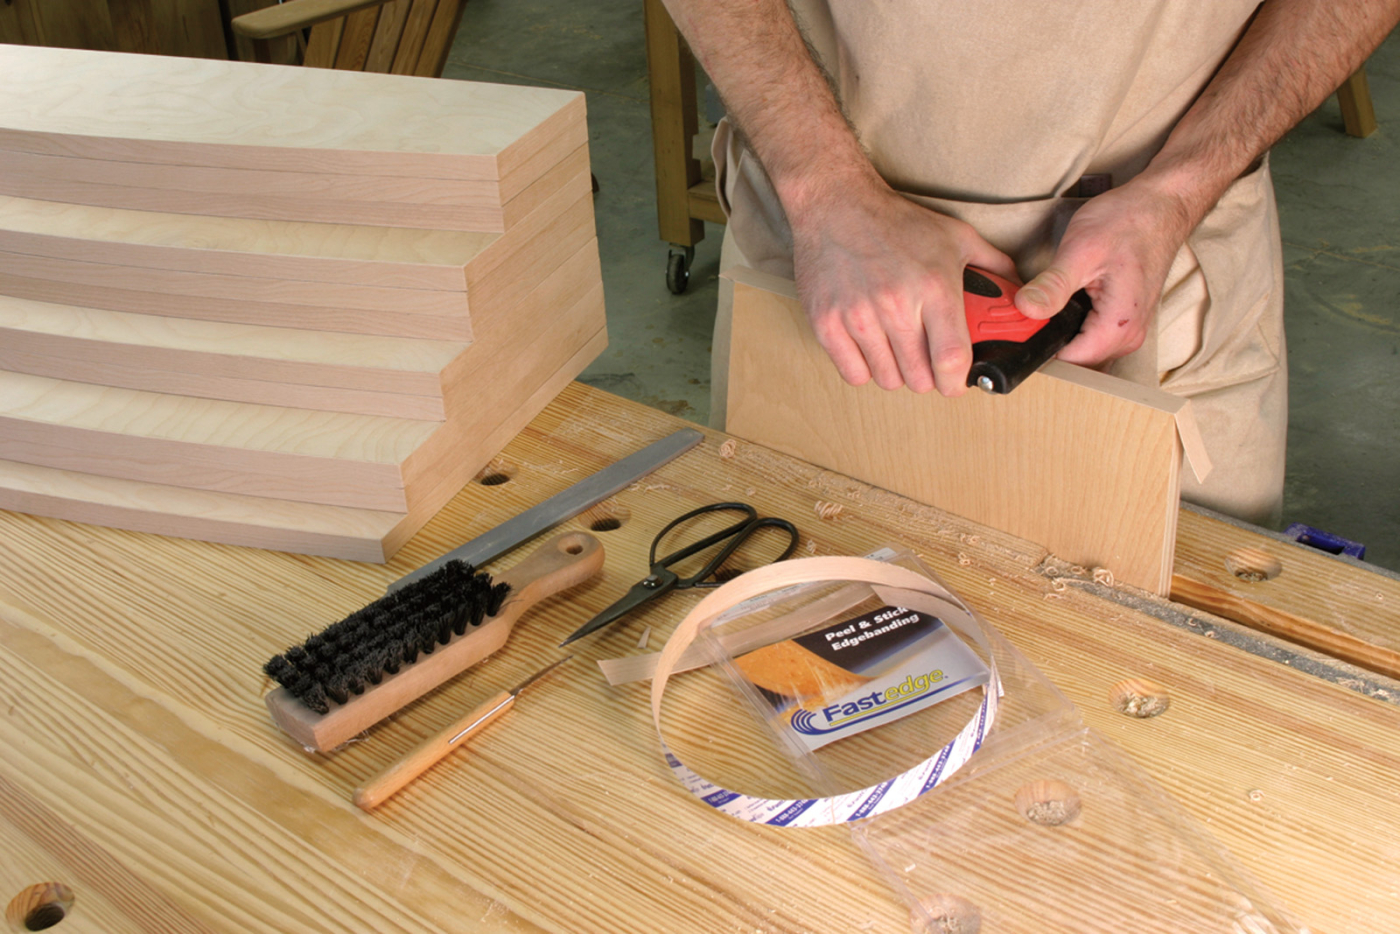
Iron-on edgebanding is a pain on outside curves (it’s even worse on inside curves). The peel-and-stick tape shown here from FastCap cut my edgebanding time for this job in half. I was impressed.
Odd Assembly
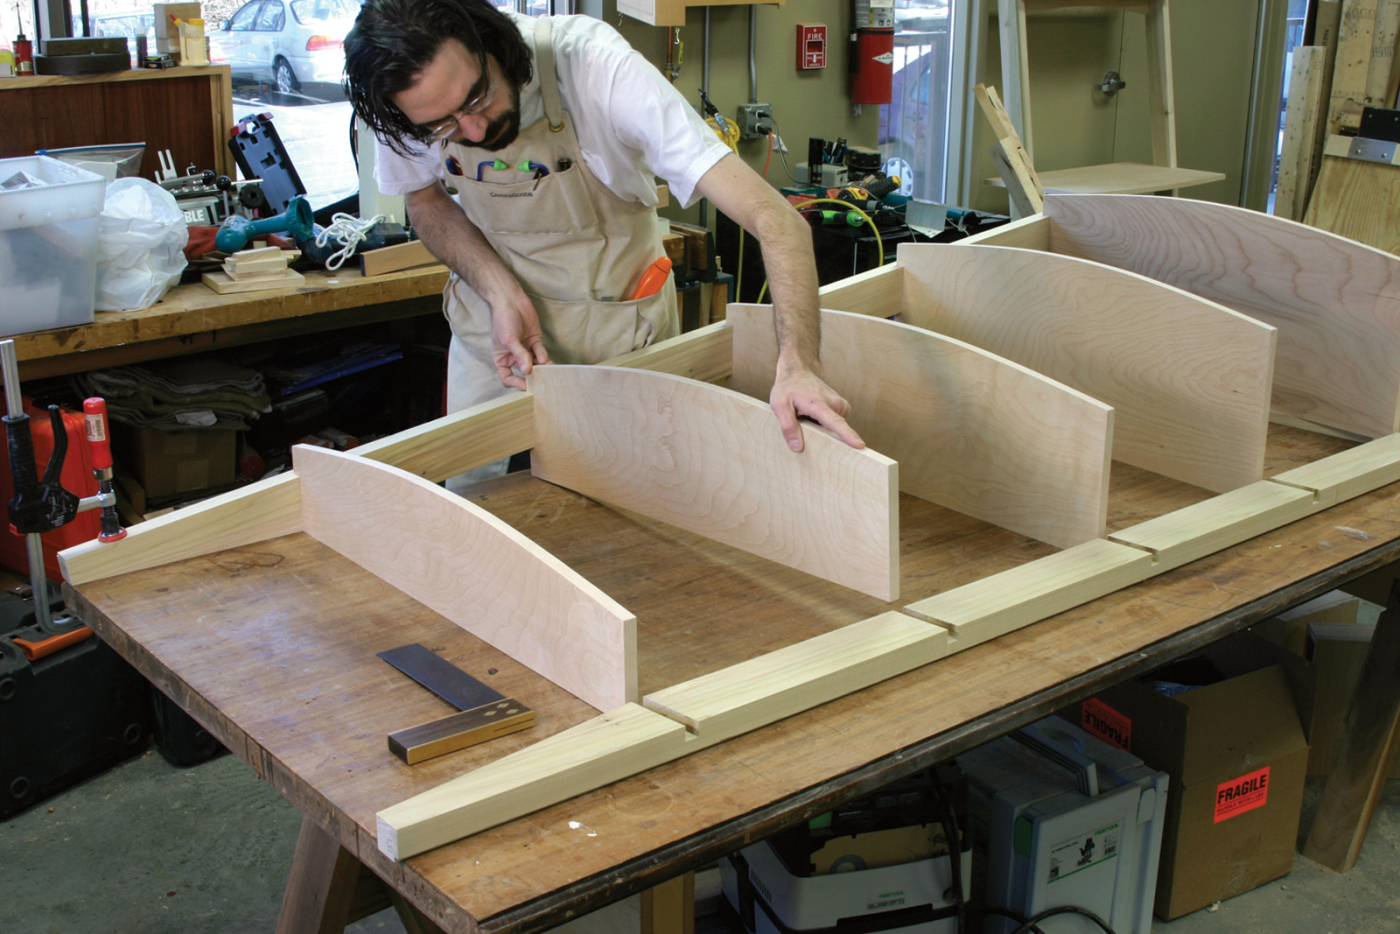
To fit the braces, you should assemble each unit, clamp them up and then trim the braces to fit snugly between the uprights.
Assembling this project was a head-scratcher at first. The best method was to clamp the top of one upright to my bench with its foot stuck in the air. I then inserted the shelves into their dados and added the second upright.
Once you get the unit to this point, you can put a couple clamps on it, and adjust the shelves and uprights so everything is where it is supposed to be and is square.
Now fit the braces between the uprights by trimming them to length on your miter saw. With all the braces fit, drill pocket-screw holes on the back of each brace.
Once you get all the shelves where you want them, mark where the uprights intersect the shelves on the underside of each shelf. This will help you reassemble each unit.
I put two screws into each upright and three into each shelf. This created an assembled unit that resisted racking and could endure some heavy books.
Screw everything together and then mark on the backside the location of each part so you can easily reassemble after finishing.
Get your shelves and braces ready to finish by sanding or hand planing them. (Yup – I plane plywood all the time.) Break all the edges with sandpaper.
To finish the shelves, I first painted the uprights and braces with a black paint – two coats did the trick. Then I sprayed on a semi-gloss lacquer topcoat and sanded between coats.
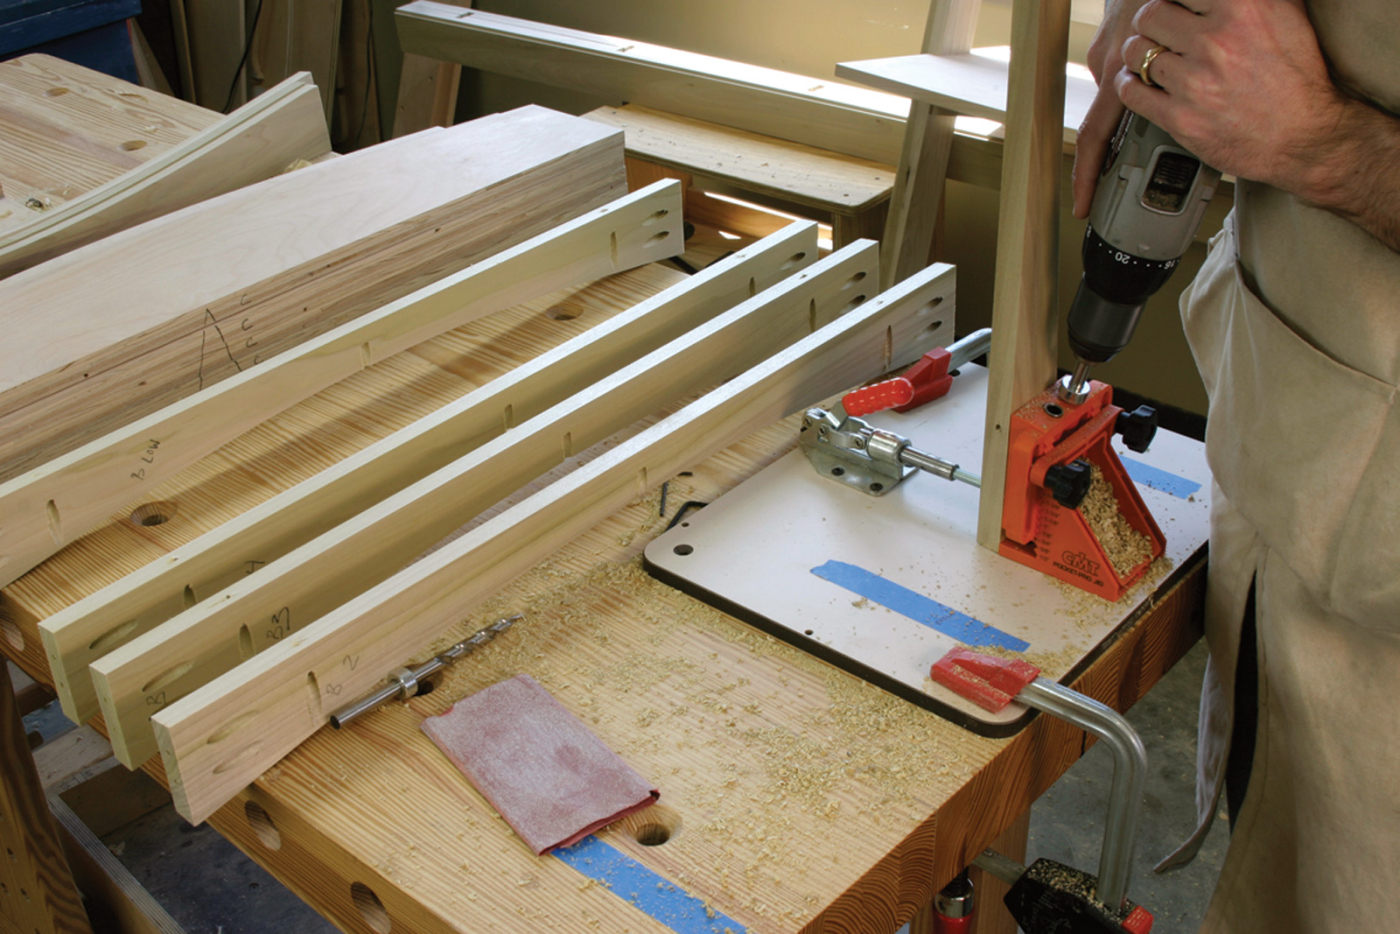
This project is where pocket screws really shine. Whenever you’re working at an odd angle or near edges like this, a pocket screw can be your best bet. The other reason I chose them is because I wanted to finish the parts separately and assemble the project on-site.
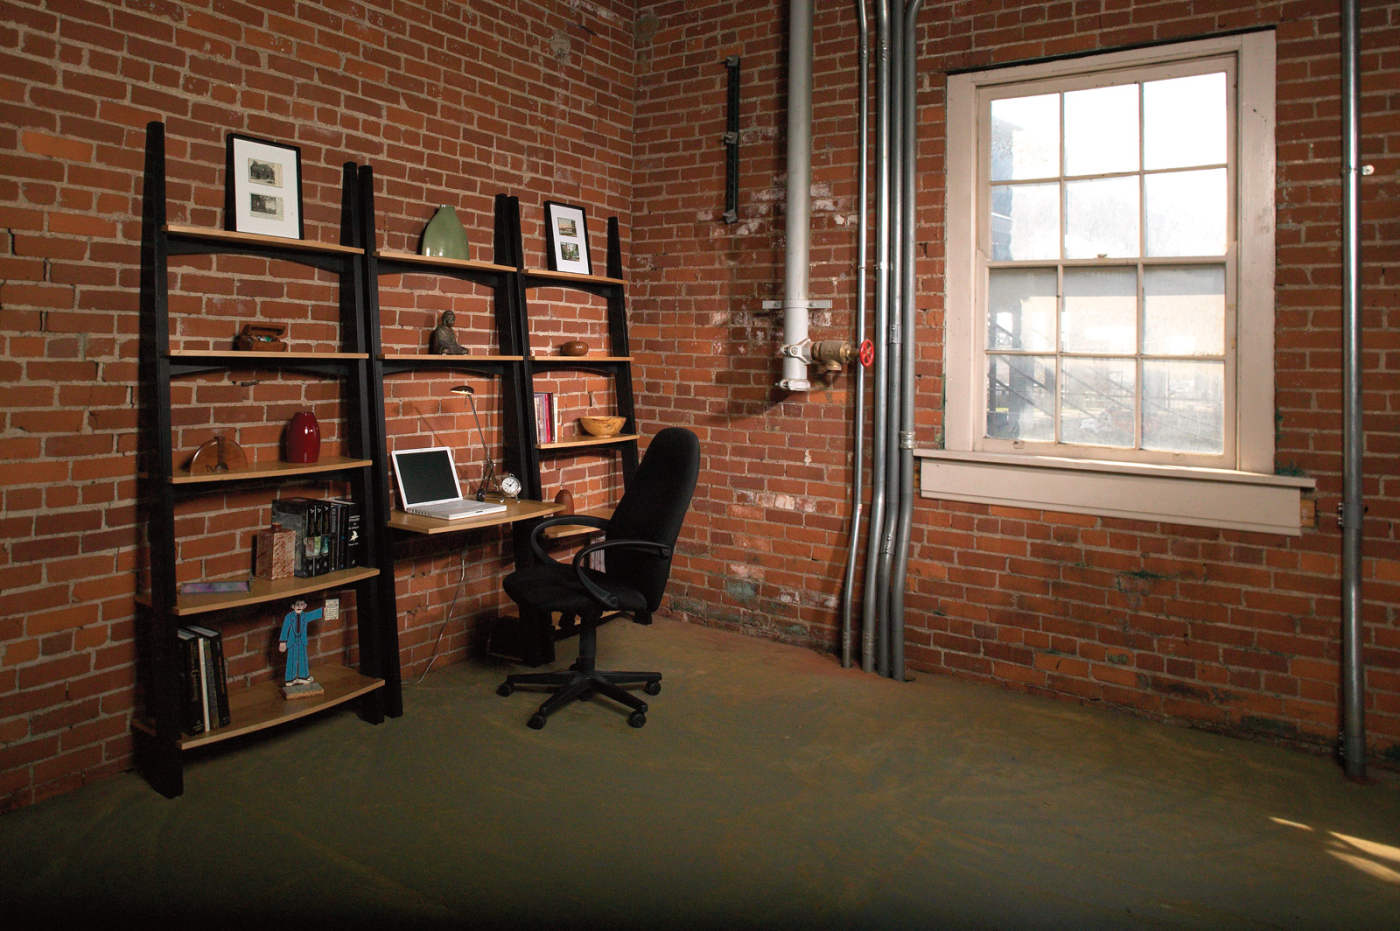
To ensure the shelves stayed in place on hardwood floors I screwed a couple rubber feet to the bottom of each upright. To ensure the desk unit was completely stable, I anchored it to the wall with a #10 screw and a metal “L” bracket.
To be sure, all this effort is more work than driving to the grocery store to buy a commercial unit. But I take comfort that these are sturdy enough to last a good long time. I wouldn’t be too surprised to run into that same lady in the middle of the night as I’m buying doughnuts and she’s buying a shelving unit to replace the first one that got too wobbly.
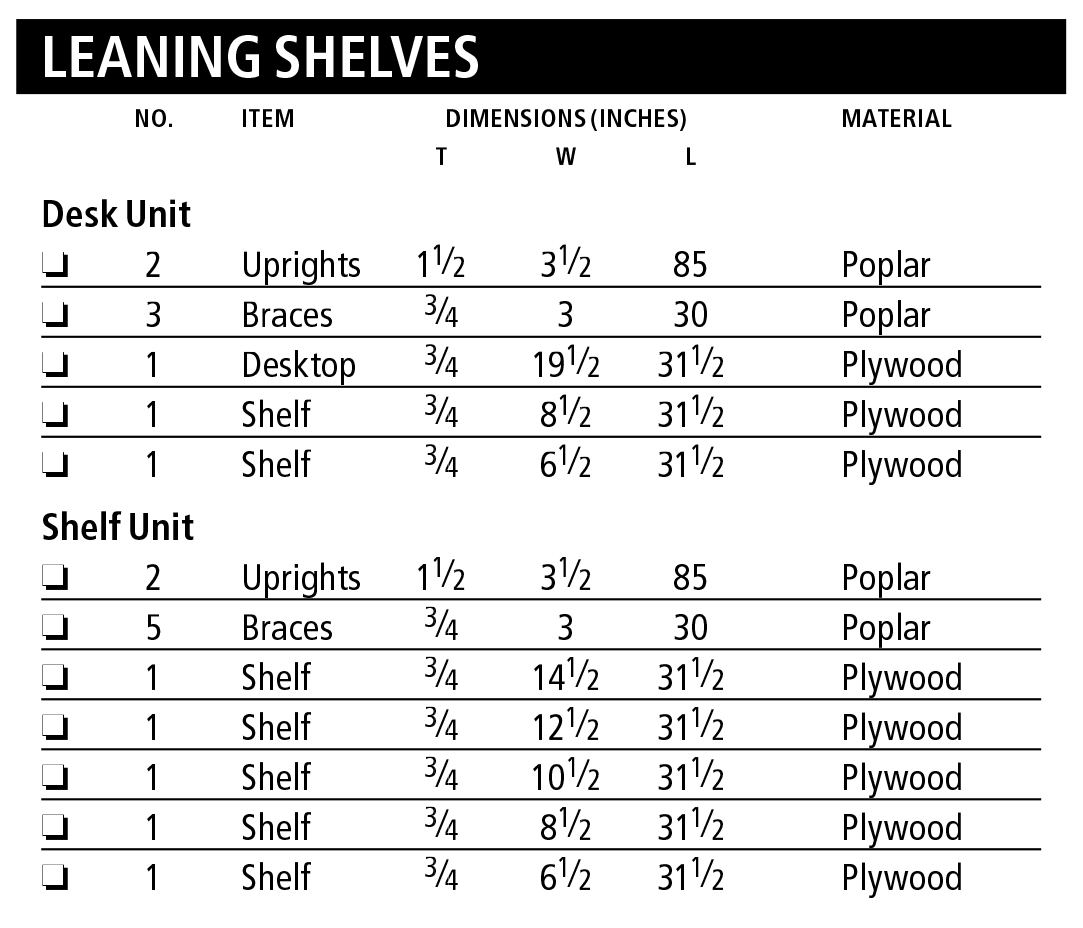
Leaning Shelves Cut List
Here are some supplies and tools we find essential in our everyday work around the shop. We may receive a commission from sales referred by our links; however, we have carefully selected these products for their usefulness and quality.