We may receive a commission when you use our affiliate links. However, this does not impact our recommendations.
Discover how and why this age-old hide glue technique works – and works best.
One of the great hurdles for many woodworkers new to traditional craftsmanship is applying veneers to a wooden substrate. This becomes even more problematic when the task involves something more than laying down a single piece of veneer, or at least something beyond several parallel pieces of veneer, onto a perfectly flat substrate.
Often an expert might recommend some overly complex approaches to the task, involving a tonnage of clamps, vacuum bags or robust presses, all in the employ of holding the veneers in place while the glue sets up. Let the application occur on a curved surface or with a composition in veneer and things can get outlandish.
More creative woodworkers might resort to applying either hide glue or polyvinyl acetate (white or yellow glue) as the adhesive and letting it dry, then using a heated iron to tack things down. These strategies begin to approach the traditional and nearly foolproof technique of hammer veneering.
Many artisans interested in historical craft have tried hammer veneering, and even more have observed it.
Why it Works
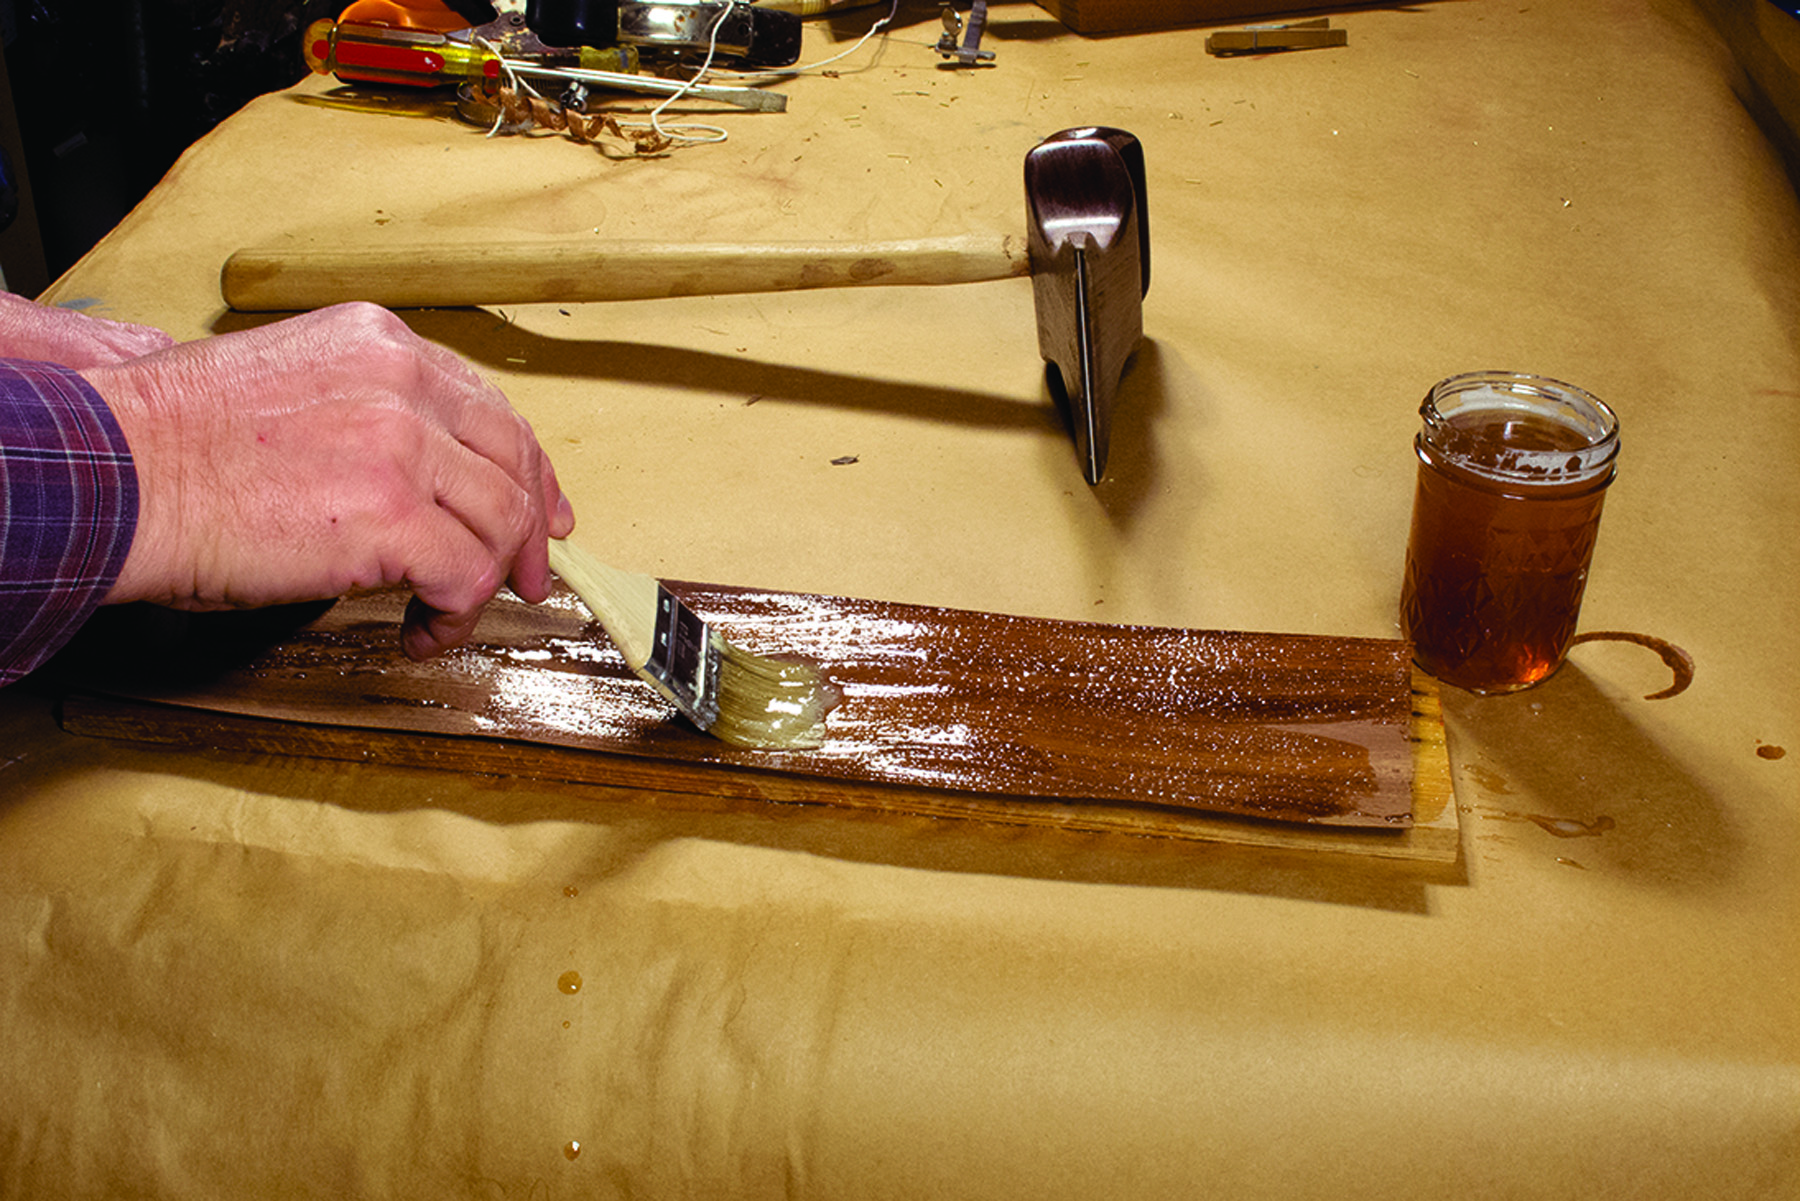
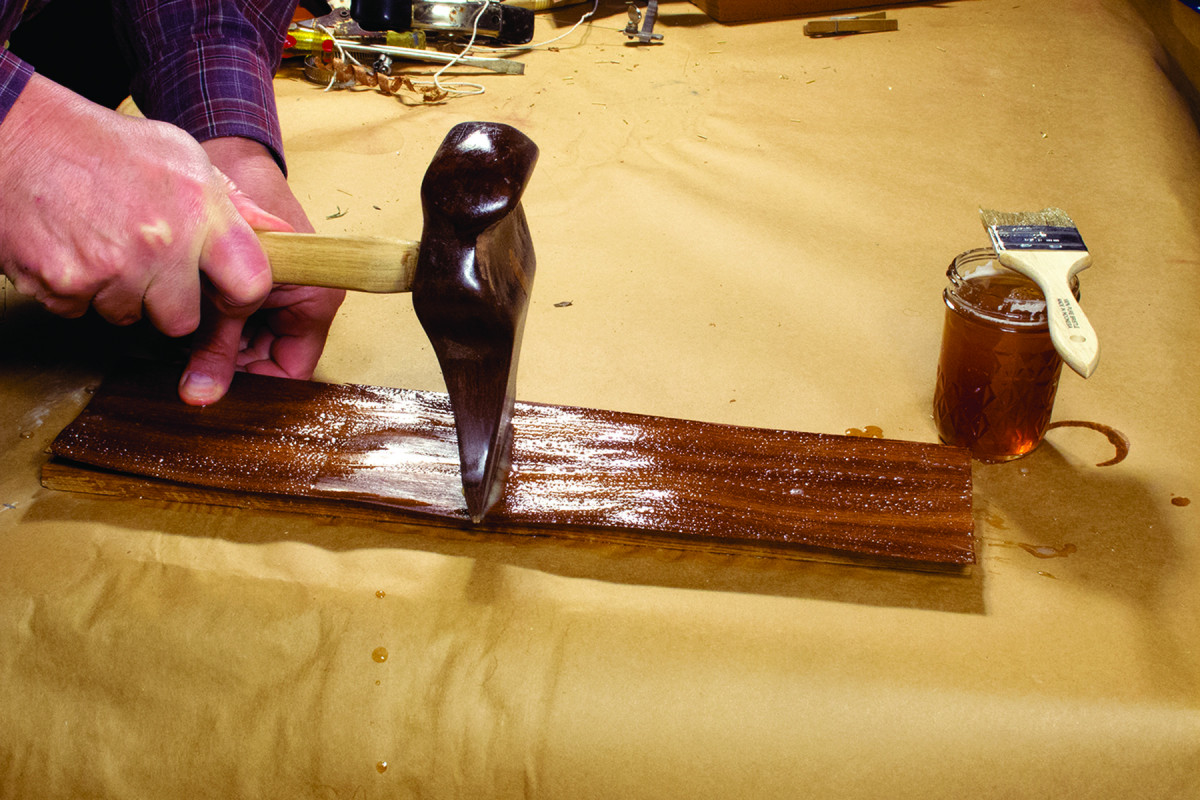
Slather it on. By its very nature hammer veneering is a sloppy process. Do not skimp with the application of hot hide glue on either the substrate or the veneer; if you do, the glue will chill and gel too quickly, placing the success of the process in doubt.
Without going into a recitation of the process, nor an exhaustive troubleshooting discourse (hint: The two biggest problems are not preparing the substrate or veneer well enough, and using the glue when its viscosity is too high), some fundamentals about the materials science involved might be useful. The question that keeps coming up is a simple one, which fortunately has a pretty simple answer: Why does hammer veneering work?
The answer lies in the nature of the hot hide glue used as the adhesive. More properly, it lies in the processes by which the hot liquid adhesive becomes a rigid, strong glue layer.
Hot hide glue is generally a variety of bovine proteins dissolved in water. Protein solutions such as this undergo a non-intuitive process when going from liquid to solid. When the temperature of the hot hide glue diminishes, at a given point of cooling, the solution no longer remains liquid even if no drying has occurred through evaporation. That temperature is known as the “gel point” where the solution turns into, well, a gel. (The exact numerical value of the temperature where this occurs depends on a number of things, most importantly the gram weight strength and concentration of the glue.) At a craft level this is when the glue “sets.” But that is only one half of the equation.
Instant bond. Done properly with well-prepared surfaces and glue, a fine-tipped veneer hammer squeezes out and gently scrapes off the excess glue from the face of the veneer, leaving some gelled glue in the grain as a filler, and rendering a nearly instant bond.
At the gel point, the glue becomes solid, or at least non-liquid, but it has virtually no cohesion (stick together-ness) nor gluing adhesion (stick to-each-other-ness). But it has enough, and it is pretty sticky (a phenomenon known as “specific adhesion” as opposed to “mechanical adhesion,” which relies on the interlocking of the components).
The full hardening of the glue comes only as the water evaporates, leaving behind a thin, epoxy-strong layer of adhesive. To reach this point, all the excess water that was used to soak the glue during its preparation must evaporate for the glue layer to reach a moisture content that’s at equilibrium with its environment.
One of the quickest ways to provoke the cooling of any molten material is to reduce the cross section of its mass. In other words, make it thinner so it can disperse its heat more quickly into the surrounding material.
That is precisely what the hammer veneering technique accomplishes – cooling the molten hide glue to the ambient temperature (below the gel point).
Apply Force
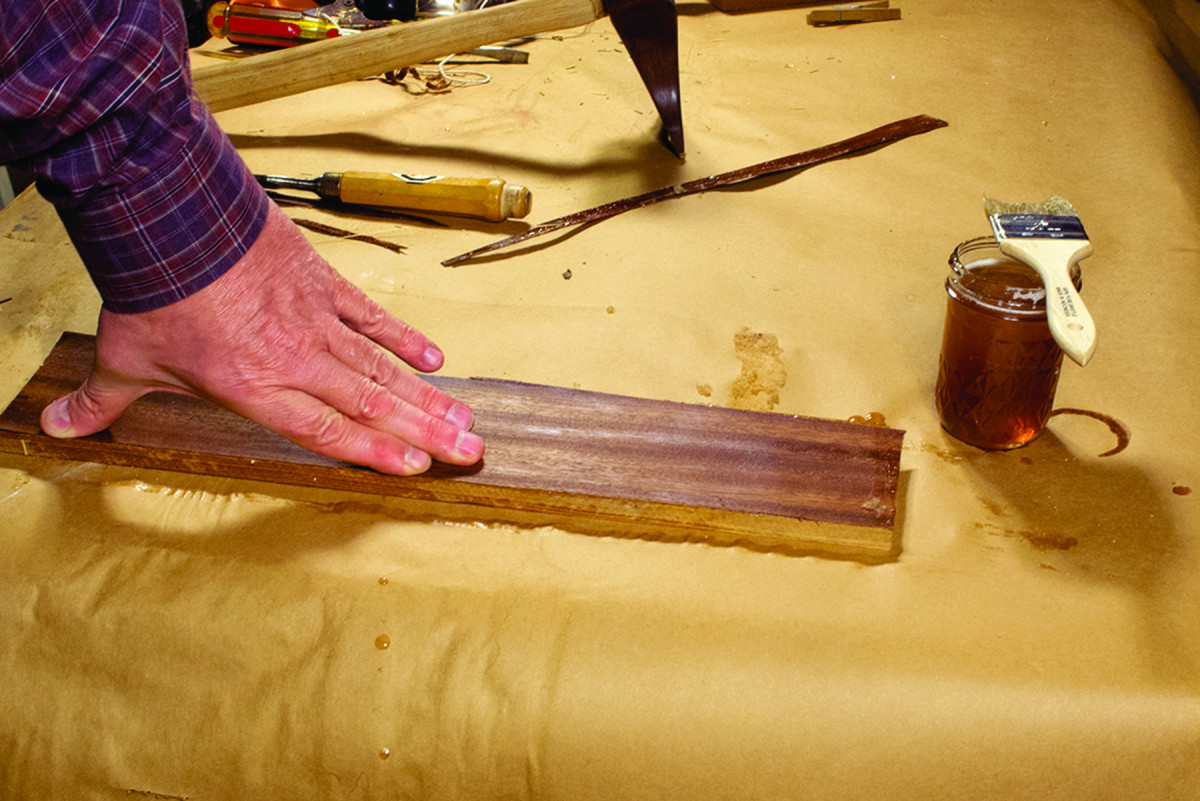
Check the results. Testing the surface after the process will tell you immediately if you were successful. Either gently tap with your fingernails or press with your fingertips to determine if the bond is tight over the whole surface. If it is not, either re-warm the area and place a sand bag on it or peel the veneer back off (the glue is still very soft at this point) and start all over.
In hammer veneering the critical process involves quickly slathering on a comparatively thick layer of molten glue to the underside of the veneer and to the top side of the substrate, placing the two in contact with each other, and “laying down” the veneer by pressing the cross peen of the hammer over the surface with considerable force. (Some “back of the envelope” calculations indicate that when I hammer veneer, the downward force of the hammer edge approaches 500 pounds per square inch.)
The hammer acts like a squeegee, forcing out the excess molten glue. The nearly immediate effect is to reduce the cross-section of the molten mass, causing the room temperature to cool it in a fraction of a second and induce almost immediate gel formation.
While the remaining glue layer is not yet very strong, it is strong enough to hold everything in place, even if the substrate is curved. Remember, at this point the glue is neither liquid nor fully solid; it is a sticky gel. The good news is that it will become increasingly hard and strong in a relatively short time as the moisture departs the system. Less good is that the glue layer remains water-sensitive, even once fully dried.
Improve the Glue
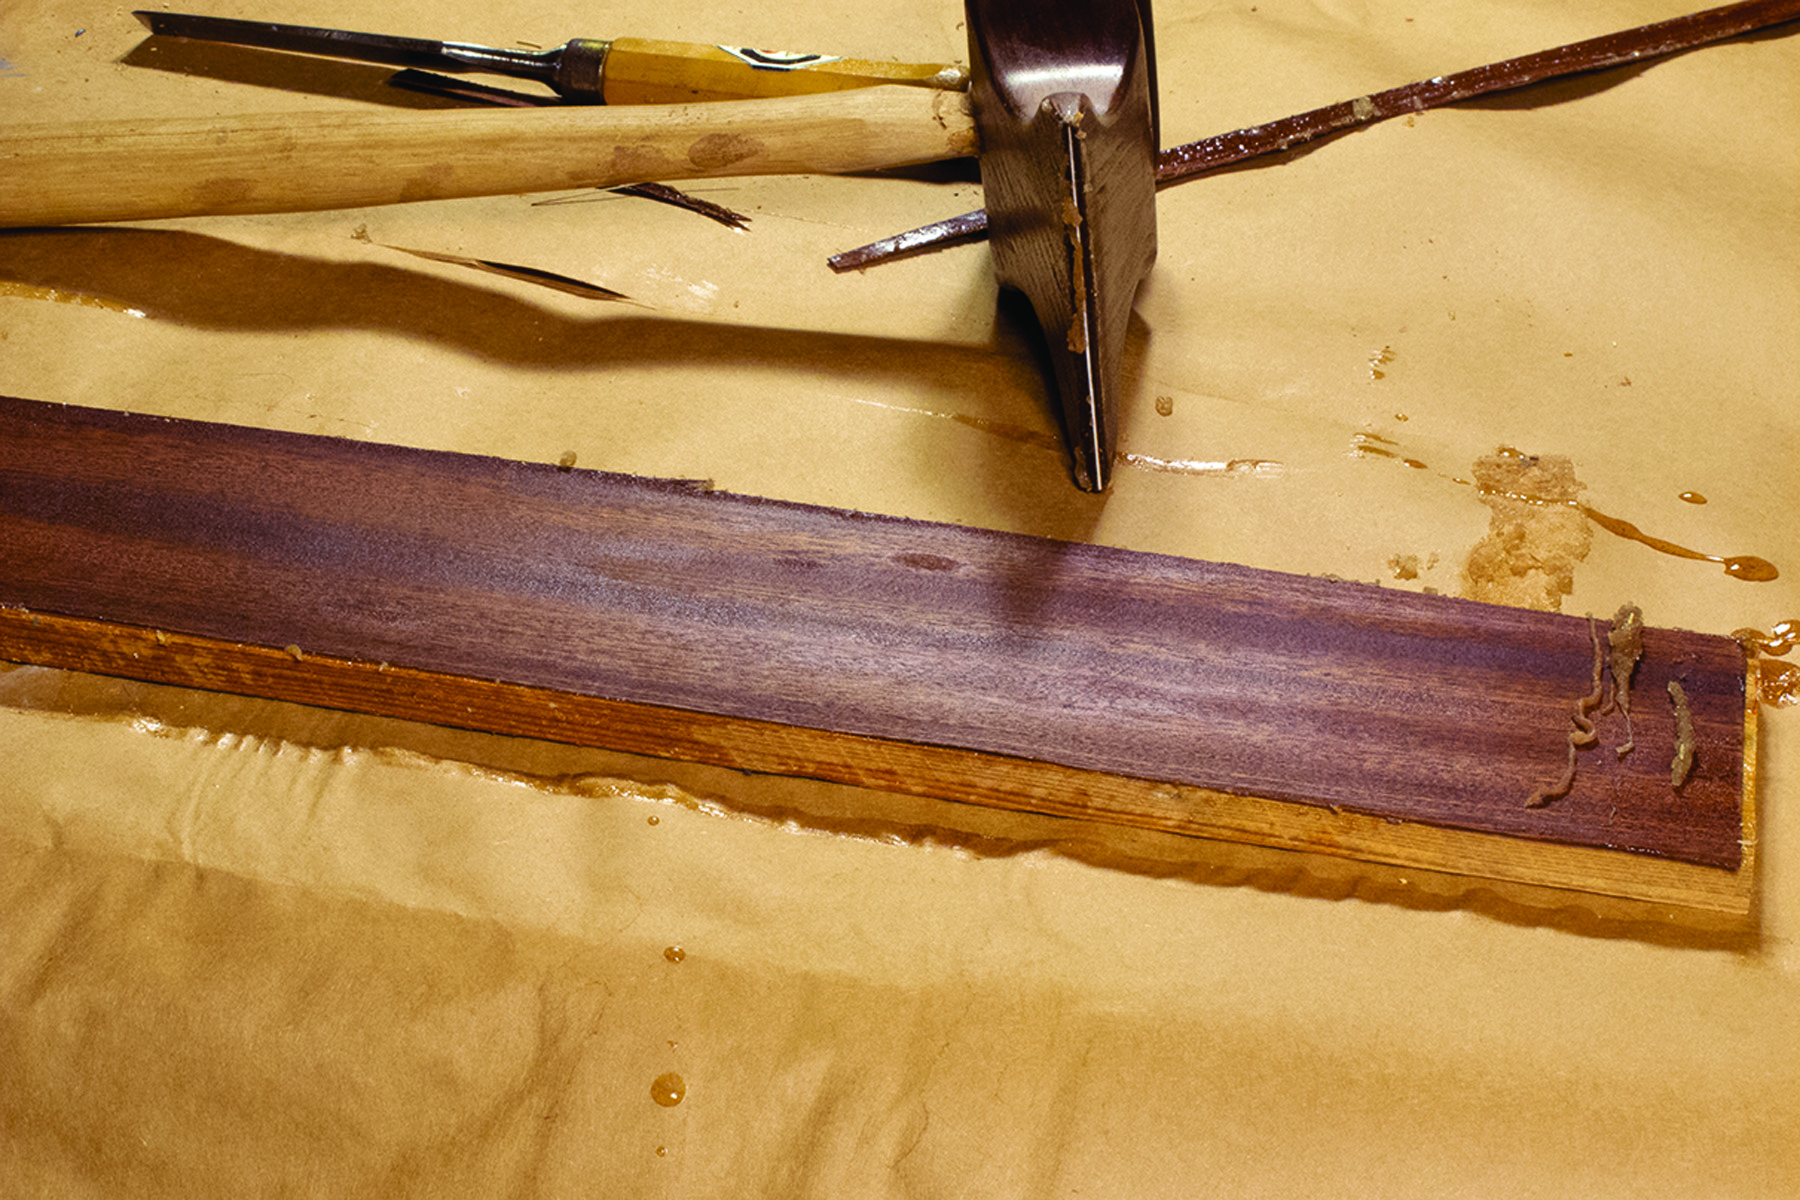
Quick & easy. Only seconds after beginning, the result is a section of veneer firmly adhered to the substrate. This took less than 45 seconds from first application of glue to this point. As a precaution, I usually place sand bags on the uncured veneer/adhesive until the water escapes the system, leaving a hard glue line.
While nearly perfect, this system can be improved by manipulating the ingredients. Adding a little glycerin (about 5 percent) to the hot glue solution increases the specific adhesion (it is “stickier”), making the immediate gel-tack more robust. You can overcome the glue’s vulnerability to moisture through the incorporation of protein cross-linkers to the system.
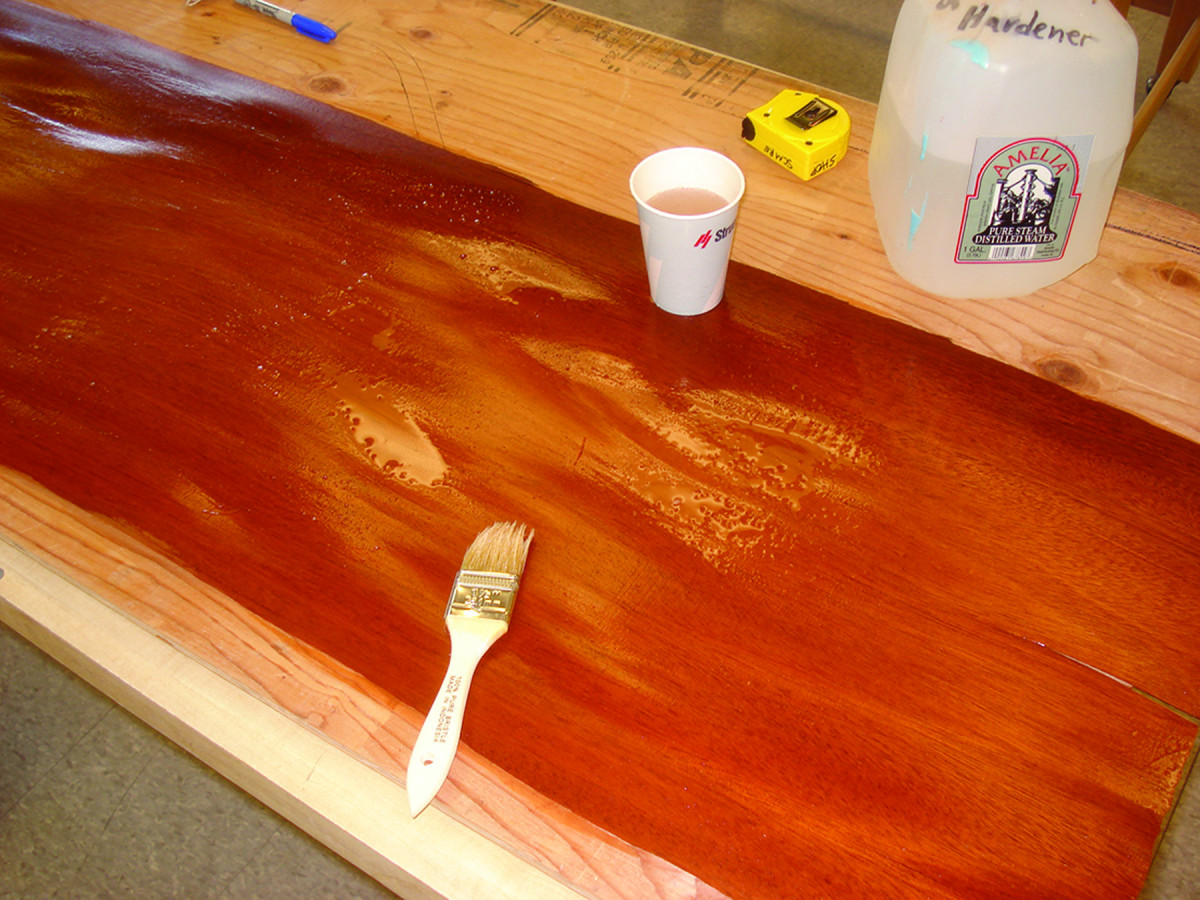
Liquid manipulation. An introduction of protein cross-linkers – a 5-10 percent solution of photographic gelatin hardener brushed onto the dry surfaces – increases the glue’s resistance to moisture.
I accomplish this by brushing a 5 to 10 percent solution of photographic gelatin hardener to both of the dry gluing surfaces then allowing them to dry. This allows the cross-linking agent to leach into the liquid glue when it is applied. Depending on how much of the agent is used, the result can range from a glue layer that is moisture-resistant to one that is impervious to it. In effect, you can accomplish what is – in working and performance effects – an adhesive with the simultaneous benefits of hot hide glue and two-part epoxy. PWM
What Is Gram Weight Strength?
The full answer about gram weight strength (GWS) is both complex and fundamental to understanding and using hide glue, hot or cold. Put simply, GWS is a laboratory measurement of some physical properties of glue, reflecting the average molecular weight of the glue mass, which in turn is determined by the “fraction” of the glue liquor decanted from the rendering tank. It is not an indication of either purity or clarity for the glue. That is a different thing altogether.
As animal hides and sinews are washed in giant tanks to extract their water-soluble proteins, the tanks are periodically drained and the contents processed into masses of dry glue. Much like olive oil, there are different properties for the glue extracted from the decanted liquids depending on how hard the vat is “worked” with heat or pressure. The longest protein chains (highest GWS) come off first, the next longest second. Finally, the lowest are the final “fraction” achieved after cooking extracts the maximum amount of soluble material from the hides and sinews.
In the laboratory these fractions of glue are prepared into blocks of glue jelly by following a specific protocol, then measured as to how stiff they are. The result of that test is recorded as the GWS of that particular batch of glue. This number tells us a great deal about the characteristics of the glue once it is in the glue pot or in the glue joint. I have glue grades ranging from 135 to 500 gram strength on my shelf. These numbers are industry standards achieved by mixing batches of different strengths.
Below is a quick reference chart to help remember how the grades behave (these are general tendencies and can be manipulated once you understand what is going on).
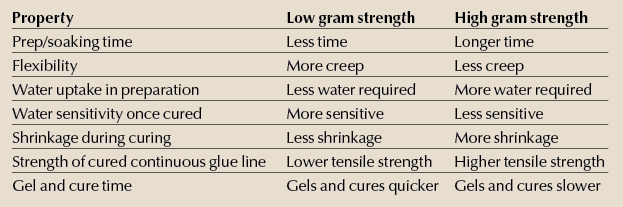
Because a “stronger” grade of glue is also subject to more shrinkage and the attendant stress as the glue line dries, it is entirely possible that a glue joint made with 135 GWS glue is stronger than a joint adhered with 444 GWS glue.
Blog: With proper technique and a few quick tips, use your band saw to cut quality veneers.
Web site: Get the back story on Don’s workshop in the mountains of rural Virginia.
Here are some supplies and tools we find essential in our everyday work around the shop. We may receive a commission from sales referred by our links; however, we have carefully selected these products for their usefulness and quality.