We may receive a commission when you use our affiliate links. However, this does not impact our recommendations.
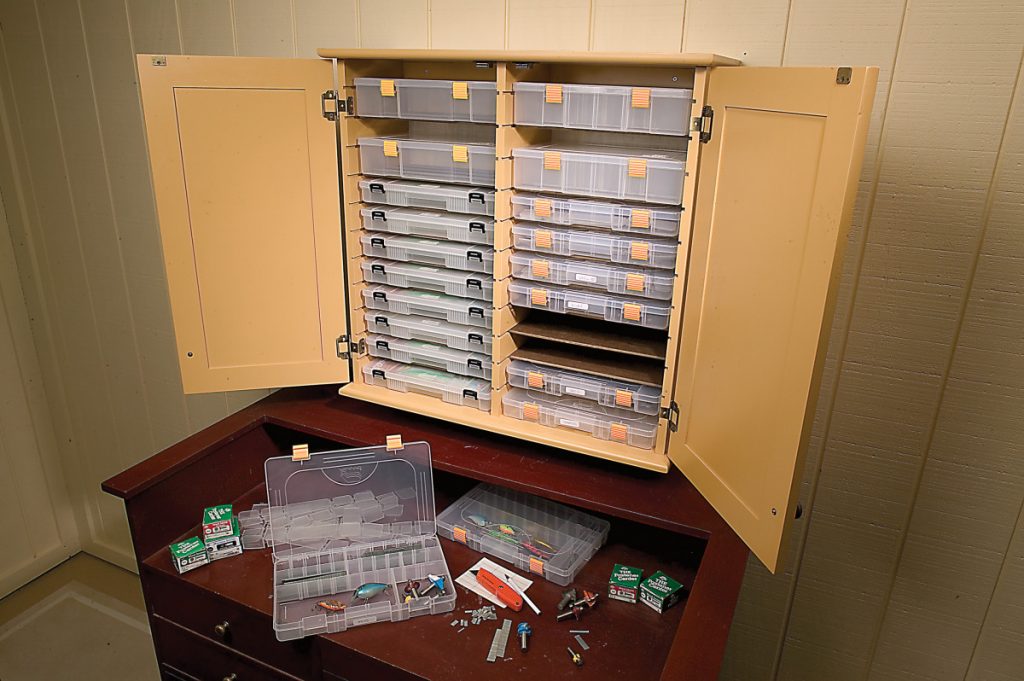 Easily organize, store and transport all your small woodworking accessories with this clever cabinet and inexpensive plastic tackle boxes – instead of drawers.
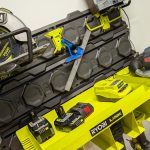
One of my favorite things to do when I have free time is to tinker around my shop, organizing my small stuff. I actually enjoy sorting through nails, bits and staples; and a pile of differently sized screws all thrown together drives me crazy. For this reason, I have become fond of Plano’s plastic utility boxes. I have about 100 of them.
This might seem excessive, but I also use the boxes to organize and store fishing lures. In fact, these boxes often are advertised as miniature tackle boxes.
 Any woodworker or angler knows that the amount of screws, nails, bits and lures one owns tends to grow exponentially, resulting in a lot of little stuff. (After sorting through my fishing lures recently I realized I own almost 1,000.) Plano’s boxes have dividers to keep everything organized and they’re easy to carry around the shop, to a job site or on a boat. However, 100 loose boxes is a bit like a pile of differently sized screws. I needed a box to organize my boxes. The cabinet you see here is the result.
This project is simple and quick to build – as a shop project should be. The plastic boxes merely slide in and out on pieces of Masonite that are slipped into dados cut on the inside of each side piece and both sides of the cabinet’s center divider. The cope-and-stick doors are entirely optional.
While any miniature tackle box will work, this cabinet fits Plano’s 3700-series utility boxes. For more information, see “About Plano Utility Boxes” at bottom.
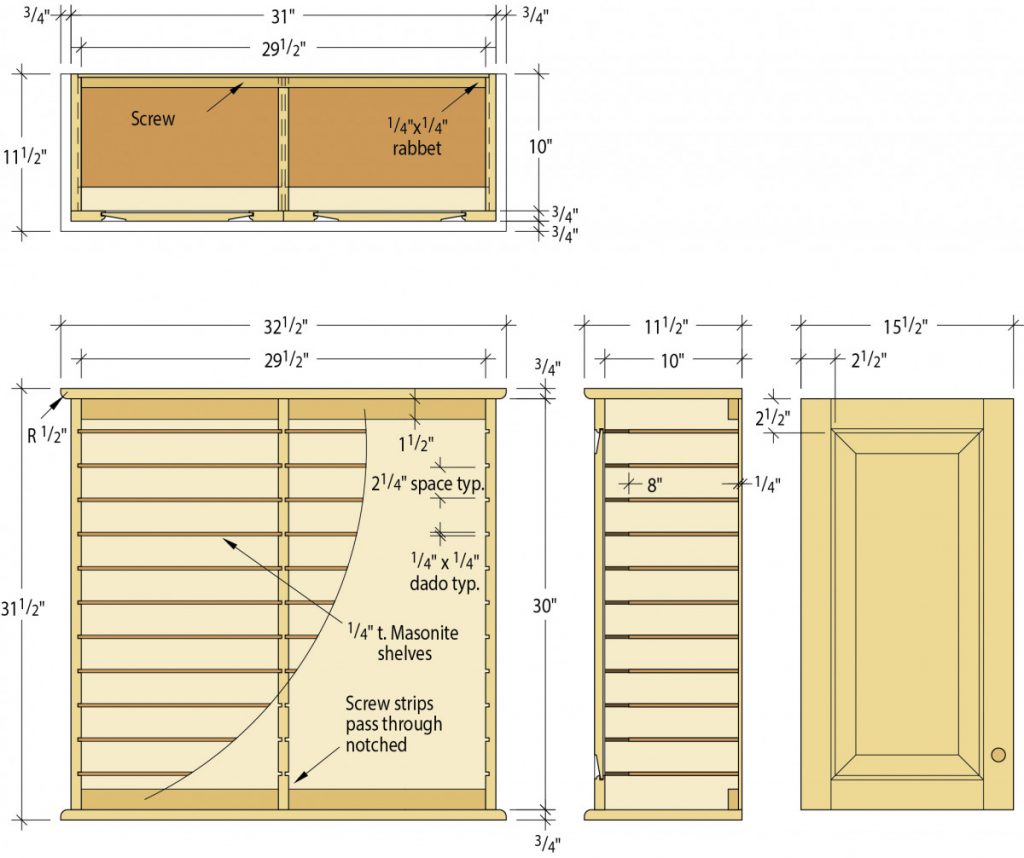
Rows of Dados
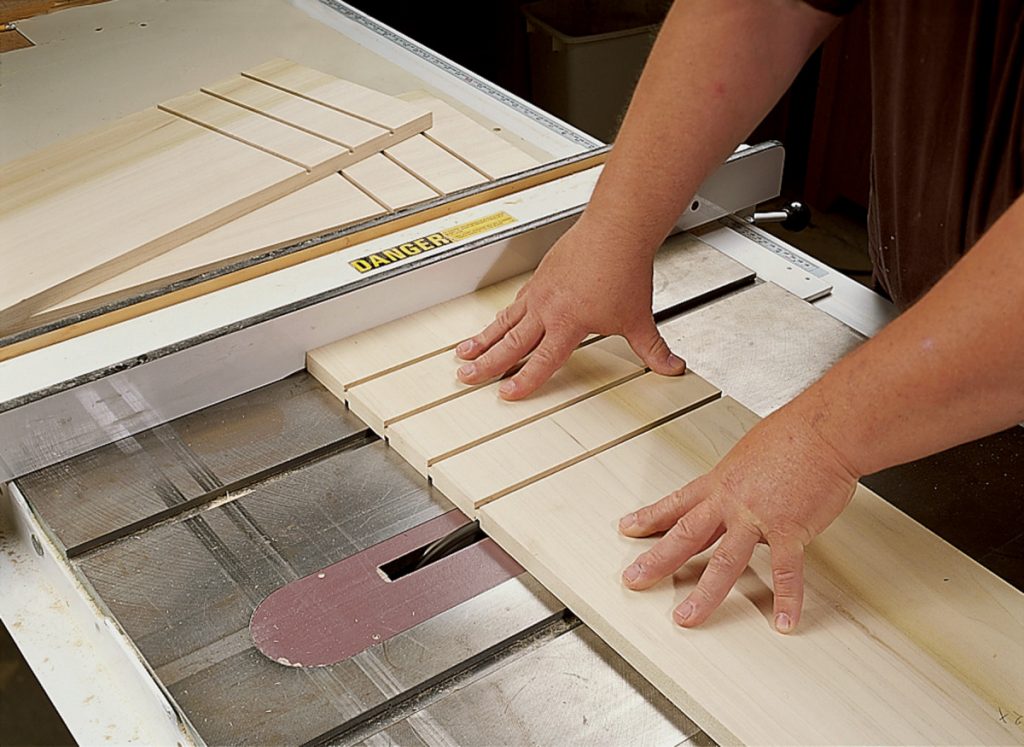 Cut the poplar top, bottom, sides, divider, plywood back and Masonite shelves to size, as stated in the cutting list. Now it’s time to cut the dados. Install your dado stack in your table saw. The dados are 1⁄4” wide by 1⁄4” deep so you need only the outside cutters. There’s no need to mess with chippers or shims.
I spaced my dados 21⁄4” apart. You need to cut each dado on the inside of each side piece and on both sides of the center divider. Cut the first dado in the four places required, adjust your fence and then cut the next one. You’re cutting 11 dados on each piece, which amounts to 44 dados. This method ensures you move your fence as little as possible.
With the dados complete, cut a 1⁄4” x 1⁄4” rabbet on the rear edge of the side pieces that will hold the 1⁄4“-thick plywood back.
Assembling the Cabinet
 Once the dados are cut, round over the edges of the top and bottom pieces using your router and a 1⁄2“-radius roundover bit. Sand all the case pieces to #180 grit.
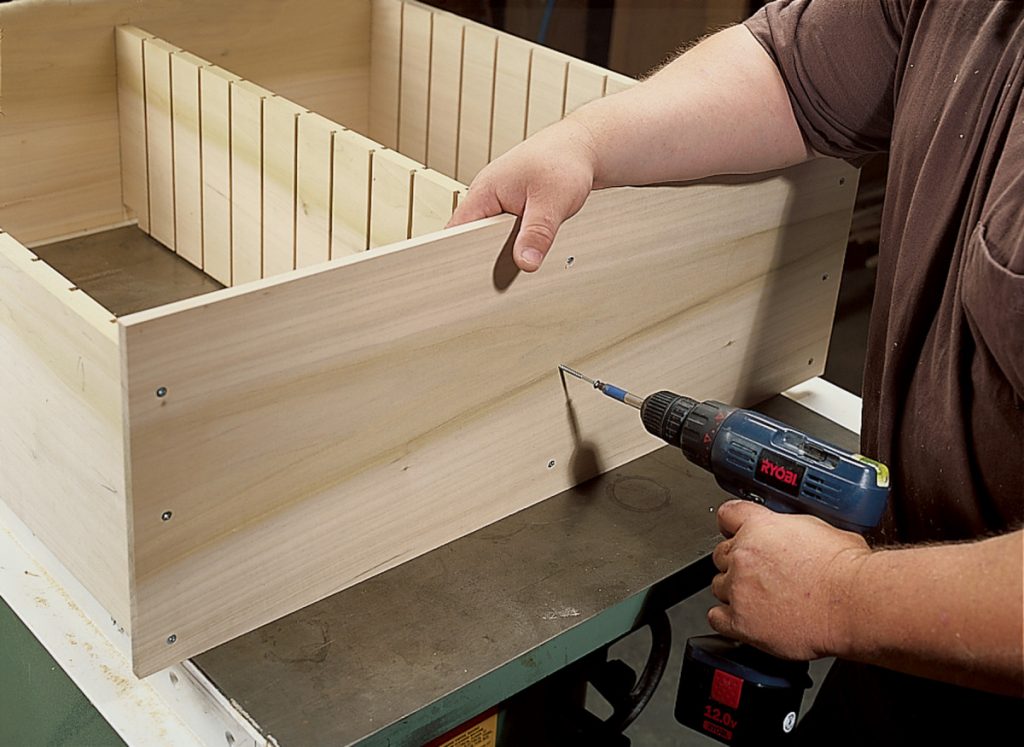
Lay out where the sides and divider will go on the top and bottom, as shown in the illustration at right. Use these layout lines to drill your clearance holes, then screw the sides, top and bottom (but not the divider) together with #8 x 2″ screws.
You need two screw strips to hang the cabinet on the wall – one on the top and one on the bottom, as shown in the drawing. While the screw strips fit between each side piece, you must first notch the center divider to make it work. Using your band saw, cut a 3⁄4” -wide by 11⁄2“-long notch at the top and bottom of the back side of the divider. Screw the divider in place and then nail the screw strips in place as well, as shown above.
If you did everything correctly, the 1⁄4“-thick plywood back should fit snugly between each side piece and flat against each screw strip. Basically, it fits into a 1⁄4“-deep rabbet you created when assembling the cabinet. Cut your back to size, sand it smooth and, using your brad nailer, nail it in place.
Cope-and-stick Doors
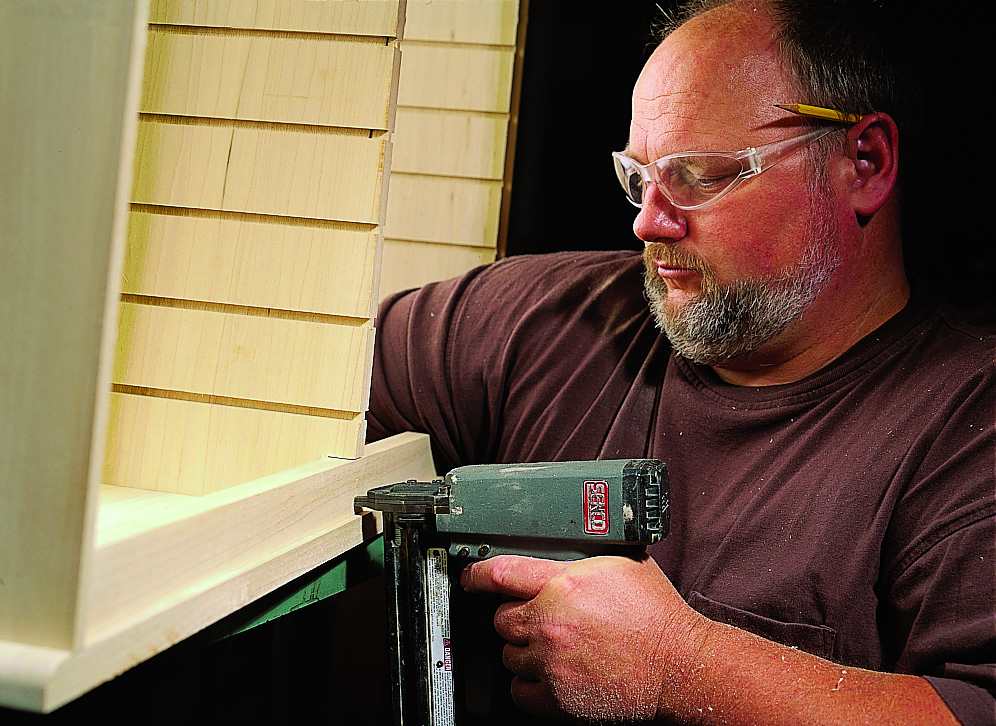
Two screw strips, one on the top and one on the bottom, allow you to screw your cabinet to your shop wall. Notice the notch cut into the divider to allow the screw strip to fit.
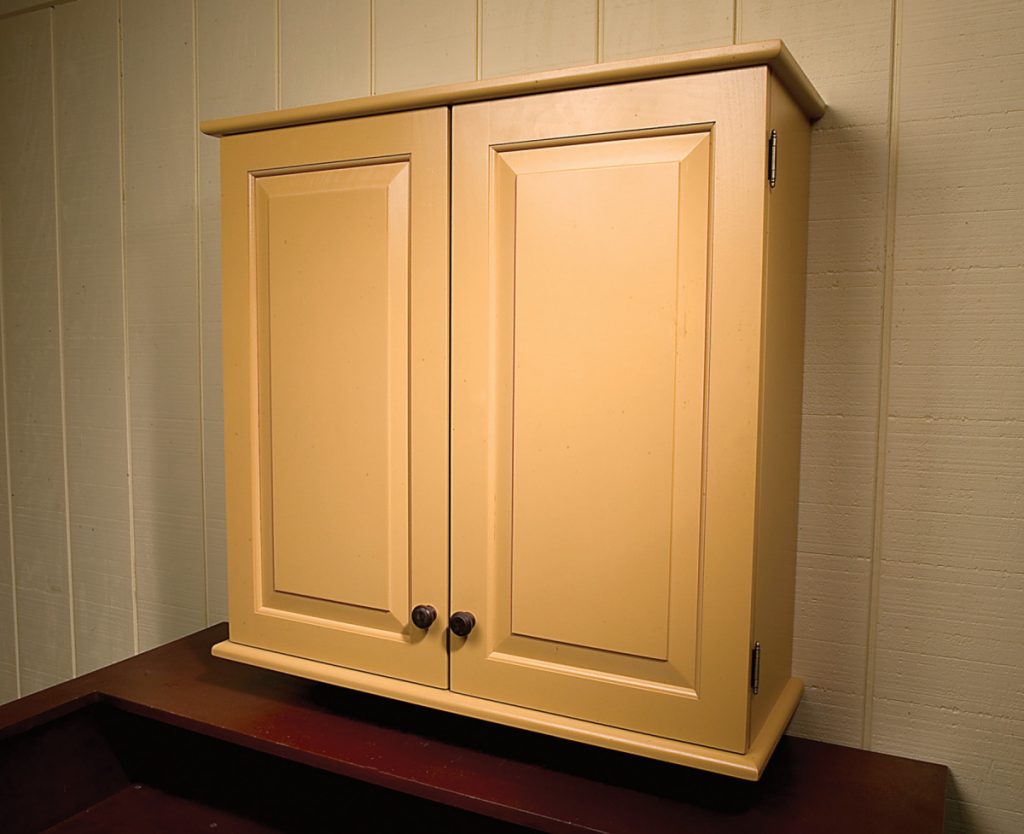
The doors are optional. In a shop, they’ll keep the boxes from getting dusty. Plus, they show off your craftsmanship. If and how you make them is up to you.
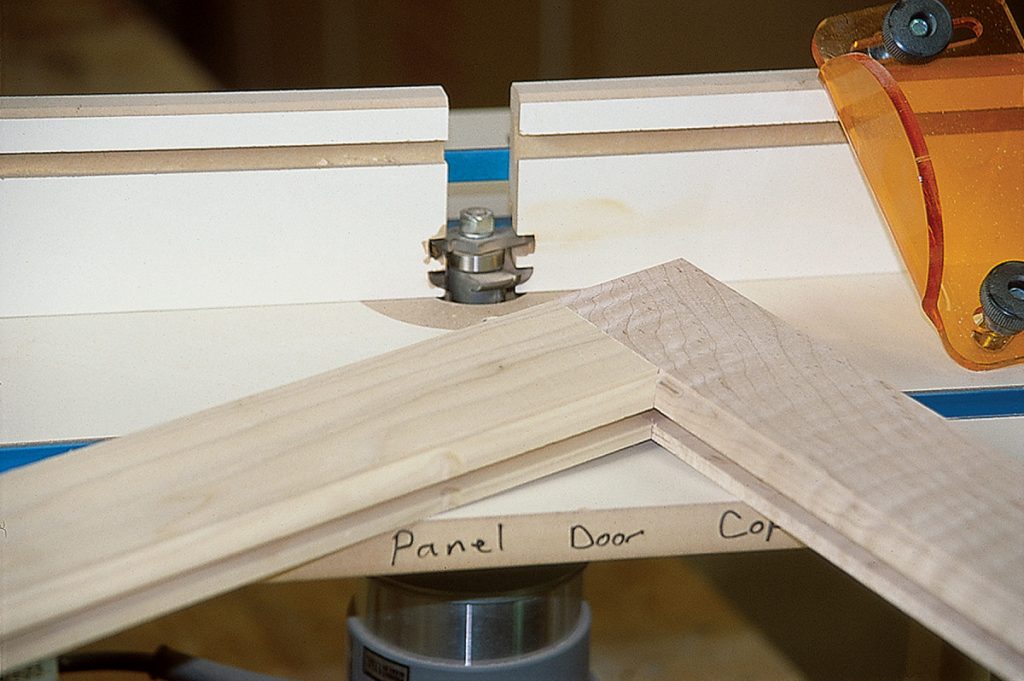
I made my two doors using stile-and-rail cutters on my router table. I used my table saw to raise the panel. First, cut all your door parts to size. Then, using your rail bit (sometimes called the cope-cutting bit), cut the tenon on the four rails. Then cut the beaded moulding profile and groove on your four stiles with the stile bit from your stile-and-rail bit set.
 It’s always a good idea to do test cuts when using stile-and-rail bits. If you want additional instruction on using stile-and-rail bits, check out my “Frame & Panel Dresser” story in the February 2005 issue.
To raise the panel, head to your table saw and bevel the blade to 7°. Adjust the rip fence to leave a shoulder on the panel at the top of the blade and a thin-enough edge to fit into the grooves you just cut in your stiles and rails. Again, cutting a test piece first is a good idea to ensure a snug fit.
Sand the panels to #180 grit before gluing them up in the frame-and-panel assemblies. Don’t sand the inside edges of the rail-and-stile pieces at the point where they mate to form the joints. You could easily create an ugly gap.
Glue up the door assemblies. It’s a loose-panel assembly, so don’t glue the frames’ grooves. As the seasons change, you want your panel to expand and contract.
I used four Amerock partial wrap-around hinges to attach the doors to the cabinet and two magnetic catches to keep them shut. Don’t forget the wooden knobs.
Initially I painted my cabinet yellow, which is the color shown here. But I decided I didn’t like the yellow, so later I painted it black and then distressed the finish. There’s no need to finish the Masonite shelves. Simply cut them to finished size and slide them into place.
This cabinet is the perfect solution for my woodworking and fishing storage needs. Whenever people visit my shop they comment on its ingenuity. It’s so simple! There’s only one problem: I didn’t build this cabinet big enough. I’m currently working on a chimney cabinet design to resolve this issue.
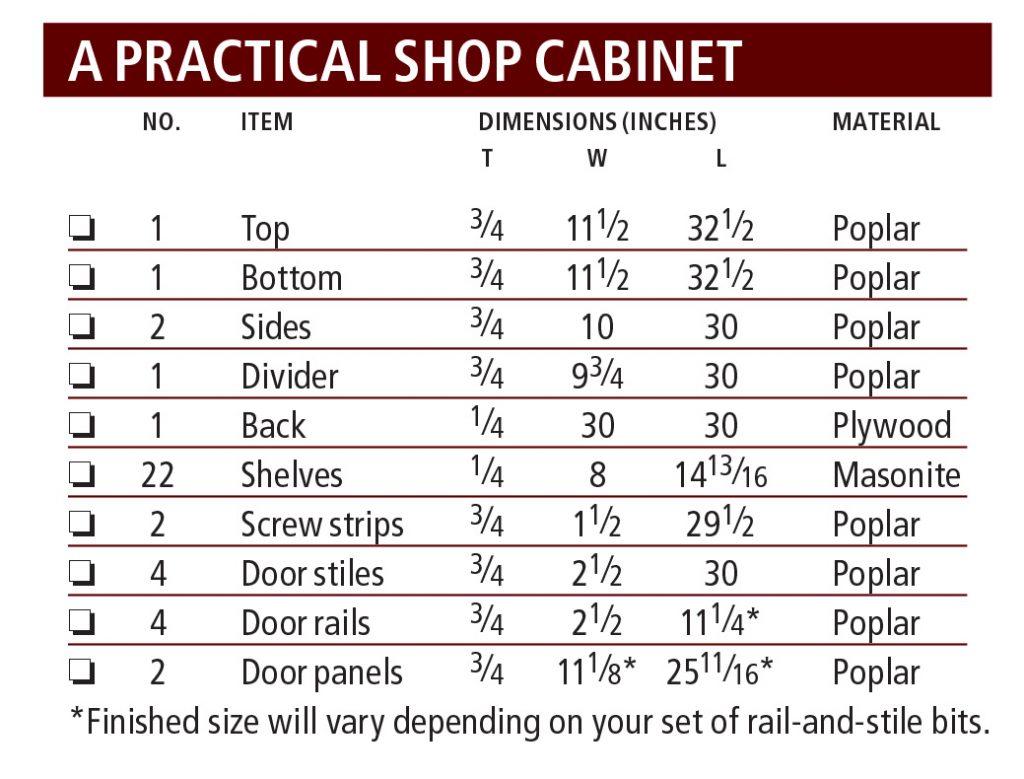
A Practical Shop Cabinet Cut List
About Plano Utility Boxes
I built this cabinet to hold any of the plastic utility boxes in Plano’s 3700 series [Amazon]. I’ve been using Plano utility boxes for years and they work great. The 3750 [Amazon] has a good, solid latch and the 3770 [Bass Pro Shops] is perfect for storing a combination of woodworking and fishing accessories. Most are inexpensive and can be found at any large sporting-goods store. – TS
Here are some supplies and tools we find essential in our everyday work around the shop. We may receive a commission from sales referred by our links; however, we have carefully selected these products for their usefulness and quality.