We may receive a commission when you use our affiliate links. However, this does not impact our recommendations.

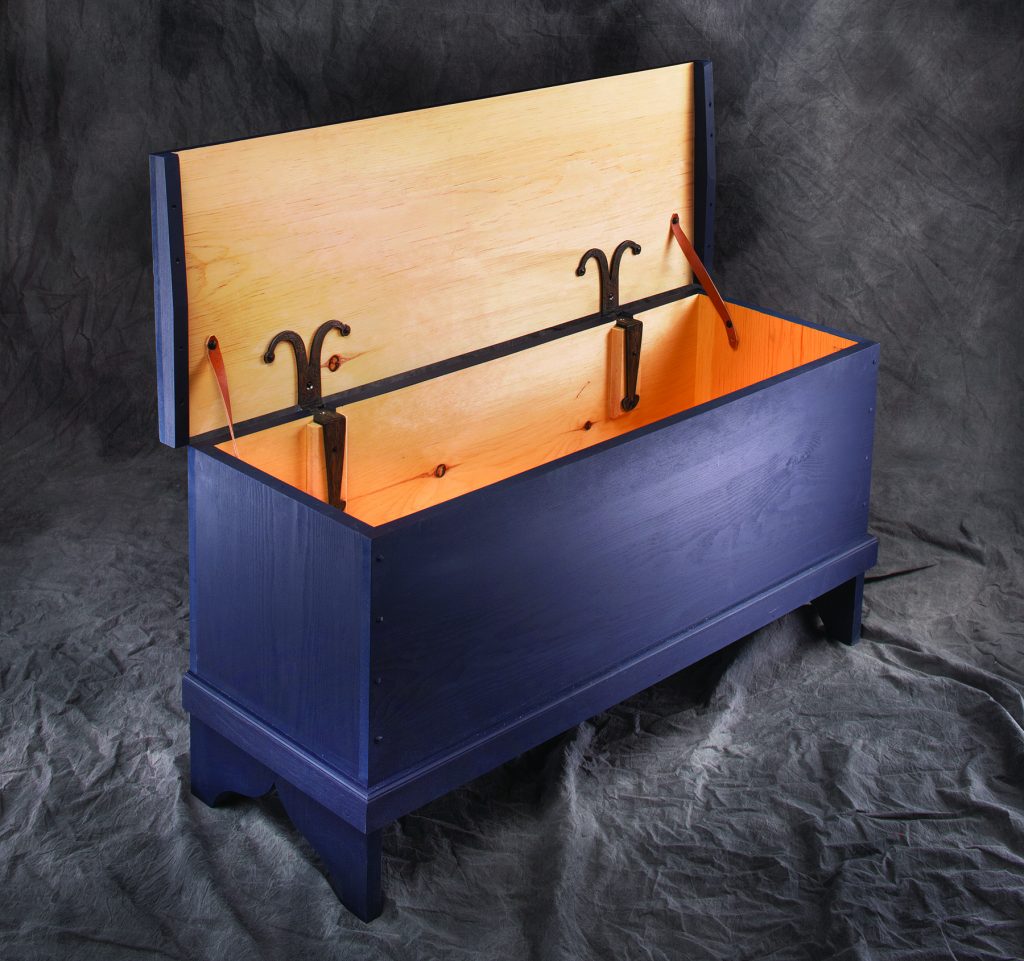
Variations on a form. The blue chest is the one I built for this article – but let your wood and aesthetics dictate your build. (The yellow chest is by Timothy Henriksen; the green chest is by Ty Black.)
Use two planks, two days and two piles of nails to make this age-old form
Six-board chests have been an enduring form of furniture in Western cultures for hundreds of years. And while they differ in their details during different ages, the basic form and the way it is built has been unchanged since the form appeared.
 The chest in this article has details I’ve seen on chests in the 18th and 19th centuries. You can choose different mouldings (or omit them), or add carving or a stenciled design to make the chest suit the time period you prefer.
Design with the Boards
Rip then crosscut. If you rip the moulding piece first before crosscutting the front from the back, you will get a nice long piece of straight-grained stock.
I built my chest using an 8′-long board and a 12′-long board. Both pine boards were 181⁄2” wide. If you don’t have access to wide lumber, feel free to glue up panels to the final width. If your chest is painted, no one will notice.
Because my boards were 181⁄2” wide, I used that fact to help design the chest – there’s no need to rip 1″ off a wide board or glue on 1″. The design of these chests is pretty flexible.
I crosscut the 45″-long lid piece from the 8′-long board and set it aside. Why 45″? These chests are typically 32″ to 48″ long, and 45″ was the clearest length of wood I could get from the board. This piece sets the die for the length and depth of the chest.
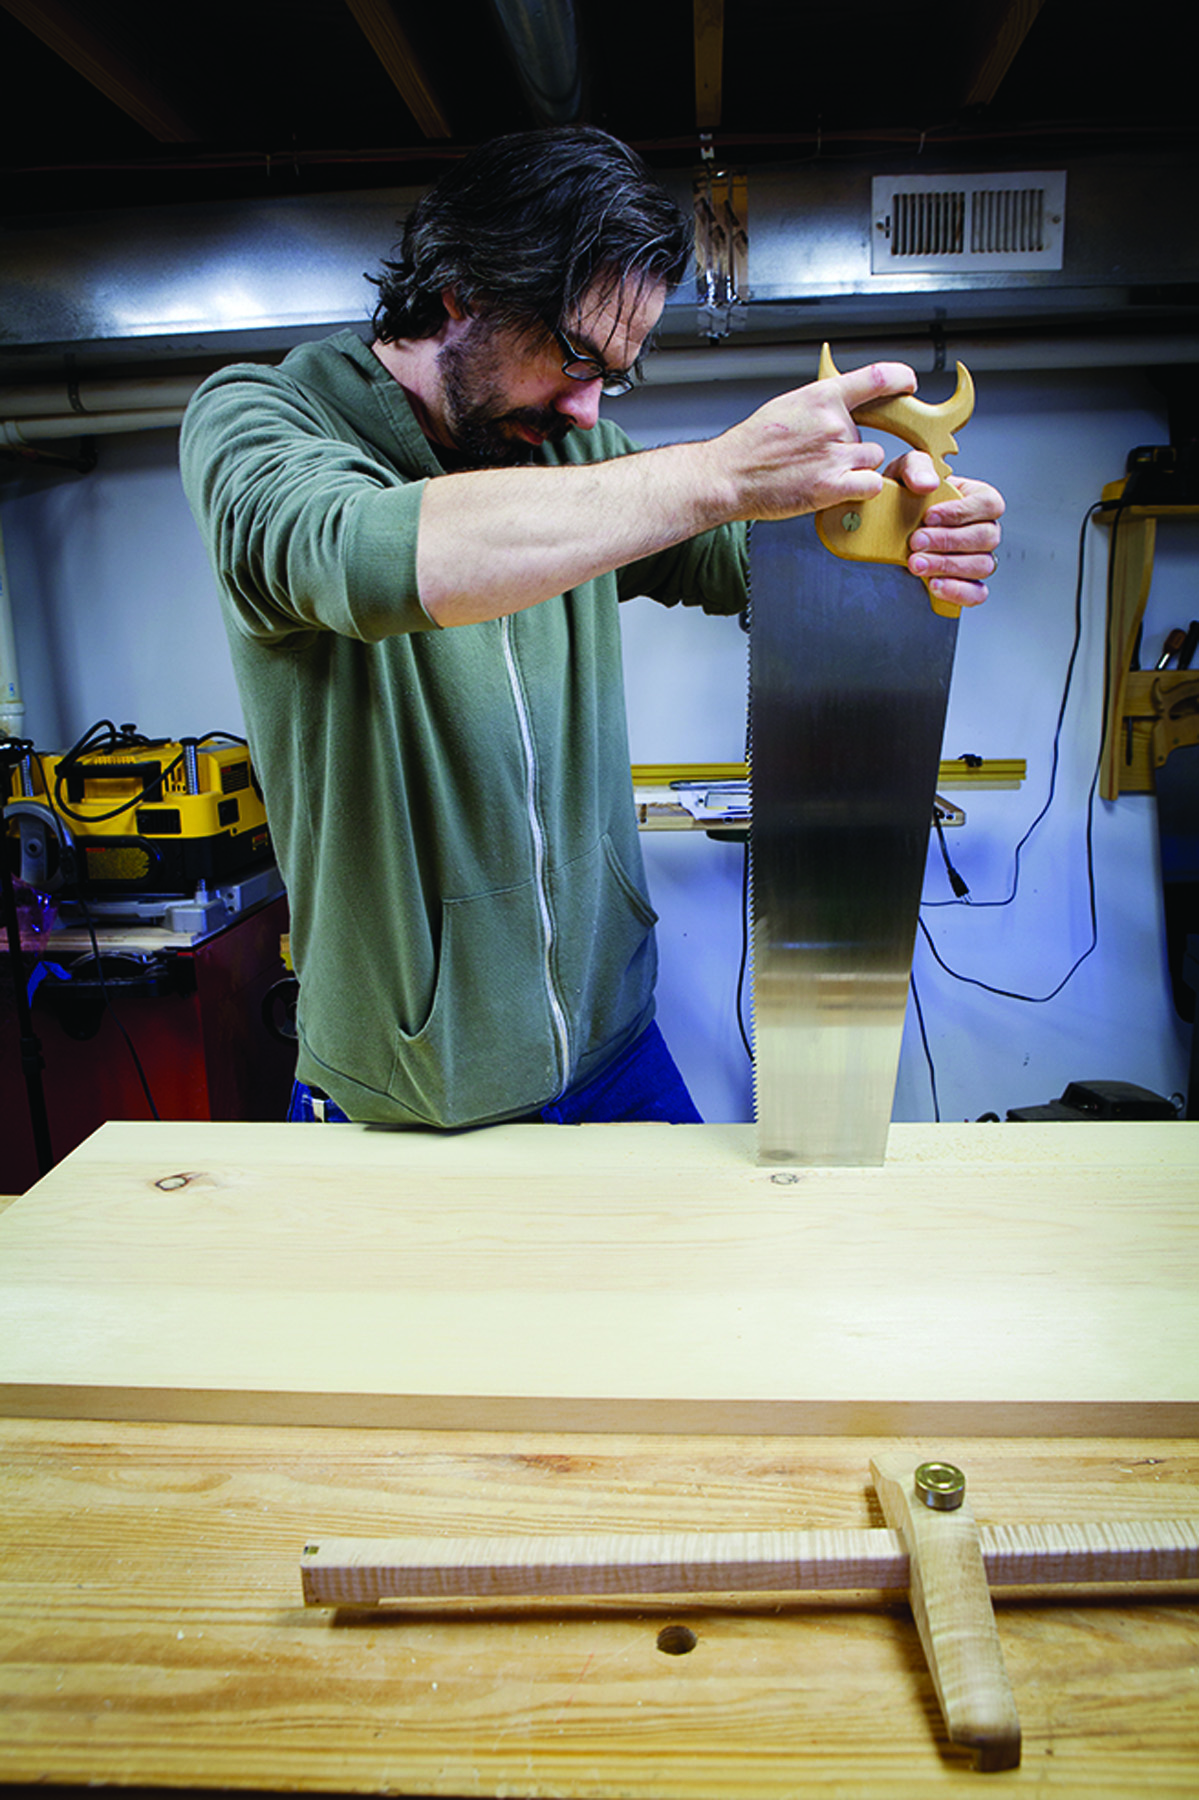
Twice as accurate. Ripping the long notches in the ends is easier if you sandwich the two pieces together. Your cut is more likely to remain square.
With the lid cut, I cut the two ends, which determine the height of the chest. These chests typically range from 18″ to 27″ tall – a good height for a chest when it comes to lifting the lid and bending over to get something out of storage. It’s not too high and not too low.
I cut the ends to 21″ long from the remainder of my 8′-long board. This length allowed me to cut around some knots and eliminate some checks on the end of the board. I then set the two ends aside and grabbed my second board.
From this board I cut my front, back, bottom, moulding and battens.
When you cut moulding by hand, the best way to do it is to “stick” one long piece of moulding and then cut your three pieces from that piece. Sticking three pieces of moulding is tricky; it’s unlikely that you will be able to create exactly the same moulding profile on all three pieces.
Find a piece for the moulding that is long enough to wrap around the front and two ends. (Moulding on the rear of a chest is unnecessary.) Cut that piece free from your board, then cut the front and back pieces to size. The hard part is done. The remaining stock will be your bottom and lid battens.
Joinery on the Ends
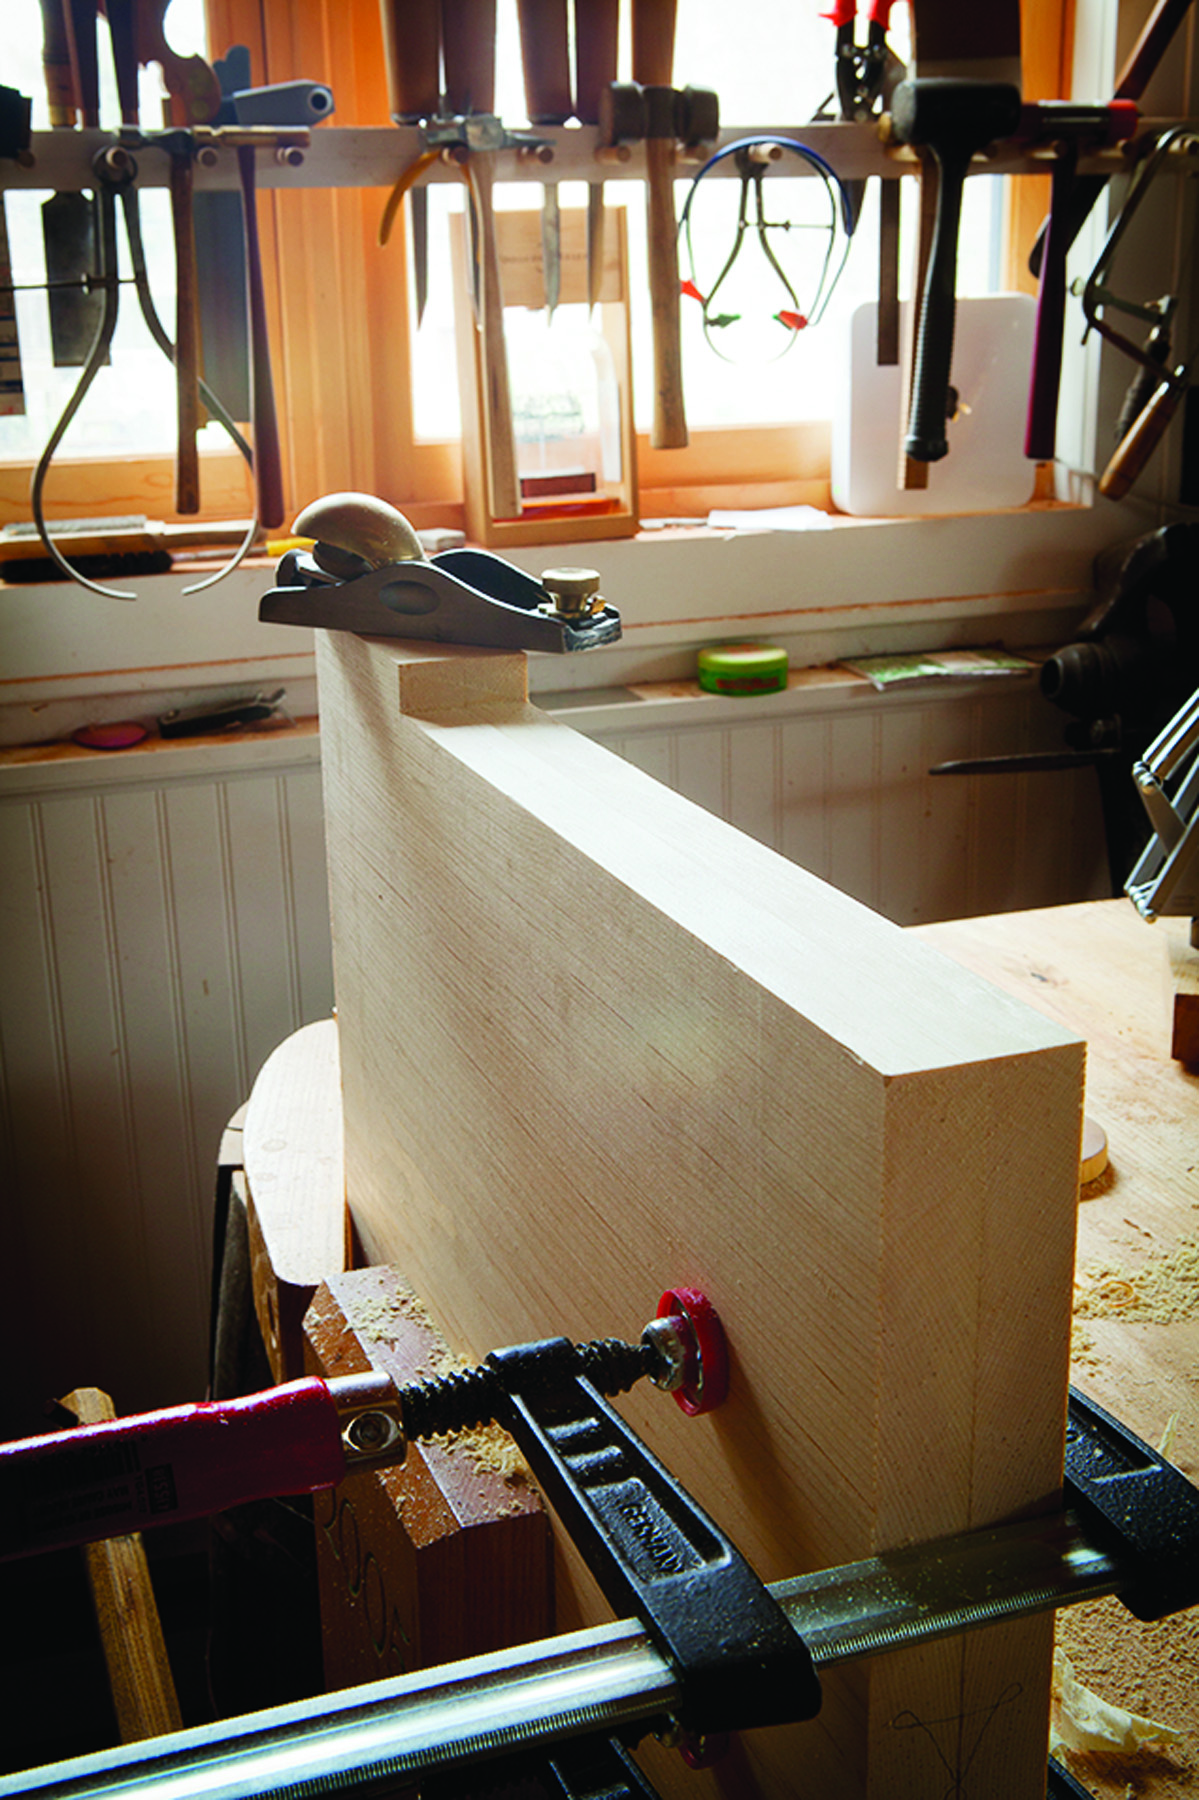
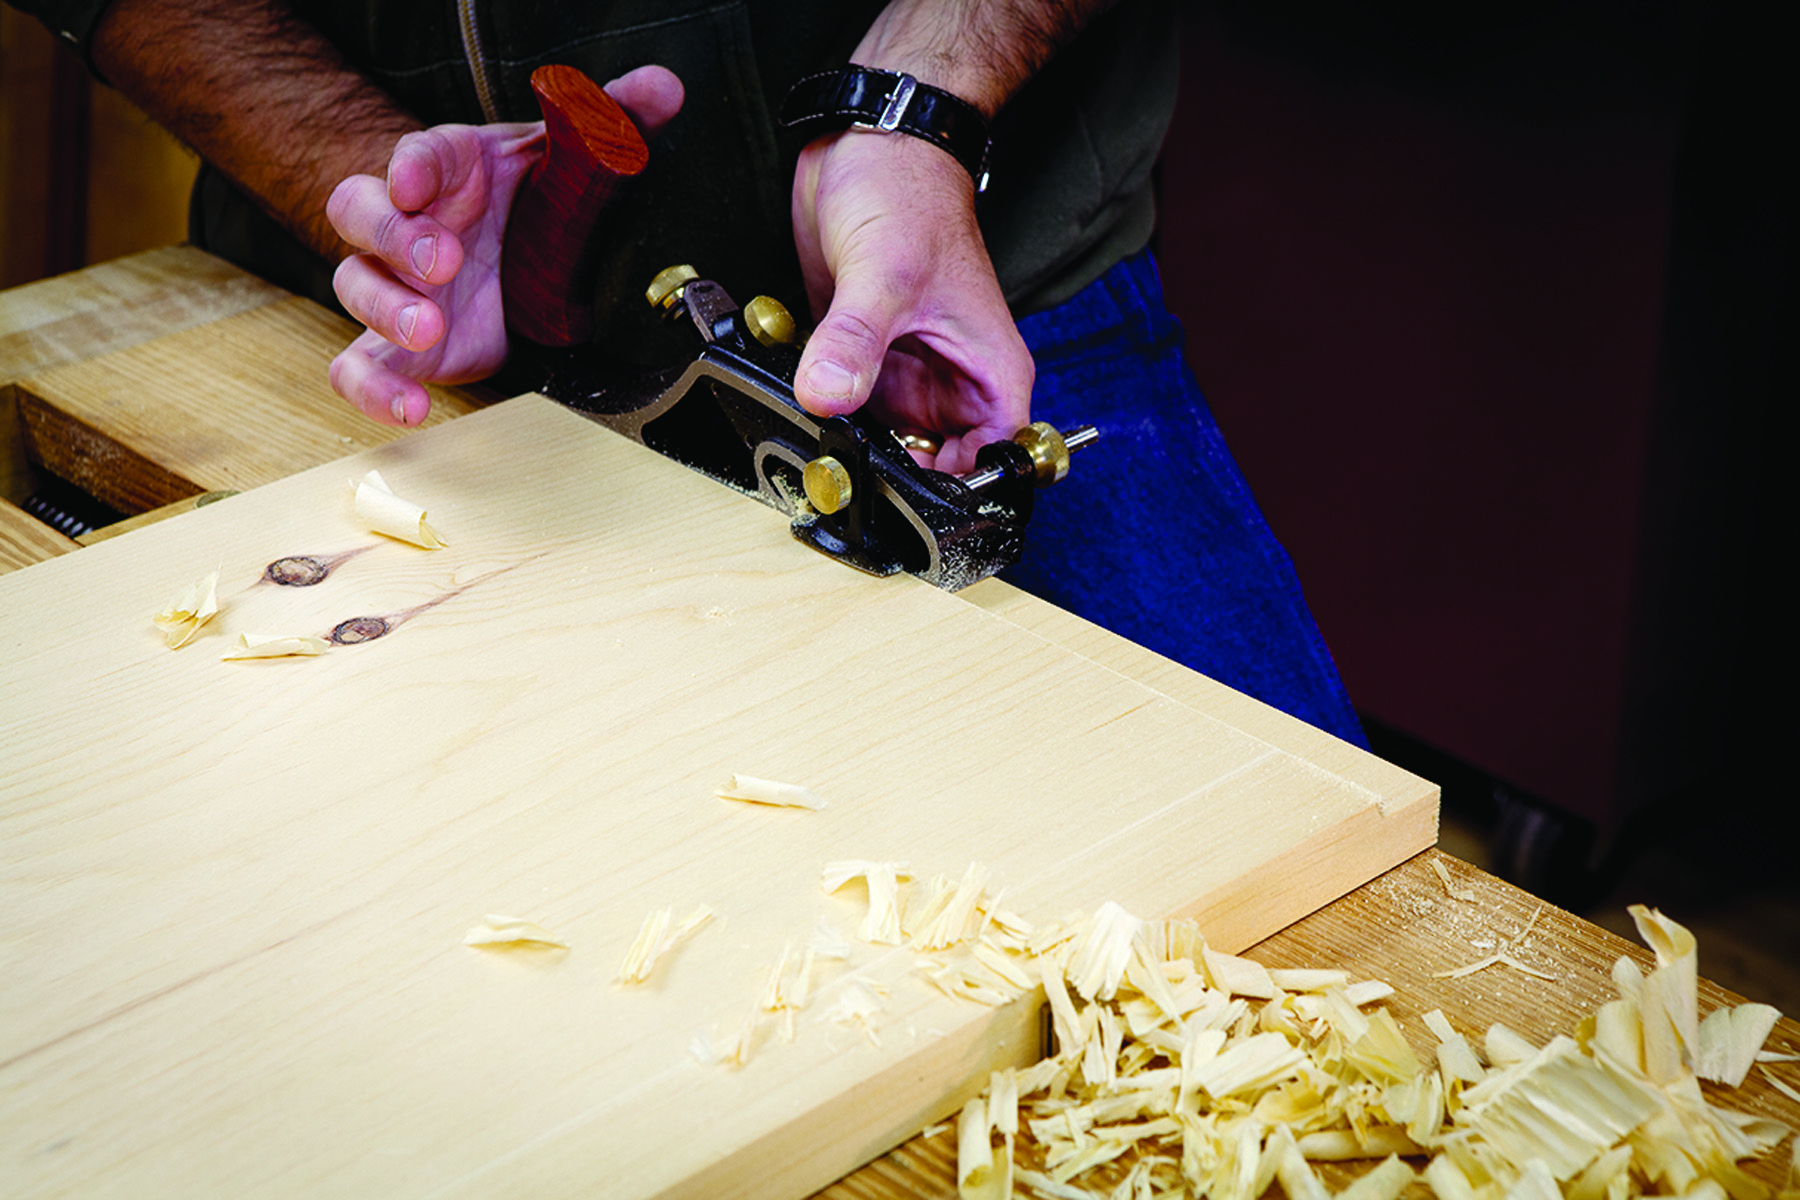
A plane job. Most of the clean-up of the notches is with a plane. Work to your layout lines and then clean up any excess in the corner.
The first step in creating the joinery for this chest is to deal with the end pieces. They have long notches cut into their long edges to receive the front and back. Not all chests had these notches, but they give you a cleaner look – the outside surfaces of the front, back and ends are all flush, even at the feet. They also make assembling the chest easier.
Some woodworkers create this notch by scabbing on a small bit at the floor. It seems like a good idea, but I don’t have evidence that this was done on historical chests. Perhaps they didn’t do it that way because these chests sat on dirt floors that got wet. And a hide glue joint there would come loose.
Cutting these long notches is easy. Sandwich the boards together and lay out the long notches – each is 5⁄8” wide and is as long as the front and back pieces are wide.
Pinch the sandwiched boards in your vise and saw the long notches. With the boards still pinched together, use a plane plus a chisel or rasp to true up the notch.
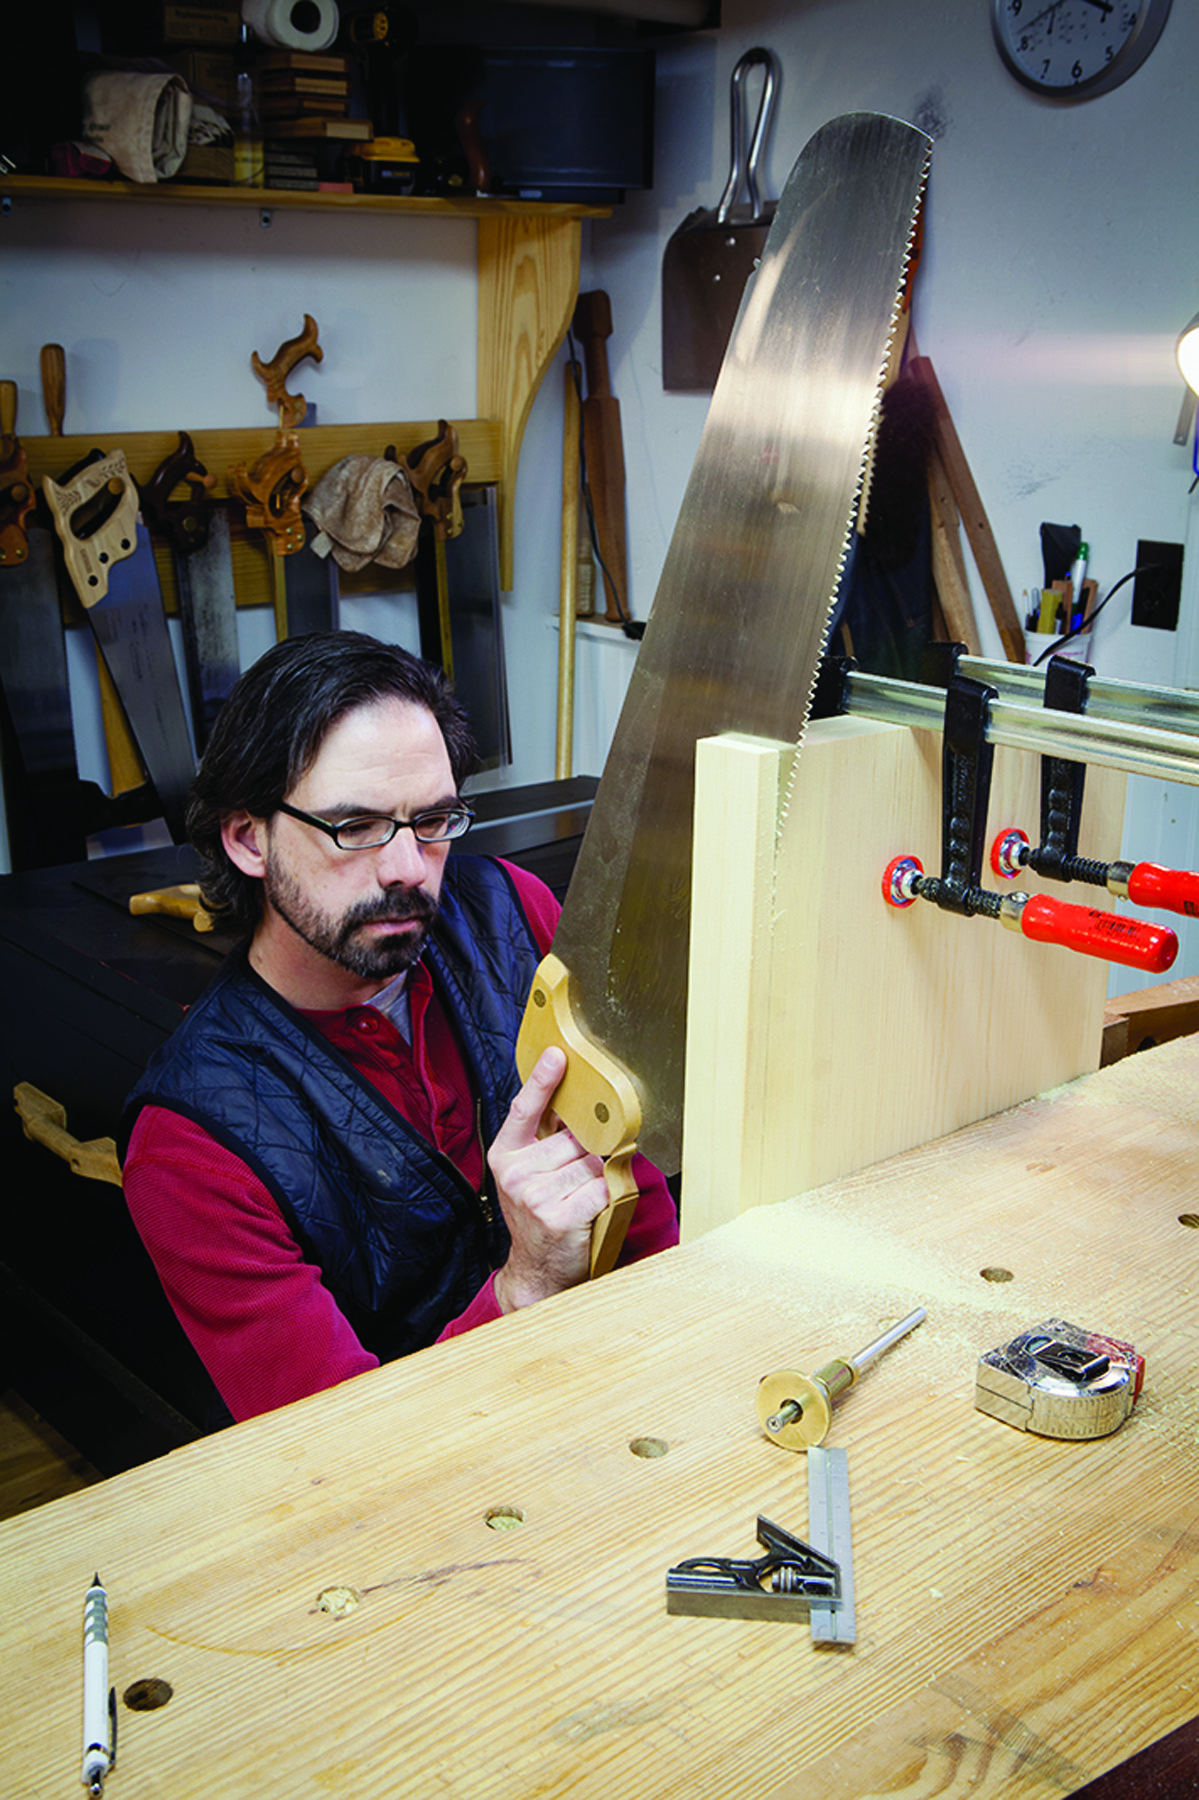
The last task while the ends are sandwiched together is to cut the decorative profile on the bottom of the ends that creates the feet of the chest.
The simplest profile is what antique dealers call the “bootjack” – it’s a simple inverted V that resembles the tool used for pulling your boots off your feet. This profile is just two lines, two cuts and done. A fancier profile is a half-circle or an ogee. Both of these are laid out with a compass, cut with a frame saw and smoothed with a rasp.
In the House
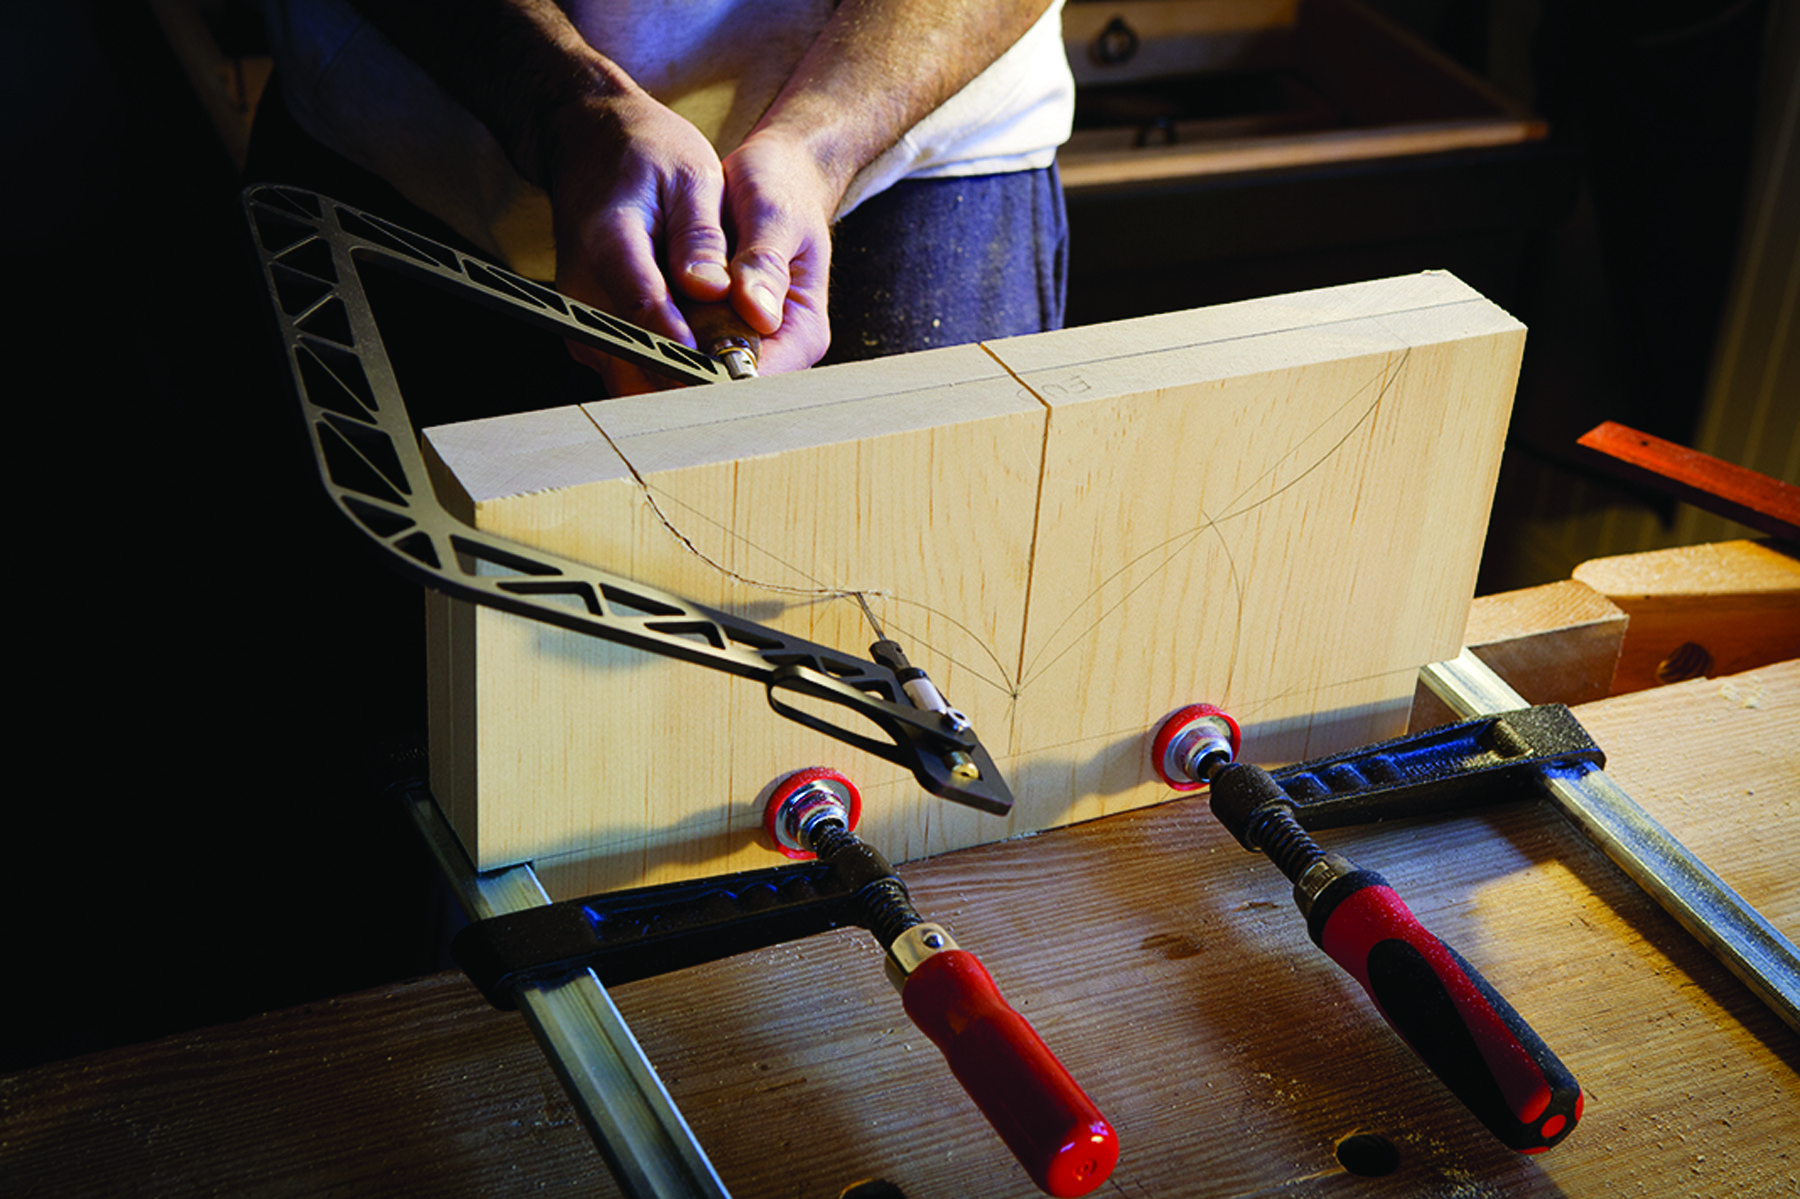
Around the bend. I lay out my ogee on both outside faces of the ends. This helps me make an accurate saw cut because I can peer over the board during the cut to ensure I’m on track.
The next decision is whether or not to plow dados – housed joints – in the ends that will grasp the bottom board. Here are some pros and cons.
Pros: A dado lets you slide the bottom board in without any battens or glue blocks for support. You don’t even need to add glue when sliding the bottom in place.
Cons: Cutting these dados requires extra tools and time.
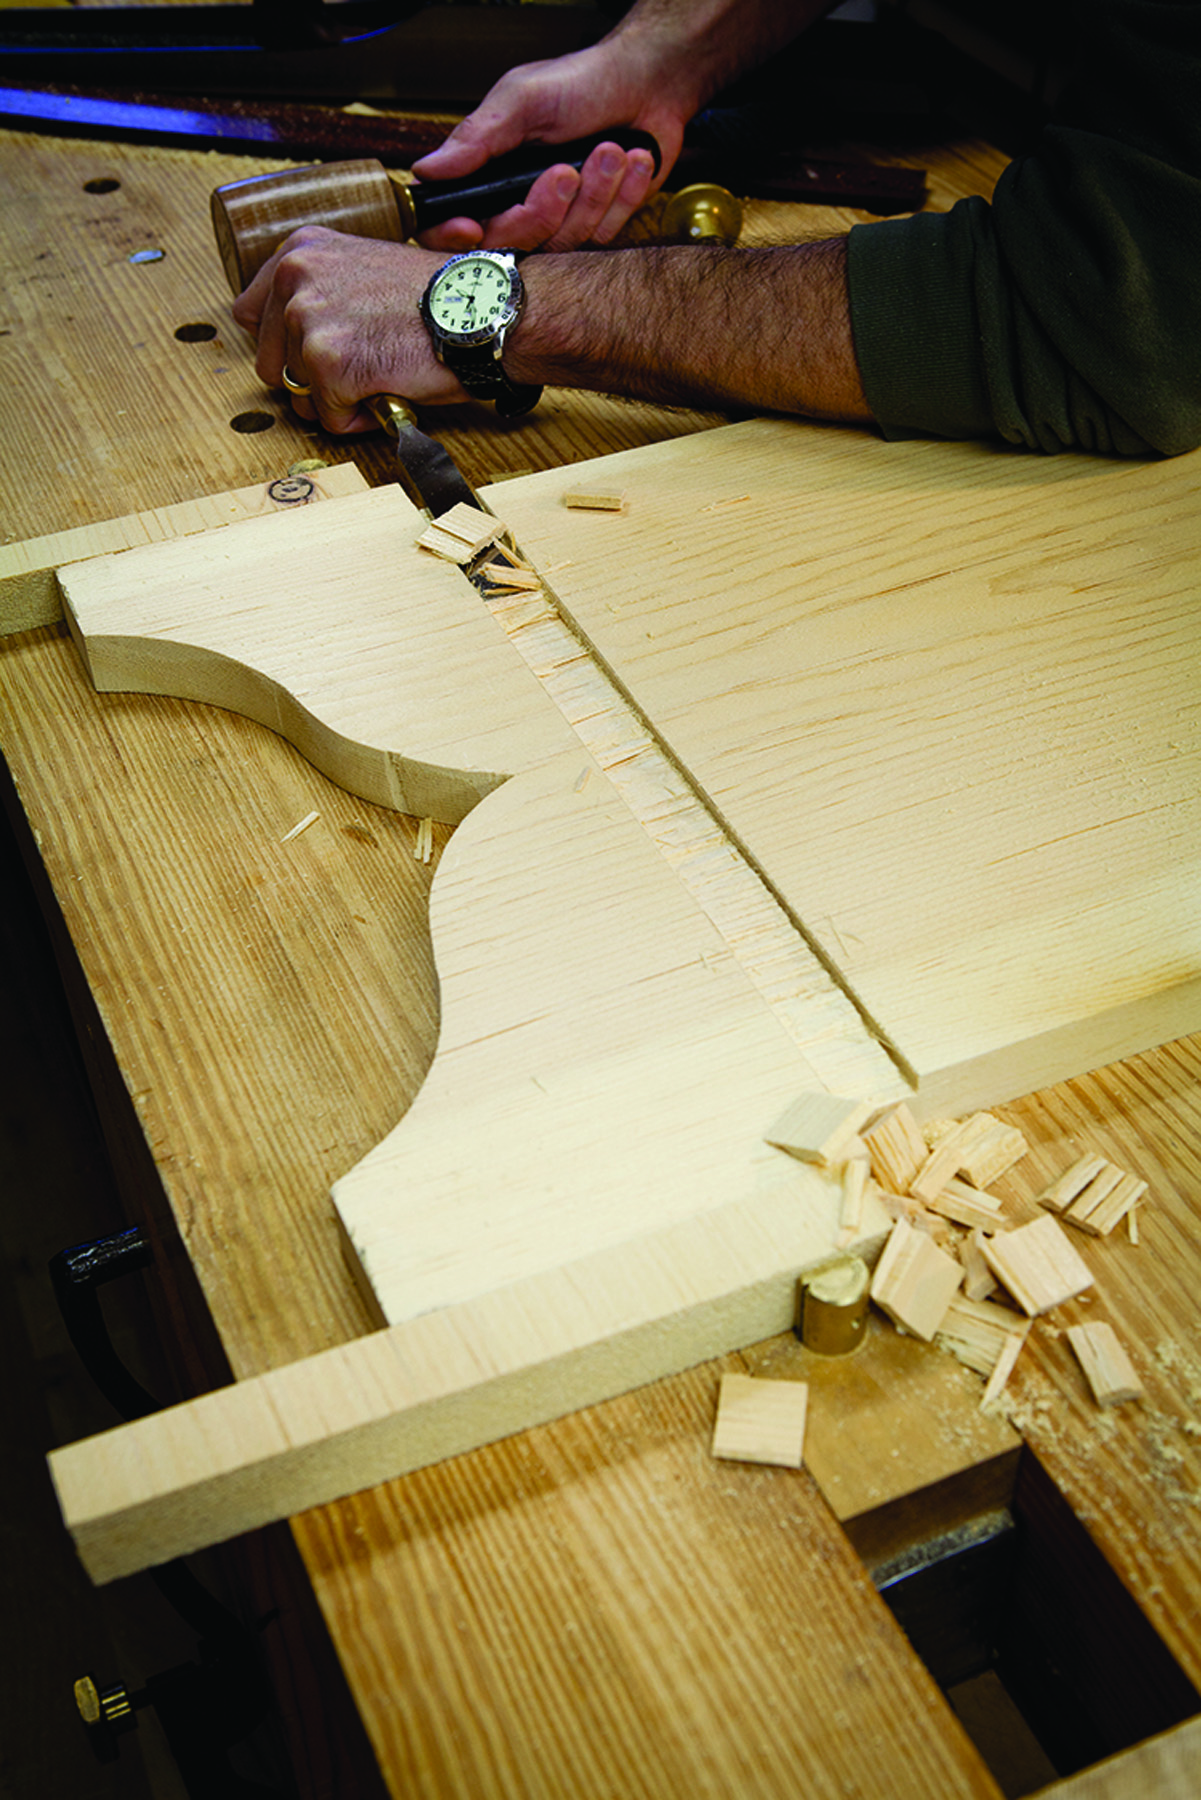
The hungry chisel. A chisel takes a bigger bite than a router plane, so do as much work as possible with the chisel.
I always opt for cutting the dados because it makes assembly easier. The first time you cut a long dado, you can nail or clamp a fence to your work to guide your saw. After a dado or two you will realize that the stiffness of the saw’s plate is enough to keep you straight.
Saw the walls of your dados, then remove most of the waste with a chisel driven by a mallet. Finish the job with a router plane. The dado is 1⁄4” deep, 7⁄8” wide and begins 5″ from the bottom of the end pieces.
Front & Back
Squaring rabbets. Cross-grain rabbets help square the carcase and line up the pieces during assembly.
The front and back pieces are a blank canvas – both for decoration and for joinery. Shallow (1⁄4“) rabbets on their ends help make the chest easier to assemble. And you can carve the front, which is typical of 17th-century chests. Or make some simple scratched decoration. Or grain paint it, which was typical in the 19th century.
Let’s talk about the joinery first. The reasons to cut the rabbets on the front and back are simple:
1. They help prevent the case from racking after assembly – especially when transporting the chest.
2. They make it easier to assemble the chest yourself. The rabbets lock into the notches in the end pieces. Then you hit a few nails.
3. You can get away with using shorter (and cheaper) nails. If you make this chest using 1″-thick stock, you need 8d nails to assemble the carcase. However, if you cut 1⁄4“-deep rabbets in the front and back pieces, you can use 6d nails instead. If you buy handmade nails, the savings add up.
Cut your 1⁄4“-deep rabbets with a simple rabbet plane or a moving fillister plane. If you are using a simple rabbet plane, first knife a line where you want the shoulder of the rabbet to be. Tilt the plane and put a corner of the tool’s sole into the knife line to turn the knife line into a V-shaped trench. Then continue to plane until you complete the rabbet. You’ll need to tip the plane a little off vertical at first. Then you’ll need to tip it vertical.
Cut the rabbets. They don’t need to be deep – 1⁄4” is perfect – but they need to be consistent in depth so that your carcase is square and everything is flush on the outside. Make the rabbets 7⁄8” wide to match the thickness of your ends.
With the rabbets complete, clean up the inside surfaces of your ends and the front and back. This is the best time to do this because you are about to nail some things together.
6-board Chest Cut List
No.ItemDimensions (inches)MaterialComments
t w l
❏ 1 Lid 7⁄8 18 1⁄2 45Pine
❏ 2 Ends 7⁄8 18 21Pine
❏ 2 Front & Back 7⁄8 16 43 1⁄4 Pine 1⁄4 rabbet both ends
❏ 1 Bottom 7⁄8 16 3⁄4 42 Pine in dados in ends
❏ 2 Battens 7⁄8 7⁄8 18 1⁄2Pine
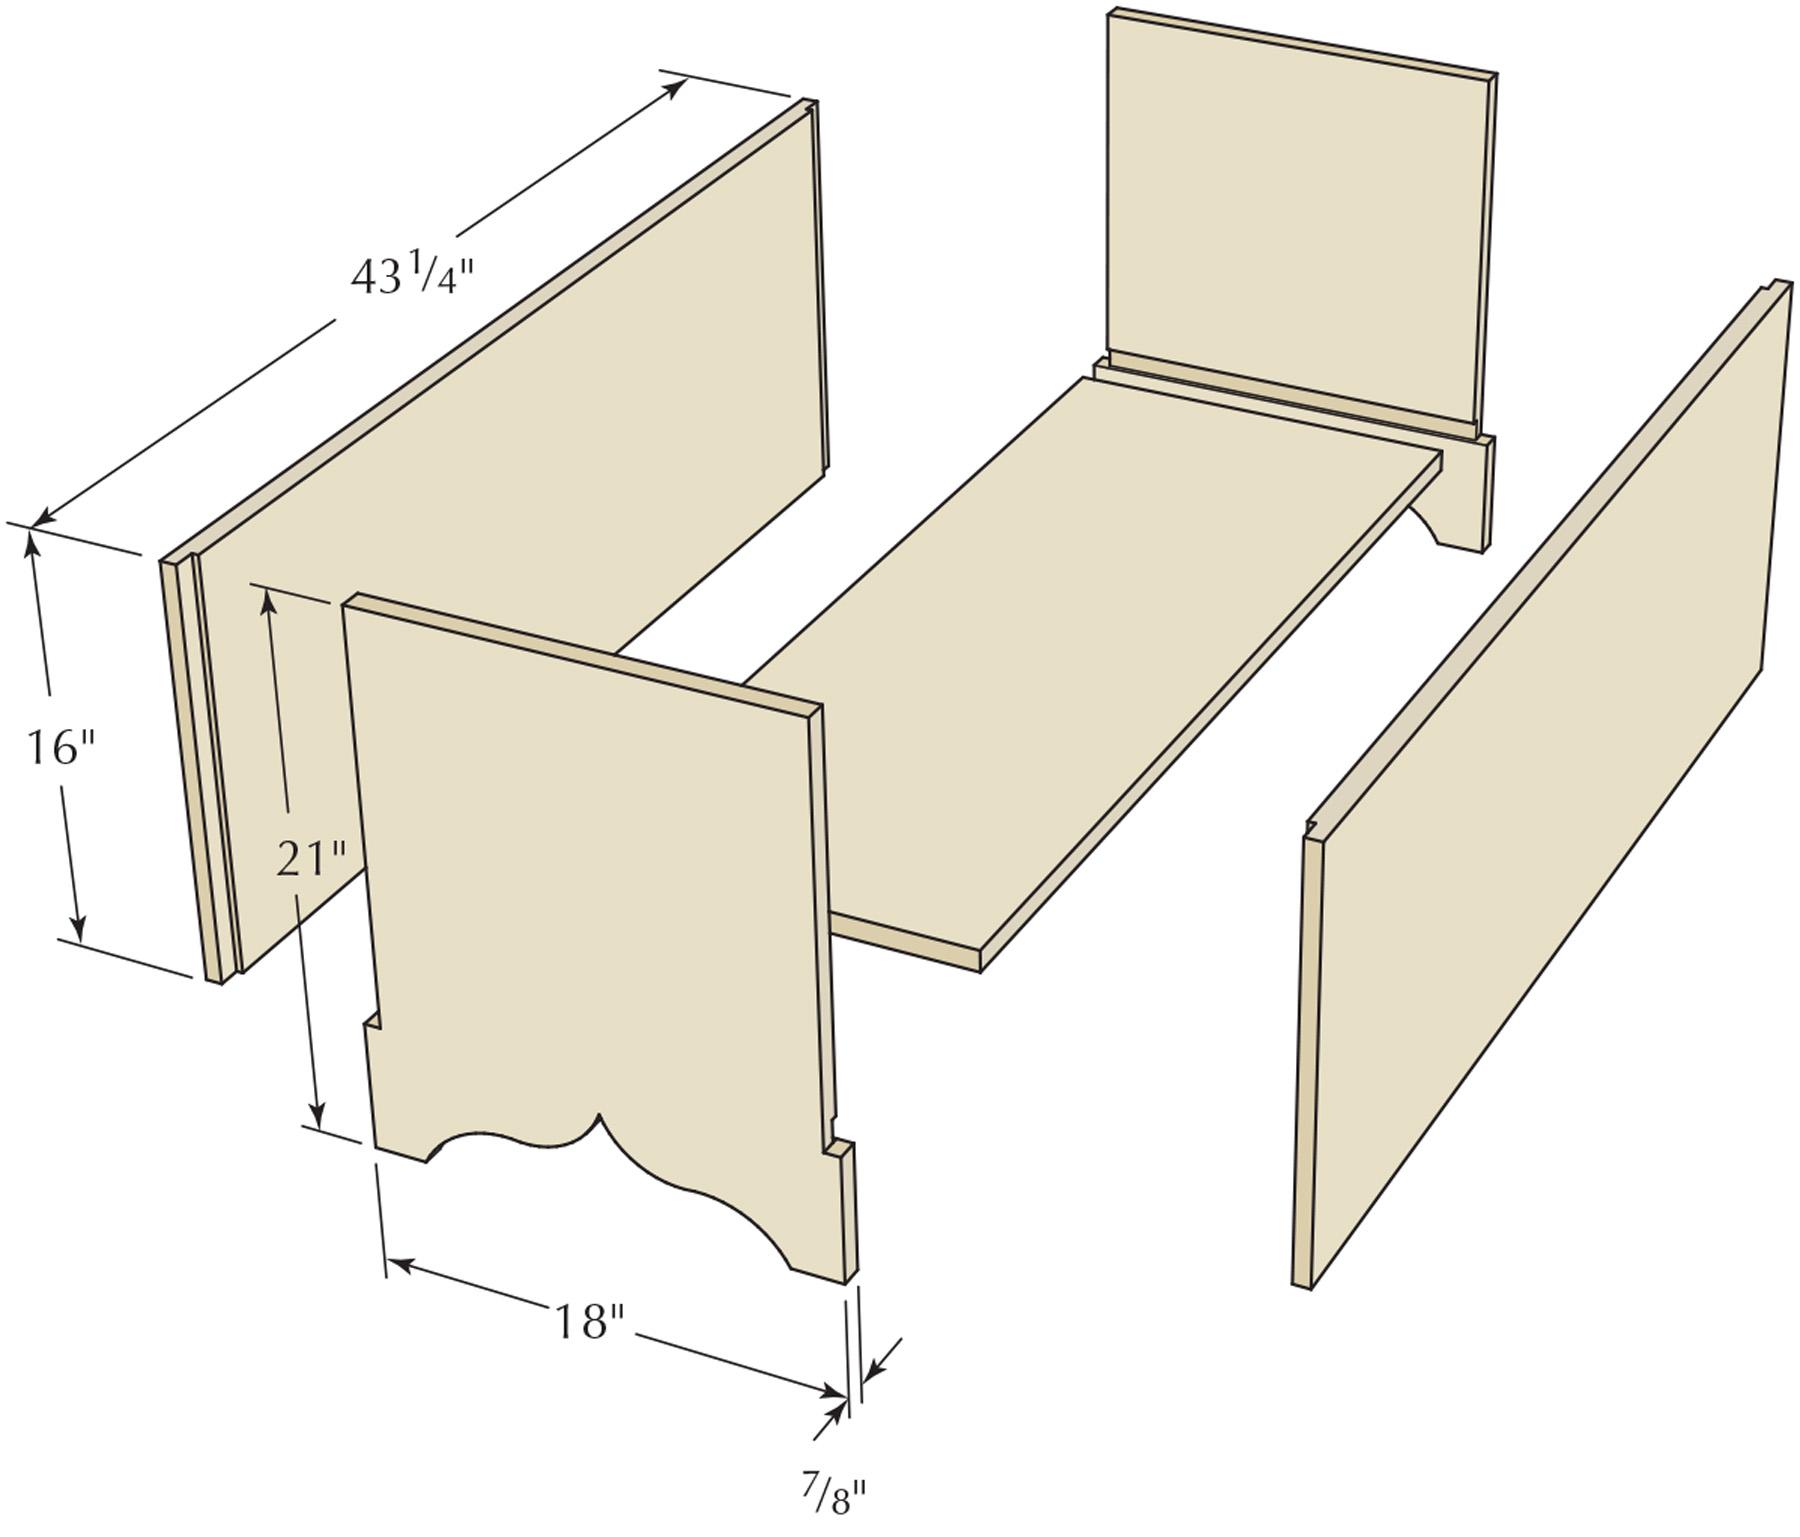
Exploded View
Why 6-board Chests Survive
When you examine these chests as a builder, they are a bit of a puzzle. The puzzle isn’t how they go together, but instead, how they stay that way over time.
These chests disobey many rules of wood movement. The grain on the front and back of the chest is horizontal. The grain on the ends is vertical. The front and back should have split and fallen off. And take a gander at the lid. The grain of the battens that help keep the lid flat and the dust out is 90° to the grain on the lid.
By all rights, the battens should have fallen off, the lid should have split and the whole chest should be a collection of interesting splinters.
Nails – the right nails – allow you to get away with serious crimes of wood movement. Nails are almost always more flexible than screws or dowels. So a nail allows the wood to expand and contract, bending back and forth through the yearly humidity cycles.
Except for hardened masonry nails, I’ve found that all nails will bend, including wrought nails, cut nails, wire nails and pneumatic ones. The reason I’ve always preferred cut nails for making furniture is that they hold better than wire or pneumatic nails. Cut nails are a wedge that – when properly driven – bend and crush the wood fibers in a way that holds the nail fast.
Wire and pneumatic nails aren’t wedges, and while they do compress some of the surrounding wood fibers, they are just not in the same league as cut nails (or wrought nails).
Another bonus: A good cut nail will have a rough finish, especially compared to a smooth wire nail. That rough finish also gives the nail some extra bite. This is why many pneumatic nails are coated with a glue that helps them stick in the wood – every little bit helps.
— CS
Nail the Back to the Ends
Head in. Cut nails with a broad head are the ideal fastener for attaching the front and back to the ends. You can use nails with a smaller head for attaching the bottom.
If you’ve cut rabbets and dados in your parts, here’s how to assemble the chest: Nail on the back (add glue if you like). Fit the bottom in the dados. Nail on the front. Then nail the bottom in place all around.
But first, there are some details to consider. The length of your nails should suit the amount of wood that wasn’t rabbeted away in the front and the back boards. If you have 1″-thick stock and cut a 1⁄4” rabbet, then you should use 6d nails – 8d if you’re working in pine. If you have 7⁄8“-thick stock and cut a 1⁄4“-deep rabbet, you can use 5d nails – 6d in pine.
You need a nail with a sizable head for this operation – such as a rosehead. Headless nails or plain brads won’t do because they don’t have enough holding power. Depending on your stock, you might need to drill a pilot. In some pines and with some nails, you won’t. So make a test joint in scrap to find out what holds and what doesn’t split. After some experience you will get a feel about what will work.
One last detail: Angle these nails slightly at a small slope – about 5°. And alternate the slopes with every nail. This slope helps keep the front and back wedged onto the ends.
With the back nailed to the ends, cut the bottom board to slide into the dados so the fit is snug and the carcase is square. This is a hand-tool way of approaching the bottom: Create the opening and fit the piece to the opening. If you are machining your bottom, you should be able to hit the length bang-on and nail the bottom onto the ends first.
Usually when I make the bottom with hand tools, it ends up too thick for the dados. Instead of reducing the thickness of the entire bottom, I bevel the underside of the ends – like a raised panel – until the bottom slides in.
I glue the bottom in place all around – then nail it in after assembly. The glue helps here because all the expansion and contraction is in your favor. So take advantage of it.
You don’t need to use fancy nails to secure the bottom. Just use 6d or 8d cut finish brads – four through each end and five or six through the front and back. Set these below the surface if they will be covered by moulding.
Sticking it to the Moulding
Skip the moulding if you are going for a plain chest. But the moulding adds the appearance of a classic plinth – the visual separation between the base section and the not-base section. Surviving pieces were made both ways, with and without moulding.
Cut the moulding on an 80″-long piece of stock. Then cut the miters. This ensures that your profiles will match at the miters. I profile the moulding on a sticking board – a long and flat board with a high fence. I used a 3⁄8“-square ovolo for this profile.
On Mitering
The less you fuss about mitering the better your miters will be. Just cut them with confidence and calm. I wish someone had told me that when I was starting out.
Wrapping moulding around three sides of a carcase is cake compared to making the full 360°. Focus on getting one corner good and tight. Then clamp those two pieces in place on the chest and mark the other corner for its miter.
With both miters cut on the front piece you can focus on getting the fit tight on the returns (the pieces that “return” down the ends of your chest). I leave the returns long until after everything is glued and nailed in place.
Glue the entire front of the moulding to the case. On the returns, glue only the miters and the front one-third of the moulding to the ends. Press everything in place for a minute or two. Then drive the brads. The moulding should not shift. Set the brads. Then saw the returns flush at the back of the carcase.
About the Lid
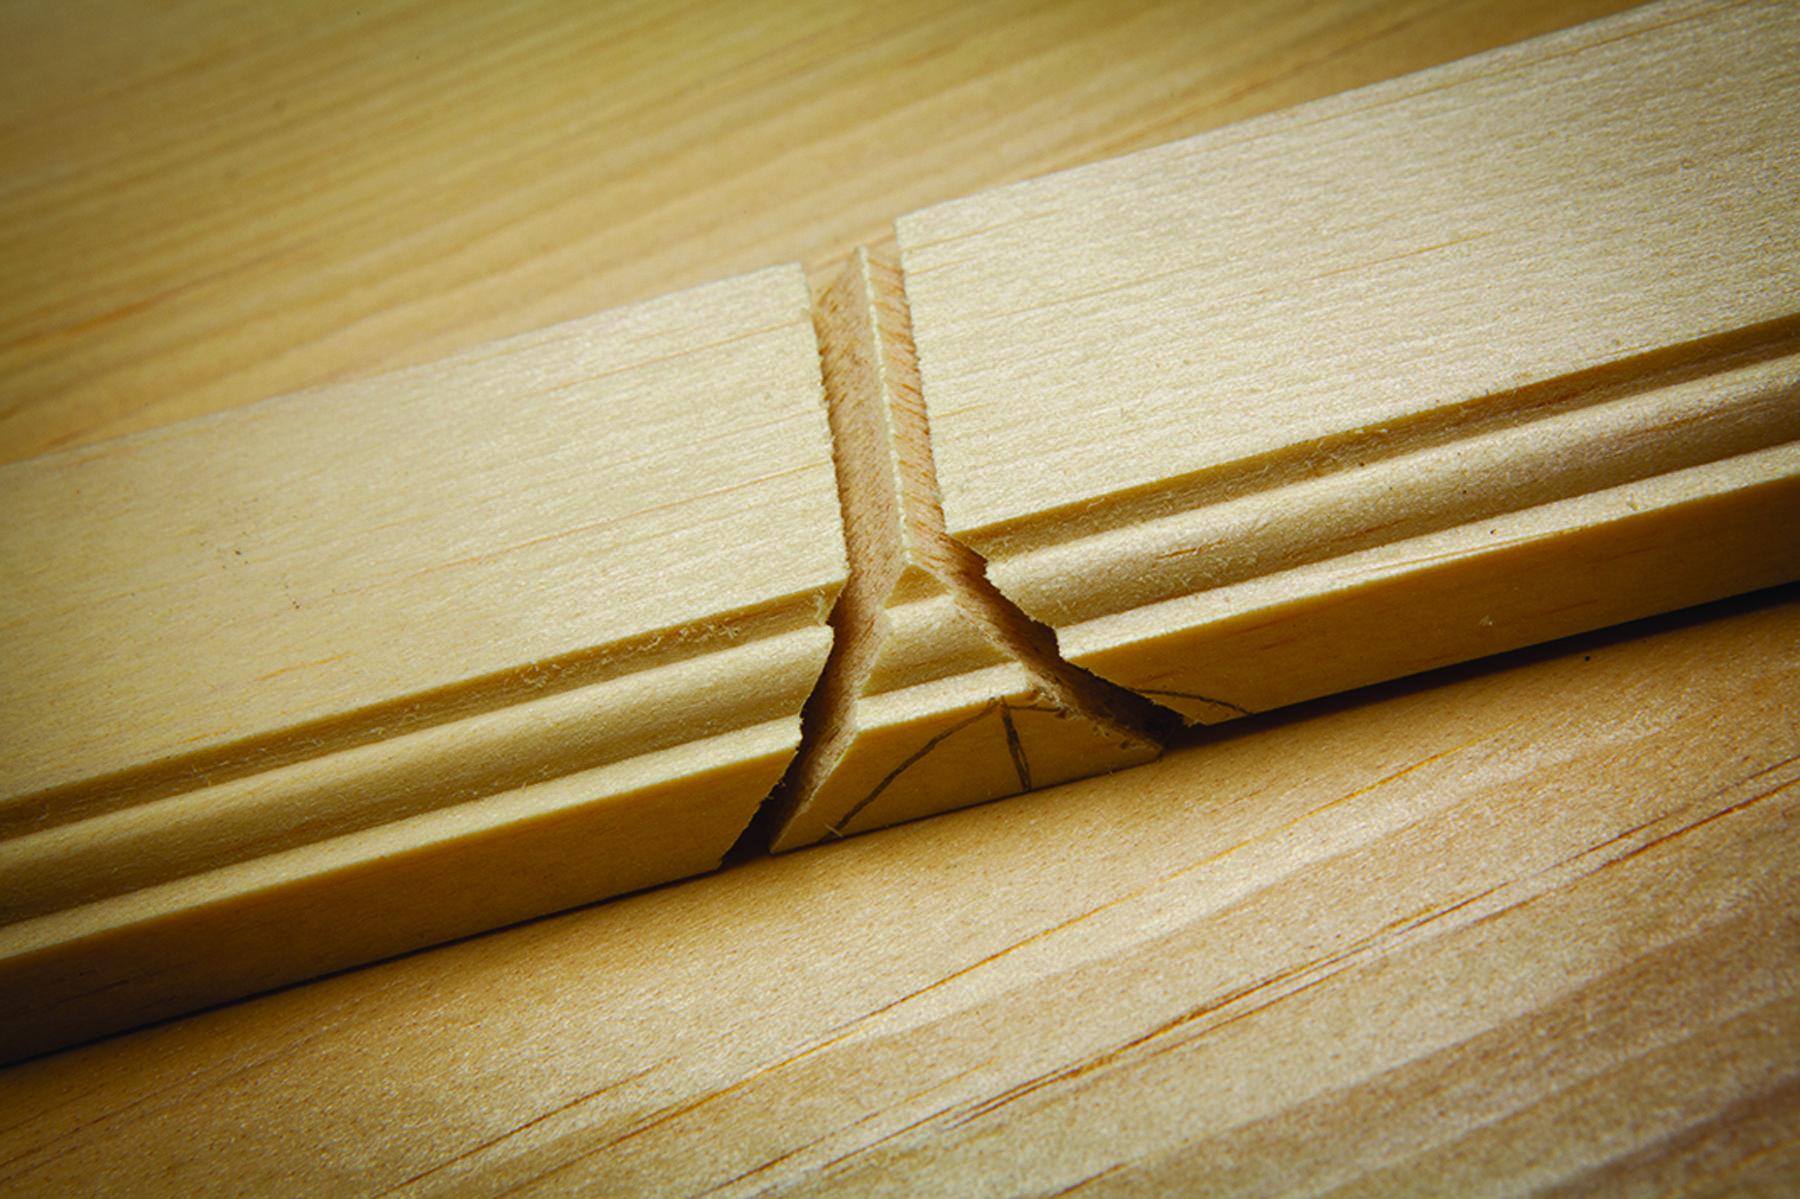
Miter slices. Here is how you miter your stuck moulding. By sawing close to your line you can make the grain and profile match around the corner perfectly.
The lid has two important components: its moulding profile around the rim and the battens on its underside. The moulding profile makes the lid look like something more sophisticated than leftover siding. The battens keep the lid flat – if you attach them correctly.
First cut the moulding profile on the two ends and the front of the lid. It can be almost any profile you have on hand. I have a larger ovolo plane (1⁄2” wide) that looks like a lot of other lids for chests that I’ve seen. Cut the profile on the ends first, then on the front edge. This allows you to erase any splintering from working across the grain.
The battens on the ends of the lid keep it flat. Nailing the battens to the lid isn’t enough – the battens will fall off when the top moves. Gluing the battens won’t do. Nailing and gluing is better, but the lid’s movement is still stronger than that joint.
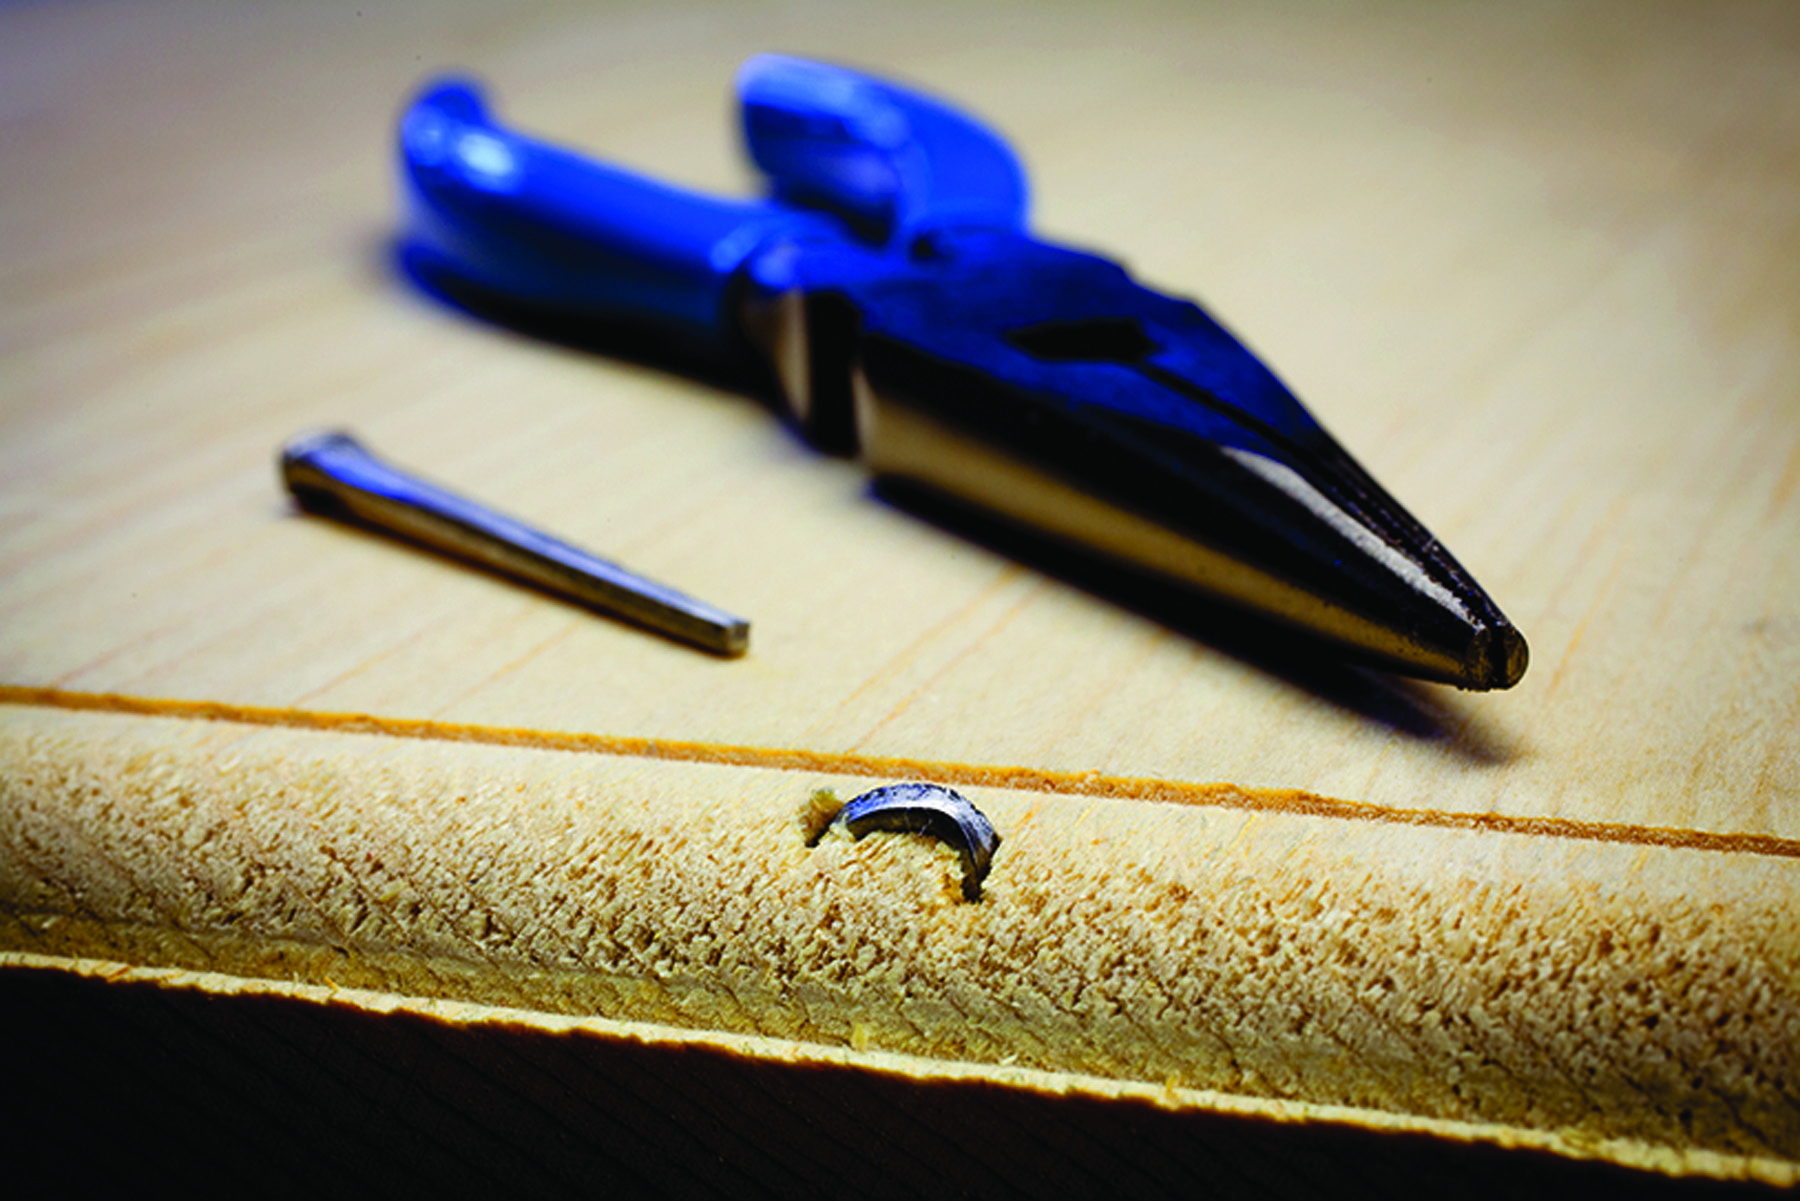
You have two choices: old school and modern. The modern approach is to screw the battens to the underside of the lid and ream out the pilot holes for the screws so the lid can move. The other approach is to drive nails through the battens and the lid so that the tips protrude through the moulding, then bend the tips back into the moulding.
Choose nails that protrude about 1⁄2” beyond the moulding. Then turn the tip of the nail over like a fishhook and drive it back into the moulding. This secures the batten to the lid and keeps the lid fairly flat.
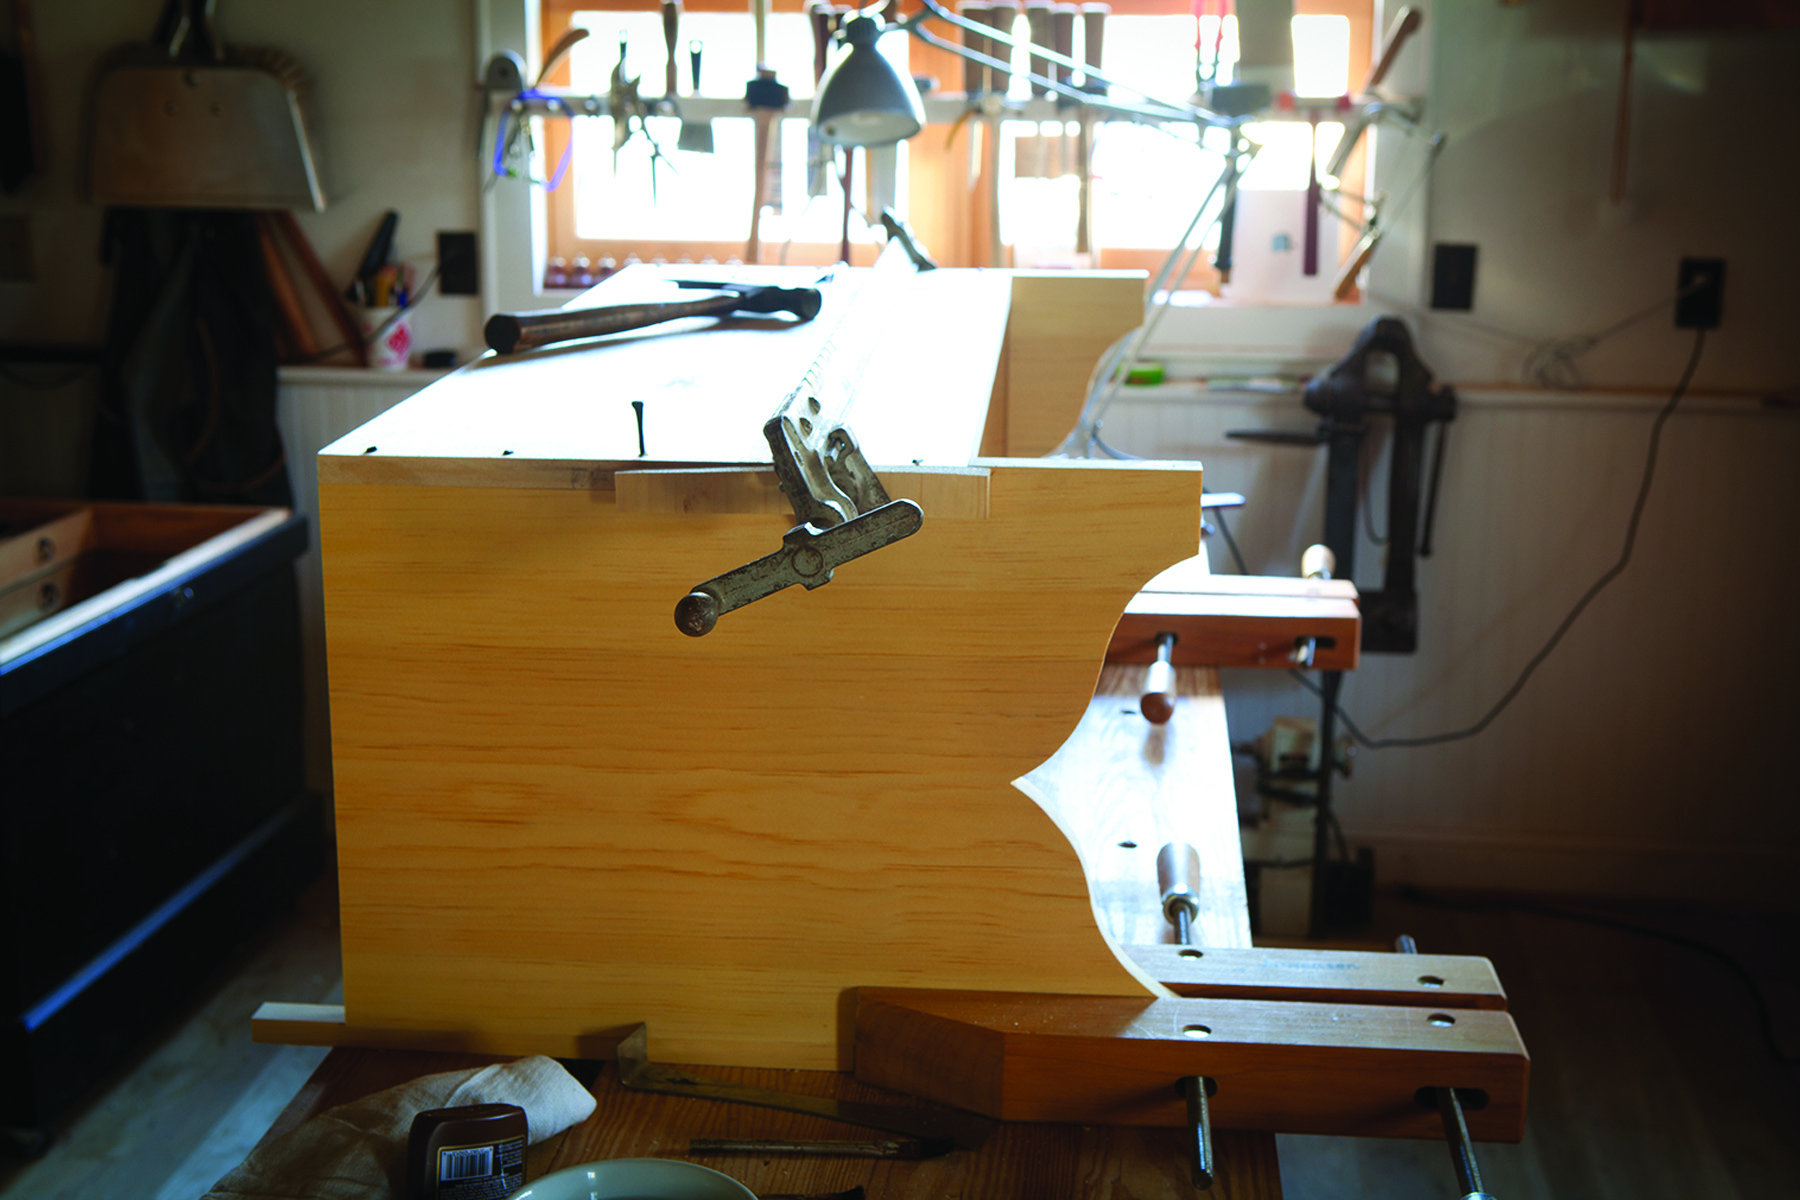
Hinge & Finish
Bent over. Clenching the nails back into the moulding hooks the battens to the underside of the lid.
There are a variety of ways to attach the hinges to the carcase and lid. Snipe hinges are an old solution (you can make your own using 2″ cotter pins).
These chests were typically painted on the outside and left bare inside. The paint highlights the form of the chest and obscures the distracting cross-grain aspects of the form.
What paint you choose should be based on:
■ Do you hate strong smells? Use latex.
■ Does the paint need to be bombproof? Consider oil-based.
■ Do you want a traditional look? Use commercial milk paint.
■ Are you a glutton for punishment? Make your own paint.
I use commercial “milk” paint. I know it’s not historically accurate, but it does give me a look I like. Plus it is quite durable and fairly low on the toxicity scale. I apply two coats of paint and sand between the coats with a #320-grit sanding sponge.
After building several of these chests, both by myself and with friends, I found that the process became faster and faster (two days is almost a luxurious amount of time). In fact, it took longer to type this explanation of building the piece than to actually make it.
Video: Learn a a trick to make clenching your nails easy.
Blog: How to Lay Out an Ogee.
Here are some supplies and tools we find essential in our everyday work around the shop. We may receive a commission from sales referred by our links; however, we have carefully selected these products for their usefulness and quality.