We may receive a commission when you use our affiliate links. However, this does not impact our recommendations.
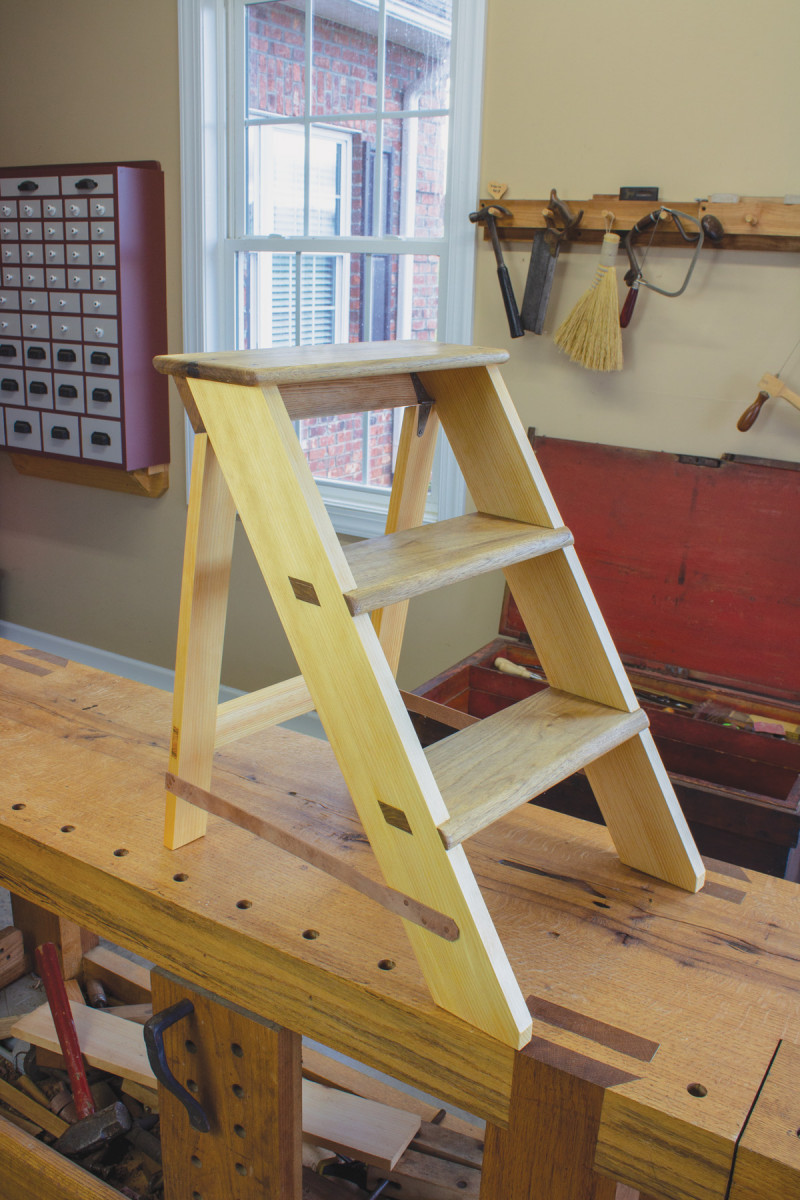
This functional form is an ideal intro to the Shaker Style.
I’ve traveled to Hancock Shaker Village in Pittsfield, Massachusetts, for the past four years, measuring and documenting pieces in their collection. I usually have a list of pieces to examine that’s more than I can ever accomplish in the time I have there. My trip this year was a little different. My pre-selected list was shorter and I stayed a little longer. So, for the first time, I had time to wander around and pick a few random pieces to check out.
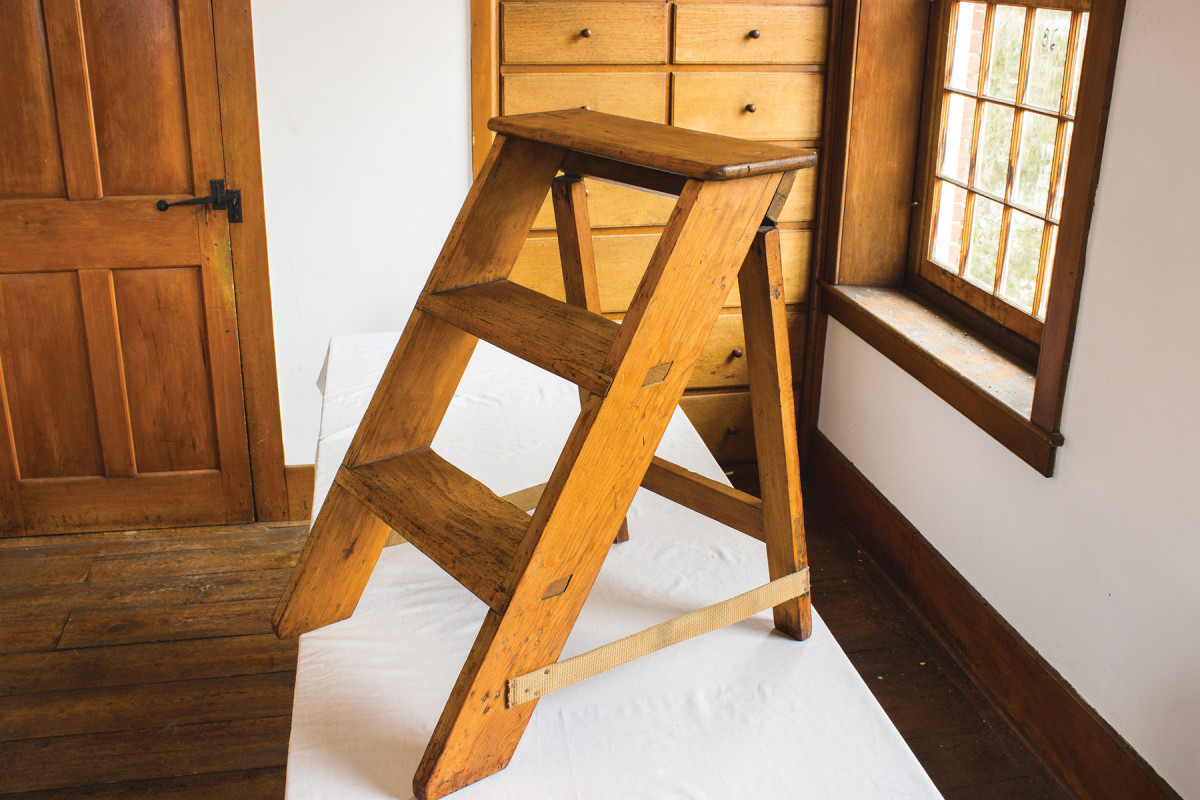
1. The original stepladder in the Hancock Shaker Village collection.
The collection at Hancock Shaker Village is vast, consisting of more than 22,000 objects housed in 20 original Shaker buildings at a historic Shaker site. This tends to cause me grief; it makes focusing on a selected few items difficult. In the process of documenting pieces, you inevitably run across more items of interest. It’s a vicious cycle to say the least.
The small stepladder described here caught my eye on my very first visit to Hancock, a passing glance was all that was possible on that visit. Last year I measured another piece in the same room with the stepladder, but was running short on time so had to pass over it again. On this last trip I finally was able to measure and photograph the ladder in detail. Except for a couple of details that I’ll explain as we go along, the stepladder I’m building here is pretty much a spot-on copy.
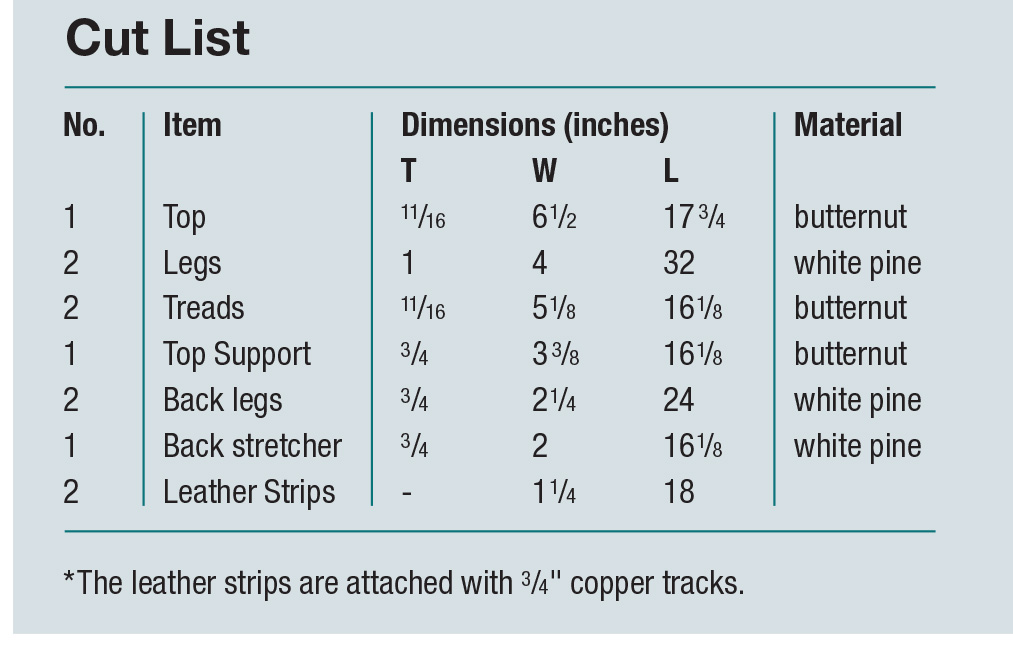
Materials & Cutlist
Wood selection for this project is very important. Get it wrong, and you could break your neck! The original ladder was made with white pine legs and butternut treads. For this ladder, I’m using the same, paying special attention to grain. However, neither of these species are what most folks would think of today as woods for ladder making. The Shakers had one major advantage in material: using slow-grown virgin timber. Slow-grown white pine in particular is much stronger and more dense than what we have available now. Butternut would be similarly affected by growth speed. At that time, these two species would’ve been plenty strong and would help to keep the ladder lightweight and easy to carry. Most modern, fast-grown white pine is especially soft and weak; totally inadequate for this project. A good substitute would be any fairly strong, clear and straight-grained stock that’s available to you. Southern yellow pine is an excellent choice if it’s available in your area.
 Front Legs & Dado Layout
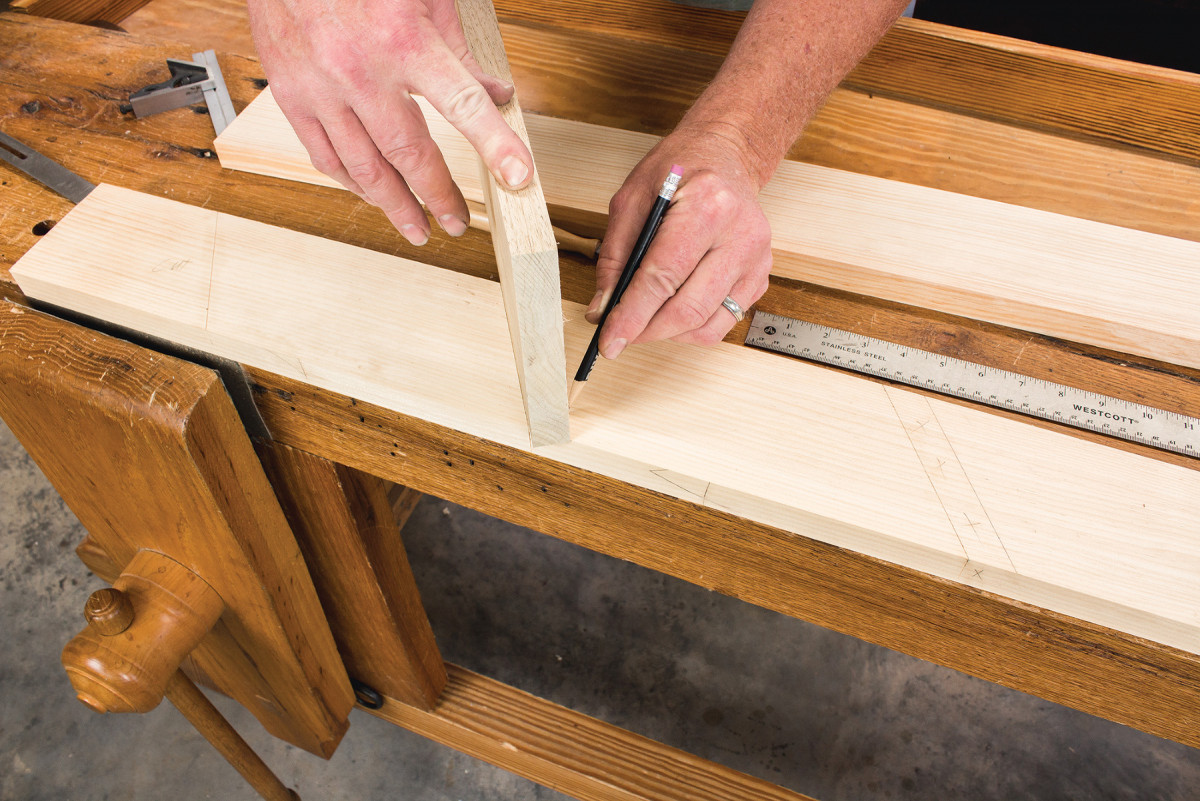
2. Clamp the legs together and do the layout as a pair to ensure perfect alignment of the joints. The best way to lay out the width of the dados is a direct transfer from the treads themselves.
Mill the front legs to size, making them a bit longer than needed and leaving the ends square. Decide which sides you want to be the faces and front edges, and mark them.
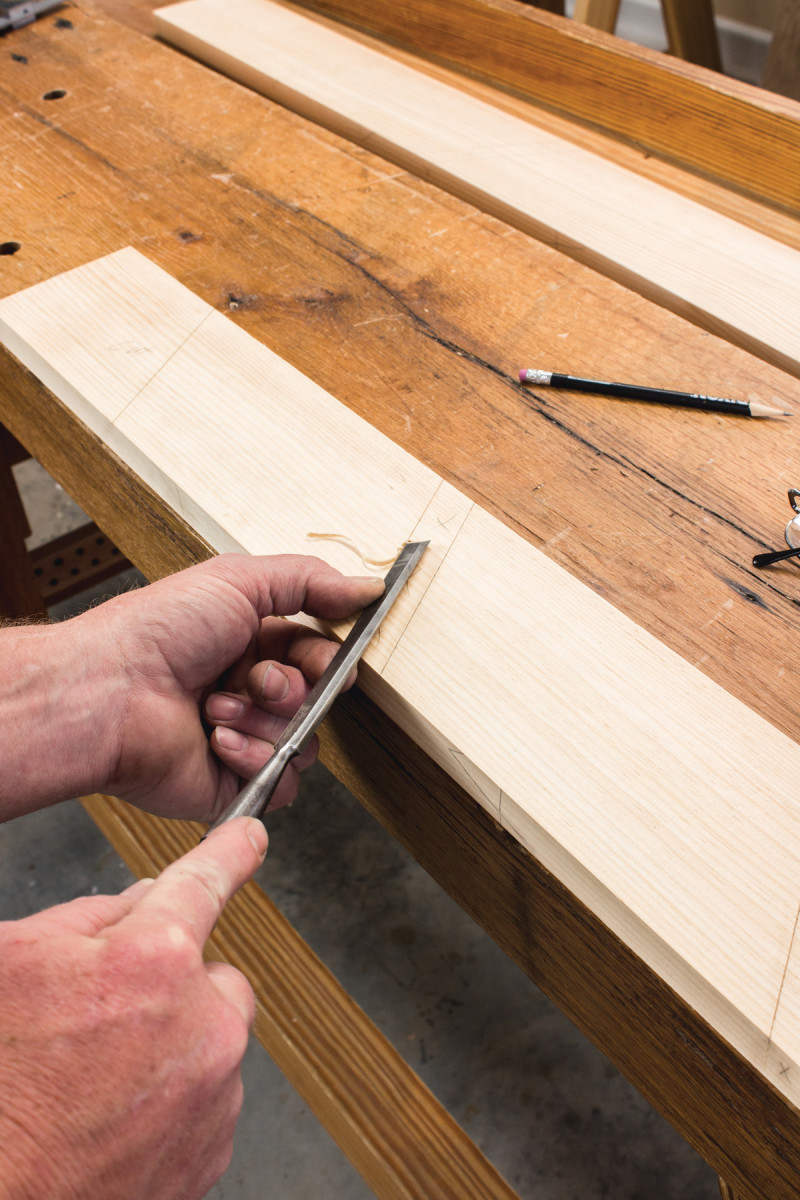
3. Use a sharp chisel on the waste side of the knife lines and make a relief cut to help start your saw.
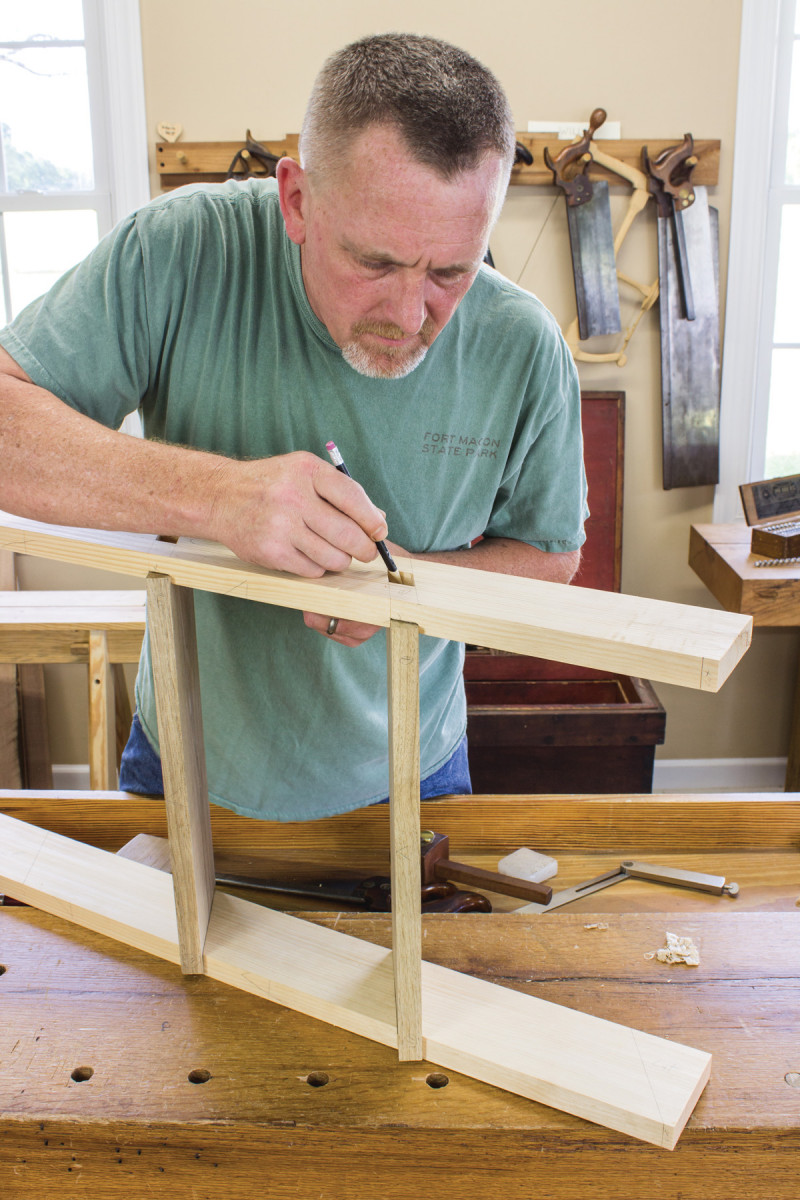
Square and knife a line a 1/4” or so from the bottom end of the legs. Measure up from this line 913/16“, knife a line across the pair of legs for the first tread location. Next, measure 913/16” from that line and knife another line for the second tread location. Last, measure up from the second tread mark 9-1/8″ and make a line for the top of the legs.
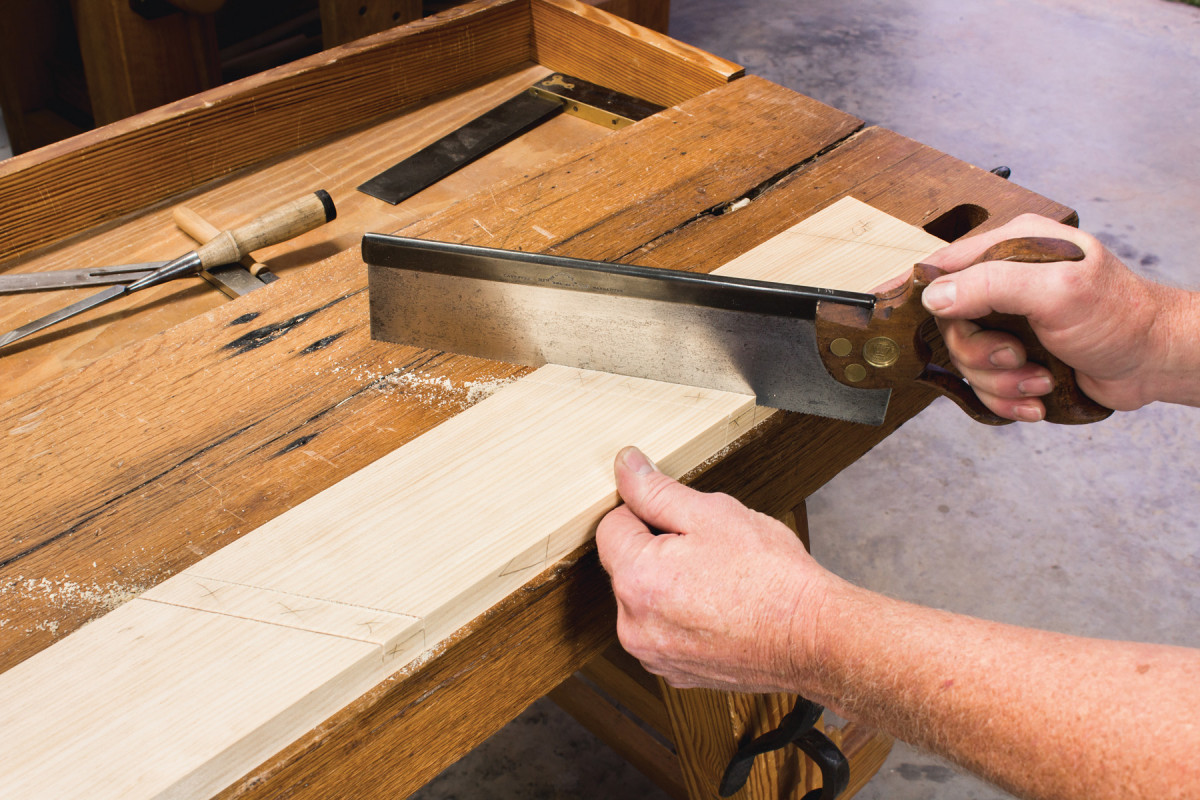
4. Using a crosscut saw, saw down to the depth marks on either end of the dado.
There are two 5/16“-deep dados on the inside of each leg to support the treads. To lay these out, set a bevel to 32° and line it up to the marks on the front edge of the leg by catching your marking knife in the knife line on the front edge. Be sure your line angles from the front edge toward the top of the legs, and knife a line across the inside face of the legs at each dado location.
Line up the tread on the lower side of the knife line and make a tick mark with a pencil on the opposite side. Remove the tread, align your bevel with the tick mark and knife line across. Last, use a marking gauge set to 5/16” and make a depth mark between either end of the knife line so you’ll know where to stop.
Dadoes & Mortises
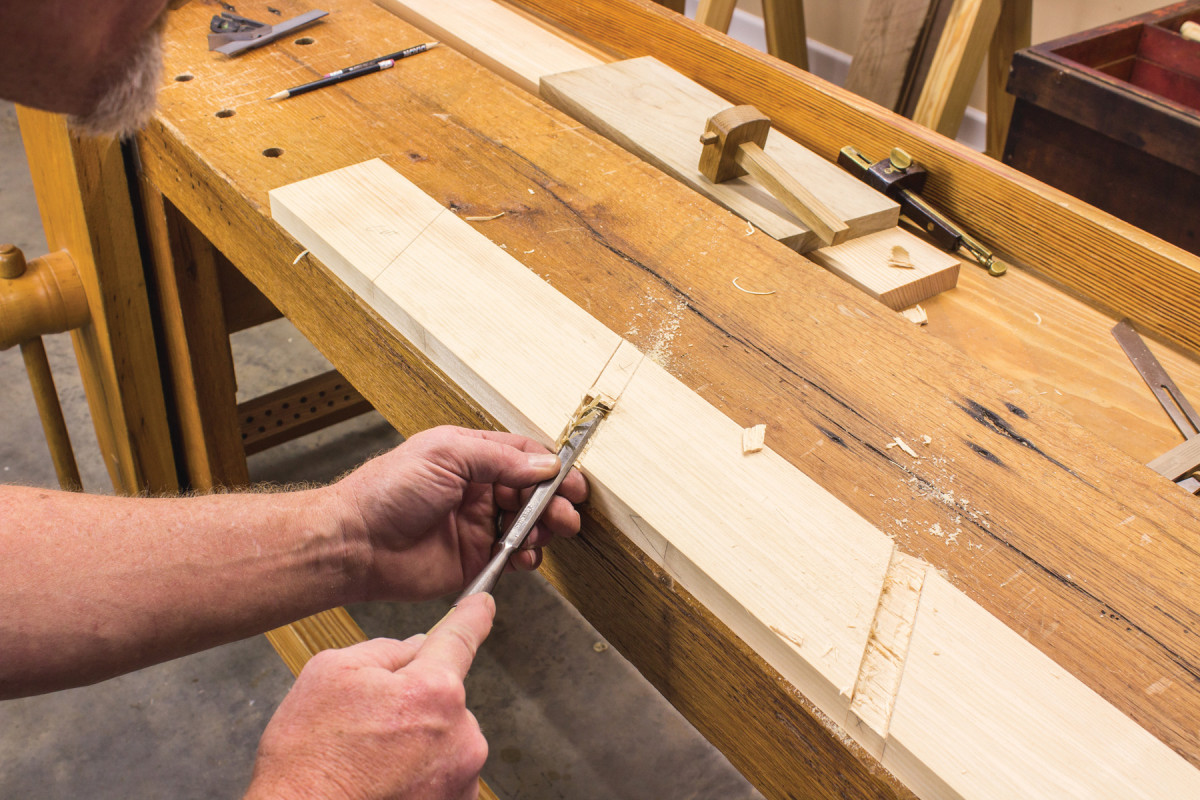
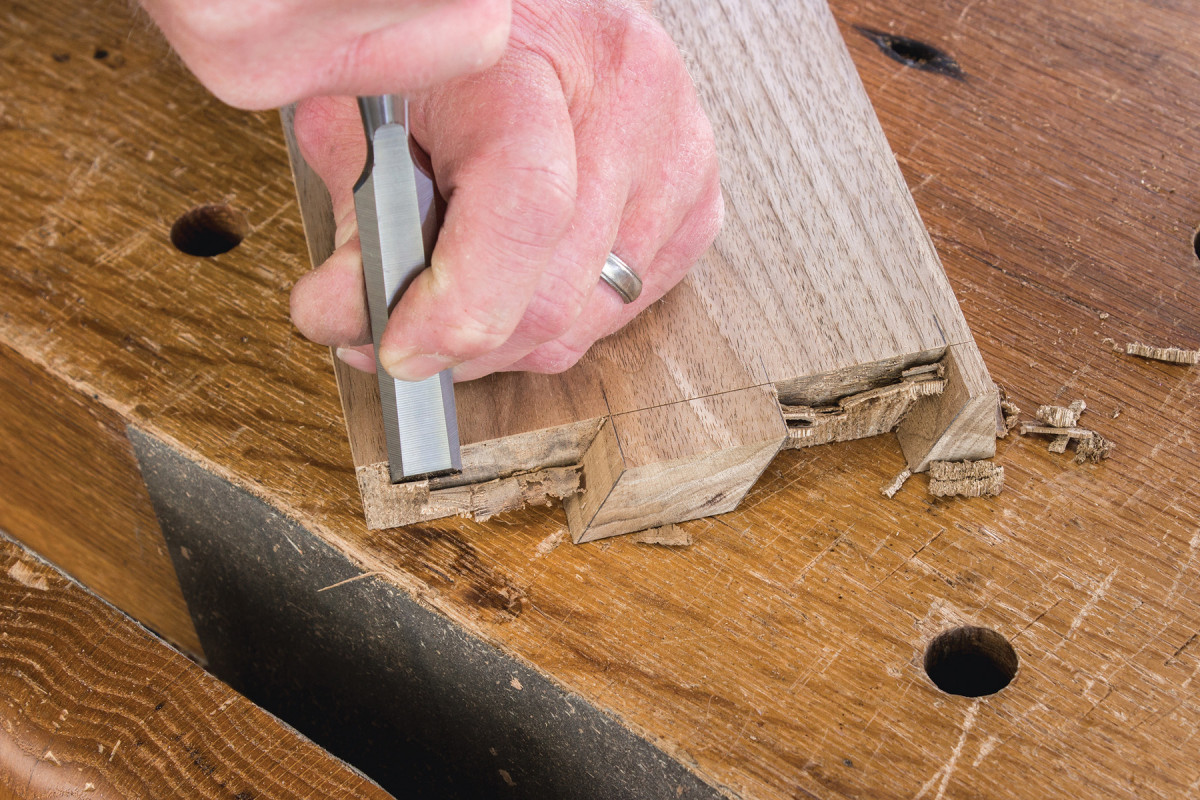
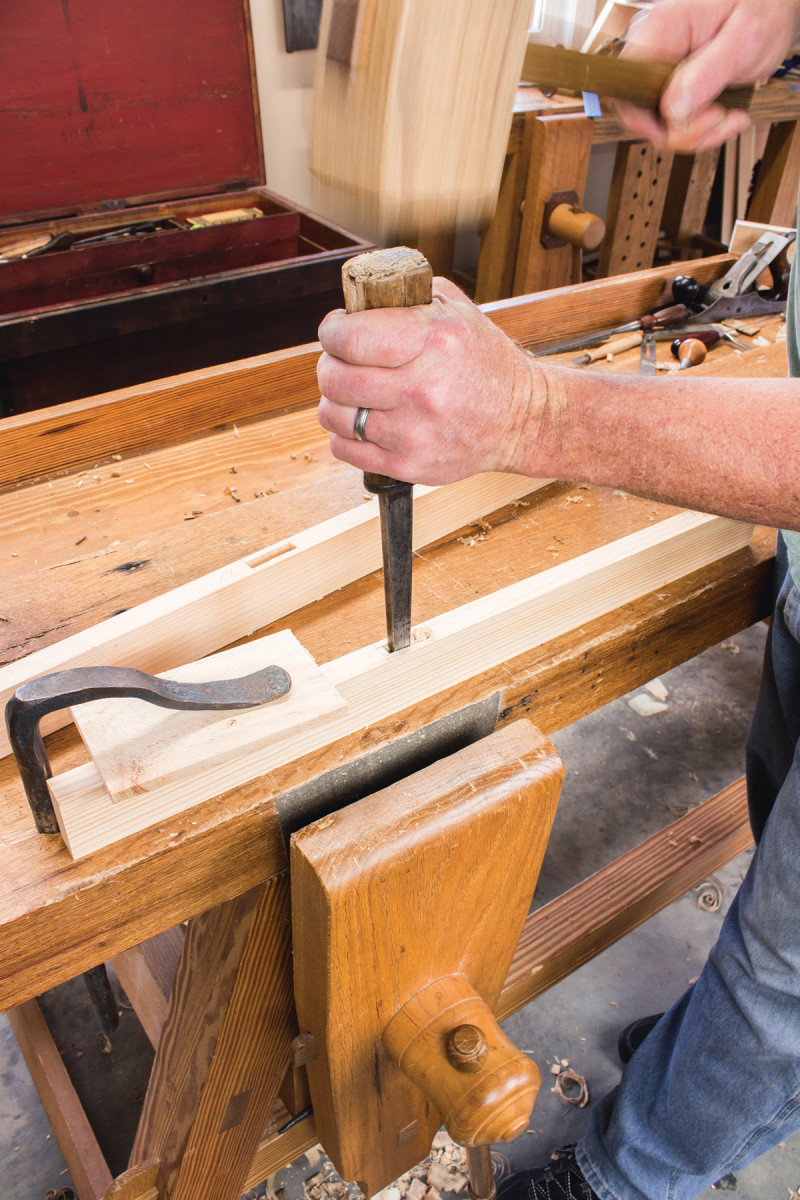
5. To finish, use a sharp chisel to chop and pare the waste from between the saw cuts. The last pass can be done with a router plane to get a nice, flat-bottomed dado.
There are several ways you could cut the tread dados, but in a situation like this, the quickest way is just a saw and chisel.
The skewed mortises that attach the treads to the legs look like they’d be difficult to execute but they are simple to layout and cut.

6. To layout the width of the mortises use a double-tooth marking gauge set to 13/16” between the points and roughly center the teeth to the width of the legs. Remove the waste from the mortises by first boring a couple of auger holes and finish by paring up to the layout lines with a chisel.
Begin by using your bevel and knife to run shallow layout lines across the face side of the legs for the height of the mortises, opposite each dado location in the same manner we did for the dado layout.
I used a scrap of wood inserted in the dado and clamped in the vise to support the work which helped prevent a blowout on the inside of the legs.
Tread Tenons
7. Transferring the mortise width directly to the tenons is the best layout method.
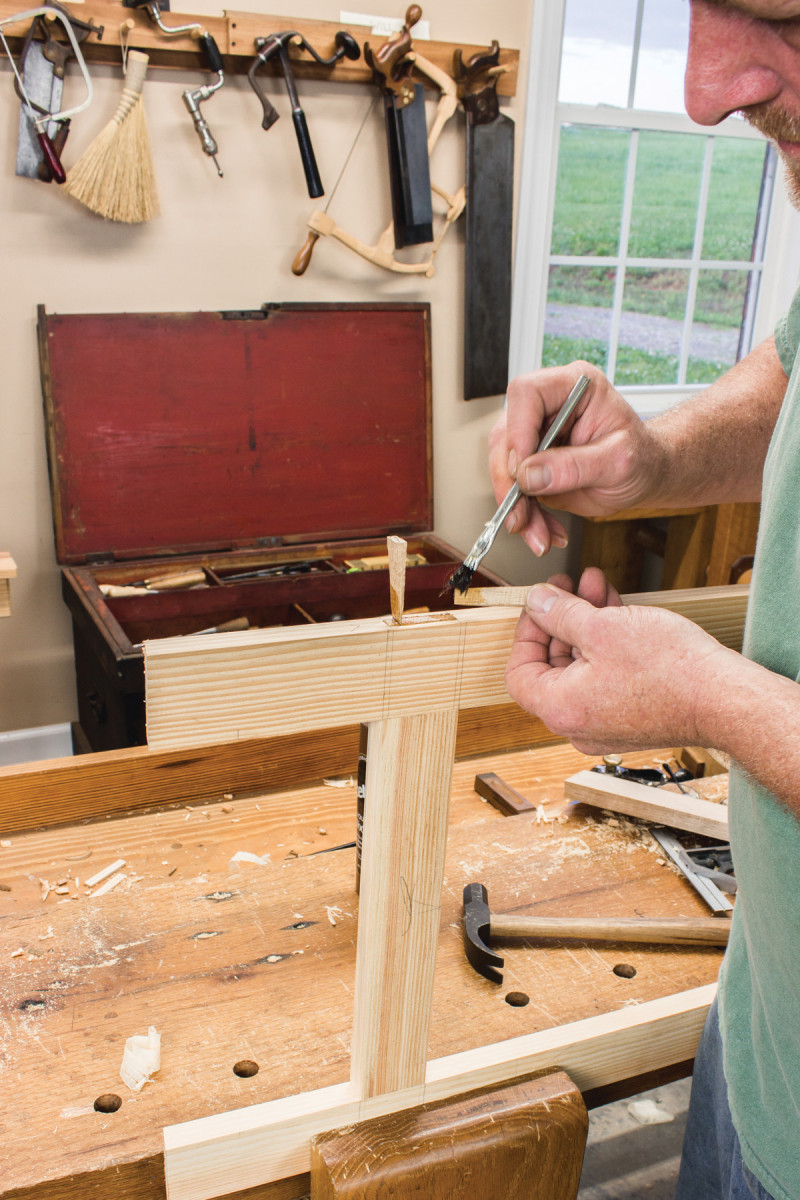
The tenon layout is done by direct transfer from the mortises. Assemble the treads and legs with the back edges of the treads extending beyond the back of the legs just enough that they can be planed flush to the legs later.
With a pencil or knife trace the mortise location and the front edge of the legs onto the ends of the treads. It’s also a good idea to number each mortise to its corresponding tenon for quick reference later.
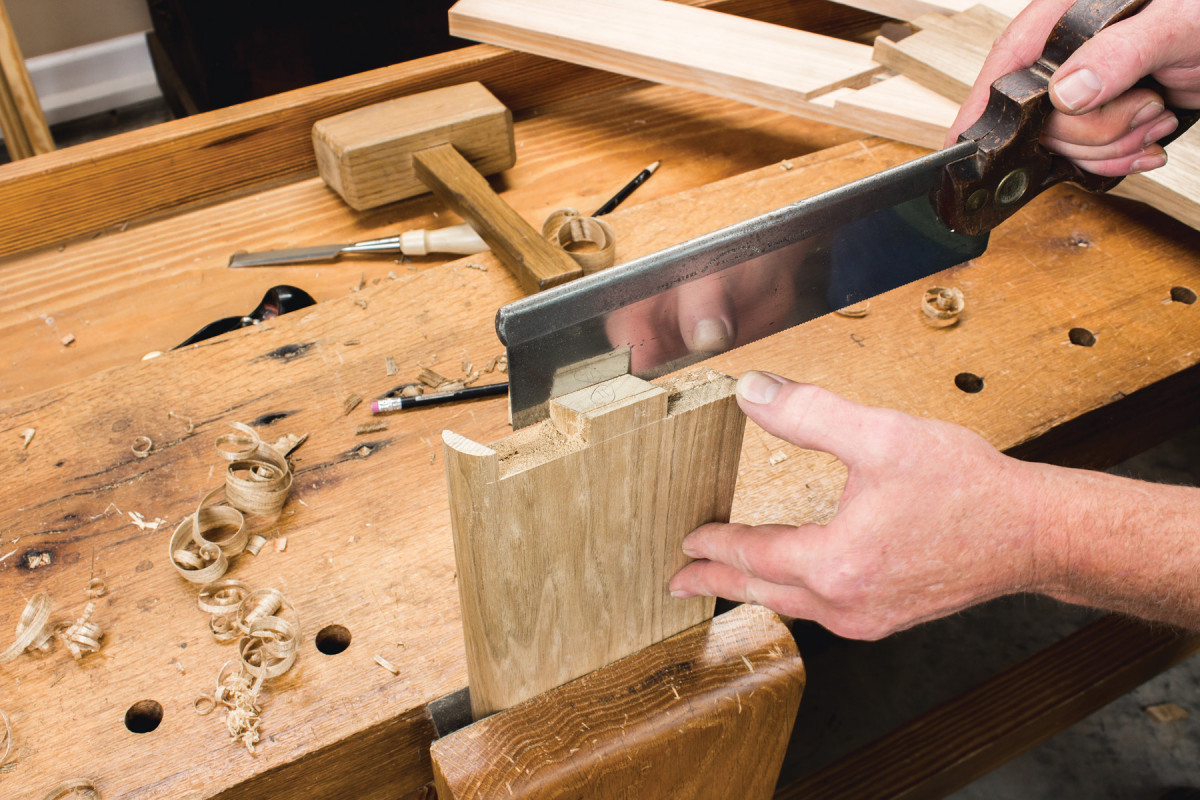
8. Use a coping saw to cut close to the baseline and finish by paring away the remaining waste with a sharp chisel, working halfway from either side to the baseline.
Use a cutting gauge set to 11/16” and cut a baseline around the ends of both treads. Square down from the marks on the end of the tread down to the baseline. Saw to the waste sides of the tenon and the front, stopping at the baseline.
Test fit the tenons. Once they fit nicely, saw two slots about 3/16” from the faces of each tenon to receive wedges. Also, before disassembling, trace from the back edge of the legs onto the ends treads.
9. Two shallow kerfs are cut in each tenon for the wedges.
The front edges of the treads are rounded. The round portion extends about 3/16” in front of the legs. Again, this can be knocked out quickly with a jack and jointer.
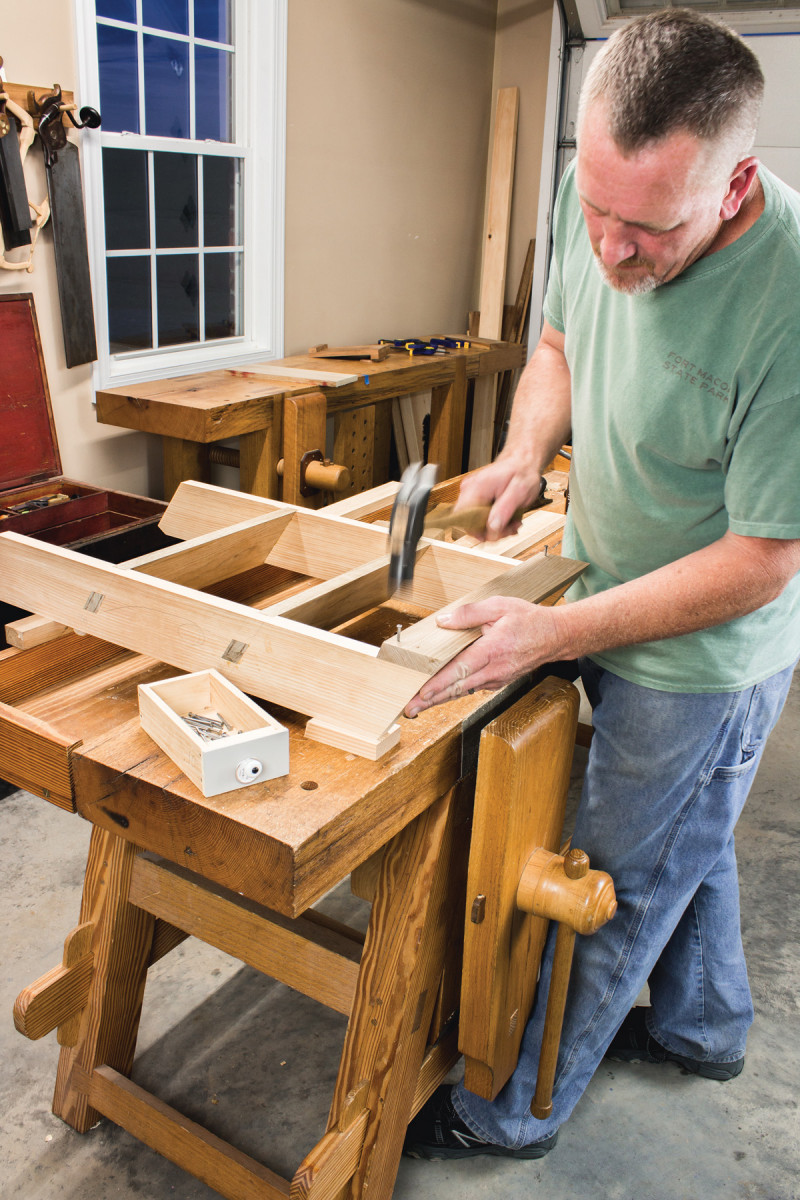
With the joinery finished, cut the angles on the top and bottom of the legs that we laid out earlier. The front of the legs on the bottom also have a 7/8” flat cut into them. Last, apply a coat of glue to the dados, tenons, mortises and assemble. Carefully tap the wedges into the tenons. Even though the wedges are oriented to put pressure along the grain, the skew of the tenon also puts pressure across the grain.
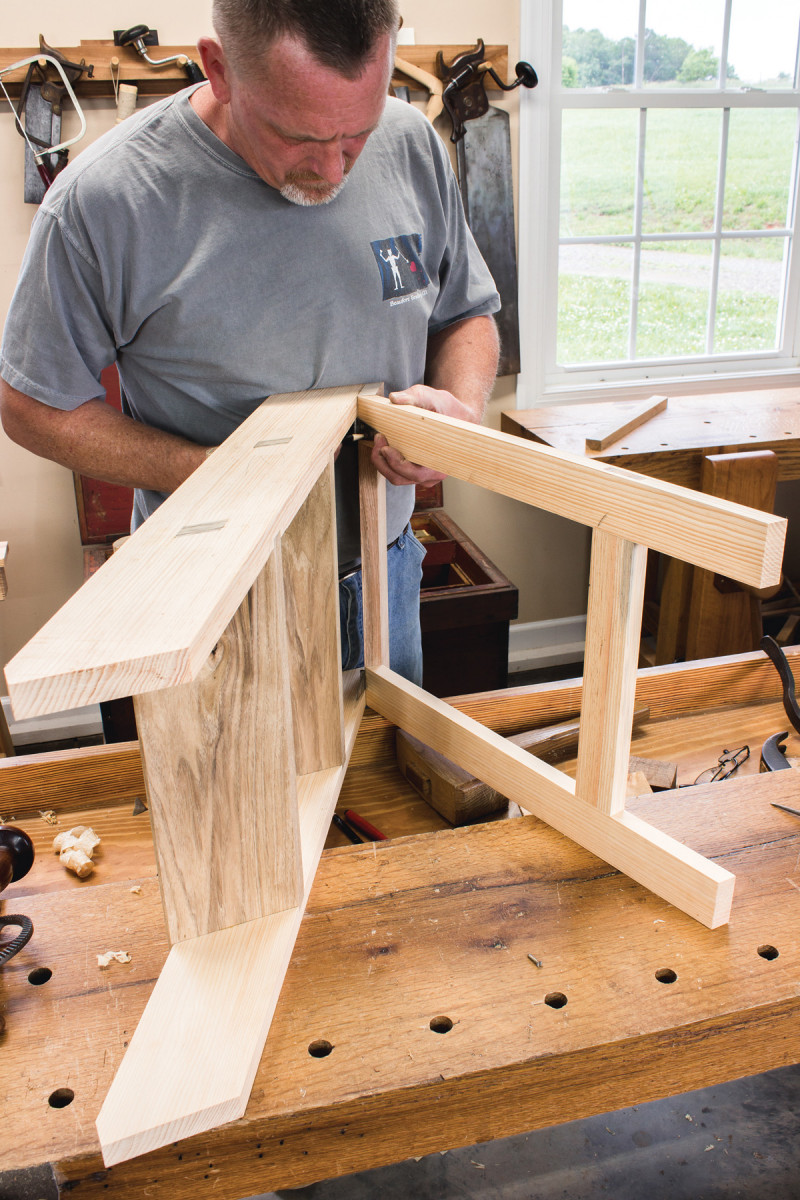
Top Support & Back Legs
10. The top support is attached to the legs with cut nails and glue.
The upper edge of the top support has the same angle as the legs. The lower edge is cut to 21.75° where the back legs meet.
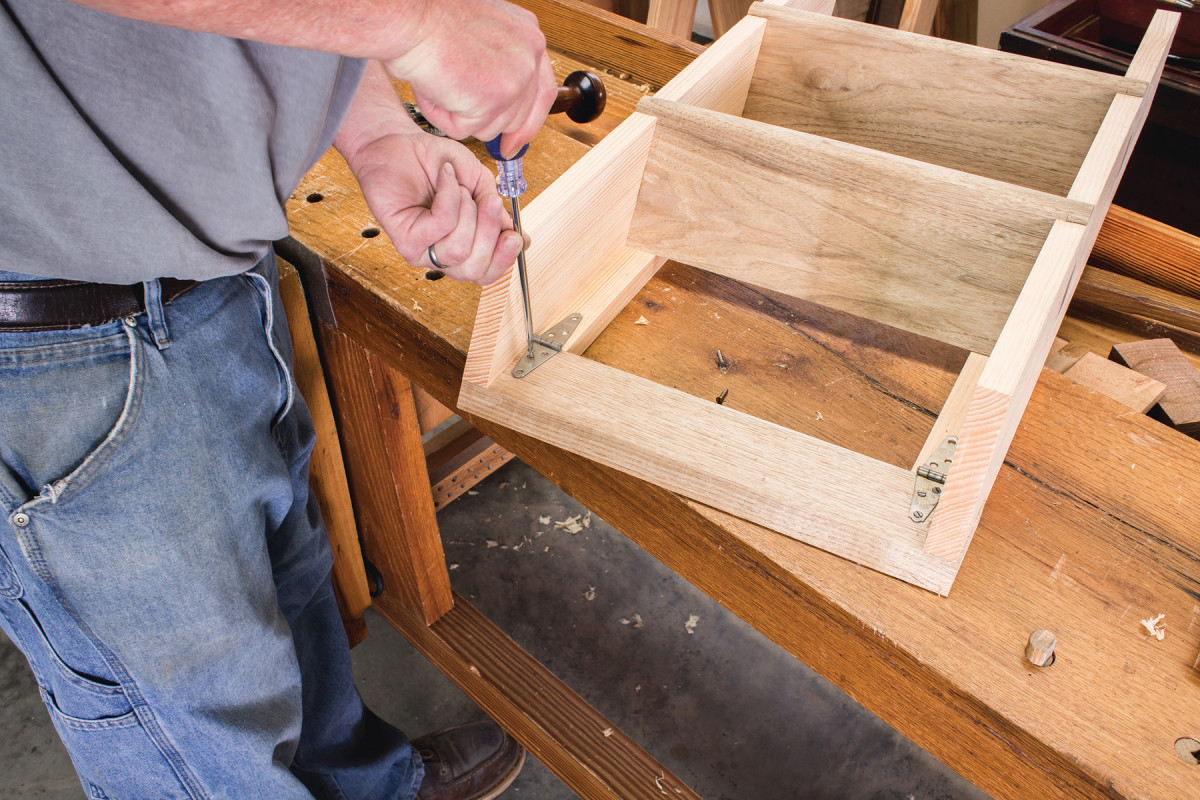
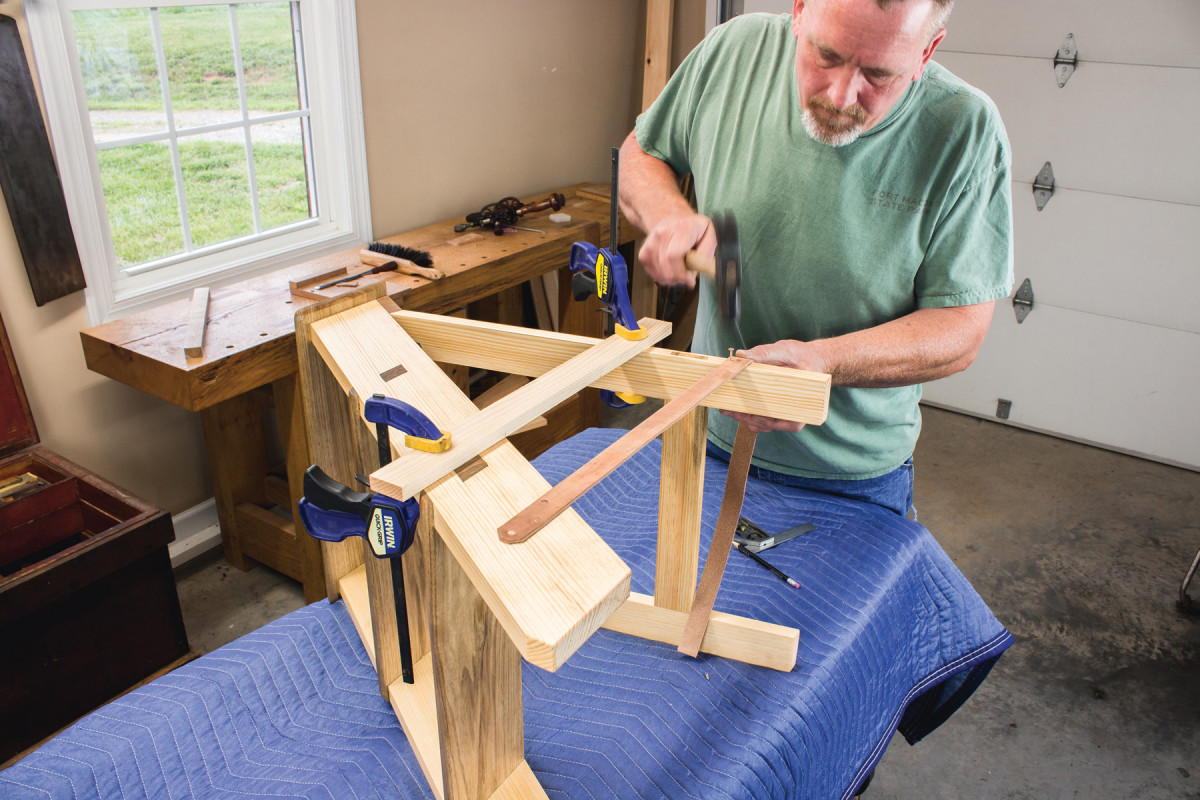
11. I attached the hinges to the inside of the top support so when the legs are open weight is applied from the top support directly to the top of the legs and not the hinges themselves.
The hinges on the original were mounted to the back face of the top support and legs. These weren’t the original hinges, and from the number of empty screw holes present, it’d been repaired in this area more than once.
12. The two legs are joined by a single 3/8” mortise and tenon on either end of the stretcher.
There’s not much to making the framework for the back legs. The tops of the legs are cut at the same 21.75° angle as the lower edge of the top support, the bottoms are cut at 32°.
13. The tenons are glued and wedged to hold everything tight.
Lay out these mortises with a mortise gauge set to 3/8” and use a 3/8” mortise chisel. Chop halfway from both sides, meeting in the middle. The tenons are laid out with the same gauge setting. Use a tenon saw cutting cheeks first, then the shoulders.
Top & Finish
14. To mount the rear leg assembly, lay the front leg assembly on its side and place the rear assembly in its position. Move it until the angle at the top of the legs is flat against the angle on the top support. Fold the hinges against the legs and mark the screw locations. Remove and bore pilot holes for the screws and install them.
The top board is a piece of 11/16” stock attached to the top of the legs. The back edge is angled to follow the leg angle on the back. The front edge and ends are simply rounded over. The top attaches with glue, four 2″ #10 wood screws and 2 cut nails driven into the top support.
The original stepladder had been painted chrome yellow (there were traces of paint on the undersides of the treads and top). The paint was stripped at some point and replaced with a clear varnish. For this reproduction, I did my favorite finish of 50/50 Danish oil/poly mix. Just wipe it on, wait 15 minutes or so and wipe off the excess. After drying for three days I scuffed it and applied a second coat in the same manner.
15. Once the finish is cured, install the leg straps.
The stepladder at Hancock had nylon strapping that’d been added at some point. What the original material was I don’t know, but from the number of empty nails holes in this area of the legs, the leg straps had been replaced more than once. Instead of nylon, I used 8-9oz. leather straps 11/4” wide. The straps are attached to the legs using 3/4” copper tacks 31/2” from the bottom of the legs. PW
Will Myers is a woodworker who makes his home in North Carolina.
Here are some supplies and tools we find essential in our everyday work around the shop. We may receive a commission from sales referred by our links; however, we have carefully selected these products for their usefulness and quality.