<img height="1" width="1" style="display:none" src="https://www.facebook.com/tr?id=376816859356052&amp;ev=PageView&amp;noscript=1">
 In Featured Article

We may receive a commission when you use our affiliate links. However, this does not impact our recommendations.

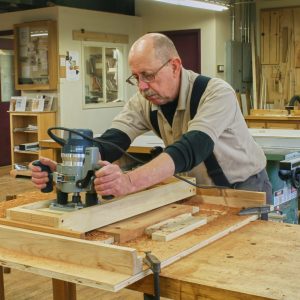
The “Gluebo” has been put through its workholding paces lately as I’ve been working on a 33″ x 84-1/2″ screen door for my house. I stayed after work on Friday to rout a 1/2″ x 1/2″ rabbet in which the screen panels will seat, and my bench is plenty long enough to securely clamp the door between the end vise and a bench dog to hold it in place for routing. I did, I admit, have a frisson of trepidation about routing on my new bench before we get to show it off at Woodworking in America next week (routing is not my strong suit; I’m always fearful of tipping the router base and ruining my workpiece, the bench, my hands…¦). But, because the long edges of the door hung off the sides of the bench, I didn’t have too much fear until I got to the ends. But no problem , I just moved slowly and carefully, and all went well.

Also, while I’ve been vocal about wanting to move my bench against a wall (it would be nice to have easily accessible hanging tool storage), it was easy to walk around the bench as I routed; I didn’t have to move the bench, or reposition my work. (Now that I’m done with that though, I’m eyeing a wall space again).

Then, I clamped the screen door into the leg vise with support from the board jack to trim the tenons and wedges flush at the through-mortises. Rock solid.

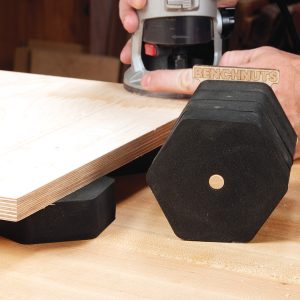
And as you can see, the large bench also came in handy for painting; I used Painter’s Pyramids to lift the door off the benchtop, and again was able to walk around the entire thing to easily get a coat on. Now it just needs a few more coats of paint to help it defy the elements.

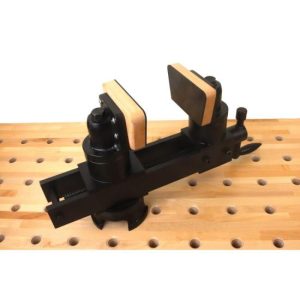
When it came to attaching screen to my mitered frames, I was able to secure the interior of the frame across a bench dog and the adjustable “Wonder Pup” from Veritas, which allowed me to stretch the screen across the frame for stapling, without having to worry about flexing the frame as I pulled the screen snug.

All in all, I have nothing but love for my new LVL bench…¦except that it looks “pink” in a lot of photos. It’s actually a deep brown/red , the color of dried blood (I bloodied my knuckles on the “Pet Screen” , that stuff is seriously tough , and briefly thought about wiping it onto one of the legs. But I opted for a clean shop rag).

The bench will be featured in the November 2009 issue of Popular Woodworking (mailing to subscribers now, and on newsstands the second week of October). You can see a video tour of the bench here. Plus, we’ll be hauling it to Valley Forge for Woodworking in America: Hand Tools and Techniques, Oct 2-4 – and we’ve extended the “Early-Bird Discount through Sept. 27.

– Megan Fitzpatrick


Product Recommendations

Here are some supplies and tools we find essential in our everyday work around the shop. We may receive a commission from sales referred by our links; however, we have carefully selected these products for their usefulness and quality.

Recent Posts
Showing 10 comments
  • Jeff Giardini

    Megan, I am most impressed that you managed to not only make a great bench, but managed to use a phrase like "frisson of trepidation" when describing its use! A wordsmith as well as a woodworker.
    Thanks for a nice piece.

  • megan

    OK – maybe in the middle of the floor isn’t so bad – but next to the planer isn’t so good…but as long as I keep a workpiece on it, perhaps the top won’t get covered w/other people’s planing.

    Jim, the screw we used is from bigwoodvise.com (the "classic); metal screws are available from Lee Valley and Woodcraft, among others.

    Courtney, I seem to be acquiring a lot of handplanes, and for handwork, the benchtop should be even with one’s knuckles while standing, with the arm hanging straight down.

  • courtney

    I too am a woman woodworker and just rebuilt my shop and am trying to decide on my workbench design. I am interested in how you decided on how tall you made it. It looks like you would be bending over a lot while working on flat objects? yes,no?
    thanks, courtney

  • Jim

    I am most impressed with this bench. I have a good top I’ve built, but need to work on an underframe. The leg vise looks to be a great idea, but I have no idea where to even start looking for the screw, (or complete part)any help would be appreciated.

  • John

    Due to space restrictions in my shop. I have no choice but to have my bench against a wall. I have many times wished I could move it out to access the opposite side rather than have to flip or rotate my workpiece. So,Megan, be careful what you wish for. Stan’s suggestion above is a good one, or, you could make a rolling rack with pegboard to but up against the back. That could be rolled back out of the way when you needed access to the rear of the bench. Then while on the back side, you could still have access to the tools by simply turning around rather than walking accross the shop. Afterward, roll it back against the bench and it would be easily accessible reaching across the bench.
    No matter what you decide, your bench looks and functions beautifully!!

  • Stan Erwin

    I have been needing a bench for some time, and I think this may be it. Watched the video and and enjoyed it,Miss Megan is not hard on these old eyes either.How about a simple jack on either end of the bench, so it could be against the wall or moved out when needed?-Stan

  • megan

    David, I actually have most of my items stashed in a rolling cart right now (you can see it under the end of the bench in the first photo). While I’m not opposed to the idea of a _good_ rolling tool rack, my current one doesn’t fit that description. But, I’m hitting the books soon to come up with an alternative.

  • David S

    Megan

    Instead of wall space, how about a rolling tool chest (son of Gluebo)?

  • megan

    I was surprised by how easy it was to plane flat (to be fair though, Chris did the bulk of it). Because we used the powered planer to level every smaller lamination before we glued up the larger lams, there was very little out of flat. And, if you’re doing Bob’s 2-part top, you could work straight out of a (good) planer, as the two halves will be small enough. That said, it’s not that hard to flatten a bench by hand; we have a tutorial on line at popularwoodworking.com/nov09 – and I’m a relative newbie, but I can do it (with some breaks to catch my breath) – so I know you can!

  • Dyami

    Megan,
    The bench looks awesome. I can’t wait to see it at WIA. I’m giving serious thought to using LVLs to make a cross between the Gluebo and Bob Lang’s 21st Century bench, as I’m thinking his separated tops will be easier to make and your base is better.

    How hard was it to make the top flush? While I’d like to learn, I’m presently no good with a hand plane and don’t really want to experiment on a bench I hope to make last a lifetime.

Start typing and press Enter to search