We may receive a commission when you use our affiliate links. However, this does not impact our recommendations.
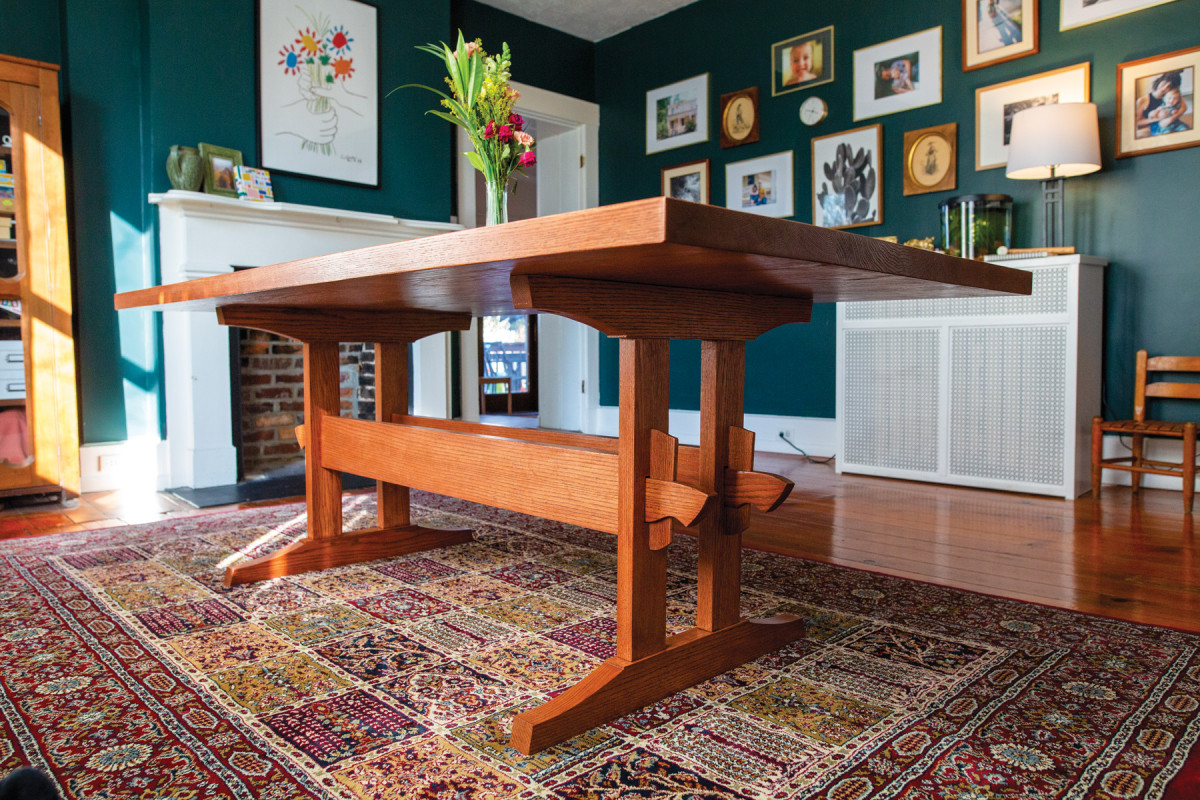
This classic design is at home in settings both rustic and modern.
PROJECT #2007 • Skill Level: Intermediate • Time: 4 days • Cost: $500
My home is a 150-year-old farmhouse situated in the middle of Cincinnati, Ohio. When it came time to tackle the renovation of the dining room, we decided on a dining table that fit the period and aesthetic of our home. As I started to research mid-19th-century dining tables, I came across an auction site with a pine Swedish trestle table with a style that was almost exactly what I was searching for.
The table features two strong stretchers with tusk and tenon joinery. This enables the table to be knocked down for transportation and assembled again without tools. I also appreciated that the leg assemblies each have two legs that provide additional support for a huge tabletop (this stands in contrast to some trestle tables that use just one leg per assembly.) The original was made out of pine, which would be the traditional choice for a farmhouse table, but I wanted to use a domestic hardwood. Red oak is a favorite in our house because of its abundance (and low cost).
After designing my table in Sketchup, I headed to the lumberyard and picked up 130 bdft of 8/4 stock that had been surfaced on three sides (S3S) with a final thickness of 13/4“. I paid extra for S3S lumber because I wanted the tabletop to use solid boards across the entire 80“ length, and, in my one car shop, this would have been a huge task to mill everything down from rough. I overbought with plans to make a bench for one side of the table down the road.
Start with the top
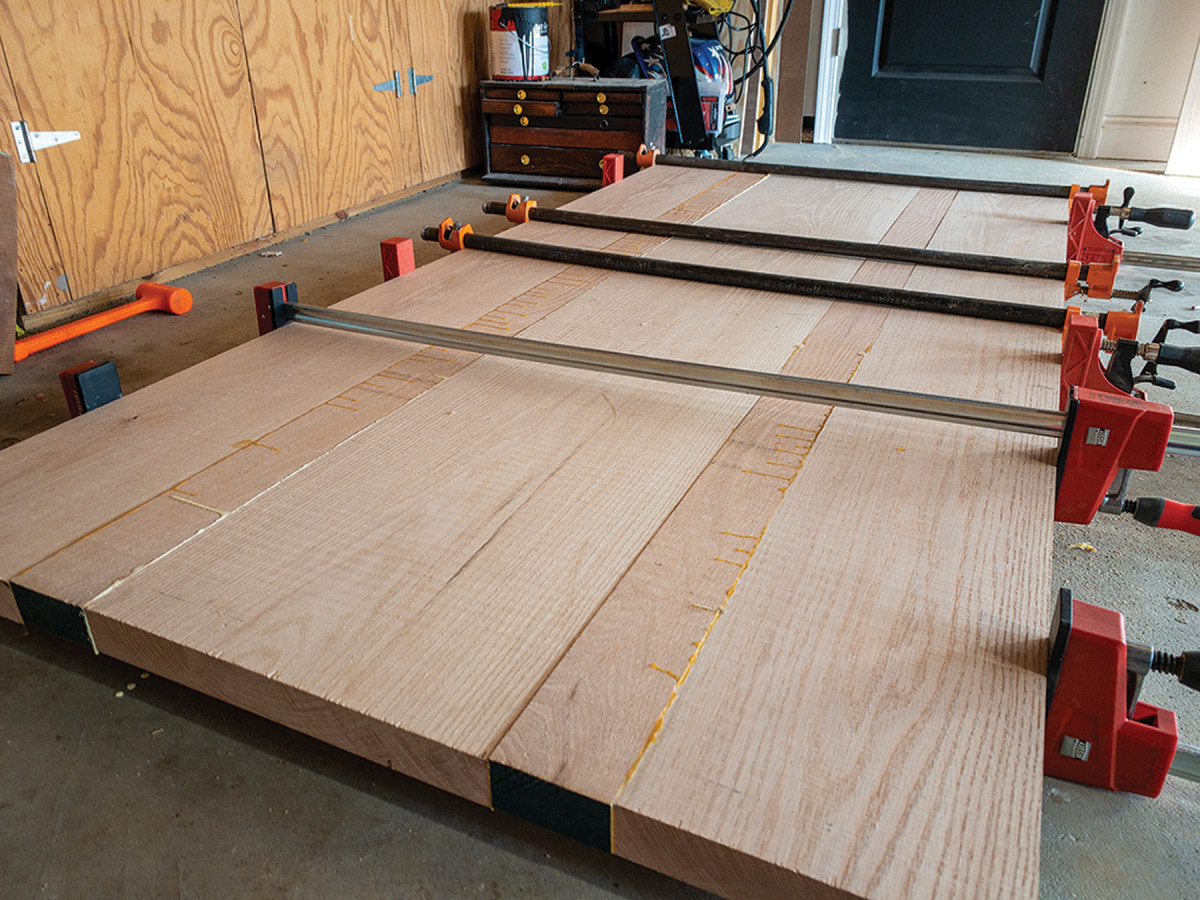
1. A beautiful 17″-wide board is centered in the table top. Working with a tabletop this size is challenging in a small shop.
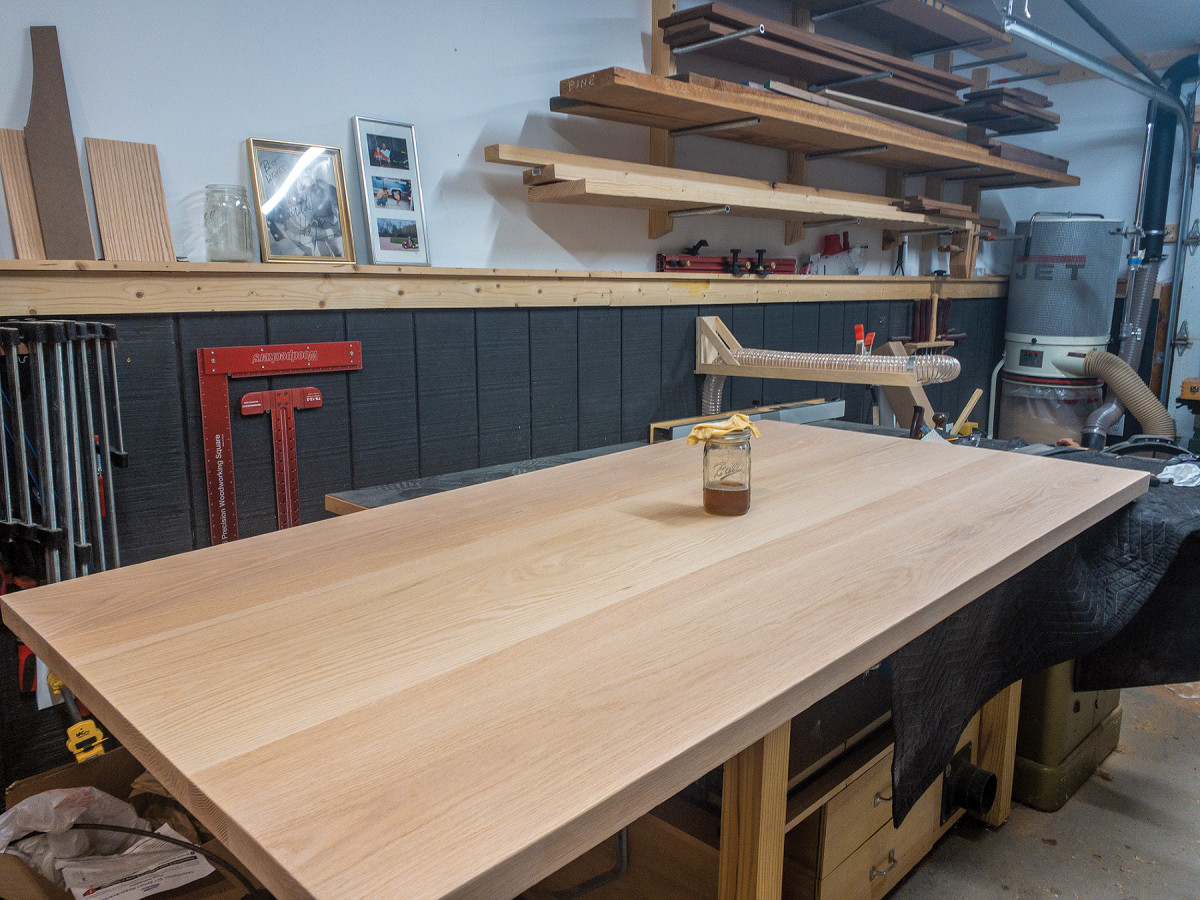
The tabletop is 40“x80“, far wider than many antique trestle tables but a very comfortable size for seating 8-10 people, especially with the trestle style base which allows the entire length of the table to be used by guests.

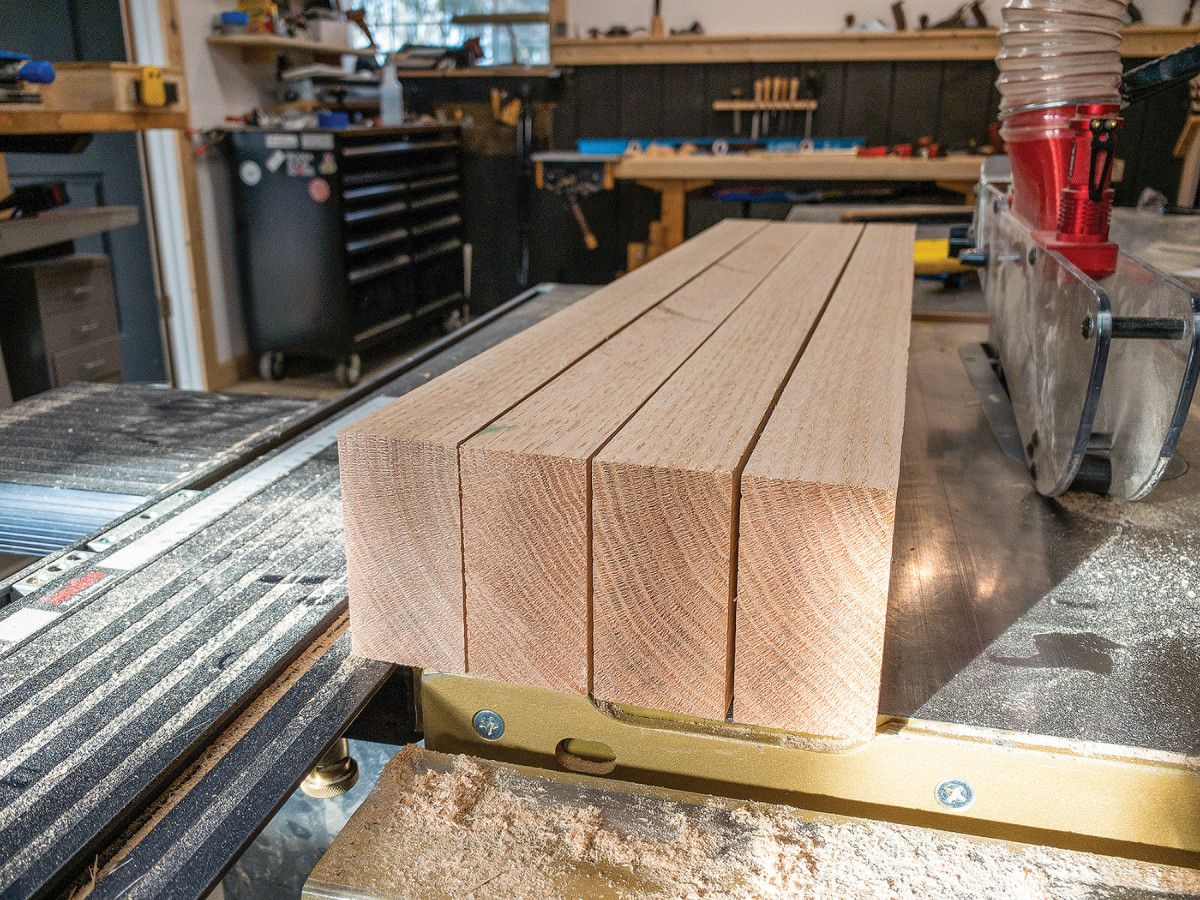
2. Planing down the leg stock will create a 1/8″ reveal where the legs meet the feet and cleats.
While at the lumberyard, I spotted one board that was a full 17“ wide. It was gorgeous and I wanted that to be the centerpiece of the tabletop. With that board allocated for the center of the tabletop, I ripped four smaller boards to flank either side to arrive at the 40“ width. I used a combination of my jointer and a handplane to create my glue joints.
Legs
3. Quartersawn material will produce beautiful feet and cleats that accentuate the arc accent.
The leg assemblies have the advantage of being symmetrical in every direction. The feet of the leg assemblies are identical to the cleats at the top of the legs and the mortises for the stretchers are centered on the leg.
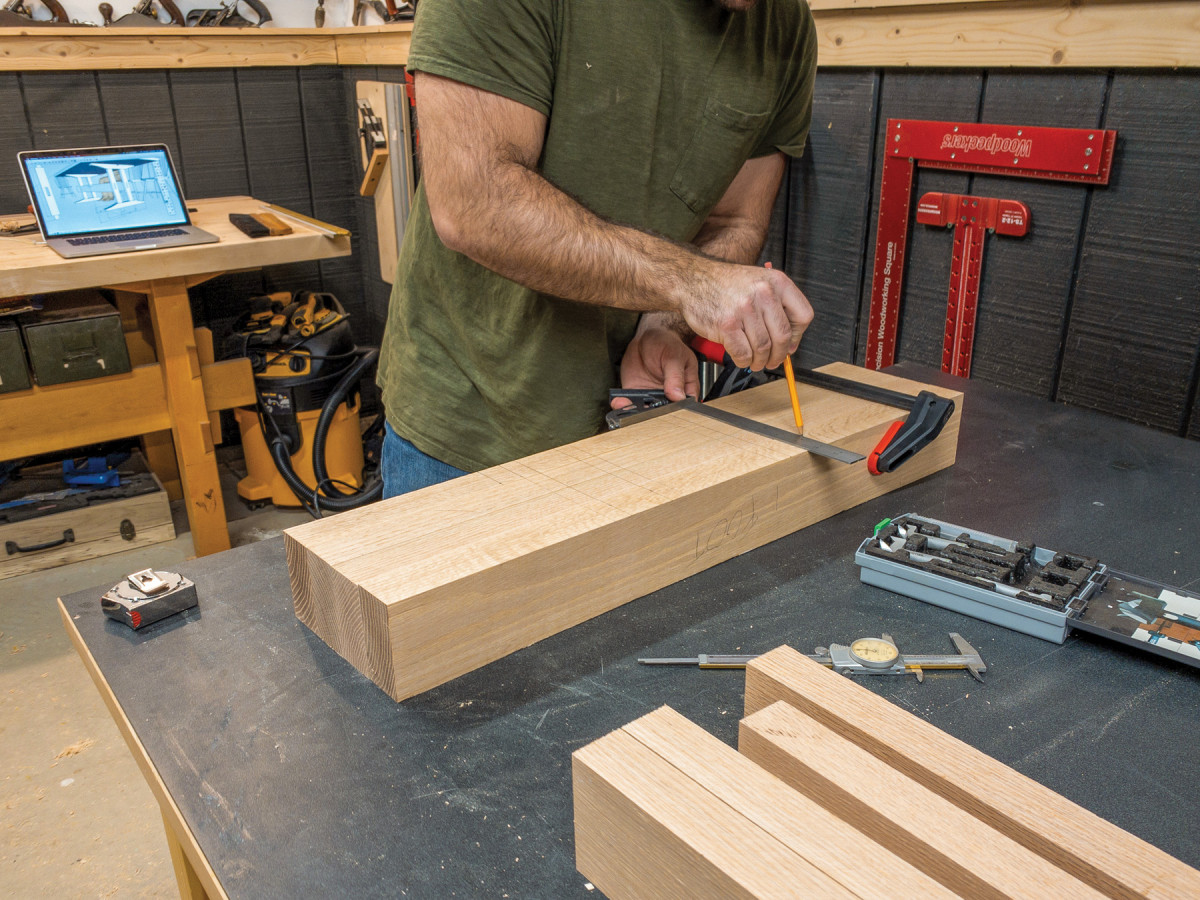
4. Clamp your feet and cleats together so that your mortise layout is identical on each part.
I played with this design quite a bit and decided upon this version because I enjoyed the matching arcs at the top and bottom of the assembly.
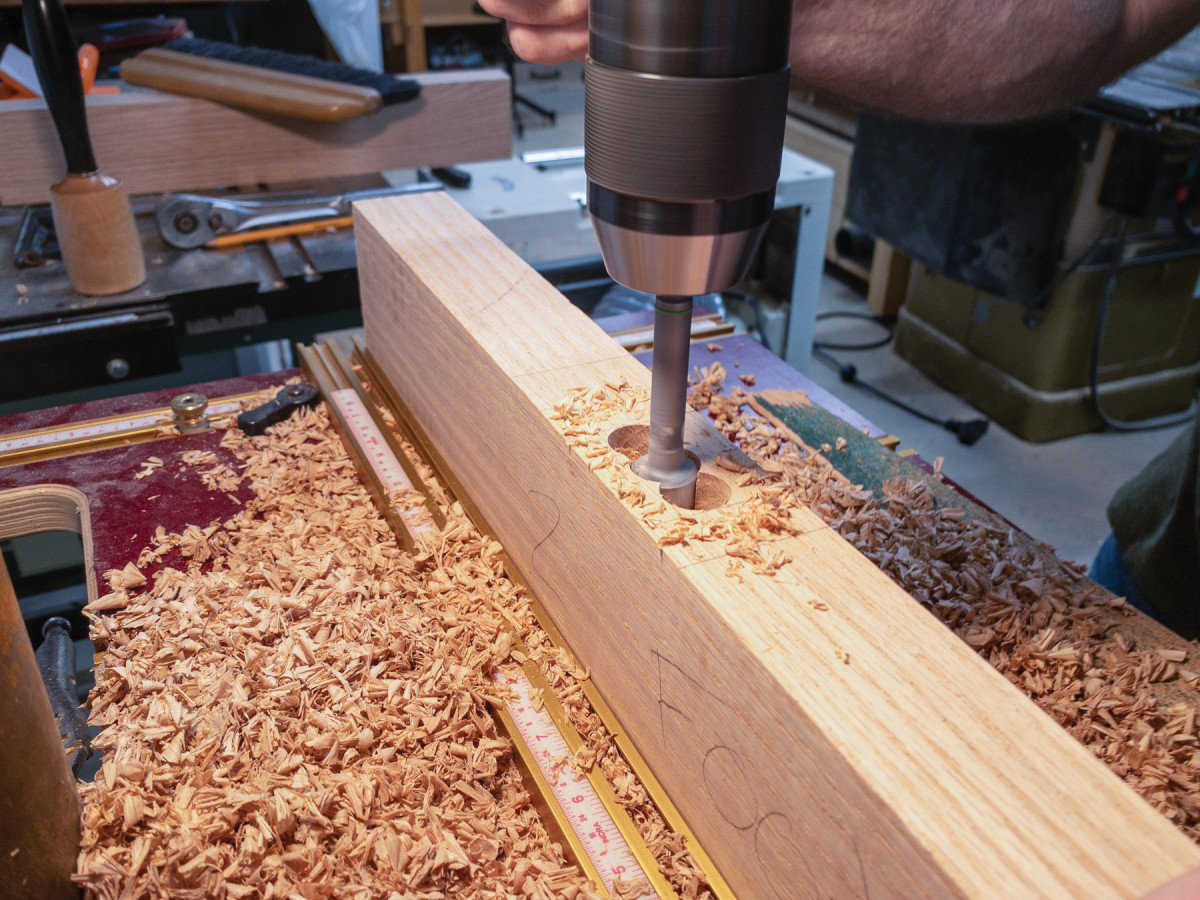
5. I set my drill press depth stop to a little over 2″ so that my 2″ tenon on the leg wouldn’t bottom out and the glue would have somewhere to accumulate.
Throughout this project, I used as much quarter sawn material as possible so that the loud grain patterns of Red Oak would be minimized. The leg material, two pieces for each assembly, was planed down to 11/2“ thick so that there would be a nice 1/8“ reveal where the legs meet the feet and cleats.
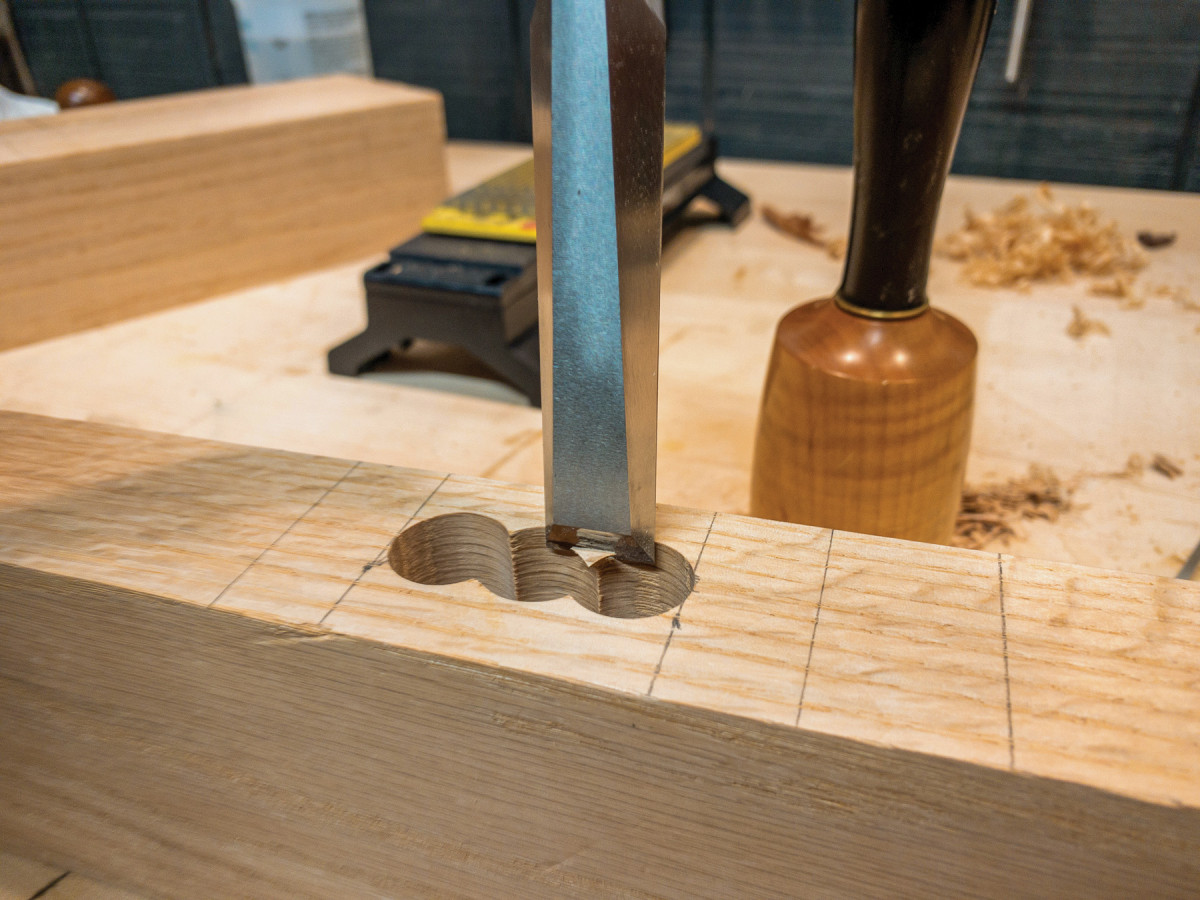
6. Once all the mortises were roughed out at the drill press, I squared the walls up at the bench with a chisel. I found myself honing my edge frequently as I worked my way through the 2″ wall.
Leave your leg stock long, the tenons at the top and bottom of the legs are 2“ each, so I rough cut my legs to 28“ and adjusted the length of the tenon after I finished dialing them in to fit the mortises. The tenons are to be cut after the mortises are created in the feet.
Feet and Cleats
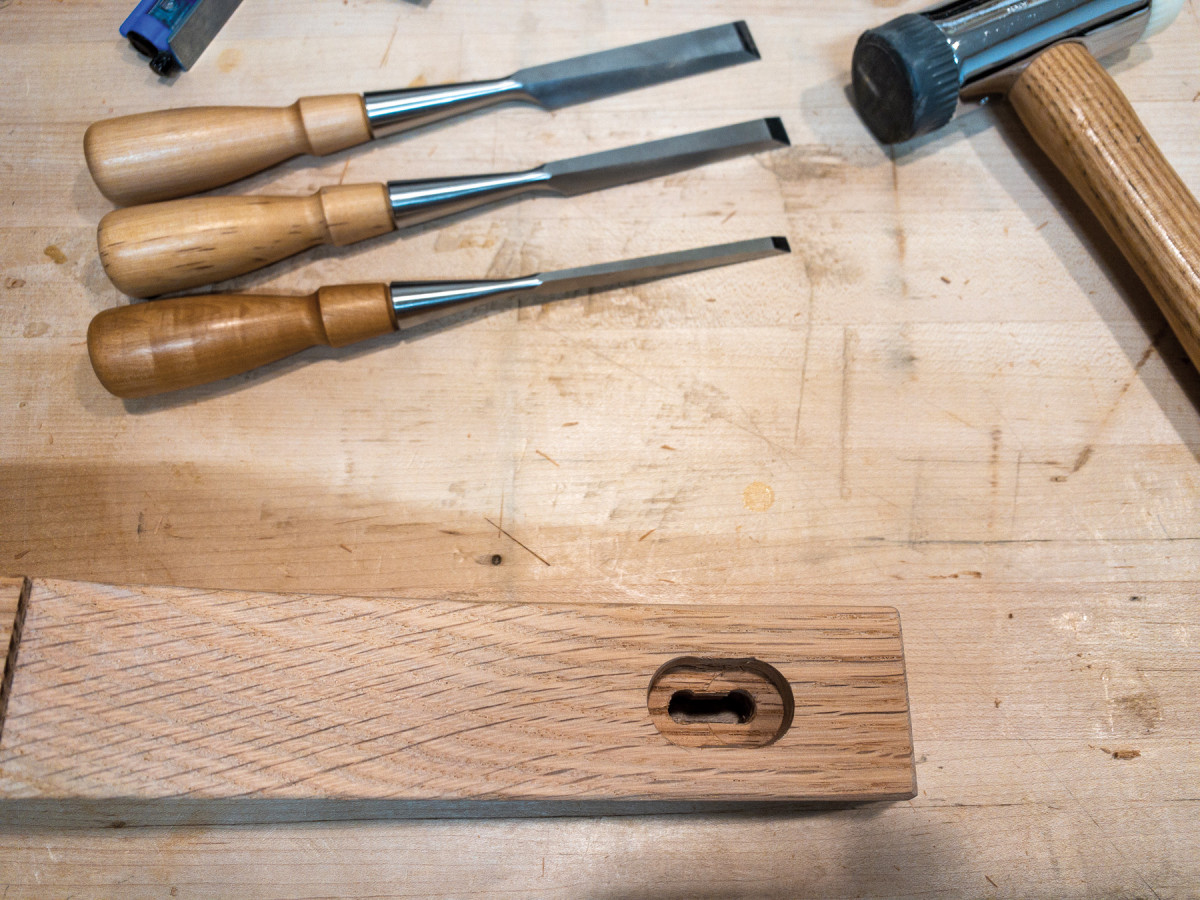
7. These mortises are deep. Strive for square but remember that with this much surface area, there’s room for a little deviation.
Each set of feet and cleats were sourced from the same board so that they would have similar color and grain patterns. If you can, choose quatersawn parts of your stock so that the tops of the feet will feature long straight lines.
8. Work out your pattern on a piece of hardboard and cut it out. Make a few different versions and experiment.
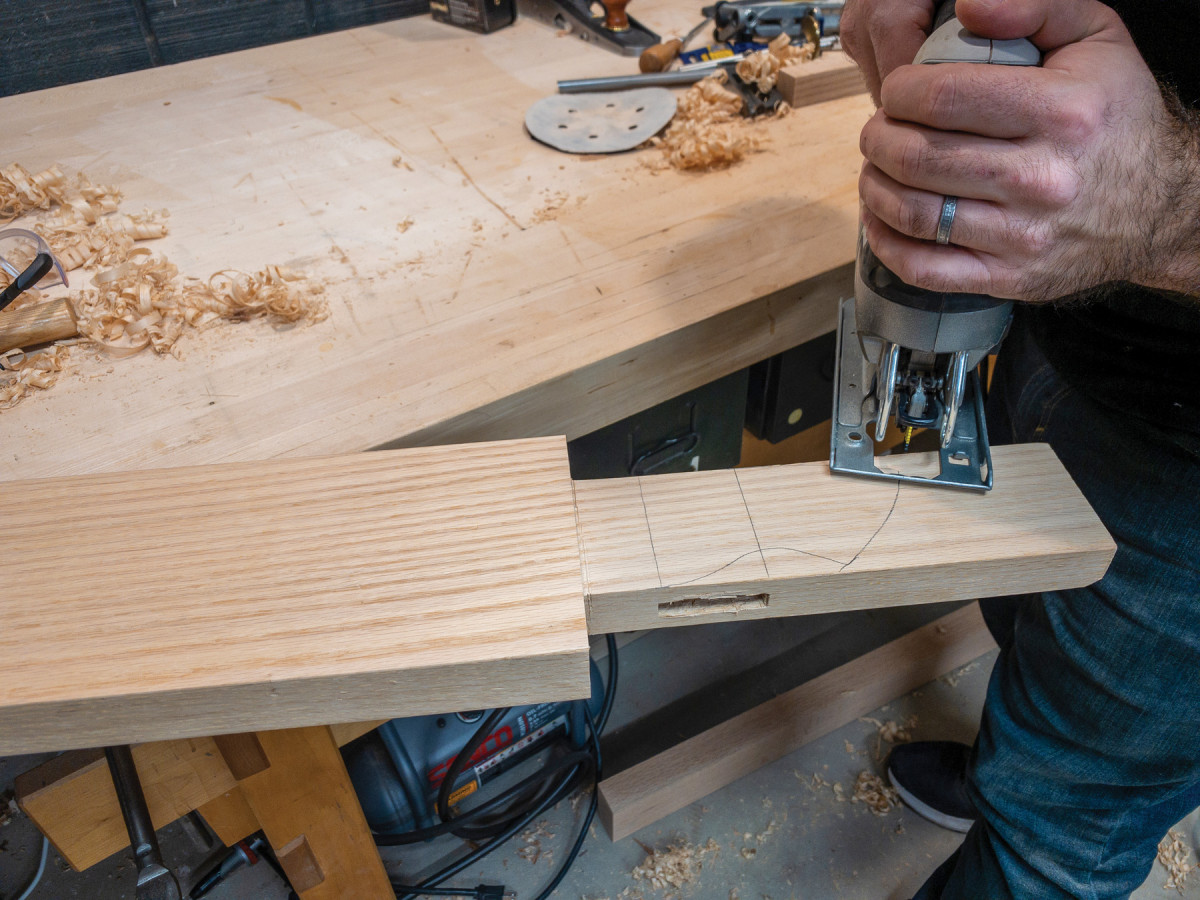
The feet are cut to their final dimension and the mortises are marked. I ganged the four parts together to layout the 2“ long mortises. I used a 5/8“ Forstner bit to hog out the bulk of the mortise material at the drill press before completing the mortise at the bench with a chisel.
9. The countersunk slot is large enough for the head of the bolt and the through slot is large enough for the shaft of the bolt to slide freely.
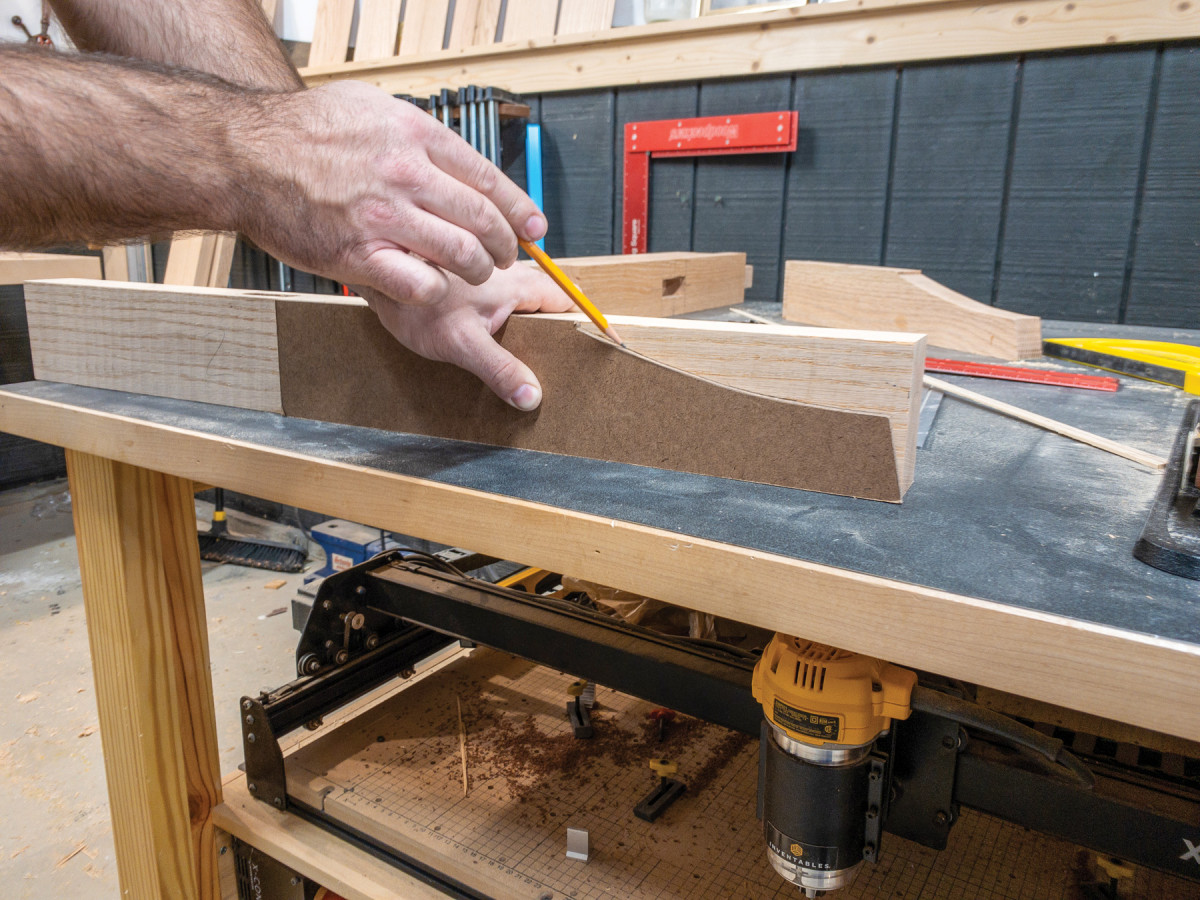
I developed the shape of the feet and cleats in sketchup and translated the drawing to a hardboard template as best I could by eye. The apex of the arch is 1/4“ deep and the angles are about 10deg. This is your chance to play with angles and curves, enjoy!
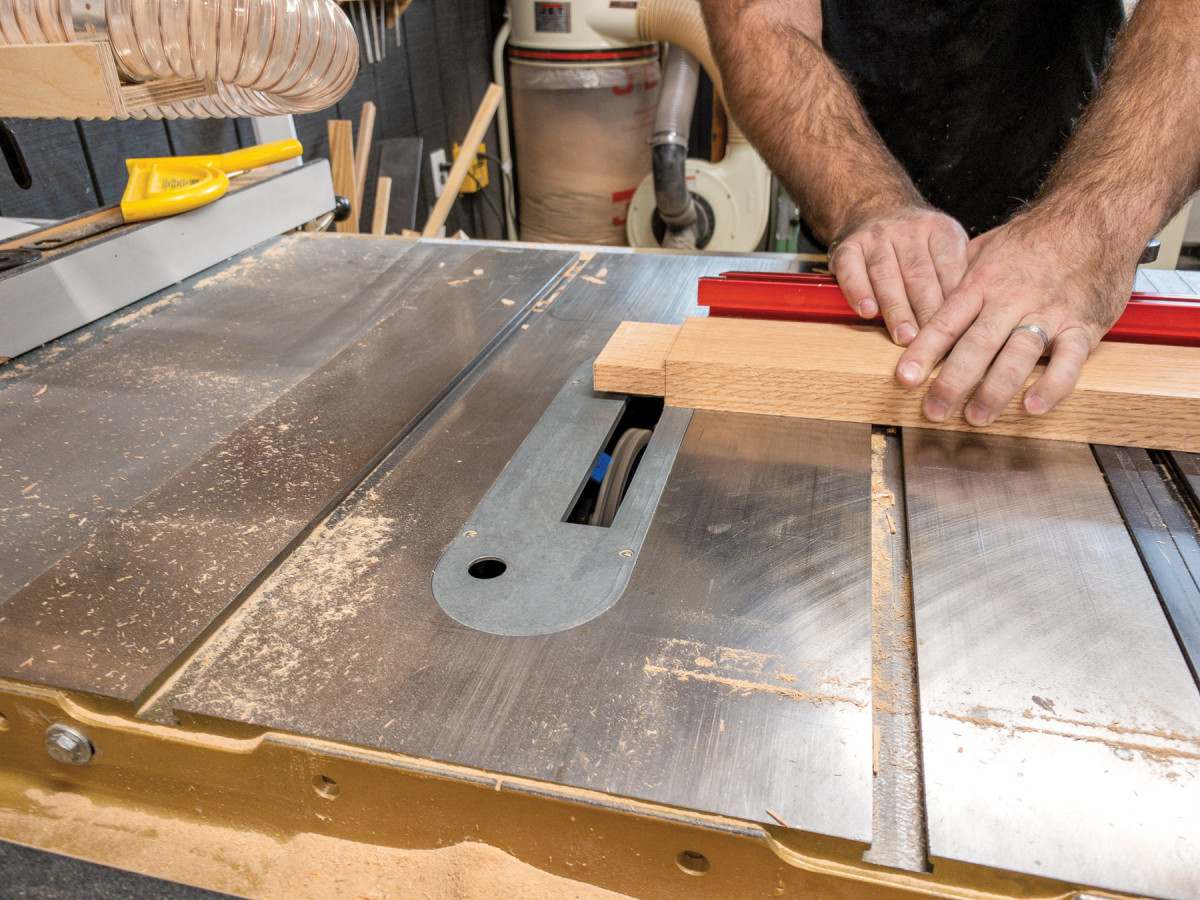
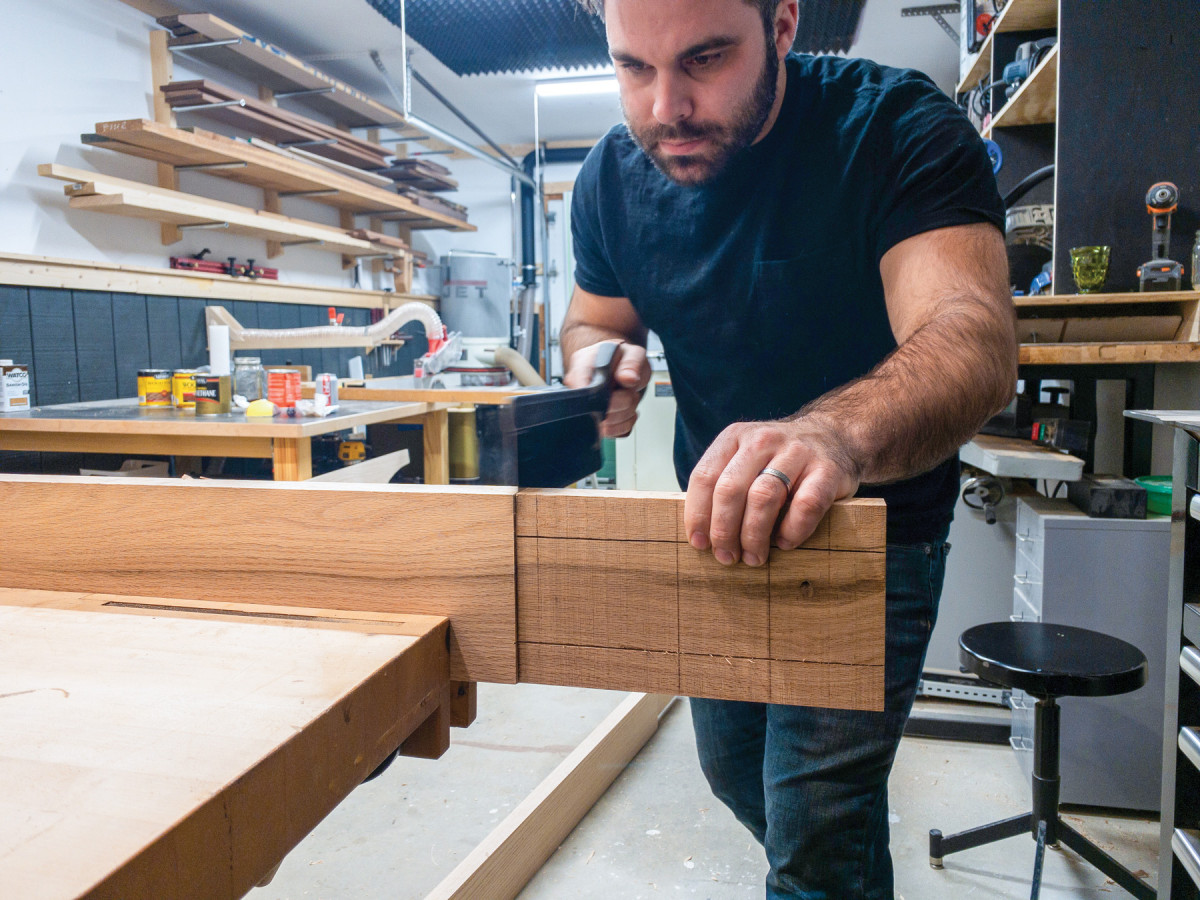
10. The tenons were cut on the table saw with a dado stack. I established the cheeks first, matching them to their respective mortises. Sneak up on your fit.
Once the shape is translated to the feet and cleats, I cut the shape out on the bandsaw. The rough curve was then smoothed with a rasp and random orbit sander loaded with 80grit paper. Make sure you maintain a nice step at the top of the curve so that the arc has a termination point that is sharp.
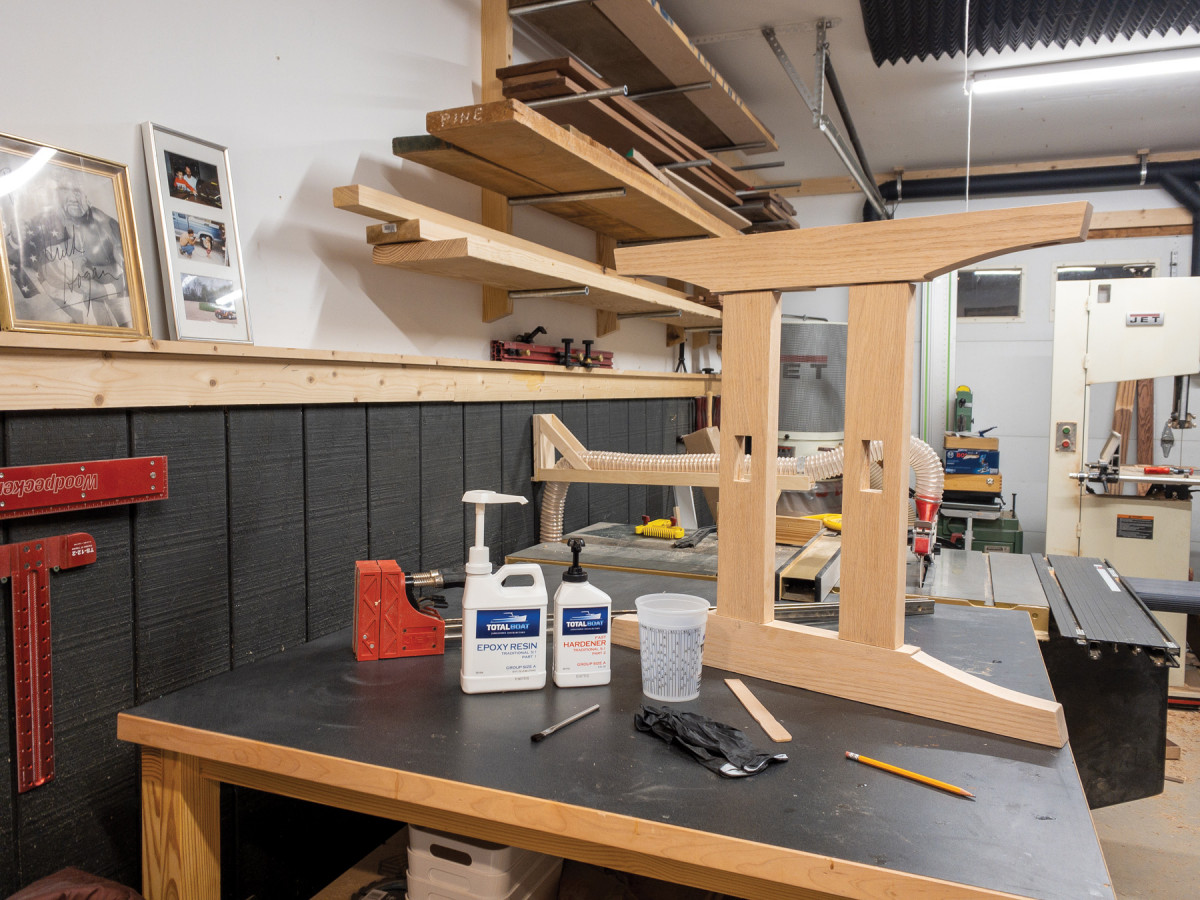
11. Epoxy with a fast hardener gave me peace of mind that these leg assemblies will live a long healthy life.
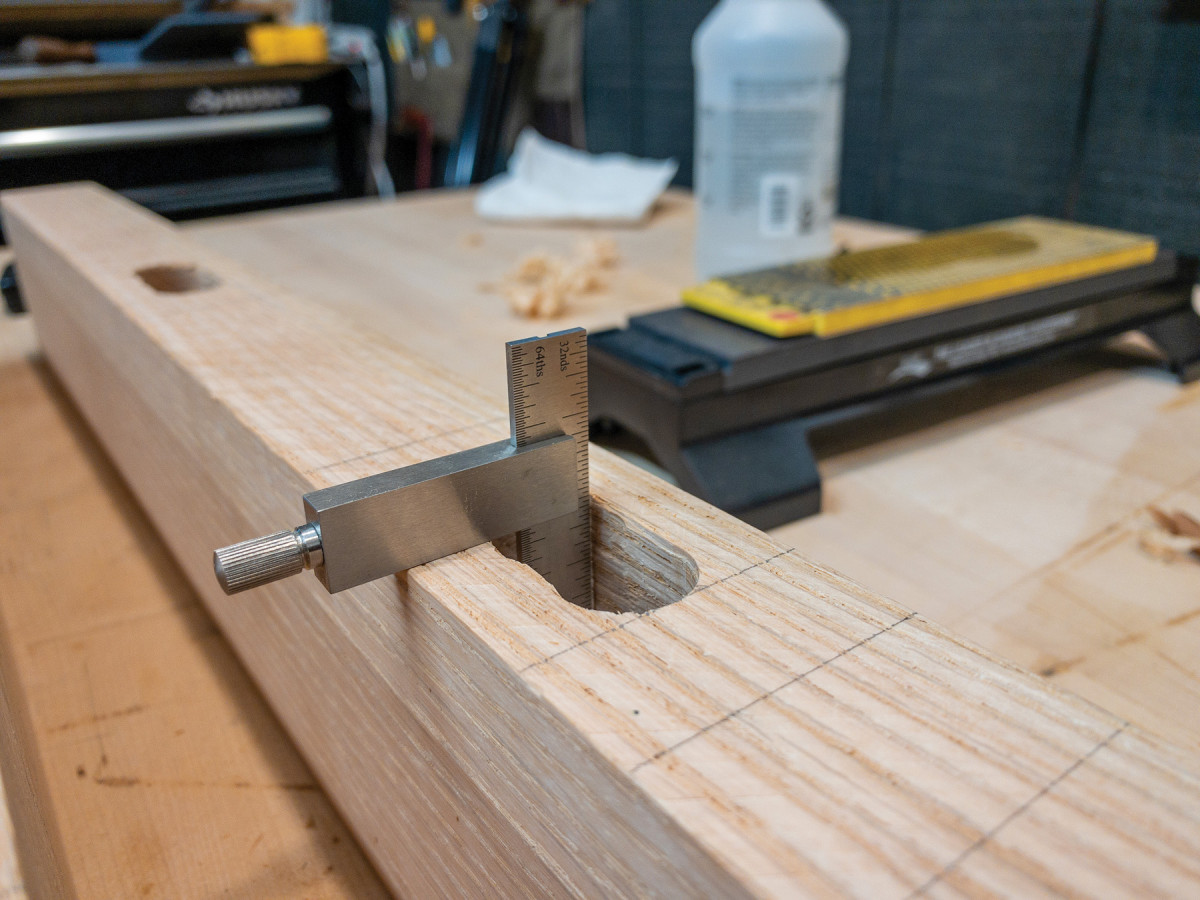
With the feet shaped, they’re ready for the countersunk slots that will house the 1/4“-20 bolts that fasten the tabletop to the cleats. These slots will allow the bolts to slide laterally to accommodate seasonal movement.
12. The large cheek was cut on the bandsaw, just an 1/8″ thick
Next, I started on the tenons of the legs. Because the mortises in the feet and cleats were brought to final size with a chisel, they vary in size just slightly, enough that I numbered each tenon to its respective mortise. The tenons were cut on the table saw with a dado stack.
13. The long tenon is crosscut at the bench. There may be some chisel work to square the shoulder all the way around, but it’s a joint that needs to look perfect.
The final mortising is in the center of the leg that will allow the stretcher tenon to pass through. The mortise here is unique in that it is not a glue joint and if you size it 1/32“ larger than it needs to be, it will make assembly of the table base easier. The real work in this joint is done by the key that sits on the outside of the leg. Like the mortises already made in the feet and cleats, I used a Forstner bit to hog out most of the material and then squared up the mortise on the bench.
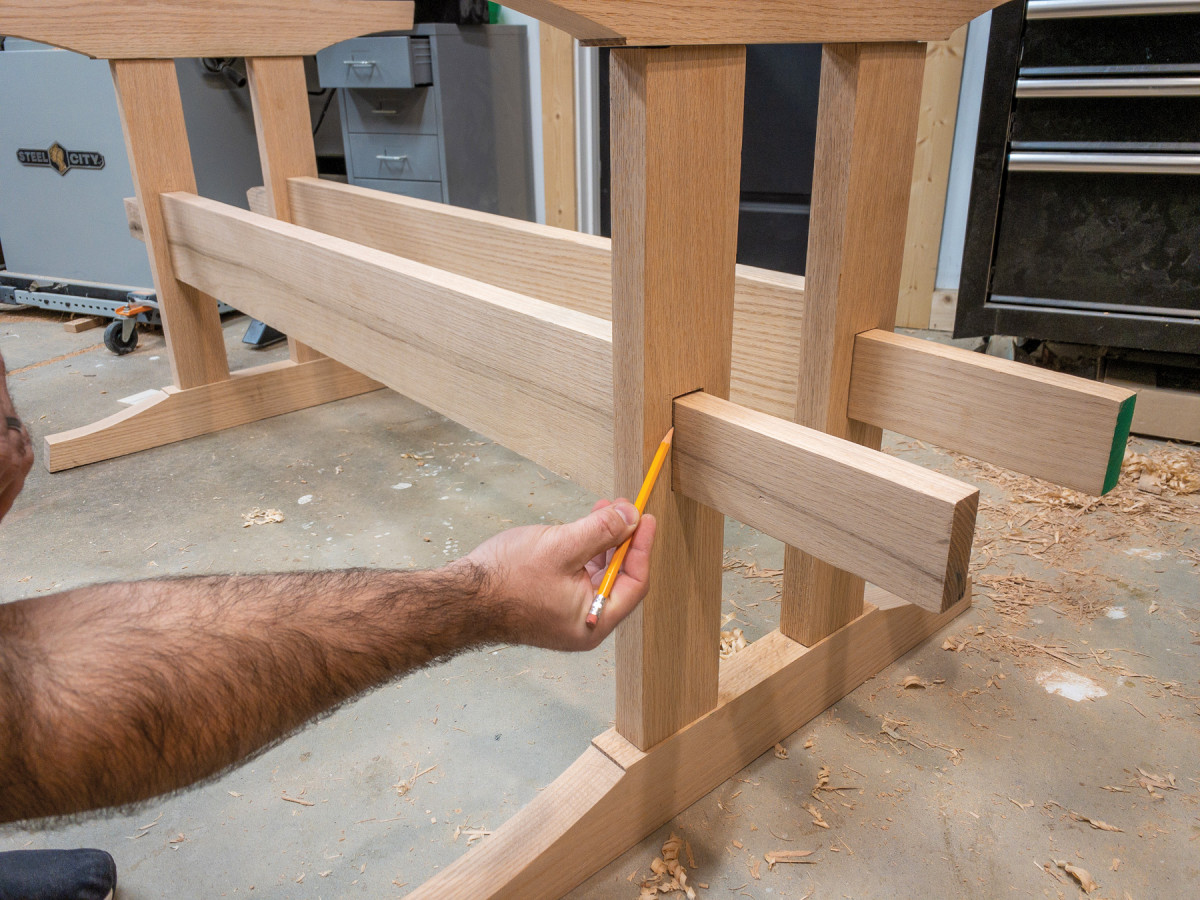
14. Mark the tenon where it exits the leg. This will serve as a reference point when determining where the mortise for the key will start.
With all of the joinery complete on the leg assembly, its time for glue-up. I elected to use epoxy for these joints. I felt that there was just enough roughness inside the joinery of the feet and cleats that the gap-filling nature of epoxy gave me a piece of mind for longevity. The temperature in my shop is maintained around 60°, so I used a 5:1 epoxy with fast hardener. Even with the fast hardener, I found that that the epoxy still took over 24 hours to cure to the touch in a couple of knotholes in my tabletop. Depending on the temperature where you’re working, you may choose to use a slower hardener.
Stretcher
15. I used a 3/8″ chisel to make the 3″ deep mortise for the key that sits on the outside of the leg.
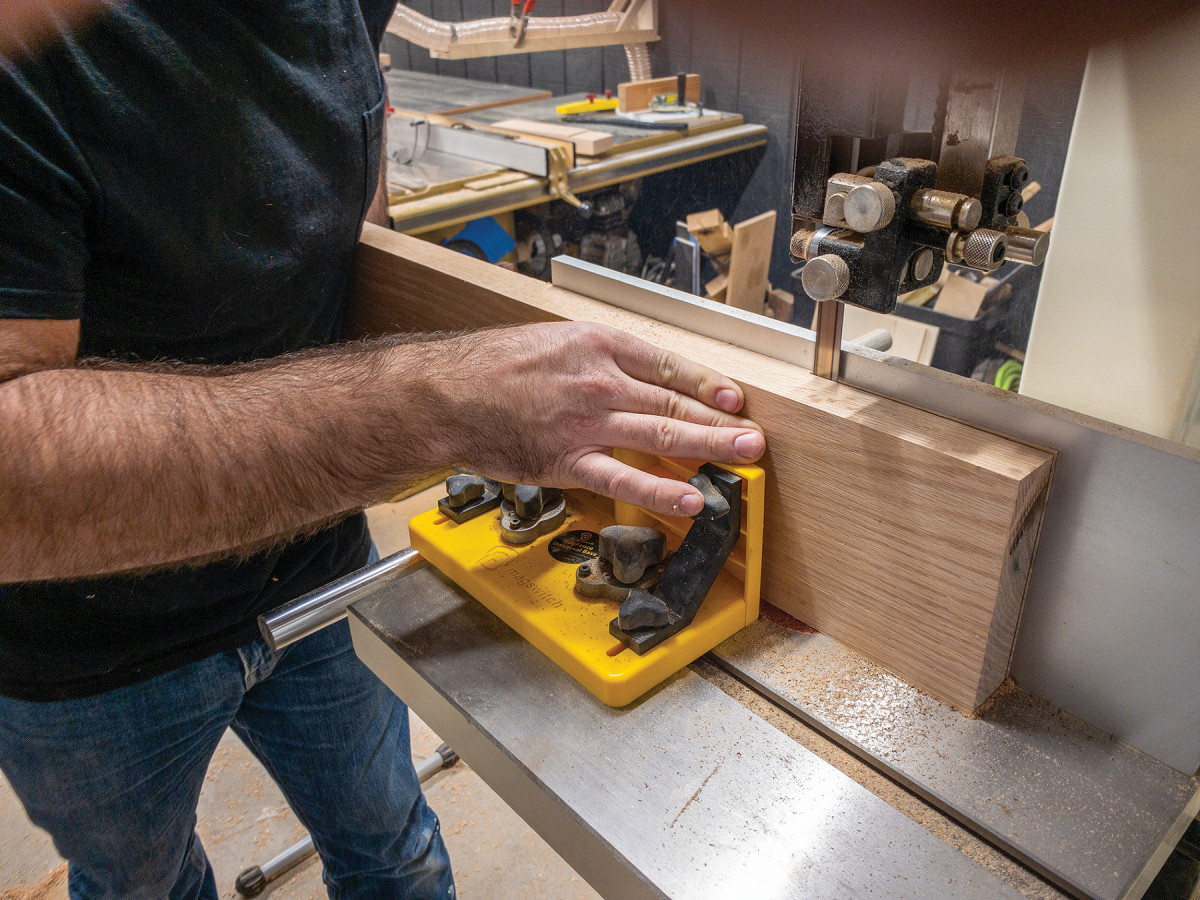
The stretchers that connect the leg assemblies are one of the largest showpieces of this table. They are long, broad faces that will be seen regularly. I selected some of my nicest material with straight grain for these. First, I ripped them to 51/2“ wide and crosscut to 62“ long. Then I marked out 46“ representing the distance between the leg assemblies, just make sure you have at least an additional 7“ on either end to account for the tenons.
16. Create a hardboard template that will allow you to transfer the shape to each of the four tenons. This is a place to experiment and refine your vision for the exposed tenon.
For the tenons, I wanted a really clean line produced by a full shoulder on all four sides of the stretcher where it meets the leg assemblies, so I took just an 1/8“ off the broad cheek to establish that line but left the tenon as thick as possible, something that will come in handy when cutting the mortise for the key. The tenon is 3“ tall for its entire length.
17. I rough out the shape with a jigsaw and finished it with a random orbit sander.
Once the tenon is brought to its rough form, you can assemble the entire base, step back and check out how the whole thing is looking at this point. Take a deep breath before diving in and finishing up the base assembly. Mark the tenon where it exits the legs so that you can layout the mortise that will accept the key for the stretcher joinery.
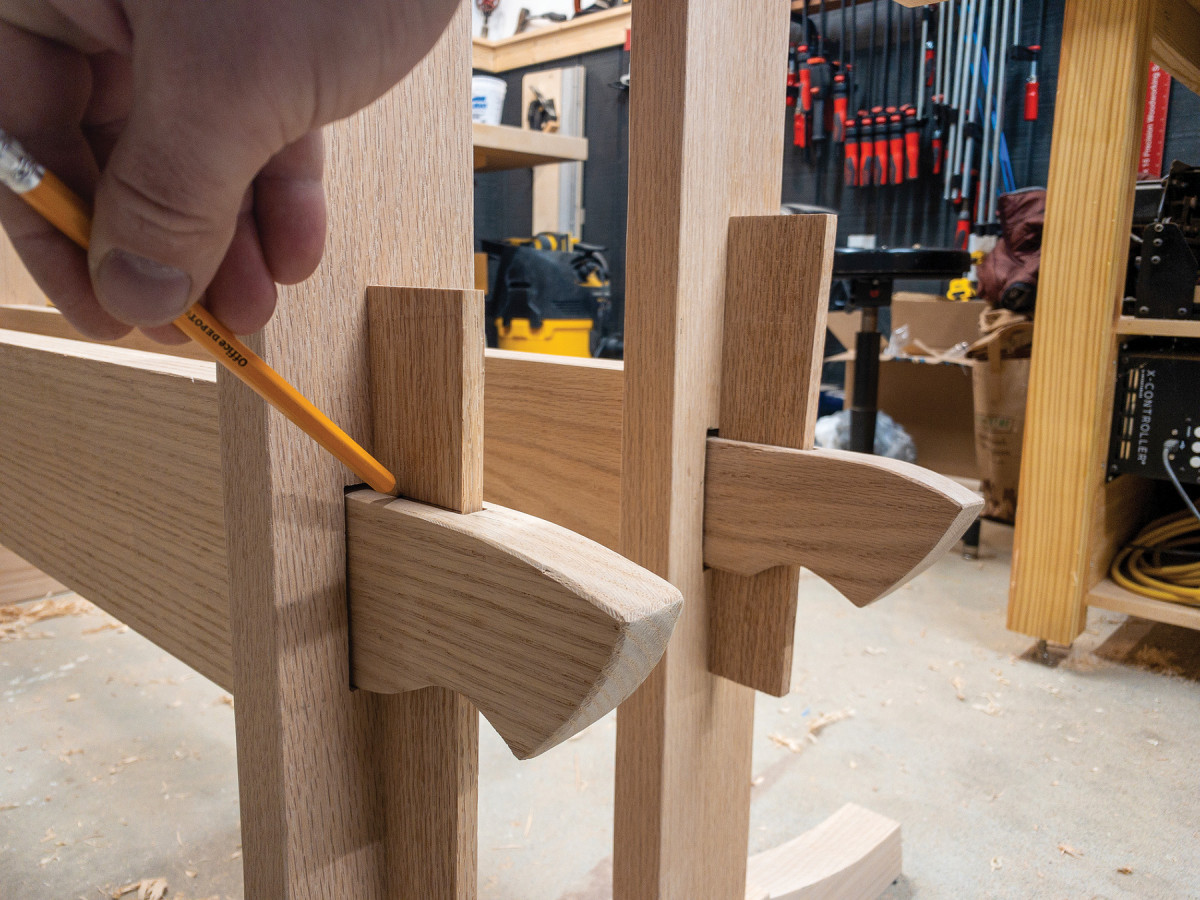
18. The keys are marked so that they can be cut to the same reveal above and below the tenon. Depending on how the chopping of the mortise goes, each key may sit differently in each mortise.
The mortise that will house the key for the tusk and tenon joinery is essential to the stability of the table, but actually kind of hard to mess up. I’ve found that all of the tweaking happens in the key that fits into the mortise. And unlike many other mortise and tenon situations, the tenon is not part of a larger part of the table. The key is a small, easily replicated part that can be easily tweaked until it’s perfect.
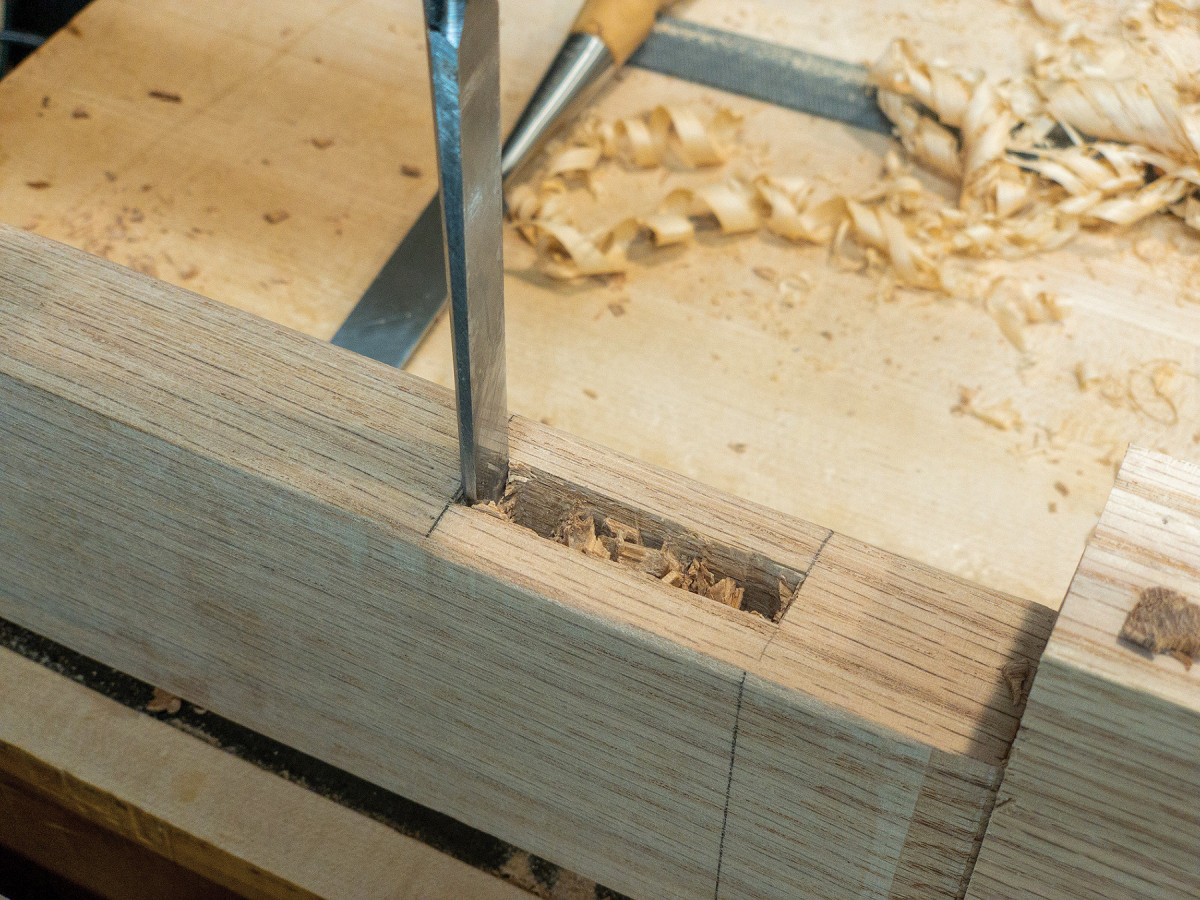
 I chopped the mortises in the tenon by hand with a 3/8“ chisel. This was slow going through 3“ of red oak but there’s just no other way to do it. The end of the 2“ mortise that is towards the end of the stretcher receives a 5° angle cut through the full depth of the mortise.
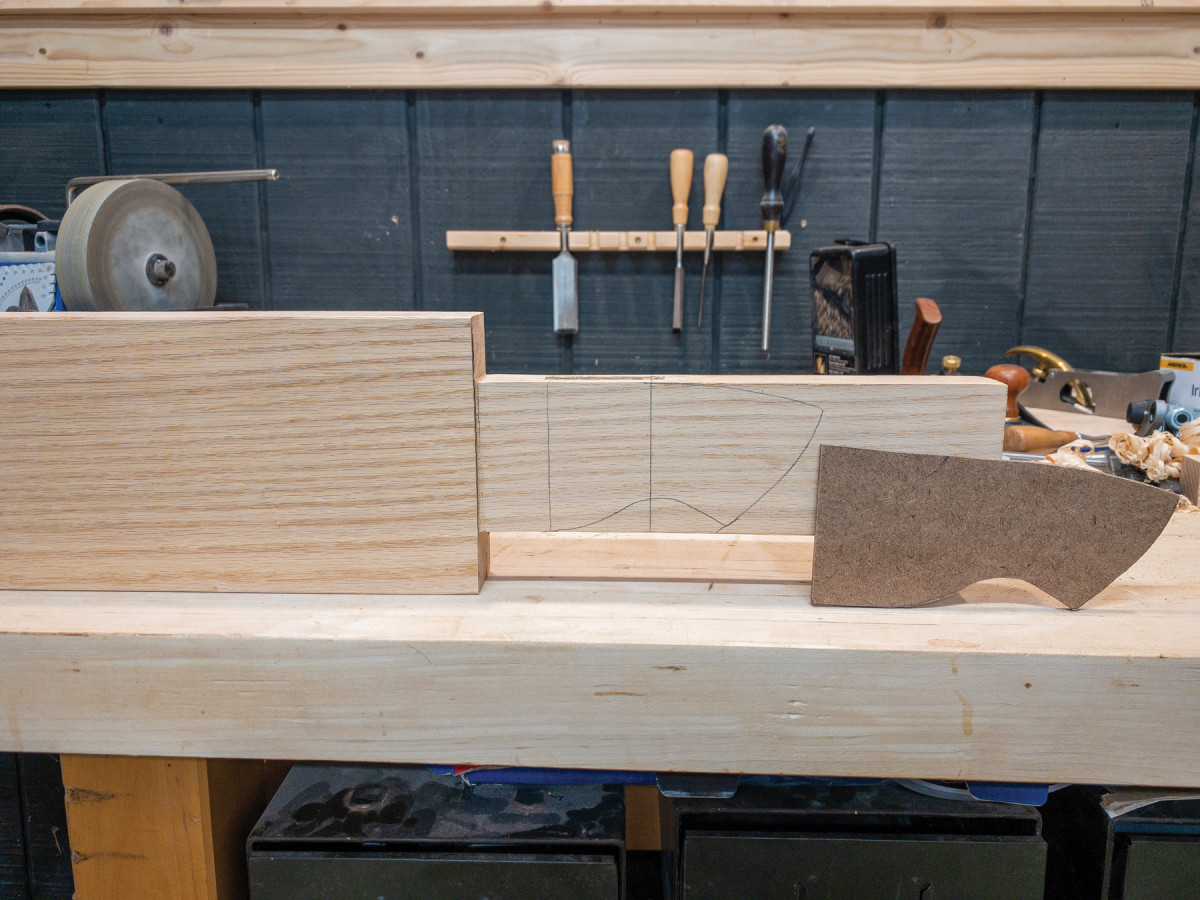
With the mortise cut, I marked out the final shape of the tenon. I experimented with this shape a lot and derived a lot of inspiration from the antique I had found online. The top of the tenon receives a long curve and the bottom creates a unique radius that exposes the key in a fun way. I created a hardboard template to transfer the shape to all four of the tenons consistently.
The final piece is the key that fits the mortise. I selected some quartersawn material, planed it to 3/8“ thick and ripped it to fit the 2“ mortise. The 5° angle was created with a hand plane and the edges were chamfered by rasp. Once the key fit into the mortise, I marked the top of the tenon so that I could cut each key so that they’d all reveal the same amount above and below the mortise.
Finishing Red Oak
19. I applied two coats of shellac to the entire project. I used a blonde shellac at a 1 pound cut.
Over the years, I’ve developed a formula for finishing red oak that fits my family’s needs. In our farmhouse, we have very old pine floors that have been most recently finished with medium-red stain before polyurethane. We wanted to carry that red into this table to make it feel like it fit with the house. After a lot of experimentation with dye and off the shelf stain, I settled on a minwax oil-based stain called Red Chestnut.
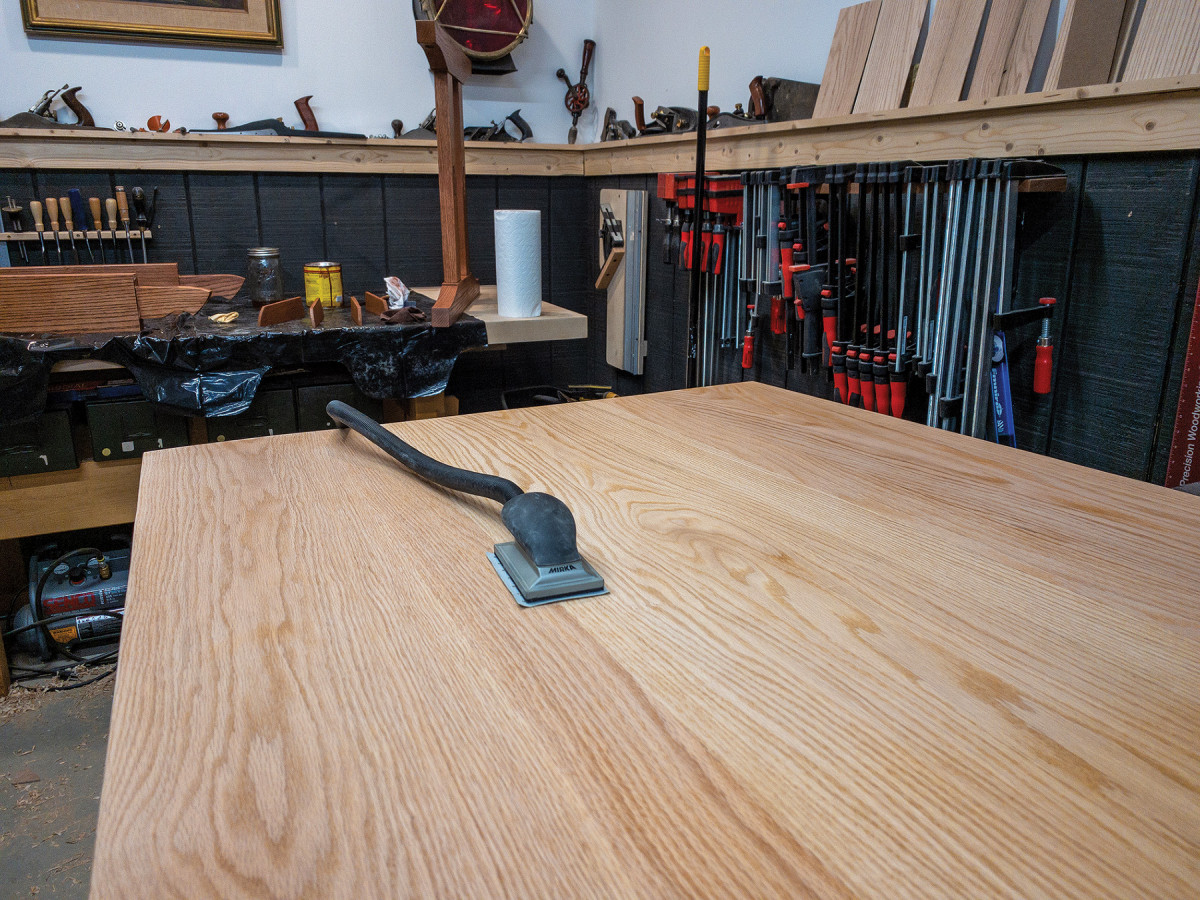
20. I sanded back the shellac so that the latewood of the red oak would absorb more of the stain.
I gave every part of the project two coats of shellac and then sanded it down to serve as a grain filler. The key is waiting until the shellac is fully cured. I was impatient with a couple of parts and had unsatisfactory results. But the areas that I waited a full day to cure turned out great.
After the shellac, I applied two coats of the stain and let it dry for a full day. Once I was confident everything was dry, I applied two coats of oil-based polyurethane to everything and then a third coat on the table top to ensure durability.
My hope is that over time, the oil-based finish will continue to amber. And in the midst of my growing family, this table will take a beating and add invaluable character that I will treasure long after the kids have flown the coop.
Here are some supplies and tools we find essential in our everyday work around the shop. We may receive a commission from sales referred by our links; however, we have carefully selected these products for their usefulness and quality.