We may receive a commission when you use our affiliate links. However, this does not impact our recommendations.
Identifying and Removing Glue
Once the glue has dried, it’s usually difficult to see on the surface of the wood. To highlight these areas, wet the entire surface with water or paint thinner, which will soak deeper into unsealed wood and leave the areas that are sealed with glue a lighter color.
Water raises the grain of wood, so if you use water, you’ll have to let it dry and then sand the wood smooth again. This procedure is called sponging or dewhiskering, and it’s a wise step to take anyway if you plan to use a stain or finish that contains water.
Alternatively, there are commercial products you can add to white and yellow glues before use that will make them show up under a black light.
When you’ve identified the problem areas, remove the glue by scraping, sanding or scrubbing with a solvent for the glue.
You can break down white, yellow and hide glues with vinegar or water. (Hot water works best.) You can soften white and yellow glues with acetone, toluene, xylene or lacquer thinner. You can dissolve contact cement with acetone or lacquer thinner, and you can thin epoxy and polyurethane glues with these solvents until they have cured. Then you’ll either have to use a methylene-chloride-based paint stripper or resort to sanding or scraping.
Whichever liquid you use to break down the glue, it’s a good idea to scrub the area with a soft, brass-wire bristle brush in the direction of the grain to help remove all the glue from the pores. Then wipe the surface dry.
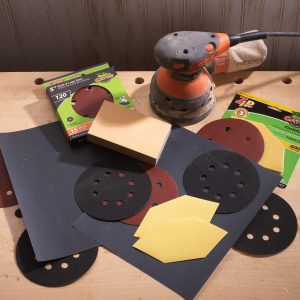
After cleaning all the glue off the surface, sand it with the same grit sandpaper you used elsewhere. You need to remove all raised grain and make the sanding scratches uniform, or differences in color may show up when you apply the stain or finish.
If you scrape or sand the glue off the surface, finish up by sanding with the finest grit sandpaper you’ve used elsewhere to make the scratch pattern uniform.
Correcting Problems
For those cases where you don’t discover the glue splotch until after you’ve applied the stain, sand or scrape off the glue through the stain and restain that area or leave the splotch and disguise it later, after you’ve applied a coat of finish.
If you sand or scrape off the glue, you may have problems blending that area with the surrounding wood. Be sure to sand the damaged area to the same grit as elsewhere before applying more stain. If the damaged area still shows, try sanding the entire part (leg, rail, tabletop) while the surface is wet with stain, then wipe off the excess.
If the part you’ve wet-sanded is a little lighter than other parts, wet-sand again with a coarser-grit sandpaper. Most stains lubricate sandpaper, which reduces the coarseness of the scratching.
If wet-sanding doesn’t solve the problem, you’ll have to strip the stain using paint stripper or the thinner for the stain. Then resand the wood and begin again with the staining step. You don’t have to remove all the color from the wood if you’re restaining with the same stain.
An alternative is to disguise the splotch after you’ve applied a coat of finish in the same way you would disguise a wood-putty repair, a burn-in repair or a rub-through. Begin by drawing in the grain using pigment suspended in a shellac or padding-lacquer binder and a very fine artist’s brush. You can also use pigment in varnish (the same as thinned oil paint or glaze), but you’ll have to allow a day’s drying time between coats.
When you have the grain lines connected to the grain in the surrounding wood, rub lightly with #0000 steel wool to soften the lines and apply a thin barrier coat of finish so the lines won’t get smeared during the next step. Then color the areas between the grain lines with either pigment or dye in a binder. When you have the splotch disguised, continue applying coats of finish.
This last step doesn’t work well on oil finishes because there’s no film build. PW
Bob Flexner is a nationally known finishing expert.


